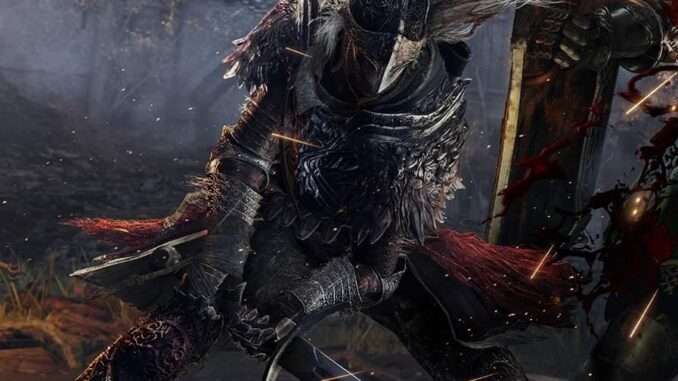
Spoiler-free beginners’ guide covering class selection, basic gameplay mechanics and encouraging words.
Introduction
It’s been about a decade since FROM Software hit it off big time with Demon’s Souls, and after lots of janky but famous games they finally took the time to make the one perfect game to rule them all – Elden Ring.
This guide is intended to walk you through the basics of the game, not assuming any familiarity with the Souls series or Elden Ring in general, but if you are familiar with the previous games by FROM, it’ll still have some advanced gameplay tricks and bring up notable differences from the Souls games.
Don’t despair! You don’t need lightning-fast reflexes or a superhuman pain threshold to beat Elden Ring, just determination and an open mind.
May the good blood guide your way, and don’t forget to praise the sun! Umbasa.
A word of warning: Savefile Security
Elden Ring does not have Steam Cloud support!
If you change computers (or need to reinstall Windows after it inevitably breaks) you will lose your savefiles.
Savefiles are found in C:\Users(your username)\AppData\Roaming\EldenRing(a mess of random numbers and letters), there is a single file for all your characters.
It’s strongly recommended you back this file up regularly and occasionally mail it to yourself or something.
Apart from the PC crash risk, all previous Souls games have had problems with “hackers”, malicious players that force glitched items on strangers to break their game or get them banned from online matchmaking. Supposedly the new anti-cheat should make this a lot less of an issue in Elden Ring, but it doesn’t hurt to have backups just in case.
Also side note: this guide was written before the game’s release, based on various Network Test footage and general series knowledge. Information might be inaccurate, please yell at me if you find something that’s wrong and I’ll fix it.
Gameplay Mechanics (Basic)
If you’ve played any previous Souls game, you can safely skip this chapter. You know this stuff already.
Basic Controls
- Left stick to move around, right stick to control the camera. (Like in basically every other game)
- Press the left stick to enter/leave stealth mode. In tall grass, you will be almost impossible to spot, and you make much less noise overall.
- Press the right stick to lock the camera on the nearest enemy. If there’s no enemy to lock on to, this will swing the camera to face the direction you’re currently moving.
- D-Pad: switch between equipped weapons. Down changes consumables, Up changes spells, Right changes main-hand weapons and Left changes off-hand weapons. Holding a direction for a few seconds will instantly change to the first slot, this is particularly useful to quickly select your healing flask when you have a lot of consumables equipped.
- A button: jump. While on horseback, you can double jump. Jumping gives you invincibility frames just like a dodgeroll, so jumping over attacks is one way to dodge them. (Particularly useful on narrow platforms where you risk dodgerolling to your death if you dodge to the sides)
- B button: dodge. Having a heavier equip load will lower the distance of your dodge. (Only equipped items count, not your entire inventory). Hold the button down to run. Running and dodging consumes stamina and cannot be performed while your stamina is depleted, just like attacks.
- Y button: Interact. Hold the button down to access your toolbelt items, or to hold a weapon in both hands (Y + R1 to twohand your main weapon, Y + L1 to twohand your offhand weapon).
- X button: Use equipped consumable. The consumable’s icon is grayed out if something is preventing you from using it.
- R1: Light attack. Pressing repeatedly will perform a combo.
- R2: Heavy attack. Heavy attacks can be charged for more power.
- L1: Hold to block.
- L2: Perform the Weapon Art of the equipped weapon. The active Weapon Art will be shown in the HUD, above your equipped gear.
- Start: Open the menu, allowing you to change gear, craft, etc. THIS DOES NOT PAUSE THE GAME, so don’t do it while there are enemies nearby.
- Select: Perform gestures. This has no gameplay purpose, but can be used to communicate with other players in multiplayer.
Runes & Death
Runes are a currency used to level up, purchase items, and upgrade gear. They are acquired from slain enemies, typically more the stronger the enemy is.
(You initially cannot level up, but you will meet a character that gives you this ability early in the game)
When you die, you will drop all runes you were carrying. (They will take the form of a golden sapling). If you can make it back to this spot and interact with the runes, you will get them back, but if you die again before this, you will lose them permanently.
Since you can lose runes permanently, it’s worth considering travelling back to safety and spending them instead of pushing onwards when you carry a lot of runes.
You will sometimes find rune consumables (e.g. “Fringefolk’s Rune”), colloquially called “crunchies” by players. If you’re just a teensy bit short of a levelup or purchase (or need to stock up on consumables after dying and dropping all your runes) this is when you should use these. You will not drop crunchies on death, so save them for when you need them.
Enemies with glowing golden eyes are more difficult than normal, but drop additional runes. These enemies get the boost if another player has been killed by them recently.
You can sometimes find skulls with golden glowing eyes. Crush them to obtain some free runes.
Flask of Tears
You start out with the Flask of Tears, with 4 charges divided between Crimson (HP) and Cerulean (FP) tears. This is a healing potion that will recharge to full every time you rest, and occasionally will also recharge when you defeat certain strong enemies.
Managing your flask charges is a vital part of both exploration and boss fights – drinking every time you take a sliver of chip damage will leave you with no healing at the end, while being too stingy will see you die with a full flask.
Drinking will slow you down and leave you unable to dodge or block, so it’s important to wait for an opening if you don’t want to immediately get hit again and lose all the HP you just healed.
When resting at a Site of Grace, you can distribute flask charges between the HP and FP tears. If you don’t use magic, you might want to have all charges distributed to HP and unequip the Cerulean flask altogether.
Attacking, Blocking and Spellcasting
What happens when you press R1/R2/L1/L2 is dependant on what you are holding in the corresponding hand. If it’s a weapon, you will attack. If it’s a shield, you will block. If it’s a spell catalyst, you will cast the equipped spell.
Your character is right-handed. Weapons equipped in the left hand will generally prioritize blocking. Shields equipped in the right hand can be used for attacking. Magic catalysts and ranged weapons such as crossbows will act the same way in both hands.
Holding a weapon in both hands (hold Y + press R1 or L1) will change its moveset. In this stance, L1 will always block and L2 will use the weapon’s associated Weapon Art, a powerful skill that uses FP.
Holding a weapon in both hands will slightly increase your effective Strength, which allows you to equip certain heavy weapons without meeting the stat requirements.
Stat Requirements and Equip Load
Weapons, armors and spells will sometimes have stat requirements. You can equip them even if you don’t meet the requirements, but they will have greatly reduced effectiveness. Spells cannot be cast at all if you don’t meet their requirements.
All equipped gear will increase your Equip Load. (Other items in your inventory has no effect, only the equipped stuff). At certain thresholds (30%, 70% and 100%), your mobility will be reduced.
If you prefer dodging over blocking, keep your equip load below 30% to increase dodge effectiveness.
Going above 100% equip load will make you unable to run and dodge, and greatly hamper your survivability. It’s usually never worth it.
Focus Points (FP)
FP is the blue meter under your healthbar. They are used to cast spells, summon friendly spirits, and perform Weapon Arts.
Spells and summons cannot be performed without sufficient FP.
Weapon arts can be performed without sufficient FP, but they will be slower, much weaker, and any magical effects such as projectiles will not happen.
Stamina
Stamina is the green meter under your healthbar and FP bar. Stamina is required to perform basically every action, including attacking and blocking, but you have unlimited stamina while not in combat.
If your stamina runs out, you will enter a winded state where you cannot run and your attacks will be slower and weaker. You can notice your character’s posture change when winded. This state ends when sufficient stamina has been recovered.
Running out of stamina while blocking will throw you off balance, and allow enemies to perform riposte attacks on you for massive damage. Your shield’s stability rating influence how much stamina you lose when blocking (higher is better).
Upgrading Weapons
As in previous Souls games, weapons are essentially sidegrades: even your starting sword is viable at endgame levels, and weapons are all roughly comparable in power and instead differ in ways like moveset and weight. Instead, you power up weapons via upgrading them.
Weapons are upgraded by spending smithing shards at an anvil. A fully upgraded (+10) weapon will be twice as powerful as a +0 weapon. However, there are several tiers of upgrades, which use different tiers of shards, and for the higher tiers you will need the help of a blacksmith.
Smithing shards are rare early on, but become easier to find as you progress to more difficult areas. Make sure to prioritize weapons you like when choosing what to upgrade! Moveset versatility, range and attack speed are usually more important than raw attack power in your weapons.
Power Stance
Equipping two weapons at once will allow you to “powerstance” them, if they are of the same type. In this stance, L1 will do special combination attacks that use both weapons at once, while R1/R2 only attacks with the weapon in your right hand.
Powerstancing increases attack power and versatility, but it leaves you without defensive options. It’s a very advanced playstyle.
(It is still possible to dual-wield weapons that aren’t eligible for powerstancing. You just won’t be able to do the special combination attacks.)
Spellcasting
To cast a spell, do a light attack with a catalyst equipped in that hand. Different spell schools use different catalysts. The flavor text of the catalyst will tell you what spells it can be used with: sacred seals for cleric Incantations, staves for Sorceries, and so on.
Spells consume FP, Focus Points. You cannot cast a spell if you’re too low on FP.
Many spells and weapon arts can be charged by holding the attack button for a longer time before releasing. This increases damage or auxiliary effects with no additional FP cost, so do it whenever you can!
You can only equip spells while resting at a Site of Grace. You start out with a limited number of Memory Slots to attune spells in, but certain rare collectibles will grant you more. Unlike in previous Souls games, there is no stat that increases the number of spell slots.
Gameplay Mechanics (Advanced)
Item Drops
Enemies sometimes drop items, such as materials or equipment.
When an enemy drops an item on death, there’s a special particle effect where five rays of light explode out of their corpse. Be on the lookout for this so you won’t miss anything!
Enemies can only drop equipment they’re actually using. If you’re looking for a particular piece of gear, pick your fights wisely.
Item drop chance increases with the Arcane stat.
Special foes such as bosses and scarabs will always drop their item upon death, with no chance of failure.
Hub World
After you progress a certain amount through the game, you will be granted the ability to warp to the hub world at any time, just like you can fast-travel to any Site of Grace. This is where you find the blacksmith, spell tutors, and other helpful NPCs you meet through your adventure.
Stakes of Marika
Boss rooms, enemy camps and other tough encounters often have a Stake of Marika nearby, which acts as a checkpoint. You can choose to revive there instead of at the last Site of Grace upon death, allowing you to quickly retry the fight.
There’s a small, barely noticeable icon of a calm face under your healthbar whenever you’re in range of a Stake of Marika.
Keep in mind that you will only be able to spend your Runes at a Site of Grace, so if you’re carrying more runes than you can afford to lose, you might want to consider backtracking before entering an obviously difficult battle whether there’s a nearby Stake or not.
Horse
After you progress a certain amount through the game, you will be given access to a spiritual horse.
While mounted, you move faster, making it easy to fight groups of weak enemies. But being knocked off your horse will stun you for a long time, which can quickly prove fatal. Additionally, you have no dodge move with invincibility while mounted, having to rely on moving out of the way instead.
Attacks change while on horseback: L1/L2 will attack on your left side and R1/R2 will attack on your right side. Your offhand weapon is inaccessible.
Stances where you hold out a weapon (e.g. dragging a greatsword on the ground, or readying a lance) will damage enemies even when you don’t attack. This can be useful to make it easier to hit enemies, and save on stamina.
Your horse has limited HP, and can be killed by enemy attacks. Being ethereal, he won’t stay dead permanently, but you will need to spend a Crimson Flask to summon him again. With the right Cookbook, you can craft certain healing items to heal him mid-combat to avoid this happening.
Your horse has a double jump, allowing access to some areas you cannot reach on foot. However, the double jump does not cancel out fall damage.
In certain areas you will find Spirit Springs, updrafts that allow you to jump great distances while on horseback. You can influence the direction of the jump, allowing you to reach otherwise inaccessible areas. Additionally, jumping into an updraft from above will cancel out fall damage, you will be enveloped by a wind effect when this happens.
You cannot ride your horse in dungeons, and certain other cramped locations. Additionally, you cannot ride in multiplayer, including when you are invaded.
Ashes of War
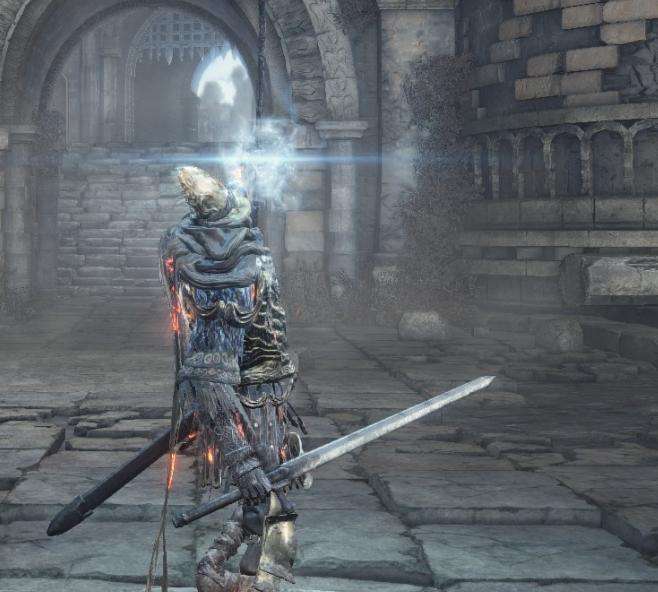
Ashes of War are a type of equipment that can be assigned to weapons while resting. They will replace the weapon’s default Weapon Art with some sort of advanced move or spell, and can optionally also replace their elemental effects or scaling. You typically earn these by defeating a lesser boss.
Ashes of War can be changed at any time (when resting at a Site of Grace), so experiment with them to adapt to the challenges you’re facing!
Keep in mind that when an Ash is equipped, it’s merged with the weapon. You can only use each ash on one weapon at a time.
Certain unique weapons cannot use an Ash of War. If a weapon isn’t listed in the Ashes of War menu, this is why.
Spirit Ashes
Don’t mix these up with the Ashes of War! Summoning ashes are usable items that contain the spirits of dead monsters. They are infinitely reusable consumables, but consume a large amount of FP when used. You will need the Cube Bell to use summoning ashes, but you will obtain it fairly early on.
Spirits start out weak, but can be upgraded by a certain NPC in the hub world.
You need to be near a summoning monument to use a summoning ash. These are typically placed near large enemy groups, and in boss rooms. You will see a glowing tombstone icon in the HUD when summoning is possible, above your equipped gear icons.
Summoned spirits’ HP is visible in the HUD. Your healing spells will heal summoned spirits too.
Most enemies will prioritize spirits over you, so you can use them as a distraction in a pinch. However, if you rely on them to do damage, you will need to lure enemies away from them and soak up all the aggro yourself.
Mixed Physique
In a certain dungeon, you will find the Wondrous Physique Flask. This is essentially a Tear Flask whose effects you can manually change, by equipping it with Crystal Tears. The flask starts out with 1 charge, but it recharges every time you rest at a Site of Grace. The default effect it comes with is causing the potion to explode, damaging you and any nearby enemies – depending on your playstyle, you might want to replace that with some other effect.
Posture Damage
Attacking an enemy will reduce their Posture. Exhausting it completely will stun the enemy momentarily, allowing you to perform a riposte finisher on them for massive damage. The weak point will glow gold when this is possible, and you can trigger the finisher by pressing R1 when close to the weka point.
Heavy attacks, headshots, and jumping attacks all deal increased posture damage. Parrying an enemy’s attack (using the Parry weapon art and its relatives) will deal a massive amount of posture damage, immediately breaking the posture of most non-boss enemies.
Breaking the posture of an enemy on horseback will make them fall off. Of course, the same applies to you.
Shield Counters
Pressing R2 immediately after blocking an attack will launch a powerful counterattack. There will be a special sound effect when you do this, telling you that you’ve executed the move successfully.
Of course, you lower your guard when doing this move, so make sure to only trigger it if the enemy staggered or otherwise finished their attack combo.
Enemies can do this too, so be careful about being too aggressive when facing an enemy with a shield.
Contrary to the name, you can do these counters after blocking even if you don’t have a shield equipped! Just keep in mind that most weapons have pretty bad block rates, so you will take heavy chip damage when blocking with them.
Time & Weather
Time of day and weather affect things. During night, enemies have a harder time spotting you and stealth is easier, but there are also stronger monsters and elite enemies roaming the land. Certain crafting ingredients can only be found at night, or glows in the dark and are more easily spotted.
Tarnished such as yourself see perfectly during the night, and you should also be wary of other creatures with glowing eyes.
Wet targets take additional electric damage and reduced fire damage, this also applies to fighting in rain. Strong winds will slow down or speed up your movement, and it’s possible to be hit by lightning. Fog will make stealth easier, but also make enemies harder to detect.
Most time-based effects doesn’t matter underground. Weather patterns vary by area, for instance Stormhill got its name for a reason.
Crafting

Crafting allows you to create consumables like elemental resins, throwing knives and arrows in the field. Finding or purchasing cookbooks will increase your repertoire.
Certain items like bombs require containers to be crafted. Containers are reusable, but the maximal capacity you can carry of that item is based on the number of containers you’ve obtained. Try to buy additional containers whenever you have the opportunity!
Of particular note for the early game are the sleep arrows, and other sleep implements crafted with the Trina’s Lily. Targets hit by one will instantly fall asleep and be harmless for 60 seconds, allowing you to do a guaranteed finishing blow for massive damage! (Or quickly put an enemy that spotted you down before they raise the alarm).
If you’re quick on your fingers, you can quickly put multiple enemies to sleep before they raise their guard. This can be useful when e.g. two elite knights guard a gate.
They don’t work on bosses, but they work just fine on massive regular enemies like trolls! Just keep in mind that they only work on targets that are living things, so stone golems, reanimated undead and the like tend to have disappointing results.
Most crafting ingredients are easy to find, so don’t worry about using consumables! Though whenever you find an ingredient explicitly mentioned as being “very rare” (such as the Trina’s Lily) you might want to mark the spot on your map.
Most crafting ingredients respawn every time you rest at a Site of Grace or die.
Stealth
Press the left stick to enter stealth mode. While crouched, you make less sound and can hide in tall grass. (Metal armor will make noise and greatly reduce the effectiveness of this. You can judge the impact by moving around and listening to the sounds your armor makes)
Enemies that haven’t noticed you yet will take increased damage from attacks. This also synergizes with other sources of increased damage, like headshots and backstabs.
Enemies will have a harder time detecting you during nighttime or other sources of darkness. However, nocturnal enemies like bats are stronger than the foes you face during the day, and usually tend to have night vision.
Counter Attacks and Critical Attacks
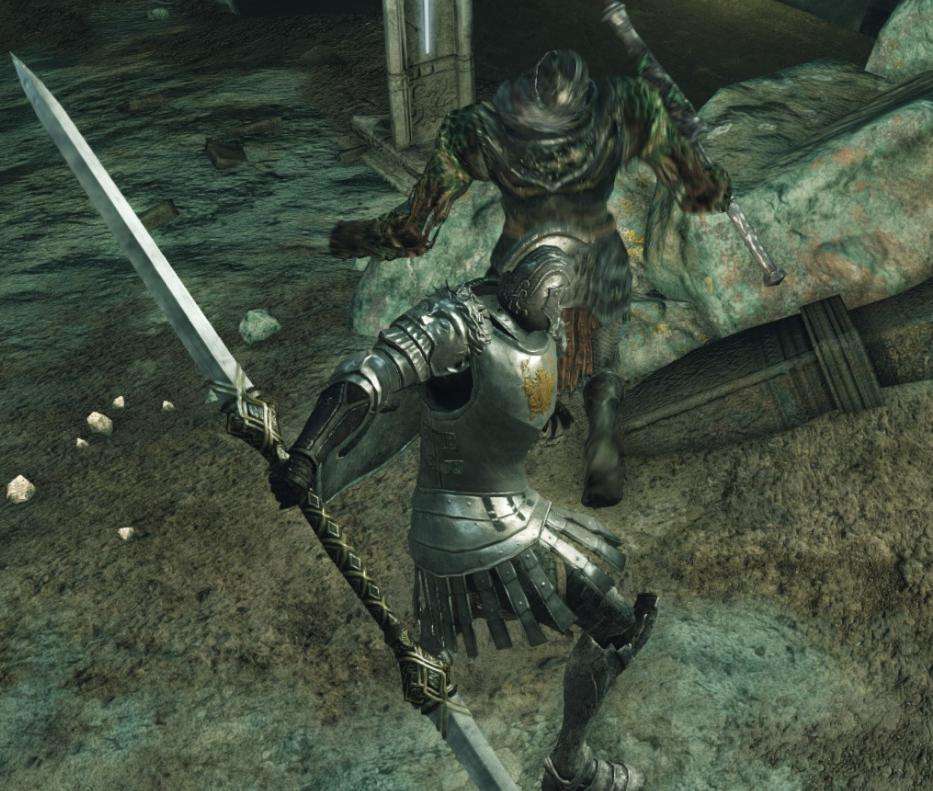
Being hit in the middle of an attack, or while running, will deal additional damage. This applies to both you and enemies. This is called a “counter attack”. When this happens, the impact sound of the attack will be deeper than normal.
Being hit by regular attacks in certain vulnerable states, such as after having posture broken, being parried, or falling off a horse, will deal additional damage greater than that of a counterattack. This is called a “critical attack”. When this happens, a special impact sound will play.
Finishing blows will typically deal less damage than a series of critical attacks, but they use less stamina and temporarily make you invulnerable for the duration of the animation. It’s typically safer to go for finishing blows over critical attacks when you have the opportunity, but ranged attackers tend to not have a choice.
Additionally, projectile strikes at an enemy’s weak point (such as shooting a human in the head) will deal increased damage and greatly increased posture damage.
Caravans & Enemy Camps
Sometimes you face large camps of enemies, or groups escorting a wagon with a treasure chest. Fighting them for the goodies is optional, but they’re usually guarding something REALLY nice…
It’s possible to loot caravan chests without killing nearby enemies, but it takes a long time to open it and you’re not invincible during this animation. If you’re going for this, stealth is your best option. (Additionally, chests can only be opened when the wagon is standing still, so if the caravan is moving, you’ll need to do something about the trolls).
Enemy camps and caravans usually have scouts, who carry a trumpet. If they spot you, they will signal every enemy in the group to attack you, so be mindful of these guys and try to take them out first.
Dungeons
You can find dungeons in all sorts of places: ruins, mines, and natural caves. They’re usually easier than world bosses / story bosses, sometimes just being a single room with loot, and usually having minibosses instead of regular bosses guarding the end. Whenever you find one, check it out!
(Most dungeons also has a Site of Grace at the entrance, so just finding one lets you rest and level up as a nice bonus)
Dungeons sometimes has large doors you can’t open normally. There’s a hidden lever somewhere in the dungeon that will open these.
Some dungeons has multiple entrances, connecting to otherwise inaccessible areas or just allowing you to tackle them in different ways.
World Bosses
World bosses are simply bosses that roam the world, such as the Tree Sentinel right outside the tutorial zone. They are considerably harder than regular enemies, but always drop something really nice when killed and are permanently gone afterwards.
World bosses are bosses, so come prepared if you intend to fight them. If you find a new boss while exploring and are almost out of resources, you might want to consider running away and come back later.
Since world bosses are roaming, you can usually lure them away from where you first find them. Use the environment to your advantage!
Multiplayer
Using a Furlcalling Finger Remedy allows you to summon another player to help you out. You will find summon signs on the ground, or glowing Summoning Pool stakes. Generally, dungeon entrances or boss room antechambers are the most lively places for multiplayer. The Remedy effect ends when you die.
However, once you summon help, you also open your world up for invasions by hostile players.
When dying as a summoned-in spirit, you will not drop your carried runes. If you feel like practicing an area before braving it yourself, consider leaving a summon sign and help someone else out – it’s completely safe!
Players can leave messages for each other. Don’t trust every message you see, you can’t tell if whoever wrote it had honest intentions. In particular, most messages near bottomless pits that read “try jumping” are just there to troll you.
Fast Travel
Whenever you are not in combat, you can warp to any Site of Grace you’ve discovered. This allows you to quickly return to vendors, dungeons and other places of interest.
However, keep in mind that there are many secrets in the world, and using fast-travel all the time deprives you of chances to stumble over them…
Class Guide
Summary
There are no class-exclusive items or abilities, everything is purely based off your stats and equipment. Thus, your starting class will only affect the first few hours of the game. Don’t fret too much over it.
Scaling effects are influenced by upgrade levels. Thus, pumping your main attack stat early on gives less of an effect. If you’re new to Souls games, you should focus on survivability instead: levelling your health, with mana and stamina when required. As you grow comfortable with your levels in these stats, you can start focusing on getting the stats needed to use the cool weapons you want to try out, and when you’ve settled on a loadout and playstyle, that’s when you start pumping offensive stats.
It’s usually better to be versatile than specialized, since you don’t know what challenges you’ll be facing on your first run.
Healing is very limited early in the game, so starting as a Prophet or Confessor to gain access to healing magic is probably the easiest as a newcomer. (Casting is slow, so use magic between fights and your Flask of Tears to heal in the middle of a fight)
To be able to use more advanced equipment, level the stats indicated on the gear. Most melee weapons require some combination of strength and dexterity, occasionally with a sprinkle of a magical stat if it has innate elemental damage.
To be able to wear heavier armor, level Strength to increase your maximal equip load.
To be able to attune stronger magic, level the corresponding stat for the magic school of your choice (Intelligence, Faith or Arcane). Unlike in previous Souls games, there is no stat to increase the number of attunement slots. You will gain additional spell slots as you find a certain rare collectible.
Vagabond
A noble traveller versed in all manner of weaponry. Jack of all trades, master of none…
A balanced class starting with heavy armor, halberd, sword and shield. And when I say “heavy armor”, I mean, “so heavy you’re overencumbered and have an inferior dodge roll”. If you prefer dodging over blocking, you need to unequip some of your equipment to get under 70% equip load.
The starting sword has a surprisingly long range, especially when used in thrusting attacks, but you probably want to stick to the halberd whenever convenient (i.e., when you’re not swarmed by fast enemies, and when you’re not fighting in tight corridors). Light attacks are thrusts with longer range, heavy attacks swings that can hit a large are around you. Holding the halberd in both hands speeds up the attacks and gives you greater reach, but of course it means you’re giving up your ability to block with the shield. The default weapon art is a running attack that can stunlock enemies and easily break a shielded enemy’s guard.
Being able to use both Axe and Spear-type Ashes of War gives the halberd a lot of customizability later on, though its default weapon art is great for burst damage right out of the gate.
Also be mindful of the halberd’s long reach while on horseback. Just holding it out to ready a heavy attack is powerful enough to kill many lesser enemies as you ride past, and this is an excellent way to clear the early camps and caravans.
Has balanced stats allowing you to pivot into any playstyle relatively easily, though of course that also means they have no major advantages over any other class.
- Archetypes: Tank, Jack-of-all-trades
- Beginner-friendliness: Excellent
Warrior
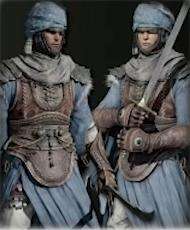
Seasoned mercenary and war veteran. Surely, war never changes?
Has the highest dexterity, and dual-wields curved swords.
Wielding two weapons of matching type allows you to enter the “power stance”, which lets you attack with both weapons at once for increased attack power at great expense to stamina. To use power-stanced attacks, use the left-hand attack buttons; to attack with just your primary weapon, use the right-hand buttons.
Starts with a parrying shield which is unsuitable for regular blocking, so if you’re a beginner and not comfortable in your ability to parry and dodgeroll every attack, you might want to pick another class.
The perfect class for fancy, dexterity-based playstyles taking advantage of the dual-wield moveset.
Dexterity also speeds up spellcasting speed, and they start with above-average intelligence, so mixing in some magic in your playstyle will be easy.
- Archetypes: Swashbuckler, dual wielder, spellsword
- Beginner-friendliness: Low
Hero
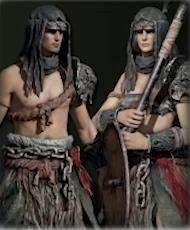
The heir to a barbarian chieftain, driven out by the Golden Order. Free wills will always be ridiculed by the powers that be.
Has the highest strength, starting with a large axe. You’ll have an easy time breaking enemies’ guard, but attacks leave you open to enemy attacks, so be careful about large groups of enemies. Doubly so for the default weapon art, which is a sustained combo attack that can stunlock lesser foes, but which is slower and locks you into the combo until it finishes.
One of the earliest caravans you can find in Western Limgrave guards a Greataxe, and if you enjoy the battleaxe you start with, you’re sure to love the Greataxe even more. Whether you want to explore further away or not, consider nabbing this axe before you leave.
The optimal class if you like oversized, heavy weapons.
Also has the second lowest magic stat investment, making this a good choice if you don’t intend to ever use magic and want to avoid “wasted” stat points.
- Archetypes: Barbarian, heavy weapons guy
- Beginner-friendliness: Average
Bandit
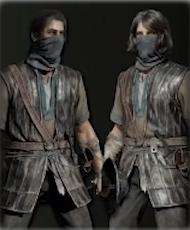
Highwayman hoping to profit from the civil war. Whatever this golden order is, it sure sounds like it’d fetch a high price…
Has high Dexterity and the highest Arcane, starting with a dagger, buckler, and shortbow.
Not terribly strong in a direct encounter, relying instead on backstabs and cheesing enemies at a distance with arrows.
The dagger has a very high critical damage multiplier, which applies to ripostes and backstabs. Fishing for backstabs and ripostes (special finishers usable after you poise-break, guard-break or parry an enemy) is considerably more effective than just stabbing your foes repeatedly.
Holding the off-hand attack button allows you to aim a bow in first person, which is useful when fighting enemies at so long ranges you can’t lock on to them. Pestering an enemy with bow attacks from a long range allows you to draw them out one at a time instead of fighting them all at once, or even outright kill them before they pose a threat! Of course, the shortbow has a pretty short attack range and low power, but it makes up for it with speed. With a little training and some sleep arrows, you can end many encounters before they have a chance to begin.
Arcane is used for some spells, but also influences item drop rate. The perfect class if you intend to focus on crafting or looking for rare items early on. But if you’re not, this is an advanced class for players that are comfortable learning parrying timings and enemy patterns, and probably not particularly easy to play if you’re completely new to the Souls series.
Starts at the lowest level other than Wretch.
- Archetypes: Rogue, ninja
- Beginner-friendliness: Very low
Astrologer
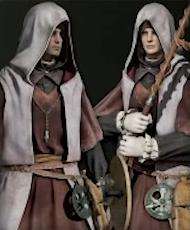
Scholar of the once-forbidden arts of precognition, now laid bare for anyone to study. Where books burn, people are soon to follow…
Sorcerer class. Starts with the highest Intelligence and Mind, allowing them to cast powerful spells, and a lot of them. Also starts off with a powerful mix of area-of-effect and DPS spells allowing them to deal reliable damage right away.
Since mana is also used to call upon Summoning Ashes, it’s also a solid starting choice for a summoner build, though the clerical classes probably are a better choice for that since they can heal their summons.
Too physically weak to use many early weapons other than daggers and short swords. But magic has many advantages in both range and power, and being able to fight tougher enemies at a distance makes many encounters considerably easier.
You will be reliant on magic attacks to deal damage, but don’t forget that elemental Ashes of War gives your melee weapons scaling with your magical stats.
There are many different sorceries, and since your spell slots are limited, it’s important to attune the ones most suitable for the task at hand.
- Archetypes: Sorcerer, summoner
- Beginner-friendliness: Good
Prophet
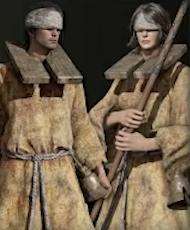
Once ridiculed as a doomsayer, then all the visions came to pass… but the people didn’t flock to your side, they ran in fear.
Cleric class. Starts with the highest Faith. Uses miracle spells to heal and support, and a spear for offense.
The spear is ineffective against groups due to its narrow attacks. For the best effect, use the range to your advantage and wield it two-handed.
Unlike almost every other weapon, spears can be used to attack while blocking. Be aware that this is both slower and weaker than regular attacks. And of course, like most mage classes, the Prophet doesn’t start with a particularly good shield. Since you have decent Strength, you might want to replace it with a larger shield as soon as possible.
Offensive miracles have a wild, unpredictable nature to them that lends themselves well for fighting groups of weaker enemies.
Healing is very limited early on, so having access to healing spells makes the early game easier.
- Archetypes: Healer, summoner, pyromancer
- Beginner-friendliness: Good
Samurai
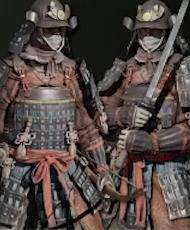
Blood has been a common sight, but these lands yet know their inner peace… you can only hope they don’t forget.
Has high Dexterity and the highest starting stamina, fighting with a katana that induces bleeding and a bow for ranged attacks, but doesn’t use a shield. Even with access to a shield, the two-handed moveset of a katana is generally preferrable with faster attacks and greater posture damage, and of course you need both hands to use a bow.
More attuned to dodging than damage mitigation.
Bleed damage is proportional to enemy health, so the uchigatana gives you an edge against larger enemies. Of course, only enemies with blood can bleed.
The weapon art is an iaido slash, which takes some time to prepare but comes out very quickly once you actually start the attack. Best used when an enemy is playing defensively, unleashed the moment they drop their guard.
The longbow is a slow but powerful bow, most useful for sniping enemies from a distance instead of engaging them directly. Holding the off-hand attack button allows you to aim a bow in first person, which is useful when fighting enemies at so long ranges you can’t lock on to them. Pestering an enemy with bow attacks from a long range allows you to draw them out one at a time instead of fighting them all at once, or even outright kill them before they pose a threat!
Hitting an enemy’s weak point (such as the head for humanoids) will deal critical damage and stun them, this is usually only possible when manually aiming the bow.
Starts with the lowest magic stat allotment, making them the perfect choice if you have no intent to use magic and want to avoid wasting stat points.
- Archetypes: Samurai, ranger
- Beginner-friendliness: Good
Prisoner
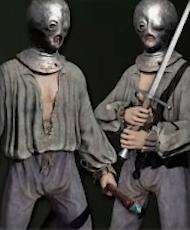
A once-noble heretic, imprisoned for unsavory experiments with the arcane. But without challenge, how are we to improve?
A hybrid sorcerer/melee class, with access to both physical damage and glintstone sorceries. Starts without the powerful sorceries of the Astrologer, so you will rely on them mostly for situational support.
Magic Glintblade is a homing spell with decent power, but the projectile doesn’t fire until a few seconds after you deploy it. This has its uses, though: it gives you just enough time to break an enemy’s guard with a melee attack to make sure they don’t dodge out of the way of the projectile!
Starts with an estoc, a hybrid sword which has light thrusting attacks as well as heavy slashing attacks. Mastery of this weapon requires getting comfortable with varying your moves to fit the situation, and it’s particularly difficult to use against groups of smaller enemies.
Their starting shield is a buckler, a parrying shield with very generous window of timing. If you want to learn parry timings, this is probably the easiest class to start with. Additionally, the shield slightly boosts some ailment resistances, but only when held in an active hand.
The iron mask has surprisingly good defenses, but you might want to replace your starting rags with some proper armor as soon as possible to compliment it.
- Archetypes: Spellsword, ninja
- Beginner-friendliness: Low
Confessor
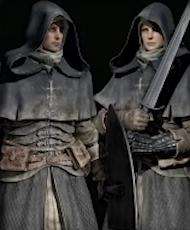
A seeker of sinners, sword always at the ready. Blind faith is dangerous, so you will be Our eyes.
A paladin-style hybrid cleric/melee class with solid weaponry to compliment their miracle-based spells. Also starts with a metal kite shield, which is a reliable defensive tool for most early-game enemies.
The broadsword lacks thrusting attacks and only has wide swings, which makes it easy to use against groups of enemies, but which leaves you open to counterattacks from faster enemies. You should get into a habit of using jumping attacks when using this weapon, both to leave yourself less open for counterattacks, and taking advantage of its higher-than-average posture breaking ability.
An excellent choice for beginners, with access to both reliable melee damage, reliable defenses, and healing. Also starts at the highest level out of all classes.
Urgent Heal is a very fast healing spell which can even be cast while moving, but it only heals a miniscule amount of HP. It does not heal allies, only yourself.
Assassin’s Approach is a spell that makes your movement inaudible, allowing you to sneak up on enemies more easily, including running at full speed. It makes stealth much easier, as long as you don’t let yourself get seen.
- Archetypes: Paladin, healer, jack-of-all-trades
- Beginner-friendliness: Excellent
Wretch

Outcast deprived of everything but their humanity. Some say, for good reason.
A joke class intended for challenge runs, starting with no armor, the lowest starting level, and only a wooden club for offense. You probably don’t want to pick it for your first run.
Their main saving grace is perfectly balanced stats, allowing you to dabble in all playstyles without a large investment, and they start out at level 1, making levelling up cheap and easy compared to the other classes. Of course, it also means they don’t start out particularly good at anything…
Keepsakes
Keepsakes are a starting item that gives you a little extra boost early in the game. They’re not terribly powerful, and the items can be found later on in the world, so don’t fret too much over your choice. It mostly affects your playstyle in the first few hours.
Crimson Amber Medallion
A talisman that slightly increases Max HP while equipped.
The boring default choice, but there’s very few situations where 10% more health isn’t going to help.
You start out with a single talisman slot, and of course only equipped talismans will provide any benefits.
Lands-Between Rune
A consumable that gives a bunch of runes (levelup/shopping currency) when used. Depending on class, it will give you enough for 2-4 levelups. Of course, you can use it to buy starting gear from merchants as well.
Make sure to not use it until you reach the NPC you intend to spend the runes at, since the consumable will not be lost on death, but the runes it grants when eaten will be.
Golden Seed
An upgrade material that increases your Flask of Tears (estus flask) uses, essentially allowing you to start the game off with 5 flask charges instead of 4.
Unlike in previous Souls games, you need an increasing number of these for each new flask capacity tier.
Gives more benefits than the life talisman early on since the flask heals way more than 10% of your health, and since you can distribute flask charges between health and mana, it could be especially useful if you intend to rely on magic damage.
Fanged Imp’s Ashes
A summoning ash, which can be used to summon a friendly spirit that will help you in battle. Infinitely reusable, but consumes Focus (the mana bar) when used.
(You need to obtain the Cube Bell before you can use summoning ashes, but fortunately you can get it very early on: head to the Church of Elleh directly ahead as soon as you set foot in the first area of the Lands Between to find the NPC who will grant you this item.)
Also note that summoning is usually only possible in boss rooms and encampments. There is a special tombstone icon in the HUD when summoning is possible.
The imps aren’t terribly powerful, but a distraction is always welcome when you fight groups of enemies. Plus, they’re kinda cute!
Cracked Pot x3
A special crafting material used to craft bombs. The pots are magical and can be reused, so this essentially acts as a capacity upgrade for your maximal bomb carrying capacity, and lets you start out crafting bombs immediately instead of having to find some Cracked Pots first.
Perfect for crafting-focused builds, or to add elemental damage to a melee-focused class.
Stonesword Key x2
Consumable master keys, working pretty much the same way as the Pharros Lockstones from Dark Souls 2.
When you find an area sealed by a blue fog you can’t pass through, you can spend these keys to unlock them. Typically these areas are either major shortcuts, or treasuries hiding some special weapon or armor.
There’s one such area right at the start of the game, but you might want to save your keys for later… partially because said area is very difficult compared to the intended path, and perhaps not the most enjoyable place to start your adventure.
Bewitching Branch x5
Consumables that will temporarily sway an enemy to your side, similar to the Rapport pyromancy. Can allow for a panicked escape from a botched encounter, or a distraction when you attempt to stealth past enemies.
Of course, they only work on weaker enemies, so there’s only so much you can achieve with these.
If you’re good at the game, you won’t need these, and if you’re bad at the game, you probably need more of these than you can reasonably find, so you probably should pick a more permanent gift.
Boiled Prawn x5
Consumable that temporarily buffs physical defense, similar to the Brightbugs from Dark Souls 2.
The effect isn’t too pronounced, but they last a relatively long time.
Do note that they only affect physical damage, and not elemental damage like fire or holy attacks.
If you’re good at the game, you won’t need these, and if you’re bad at the game, you probably need more of these than you can reasonably find, so you probably should pick a more permanent gift.
Shabriri’s Woe
Talisman. Increases the rate which you inflict Madness on enemies. Madness is a rare ailment, and it’s just as lethal to enemies as it is to you, but you don’t start out with any reliable means to inflict it.
Mostly useful for speedrunners, I suppose.
None
If you really want that extra bit of challenge, you can just opt out of picking a keepsake altogether. I wouldn’t recommend it for your first playthrough.
Frequently Asked Questions
I can see something cool off in the distance. Can I go there?
Yes.
It might not be as easy as it seems, the direct route might be blocked, and it might be a really bad idea to go there, but there are very few places you can’t explore if you want to.
What should I level up first?
Focus on HP. Weapon scaling is unimportant early on (it increases as you upgrade weapons) and you should worry about survival before you start worrying about increasing your DPS.
(Though keep in mind, Strength increases your equip load so if you rely on high-defense armor you will need a bit of this too)
How do I beat the Tree Sentinel?
Speed is the key here. Come back when you get a horse, and then fight him by jousting (run past him at high speeds and stab him when passing by)
Beating him rewards you with an Ash of War for shields that lets you create a temporary healing zone. If you never use parries, it’s a solid choice for beginners to help deal with the limited early-game healing.
How do I level up?
You need to team up with Melina, the Finger Maiden. After meeting her, you can select “Level Up” at any grace you rest at.
After finding three Sites of Grace, she will approach you the next time you rest. Ones found in dungeons does not count towards this, only the ones on the overworld. The easiest way to find additional Sites of Grace is to follow the guiding light from the Graces you ignite.
When do I get the horse?
When you first meet the level-up maiden Melina, she will give you the whistle that lets you summon him. Follow the guiding light from the Graces you ignite and you should find the one she hangs out at. (She should show up at the third grace you ignite, but there are exceptions to this rule).
I’m using a shield, but I still take a lot of damage!
Check the shield’s stats. Smaller shields like bucklers don’t block a lot of damage, they’re intended to parry (deflect) enemy attacks instead. Larger shields typically block more damage (sometimes even 100% of damage!) but they require more Strength to equip. If you don’t meet stat requirements, the effect of the shield also is greatly diminished.
Also keep in mind, a lot of metal shields (which block the most physical damage) don’t block magic damage very good, so if you’re fighting something hurling arcane projectiles or lightning at you, you might want to change to a wooden shield instead.
What’s the best early-game weapon?
The Twinblade, found in the a certain dragon-burnt ruin early on, is a solid choice. It hits in a wide area around you when one-handed, and when twohanded it can quickly deliver a series of hits that stunlocks lesser enemies. Additionally it has access to a large number of Ashes of War, allowing you to supplement its basic attacks with a lot of skills that compliments its moveset.
The Lance is another great choice. Slow but powerful, and with great range. It’s the most useful on horseback, where you can compensate for its slow speed and take full advantage of its long range. Combine with the Repeating Thrust Ash of War for some insane burst damage and you’re good to go.
Can I make a fistfighting build?
You can fight with no weapon equipped, but both raw damage and scaling are pitiful, and you lose out on the ability to use Ashes of War. However, there are a fist weapon class in the game, such as the ancient roman boxing glove, the Caestus, which is available early on.
How do I swim over to the dragon island?
You don’t. For some reason “just swim over to that island lol” has become a meme among Souls content creators. Don’t be fooled; you can only reach that island by going through a certain dungeon at the beach.
How do I beat Flying Dragon Agheel?
Bring some horse-healing items (e.g. craft raisins using Rowa Fruit) and equip a lightning-elemental Ash of War on a long weapon, like a lance or greatsword.
Stay on horseback, stay mobile, and circle around Agheel at a safe distance, taking some stabs at their feet whenever you get an opening. (A safe distance doesn’t necessarily mean a LONG distance, Agheel’s breath has a pretty big area of effect – aim for far away that you won’t get stomped on or bitten, but not in fire breath range).
Make sure to keep your horse alive using the raisins, because you’re pretty screwed if he dies.
For some reason Agheel takes massive fall damage and can be oneshot by walking off a reasonable-sized ledge, but it’s very tricky to set up this cheese and it probably will be patched out soon…
How Do I beat the Demi-Human Chief x2?
Use stealth. One of the chieftains is sleeping initially and will only wake up if you fight nearby. You can also pick off a lot of the regular demihumans without being spotted if you take the right approach, making the fight much easier. If you are spotted, fire bombs are your friend to deal with the groups of enemies. Summoned spirits just risks drawing all the aggro in the entire room, so use with caution.
How Do I beat the Bloodhound Knight Darriwil? He ignores my dodges!
Darriwil’s attacks are delayed, so if you dodge on instinct, your dodge ends prematurely and you’ll get hit. Stay cool and wait until the last moment before you dodge. (Many other bosses also do this)
Where do I find Smithing Stone Shards?
They’re scattered all over the place in small numbers, often dropped by certain tougher enemies like the trolls on Stormhill. But your best bet to get them quickly is exploring mine-type dungeons, which usually have both dedicated treasure piles of them and enemies that commonly drop them. Bring some means of elemental damage, since enemies with stone skin are very resistant to physical damage.
Throwing knives deal like no damage, why should I bother with crafting?
Throwing knives are mostly meant to aggro a single enemy without alerting their buddies, letting you separate a group and take them on one at a time. For more damage, try the Fire Pots (they can even hit multiple enemies at once!)
Is there a crafting-focused build?
Arcane boosts your item discovery rate (there’s also spells and gear that scales with Arcane, but they’re rare early on) and most thrown projectiles scale with strength and/or dexterity.
If you don’t want to fight directly yourself, consider focusing on spirit summons and healing spells, suppleanted with ailment-inducing weapons like the Coiled Snake Shield.
How do I beat Margit the Fell Omen?
Margit is the first “git gud” boss of the game and a massive leap in difficulty from previous first-area bosses like Iudex Gundyr and the Dragonrider.
If you immediately ran here instead of exploring Limgrave, and you’re bad enough at the game to need this guide, you probably should hold off a bit and explore other places first – upgrade some weapons, get some stats, get comfortable with dodgerolling and blocking timings, and get yourself equipped with some War Ashes you’re comfortable with. Grinding is by no means necessary for success, but it does make things easier.
Some general pointers:
- Heavy attacks and jump attacks deal greatly increased posture damage. Use these whenever you can, and you will occasionally stagger Margit, creating an opening for critical attacks or healing.
- A lot of Margit’s attacks have a delay to them that makes it hard to dodge them on instinct. Try to keep your cool and dodge at the very last second.
- Being a beast, Margit is weak to fire damage and hemmorhaging/lacerating damage. Incantations, Ashes of War and consumables that add fire damage will all give you an easier time, as does anything that causes the bleeding status ailment.
- Using a large shield and Guard Countering is a simple strategy, but it’s not super effective against Margit’s long combos. Try to dodge primarily and make sure you don’t do a Guard Counter until the last attack of Margit’s combos, so you don’t eat up eating a follow-up attack to the face. Also keep in mind that Margit’s jump attack cannot be blocked.
- Margit cannot fall into the bottomless pits to the side of the arena. However, YOU can, especially when he starts using the hammer attack which has massive knockback. Try to stay in the middle of the arena.
- Margit’s attacks have a large area of effect that easily kills weaker summons, and like most bosses he will focus on summons first. A melee-focused tank like the Mercenary is your best bet here (though with a little luck the Wolves might also survive since they jump around a lot).
- Having the high ground (being further up the slope than Margit) makes it easier to hit him with jump attacks, which deals additional posture damage.
- There might be a certain key item that weakens Margit, if you can find it…
- If you’re extremely stuck and don’t want to bash your head against the wall for another hour, you CAN find an alternate way into the castle that doesn’t force you go get past Margit. Though the next boss you’ll need to fight is even harder…
- (Also, the reward for beating Margit is an additional talisman slot, so it’s well worth your time fighting him!)



god this game seems to be so buggy… says i have what i would need for setting ashes of war but i cant set any. dont even get the selection option for it
yeah found it now after checking the same chest 3 times now it was in it again…. welp
Just a correction, minor at best, but Endurance is what ups equip load, not strength. Strength is purely for weapon use and scaling.
Hey author, turns out my brain is Tarnished. I thought Spells/Pyro/Miracles would still be referred to as such. What I was calling Incantations was actually the Ash Summons with the bell, when incantations actually refer to Pyro/Miracles. I feel the name changes are wholly unnecessary and confusing since spells are still called spells, but that doesn’t make me any less of an idiot lol. TY for being a standout community member!
Elden Ring DOES support Steam cloud saves. It doesn’t have the Steam Cloud icon listed on the store page, but it does indeed have cloud saves.
Great guide, it gave me some well needed guidance on the starting classes and why I was having a hard time as a bandit. Now I know why…
The FAQ, how do I beat foes x, y or z are to a certain extend spoilers.
Worth noting and maybe adding in (though it is a slightly more advanced thing) that you CAN duplicate ashes of war at the Warmaster shack, in case you find a rare ash that you want to use on two different weapons.
Just wanted to say thank you! This is exactly the guide I needed.
i am terrible at this game and this is exactly what i needed to read, thank you. i mean, i’m still terrible having it read it, but at least i’m well informed.
Thanks for this guide. After reading it I realised I’ve played 20 hours and beat multiple bosses without equipping a single Ash of War because I assumed they were permanently applied to a weapon. Having fun destroying enemies with Ashes of War equipped now!