
This is a guide to all NPCs and their Questlines.
Nomadic Merchants
I will list all the Nomadic Merchants here later. Until then, here is a tip.
- Option 1: Whenever you find a Merchant, open your map and place a marker down on your location by pressing X/Square. This way you can remember where they are later.
- Option 2: Whenever you find a Merchant, kill them and take their drop to the Twin Maiden Husks so that you have all the Merchant’s Inventories in one place.
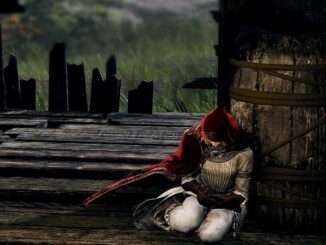
Roderika
- Meet Roderika at the Stormhill Shack just outside of Stormveil Castle.
- Talk to her multiple times and go into Stormveil Castle.
- Find the Chrysalid’s Memento deep in the castle on a pile of corpses nearby a Mini-Boss Grafted Scion that looks like the boss in the Tutorial.
- Return the Memento to Roderika.
- After unlocking Roundtable Hold, talk to Roderika and Blacksmith Hewg multiple times until Hewg takes Roderika as an apprentice.
- Go to Roderika’s previous location at Stormhill Shack for Golden Seed and back to her in Roundtable Hold for another Golden Seed.
- Go back to where you found the Memento for a Crimson Hood.
Notes: If you go to Lake-Facing Cliffs in Limgrave, you will be unable to give her her Memento and will miss a Golden Seed. However there are more Golden Seeds in game than can be used so it doesn’t matter much. Is this the end of the questline? She has later dialogue but nothing has really happened besides asking you to save Hewg, but he refuses. End?
Blacksmith Hewg
- Follow Roderika’s Questline, ater mentions wanting to create a weapon that can kill a god.
- After you upgrade a weapon to max, he thanks you for allowing him to make the weapon and hopes that you’ll use it to kill a god.
Notes: End?
Brother Corhyn and Goldmask
- Found in Roundtable Hold.
- Jump off the Balcony in Roundtable Hold and kill Mad Tongue Alberich then collect the Cipher Pata from the room beyond.
- Talk to Brother Corhyn and he will announce he is leaving.
- After getting up the Grand Lift of Dectus, go North-East of the lift to the Altus Highway Juntion Grace and North of that you can find Corhyn along the road.
- Talk to him then go to North-East and on the North-End of the bridge you can find Goldmask.
- Talk to Goldmask then go back to Corhyn and talk to him then back to Goldmask.
- Corhyn and Goldmask can later be found in Leyndell on a hill near West Capital Rampart.
- Talk to them and then get the Golden Order Principia near the Erdtree Sanctuary Grace(South-East of West Capital Rampart) by going up a root, through the door, and jumping onto a roof before circling the building and climbing another root.
- Take this book to Corhyn or Miriel and learn the Law of Regression.
- After learning, travel West of the Erdtree Sanctuary Grace and down an elevator and stairs to find a message on the ground.
- Stand on the message and face the statue then cast Law of Regression.
- Touch the newly formed message then talk to Goldmask and Corhyn.
- Later, travel to the Stargazer’s Ruins in the North section of the Mountaintops of the Giants, located on the North-Eastern corner of the map and talk to them.
- After beating the Fire Giant and Maliketh, find the corpse of Goldmask on the West side of Erdtree Sanctuary Grace, past a few plants for the Mending Rune of Perfect Order. Corhyn can be found at the previous location in Stargazer Ruins and refuses to sell you Incantations anymore. You can kill him for his stuff.
Notes: Quest can be completed even with Corhyn dead. You also have the option to give him the Potion of Forgetfulness from Rya’s Questline. Doesn’t do anything but gives dialogue.
Boc the Seamster
- Is a tree South of the Telescope South of Agheel Lake North Grace, he will talk to you.
- Hit him to free him and talk to him a couple times.
- Go to Coastal Cave, on the shore West of the games start and talk to him inside a few times.
- Kill the boss of Coastal Cave and talk to him again to give him the Sewing Needle.
- Meet him next to the the Lake-Facing Cliffs Grace, North of Stormveil Castle and talk to him.
- He will appear again at a few different Sites of Grace but doesn’t do anything.
- Grab the Gold Sewing Needle from the Church of Vows on the East side of Liurnia Lake.
- Eventually you’ll meet Boc at the East Capital Rampart in Leyndell Royal Capital.
- You have to buy a piece of boss gear from Enia and then you will be given the option to give him the Gold Sewing Needle.
- Later he will mention his ugly appearance and ask your thoughts on it.
- Here you have a choice.
- Choice 1: He will mention Rennala and ask for a Larval Tear to go change himself. If you choose to give it to him, he will show up at Rennala’s boss room as a human, then when reloaded he will be dead.
- Choice 2: Go to Hermit Village, located South-East of Volcano Manor and most easily reached by going through the “Coward’s Way” to reach Mt. Gelmir, you will find Prattling-Pate: You’re Beautiful on the South side of the village. Take that and use it next to Boc in East Capital Rampart and then talk to him. He will mention hearing his mother’s voice and ask if you feel the same. If you agree then he will be happy with his appearance.
Notes: End?
Gatekeeper Gostoc
- First found at the main gate of Stormveil Castle
- Offers you an alternative path to the main gate.
- Will open the main gate for you if you refuse his offer and become a merchant
- Locks you in a room with a powerful enemy in the castle
- Shows up after killing Godrick the Grafted to get some revenge.
Notes: Steals some of your Runes whenever you die in the castle. Killing him puts an end to it but he is now known to be part of Nepheli’s Questline and so should be left to his devices
Thops
- Meet at the Church of Irith next to the Lake-Facing Cliffs Grace.
- Buy all Sorceries.
- After getting into the Raya Lucaria Academy, find the Glintstone Key on top of a Chandelier in the Church of the Cuckoo’s inside of the Academy. This can only be gotten by travelling the rooftops which start near the Debate Hall Grace.
- Give him the key then travel to Schoolhouse Classroom Grace in the Academy and loot his body just outside and around the corner.
Notes: Could he have been saved?
Miriel, Pastor of Vows
- Located at the Church of Vows on the East Side of Liurnia Lake. Takes Scrolls and Prayer Books and teaches their contents.
- Also teaches you how to make NPC’s you’ve aggro’d by accident friendly again.
Notes: Could there be more?
Gurranq, Beast Clergyman
- Go to the Third Church of Marika, just North-East of the Minor Erdtree in East Limgrave.
- Go North of the Church and into the water to find a Sending Gate.
- Use it to find the Bestial Sanctum where Gurranq is.
- He wants Deathroot which can be found in quite a few different locations, usually places where there is a lot of death or Undead for a total of 9.(will list here later)
- Give Deathroot to him and he will give various rewards.(will list here later)
- After the 4th Deathroot, he will become hostile and must be hurt a little to get him to become friendly again(rot or poison makes this easy, just run outside after applying).
- Turn in all 9 Deathroot and he will leave and become Maliketh, the Black Blade which is a boss late in the game. (Look at the notes for an explanation)
Notes: His location can be told to you by D, Hunter of the Dead. About the fact that Gurranq is in both places. Crumbling Farum Azula is a place that exists outside of time according to lore evidence in the area. I can say with absolute certainty that Gurranq = Maliketh but the only explanation I can give for why killing Maliketh =/= killing Gurranq is that Maliketh is a “future” version of Gurranq and killing someone in the future does not change their present.
Iron Fist, Alexander
- Can be found on a cliff South of the Agheel Lake North Grace, far North of the lake in Limgrave and West of the bridge where he wants you to hit him to free him from his hole.
- Can also be found in Gael Tunnel, East of Limgrave and on the West side of Caelid where you need to open the door next to the boss room that acts as a path between Limgrave and Caelid.
- Is later found at Redmane Castle in the South-East corner of Caelid and can be talked to.
- Summon him for the boss-fight and after the fight he can be talked to nearby.
- Next found South of the Carian Study Hall located on the East side of Liurnia Lake and needs you to use an Oil Pot to free him.
- Later found sitting in the lava at Seethewater Terminus, West of Volcano Manor near the North-West corner of the map.
- Can later be summoned for the Fire Giant boss fight on the South-East corner of the Mountaintops of the Giants.
- Final location is up the path near the Dragon Temple Altar Grace, located in Crumbling Farum Azula, past an Imp Statue Fog Wall. He will challenge you to a duel and upon winning you get Alexander’s Innards and a Shard of Alexander.
Notes: What are Alexander’s Innards used for? It might be the Great Jar in Caelid after doing it’s quest. Some also think Jarwight but he is a puppet at this point though someone reported having seen him alive and not as a puppet somewhere. I have a theory that the fates of multiple puppets may be changeable.
White-Faced Varre
- Found just outside the starting area, talk to him then return to talk after unlocking Roundtable Hold.
- Return to his location after killing Godrick to find a message.
- Go to the Rose Church located on an island in the South-West area of Liurnia Lake.
- Talk to him for Festering Bloody Fingers then perform 3 Invasions, outcome doesn’t matter, and talk to him again for a Lord of Blood’s Favor.
- Next go to the Church of Inhibition in the North-East section of Liurnia and interact with the corpse of the maiden in the chair.
- Return to Varre to get a reusable Blood Finger for Unlimited Invasions and a Pureblood Knight’s Medal that he says to use “when the time is right” Can be fought as an invader in Mohgwyn’s Palace.
- After killing as an Invader, can be found near the Midpoint Grace for extra dialogue and his stuff
Notes: There are multiple alternatives to the Church of Inhibition, it’s just the easiest. When is the right time to use the Pureblood Knight’s Medal?
Bloody Finger Hunter Yura
- Can be found South-East of the lake in Limgrave under an overpass.
- Talk to him to learn about the dragon nearby.
- Kill the Dragon for more dialogue.
- Go North of the lake, up the stream and be Invaded by Bloody Finger Nerijus and Yura will appear to help. Don’t let Yura die. If Yura dies, it may break his quest.
- After Nerijus is dead, go a bit further North and talk to him under another overpass.
- Later, when you get access to Raya Lucaria Academy, go to the Main Academy Gate Grace and on the bridge going North, past the seal(don’t interact with it, just walk past) you will see a Red Summon Sign.
- Interact with it and help Yura kill Bloody Finger Ravenmount Assassin, Yura living or dying doesn’t matter here.
- Talk to him after the fight. Later, after going up the Grand Lift of Dectus, Go North-East of the Grand Lift to the Second Church of Marika. There you will find him on the ground.
- Talk to him then you will be Invaded by Bloody Finger Eleonora. Kill her for a few rewards.
Notes: His body is later taken over by Shabriri, advancing too far causes his death so Shabriri can take over.
Sorceress Sellen and Witch-Hunter Jerren
- Found under the Waypoint Ruins East of the lake in Limgrave after a boss fight.
- Accept her offer to teach you sorceries.
- Later go to the Hermit Village in the West part of Mt. Gelmir, North-West of the Grand Lift of Dectus, and find an old man named Primeval Sorceror Azur who has a crystal for a head and gives the spell Comet Azur.
- Go back to Sellen. Then head to Sellian Hideaway in North Caelid past the seals in Sellia and North of the Church of the Plague Grace. It is hidden behind an Illusory wall behind a giant gravestone.
- Talk to Master Lusat and defeat Radahn in Redmane Castle then return to Sellen.
- Head to Witchbane Ruins, South of the Fourth Church of Marika in West Weeping Peninsula, South of Limgrave, and talk to her.
- Beat Caria Manor in North Liurnia Lake and go North-West of it to find a Dragon. Beat or ignore it and search the ruins for an Illusory Floor.
- Enter inside and find the Illusory Wall at the back to find Sellen again.
- Interact with it and return to Sellen in Witchbane Ruins.
- Talk to Witch Hunter Jerren a few times. If Jerren is not there, go to Castle Redmane and talk to him in the church on the way to the Radahn Boss Fight and he will leave and appear in the Witchbane Ruins.
- After getting access to Raya Lucaria, go to the Grand Library Grace and walk out to find 2 Summon Signs.
- One helps Sellen and one helps Jerren. Sellen gives the Glintstone Kris and makes Shard Spiral available to buy, Jerren gives an Ancient Dragon Smithing Stone and both give Witch’s Glintstone Crown.
- Choose one and kill the other.
Notes: Scrolls can be given to her but I’d give them to Miriel. Sellen also features in another questline but isn’t completely necessary to complete it.
Blackguard Big Boggart
- Appears at Boilprawn Shack in the South section of Liurnia Lake.
- During Rya’s Quest for her necklace, he is the thief and will let you buy the necklace.
- Buy the necklace and some Boiled Prawns and he will give you an emote for buying the Boiled Prawns.
- Later he appear in the North outer moat of Leyndall and will sell Boiled Crabs as well. Buy some. Later during Dung-Eater’s questline, Dung-Eater’s invasion will happen here.
- Talk to Boggart and he will warn you about Dung-Eater being in the area and to stay on your guard.
- If you reload the area you will find him having become a victim of Dung-Eater, tied to a chair. He begs you for death and then dies, leaving a Seedbed Curse on his body.
Notes: If you kill Dung-Eater Invader before having bought Boiled Prawns from him then he will still appear in Leyndall but will not become a victim of Dung-Eater. His Seedbed Curse is not necessary to complete Dung-Eaters Questline.
Dung-Eater
- Appears at Roundtable Hold beyond the room with the Twin Maiden Husks.
- When given a Seedbed Curse(found in several locations, the earliest meaningful one being available in Leyndell Royal Capital. Will list here later) he will give you the Sewer-Gaol Key and tell you to come meet him.
- Go to the Avenue Balcony Grace in the Center of Leyndell Royal Capital and find a Well to the North-West in a ruined area nearby the Lower Capital Church Grace.
- Go down the Well to enter the Sewers.
- Go through until you reach the Underground Roadside Grace.
- Go out the door, turn left, run past the big guy and go down a large open grate on the left side before reaching the gate. Once you fall in, go down the path, not into the sewer pipe tunnel, and you’ll see multiple giant flowers.
- Run past the flowers and up the ladder to find the room with a bunch of Giant Hands. Kill the hands and then open the nearby door with the Sewer-Gaol Key to find Dung-Eater.
- Talk to him then go back to where he was in Roundtable Hold to find a message.
- Go to outer moat on the North side of the Leyndell Royal Capital, outside the city walls, and he will spawn as an Invader. If he doesn’t, it means that Blackguard Big Boggart is there and you should talk to him, buy some Boiled Crab, talk some more, reload the area, and talk to him again to collect a Seedbed Curse. When walking away, Dung-Eater should invade.
- Kill him and go back to the him in Roundtable Hold.
- Go to his real body and depending on if you’ve progressed Seluvis’ Questline, you get a choice.
- Default Choice: Give his body Seedbed Curses and once you given him 5, you get the Mending Rune of the Fell Curse for another ending to the game.
- Special Choice: If you’ve gotten the Seluvis’s Potion from Seluvis, you can choose to give it to Dung-Eater while he is tied to the chair. Go back to Seluvis and talk to him until he offers to sell you the Dung-Eater Puppet as a Spirit Ash.
Notes: Gross…..
Kenneth Haight
- Found on top of a ruin North of the forest in Limgrave.
- He will ask you to clear Fort Haight in the South-East corner of the forest.
- Go there and clear the Fort then return to Kenneth.
- He will reward you and then move to the Fort and mention looking for a new Lord.
Notes: According to data-miners, the lord is definitely Nepheli but no one is sure how to do it. I have a theory that the fates of multiple puppets might be changeable and so there might be a method of changing the Nepheli Loux Puppet.
Great Jar
- Found in North Caelid just outside an arena.
- Doesn’t speak but after talking to him there will be 3 Red Summons just down the hill from him named Knight of the Great Jar.
- Defeat them and talk to the Great Jar again for a reward.
Notes: Maybe Alexander’s Innards can be given to him after doing both quests?
Albus
- Go to the Folly on the Lake Grace in the South section of Liurnia Lake. Go South-West from there and you should find a town hidden beneath the cliffs.
- Proceed through the town and after getting the Village of Albinaurics Grace, kill the flute-playing enemy and nearby you should see a large Pot, Bush, Tree(it varies). Roll into it or attack and it will turn into Albus.
- Talk to him to get the Haligtree Secret Medallion(Right). He will mention Latenna and then die.
Latenna
- South-East of where you found Albus, South of the Scenic Isle Grace you will find the Lakeside Crystal Cave. Go through the cave and you will find the Slumbering Wolf’s Shack.
- Here you will find Latenna and her dead wolf, Lobo. If you haven’t done Albus’ quest, she will not say anything meaningful. After you’ve talked to Albus, she will be more friendly and will tell you where to find her half of the medallion as well as join you as Spirit Ashes.
- Much later you will get to the Mountaintops of the Giants. Go to the North section of this zone to Castle Sol and you will find the Haligtree Secret Medallion(Left) after killing the boss.
- Go back to the Grand Lift of Rold where you entered the Mountaintop of Giants and go to activate the medallion but don’t activate it yet. When you get the option to use the medallion, click left or right until you see the option “Use Medallion(Secret)” and choose that one.
- Go through the Hidden Path to the Haligtree into the Consecrated Snowfield then head to the Northwest to the Apostate Derelict. Near the NPC will be a Summon interaction which will summon Latenna. She will reward you with a Somber Ancient Dragon Smithing Stone.
Notes: Asks you to bury her beside Lobo when everything is done. Can this be done after killing final boss?
Ensha
- Found being an Edgelord in Roundtable Hold. After getting either half of the Haligtree Secret Medallion, will invade you the next time you go to Roundtable Hold.
- Dies an edgy death. Go to where he once stood for his armor set. Talk to Gideon to see how sad he is about the death of the Edgelord.
Notes: edge-lord!
Nepheli
- Found outside and down the path going towards Stormveil’s Main Gate from the Secluded Cell Grace outside the boss room. Go from the Grace towards the Main Gate and she will be in a side room on the way. She can then be summoned for Godrick the Grafted boss fight.
- After killing Godrick, she appears in Roundtable Hold just before the Twin Maiden Husks and gives you the Arsenal Charm.
- Can then be found just outside the Village of the Albinaurics South-West from Folly on the Lake Grace in the South section of Liurnia Lake. Talk to her then kill the nearby boss Omenkiller.
- Return to the Roundtable Hold and go downstairs past Hewg and talk to her there then talk to Gideon. From here you get a choice.
- If you have done Seluvis’ questline, you can give her the potion and she will appear in Seluvis’ puppet room. After his death, you can get the Nepheli Loux Puppet.
- If you don’t give her the potion, you can give her the Stormhawk King Ashes. These are found by going to The Four-Belfries located in the West part of Liurnia Lake. There you will find 3 locked Waygates and a single key. Use it on the Gate that mentions Anticipation. This will return you to where the game started. Go through the area, get your revenge, and find the Stormhawk King Ashes around the chapel where you first spawned. Give these to Nepheli Loux and she will be reminded of her first hawk.
Notes: Based on data-mining, it appears that she is meant to be the Lord that Kenneth Haight is looking for but no one has figured out how to continue her quest. It appears that an NPC necessary to the quest has been removed and so this may be the end to her quest though it isn’t certain. I have a theory that the fates of some of Seluvis’ puppets can be changed.
Pidia
- East of Ranni’s Rise, North-East of Seluvis’ Tower, jump off the cliff on to the ramparts of Carian Manor. Make your way through this path and you will find Pidia inside the building where the Manor Lower Level Grace is located, but above it where you couldn’t reach before.
- Becomes a merchant for you. Return after Seluvis’ death and you will find him being murdered by his own puppets. By the time you arrive, he is dead. Has Dolores the Sleeping Arrow Puppet to loot.
Notes: Pitiful Pidia.
Seluvis
- First encountered during Ranni’s questline as a spirit. To do this, go through Carian Manor in North-West Liurnia Lake and go North-West of that to get to Ranni’s Rise. Talk to Ranni and join her(if you already are helping Rogier, you’ll have to go back to him then come back to join her)
- After joining her go downstairs and talk to the spirits then back upstairs to Ranni. DO NOT give the Fingerslayer Blade to Ranni. Once you do, Seluvis dies.
- Seluvis can now be found in his tower South-East of Ranni’s Rise. He will give you a potion to give to Nepheli and you can buy Sorceries from him. The choice is here.
- If you give it to Nepheli, you will make Seluvis happy and get the Nepheli Loux Puppet later from his dead body.
- If you give it to Gideon, nothing happens.
- If you give it to Dung-Eater at the end of his questline instead of the Seedbed Curse, then you can buy the Puppet from Seluvis.
- After buying all of his sorceries, go North of his tower, into the ruins and find an Illusory Floor in one that leads down to a room full of Seluvis’ Puppets. Roll into the door in the back to reveal an Illusory Wall. Go back to Seluvis and bring up the room(may require buying all Sorceries from him first) and he will give you a free puppet.
- After you buy all Sorceries and get your first puppet, he will let you in on his scheme. He wants you to find the Amber Starlight Shard located North-East of the Atlus Highway Junction Grace, North-East of the Grand Lift of Dectus, in a canyon filled with Krakens.
- Bring the Amber Starlight Shard and give it to him to receive the Magic Scorpion Charm. He will then give you a potion to give to Ranni. If you do it, then she will wake up angry at you, then kill you and Seluvis. Seluvis also dies after giving the Fingerslayer Blade to Ranni and continuing her quest.
- If you give the potion to Ranni and make her mad, you can absolve yourself at the Church of Vows to fix her questline, but I recommend just not giving her the potion. After his death his corpse will sell you puppets for Starlight Shards.
Notes: Other uses for the potions he gives you?
Gideon Ofnir
- First found in Roundtable Hold. Talk to him for mean comments.
- Upon reloading, appears in the room next to Ensha. Talk to him for more mean comments.
- Collect at least one Great Rune, most will get Godrick’s first, then return to him to be neutral and be given information about the Great Rune holders.
- After killing Morgott at the Erdtree, return to him to be besties and he will offer you information and ask that you share any info you get as well.
- Return to Gideon periodically after killing Mohg, The Omen, finding the Mohgwyn Dynasty Mausoleum, killing Mohg, Lord of Blood, reaching Miquella’s Haligtree, and killing Malenia, Blade of Miquella. He will reward you for the information.
- Mohg, The Omen is found in the Sewers beneath Leyndell on the way to complete Hyetta’s quest.
- Mohgwyn Dynasty Mausoleum can be entered by used the Pureblood Knight’s Medal from the White-Faced Varre questline or by finding a blood-covered Waygate in the woods in the West section of the Mountaintops of the Giants, North-West of where you enter after using the Haligtree Secret Medallion. Mohg, Lord of Blood is found as the boss of that area.
- Miquella’s Haligtree is found through the Waygate in Ordina, Liturgical Town(covered in Millicent’s guide) and Malenia, Blade of Miquella is found as the final boss of the area.
- After giving all the information and receiving all of your rewards, Gideon will say that he has nothing more to teach you.
- After advancing the game to after the Forge of Giants, he will tell you he is getting everything he can before he leaves. Upon reaching Leyndell again, he will be gone from Roundtable Hold.
- After going through Leyndell for a second time, he will be found in the boss room where you fought the Golden Shade of Godfrey on the way to the Erdtree. He decided to quit being besties and now has the powers from all that stuff you told him about.
- Kill him. Hear more mean comments.
Notes: All-Knowing but didn’t know how bad he’d get beat down.
Cursemark of Death / Age of Stars (Ranni / Fia / Rogier / D / Iji / Blaidd)
Features Ranni, Fia, Rogier, D, Iji, and Blaidd
Starting Out
Rest at 3 different Sites of Grace in the overworld and get your horse, just needs to be done before going back to Church of Elleh. Go North-East of the lake in Limgrave, Far North-East and across the bridge from Stormveil Castle until you encounter some graves. There you will find D, Hunter of the Dead mourning over a dead body. Talk to him to get a warning about Summonwater Village to the East. Go there and kill the Tibia Mariner there. After getting the Deathroot, go far South into the forest and and just South-West of the Minor Erdtree on the map is the Mistwood Ruins. You’ll hear a bunch of howling and see a figure on top of the tower there. Go to the Church of Elleh outside of the starting area at night and talk to Renna who is nearby to get your Summoning Bell and talk to Merchant Kale and mention the howling to get the Finger Snap Emote. Go back to the Mistwood Ruins and use Finger Snap to get Blaidd to come down and talk with you. He is looking for a man named Darriwil.
Go South-East of the lake in Limgrave and just West of the bridge on a hill is the Forlorn Hound Evergaol. Enter the Evergaol to kill Bloodhound Knight Darriwil. If you kill him without Blaidd’s help you get an extra reward. After he’s dead, talk to Blaidd nearby before beginning your journey through Stormveil Castle. In the North-West section of the Castle, find the Chapel and go inside to find Sorceror Rogier(who was able to be summoned for Margrit) and talk to him. Go ahead and kill Godric then afterwards, rest at the Liftside Chamber, leave the door and go right to find a corpse on the edge. You can get down to the bottom from that ledge. Make your way through and be careful for the massive monster that will appear. You need to kill it or lose aggro from it or chance rolling around it but at the end of the path where is spawn is a giant face on the ground and a red bloodstain. Activate the bloodstain of Rogier and then go to Roundtable Hold
Roundtable Hold
Talk to D to learn about the Bestial Sanctum and go there and back if you like but not necessary. In one direction is 3 different paths, take the right path and go into the bedroom to talk to Fia and have her hold you(note that the item you get causes a constant health debuff until used), then go back to the main room and through the path to find Rogier. Talk to him and mention the face and he will tell you about it. Go back to Fia and have her hold you again, this time talking while being held.
Afterwards go to the North-East corner of Liurnia Lake to the Black Knife Catacombs. When you get to the room with the guillotines, ride one up to the pathway above and hop over. Follow the path to it’s end and roll into the walls until you find the Illusory Wall that leads to Black Knife Assassin boss fight. There is a summon sign for D that you can use if you like. After the fight, go back and talk to Fia then talk to Rogier. Leave and come back to Rogier to learn that he wants you to find Ranni.
Finding Nokron
Go to the Northwest section of Liurnia Lake and find the Kingsrealm Ruins South of Caria Manor. There you will find a giant blacksmith named Iji. If you beat Darriwil alone and got the extra reward from Blaidd then Iji will offer an extra item in his shop. Go through Caria Manor and go North-East, past the Dragon to the center tower Ranni’s Rise. Go up to the top of the tower and talk to Ranni. If you mention the Cursemark, she will be mad and kick you out. If you get kicked out, go back to Rogier then back to Ranni to continue. Go down and talk to Iji, Seluvis, and Blaidd then back to Ranni then back to Blaidd.
Go North-East of the Mistwood Ruins where you met Blaidd and head to the Siofra River Well and go down the lift. Go through the area and find the next lift and take it. Head to the East and find Blaidd nearby a wind-circle for your horse. Talk to him then go back to Ranni’s Rise and go the the tower South-West of it. Inside is Seluvis, talk to him to get a letter of recommendation then head to Waypoint Ruins, East of the lake in Limgrave. Go down some stairs and beat the boss then talk to Sellen in the room beyond and give her the letter. After go back to Blaidd in the Siofra River Well to discuss your next move. Go to the bottom right corner of the map in Caelid to Redmane Castle and talk to Blaidd before fighting Starscourge Radahn. After winning, talk to Blaidd again.
Entering Nokron
Go back to the Mistwood Ruins where you first met Blaidd and find a message there. Go to Iji and talk to him then go back to the Forlorn Hound Evergaol where you found Darriwil and free Blaidd from it. Go back to Iji then back to Mistwood Ruins and head South-East. There will be a massive crater in the ground that leads to Nokron. Go through the zone and at the end of it find the Fingerslayer Blade before heading back to Ranni to trade it for a Carian Inverted Statue. Go East of Liurnia Lake to the Carian Study Hall and use the statue on the pedestal. Proceed to the top of the tower to find Ranni’s dead body and get the Cursemark of Death. Go back to Rogier and find his dead body.
Ranni’s Destiny
Go to Ranni’s Rise and head to the tower in the North side as the seal is now broken. Take the Waygate to enter Ainsel River Main. Nearby is a coffin with a Miniature Ranni Doll. Go to the nearby Grace and rest at it, choosing the talk to doll function 3 times to get the doll to give you a quest. Proceed through the area and you will find the Baleful Shadow, which looks like Blaidd, defeat it and the doll will talk to you again and give you a Discarded Key. Go to the Raya Lucaria Grand Library(the boss room for Raya Lucaria in the center of Liurnia Lake) and use the key on the chest inside for the Dark Moon Ring. Go back to the Ainsel River and proceed to further in to the Lake of Rot(big red swamp area that causes rot).
Travel through it and past it to the Grand Cloister and head down. Instead of going through the big doors, go over to the left to the cliffs edge and get into the coffin there. After that, fight and defeat Astel, Naturalborn of the Void and proceed past his area to the Moonlight Altar. Continue past the Dragon and go to the nearby Cathedral of Manus Celes to the North-East. Talk to Ranni’s body and get the Dark Moon Greatsword. Go back to Ranni’s Rise and find Blaidd outside hostile. Kill him then go to Iji and report what happened. Rest at the nearby Grace and loot his body.
Death God
Proceed through the game until you reach Altus Plateau then return to Fia to receive a Weathered Dagger. Give the dagger to D and reload the area. Head through the hallway with the blacksmith and into the now open room beyond to find D’s body and Fia standing over it. Loot the body and talk to Fia and she will disappear. Go to Siofra’s Aqueduct, the northern part of Nokron, and you will find a man unable to speak. Give him D’s armor and proceed to the boss room with the 2 Gargoyles. After killing them, get in the coffin on the other side of the boss room to get to Deeproot Depth’s.
Proceed through the area and when you see a bunch of roots going down to the water and onto building, climb them to get to the top, use the Grace and head through to a large open area with the same giant face from a while ago there. Head across the room and kill the spirits that are summoned before talking to Fia and asking to be held. Reload the area and talk again to give her the Cursemark then reload again to find her sleeping. Interact with her and kill Lichdragon Fortissax. Interact with her again to get the Mending Rune of the Death Prince. Reload and the man from earlier, D’s brother, will have killed Fia. Kill him or reload the area to get the armor back along with his sword.
Volcano Manor Questline – Part 1 (Bernahl / Diallos / Patches / Tanith / Rya)
Features Bernahl, Diallos, Patches, Tanith and Rya
Starting Out
From the start of the game, follow the Guidance of Grace until you reach Stormhill Shack Grace. Go East from there, following the road into the woods and you’ll encounter Warmaster’s Shack where you’ll meet Bernahl. Talk to him and you can buy some of his Ashes of War if you want. Note that if you manually travel here from Stormhill Shack at knight, he will be replaced by the Bell-Bearing Hunter. After talking to Bernahl, travel to the Agheel Lake North Grace, located South-East of the Warmaster’s Shack, or just East of the giant gate with all the enemies you passed through earlier. Follow the road East of that grace and then just before hitting the bridge, go South and take the path down to the water. Go North up the stream from there and you will be invaded by Bloody Finger Nerijus. Kill him then go into the nearby cave. Proceed through the cave and open the chest that looks like an obvious trap to find Patches who will then become a boss and attack you.
Stop killing him when he surrenders, about half health, and the fight will end. Talk to him then reload the area and talk to him again. Reload and talk to him again then open the nearby and return to him again for an emote(not necessary but you will miss it if you don’t). Proceed through the game until you unlock Roundtable Hold which is done by either defeat Margit and resting at his Grace, or by taking the path North of Stormhill Shack, past the Finger Reader, onto the broken bridge then going left at the edge. Continue on that path to get to the Lake-Facing Cliffs Grace and when rested at, you’ll unlock Roundtable Hold. Go to Roundtable Hold and you should find a man in red named Diallos. Talk to him and he will ask you to find his servant Lanya.
Liurnia Lake
Starting from the Lake-Facing Cliffs Grace(gotten after defeated Godrick or by taking the path mentioned earlier) head North-West to the Grace then go North-West into the lake. Go past the Laskyar Ruins Grace, still heading North-West and you will find a little island called Scenic Isle and there you will meet Patches again. Talk to him and he will give you a tip about helping a girl. Go East of him to find a pavilion, North of the Lanskyar Ruins, and you will find Rya who says her necklace has been stolen. Head North-West from her to find the Boiled Prawn Shack where you will encounter Blackguard Big Boggart. He offers to sell you the necklace, or you can kill him for it. Buy it from him and buy some Boiled Prawn to get an emote. Go back to Rya who will give you an invitation to the Volcano Manor.
Go North from here, past the Academy Gate Town Grace and you will find Diallos standing over his dead servant and swearing revenge. Proceed with the game from here until you reach Altus Plateau. You can proceed by activating the Grand Lift of Dectus, requiring 2 medallion halves or by going the “Cowards Path” through the Ruin-Strewn Precipice. For this guide, we’ll take the “Coward’s Path” cause it’s less complicated to explain and you’ll need to go through this path anyway later. Go North-West from the Academy Gate Town and then North-East once you hit Testu’s Rise. Continue North-East up the stream until you reach the end and climb the nearby tower. Proceed through the Ruin-Strewn Precipice to the top and kill Magma Wyrm Makar.
Entering the Manor
At the top of the Grand Lift of Dectus(if you got the medallions) or in the Lux Ruins past the Magma Wyrm Makar boss room(if you took the “Coward’s Path) you will meet Rya again. Give her the invitation and she will take you to the Volcano Manor. There you can talk to Tanith and join the Manor, becoming a Recusant Bloody Finger and get a key. Go down the hall and open the doors talk to the ghost who will mention leaving a serpent slaying spear in the lord’s chambers, it’s a surprise tool that will help us later. Unlock the door nearby to find Rya, Bernahl and….Diallos. Talk to all 3 then grab the Volcano Manor Request from the table. Go to the red spot indicated on the map, it will be North of Warmaster’s Shack where you met Bernahl, and find the Red Summon Sign on the ground. Use it to fight and kill Old Knight Istvan then head back to the manor and talk to Tanith. Just outside the room you should see Patches. Talk to him, then go talk to Bernahl…and Diallos I guess, then go to the room across the hall and open the door to see a giant snake. Talk to it to find out that it’s Rya. She will mention slithering in the walls. Go to the room next to the one she is in and roll into/attack the walls to reveal an Illusory Door. Proceed through the path until you reach the Prison Town Church Grace. Return to Rya and talk to her about it then talk to Tanith about Zoraya.
Volcano Manor Questline – Part 2
Making Friends
Collect the second Volcano Manor Request if you haven’t already then go to the red dot, same as before. It is located East of Volcano Manor. Finish it and return to Tanith then talk to Bernahl for a request from him and Patches for a request from him. I think Diallos is usually whining about being inadequate or something at this point so ignore him and getting ready to make friends with the other 2. Go back to the boss room where you fought Magma Wyrm Makar and find the Red Summon Sign for Great Horned Tragoth.
Kill him and return to Patches, then reload the area and talk to Patches to get the item he was just holding onto for you. Proceed through the game to the Royal Capital of Leyndell, the area North-East of the Grand Lift of Dectus. Go through the Captial and find the Red Summon Sign for Vargram the Raging Wolf and Errant Sorceror Wilhelm. Work with Bernahl to kill them both then return to Bernahl for a reward.
Discovering Secrets
Go back to the Prison Town Church Grace and proceed through that area and you will eventually come to Temple of Eiglay where you will find and fight a Godskin Noble boss. Kill it and go to the altar nearby for the Serpent’s Amnion. Go back to Rya and give it to her to discover what it means. Reload the area and she will have disappeared. Go to Tanith and talk to her about it and she will give you a Potion of Forgetfulness. Go to the Temple of Eiglay and go up the lift onto the balcony, jump off the left side onto the hardened magma below, go across the bridge cover in slugs and head up to find an Iron Maiden.
Run past it and past the open window you will want to use to escape it. Around the corner you will find a door and across from it will be another door. 1 door give you a shortcut to here for later in the form of a lift. The other door has Rya inside. Talk to her and she will ask you to kill her and you get the option to give her the potion. You can do either if you like but I recommend doing neither. Instead go talk to Tanith and then grab the final Volcano Manor Request.
Finishing the Manor
The final request for Volcano Manor requires you to get to the Mountaintop of the Giants area. Do this by through Leyndell, going North-East to the Grand Lift of Rold. You’ll have to beat the boss at the Erdtree first to get the medallion for this lift. Once you’ve gotten to the Mountaintop of Giants, go to the Red Summon Sign near the Shack of the Lofty, the red dot on the map will guide you. Kill Juno Hoslow, Knight of Blood aka Diallos’ much more capable brother. Kill him and return to Tanith and she will transport you to the boss area. There you will find the Serpent Hunter which is our surprise tool from earlier. Use it or don’t and kill both phases of the boss then return to Tanith. Talk to Bernahl and Patches to say goodbye then head to Rya who now realizes you aren’t going to kill her. Reload the area and she will be gone, having left behind a note and a reward. Go back to the manor and everyone will be gone but you can buy Ashes from the sword sitting where Bernahl sat. Go back to the boss room and you will find Tanith there. Talk to her then kill her and her knight. Proceed through the game until you reach Crumbling Farum Azula. Once there, proceed through the area until the Beside the Great Bridge Grace. When getting onto the bridge, go left and down that path and continue to the end to be invaded by Recusant Bernahl. Kill him to tie up the last loose end.
Notes: The Potion of Forgetfulness can be used on a few different NPCs during their storyline, usually when they are most depressed. Patches is probably somewhere but he may not appear again until a DLC.
Lord of the Frenzied Flame Questline – Part 1 (Irina / Edgar / Hyetta / Shabriri / Gowry / Millicent)
WARNING!
This Quest can lock you out of other Endings. The first half leads to a lock, and the second half is the key to unlock that lock. You MAY be unable to do this second half once you’ve lit the Forge past the Fire Giant. This is not confirmed yet but I suggest doing the second half before going past the Fire Giant to avoiding having a lock with no key. Even if you get the key to the lock, you will have changed the sequence of events leading to the end of the game.
Starting Out
Go South-East of the games starting area, past the Bridge of Sacrifice and meet Irina. Accept a letter from her and travel south Castle Morne, beware of arrows.
Travel through the castle and find her father Edgar on the ramparts of Castle Morne and deliver the letter. An easy way to find him is, after going up the elevator, go right around the worshippers, into a room, up a ladder, up another ladder, and then keep taking lefts. Kill the boss in Castle Morne. Return to Edgar in Castle Morne then return to Irina where you met her.
Choice: Don’t kill Edgar and he will appear in the next section. If you kill him now and reload the area(possibly going back to his spot in Castle Morne. May also require meeting Hyetta first), you can get all the necessary rewards but miss a couple extras later.
Eating Grapes
From the start of the game, go North-West and go past or through Stormveil Castle and meet Hyetta at the Lake-Facing Cliff Grace, north of Stormveil Castle.
Grab the Shabriri Grape from under the throne room of the castle, entrance nearby in the cliffs, then give it to her.
Go North-West until your in the water then go North to a shore where the Purified Ruins are. Find the hidden floor in the center of the ruins, under a bunch of pots and barrels, to grab the Shabriri Grape within. Find Hyetta in the North-West side of the ruins, near the shore where you arrived, and give her the grape. Go North-East to find the Liurnia Highway Grace at the fork in the road, we’ll use it later.
Go North-West from the shore of Purified Ruins over to the Western shore. Stay in the water and go North along the shore until you find a ghost talking about a crazy man. Go in the direction the ghost is facing, North-West, and follow the trail of bodies to the Revenger’s Shack Grace. Kill Edgar the Revenger when he invades for another Shabriri Grape. Travel back to the Liurnia Highway Grace and follow the road North, past all the ghosts and through the tunnel. Get the Gate Town Bridge Grace and just north of it will be Hyetta. Talk to her, give her a grape, listen to her enjoy it, tell her what it is, listen to her puke, reload the area, talk to her to hear her rationalize it.
This part gets mildly complicated. Go into the water from the Gate Town Bridge Grace and follow the wall going North-West. Eventually you will find a Spiritjump(horse-jump) near a Walking Mausoleum. Use it and go North to find the Bellum Church Grace. Hyetta is here. Go East/North-East to the wall and hug it while going around. Hide from the Gaze of Sauron’s Eye and make your way towards it. Kill Sauron’s minions, climb Mt. Doom and Destroy the Ring!!!….of people. With Sauron defeated, go back down and head South to Frenzied Flame Village, through the village to the other side, up the slope going North to find a ghost talking about Vyke. Go North to the Church of Inhibition and Festering Fingerprint Vyke will invade. Kill him for the Fingerprint Grape. Go back to the Bellum Church Grace and find Hyetta nearby and give her the Fingerprint Grape.
Catching Fire
Collecting 2 Great Runes is required to progress. At this point in the game, you can collect them from Godrick in Stormveil Castle(Limgrave), Rennala in Raya Lucaria(Liurnia Lake), Radahn in Castle Redmane(Caelid), Rykard in Volcano Manor(Questline is at the top of the page), and Mohg, Lord of Blood(requires doing White-Faced Varre’s Questline and using the Pureblood Knight’s Medal). Kill 2 of them for their Great Runes, don’t have to activate them, to be able to enter Leyndell. (I’m fairly certain there is an alternate path into the capital because I remember taking it but I don’t remember it. If anyone knows, let me know I’ll update to be for sure this path or that path)
Proceed through the game to Leyndell Royal Capital and finish the boss at the Erdtree to get the Rold Medallion.
Leave the city through the East and continue along this path until you reach the Grand Lift of Rold. Go up and nearby is the Zamor Ruins Grace with Shabriri nearby. Talk to him to learn about the Frenzied Flame under Leyndell. Optional: Kill him now for his armor or wait and you can get it from him after getting the Frenzied Flame.
Return to Leyndell and, from the East Capital Rampart Grace, go West and take the lift down. From that lift take the next lift down. Go right and you’ll see a big empty space where a Defiled Root Monster spawns. Just ahead is an enticing doorway and to your left is an enticing bridge to escape with. Ignore both. Just right of the door, a little hidden, is another door that requires you to jump to reach. Go through that door and on the other side you will find an area containing a well. Go down the well to enter the sewer and continue through to the Underground Roadside Grace.
From the Underground Roadside, go left and jump down into a large open grate. Turn and go down the long tunnel then make a right at the circular opening. Go into the opening and follow the path until you reach a bunch of slugs. Jump over the hole in the floor an continue before turning the corner to go up the slope. At the top of the slope is another hole to jump over. Jump over it and continue, taking a right at the fork going through an open door. Continue going straight to a ladder. Climb the ladder then through the door and before opening the next door, turn right and go pull the lever to open the gate for a shortcut.
Go back to the un-opened door and open it to go through. Turn left and hop down to the path below and go down the stairs. Follow this path until you reach a ledge with a ladder and a giant flower below. Instead of going down, turn around and go through the path on the left. Continue on this path, past the Basilisks, ignoring the first opening on the right, and into a room with a big guy and a ladder. Go up the ladder, through the doorway, and across the bridge to open the shortcut right in front of the Underground Roadside.
Rest if you need to then go back into the shortcut, then on the bridge look to your right to see 3 sets of pipes. 2 down below and 1 you can just walk on. Take the one you can just walk on and follow it to it’s end then jump down to the left. Turn left and hop up and go through the door to find a ladder on your left. Kick it to create another shortcut then look over the edge in front of the door to see a pipe with a Mario-style pipehole in the top. Hop in it.
Once inside the Mario-style pipehole, follow the path going around the corner(you should see a rat), not the one with the open door. Follow the path and look for an opening on the left. Take the opening and go down then around the corner. You’ll see a hole in the floor. Jump INTO the hole, not over it. Down the hole you’ll see a corner. If you go around the corner you can open a shortcut to the area with the basilisks from earlier. Open it and turn back around going down the tunnel.
Go down the tunnel and you’ll come to a ladder. Go down the ladder and you’ll find a room with Warrior Pots and to the right will be a Cage Elevator. Take the Elevator down to get the Forsaken Depths Grace.(FINALLY. I hate the sewers. So many twists, turns, falls, enemies, shortcuts, secrets. Way too much in one location)
Once you’re at the Forsaken Depths Grace, go through the nearby door and through the path to the boss room where Mohg, The Omen waits. Kill him and attack the altar behind the chest to find a secret passageway.
Lord of the Frenzied Flame Questline – Part 2
WARNING!
Progressing further will lock your questline and can only be unlocked by completing the second half of this guide. Go down the secret passage and make your way to the very bottom to find Hyetta. Take off your clothes for the maiden and get touched by Three Fingers to acquire the flame.
Complete the game this way for The Lord of Frenzied Flame Ending or continue through the second half of the guide for the way to undo what has been done and re-open the other endings.
After completing the section above, the game’s ending is now locked and you can’t do the others. In order to unlock the ending again, you must do the section below and choose the “good” path.
Curing the Madness of Millicent
In East Calid, East of the giant swamp area, South of Sellia, Town of Sorcery, is a small shack with a giant dog out front. Kill the dog to keep him from messing up the quest then talk to Gowry in the shack who has a request. Go North into Sellia and then West to the Sellia Under-Stair Grace.
Go South-West into the swamp, watch out for Millicent who will invade you repeatedly, and find the boss Commander O’Neil. Kill him for the Unalloyed Gold Needle and return it to Gowry.
Reload and talk to him again for the repaired needle. Go North into Sellia and light the fires at the top of the towers then proceed North to the Sellia Backstreets Grace. Follow the path up and go South to the Church of the Plague where you will find Millicent.
Talk to Millicent and give her the needle. Reload and talk to her again then go back to Gowry. Reload and Gowry will be gone but she’ll be there. Reload and she’ll be gone but Gowry will have returned. Talk to him for rewards. Note: Return to him after giving Millicent the Prosthesis for the chance to learn an extra sorcery, and then again after Millicent’s Quest for a talisman that greatly increases incantations. Or kill him for it. Either/Or.
Millicent’s Destiny
After having talked to her in Gowry’s Shack, go to the Erdtree-Gazing Hill Grace located North of the Grand Lift of Dectus(may require going through the “Coward’s Path” in Ruin-Strewn Precipice to reach the Grace) and talk to her there.
Go North, all the way until you reach the Shaded Castle and explore it to find the Valkyrie’s Prosthesis on the North-West edge of the castle in a chest guarded by a Cleanrot Knight. Return to her with it and give it to her.
Next, follow the road leading North from the Grand Lift of Dectus. Follow the road to the broken bridge and the Forest-Spanning Greatbridge Grace. Head North through the forest to the other side of the bridge for the Road of Iniquity Side Path Grace.
Head East from there to the Windmill Village Grace. Go through the village and kill the boss at the top for the Windmill Heights Grace. Rest at it then talk to Millicent nearby.
Later when you’ve unlocked the Mountaintop of the Giants past Leyndell Royal Capital, go North-East from the Zamor Ruins Grace until you hit the Ancient Snow Valley Ruins Grace. Talk to her there.
Continue on the path, going North of the Grace and far to the North will be Castle Sol. Beat the area to get one half of the Haligtree Medallion.
If you haven’t gotten the other half already, go to the Folly on the Lake Grace in the South section of Liurnia Lake. Go South-West from there and you should find a town hidden beneath the cliffs.
Proceed through the town and after getting the Village of Albinaurics Grace, kill the flute-playing enemy and nearby you should see a large Pot, Bush, Tree(it varies). Roll into it or attack and it will turn into Albus. Talk to him to get the other half of the Medallion.
Go back to the Grand Lift of Rold where you entered the Mountaintop of Giants and go to activate the medallion but don’t activate it yet. When you get the option to use the medallion, click left or right until you see the option “Use Medallion(Secret)” and choose that one.
Go through the Hidden Path to the Haligtree into the Consecrated Snowfield then head North to Ordina, Liturgical Town. Find the Imp Statue on one of the roofs, activate it, then light the fires around town, there are 4 total. After the fires are lit, you’ll be brought back to the normal world.
Go to the North side of the town and use the Waygate. It will bring you to the Miquella’s Haligtree area. Go through the area until you get the Prayer Room Grace and talk to her there.
Continue onwards to the Drainage Channel Grace then from that Grace, go back up the ladder then up the hill to the right. Kill the shrimp then turn left to see a large circular swamp area, only accessible by a tree-branch. Cross the branch and enter the area to to fight a Defiled Root Monster. Kill it then reload the area.
Go on the hill above the swamp in the same spot you fought the Defiled Root Monster, there you will see 2 Summon Signs.
WARNING: If you choose the Red Summon Sign and have done the first half of this guide, you will be locked into the Lord of Frenzied Flames Ending. If you want to do one of the other Endings, choose the Normal Summon Sign and DO NOT kill her afterwards.
The Red Summon Sign has you invade Millicent and kill her, giving you Millicent’s Prosthesis for the deed.
The normal Summon Sign brings you in to try to save Millicent from 4 Invaders called Millicent’s Sisters and rewards you with the Rotten Winged Sword Insignia. Reload the area and she will be nearby and can be talked to. If you kill her, she gives the Millicent’s Prosthesis. Otherwise, reload the area again to get the Unalloyed Gold Needle.
If you got the Unalloyed Gold Needle and have taken the Frenzied Flame upon yourself, go to the Red Lotus Flower (there are 3, I think any of them work but I’ll need confirmation on that) and use it there to get Miquella’s Needle.
Travel to Crumbling Farum Azula and go to the Beside the Great Bridge Grace. Take the elevator down, walk down the stairs and outside near the ledge will be a split on the side where you can drop down onto a platform. Make your way down the platform to a bunch of graves with skeletons on top. Go to the empty one and interact with it to reach a boss.
Kill the boss and then use Miquella’s Needle to cure yourself of the Frenzied Flame and open up access to the other endings again.
Notes 1: If you get the Revenger’s Shack Grace before completing the rest of the quest, Edgar the Revenger may not appear(have gotten several reports this is not the case anymore so I will test it thoroughly later to make sure). Could there be a method to save Irina? Irina appears to have died from Demi-Human and a Note says kill Demi-Human leader to demoralize the rest.
Notes 2: Hyetta will not appear until after the Irina/Edgar Quest. What is the relation between Hyetta and Irina? Why does she only appear after Irina’s death? She isn’t Irina because Irina’s dead body is still there.
Jarburg Questline (Alexander, Diallos, Jar-Bairn)
Starting Out
- Head East from Stormhill Shack in Limgrave until you hit the bridge. Once at the bridge, go up the cliffs to the South to find Alexander. Talk to him and free him.
- Unlock Roundtable Hold and talk to Diallos to hear about his friend. Go to Liurnia Lake and head South-East of Ray Lucaria to find the Academy Gate Town. A bit North of the Academy Gate Town Grace you will find Diallos over his friends body. Talk to him then go back to Roundtable Hold and talk to him again to find out his plans.
- Head to East Liurnia Lake and find Carian Study Hall. On the cliffs above, just West of it, go a little South and find a way to hop down the cliffs to find Jarburg. In Jarburg, find Jar-Bairn and talk to him. He won’t like your hands so leave.
Note: You can complete Volcano Manor and Alexander’s Quest in whichever order you like but you need to do both to complete the questline.
Volcano Manor
- Enter Volcano Manor in Mt Gelmir, West/North-West of Altus Plateau. You can do this a few different ways covered in detail in the Volcano Manor section but I’ll give the short version here.
- Complete Rya’s quest by getting her necklace for her then go up the “Coward’s Path” and talk to her at Lux Ruins
- Go up the “Coward’s Path” and proceed on foot
- Go up the Grand Lift of Dectus and find your way to Mt. Gelmir and proceed on foot.
- Go to the bottom of Raya Lucaria Academy and get eaten by the Iron Virgin to be teleported, then proceed on foot.
- Once at Volcano Manor, you can complete the entire questline, talking to Diallos along the way, or just kill Rykard to end the questline. Either way, Diallos leaves and goes to Jarburg.
Alexander’s Quest
- Can be found in Gael Tunnel, East of Limgrave and on the West side of Caelid where you need to open the door next to the boss room that acts as a path between Limgrave and Caelid. However this isn’t necessary
- Proceed through the game until the Festival begins at Redmane Castle in the South-East corner of Caelid and there he can be talked to. Summon him for the boss-fight and after the fight he can be talked to nearby.
- Next head to the cliffs above Jarburg on the East side of Liurnia Lake and use an Oil Pot to free him.
- Later he can be found sitting in the lava at Seethewater Terminus, West of Volcano Manor near the North-West corner of the map.
- When you reach the Fire Giant boss fight on the South-East corner of the Mountaintops of the Giants you can summon him to help you fight it.
- Once you reach Crumbling Farum Azula, go up the path near the Dragon Temple Altar Grace, past an Imp Statue Fog Wall and beyond the Dragon on a sloped ruin. He will challenge you to a duel and upon winning you get Alexander’s Innards and a Shard of Alexander.
Passing the Torch
- Go back to Jarburg and you will find Diallos and Jar-Bairn. Talk to them both a few times and reload the area and talk some more.
- Keep doing this until Diallos dies a hero……then talk to Jar-Bairn.
- Reload and give him Alexander’s Innard to get the Companion Jar Talisman.
Notes: Jar-Bairn mentions you not having soft hands. Can you make them soft/slippery? Soap didn’t work.
Lord of Stormveil Questline (Nepheli, Kenneth, Gostoc)
Starting Out
- Go to the North side of the forest in East Limgrave and find Kenneth Haight on the ruin there. Talk to him and he will give you a quest.
- Go to the South-East section of the forest and defeat the enemy at the top of Fort Haight then go back to Kenneth for a reward.
- Return to Fort Haight and talk to Kenneth at the top to hear him lamenting.
- Go to Stormveil Castle and beat the 1st boss then accept Gostac’s advice and take the side path. Proceed through the castle to the 2nd boss but don’t go in just yet.
- Go leave down the path from the boss room and past the giant to find a building. Inside is Nepheli Loux. Talk to her then you can summon her for the boss fight.
- Kill the boss and reload then talk to Gostac nearby and go back to Roundtable Hold to talk to Nepheli.
Questioning Beliefs
- Go to the South part of Liurnia Lake and find the Village of the Albinaurics. Nepheli will be just outside on a pile of corspes. Talk to her then summon her for the boss fight in the area.
- Return to Roundtable Hold and talk to her and Gideon to exhaust their dialogue.
- Go to the North-West part of Liurnia Lake and defeat Caria Manor then go West from the Manor to find Ranni’s Rise. Talk to Ranni and the ghosts then Ranni again to leave.
- Go South of Ranni’s Rise to the tower nearby to find Seluvis. He will give you a potion for Nepheli. Take it to Gideon instead and report back to Seluvis.
Preparing to Rise
- Go to the Great Belfries on the West side of Liurnia Lake, South of Caria Manor and get the key in the chest there.
- Go to the nearby Waygate that has the message mentioning Anticipation and unlock that gate then enter it.
- Go through the area and take the side path that was locked at the start of the game to find the Stormhawk King’s Ashes.
- Continue through the game and until you finish Leyndell.
Becoming a Lord
- Go back to Roundtable Hold and give the Ashes to Nepheli.
- Go back to the Stormveil Castle Boss room and rest to find Kenneth, Nepheli and Gostac. Talk to them and you will receive an Ancient Dragon Smithing Stone and can buy another from Gostac
Notes: Finally!

I accidentally died to dung eater invading, thought I’d broken the quest but it continues just the same as if you’d defeated him tho with presumably slightly different dialogue
In the Volcano Manor section you mention Diallos’ mask can only be taken from him at a certain point, but with the new Jarburg questline you can get it there instead.
I literally killed Millicent accidentally by landing on top of her when I ran over to her after helping her during the 4v2 invasion. FML
Maliketh and Gurranq are not the same people. The game refers to Maliketh phase 1 as “Beast Clergyman” as opposed to “Gurranq, Beast Clergyman”. This isn’t definitive proof, but fromsoft would have said it was Gurranq if it was. If this isn’t definitive enough for you, your time travel theory is also incorrect as Maliketh existed since long before the shattering and the events of the game according to Rogier’s dialogue, making it impossible for Gurranq to become him.
You don’t miss a Golden Seed if you progress to Liurnia and Roderika moves to Rountable Hold, if you go back to the shack where she was there will be a Golden Seed.
Its worth mentioning that you can miss out on the reward Rya will give you when you do her steps frequently. Once you finish up in the manor you will not be able to get it anymore.
patches appears in shaded castle after the patch now
If you give Seluvis’s potion to Gideon in Roundtable hold – Seluvis himself will be forced to drink it and becomes a puppet.
Okay figured out a thing. To get Patches to Volcano Manor you have to defeat General Radahn. Also, to get Brother Corhyn to the road north of Altus Pleateau Junction, you also have to defeat General Radahn.
There is more you can do with Patches when you first encounter him:
Gesture “Extreme Repentance”
“Obtained by befriending Patches, then fighting him once more, letting him take you to low health then using the Grovel For Mercy gesture when he tells you to”
Sounds dangerous tho, very easy to accidentally kill him