
Here’s an informational guide on all of the levels in Escape the Backrooms.
Guide to All Levels
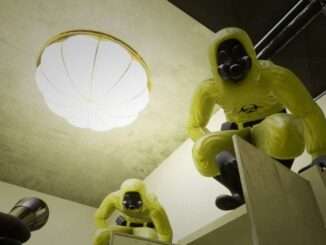
- Level 0: The Lobby
- Entity(s): Bacteria (A.K.A Squiggly Boi/Cupcake)
- How to beat: Find ladder parts and fix it to find the key, then find the door to the pitfalls. If you make it through the pitfalls by balancing over it, you can go through the vent and to the next level or use a rope to help someone who fell. If you fall, you must escape and find the room to the next level.)
- Level 1: The Habitable Zone (A.K.A Garage)
- Entity(s): Skinwakers (A.K.A Skinstealers, look like humans sometimes and make human noises, if you see one running at you at full speed, run the opposite direction to a door and close it.)
- How to beat:
- Part 1: Find the red door to cars and count the colors for elevator code.
- Part 2: Find all 4 keys in rooms and go to door and unlock it.
- Part 3: Find the door to the elevator cage thingy, and grab everyone (alive) and shove em in the elevator and go to next level)
- Level 2: Lights Out (A.K.A Smiler Level)
- Entity(s): Smilers
- How to beat:
- Part 1: Go to the hub and go to the terminal and activate it using the passcode in the computer in the room past the code you need to do and use the passcode “itheardyou” and activate the gate, then go to door 1.
- Part 2: There will be a light turning on and off every 7 seconds per say, and you need to run to the lighted up rooms with 2 doors. Open those doors and keep going to different rooms until you find the room with a door leading to long hallway with pipes, that’s the exit.
- Level 3: Pipe Dreams (Long Hallway with Pipes)
- Entity(s): One Smiler Spider Thingy
- How to beat: Go to the station way first (Don’t go the fun way first, trust me), then you’ll get chased by a smiler spider thingy then find the door to the side to the next room to the next level.
- Level 4: Electrical Station (Hound Level Brick Wall Thingy)
- Entity(s): Hounds
- How to beat it:
- Part 1: No hounds in this one, just turn on all of the three levers and go to gate 2 (part 2).
- Part 2 – A few founds in this one, just blind them by flashing your flashlight at them 3 times, then run for the door, and steer clear of electrified water, and find all 3 levers, and go to gate 3 (part 3).
- Part 3: So many hounds, like, hounds in every room and much death water! Find all 3 levers and go back to gate 1 and thus, through the exit!
- Level 5: Abandoned Office (AKA Officerooms)
- Entities: None
- How to beat it:
- Part 1: Find a room with various types of furniture spread around and vending machines according to those furniture. Count the book stacks, water dispensers, tables, and chairs, and put the number of each type of furniture into the according vending machines (you’ll know which one is which because of the picture on the front of the vending machine). Then, once you do it correctly, the door to the next area will open.
- Part 2: Find an area with a button that says “Reset Cameras.” You’ll traverse the next areas until you find a room with the exit to the next level and a bunch of screens of the cameras. If one is red and says “Spotted”, the exit will lock, and you will have to go back to the area with the “Reset Cameras” button and press it. Traverse the areas whilst avoiding the cameras and go into the next level.
- Level 6: Terror Hotel (AKA Hotelrooms) Part 1
- Entities: None
- How to beat it:
- Part 1: Find the pictures in the room that depict different people, and press the buttons under them in order from youngest to oldest, then the door will unlock upon doing it correctly (remember to grab the bug spray!)
- Part 2: Go into the different rooms and find the swarms of tiny moths, and spray them with the bug spray. Upon contact with bug spray, they will turn into moth jelly. Bring 3 of these moth jellies into the long hallway and find the cabinet thingy at the end of the hallway (with a paper next to it that says “feed them and they will reward you”, then press f (not right click) to place the moth jelly. The cabinet will go down, then come back up again, and the moth jelly will be gone, and you will get a key. Bring the 3 keys to the door with 3 locks, and then go into the elevator to go to the next part.
- Level 6: Terror Hotel (AKA Hotelrooms) Part 2
- Entities: Skinstealers and Hounds
- How to beat it: Look at a little dresser that has all of the room numbers, then find the door numbers that are missing and find those rooms. Inside of those rooms will be papers, and you must collect them and return to the main area and place them into the dresser. After collecting all of them, it will spell out “LOOK UP”, and the code to the locked door with a combination lock on it will be written in blood on the ceiling. (A little cheat sheet: Possible Lock Combinations are: 17564, 89472, and 05938.) Enter the code into the combination lock, then go to the next level!
- Level 7: Boiler Rooms (No AKA, is nicknamed as it is named!)
- Entities: Deathmoths
- How to beat it: It’s pretty easy, it’s just a massive maze, just find the exit! There will be Deathmoths, but as long as you crouch around them, you’ll be fine. If your screen gets hazy/wobbly, and/or your thermometer reaches high temperatures, that means one is near. Do not, and I mean DO NOT go into doors without an exit sign above it, because those are “Suicide Rooms”. Basically it’s rooms with multiple Deathmoths that will kill you upon opening the door. (It’s also where deathmoths will sometimes bring you upon seeing you). The higher the temperatures, the more Deathmoths there are, and the closer they are.
- Level 8: Back to Pipe Dreams!
- Entities: None this time
- How to beat it: Instead of going the “Station” way this time, go the “Fun” way, and run until you see rainbow flashing lights and hear distant music, then go into the orange room on your left once you see it. Pretty simple!
- Level 9: Level Fun (No AKA, nicknamed its exact name)
- Entities: Partygoers
- How to beat it: Crouch! Crouch all the way until a certain part (looks like a LARGE area), then they will see you, and you have to run. (Sorry for being vague, it’s hard to explain). If partygoers do see you, Sprint for a table then crouch under it. Keep exploring until you find a white room with multiple balloons, then go into a door to a room with slides in it. (It doesn’t matter which one you go into, all are safe, but will lead to different places.)
- Level 10: Poolrooms (Again, nicknamed as its official name)
- Entities: None
- How to beat: Since this is, yet again, another exploration level, just find the arches, then find a door with a red aura with an exit sign above it. Do not go into any doors without a red aura. Be wary, though, some areas will kill you! If you see static, Go the opposite direction! Be cautious!
- Level 11: Run for your life! (AKA Level Run)
- Entities: Partygoers and Smilers
- How to beat: Run for your life. Literally just run in a straight line whilst avoiding obstacles. Don’t stop, don’t get stuck. Just. Go. Go until you reach a door at the end of the giant hallway. Just go.
- Level 12: The end (Not really the end, just named “The End”. Confusing, right?)
- Entities: The Librarian
- How to beat: At the start, turn on the computer to track your progress at collecting VHS tapes spread all around on shelves around the area. You’re going to need to collect all of these VHS tapes, then turn on the computer again to open the exit (it’ll just be an orb that makes an ominous sound). But what about the Librarian? Well, it’s basically blind, but will still roam around, so remember to crouch so it can’t hear you! If you collect VHS tapes, you will be attracted to the sound, though. Be careful! Also, after a certain time, the lights will be turned off, so be extra careful during this time. (You can turn up your gamma to see a little more when lights are off, and turn your shadows to low). If you need to get somewhere specific, but the Librarian is camping in that area, you can turn on one of the two alarms placed on the side walls opposite to each other, and the Librarian will head for the alarm.
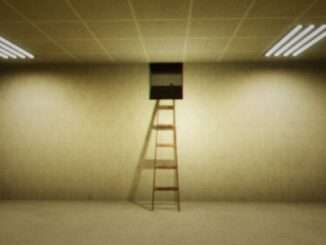
- Level 13: Level 9223372036854475807 (AKA The Stairs)
- Entities: None
- How to beat: Climb the stairs until you reach level 94, then jump off into the middle of the stairwell, and you’ll reach the next level. Sometimes, the numbers are scrambled, so keep track of the numbers until you see 94! Don’t jump off any earlier, or any later than 94. (Or until you reach the level infinity after 100).
- Level 14: The Housing Levels (The Housing District)
- Entities: Puppets Boys (AKA Animations, or Pinocchio’s Cousins).
- How to beat: Keep running until you reach the floating castle with a rope, then climb the rope! There will be multiple houses and trucks with roads scattered around the expansive area, and they will all come into use! It’s not that easy, though, because once it’s nighttime, the puppet boys will come out to getcha, and they’re fast, too! To avoid them catching you, go into one of the houses, and hide under the bed or in the closet, and if you’re near a truck, jump into it before sunset, or else the doors will close on you. Get to the castle and climb the rope to get to the next level!
- Level 15: The Clown Castle (the one with the fat clown man idk)
- Entities: The Animated King
- How to beat:
- Part 1: Move the moving platforms with symbols on the top of them to the according symbols on the floor to open the door.
- Part 2: Look away from the Animated King (Clown Man) to begin the phase, and survive 100 seconds to get on the rollercoaster (which honks once ready) and get to the next level! If the Animated King chases you, look at him, and he’ll dissapear (oh wow)!
- Level 16: Lights Out (AKA the dark level, with the wretch)
- Entities: Wretch
- How to beat:
- Part 1: Find the next part, which will be at a room with a table with Lidar scanners. The first part is very dark, you will need a flashlight. This is an exploration part, no entities will harm you, but you will see a wretch, it won’t attack you, instead walk out of view.
- Part 2: Once at the room with the lidar scanners, grab one and go inside the maze, flashlights will not work past that point. The lidar scanner has a tracker that will show you how far some of your teammates are (if you are in multiplayer), which will be green dots. The wretch, the entity, will be a red dot, so look out for it. Use the lidar scanner to place glowing orbs in the targeted spot, which will light up your way. Since this is a maze, your objective is to find the exit, which will appear as an entrance to a white room with a blue door. Go there (hard to miss once you find it). The wretch will now harm you, so be careful. If it is close, be sure to crouch, and it will not harm you. If you somehow lose your lidar scanner, you will be able to hear the wretch coming with its loud breathing.
- Level 17: Thalassophobia (AKA Ocean Level)
- Entities: The Thing (Aka Giant Angler Fish)
- How to beat:
- Part 1: Row your boat to the lighthouse. Nothing more, just get in a boat or swim to the lighthouse. Once at the lighthouse, put on a diving helmet and get into the shark cage to get into the next part.
- Part 2: Once you are free from the shark cage, find the cave systems to get to the next level. The Thing (Giant Angler Fish) will at first stalk you (in both parts) out of sight, but, if you stay too long, will kill you! (I’m not sure if he does ever appear, though, because this level is kind of unfinished. Let me know if it does appear).
- Level 18: The Cave Systems (AKA Cave Levels)
- Entities: Skinstealers and Deathmoths
- How to beat:
- Part 1: There will be Deathmoths in this part, so go into the decontamination door, and turn the valve to open the door, then crouch! There will be Deathmoths EVERYWHERE in this part, so keep exploring until you find a bridge! Cross this bridge one at a time while crouching, otherwise, the bridge will fall and you will die.
- Part 2: After crossing the bridge, you will resupply, then open the decontamination door. There are Skinstealers in this part, so keep running till you get to the ladder, which will lead you to the next level!
- Level 19: Water Damage (AKA scarier level 0)
- Entities: Bacteria (squiggly boi/cupcake)
- How to beat:
- Part 1: Go to the room with a lever and pull it to figure out the symbols in order for the locker in the other room which contains a chainsaw. Grab this chainsaw and destroy the wooden wall next to it to get to the next part.
- Part 2: Explore the areas until you find arrows on the wall, then follow those arrows until you reach the checkpoint with a chainsaw (the next part.)
- Part 3: Find all of the rooms with levers and pull all 4 (they are timed), and find the gate and go into it to go to the next level! The bacteria is all around this area, so be cautious! To hide from it, go into rooms (after chainsawing the wooden barriers down), or, hide in vents.
- Level 20: The Darkened Suburbs (AKA Darker Housing) Part 1
- Entities: Wretch and The Neighborhood Watch (AKA Eyeball Thing)
- How to beat: Look at the screen to find the houses that you need to go to to activate the terminals, and go to those houses. There will be wretches in those houses, so upon entering, run into rooms, close, and LOCK the doors to make sure the wretch can’t get in. Activate the terminals in each of those houses to open the gate to the next part. Be wary, though, you cannot stay in the roads, for The Neighborhood Watch will kill you upon sight (and drain your sanity faster if you look at it.). Enter the gate to get to the next part!
- Level 20: The Darkened Suburbs (AKA Darker Housing) Part 2
- Entities: Wretch
- How to beat: Go into the mansion and head into the door, and then watch the demonstration. After watching the demonstration, the doors will open, and you must find all 4 canisters of who knows what liquid, and place them into the little juice thingymaginy machine. Then, you must lead the wretch into the cage, then it will activate the cage, and the bars will come up, then, you must move the thingy next to the cage over the wretch, and decontaminate the wretch into a HUMAN AGAIN, then, take the card from his unconscious body, and go back to the darkened suburbs to find the exit to the next level. (It’s hard to explain, I don’t know much on this part).
- Level 21: The Bumper Crop (aka the cornfields)
- Entities: Faceling Rogues, Farmer Facelings
- How to beat:
- Part 1: Walk across the straight road until you reach the barn, but be careful, there is a faceling rogue that will sneak up behind you, and if you are not careful and looking for them, they will kidnap you, effectively ending your life.
- Part 2: Once at the barn, head straight through it and into the wheat, and follow the red lights. There will be a faceling with a chainsaw in the wheat, so be careful not to get caught. Go to the red lights, and turn on the windmill towers. Once you turn them all on, follow the lights to the parking lot.
- Level 22: Level 3999 (AKA the arcade)
- Entities: None
- How to beat: Enter the arcade, and walk (you’ll know where to go, and it’s safe, don’t worry). Congratulations, you beat the game!
Be the first to comment