
The hardest achievement / trophy in the Ubisoft portfolio, made easy(ish).
Beat the Game on Expert Survivor
Before you go any further, if you haven’t beat the game on Expert difficulty and Survivor mode, without Permadeath, STOP.
You won’t do yourself any favors by pouring hours of gameplay into run after run learning all your lessons the hard way. Even after beating on Expert Survivor, it takes most people at least several runs on permadeath before earning Survival Of The Fittest. The rest of this guide still applies, but do your due diligence, and enjoy earning Top Of The Food Chain first.
Essential Settings
Start A New Game
These are the settings you need to unlock Survival of the Fittest:
- Survivor mode: ON
- Permadeath: ON
- Game Difficulty: EXPERT
Search Animations: OFF
Without this, you will stop for a one-second animation every time you pick up a resource. Forced animations can kill. You will want to be able to pick up resources at a full sprint.
Hunter Vision Duration: Infinite
You’re going to want to have Hunter Vision active for almost the whole playthrough.
Music OFF
Predators don’t show up on hunter vision, so you will hear them before you see them.
Brightness (+)
Bright enough you can see at night.
You can play with contrast and gamma, too, to offset the graying out of Hunter Vision.
Field of View Scaling (~105)
This protects from flanking, but set too high creates a fishbowl effect. Make as high as you can without getting sick or losing your aim. For me, the sweet spot is 105.
Interface options all ON
Why limit your information?
Some of these are invaluable. The only ones I skip are tooltips / tutorial updates (if you need these, you’re reading the wrong guide) and the crouch indicator, which I find distracting.

The Strategy
In broad strokes, my strategy is to make it through the early game with as little risk as possible, moving directly toward the goal of taming a Sabretooth. Once you have a Sabretooth at your side, the game gets dramatically more forgiving.
From there, it’s a strategy of targeting the most impactfull skills and equipment first with minimally-risky XP opportunities while moving the Story missions along.
The last two missions should be killing Ull and Batari. Even fully equipped, both are risky battles.
Surviving the Early Game
Far Cry Primal was designed to be played with a pet. Until you get one, you are very, very squishy. The first goal is to tame the White Wolf without getting distracted by all of the things that can kill you. Rule #1, then, is to avoid any encounter you can until tame that wolf.
Path to Oros
Thankfully, the Prologue itself isn’t very deadly. In fact, it’s one of safest places in the game to gather resources. After you make camp and craft your club, double-back to the area where you hunted goats, and you’ll find it full of docile tapirs. Be sure to fill up your resources before moving on.
As you follow Sayla’s tracks, also be sure to investigate at every opportunity. Each investigation site gives you risk-free XP.
Before you enter the cave system, you’ll have to get past three wolves. Scare them with fire and move on. Hunting wolves becomes much easier once you have one of your own.
Deep Wounds
It’s hard to underestimate just how weak you are at this point in the game. Any fair fight? You lose. So you want to run away? Usually too slow. The only options are Takedowns or complete avoidance.
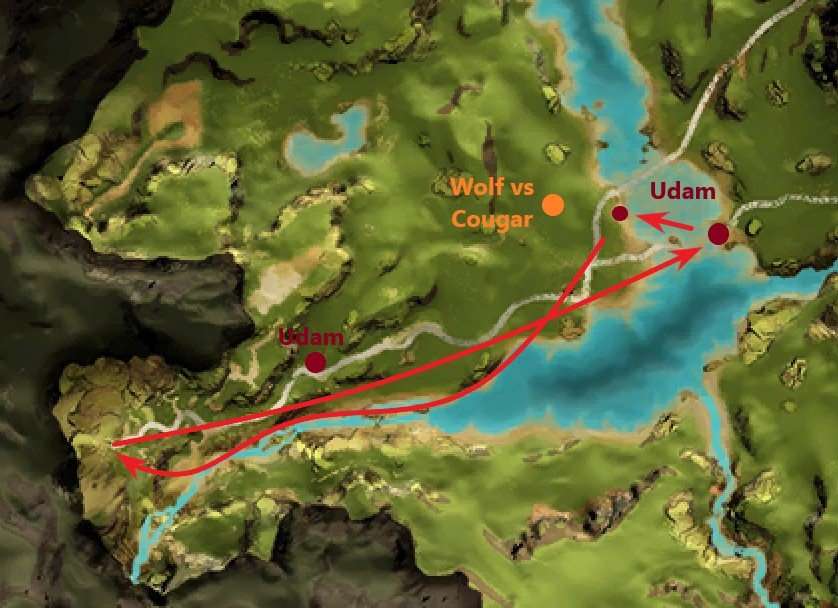
Follow the creek coming out of the village down to the river, where you’ll see two Udam on the other side, and one on your left (the near side of the river). Head to the two on other side of the river first. Approach quickly, only sneaking for the last 20 feet or so. Takedown the Udam on the right first, then immediately take down the other. Harvest the Green Leaves and loot the bodies.
There is a chance one body has a Green Leaf, in which case you can head straight back to the village. Otherwise, cross back to the village side of the river and take the Green Leaf behind the last Udam without killing him. There is a Jaguar fighting a Wolf further on past him that you want to avoid.
Green Leaves in hand, head back to the stream coming out of the village. Don’t go up the vines on the right or you’ll come up right in the middle of three Udam out on a walk. Keep walking up the stream bed and climb up the last vines on the left.

Tensay the Shaman
For the first time, you have unscripted freedom outside missions. This is a bad thing: no reloading from checkpoint, and encounters are randomized.
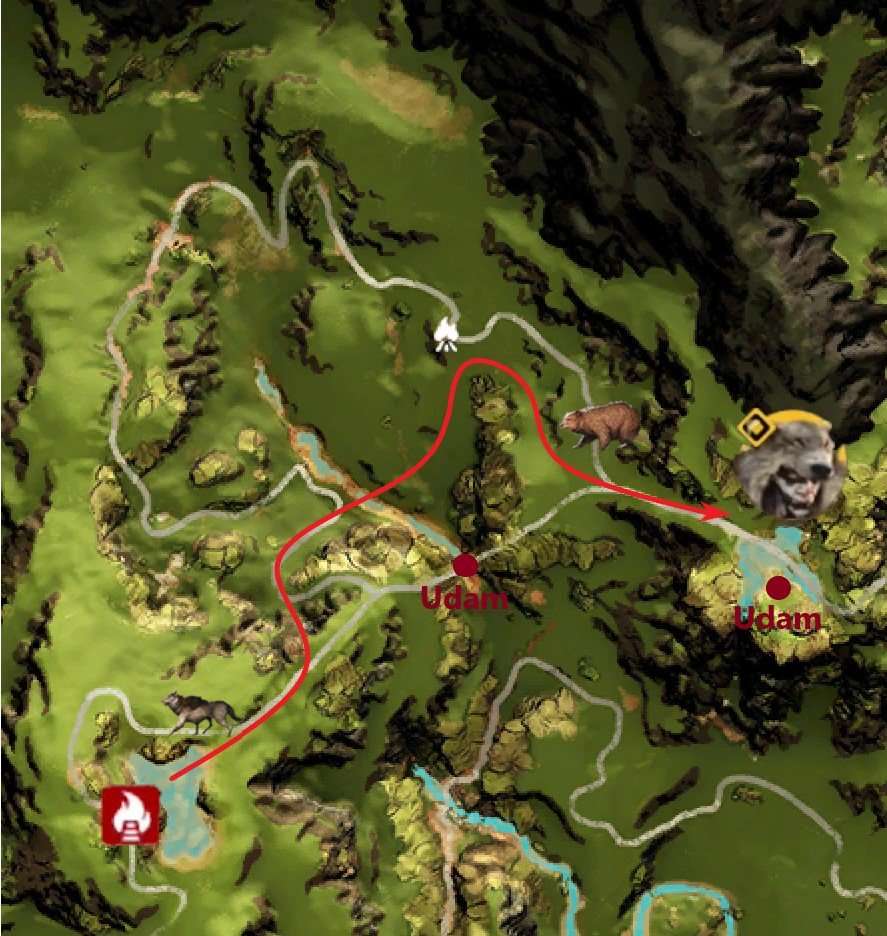
Head back down the riverbed and follow your quest marker to the Nakuti Bonfire. The only real threat here are boars, Wenja Events, and the chance of a wandering Dhole. Resist hunting the deer and goats.
After claiming the bonfire, use the vantage to scout for a prowling Wolf. Following the quest marker will lead you across Prashrawa’s Birth, but chances are three Udam will be camped there. Instead, slide down the hill to the left and cross the valley below. As you start climbing the other side, keep your ears open for a bear. If it sees you, slide back down into the valley and circle around to the other side of Prashrawa’s Birth.
As an aside, sliding down hills is super important, especially early game. Until you can afford the Sprint Forever skill, it is often the only way to outrun enemies. Even then, the only way out of a Mammoth or Rhino charge is climbing up or down, and usually there isn’t time for ‘up’.
As you approach Tensay’s cave, you may run into three Udam camped at the Stone Fingers. If they aren’t there, pick up the two Daysha hands nearby before heading in. After Vision of Beasts, take care coming out of Tensay’s cave, as the three Udam or bear may have spawned. The the second Tensay mission to the northwest.
Master of Beasts
There are three parts to this mission: Udam wolf hunters, taming the White Wolf, and hunting Udam.
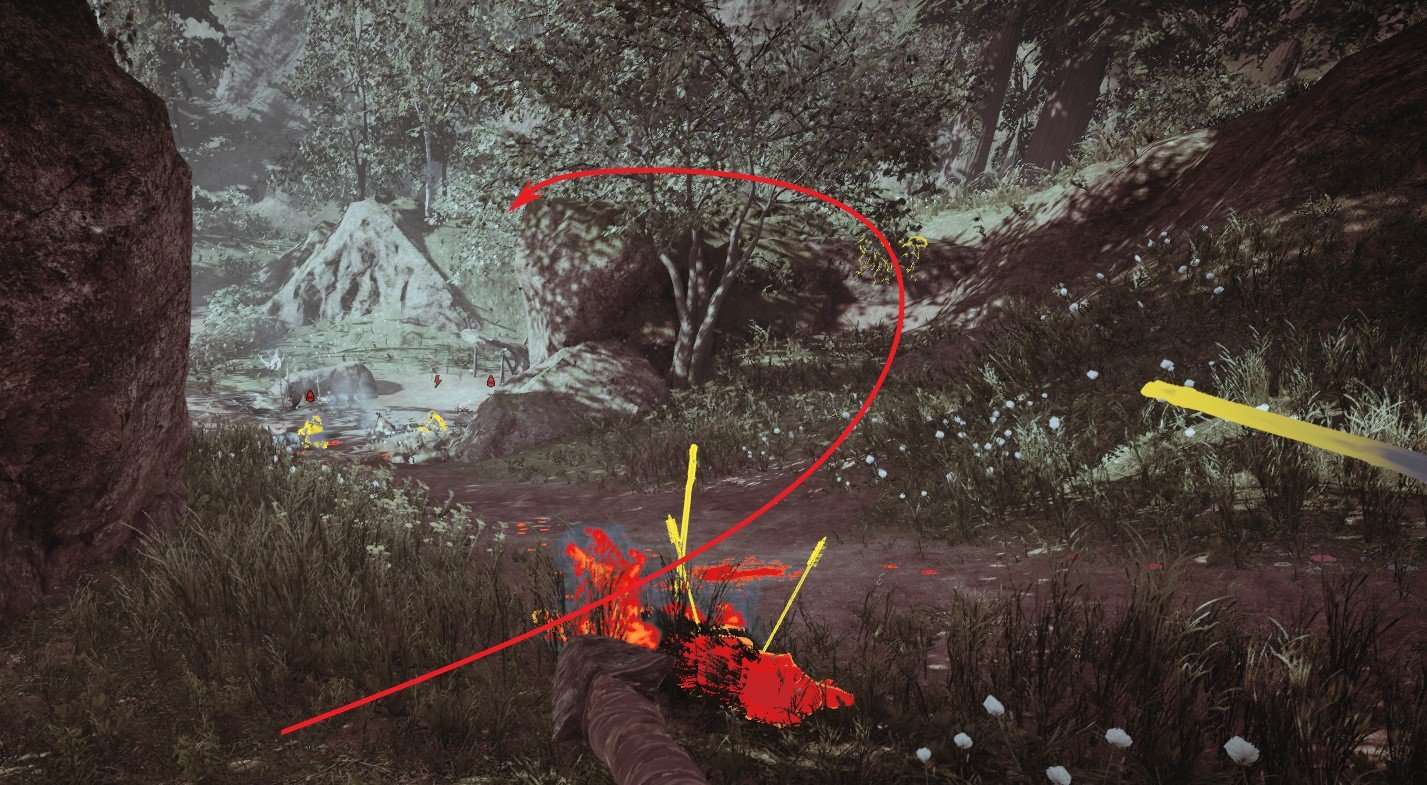
Dealing with the three Udam wolf hunters is your first real unavoidable fight. Sprint to the right, and circle around behind them. No need to sneak, just walk up and climb up on the rock directly over them. The trick is to be quick between shots. Line up the first and make sure you get a clean headshot. It usually takes them a second to realize what’s happen, which is enough time to get one more shot. I save my spear for the archer.
After that, there’s a short hike to tame your White Wolf, and you finally have the bodyguard you need to survive small skirmishes.
Marsa Cave
Now that you have a pet, it’s time to upgrade it.
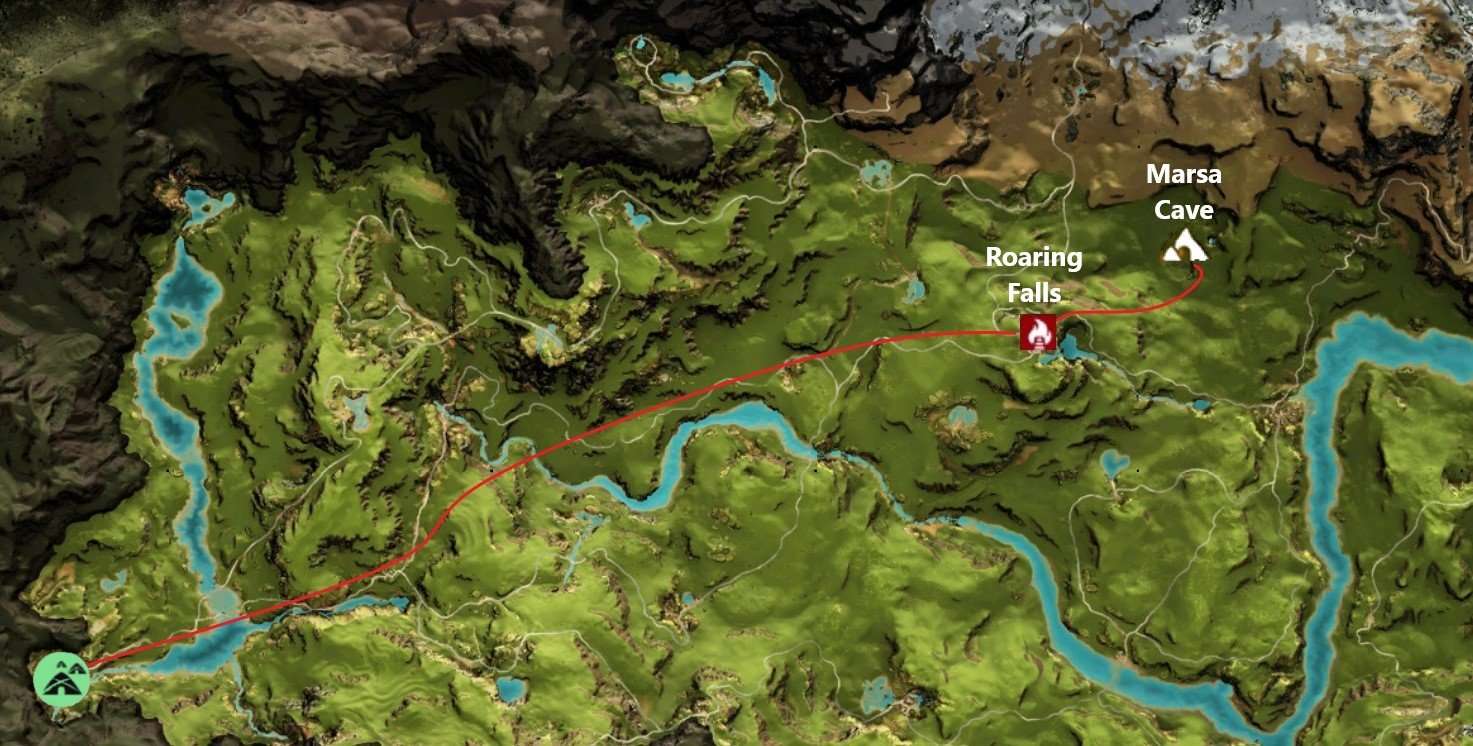
Fast travel back to the village and upgrade Tensay’s hut. DO NOT also build Sayla’s hut, until you are ready to trigger the Attack Of The Udam mission. First, we need to visit magical Marsa Cave, so named because three rare beasts spawn there.
When you visit Marsa Cave, you will encounter one of the following (each variant has equal probability of 20%):
- 1 Black Jaguar;
- 1 Stripe Wolf + 2 gray wolves;
- 1 Black Lion;
- 1 Brown Bear;
- 3 Udam – one armed with a club, one with spears and the 3rd one with poison bombs (in an early stage of the game you shouldn’t mess with the last one if you’re not 100% sure that you’ll get an arrow to the head of a moving target in a split second ;).
The technique to find all animals at that location is … when you see something you no longer need, save and quit to menu, then reload the game and travel back to the cave from nearest discovered/conquered resting point.
That’s 3 rare and 2 common animals to tame just in the cave. There are also Jaguars by Roaring Falls Bonfire and Cave Lions that lurk near the entrance to Marsa Cave, for a total of 7 tamable animals.
Taming Beasts
A couple tips on taming beasts. I’d argue the most useful thing about having a pet is their ability to scare off wildlife. Animals can generally scare off other animals of their tier or lower, with those tiers being:
- Tier 1 – Dhole, Wolf, Jaguar, Leopard
- Tier 2 – Cave Lion, Brown Bear
- Tier 3 – Sabretooth, Cave Bear
- Tier 4 – Badger (Mammoth, Rhino)
With your White Wolf, taming the rest of the Tier 1 animals is fairly easy. Just be careful of hit-and-run tactics of Jaguars and Leopards. Taming a Cave Lion, on the other hand, is a whole other story. If it locks onto you, flaming arrows or your pet attacking won’t stop it. It can climb onto elevation. You might be able to kill it with a spear to the head, but that doesn’t help taming. Your best defense is actually your bait. Also worth noting that Brown Bear, Cave Bear, and Sabretooth all require half-health before tamable, which is difficult if they aren’t scared by your pet.
The strategy, then, is to try to get the drop on a Cave Lion and tame it before it kills you. Use the Cave Lion to protect you while you tame a Brown Bear (or the Rare Black Lion at Marsa). But how are you supposed to tame a Sabretooth? Answers lie at the lucky Bone Cave. For now, keep farming the Bone Cave until you have at least a Cave Lion. Then we’re back to the village.
But one other word of warning, as long as we’re here…
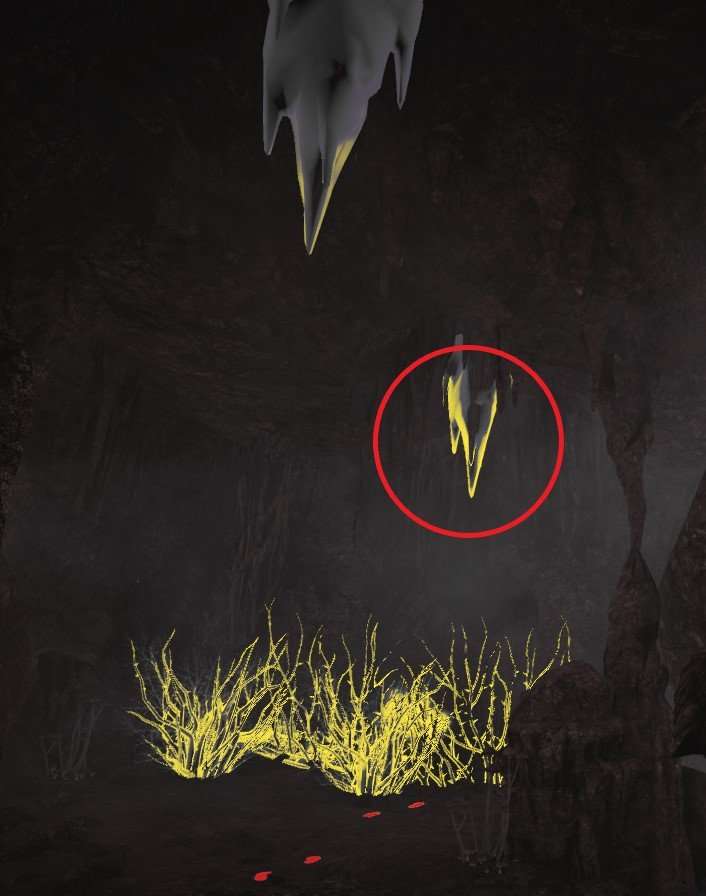
The cave painting at Marsa Cave is a trap. When you light the vines on fire to clear them, the flames run up the wall to the roots in the ceiling and catch the stalactite right above you. In about ten seconds it’ll come crashing down right where you’re standing. So back up!
You’re welcome.
Attack of the Udam
A Choice
I recommend you tame every beast, upgrade all your equipment, and unlock every skill you can before progressing the main quest. I prefer to advance to the Bone Cave, where you have an opportunity to safely tame a sabretooth. With a sabretooth at your side, the rest of game is easier and waaaay safer.
Attack of the Udam: defending the village
Time to prepare for a battle. Top off your meat and weapon stores, summon your best pet (hopefully the Rare Black Lion), and lock in any skill points. I recommend both ‘Extra Health I’ and ‘Sprint Heal’. Once you’re ready, upgrade Sayla’s hut and follow the prompts.
The strategy is to not be a hero and let your pet and Wenja allies do the heavy lifting while you support with spears and arrows. When you do melee, it should be to revive your pet or peal off Warriors who are pinning down your ranged Wenja. Look for safe Takedown opportunities, where a Udam turns his back to you, either because he ran past you or is attacking a Wenja on the front line. If anything starts going sideways, remember: this is a mission. You can reload from last checkpoint anytime.
You start with 3 Wenja archers and 2 Spears.
There are 19 Udam that come in four waves:
- 1st Wave I (front): 4 Warriors, 3 Archers
- 2nd Wave II (cave): 3 Warriors, 1 Archer, 1 Spear, 1 Scourge (poison bomber)
- 3rd Wave III (front): 2 Warriors, 2 Spear, 1 Scourge
- 4th Wave IV (cave): 1 Scourge
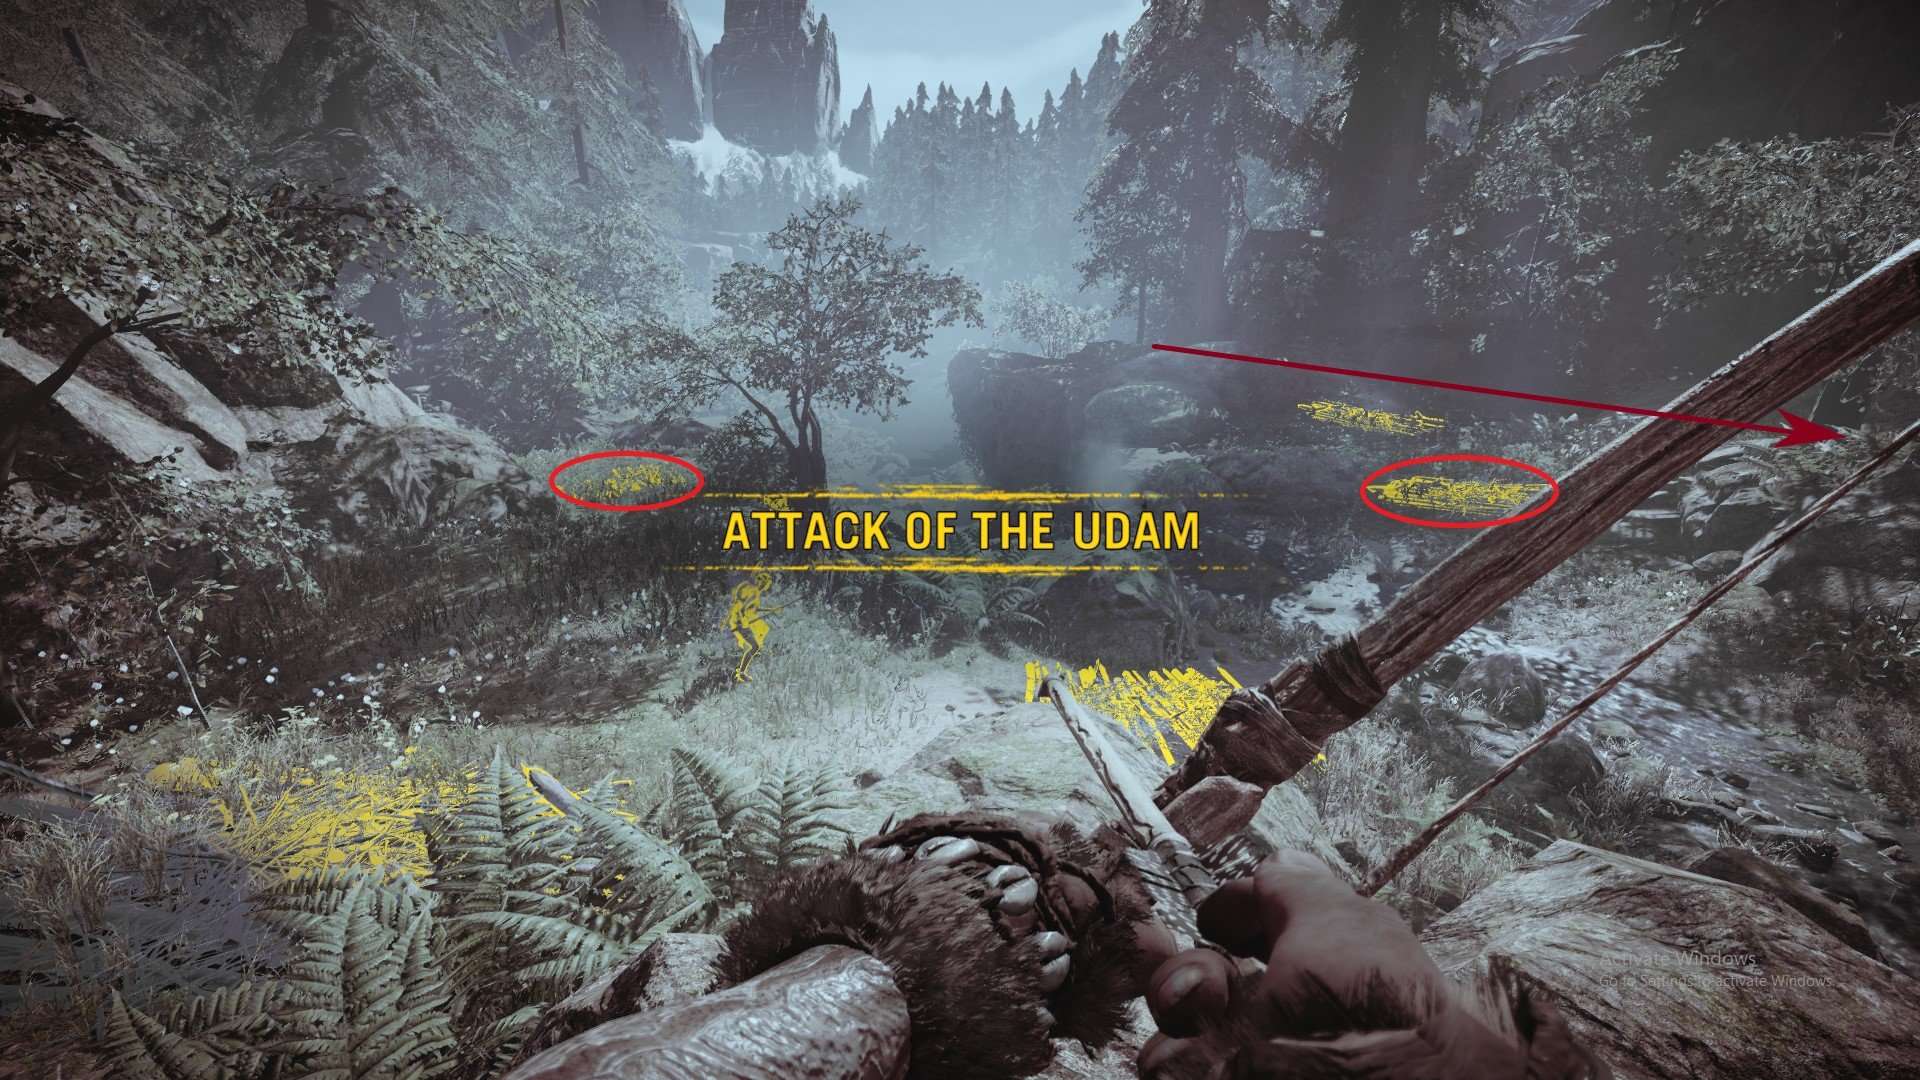
1st Wave
Right away, light these two barricades on fire. The right one will divert the first wave into a kill zone up to the right, while the left one will help with the third wave. You can light all on fire if the third wave is giving you trouble. This is a chaotic melee, with the Udam hitting almost all at once, so take care not to get drawn into a cluster. When there are only 2 Udam remaining, you will hear a war horn signaling the next wave is on its way from the cavern entrance.
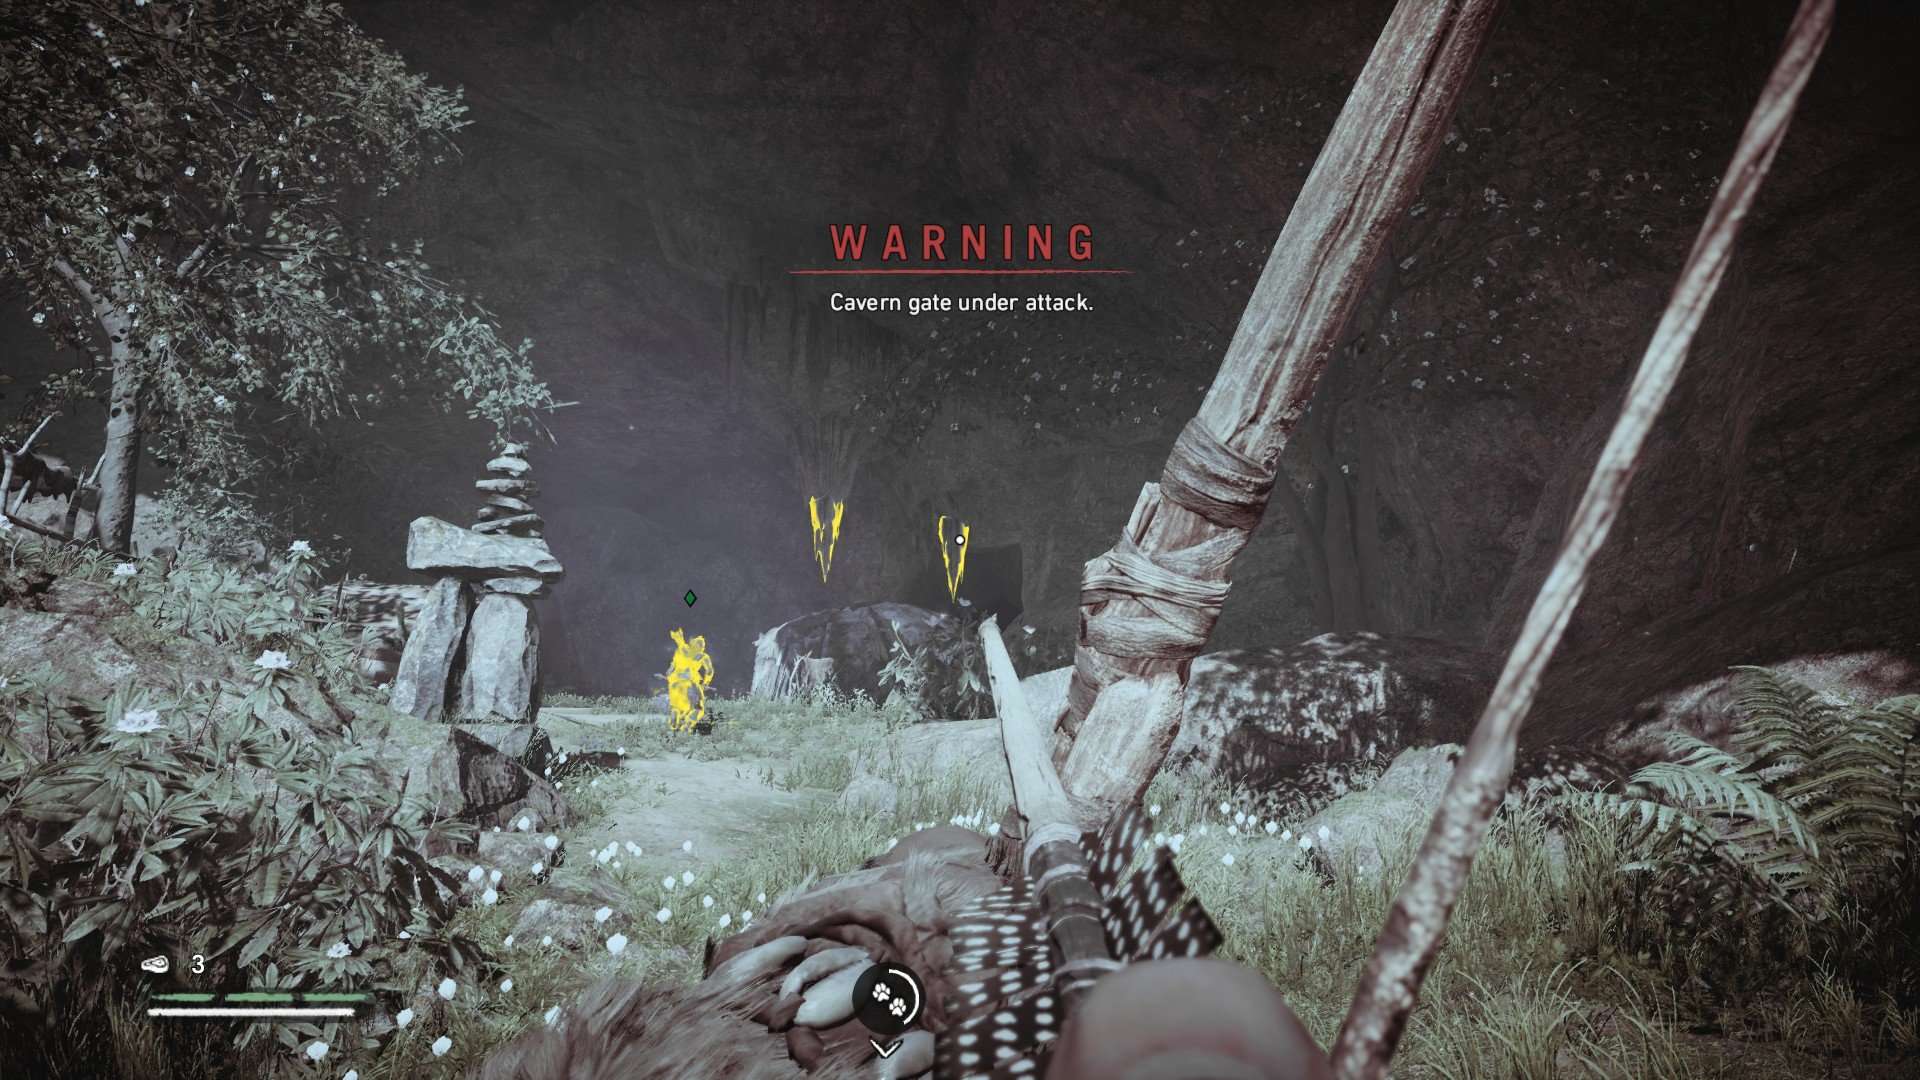
2nd Wave
The Udam will spawn in three sets of two: 2 Warriors, Archer/Spear, then Warrior/Scourge. The temptation is to lead out with the stalactite overhanging the barrier for an easy double-kill, but because the last set doesn’t spawn until the barrier is down, doing so will prematurely trigger the third wave. Instead, wait for them to break down the barrier and charge. Use stalactites to kill Udam lingering in the cave, and hit the Scourge with your pet once it spawns. When there are only two left, the third wave will trigger.
3rd Wave
Udam will spawn all over the front part of the village, and if you lit all of the fire barricades, a few will be boxed in. Because they are so scattered, this wave is perfect for mopping up with Takedowns and your pet. As always, when there are only two left, the final wave with trigger.
4th Wave
A single Scourge spawns from the cavern entrance. Take your time.
Attack of the Udam: the Udam camp
Once the Udam attack is repelled, Sayla tells you to go take the fight to their camp. Keep a low profile and avoid random skirmishes or wildlife.
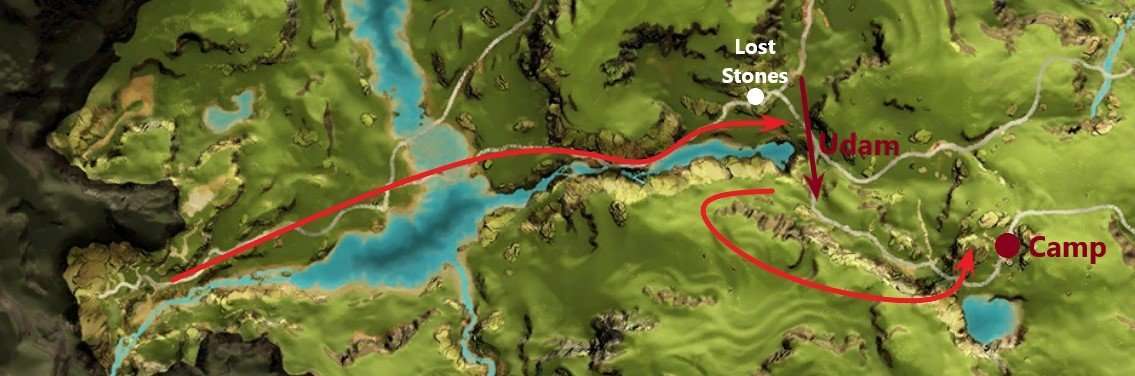
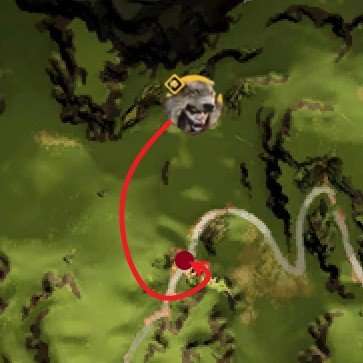
As you round the bend at the Lost Stones, you will see four Udam running away in single-file, heading for their camp. When you first encounter them, they will be too far ahead to stop, but if you reload from the last checkpoint, you can catch them. Send your pet to attack the first in line to slow them down, then sprint behind the last and Takedown them one at a time.
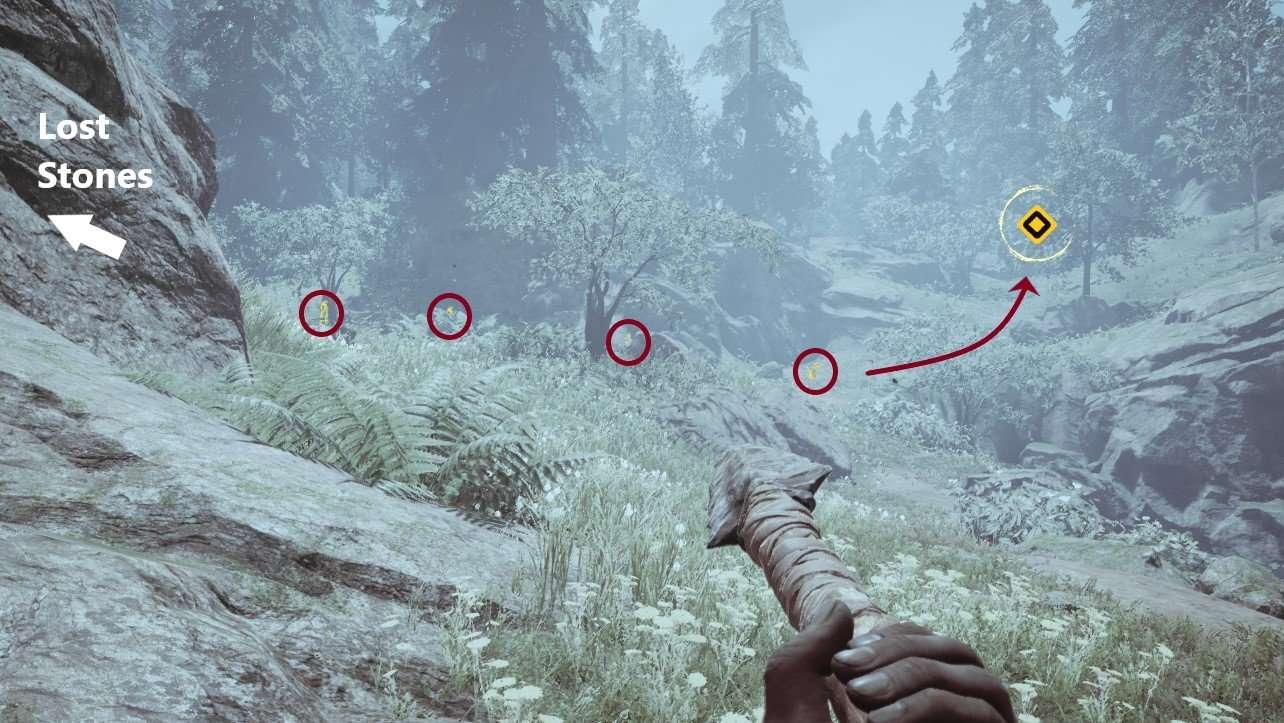
Up the hill to your right is a ridge. Circle all the way back to get on top of it (you’ll get a warning that you are leaving the mission zone). This will let you enter the camp from a perfect sniping position. If you succeeded at the Lost Stones, there should only be four Udam left to deal with, and the first one is served up on the middle ledge below you. Pick them off one at a time from this ledge, and if they notice you, climb the vine to the higher platform or hide in the bushes to finish them off.

Each bone tree will spawn 3 Udam, but the first will also summon 4 Wenja to join you. Stay back and let your pet and the Wenja mop them up, one wave at a time. Once it’s done, you will travel back to the village to plan your next move.
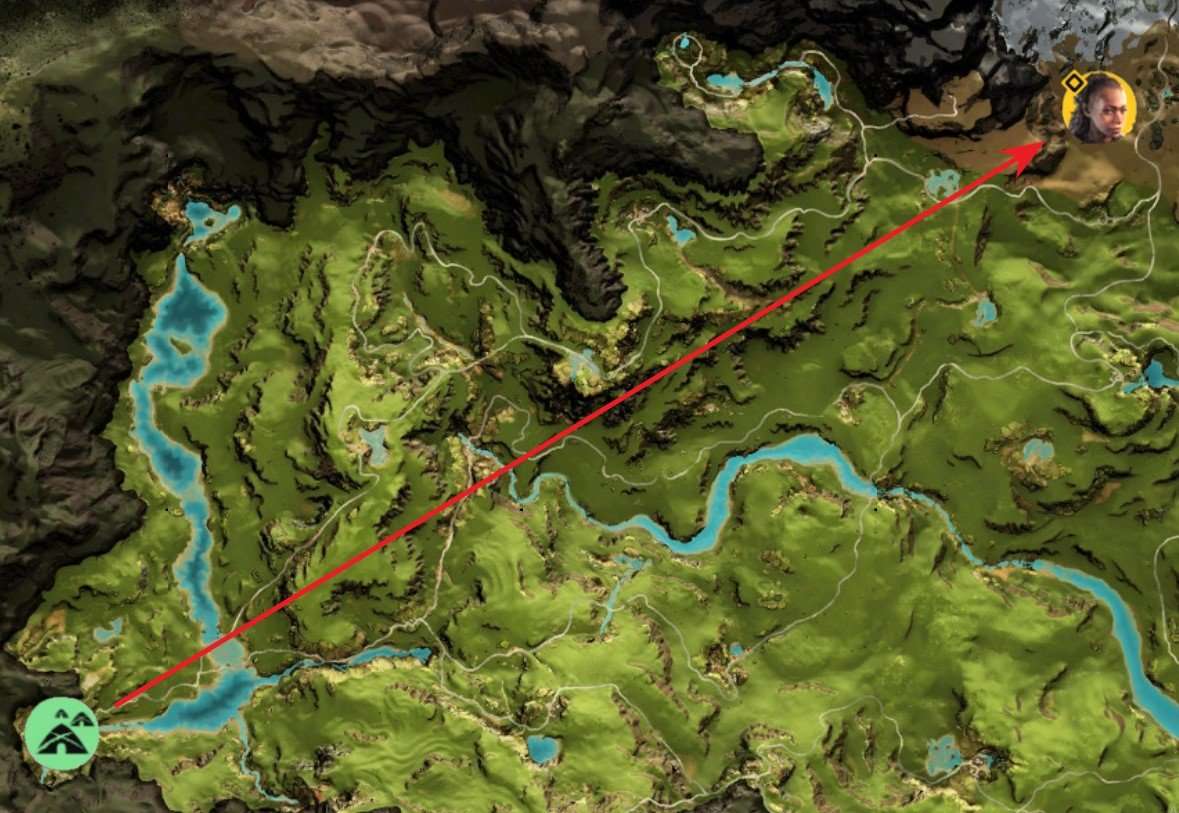
The Bone Cave
Speak with Tensay to complete Vision of Ice, then speak with Sayla to trigger The Bone Cave mission in the north. Go there, and be ready to tame a sabretooth.
There are two Cave Lions to deal with in the first large chamber of the cave. Bring a Cave Lion or Brown Bear to deal with one, and be ready to kill (or tame) the other.

Once they’re dispatched, keep climbing up until you reach the back of the cave, where a wounded Wenja is hiding in a narrow gap in the rock. Before talking to him, turn around and scout the platform. There is a ‘V’-shaped outcropping the rises up to the ceiling. Walk as far up as you can go, and you will be safe and out of reach. Go back, talk to the Wenja, move back to safety, and wait.
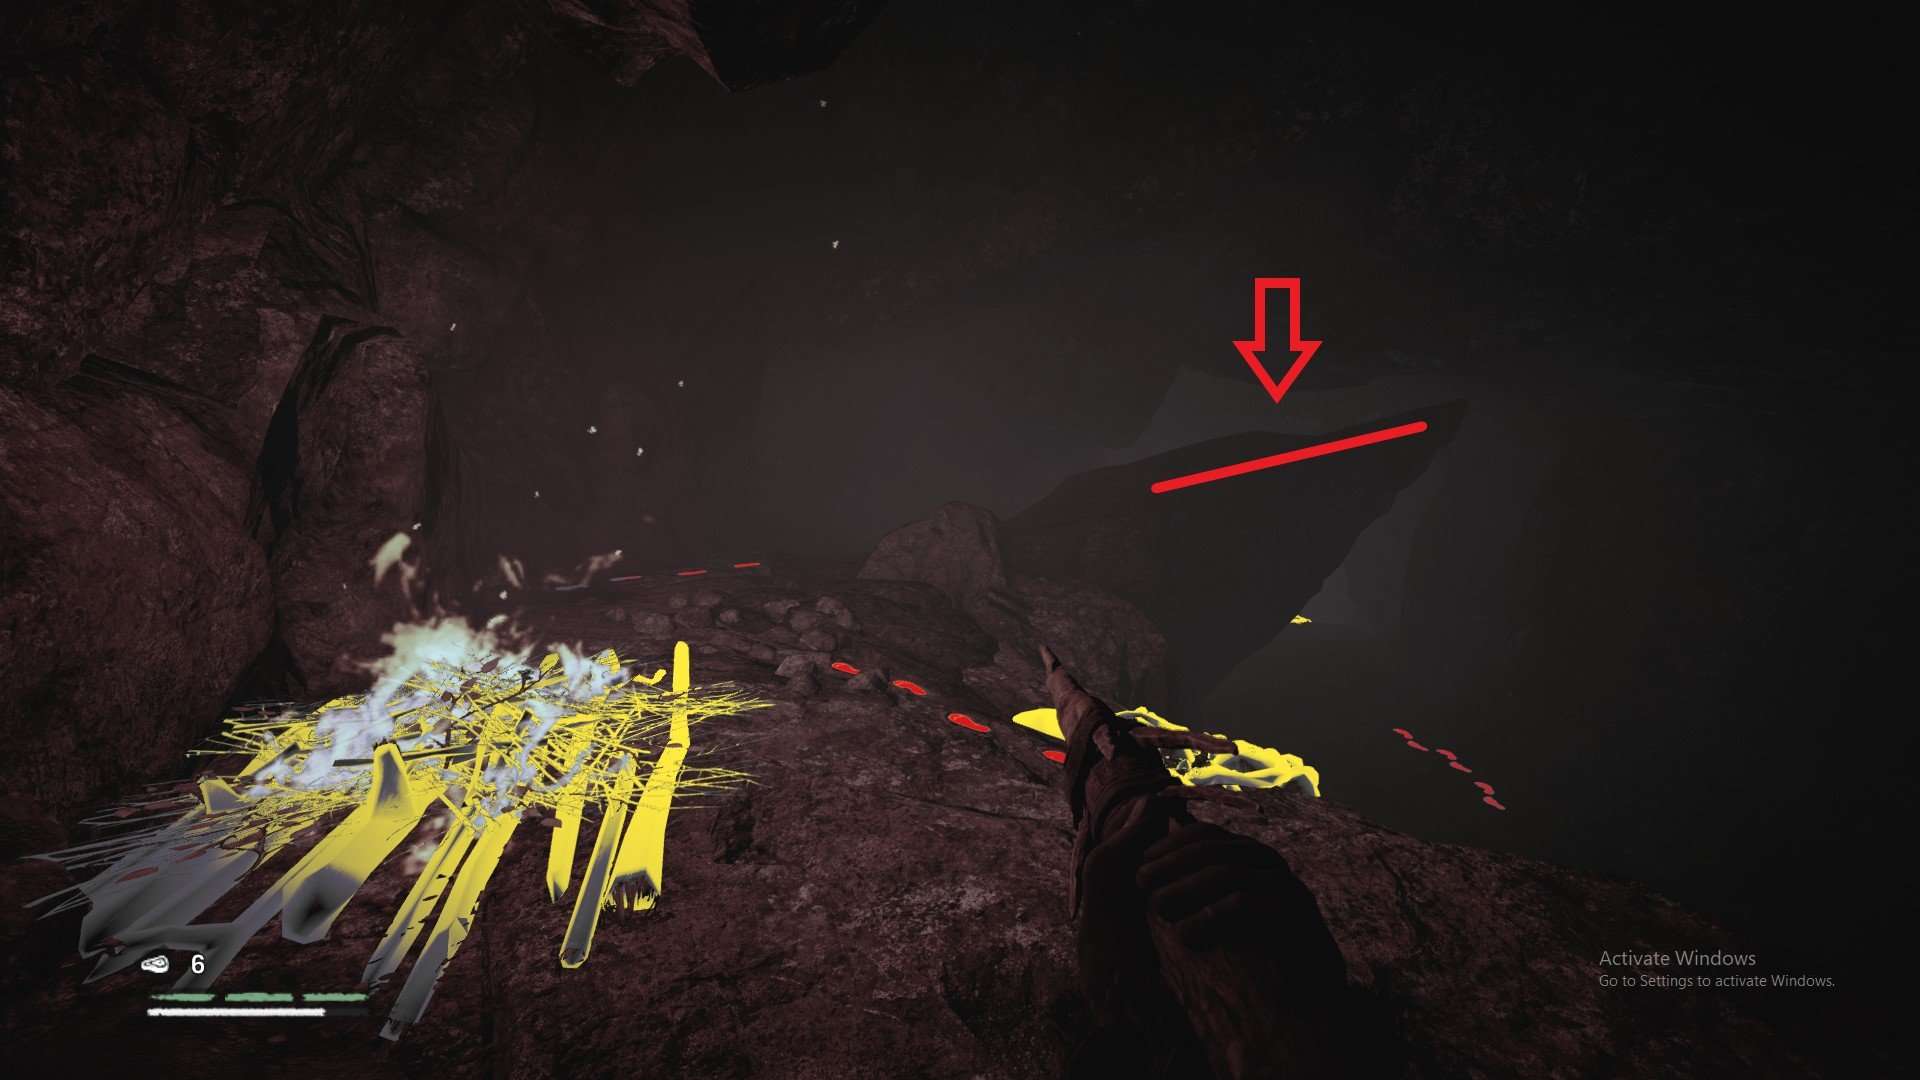
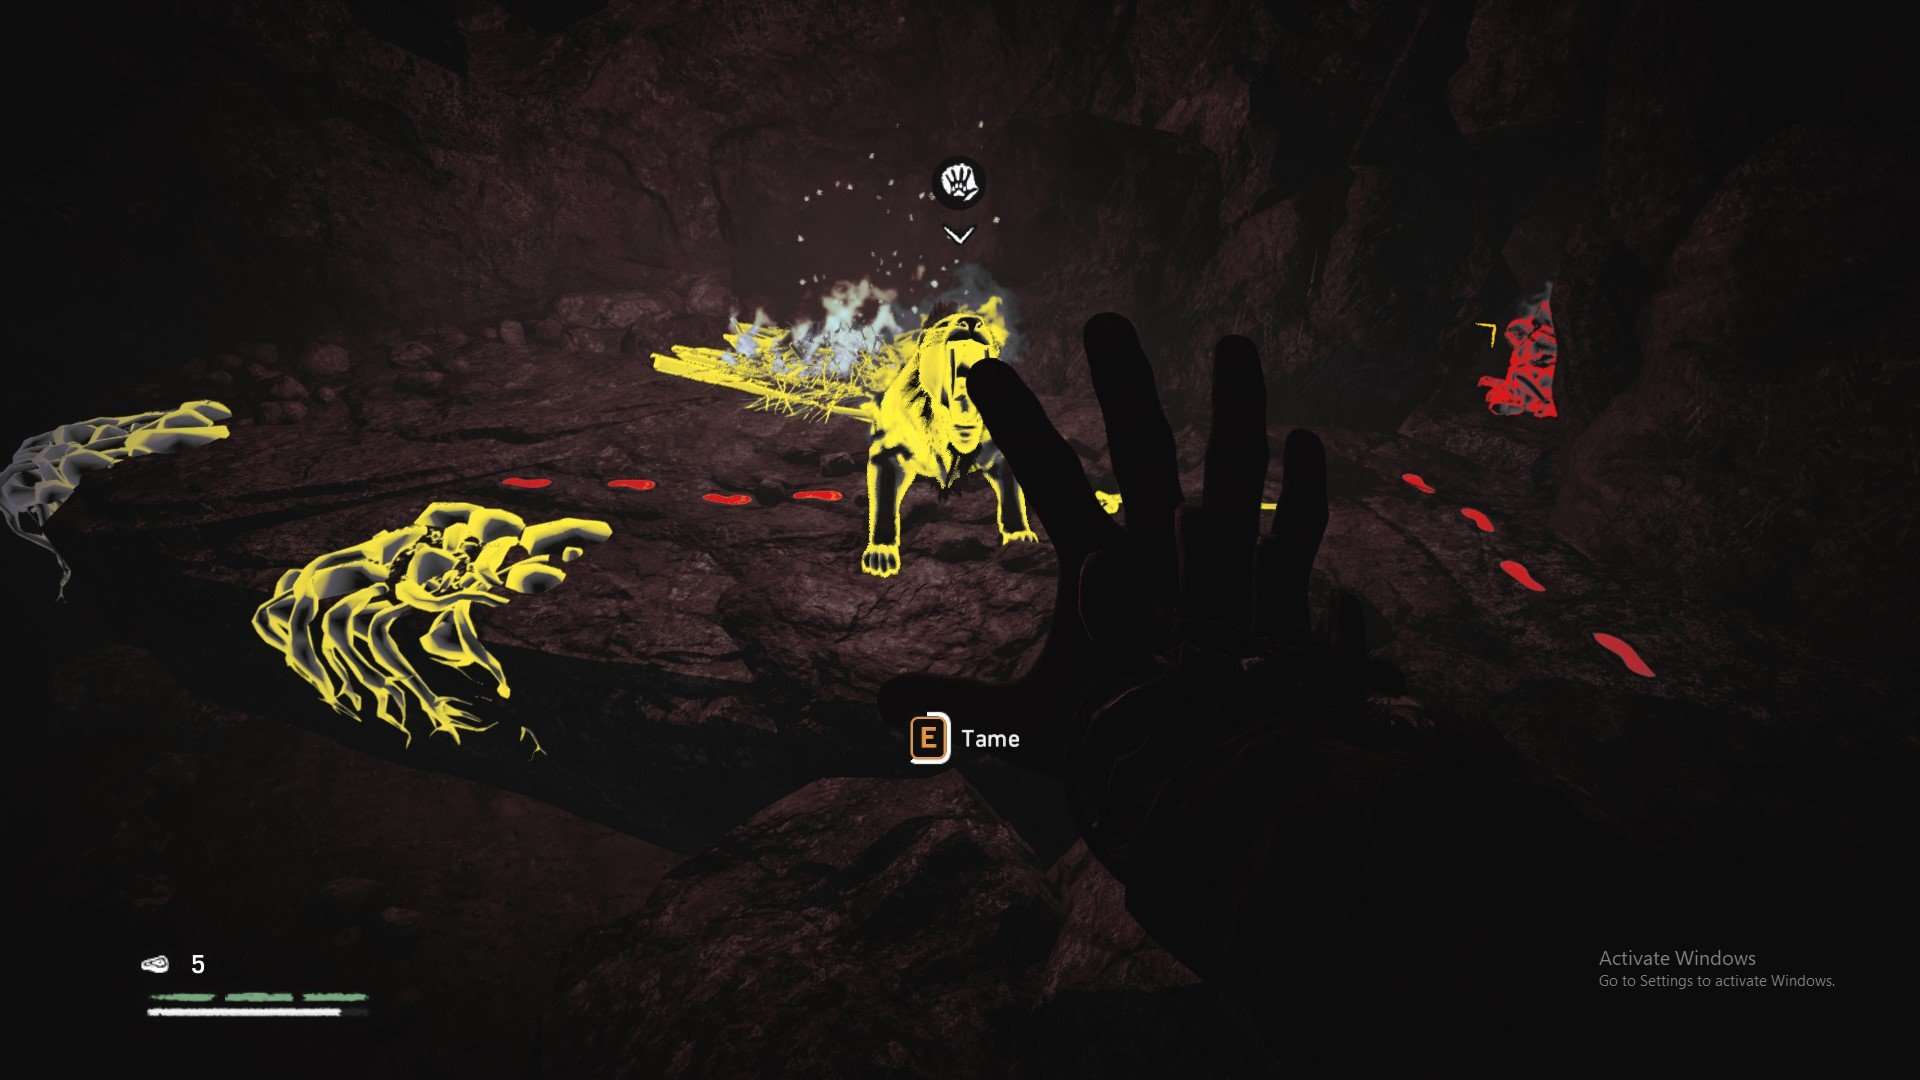
Another Cave Lion and your future best-friend Sabretooth will come into view. You can ignore the Cave Lion for now, and focus on bringing the Sabretooth down to half health. Be patient. You can lure both cats into view by backing down to the main platform. Keep all three entrances to the cavern in view so you know when to run back up to the “safe” zone.

The Sabretooth usually notices you much faster than the Cave Lion, which is helpful in pealing him off. Once you’ve stuck him with 2-3 spears or flaming arrow headshots, throw bait on the platform right outside the “safe” zone, so that the Cave Lion doesn’t get to you while taming.
If any part of the plan goes sideways, remember you can always restart the quest. If you accidentally kill the Sabretooth, restart the quest. If you run out of arrows, restart the quest. If you take a hit from any of the cats, restart the quest (a second hit will kill you). If you’re patient, you will eventually be rewarded with a bodyguard that can take you through the end of the game.
Cheating
Primal is a AAA game, but it’s not perfect. I’ve had Bloodfang vanish permanently, and died from a myriad of glitches ranging from true technical issues to poor game design. I’ve died from grappling hook failure, melee auto-aim launch me over a cliff, once in the middle of a field from nothing, a stalactite that didn’t stun Ull, etc., etc. If any of that would ruin your enjoyment of the game, consider these alternatives:
- Restart a Mission. A surprising amount of a playthrough is going on missions. While on a mission, you can restart or load the last checkpoint at any point. You can, for example, restart any time you break stealth or take damage (most enemies take two hits to kill you). You can choreograph every move until you can play the mission perfectly, as long as you’re quick on the ‘Escape’ key. To my mind, this is squarely fair game, as it’s how the developers made it.
- Save and Quit. Also fair game. As long as you aren’t taking damage, you can usually quit and reload normally. For example, when a herd of Rhinos are inches away from trampling you to death, or a moment before hitting the ground in a fall.
- Force Quit. During combat, you can still hit ‘Esc’, and force quit the game through the task manager. Sometimes you can quickly Alt-Tab as Tekkar is falling dead and still force quit with your game intact. I consider all of this cheating. But when the game actually glitches, like a tamed Bloodfang just disappearing permanently out of nowhere, for myself I’m okay doing this.
- Copy Your Save Files. There are a number of guides about how to do this, including the link below. Basically, you opt out of cloud-based saves and copy the save files somewhere safe. This is the only way to resurrect a game after the death screen. On one hand, this effectively negates the Permadeath setting. On the other, Primal is pretty glitchy game for an AAA title. Choice is yours.
Be the first to comment