
Challenges Guide
By kamil20016.
Note: Don’t forget about in-game codes to get various useful items like Souls & Farming Potions. Also read our tips & tricks for new players.
When Should I Start Challenge?
What Should I Watch Out For?
Important Things:
C1 = Challenge 1, C4 = Challenge 4 etc. While they don’t have numbers in the game, we number them from left to right, from top to bottom.

Important:
- Challenges and starting them are a very thorny subject. I’ve seen quite a few different opinions which differ greatly. I’ll present you with my approach, which was to over prepare and breeze through them. It certainly isn’t the most optimal strategy, but it’s good enough.
- C1 is considered by many as very easy, but after c1 make sure that you understand the basics of making builds with your talent points. Picking up random nodes without any plan whatsoever can result in spending a lot more hours than necessary in the challenge. It’s not necessary to make perfectly optimized choices, but it’s important to avoid some entirely useless nodes.
- You may also want to do your first gear farming run before c2 to ensure that challenges will go quickly.
- It’s impossible to tell when exactly someone should do some of the early challenges. Why? Your reinc level can be high, but your gear could be shit. Your gear could be good, but you could have very few free talent points. Etc.
- Yes, entering a challenge counts as reincarnation and give you all of its benefits
The Basics Before Starting:
Things that will make challenges easier no matter what:
- Good gear.
- A lot of free talent points.
- Decent choice of nodes in talent tree.
- Bonuses from reinc level.
- Doing c1-c4 with smasher, c5 with harvester, and c6 with rancher.
- Do them in order. They are listed in order of difficulty.
- Feel free to use att/def potion or try to roll att/def buff from whack-a-potato if you are a 10-20 waves short from reaching your goal, they might help you cover the final distance.
- Get as much of this as you can:

- Worms scale really well on long runs. If you don’t feel like following my overpreparation advice, consider getting a bit more worms. (this counts as the 1/2).
- I heard that it’s usually to cap crit chance on challenges, so a crit node or two might be worth getting. (This tip also counts as the 1/2, since).
Disclaimer: Some challenges can disable certain features of the game, so sometimes stuff like better gear might not help. Just read the challenge description.
Thing that you can accidentally do to make the challenge much harder:
- Watch out with those skull page 3 purchases:

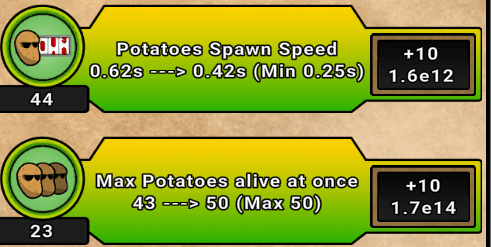
They are amazing for making areas faster to clear, but getting a lot of them makes waves harder. You should buy some of them, but remember to avoid mindlessly maxing them out. With my over preparation advice this shouldn’t matter too much, but keep this in mind.
My Approach
Important:
- When I say that challenge becomes easy – it means that it should take 1h or less. It could even take 20-30 min if you over prepared a bit too much. I’ve seen some people spend 24h+ on a single challenge, which is a massive waste of time.
- When you finish a challenge, the restrictions that it poses disappear. It’s recommended to finish the run after completing the challenge to level up your class further and get some reinc xp. Might not be worth it if challenges were extremely trivial for you and you can do c1-c3 in an hour.
- In some challenges your task is to beat 1-9-50 boss, not the 1-9-50 wave. What does that mean? You need to kill that special red potato. He is very slow, so you might end up reaching 1-9-52 or 1-9-53 before completing the challenge.
C1
The first challenge should be doable for most people right after unlocking it. The downside is that it won’t be easy. Having 30-40 free talent points will make it trivial. Even 20-30 free talent points should make it easy. With anything less than that it’s still very doable, it just may take a few hours to complete.
C2-C3
I did c2 and c3 in one go. How much did I over prepare? I had 4 classes at level 1k, rancher and harvester at 600. That’s around 52 free talent points + 5 from the c1 reward. I went for them after a solid gear farm with freeloader, so I was as op as possible. I don’t feel like this way of doing things is a huge time waste: getting a single class to 1k should take 2 reincarnations.
You spend time that you’d spend in a challenge leveling your classes, and then do challenges easily. With this amount of preparation I was able to do c2 with harvester and c3 with rancher. Why? While that made challenges a bit harder, I leveled them up in preparation for c4.
Using harvester / rancher for c2 and c3 is a somewhat risky move. If you aren’t over prepared enough, or if you aren’t confident enough, feel free to breeze through them with smasher
C4
At this point all of my classes were close to 1k lvl, making that around 60 free talent points just from their levels alone. Don’t forget about buffs from completing c1-c3. Thanks to my previous over preparation, I was able to start c4 directly after finishing the c3 run. I’d recommend to avoid playing around with other classes and to use smasher for this one, as c4 can be quite nasty.
I’d recommend starting it 1-2h before going to sleep. Spend 1h or so preparing the run while in challenge (get as much progress as possible). You might be able to do it before sleep, but if not just let the game play itself overnight. You should wake up being able to breeze through it.
C5-C6
Note: If you were able to do c5 relatively easily, you can go for c6 immediately. If you struggled with c5, you’ll struggle even more with c6 if you try to do it right after.
I gotta be honest, I don’t remember anything about them. I’m pretty sure they are somewhat similar to c1 – you could do them immediately after unlocking, but they could take a while. So when you unlock them do a few more reincs, get better gear, and you should be able to breeze through them. Not guaranteed tho.
Example Stats for C5:
RL 986 at start, harvester at 2396, all 6 levels combined about 12K, gear T6+6, no p3 skulls bonuses to speed up. 260% att/hp bonus from milk. Challenge took about 30-35 minutes. Died once right at 1-9-50 bosses, second time through no problem.
C7
C7 is essentially a progress check: quite easy if you have (SPOILER ahead) calcium unlocked (silver lock to the right of barrels in cows menu). It’s possible without calcium, but only if the way you progressed through the game is non standard, and even then c7 would be really painful. So get calcium and have fun.
C8
Recommended stats for quite smooth experience: 150k% in milk attack and hp bonus, 3-5 medium gear. I did it in 20 minutes with 140k% in milk att / hp, 3-6m gear, hp buff from whack-a-potato and att/def potion.
When Should I Do Infinite Challenges?
How good are they? How do they work?
For now there are 2 types of infinite challenges. They are usually referred to as “labor challenges” for c1 and c2, and “path challenges” for c3-8.
Labor Challenges
Both labor challenges (you unlock the medium one later on) work in a similar way. Every feature that gets reset on reincarnation doesn’t work (apart from talents). Your goal is simple – get as far as possible. What are the benefits? They can save you time.
Getting to 1-x-25 will reward you with autocompletion of every area before 1-x on a reincarnation. For example, if you get to 1-4-25 on easy labor, after a new reincarnation you’ll start the run at 1-4-1, with all areas before 1-4 maxed out like so:

Medium labor works in the exact same way (but you need to reach 1-x-25 on medium difficulty).
Note: Getting to 1-x-25 on medium labor will give you the benefits of getting to 1-x-25 on easy labor.
Are they worth doing? – kind of, but certainly not worth focusing on. You may want to revisit them occasionally, after making a big progress in the game.
Small Tip: There is no need to get to wave 100 in every area while doing them. You can get to 1-x-50 and manually go to the next area.
Warning: They can be very slow to do before completing c7 (c7 from “normal” challenges, not infinite ones). Why? You can’t buy anything from the p3 of the skull shop.
Path Challenges
Path challenges work in the exact same way no matter which classes challenge you are doing. The only thing that changes is the class you are doing the challenge with, as well as the reward that you get. Your goal is simple: getting to as high 2-x-25 as possible (maybe 3-x-25 too, not possible rn).
How do the rewards from them work?
4 of the path challenges give 1.1x multi per area after 1-9 to the stats described in the “special” section, 2 of them give 1.05x multi. Read the challenge description for more info.
For Example:
If you complete 2-6-25 with smasher:
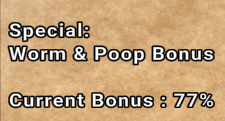
(In this case + 77% is equivalent to multiplying the stats by 1.77. Why 1.77? 1.1 * 1.1 * 1.1 * 1.1 * 1.1 * 1.1 = 1.1^6 = 1.77)
If you complete 2-5-25 with rancher:
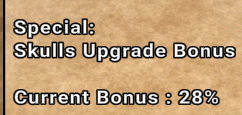
(In this case +28% is equivalent to multiplying the stats by 1.28. Why 1.28? 1.05 * 1.05 * 1.05 * 1.05 * 1.05 = 1.05^5 = 1.28)
Rewards from them are permanent, and global – no matter what class are you using, you’ll be getting multipliers from every path challenge.
When should I try them out?
Right after unlocking them. No overpreparing necessary in this case. Pretty much everyone should be able to get to 2-2-25 in less than 30 minutes. Pretty much no one will get to 2-3-25 on their first time.
How often should I try them out?
Looking at the juicy rewards you should’ve realized how important they are. Updating your highest area on them can give you a pretty big boost. Very active people who progress fast may want to update them every day. Very slow people may want to update them every few days. This depends mostly on your speed of progress, as well as your willingness to spend quite a bit of time.
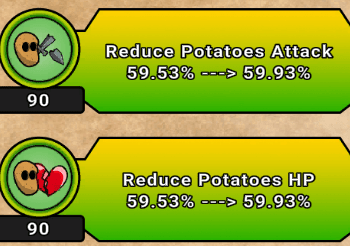
The “reduce potato attack / hp” upgrades from the p3 of skull shop are especially effective on this challenge. You may want to focus a bit more on them no matter what area you are trying to reach.
Basic Strategy
You should put a bit more focus into con nodes (hp ones). No need to hyperfocus, but getting a few more than usual is a good idea. This “strategy” should be fine till 2-5-25. At 2-5-25 you may already notice that enemies melt through your health, and that killing them is quite easy (their attack is much higher than hp).
If you managed to beat 2-5-25 on your previous attempt, and have progressed a bit in the game, it might be worth to look into advanced strategy before trying to tackle 2-6-25.
Advanced Strategy
Spoilers regarding the 3k+ class level talent tree stuff.
This strategy might not be 100% required to do 2-6-25, but implementing a part of it should be still quite useful.
At 2-6-25 and above, infinite challenges turn into rng survival game. Your goal is getting lucky / tanky enough to kill off 15 waves of enemies. Why 15? At this point you are most likely well past c7 completion, so enemies on the screen are capped. So there should be 50 enemies at the same time on the screen. That’s 10 waves done, even before you touch a single enemy.
Why lucky / tanky? The discrepancy between enemy attack / hp is massive. You should be able to one shot enemies, but they will be able to deal massive damage to you. So you need to hyperfocus hp.
How much do you need to hyperfocus it? No matter what class you are playing with, make a speedrun towards the hoer 3k+ special tree and grab as many hp upgrades from there as possible.
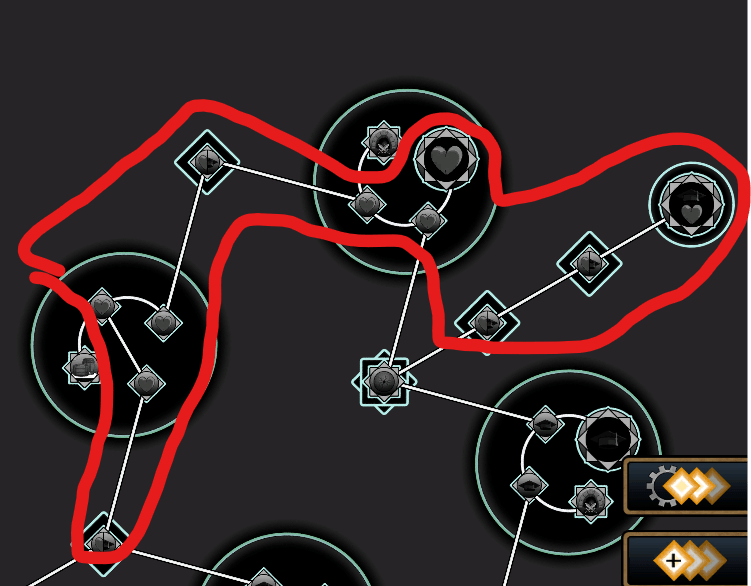
You’ll most likely pick up enough damage related nodes on your way. Guys doing 2-8-25 try to get every single hp node from the talent tree. Yes, you heard this right: every single node. Have fun!
If you are wondering why this is the case, I’ve got you covered. The reason is quite simple in fact. The challenge description is lying. According to the description, the enemy hp and att should be raised to the power of 2. What’s the reality? HP^1.63, ATT^1.93 (or sth like that, I don’t remember the exact values). While we should be happy, since path challenges are in fact easier than they should be according to the challenge description, the massive difference in exponents causes them to feel unbalanced.


Be the first to comment