
It’s often not immediately obvious how to place your buildings correctly to achieve desired maximum output. In this guide I’ll introduce you to basic mechanic of the resource nodes, and efficiency nodes in New Cycle.
Contents
Guide to Basics
Сrеdit gоеs to Cypeq!
Resource Nodes – Water | Stone | Lumber | Iron | Food
Placing wells well
You want to maximise your annual water output by placing as many wells as possible as soon as you have stable stone and wood output.
Wells can be easily placed all around the map and will work for you at no cost.
Even without road connection they provide good 70% of their ideal output.
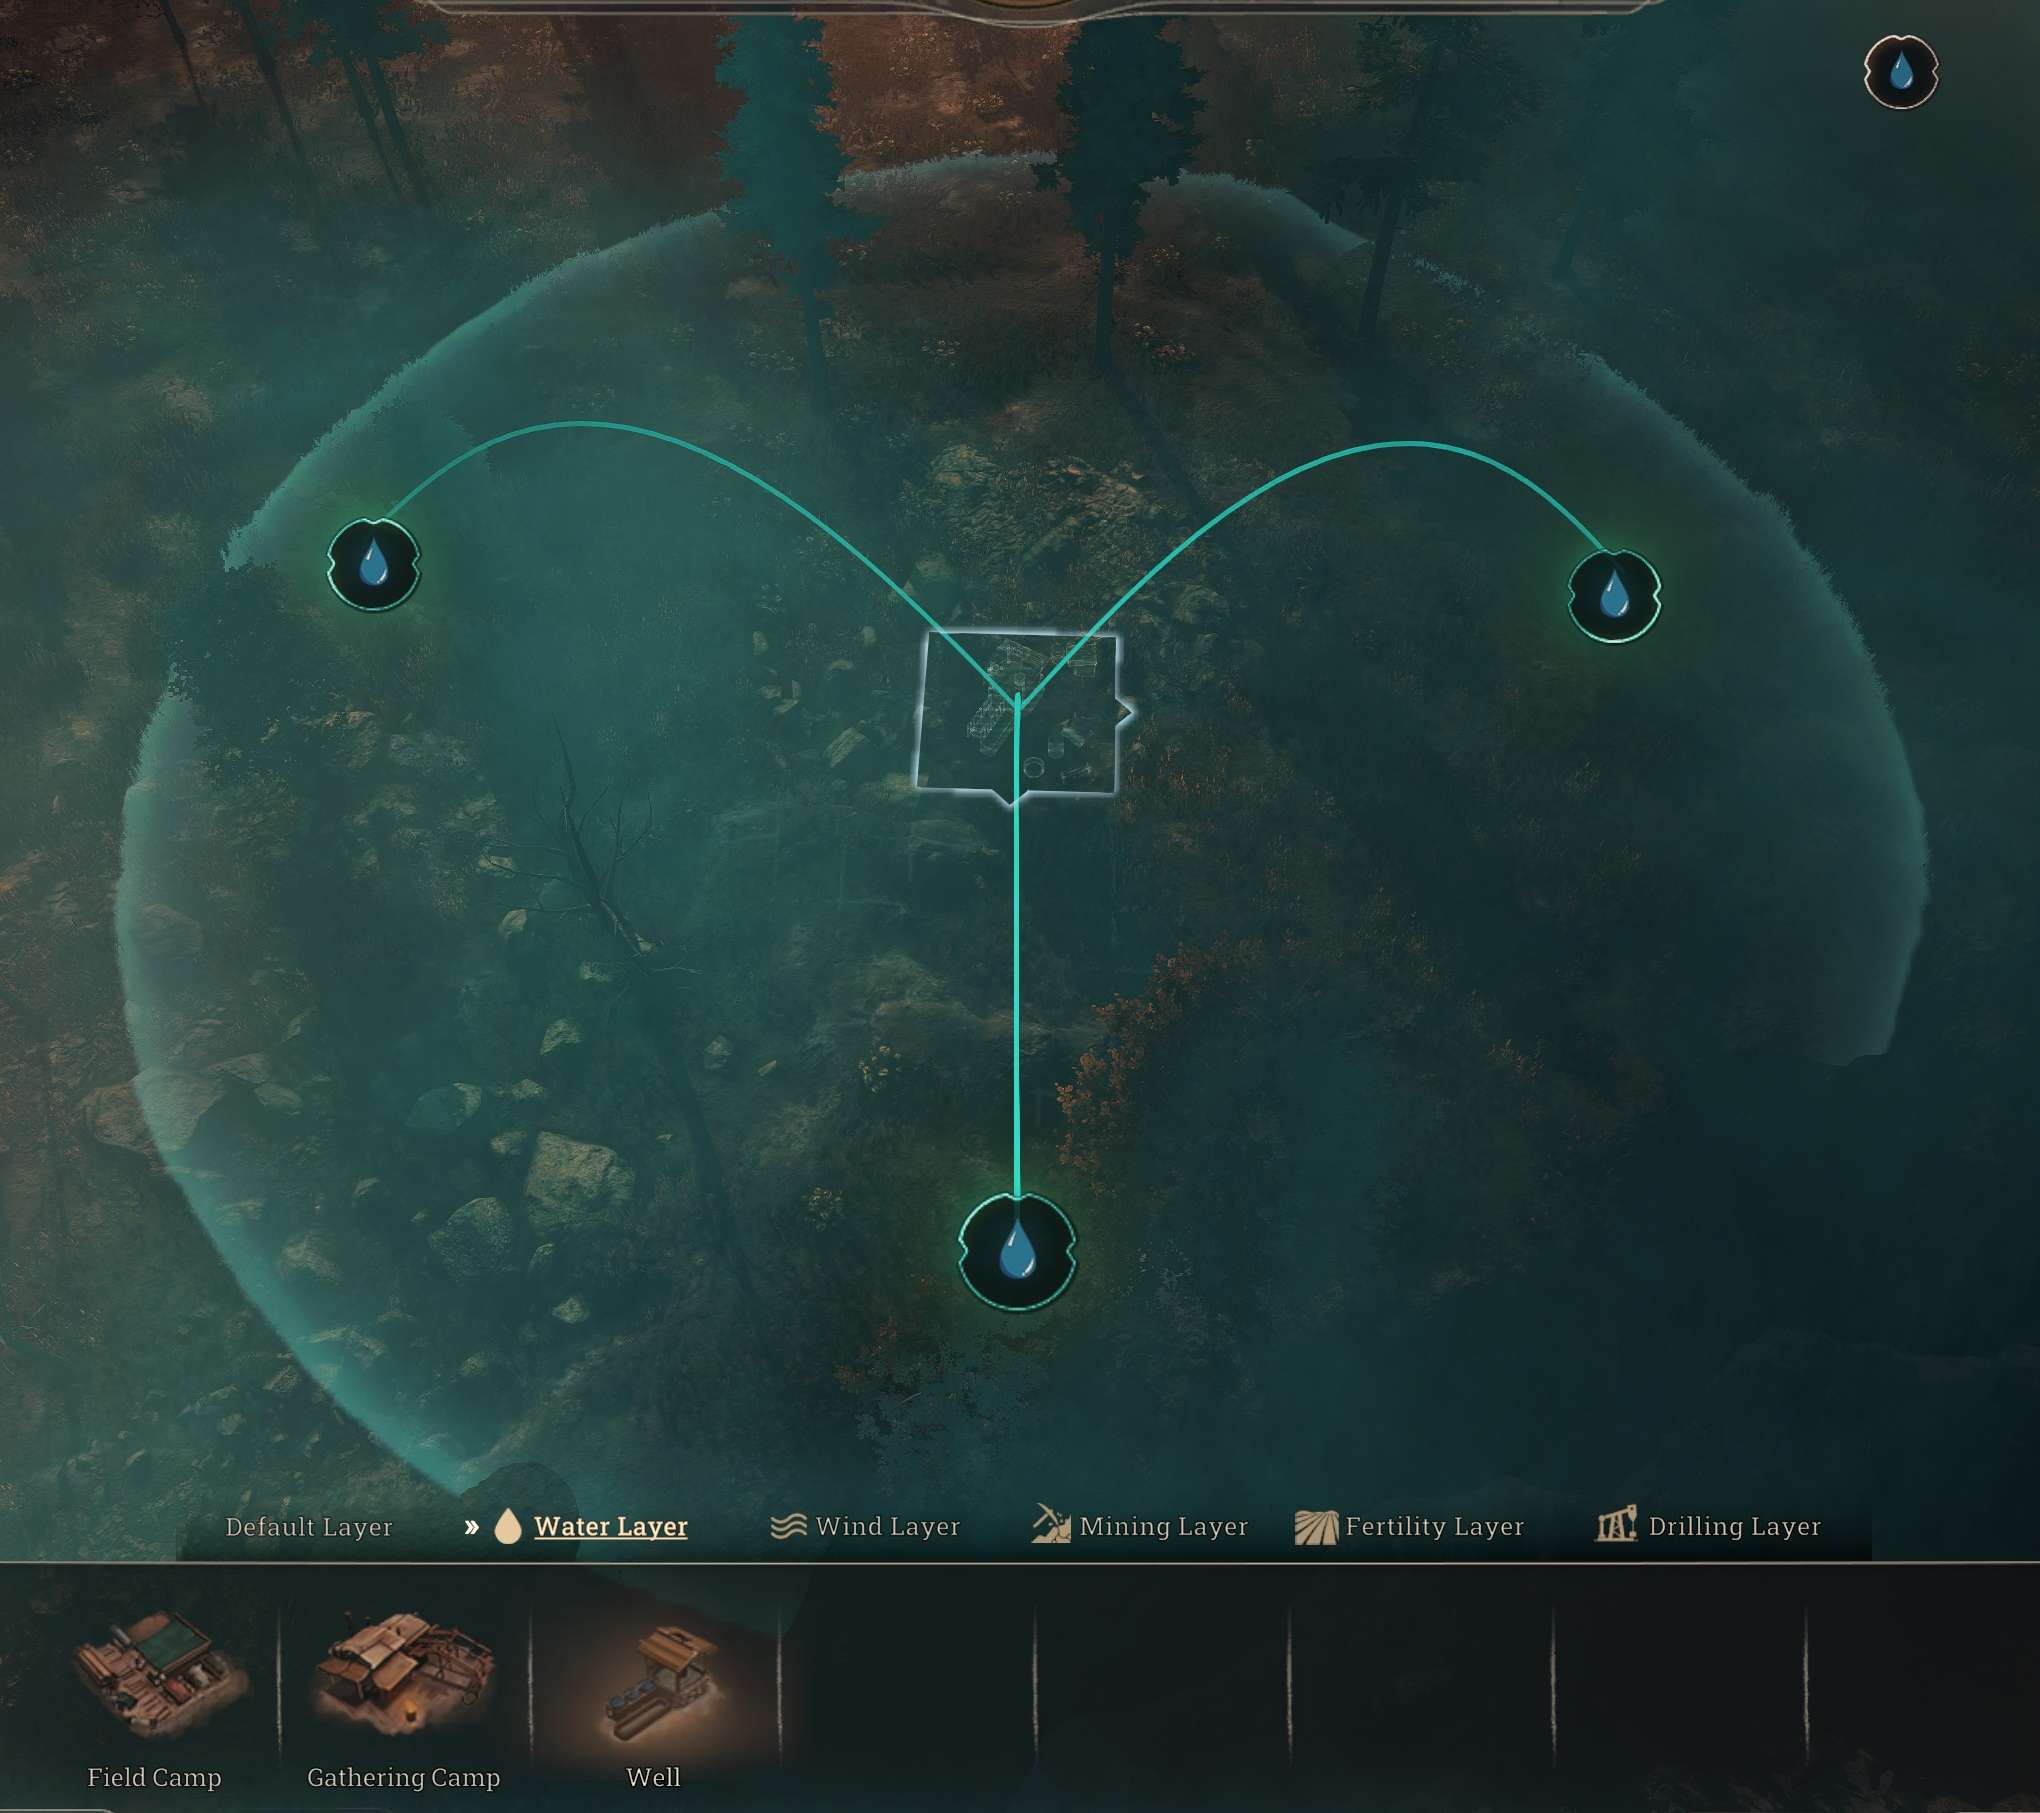
This is how they should be placed, claiming only one water resource node at time.
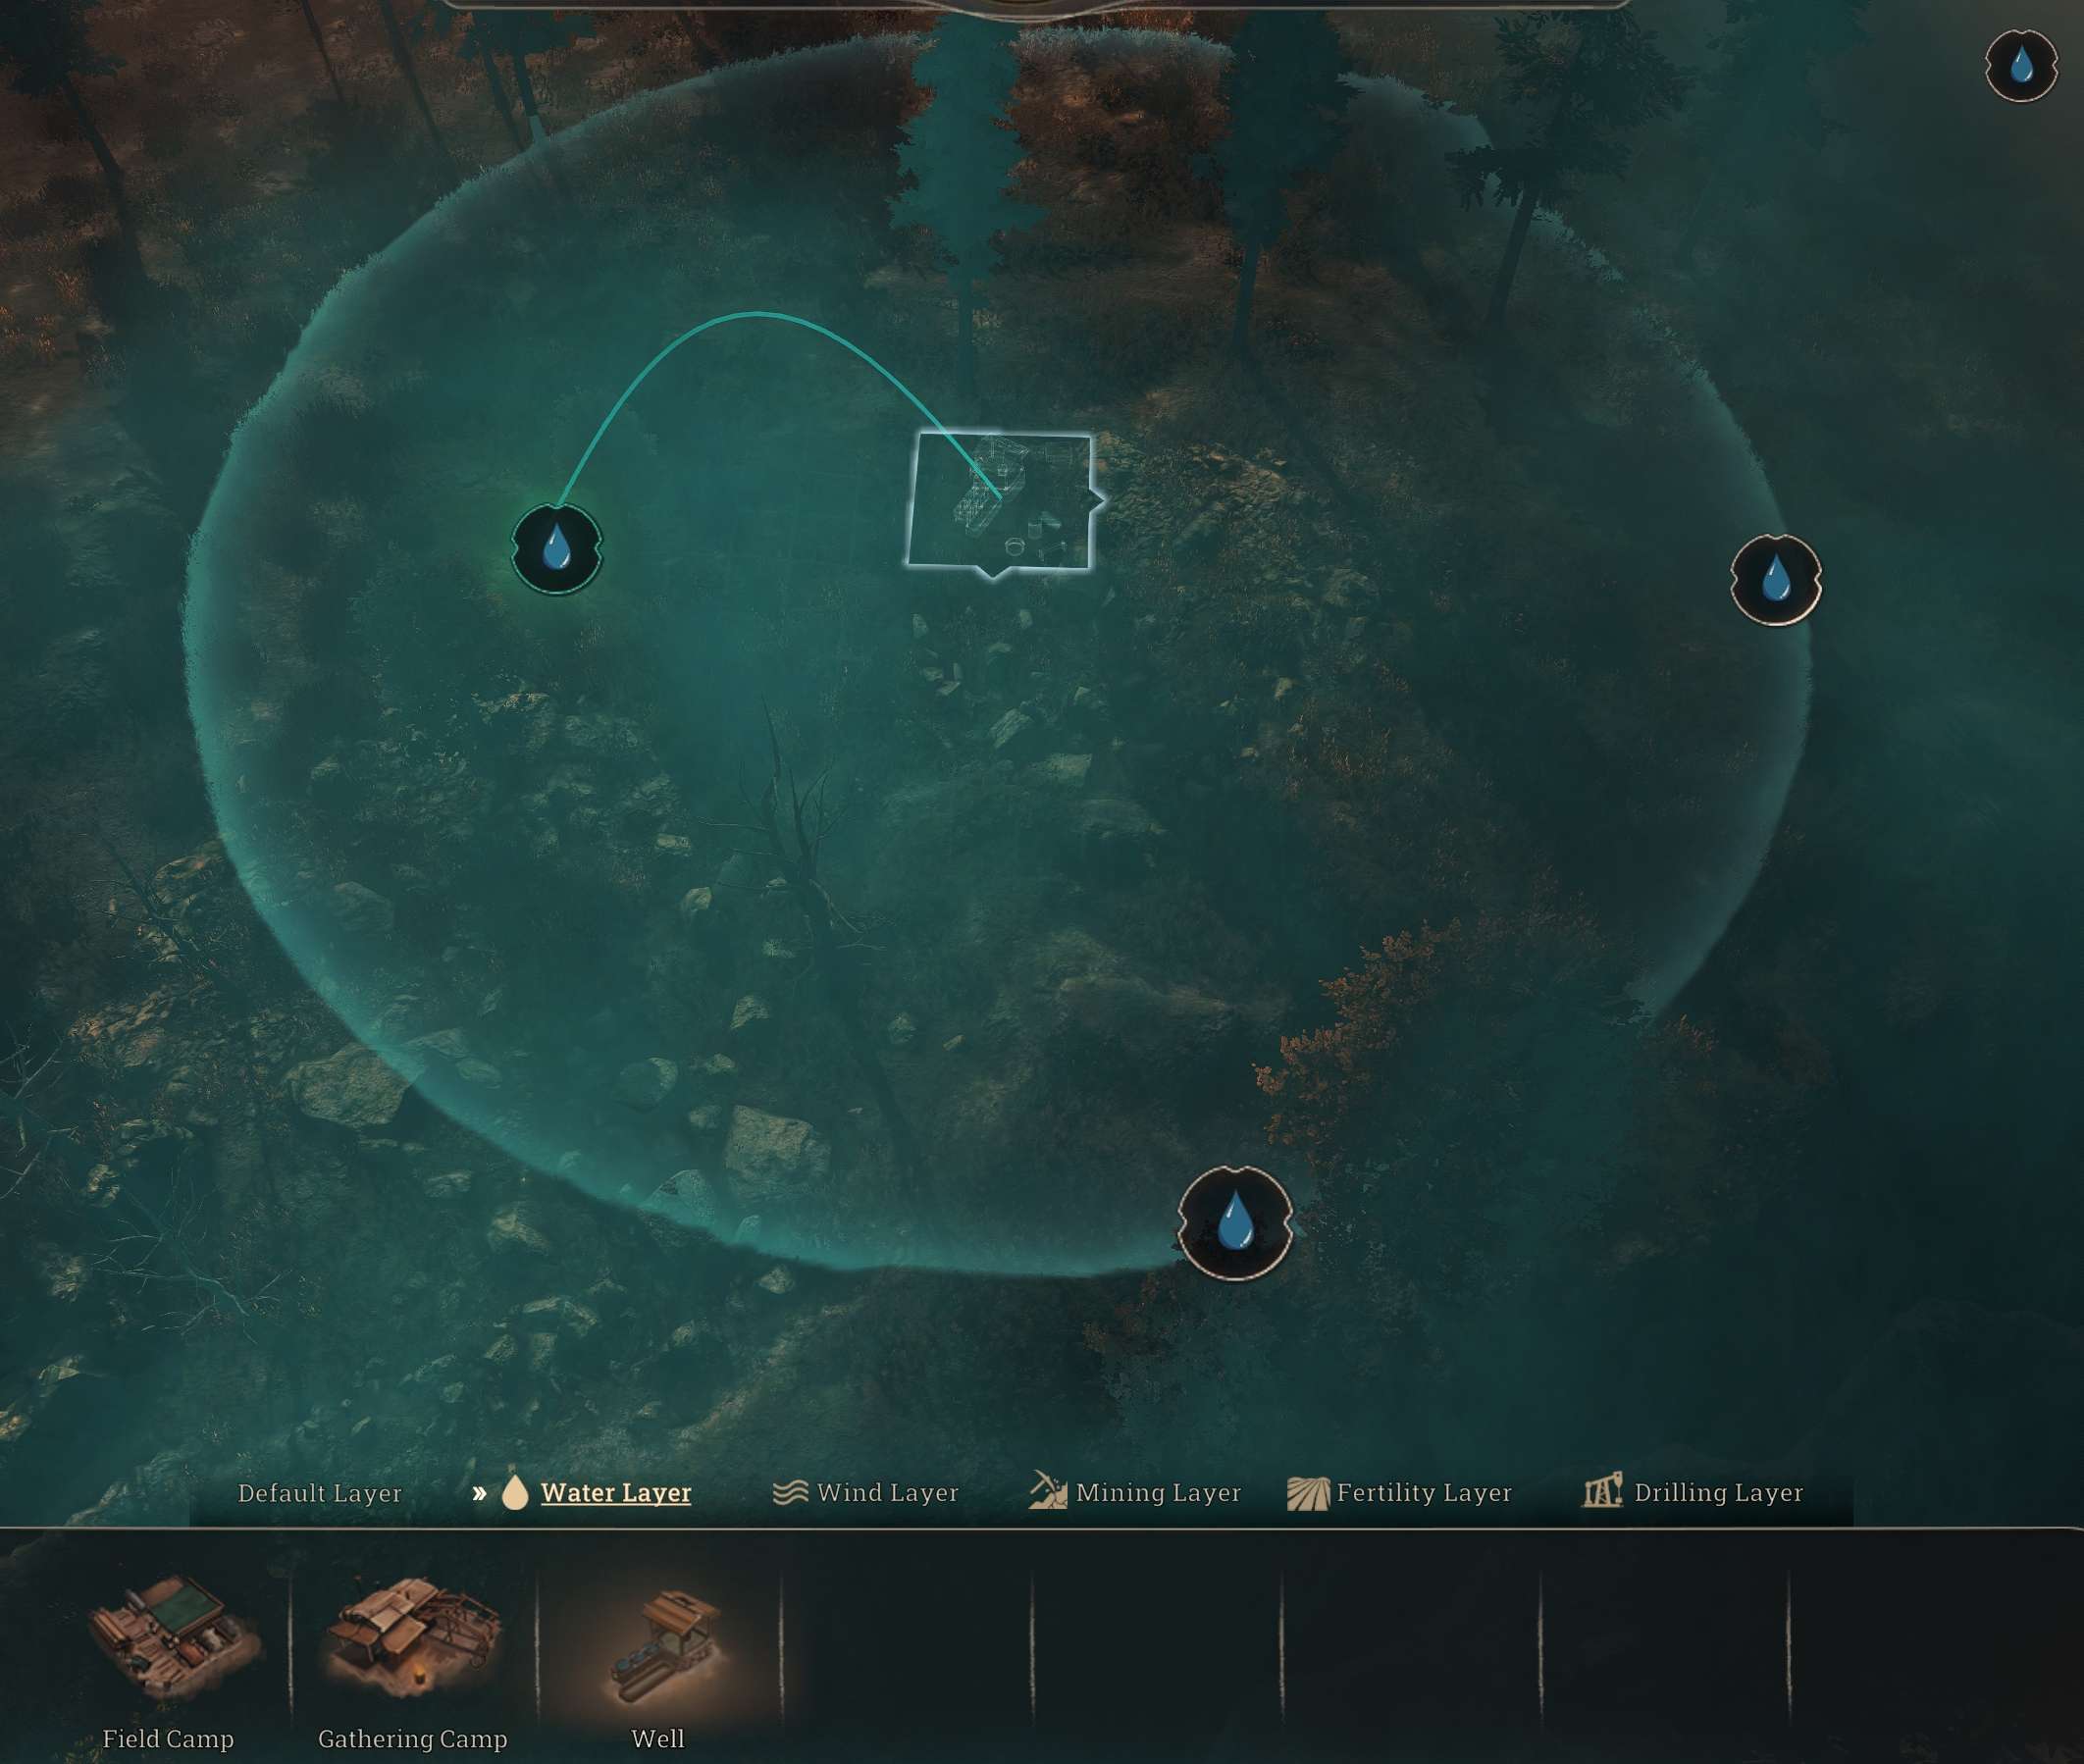
It’s a good idea to do this because wells work one node at time, and in average in-game year they can drain around one node only. Which will replenish next spring.
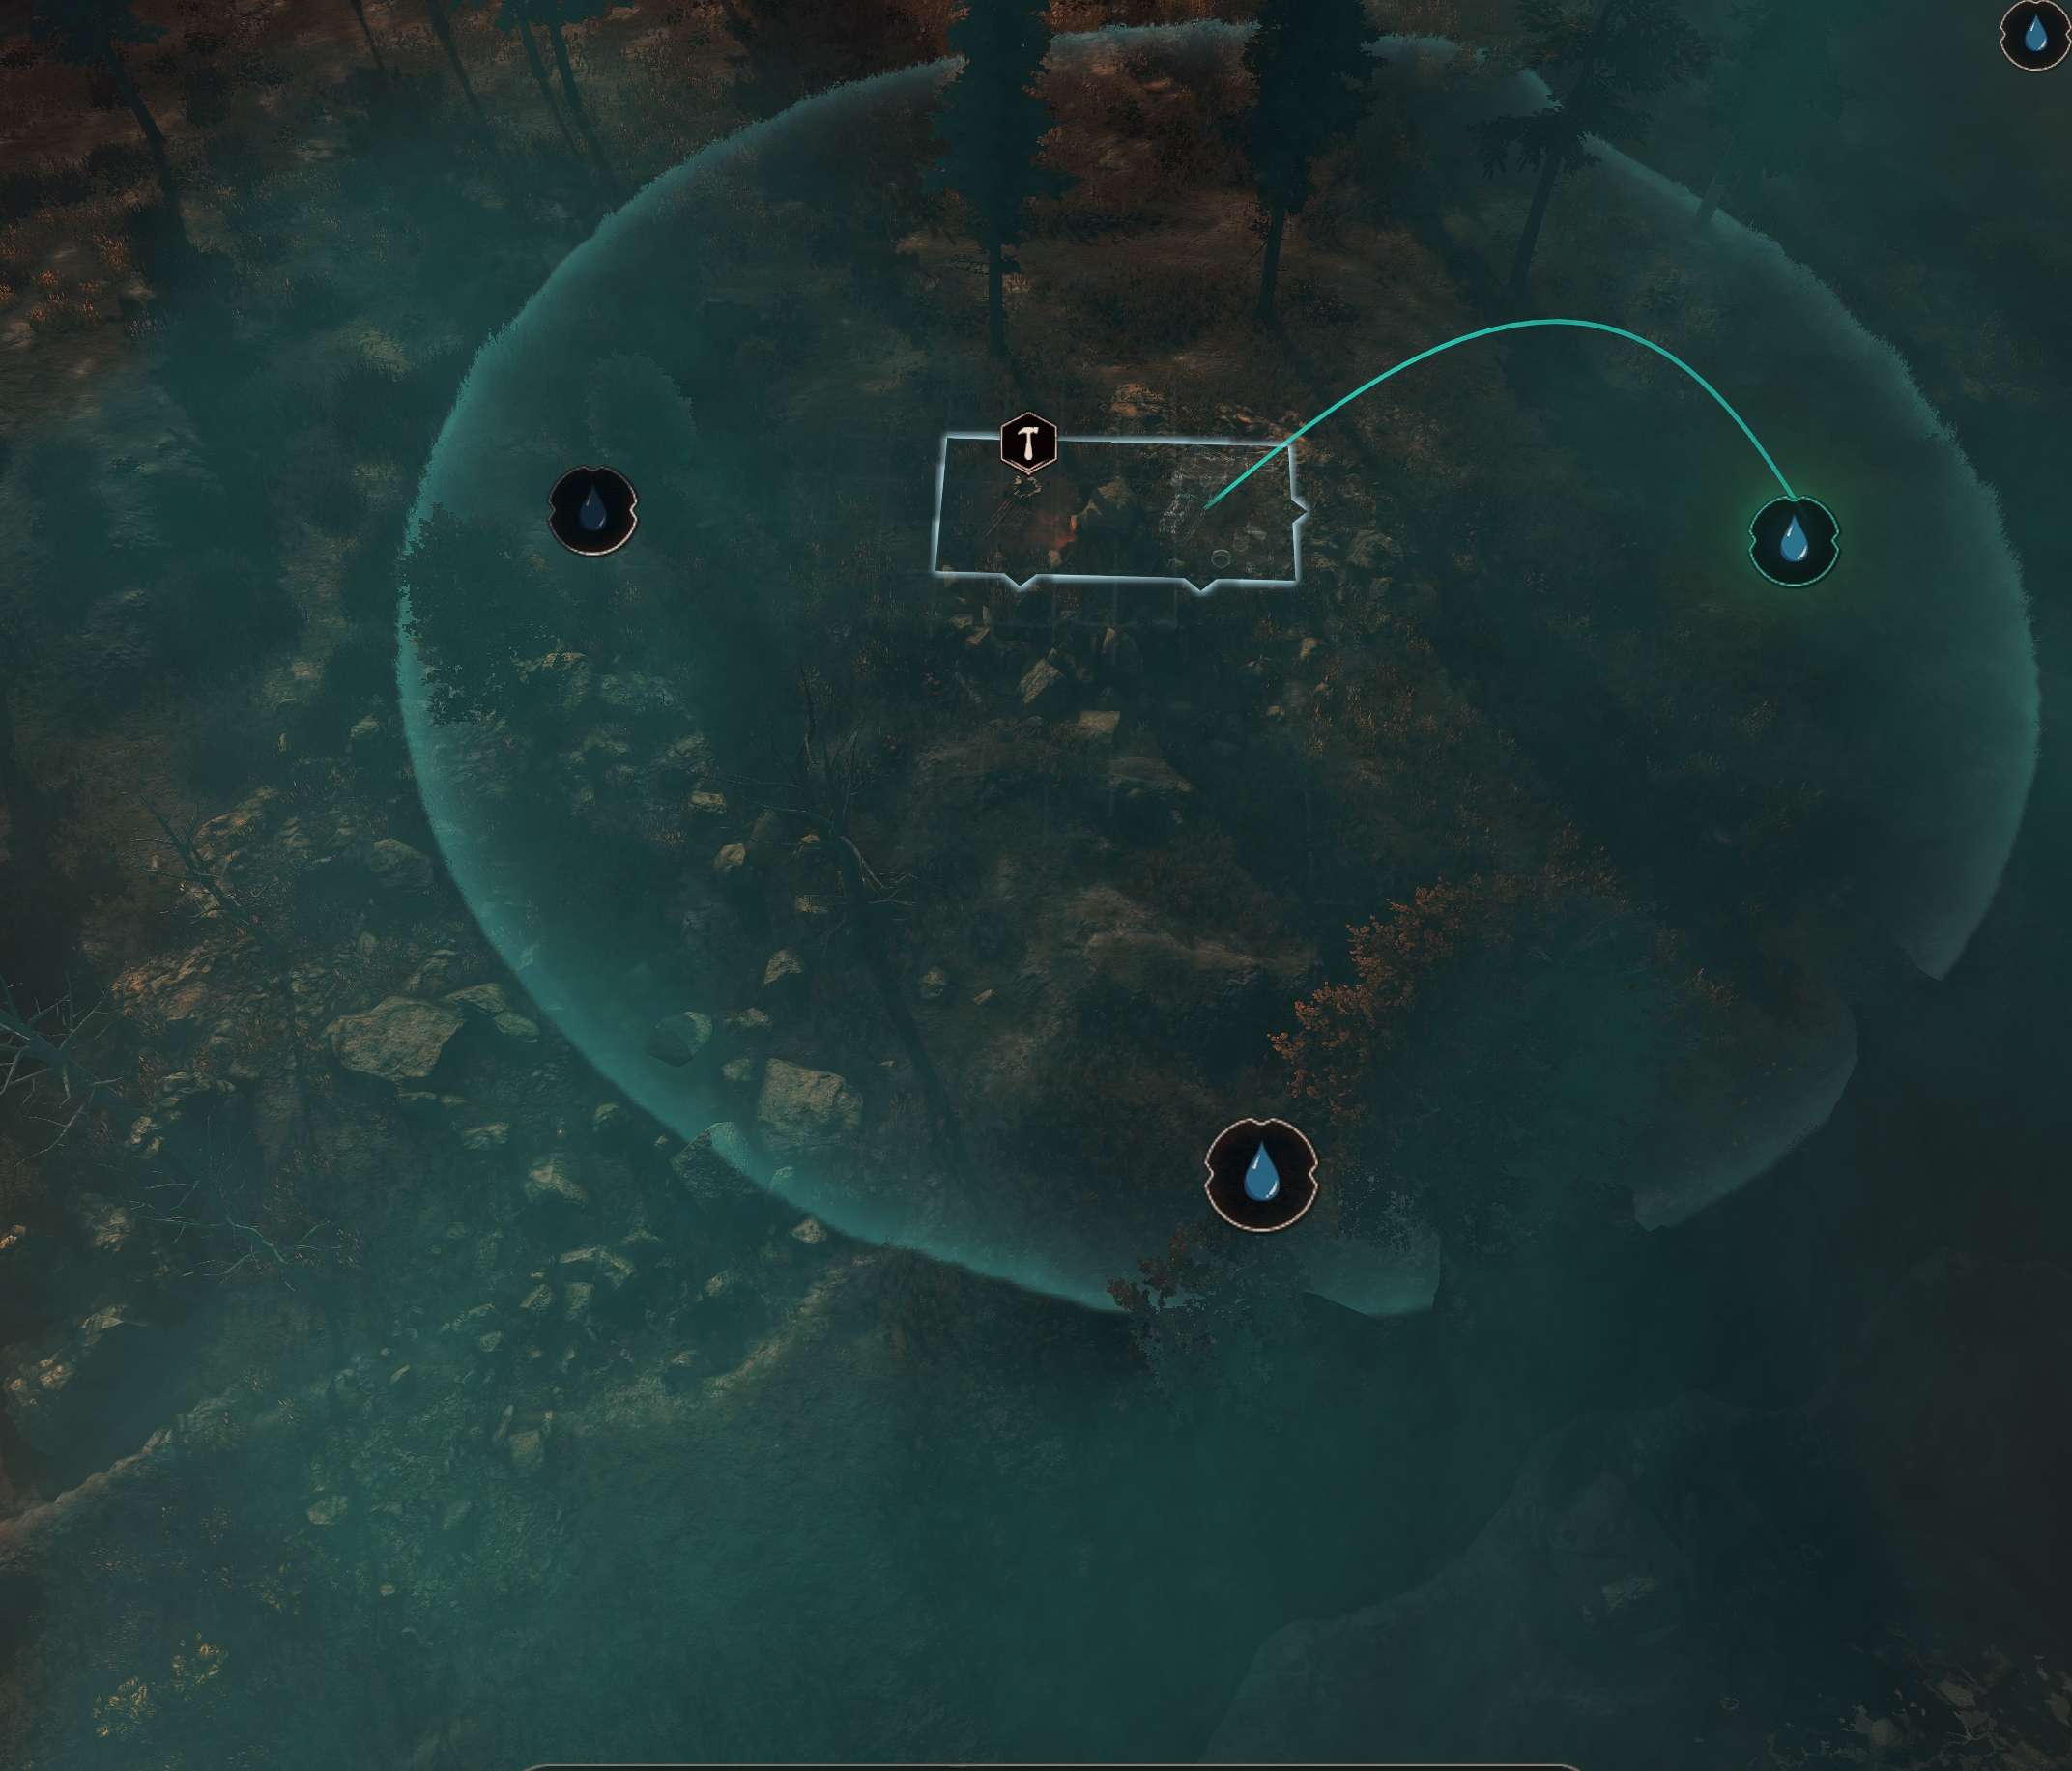
This is a BAD example of what you might be tempted to do building out wells for the first time. This well will claim for itself all 3 nodes, no other well can access them and you’re never fully use them up unless you’re on high difficulty and there’s draught.
Do NOT do this
Final note on the water production, down the line you can scout locations on the world map and build wells in discovered zones, those are good infinite and steady source of water as well.
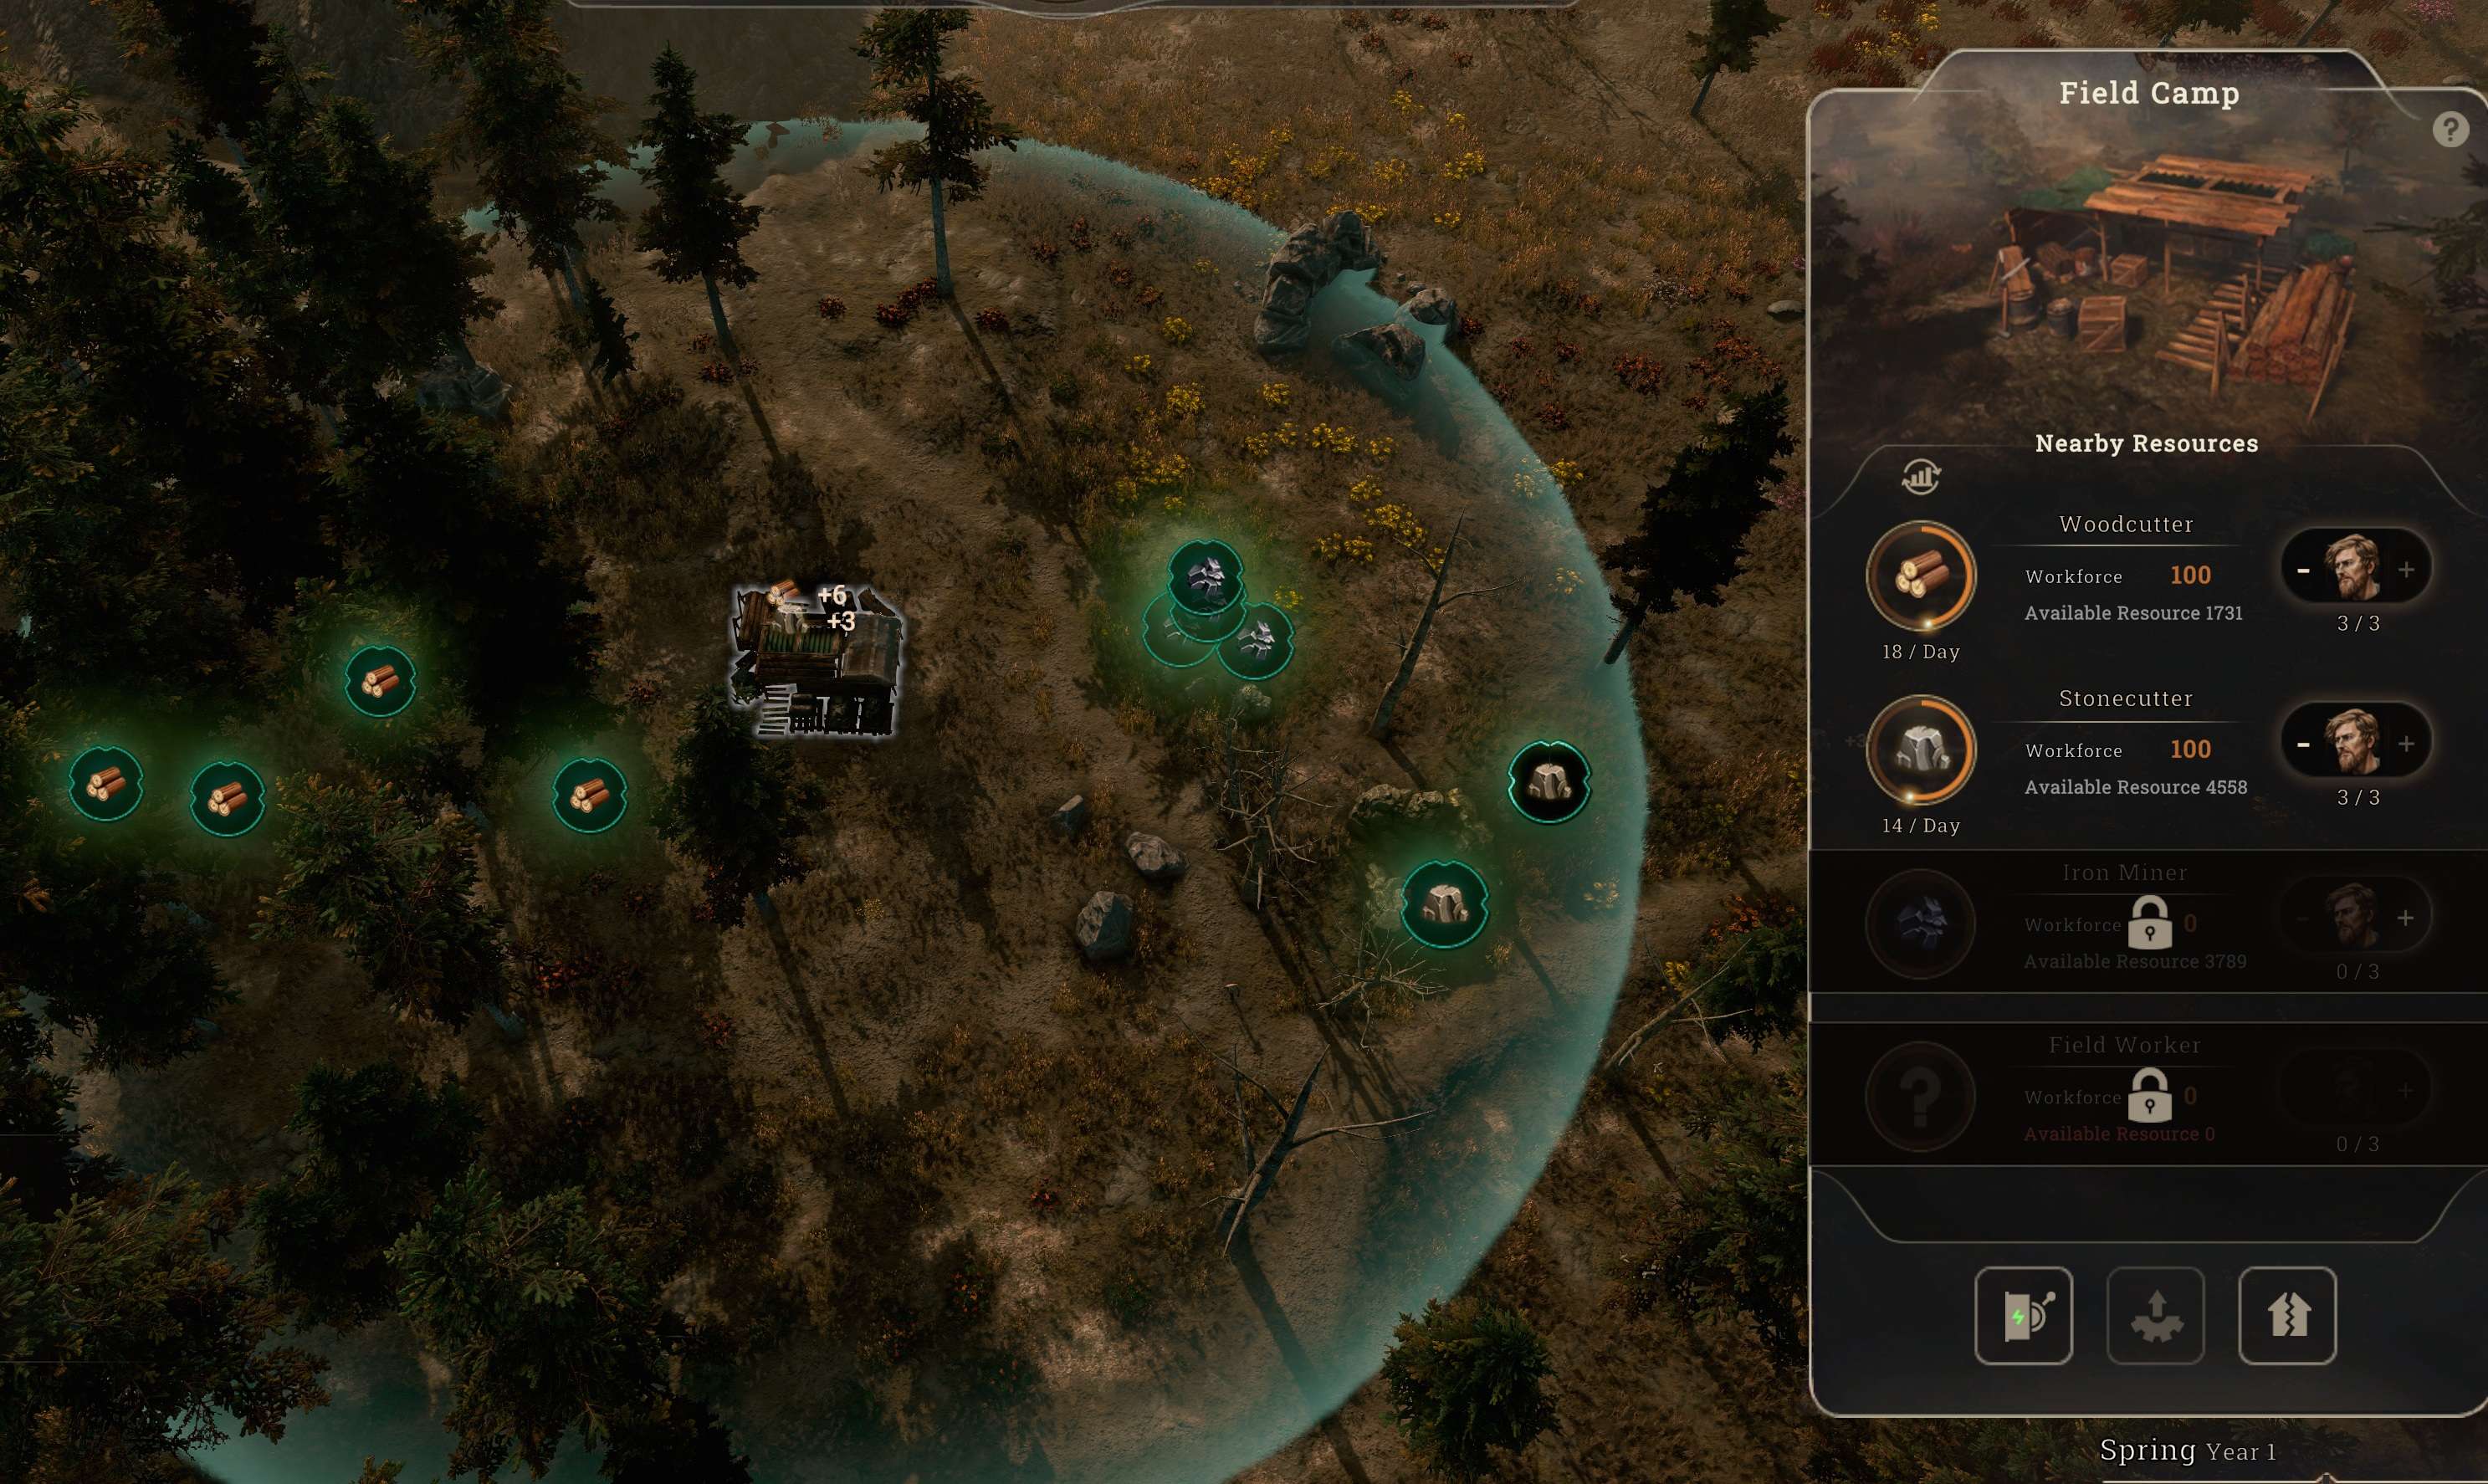
Materials and Food
Starting with food nodes (meat, fish and mushrooms) they work in the same way, but typically you are not so strained on available resource or demand for it and every building consumes workforce.
Its a good idea to ease management by having more than one node available, in case single one runs out, your workforce would be left idle for the rest of the year.
With industrial resources (lumber, iron, stone) it’s a good idea to browse map carefully and find ideal spots where all three are available. It will ease your management.
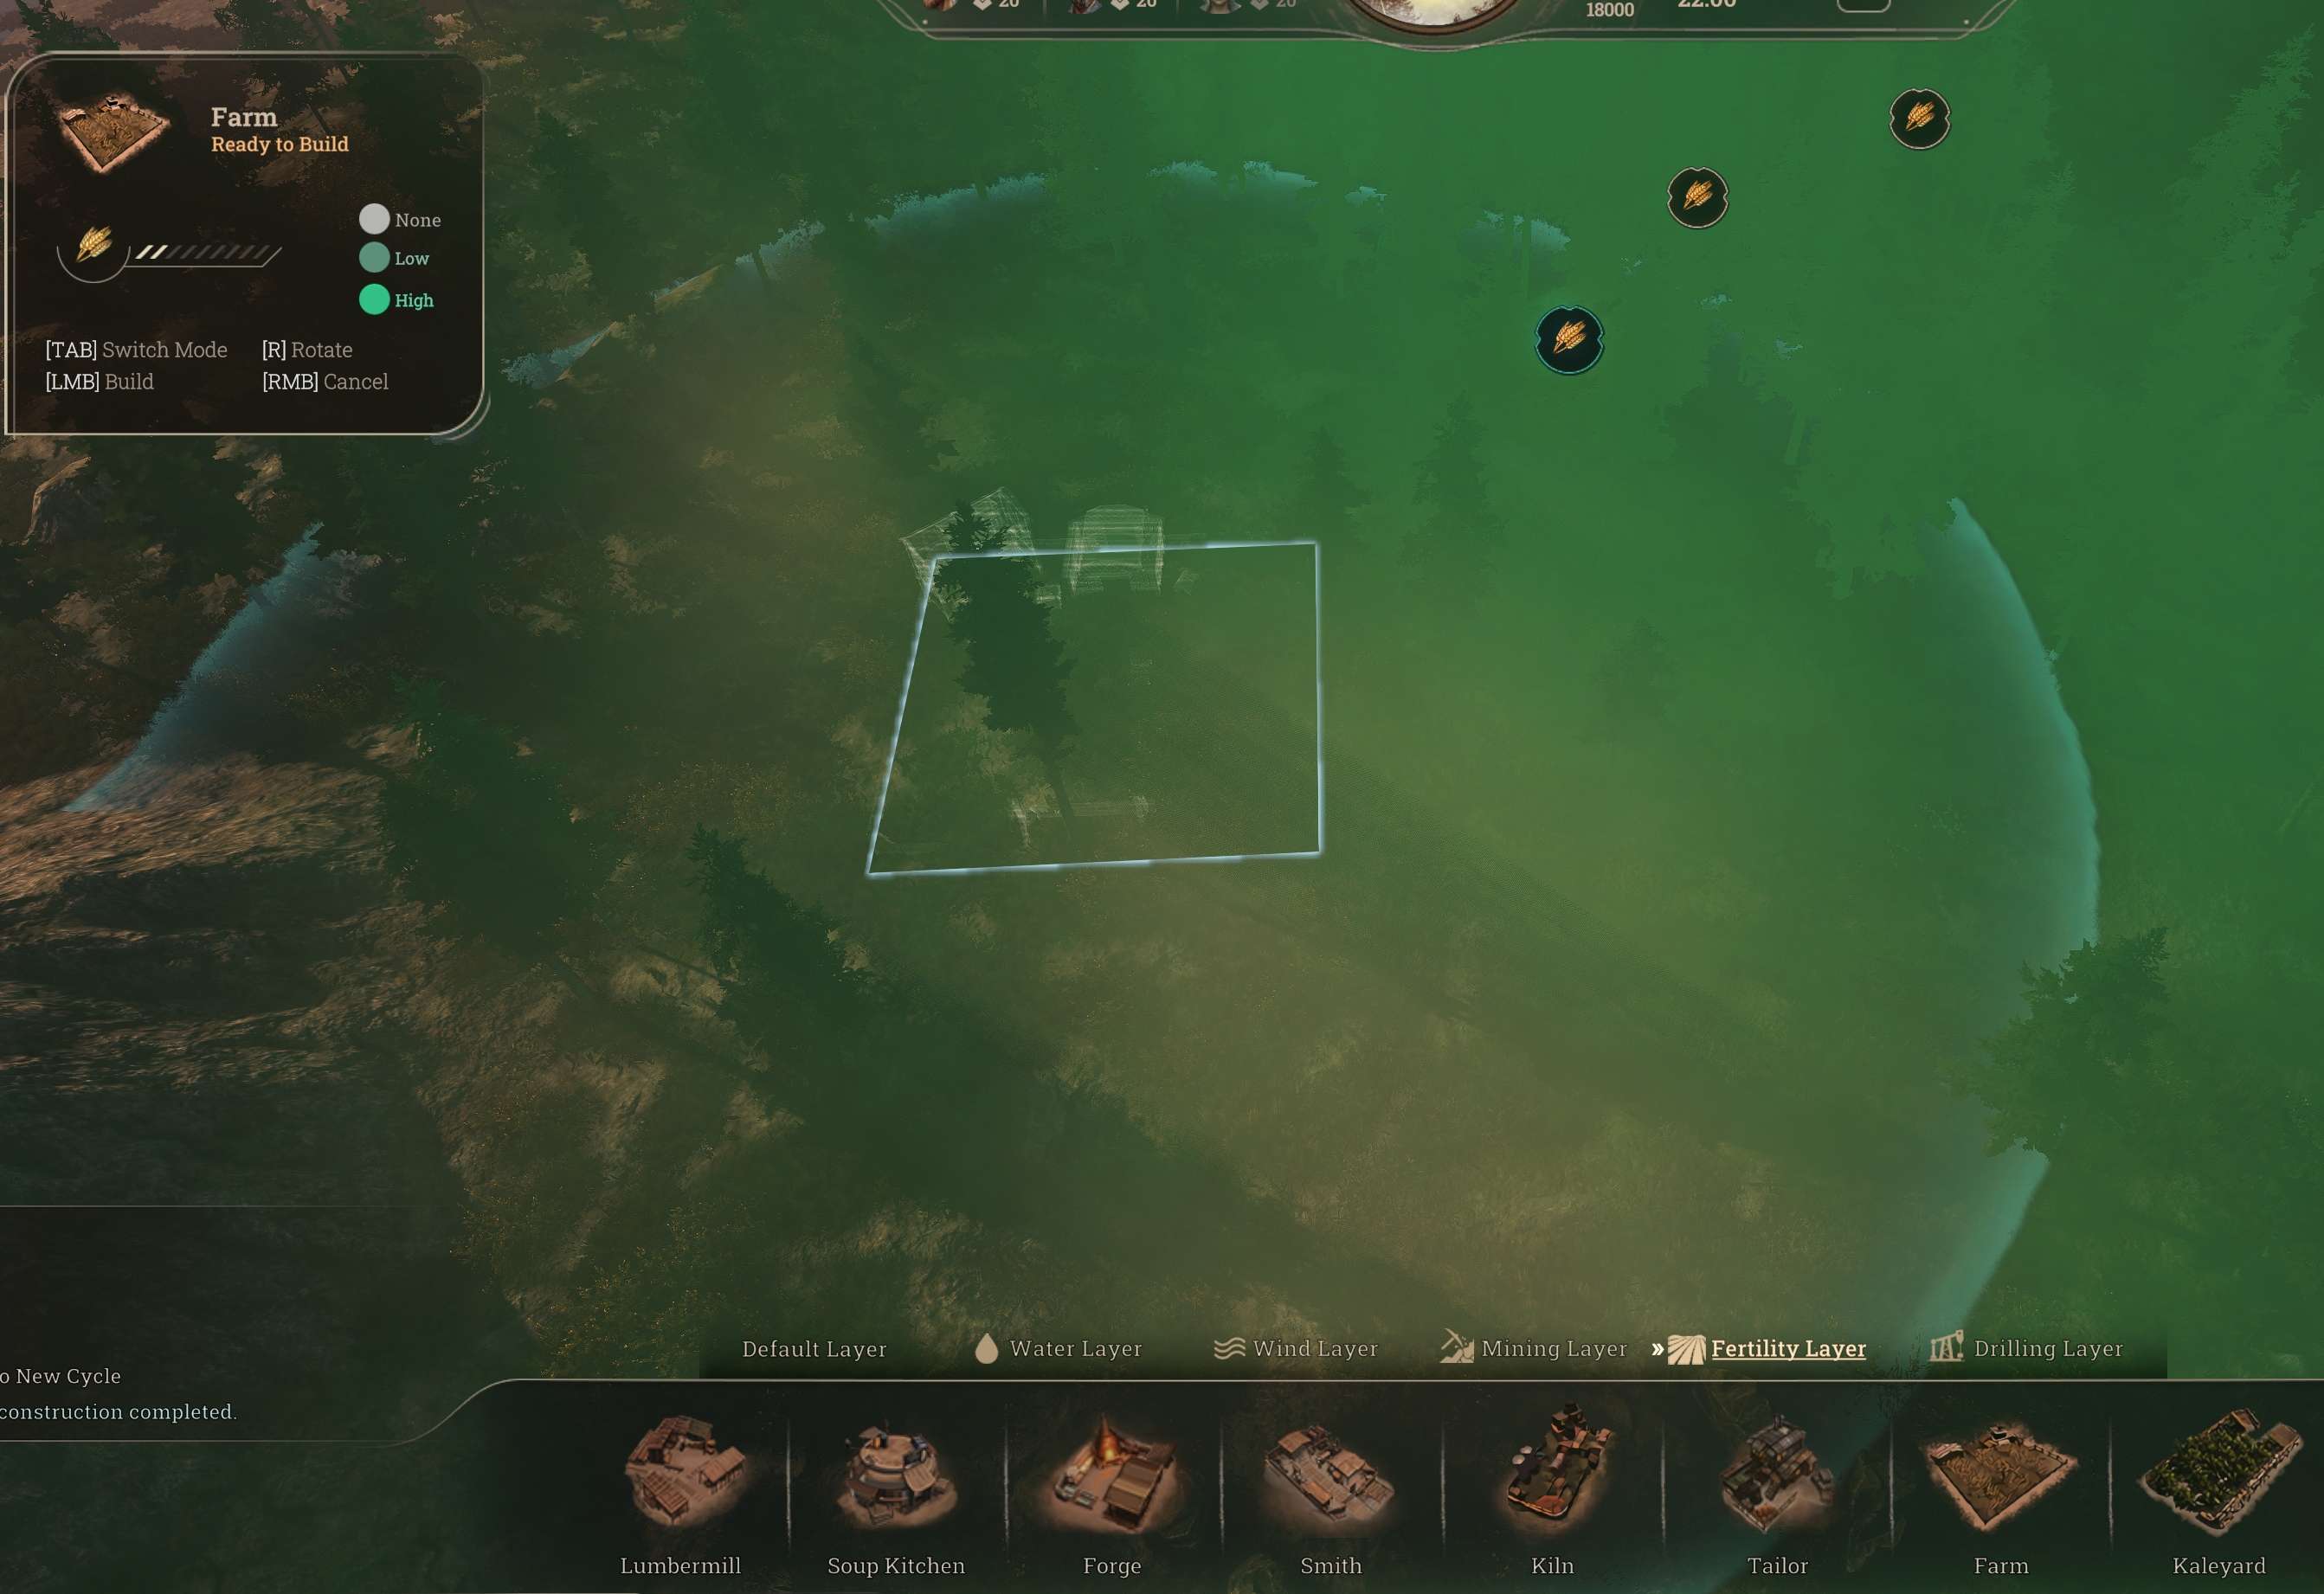
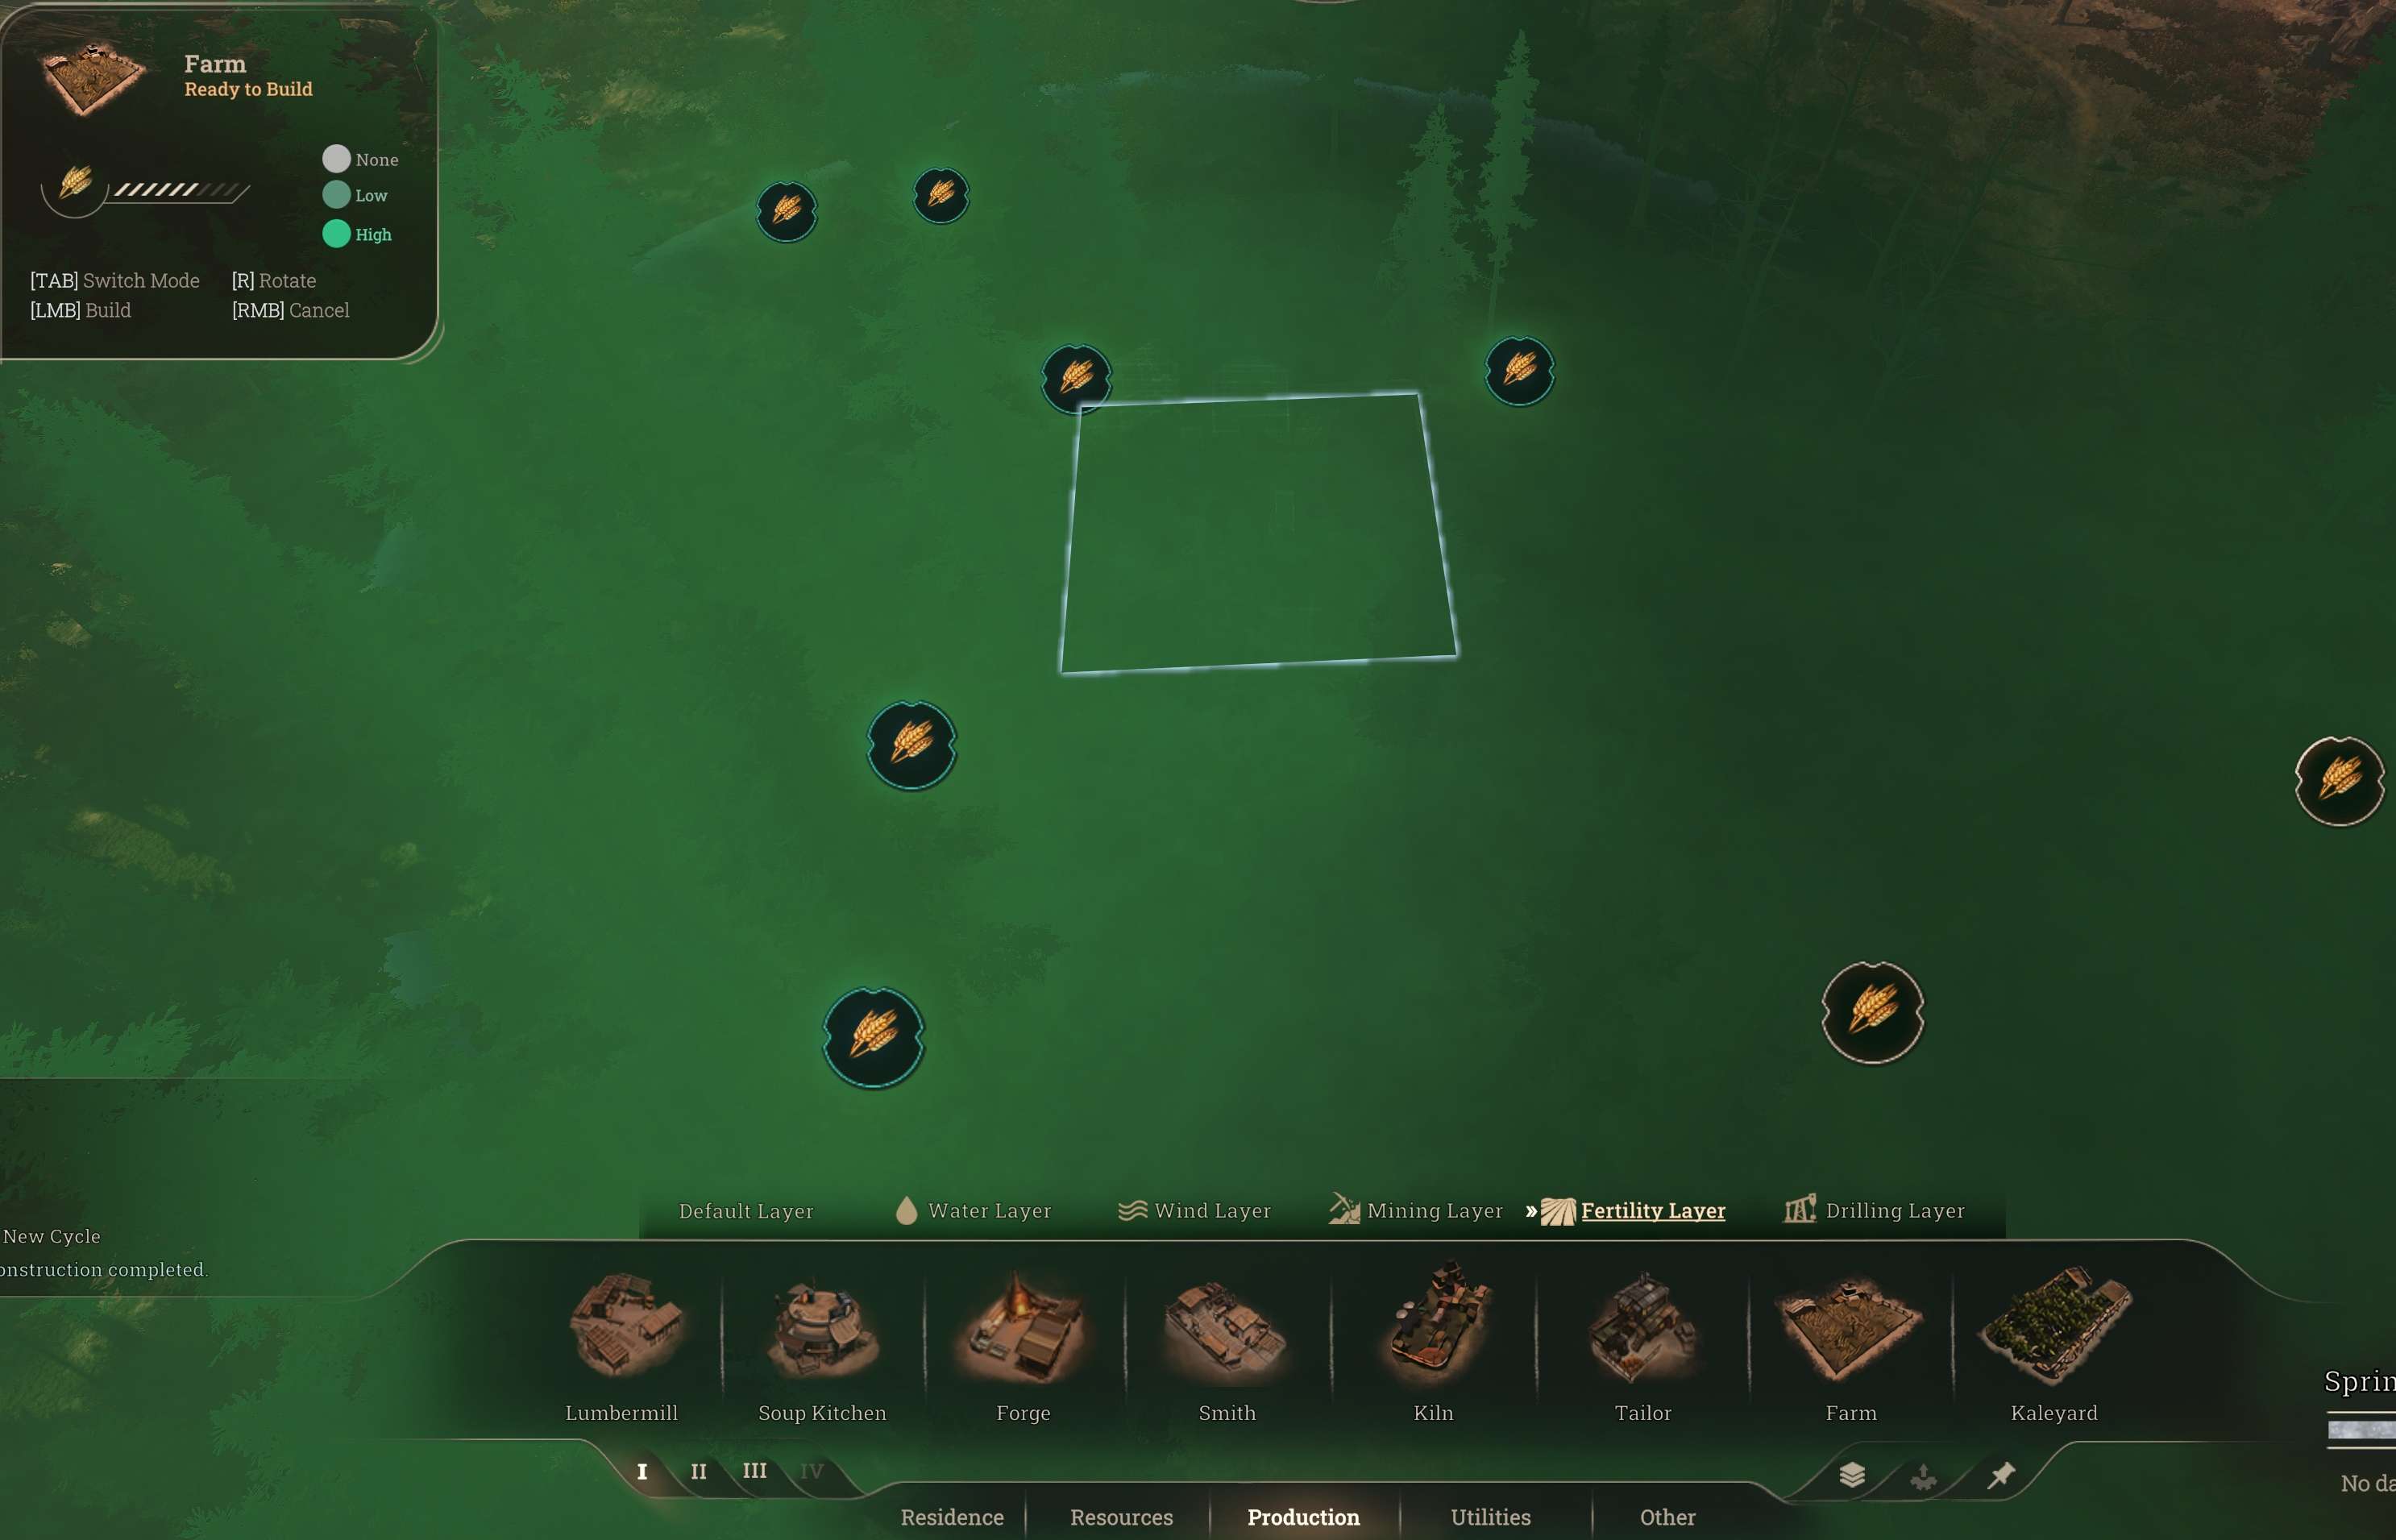
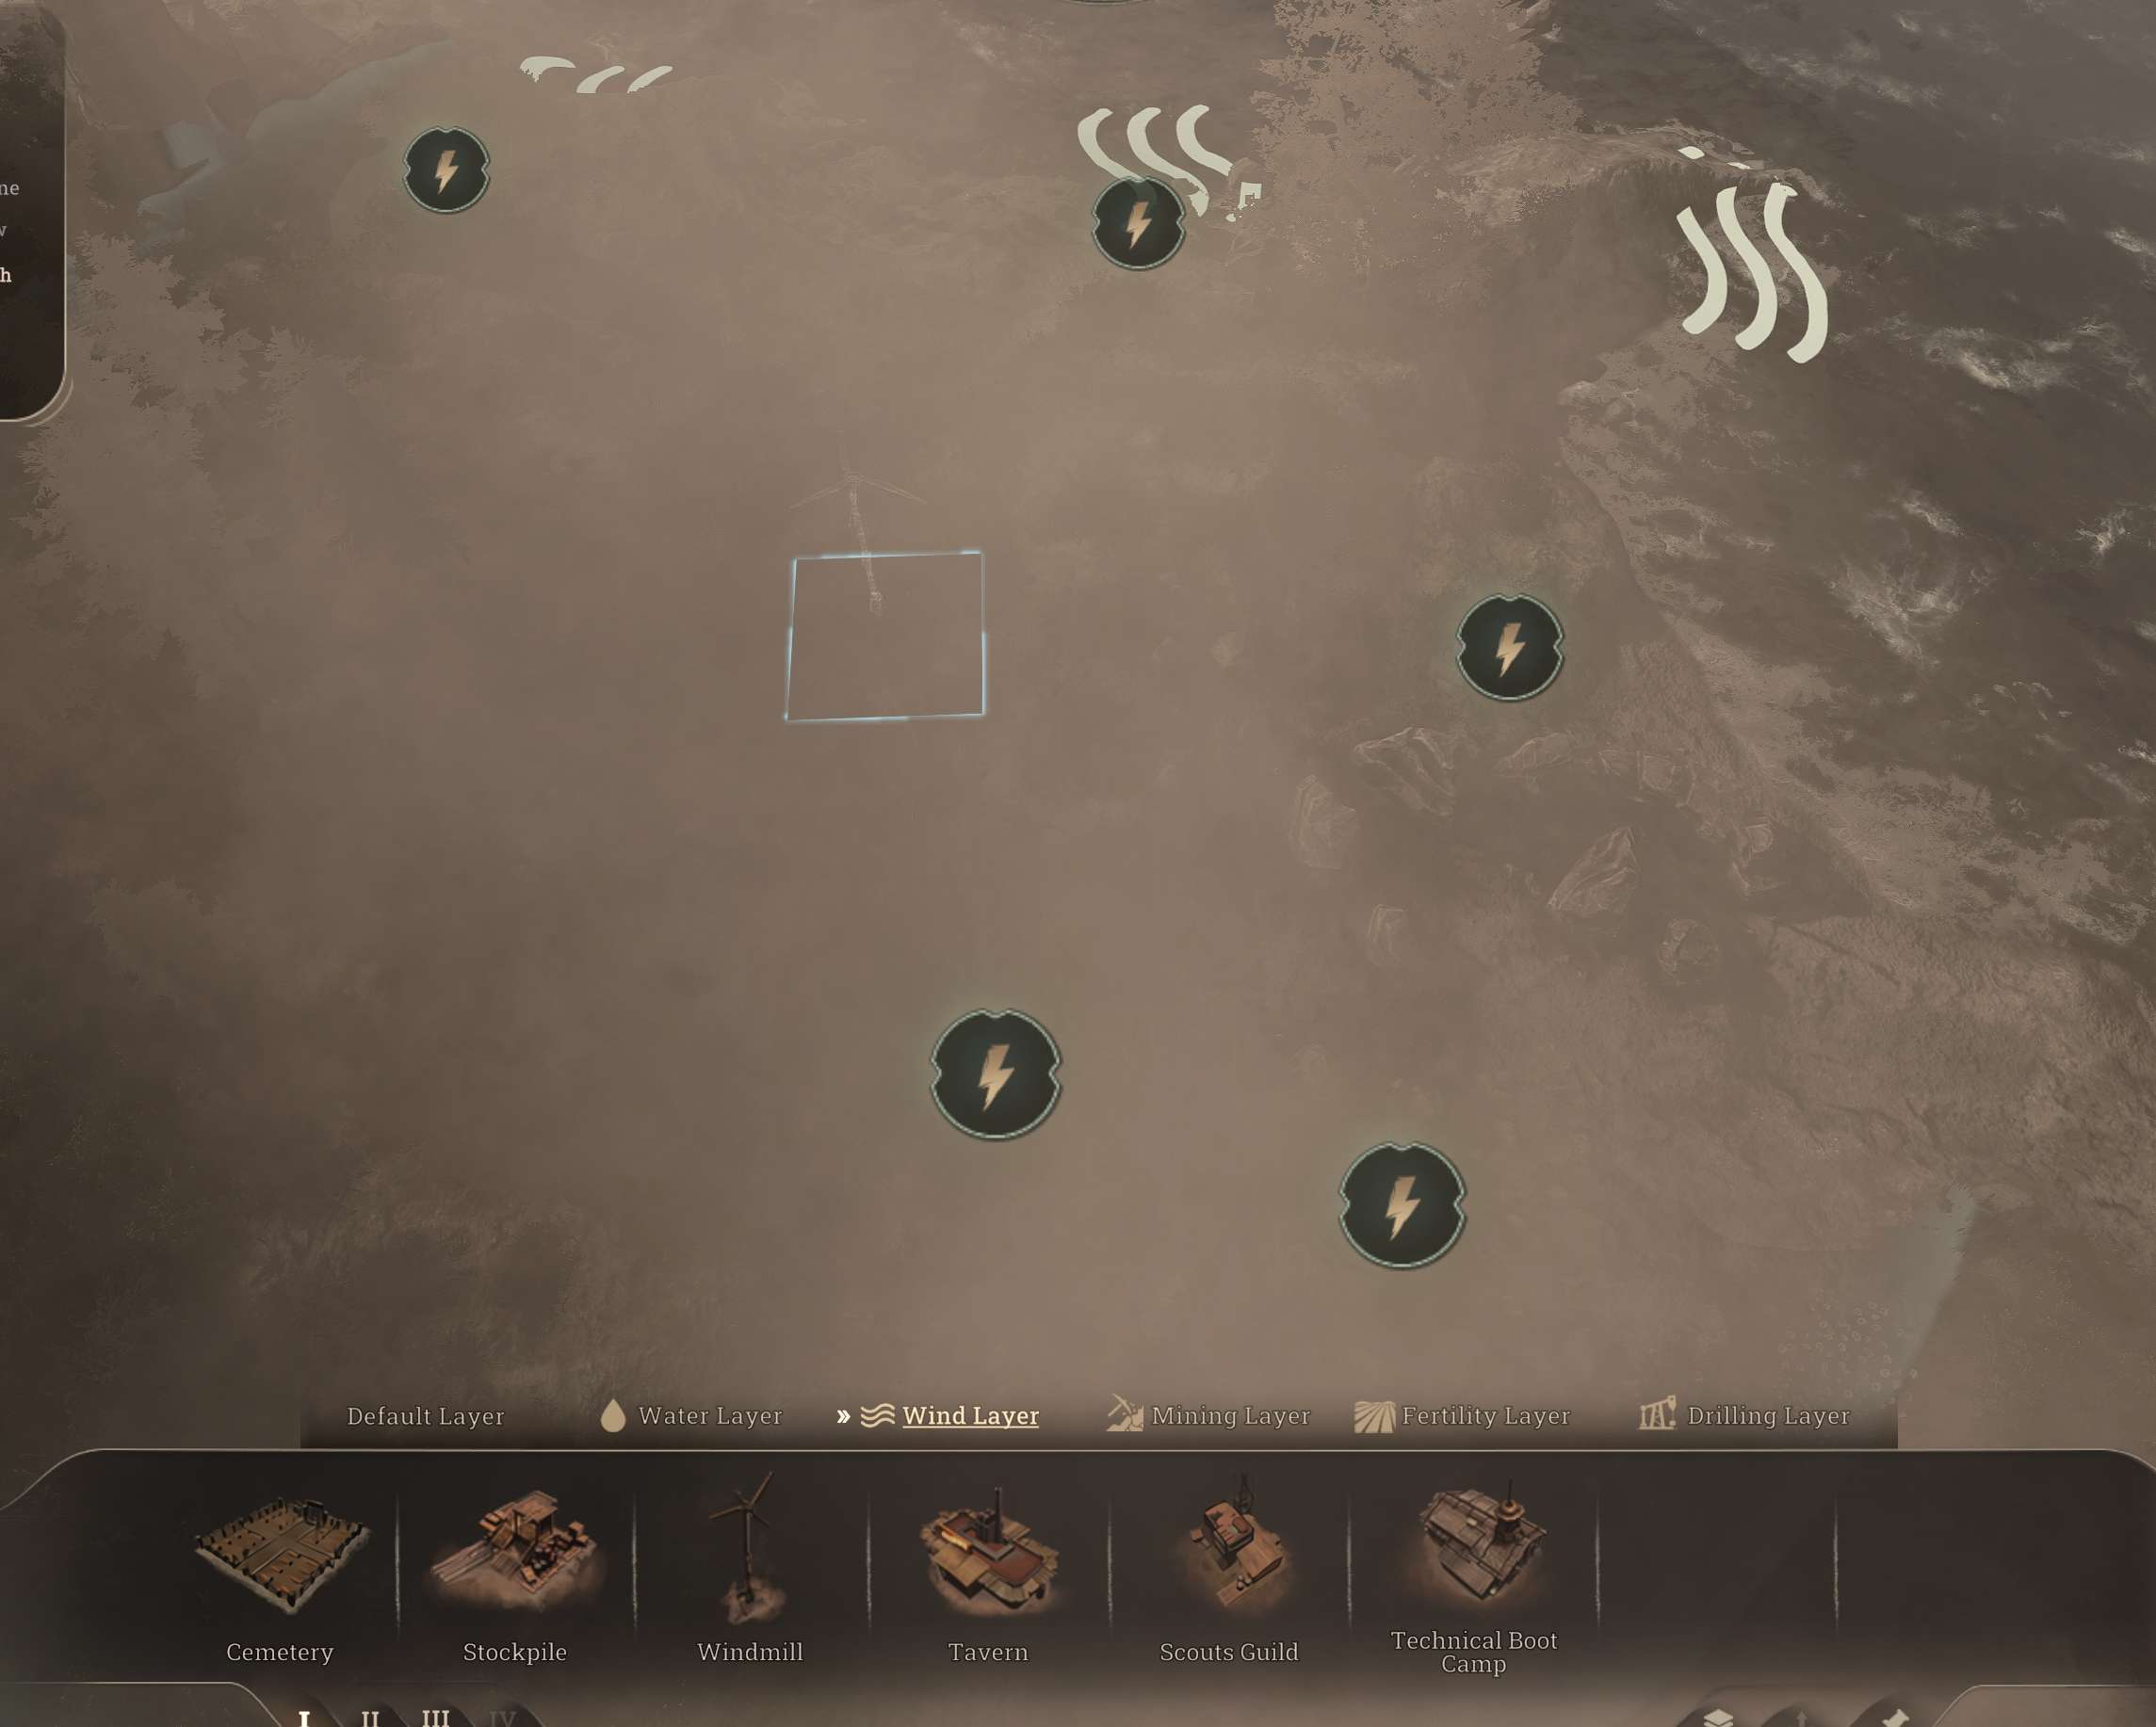
Efficiency Nodes – Power | Crops | Oil
Efficiency nodes for resources like power, crops, will provide you not with resource directly but efficiency for a building in the node range.
In this case you want to place your buildings gathering as many nodes in it’s effective range as possible.
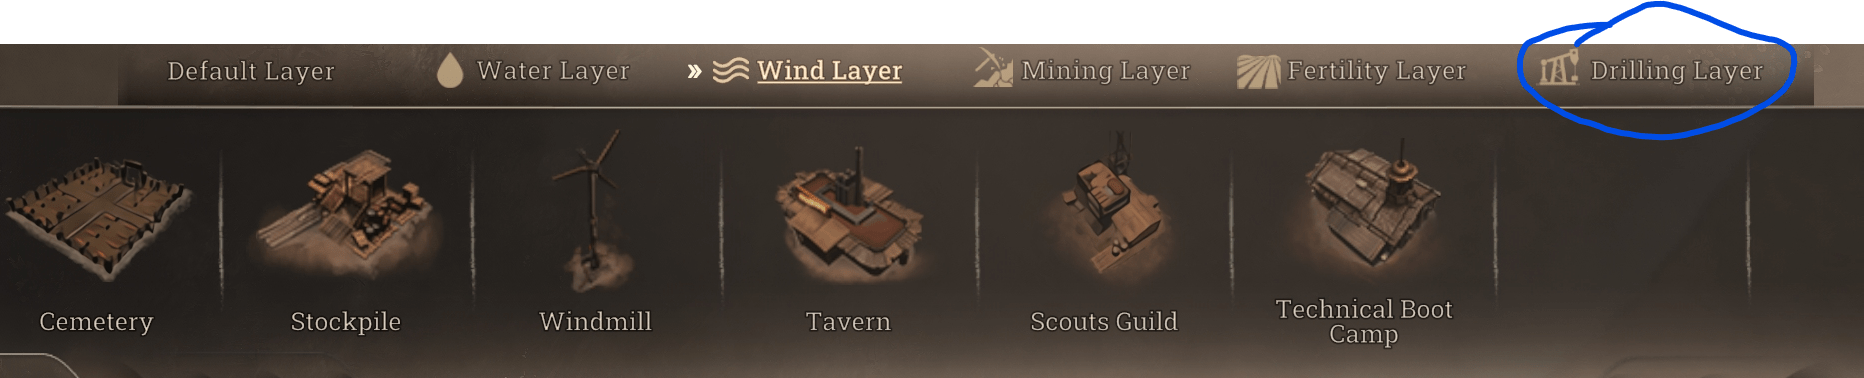
Staring off from the end. You want to be mindful of the oil fields, open up your build menu and navigate to Drilling Layer.
Oil is an endgame resource you want to find it on your map early for one reason.
You don’t want to build over it by accident. This applies to other two as well but there’s more of them on the map, and you’re less likely to end up in such situation.
Here you can see low efficiency, one node is generally a place where it isn’t worth to build a farm at all.
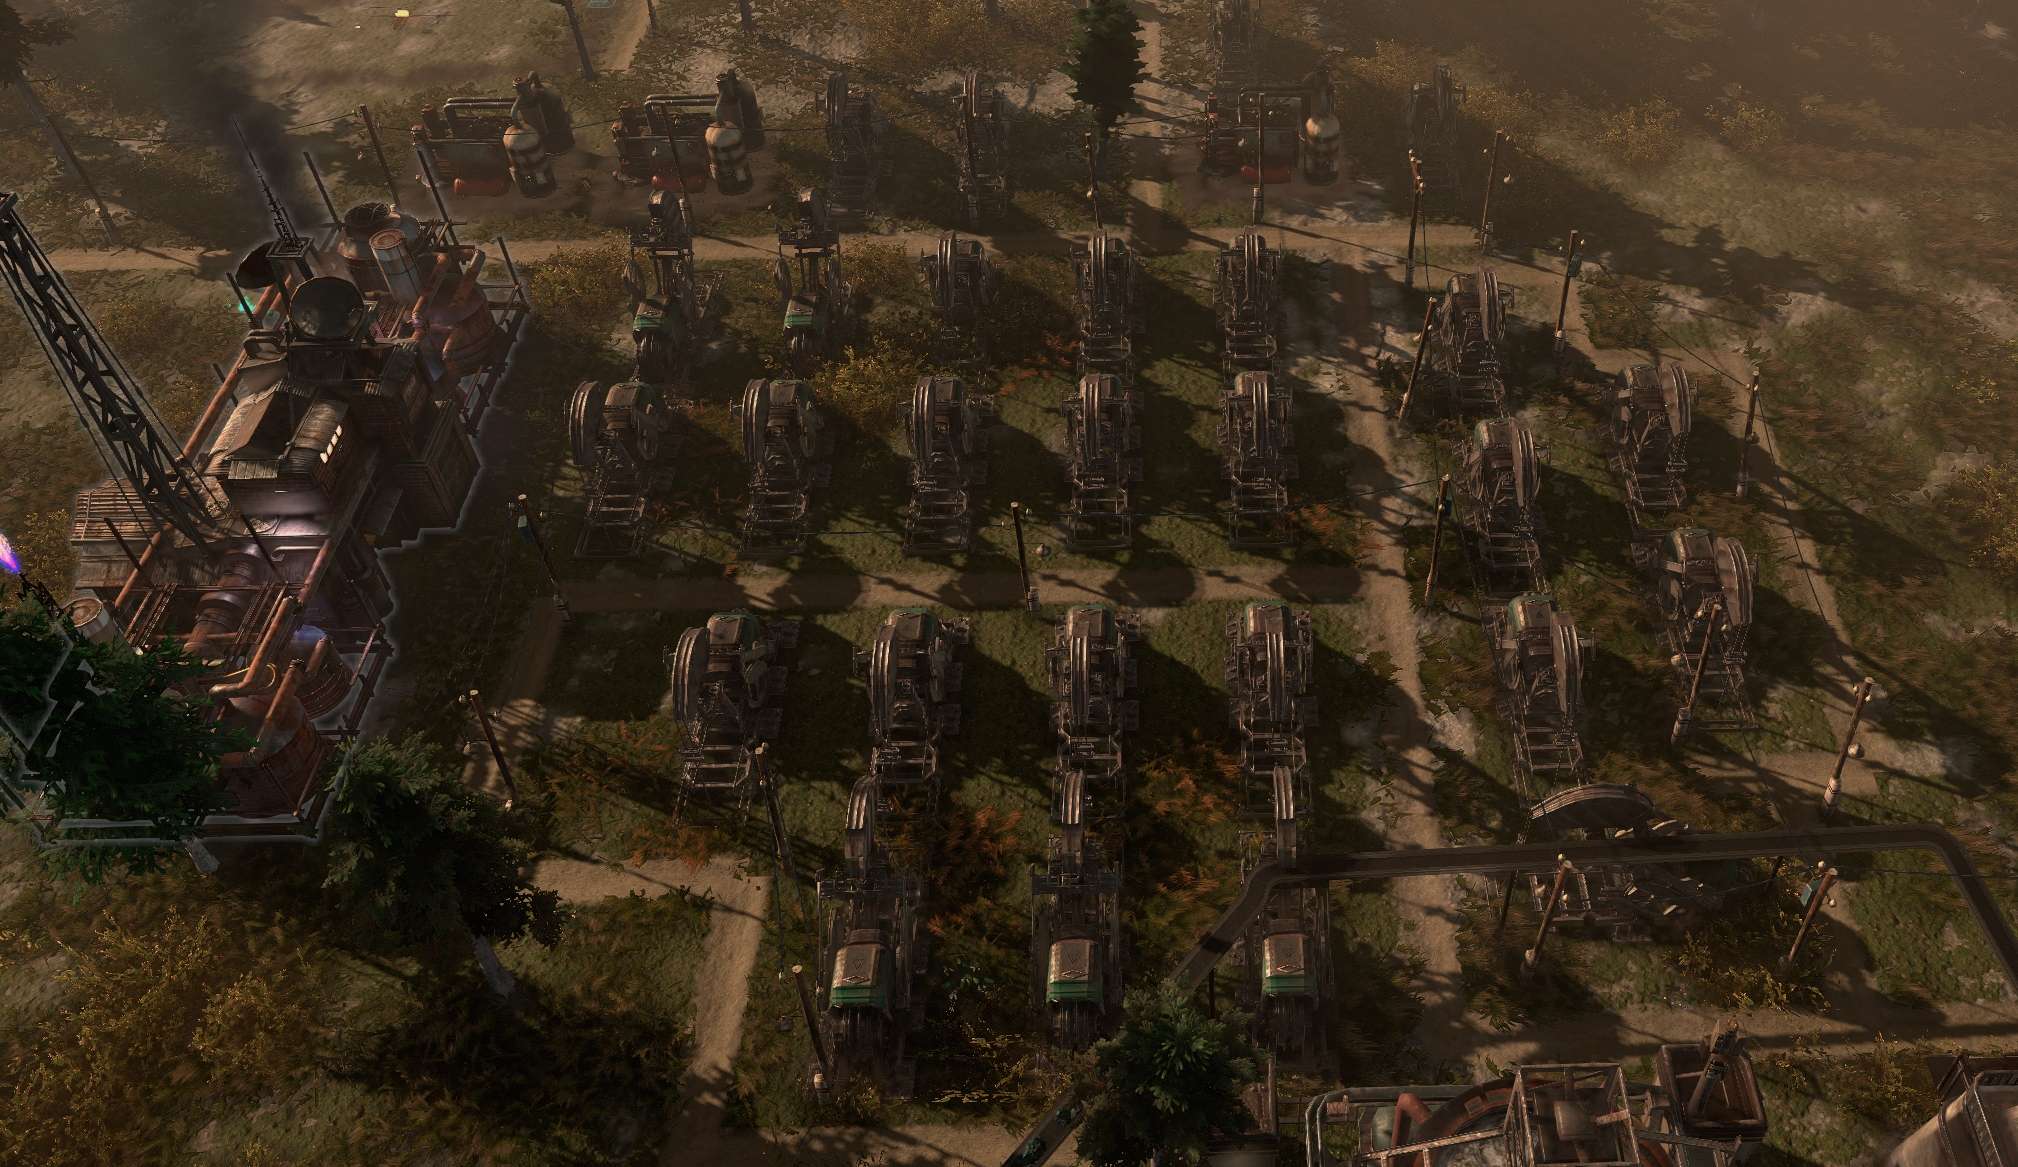
With four or more nodes you’ll be having very nice production rate, stuff as many as you can in such zone and be mindful the all need road connection.
With windmills it’s easier they don’t need infrastructure (so far) and you can chuck a tone of them wherever is the best spot on the map.
When it comes to oil, you need absolutely all of it at highest rate, perhaps being mindful of efficiency early on. So you should look forward to exploiting fully every node, creating sizeable oil pumping field.
Bonus Content – Housing
Houses and related buildings don’t need roads so far, you can freely maximise area efficiency like so:
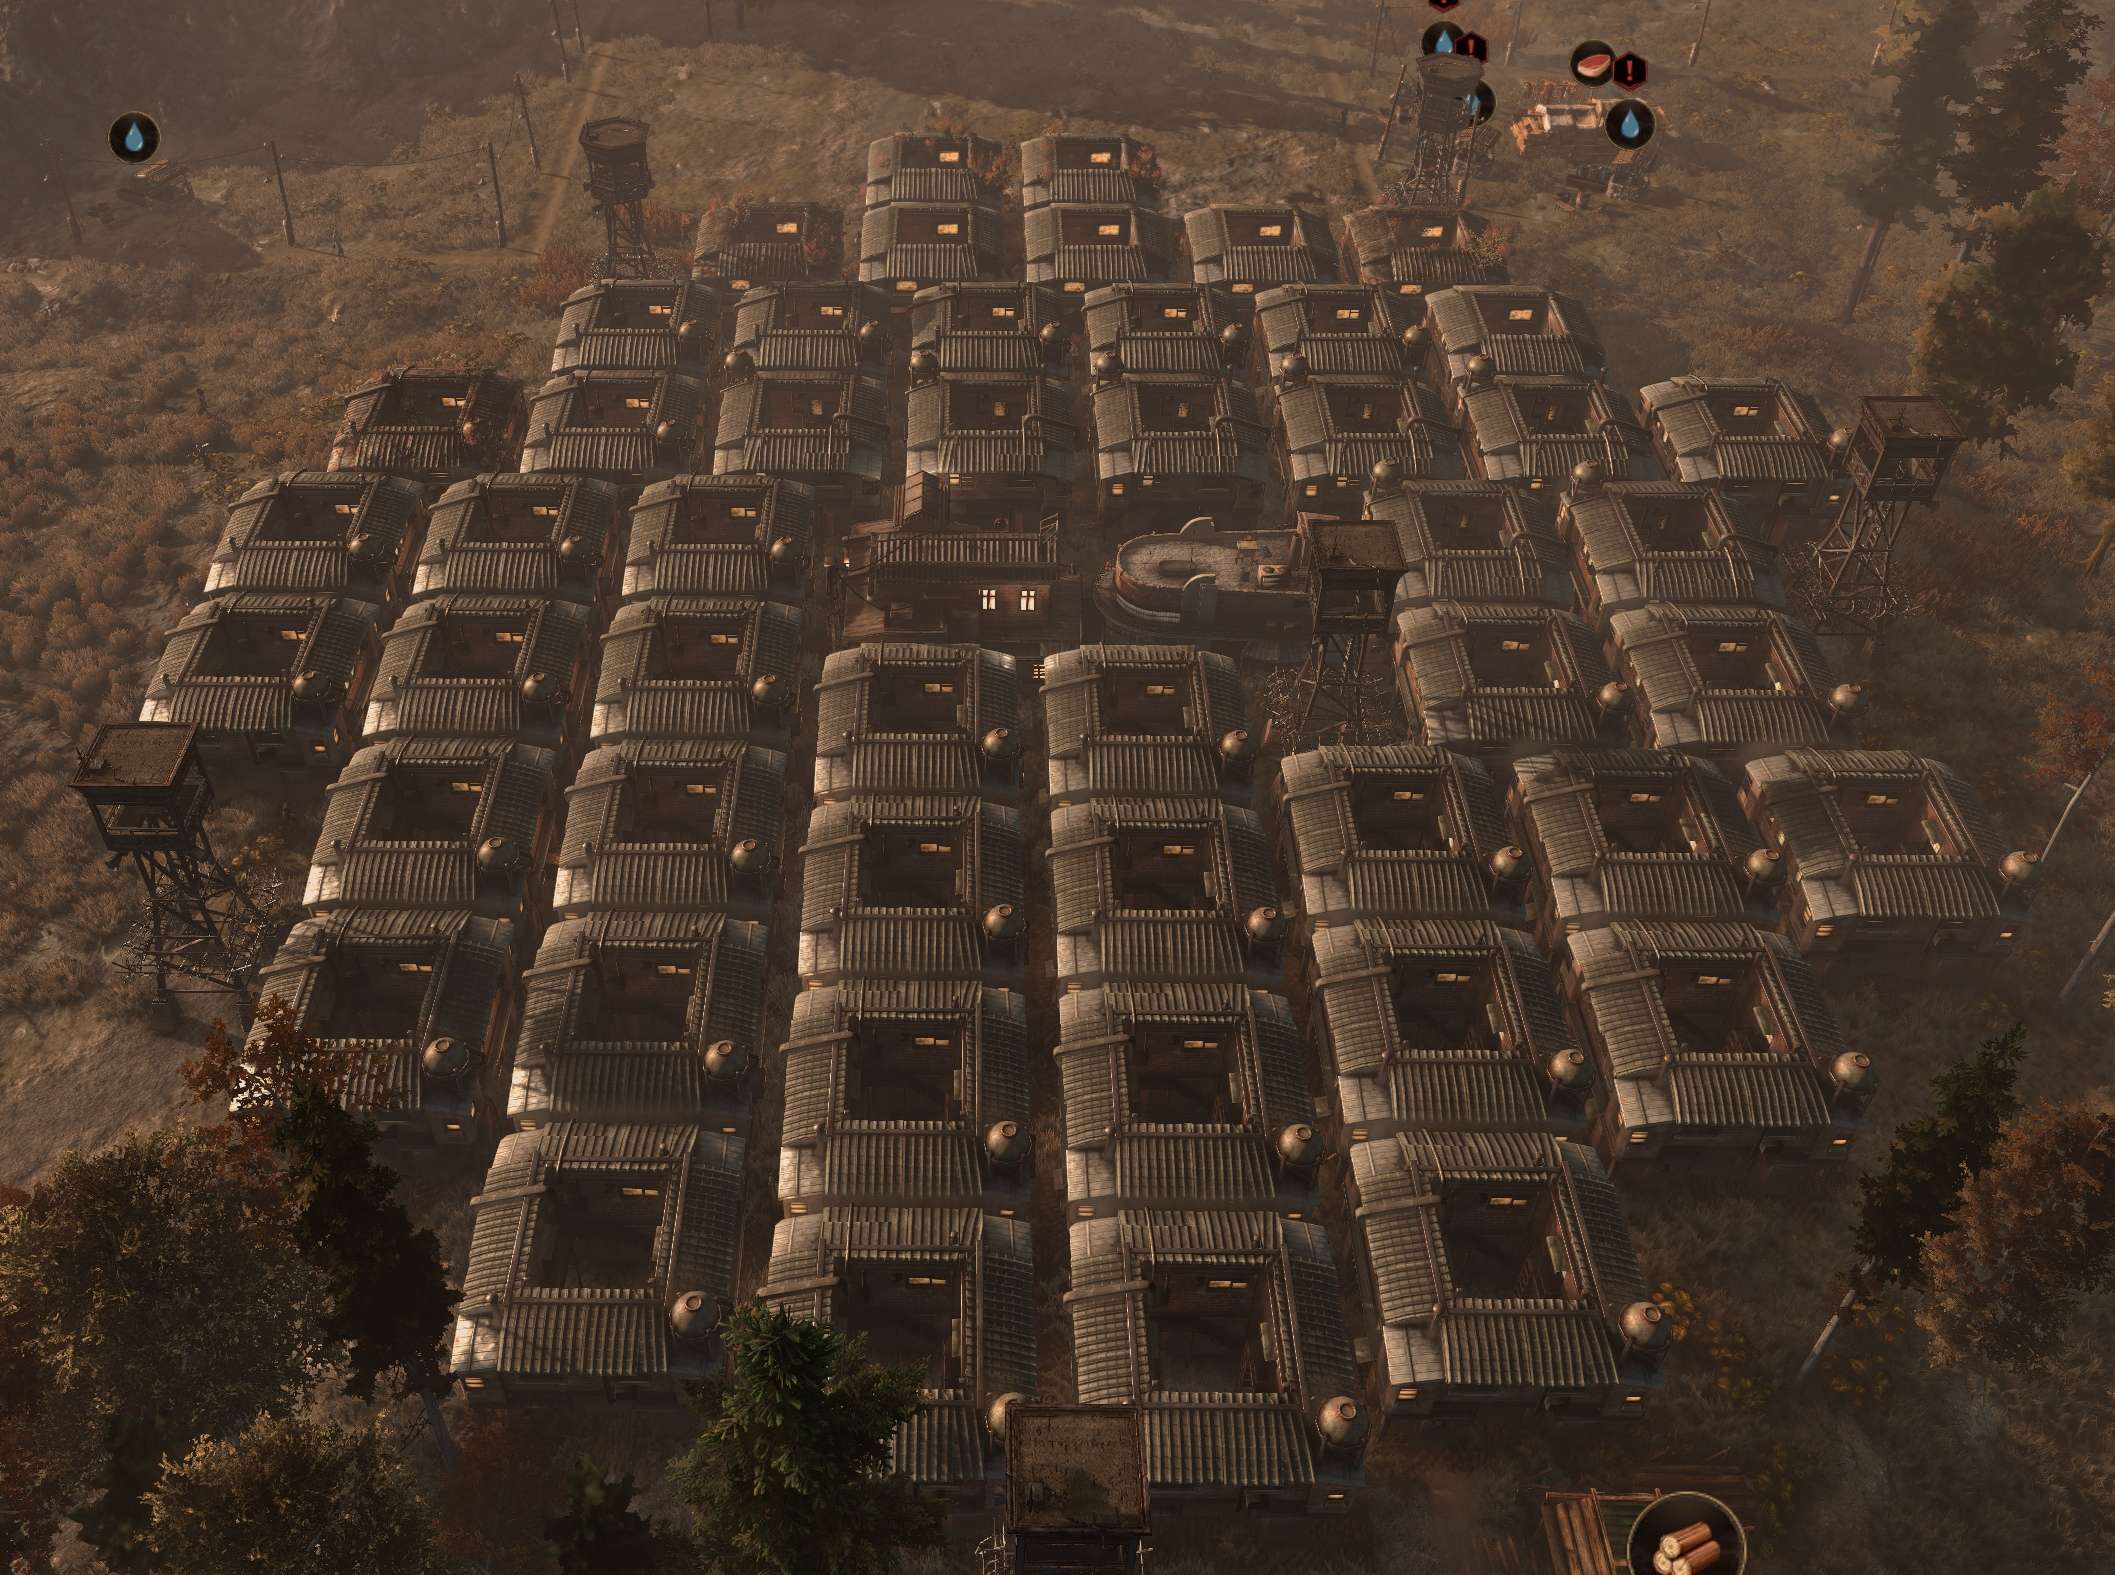

There is no need to clutter house and service buildings. There is no lack of building space for the couple house you need and they dont have any upkeep cost.
The well placement makes only sense for t1. With the tier 2 pump you consistently drain a water source. Havent build a tier 3 yet.
T1 wells setup like this, across the whole map can take you quite far into the game if not all the way to the end, because you can supplement water use with worldmap camps. T3 is a good idea down the line, you might wanna build out something nice in place populated by multiple wells.
Water replenishment in game is RNG. There will be years where T1 well won’t be able to drain the source fully, There will be years where t3 will drain 3 nodes before spring ends.
On average my observation is that you should stick to t1 for the most of your play through, it’s extremely cost effective, higher tiers consume power to operate, and on top of that T3 is super expensive to build. Resoruces = time.
Time is better spent on making progress towards the game goals.
On the housing it’s just a hint that you can do this, if you find satisfaction in it. You don’t have too and I encourage everyone who likes a pretty settlement to pursue that to their heart’s content.