
Improved maps that were taken from the game and made more visible.
Table of Contents
Hide
All In-Game Maps
Note: Want to support the author? Go here!
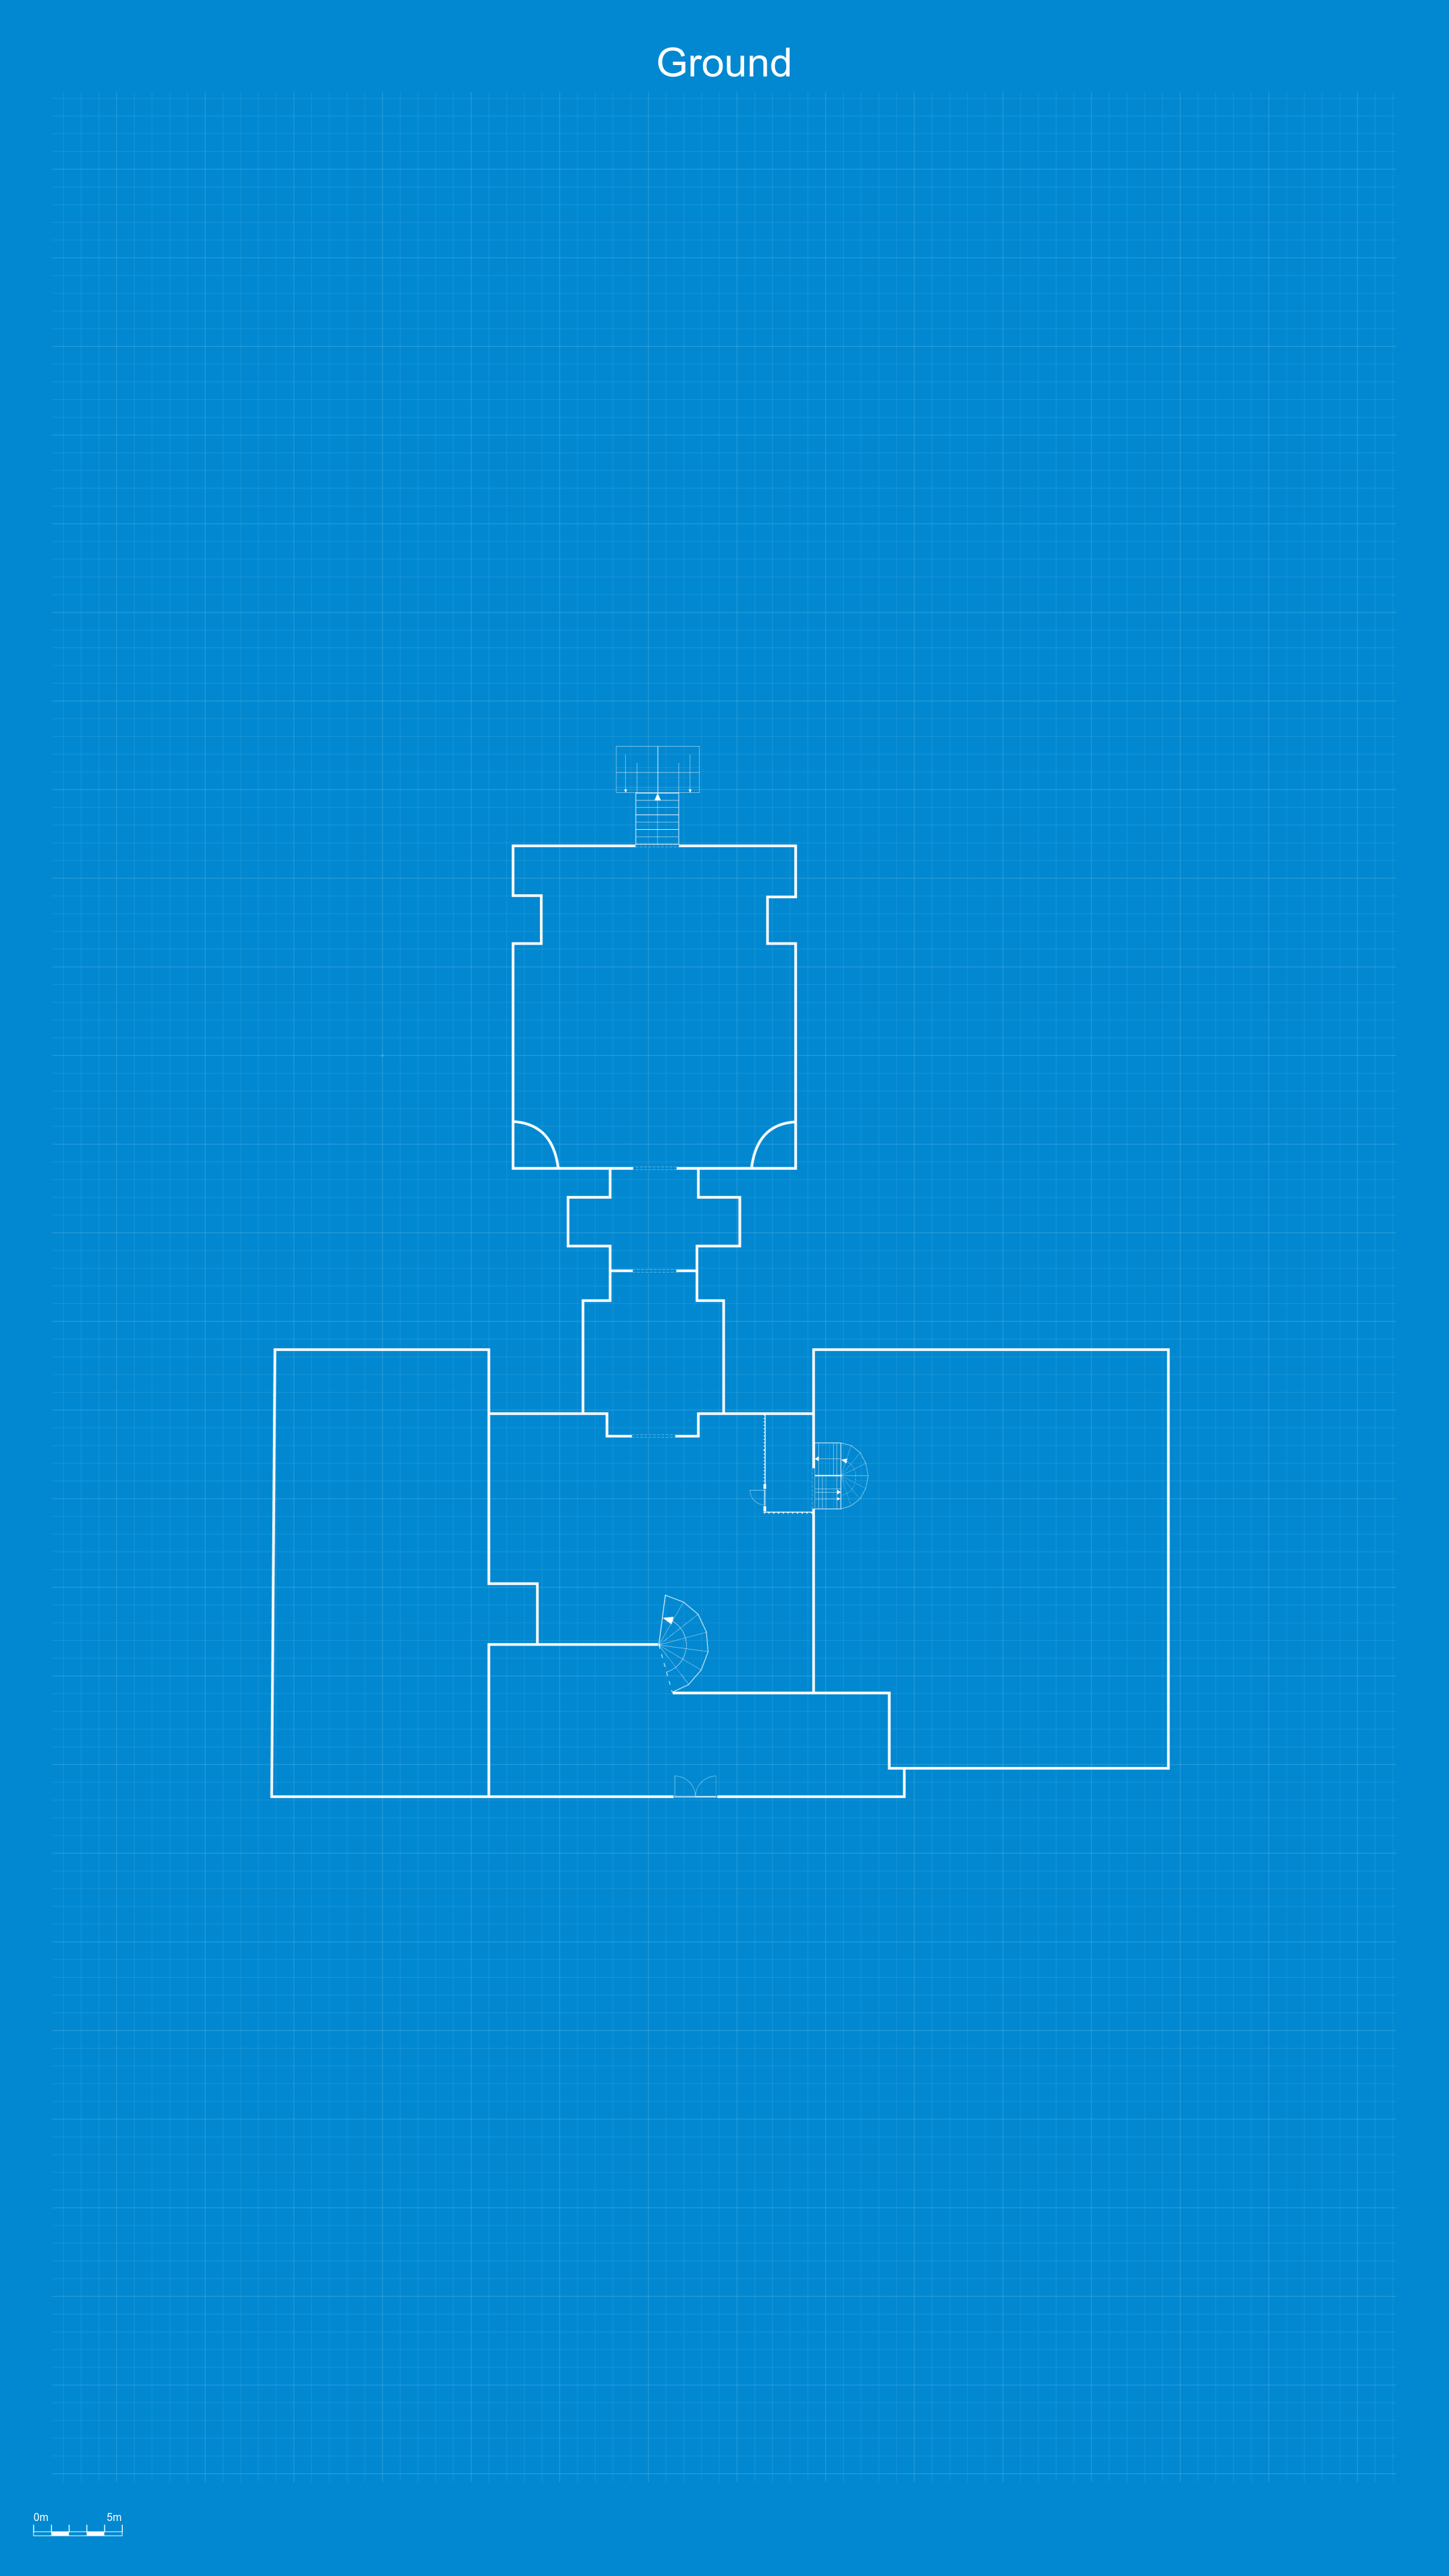
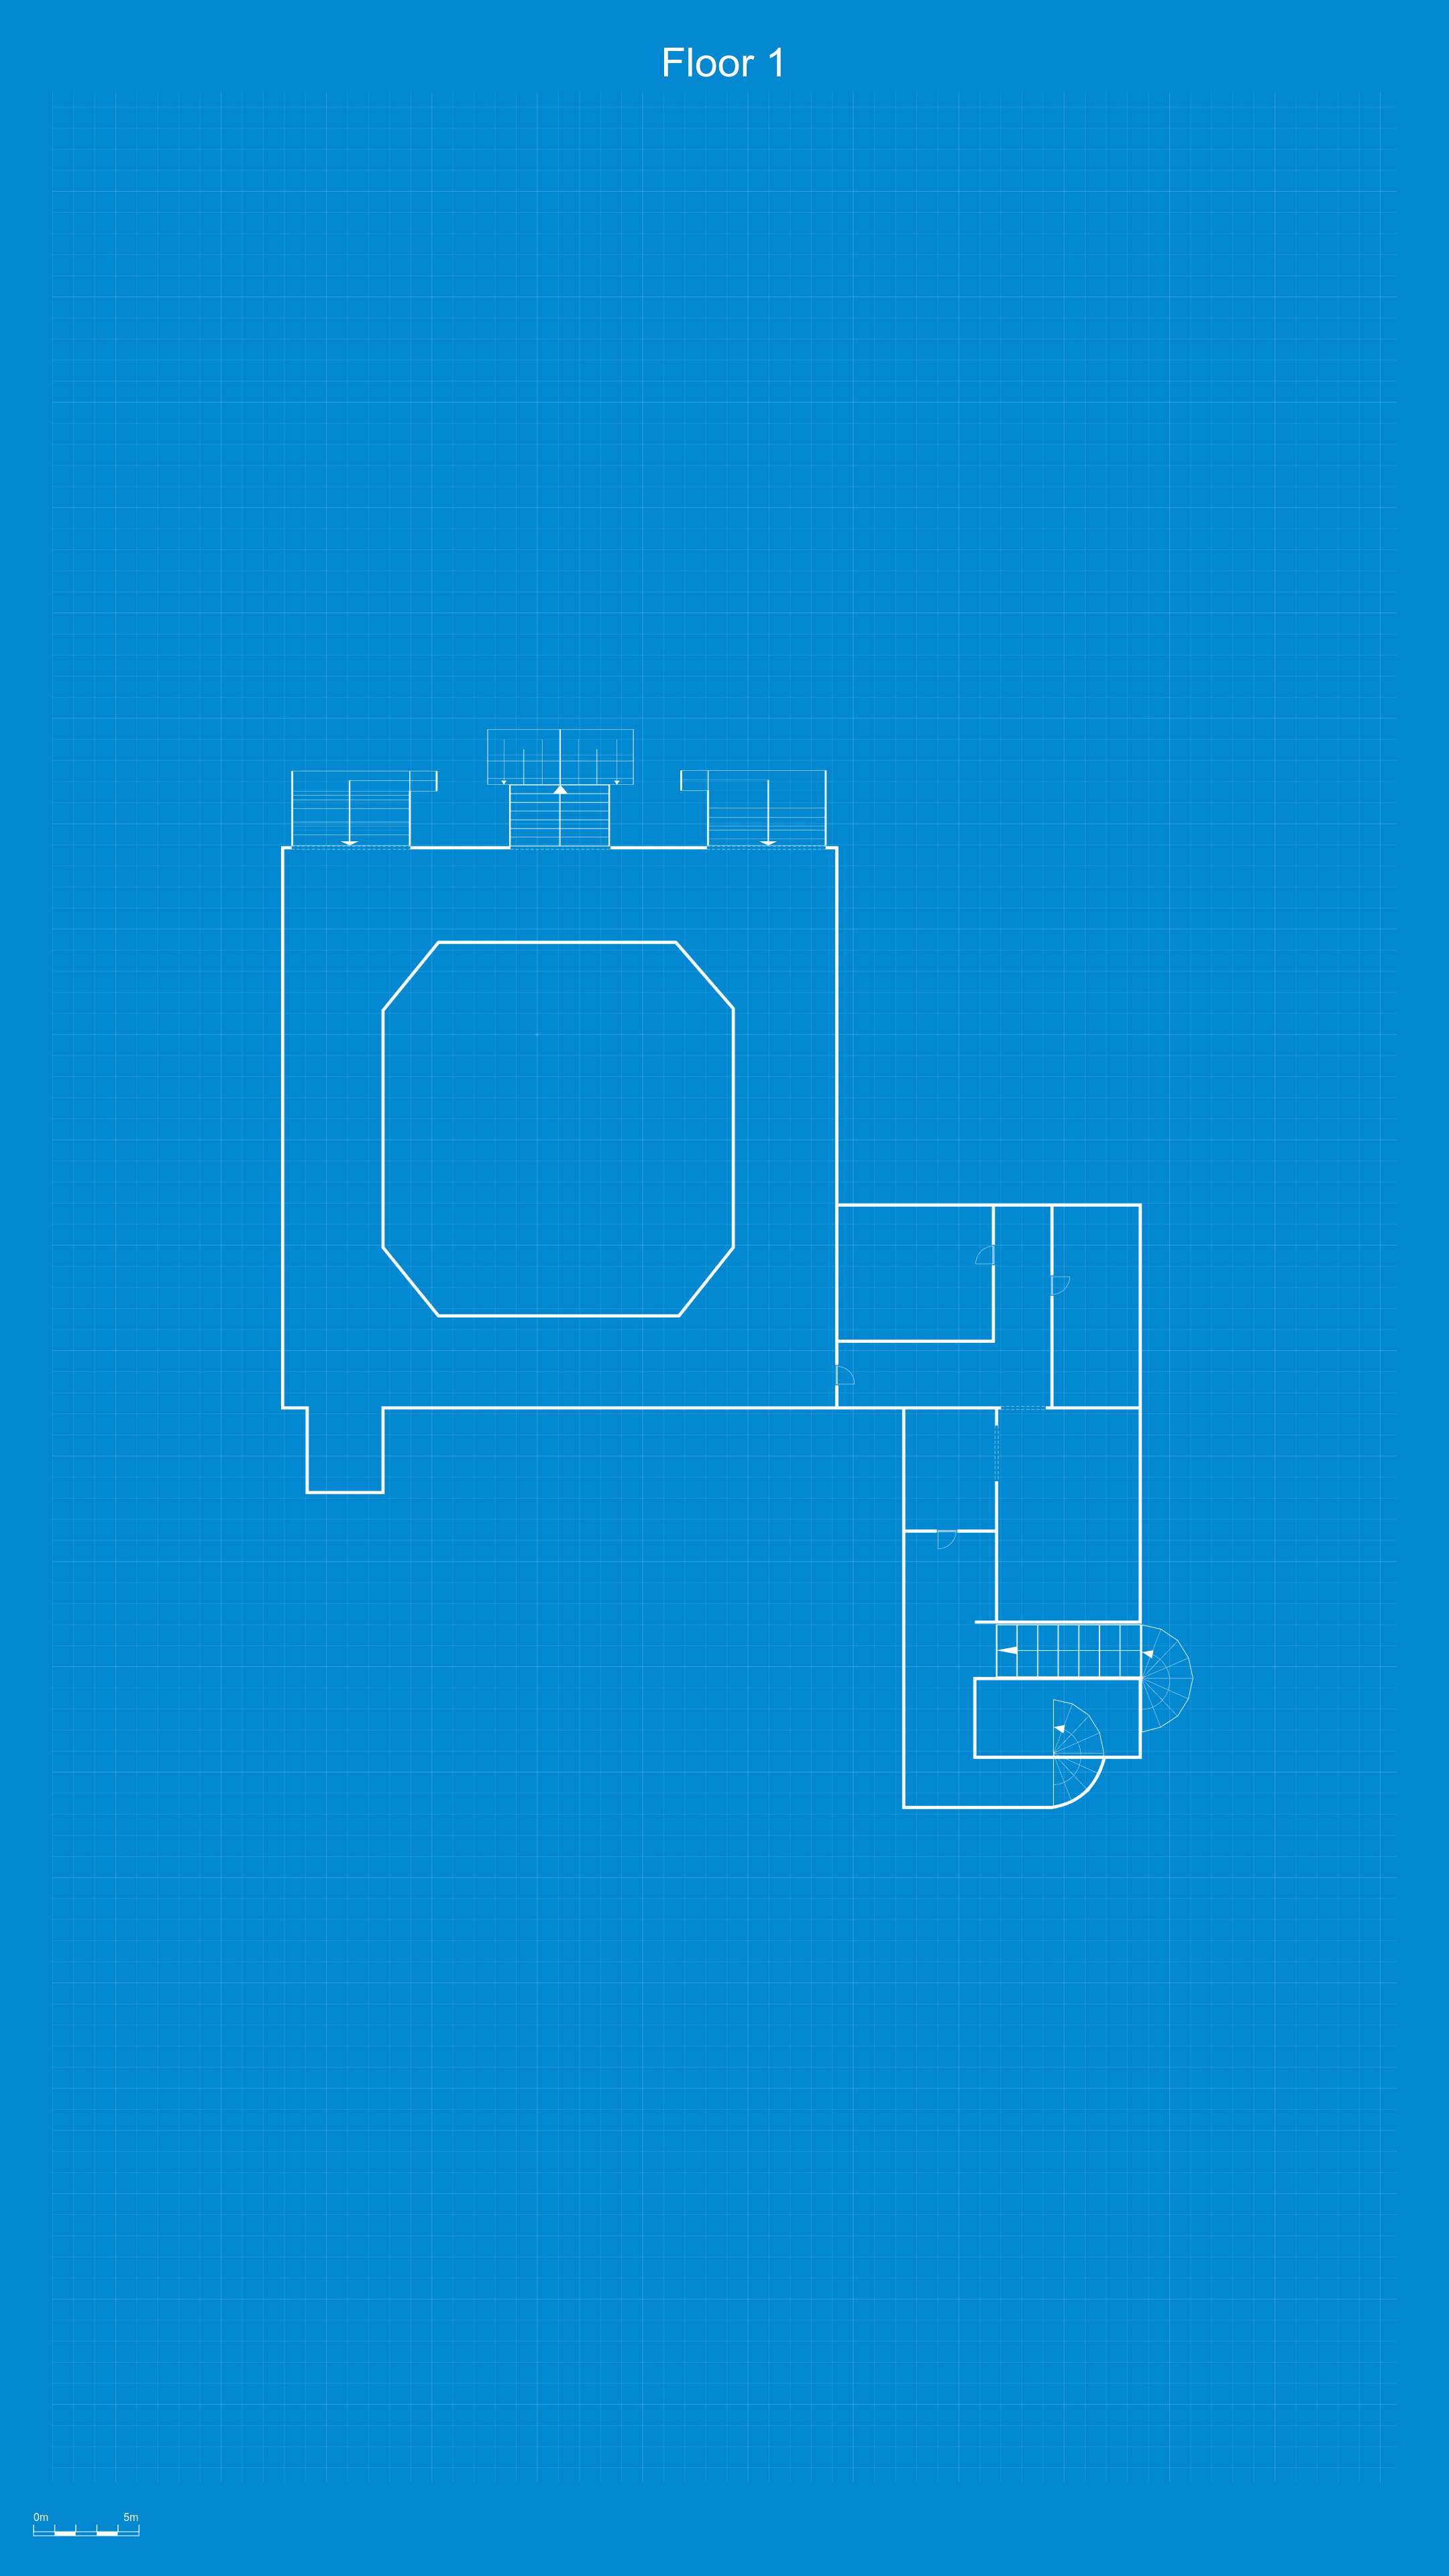
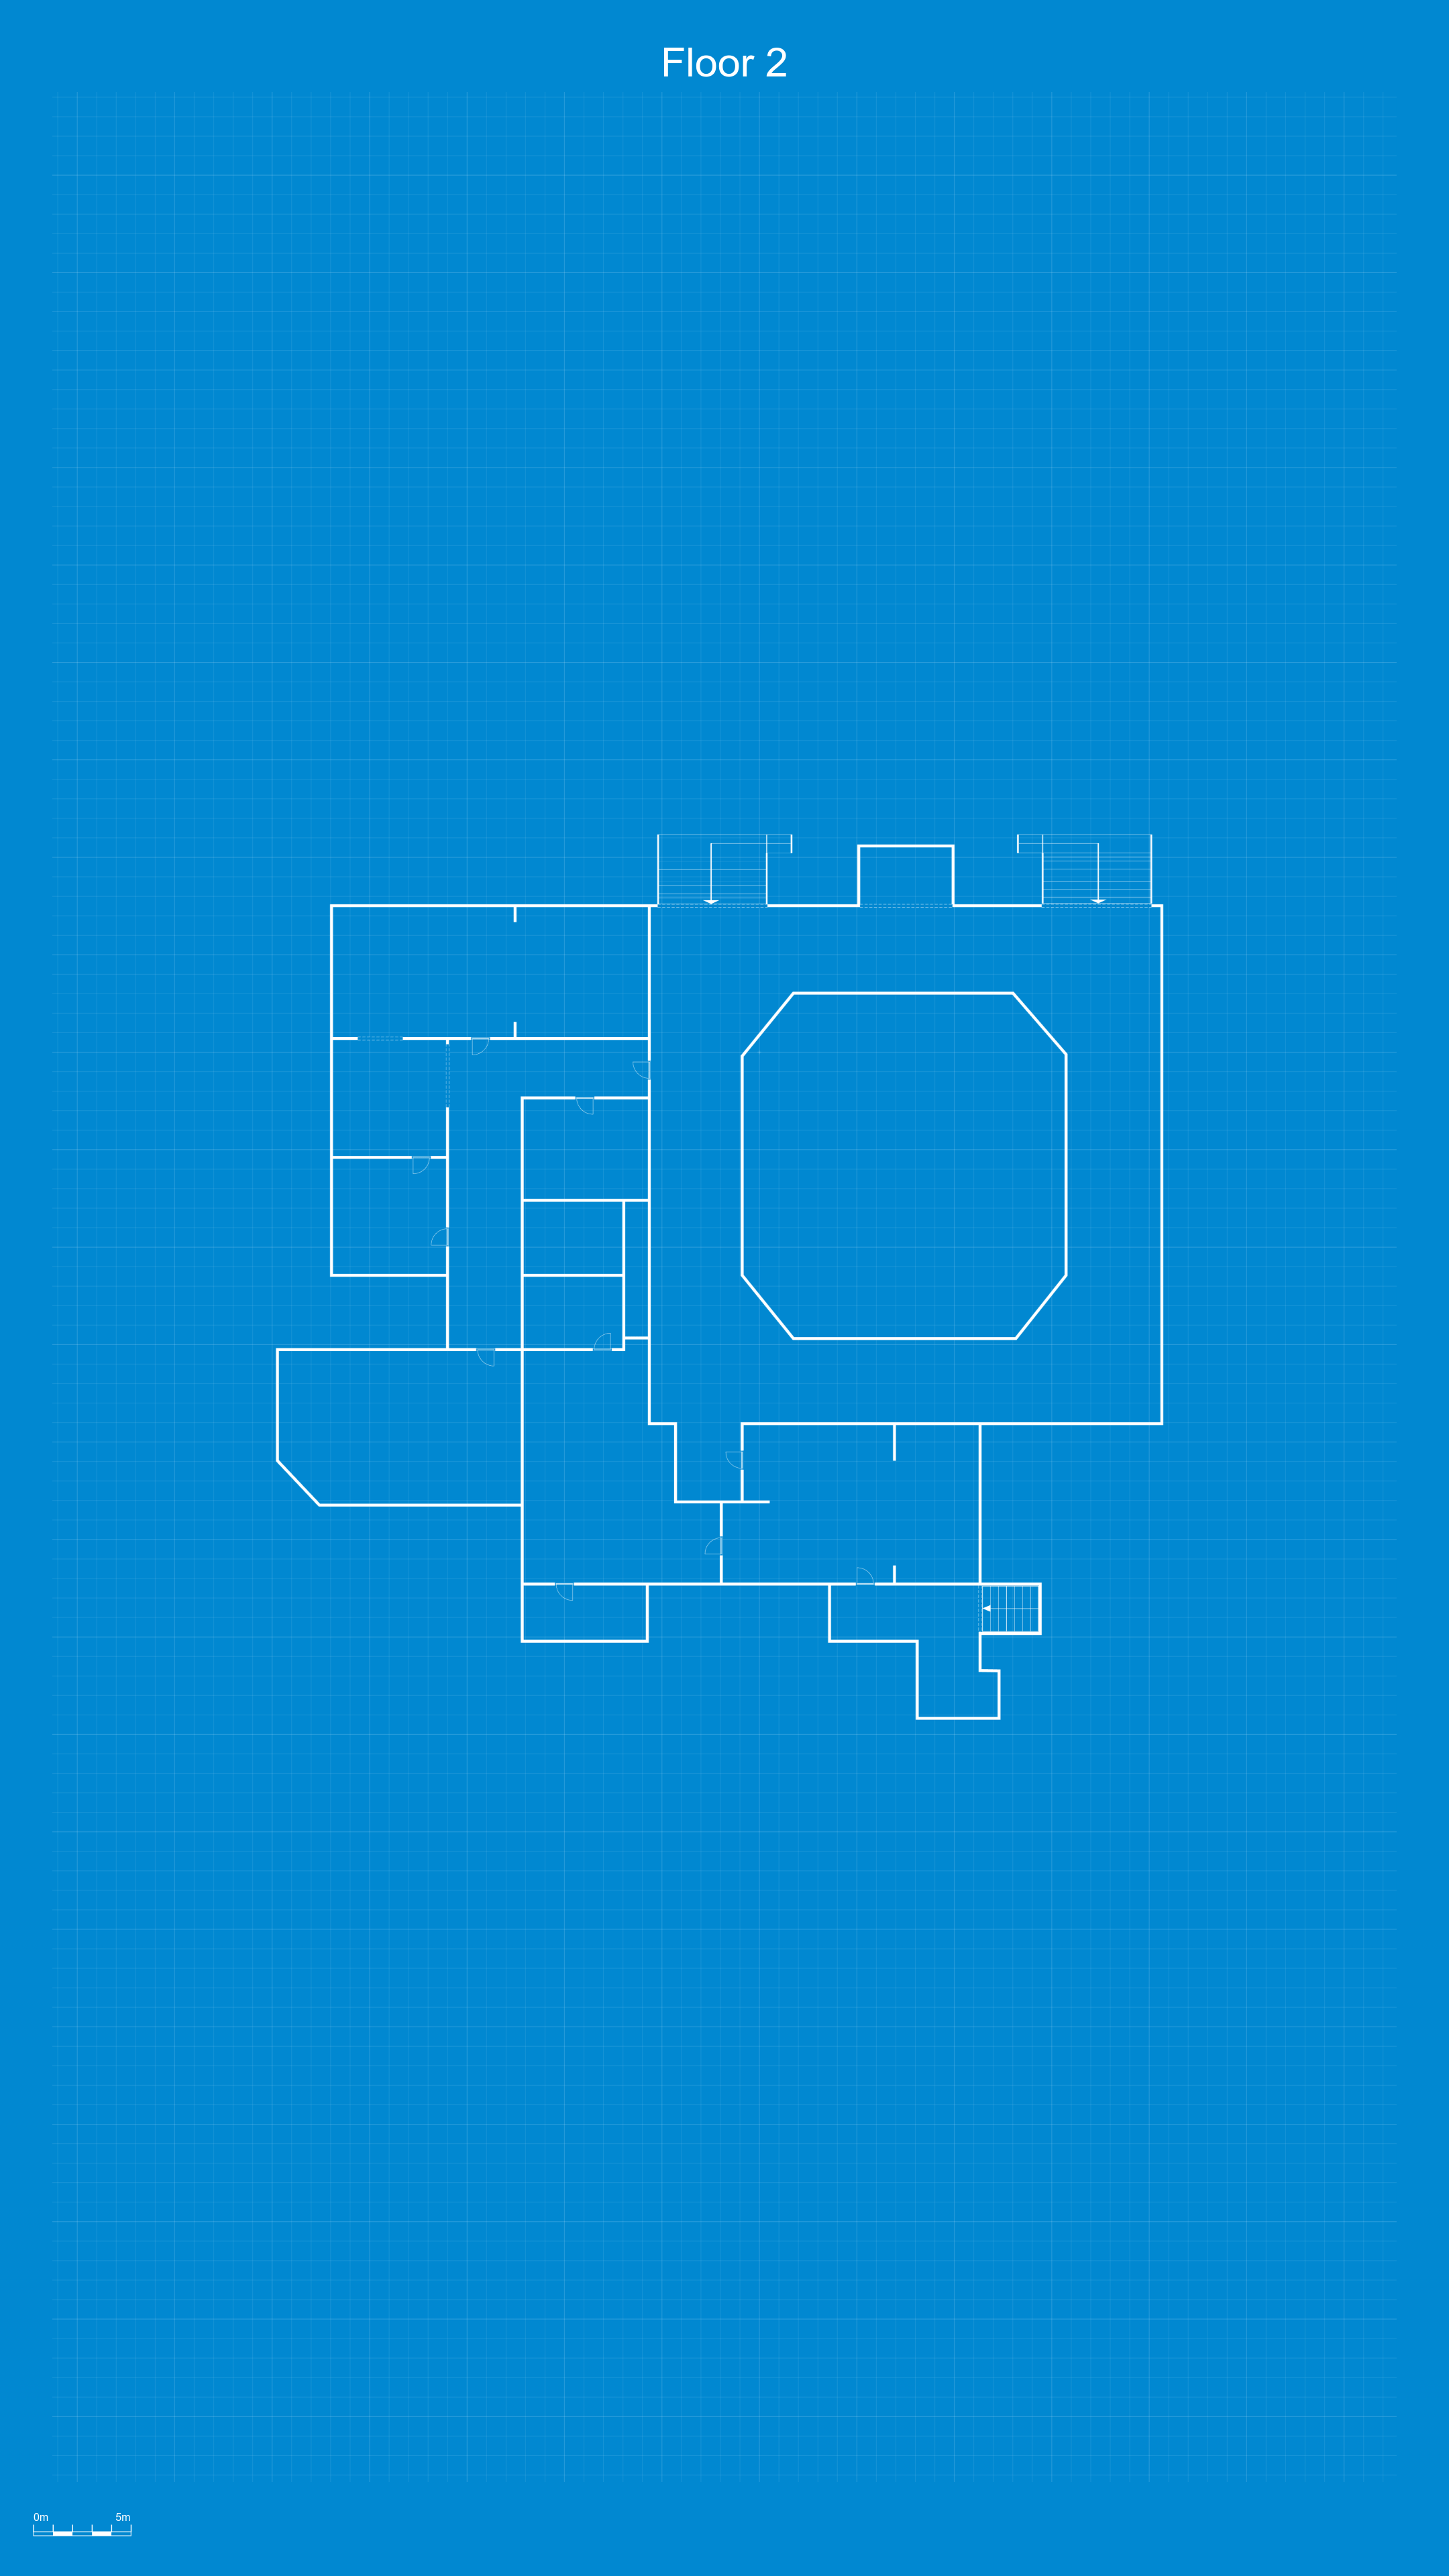
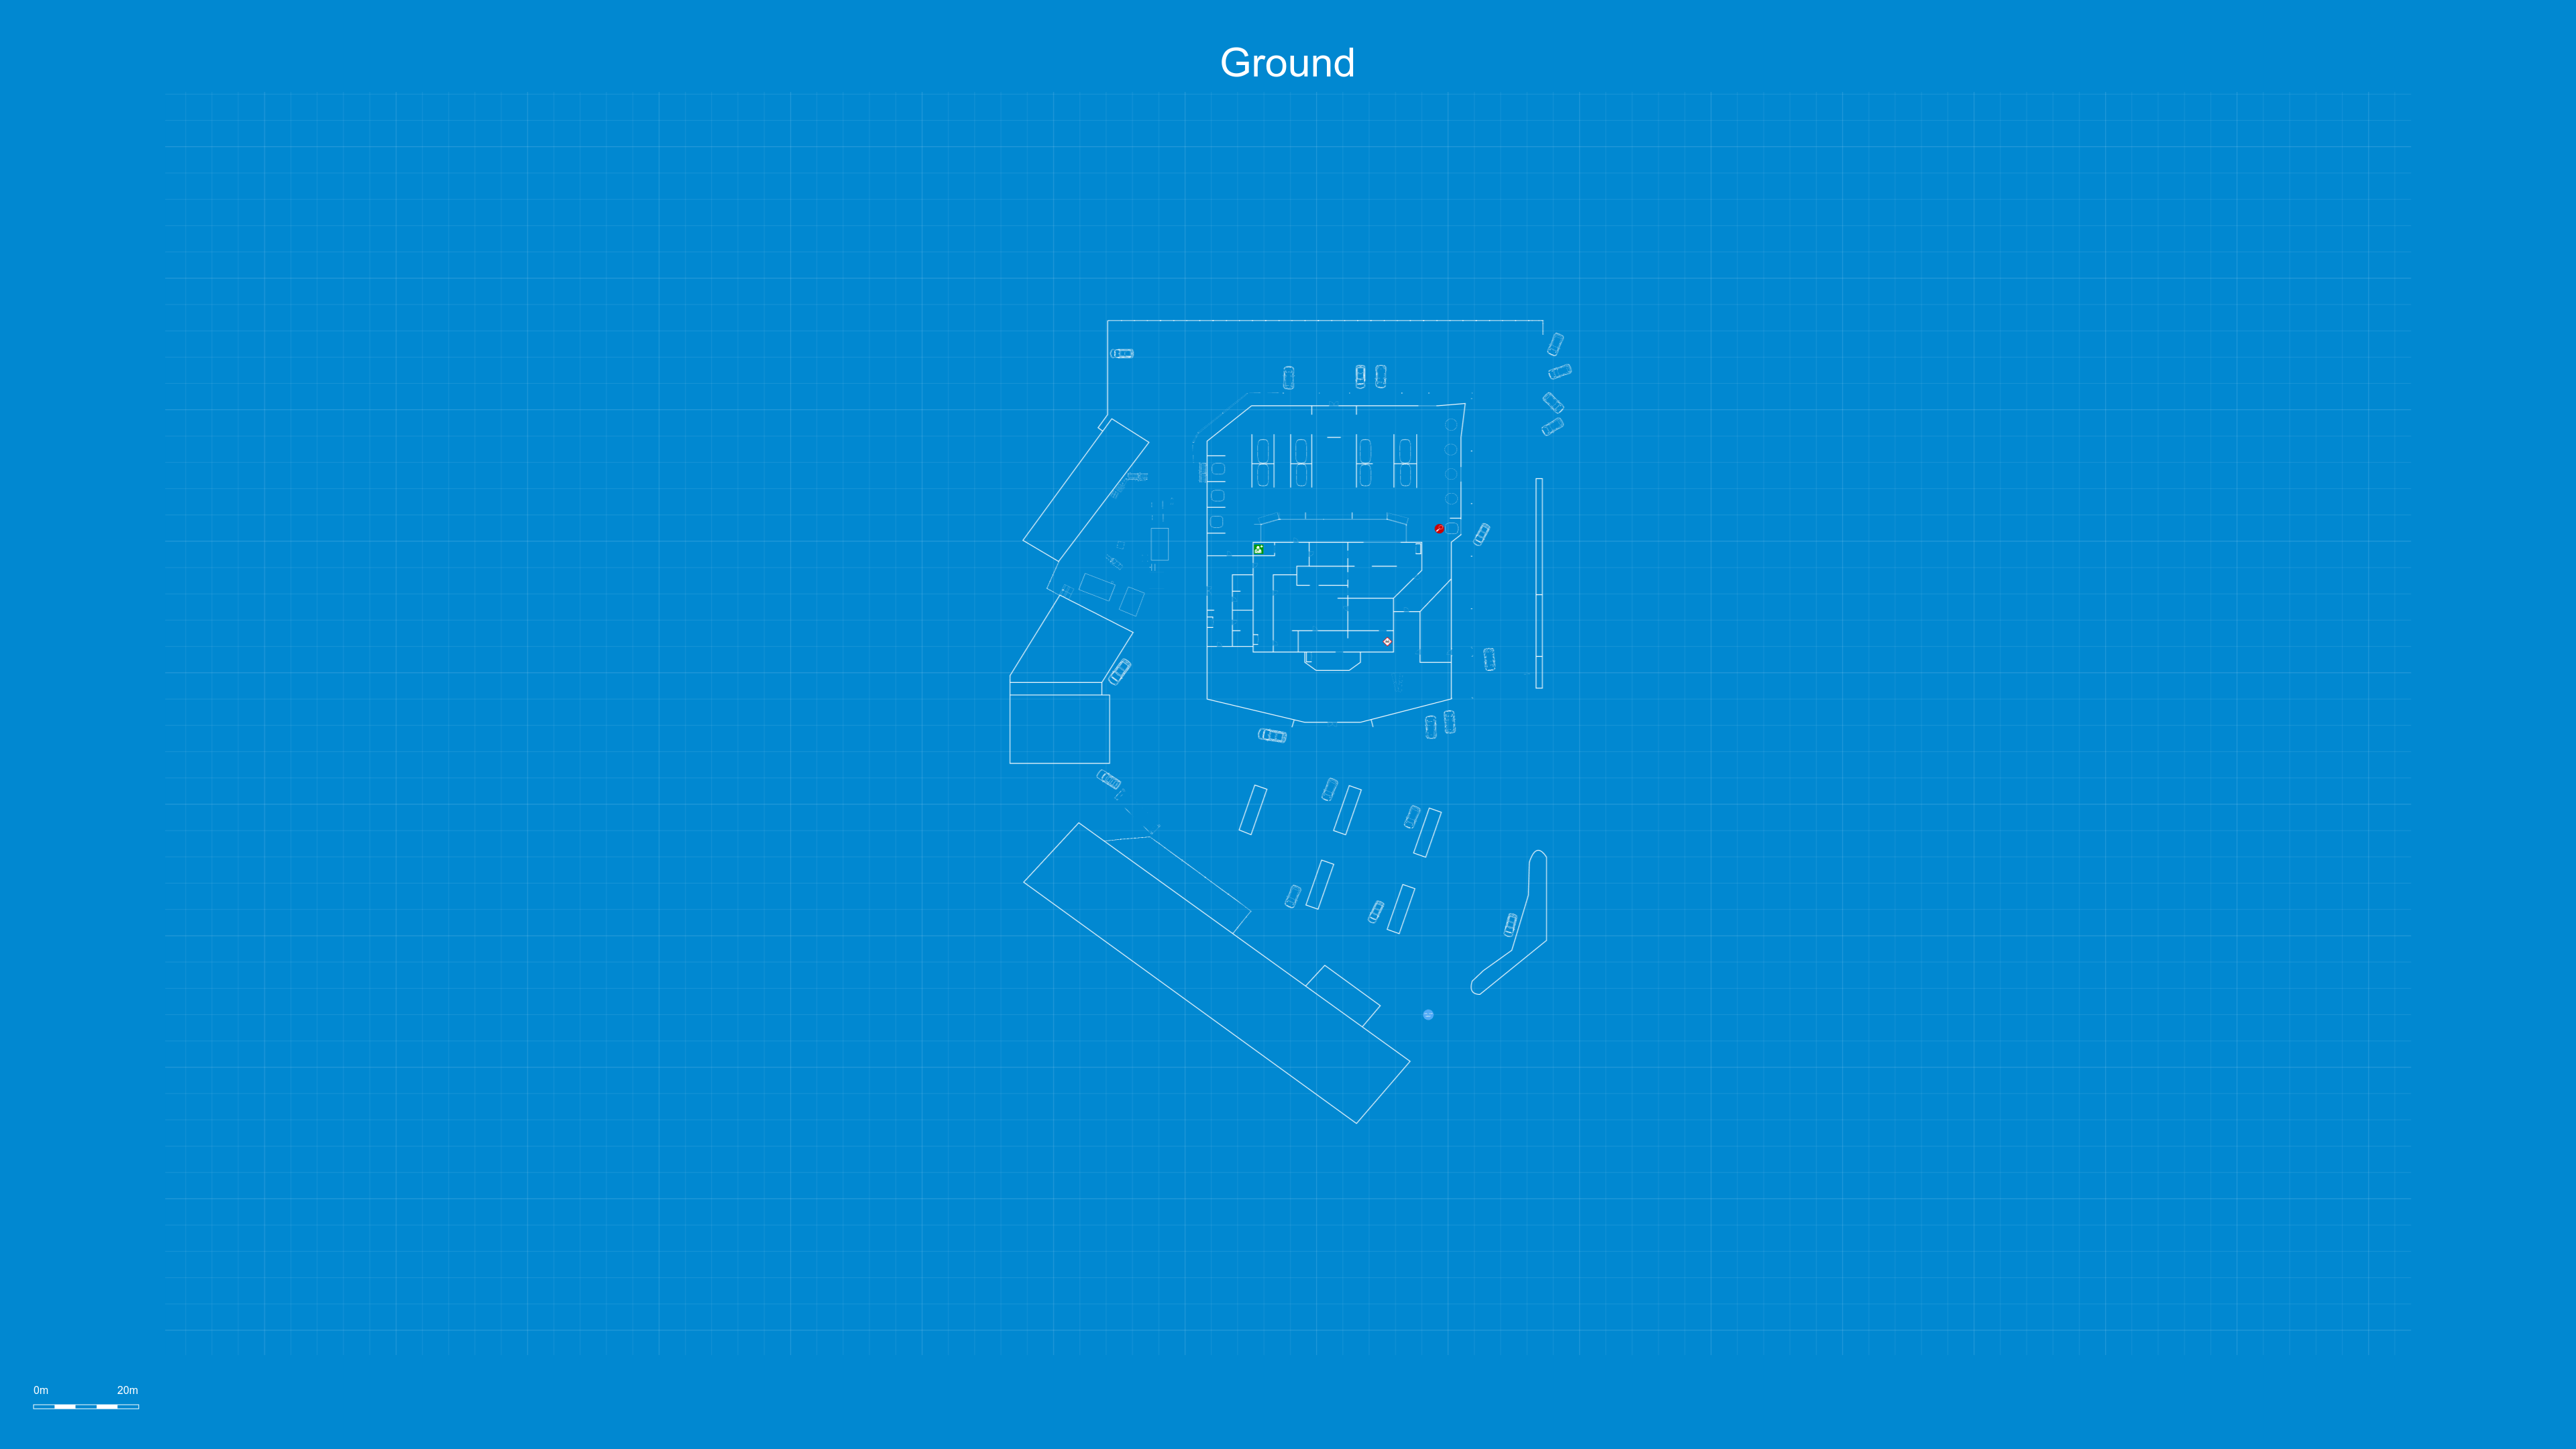
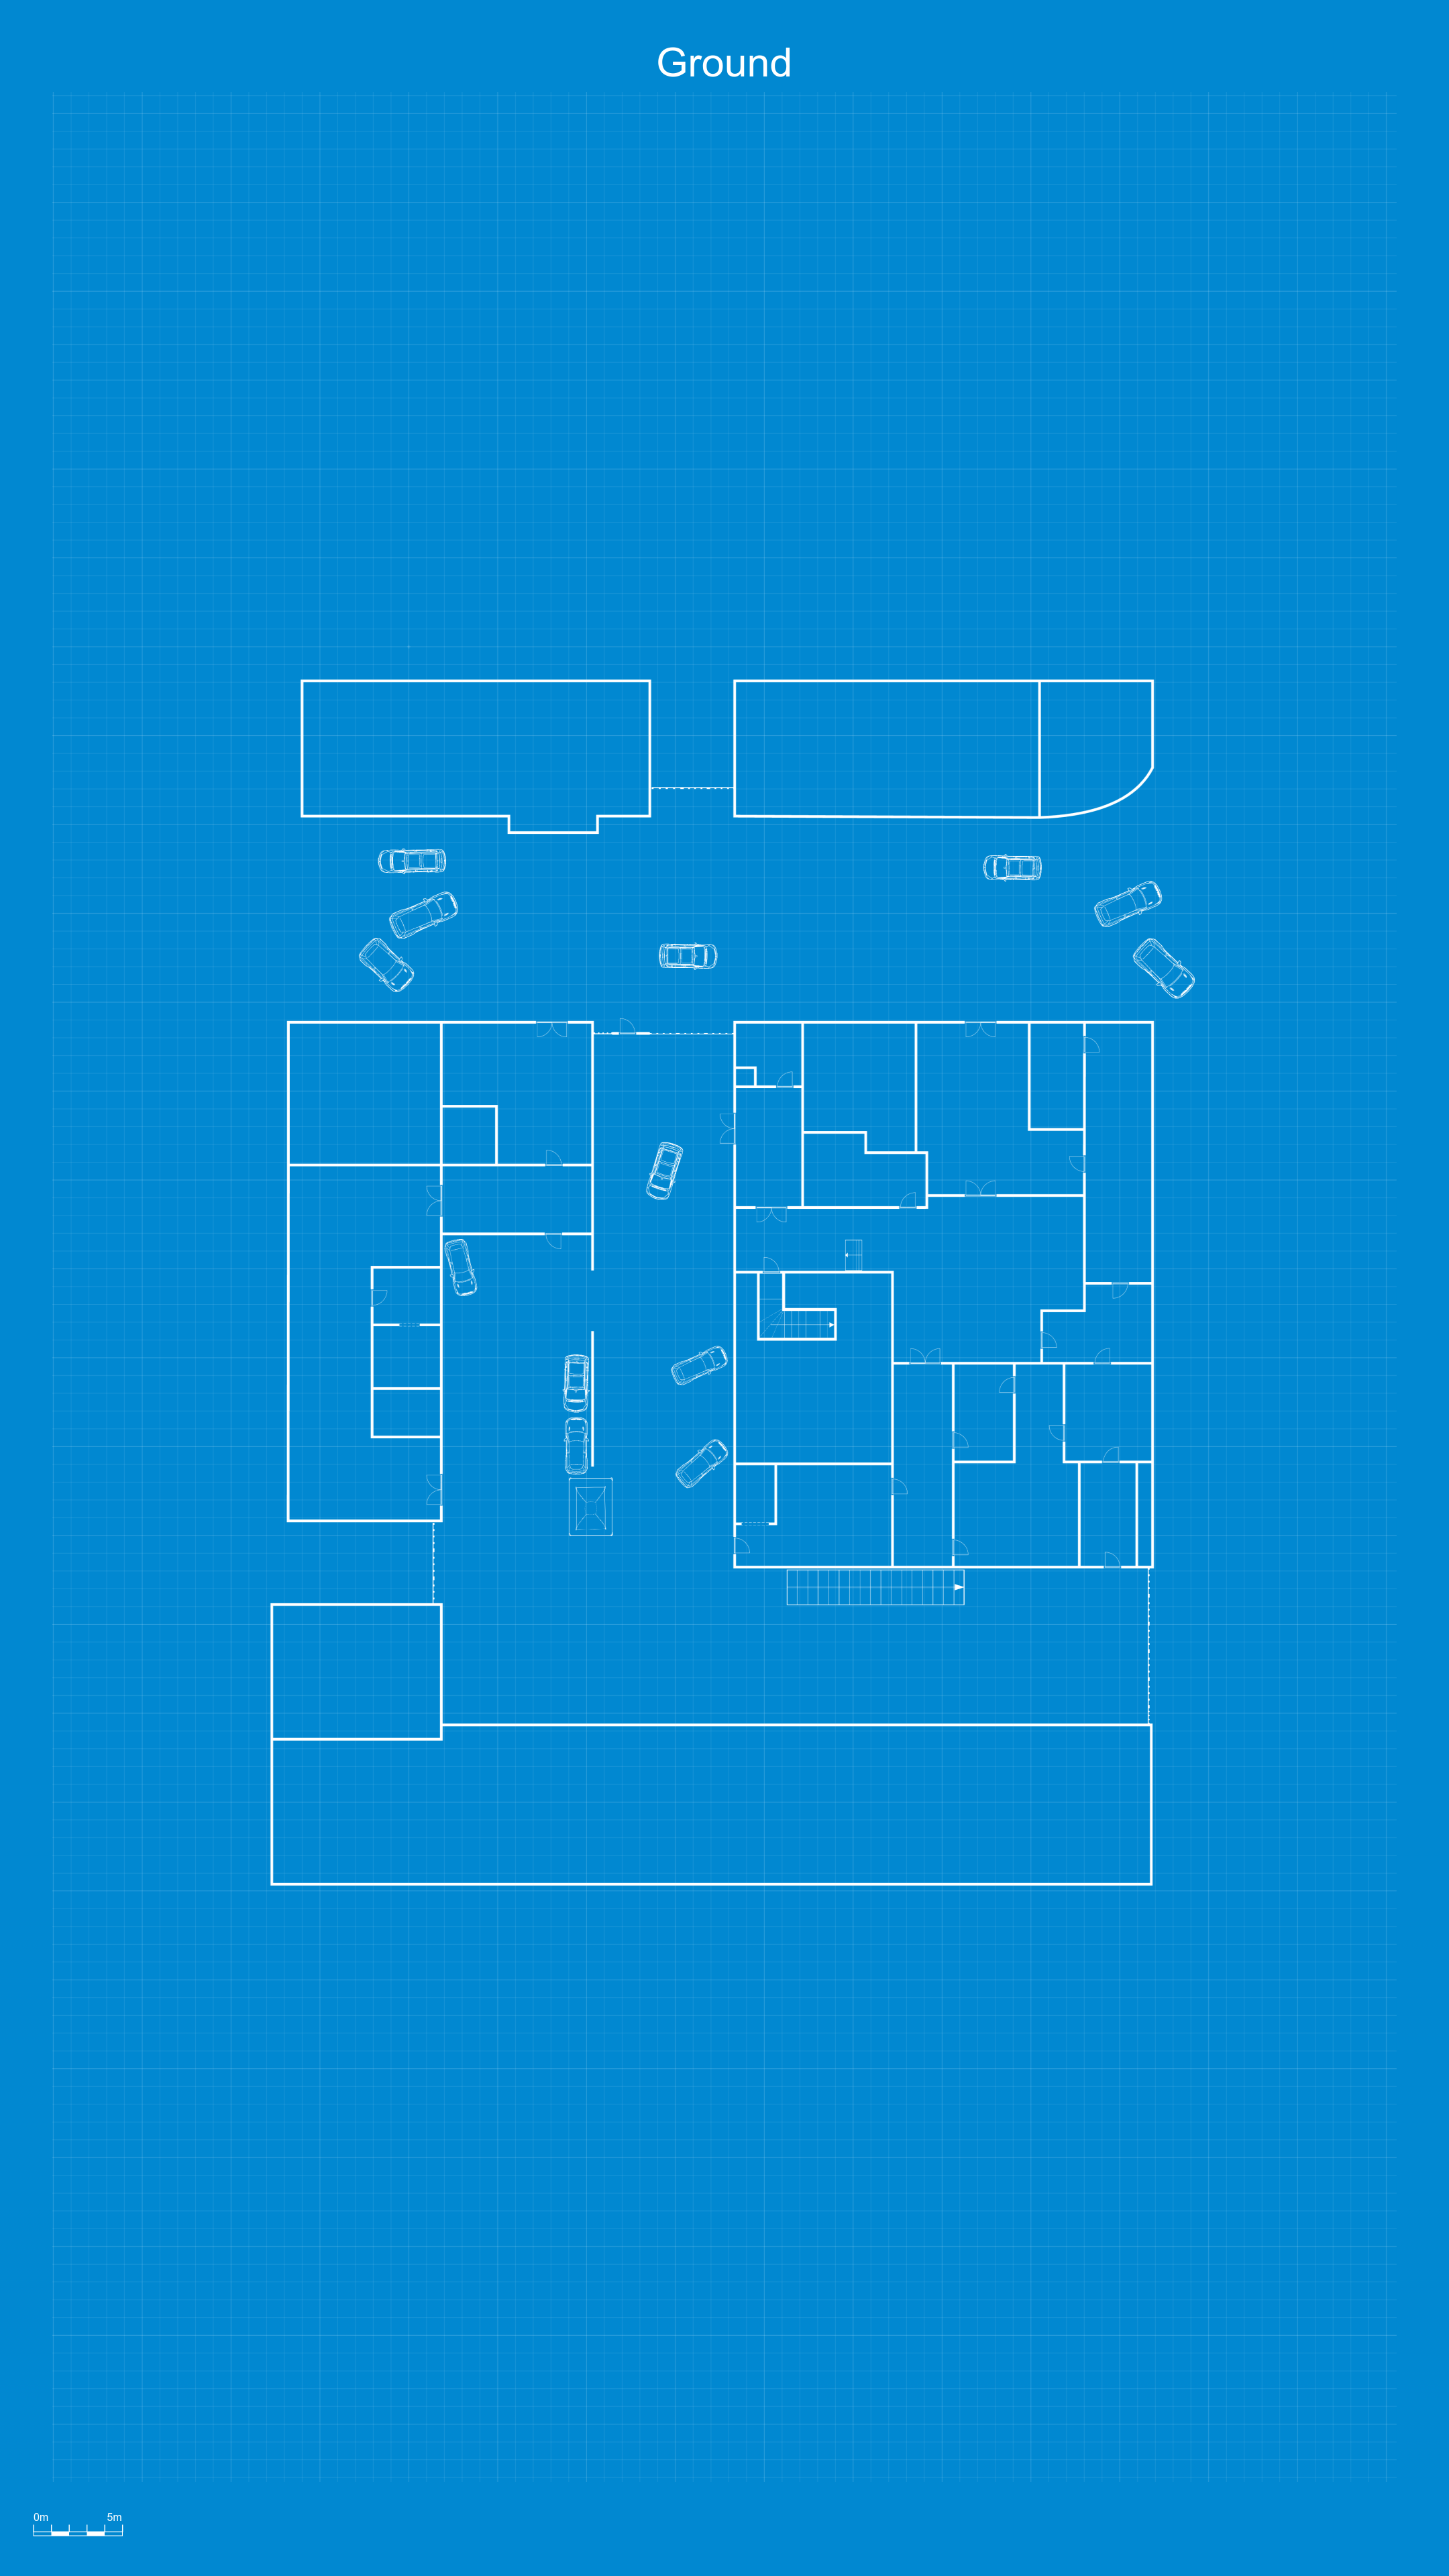
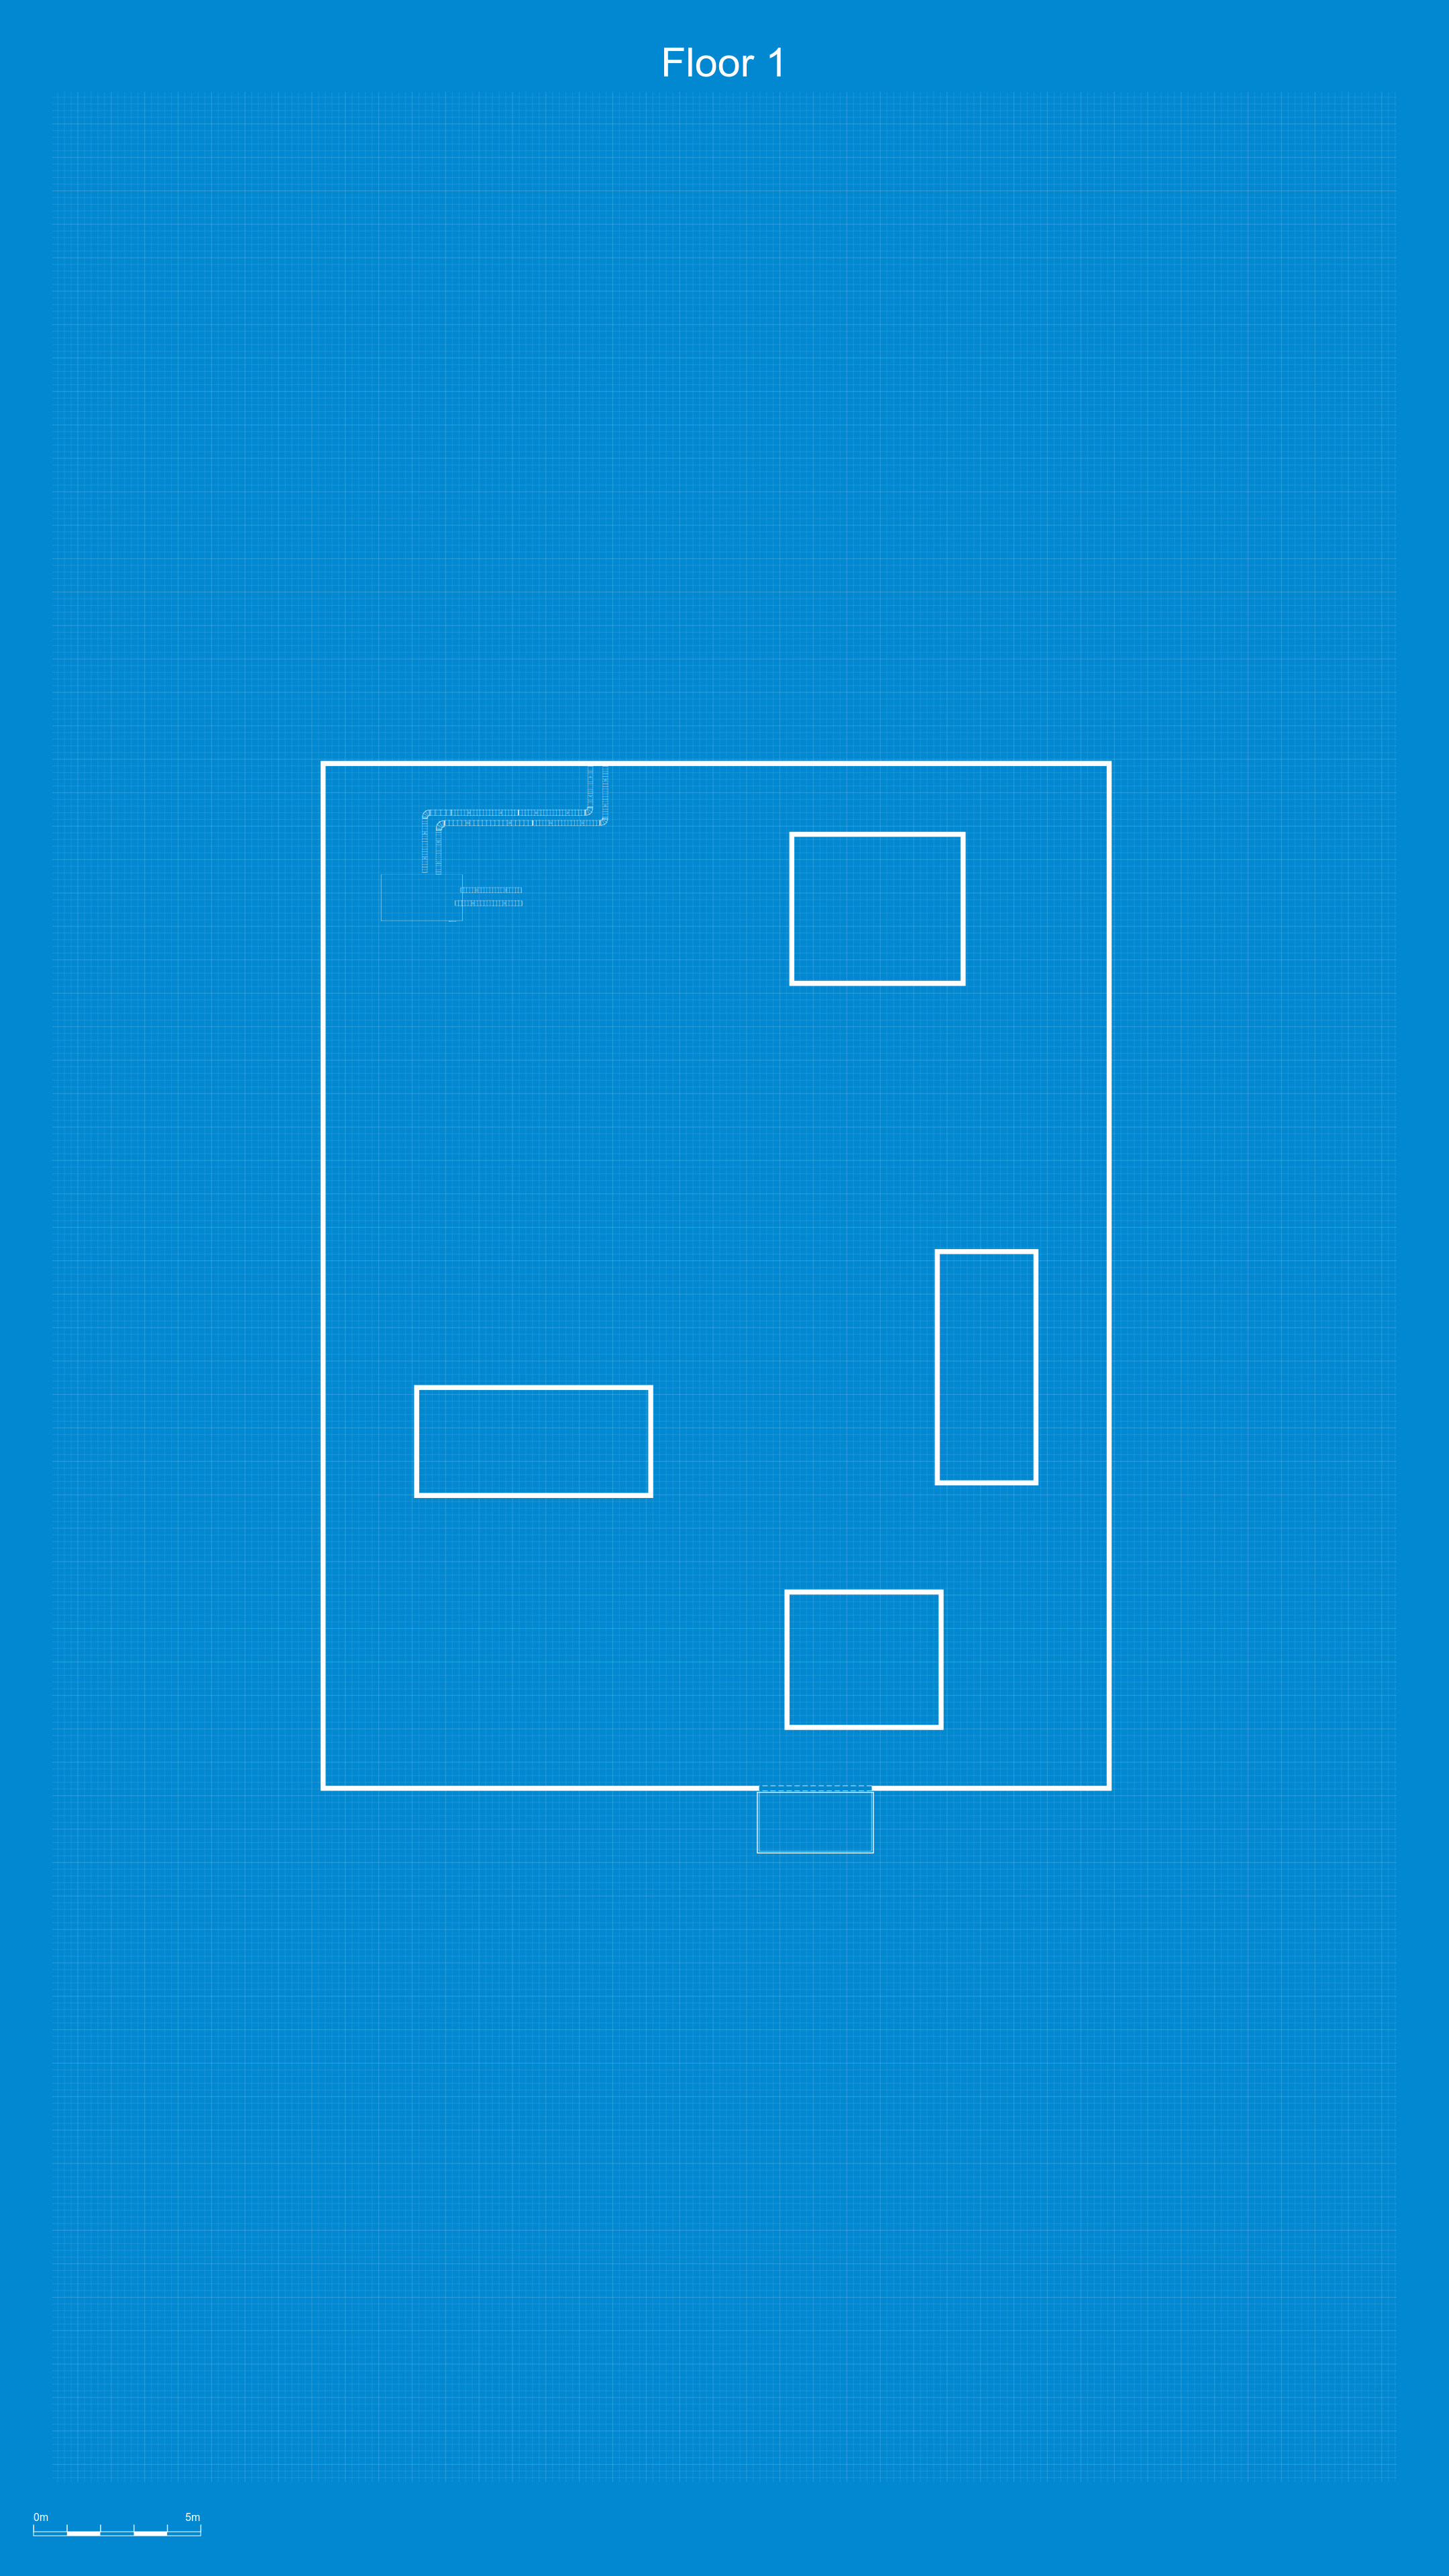
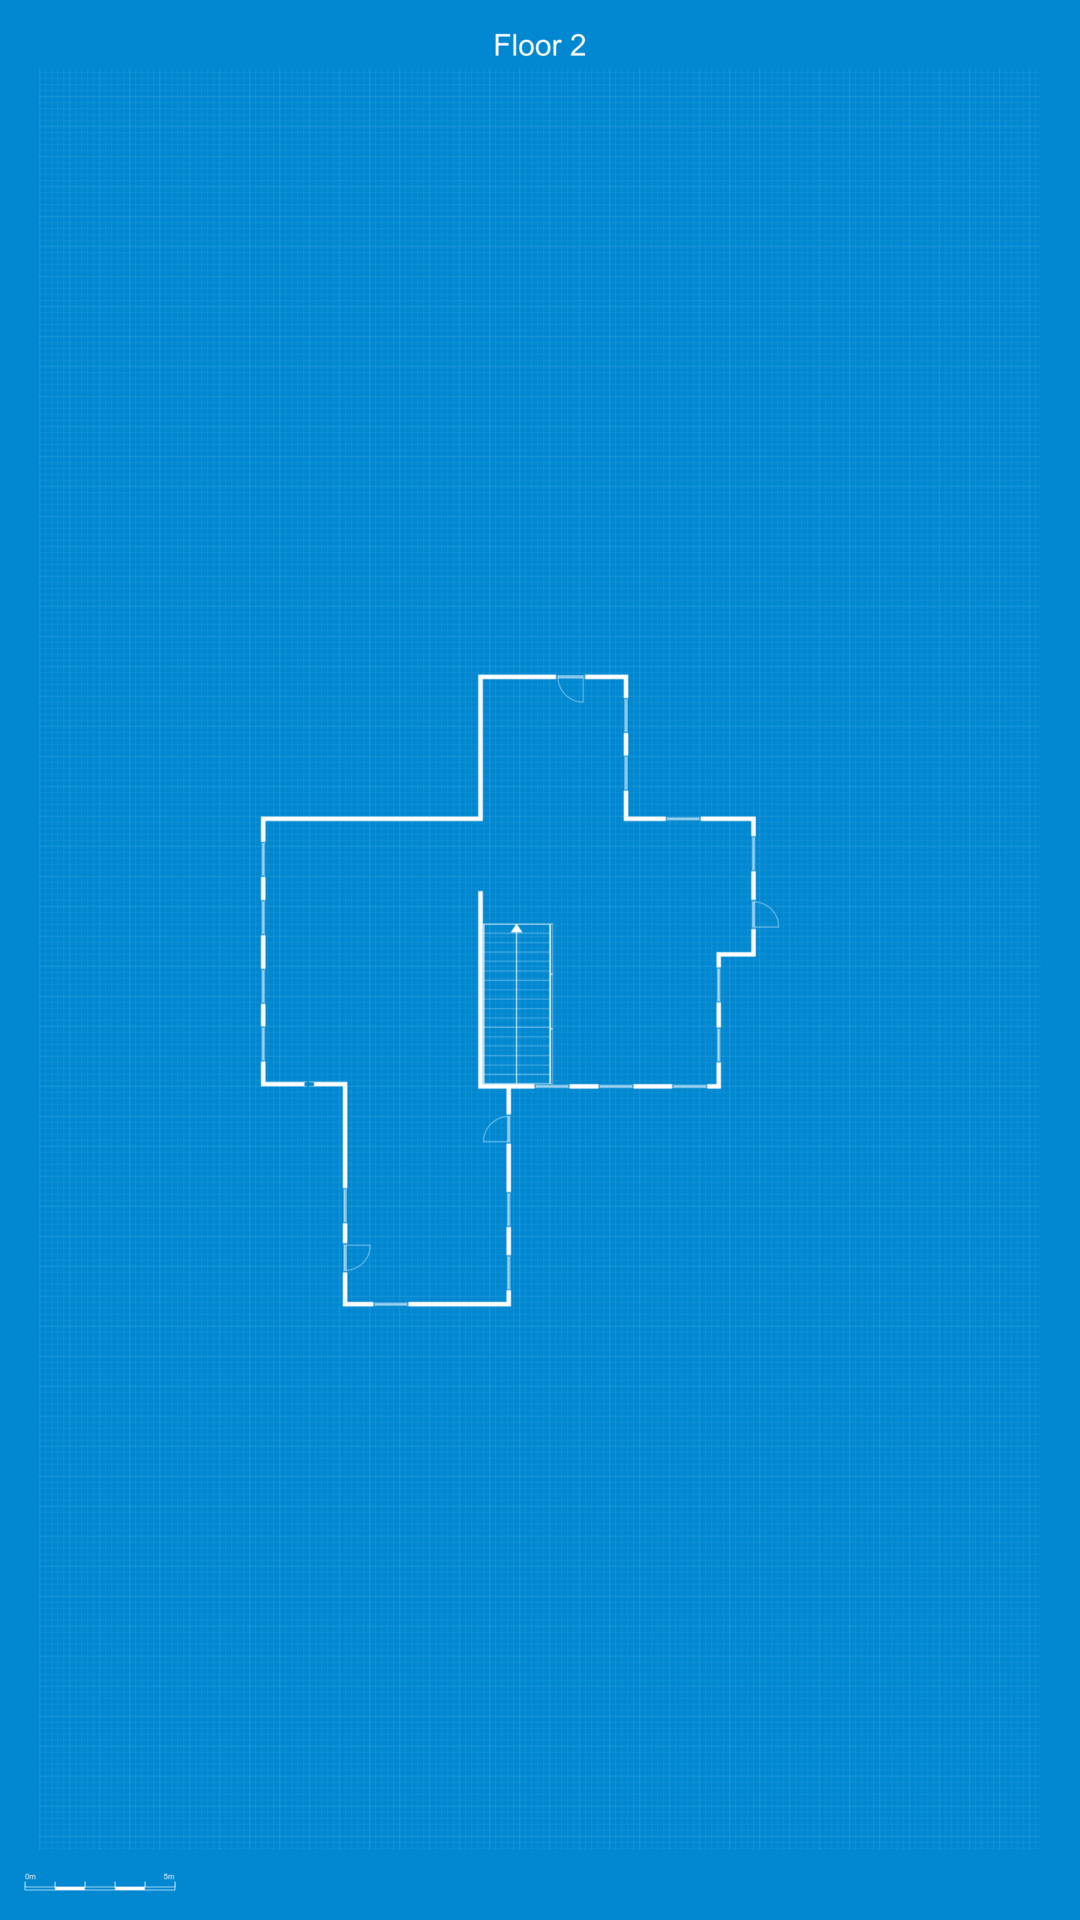
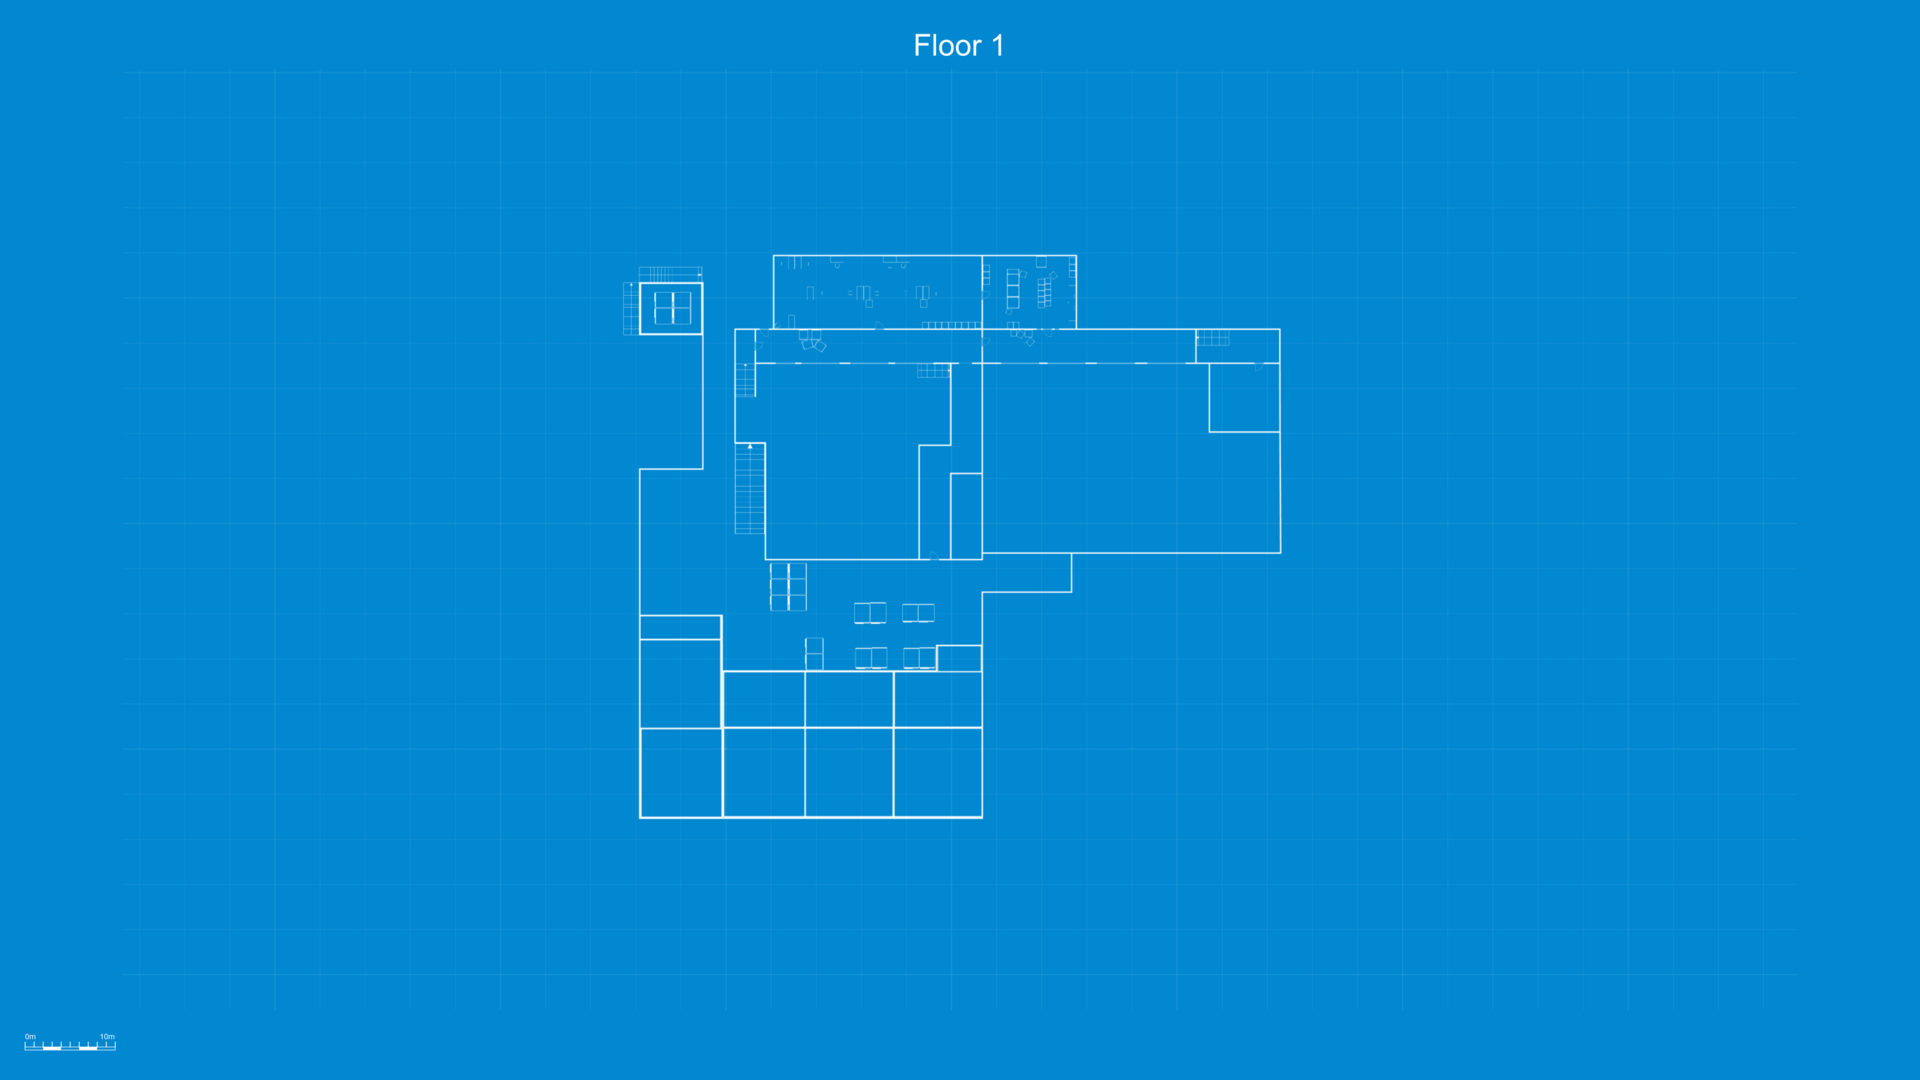
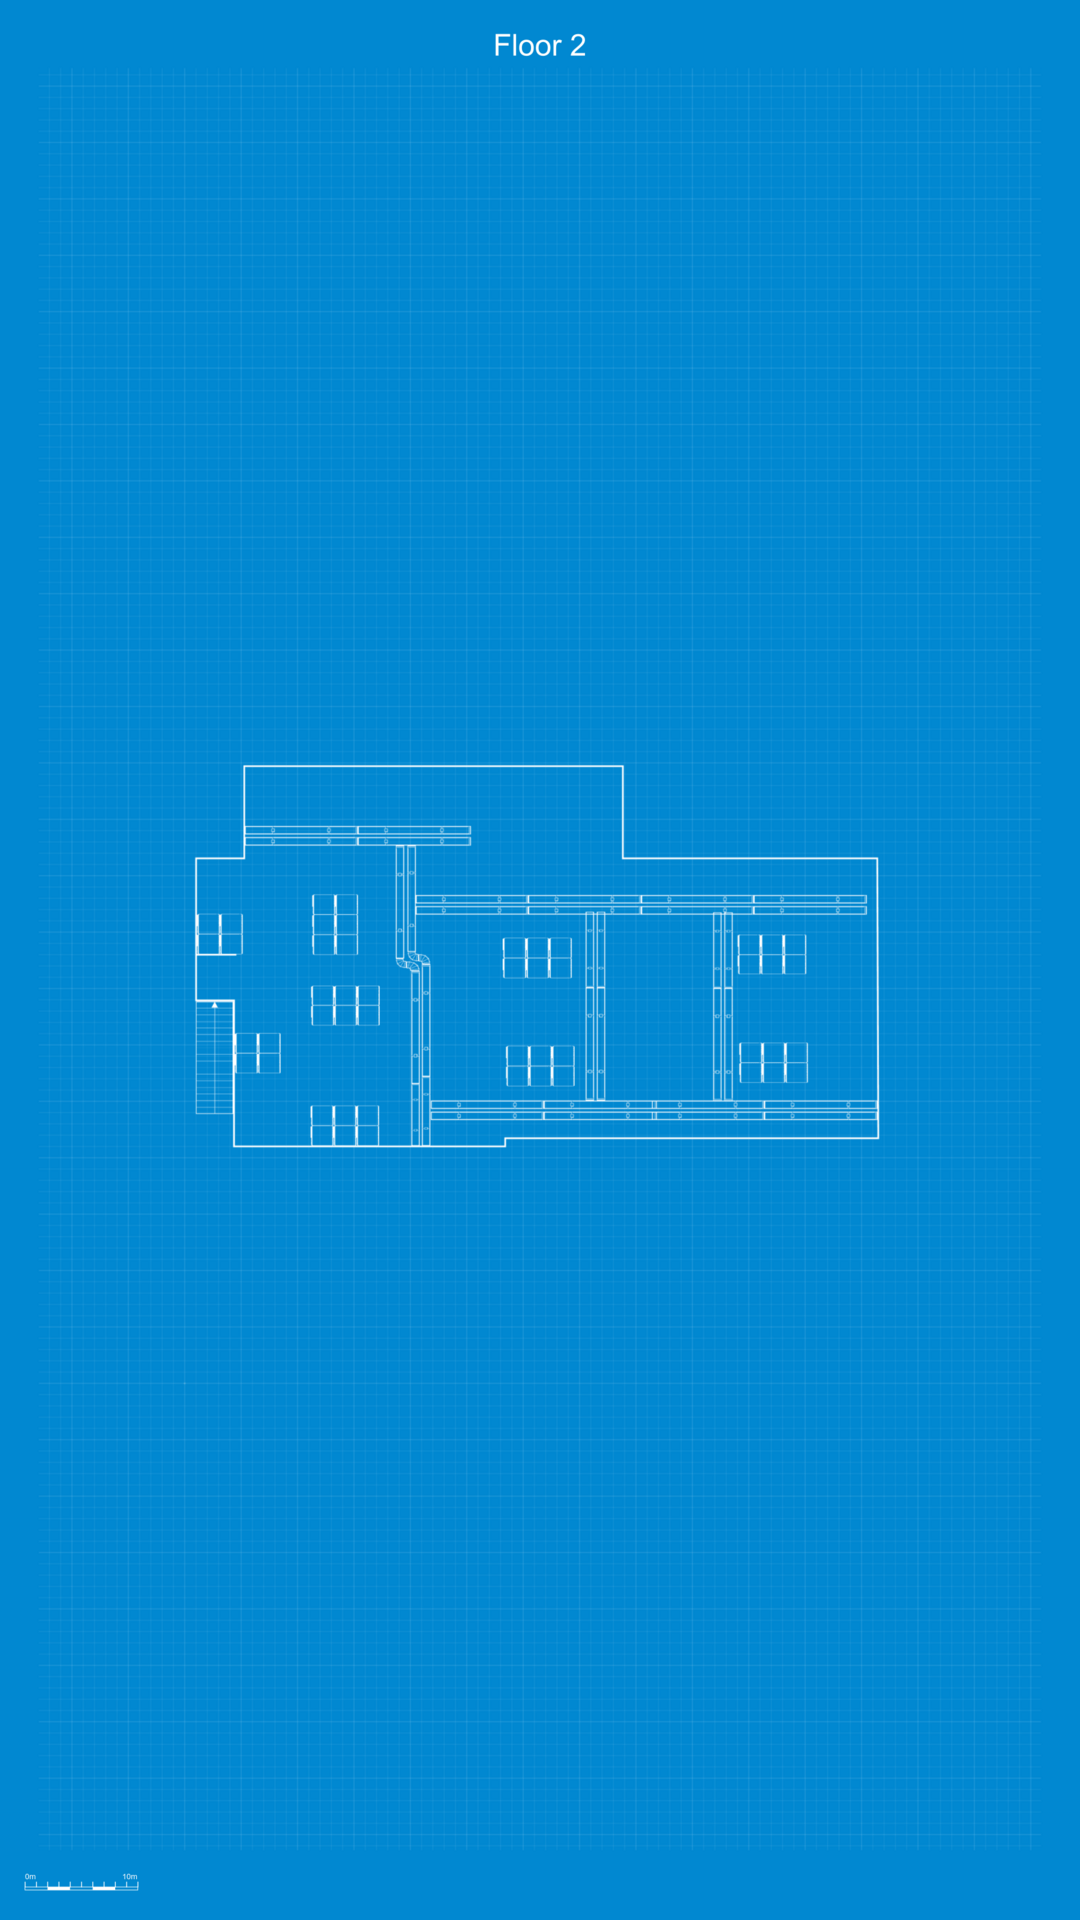
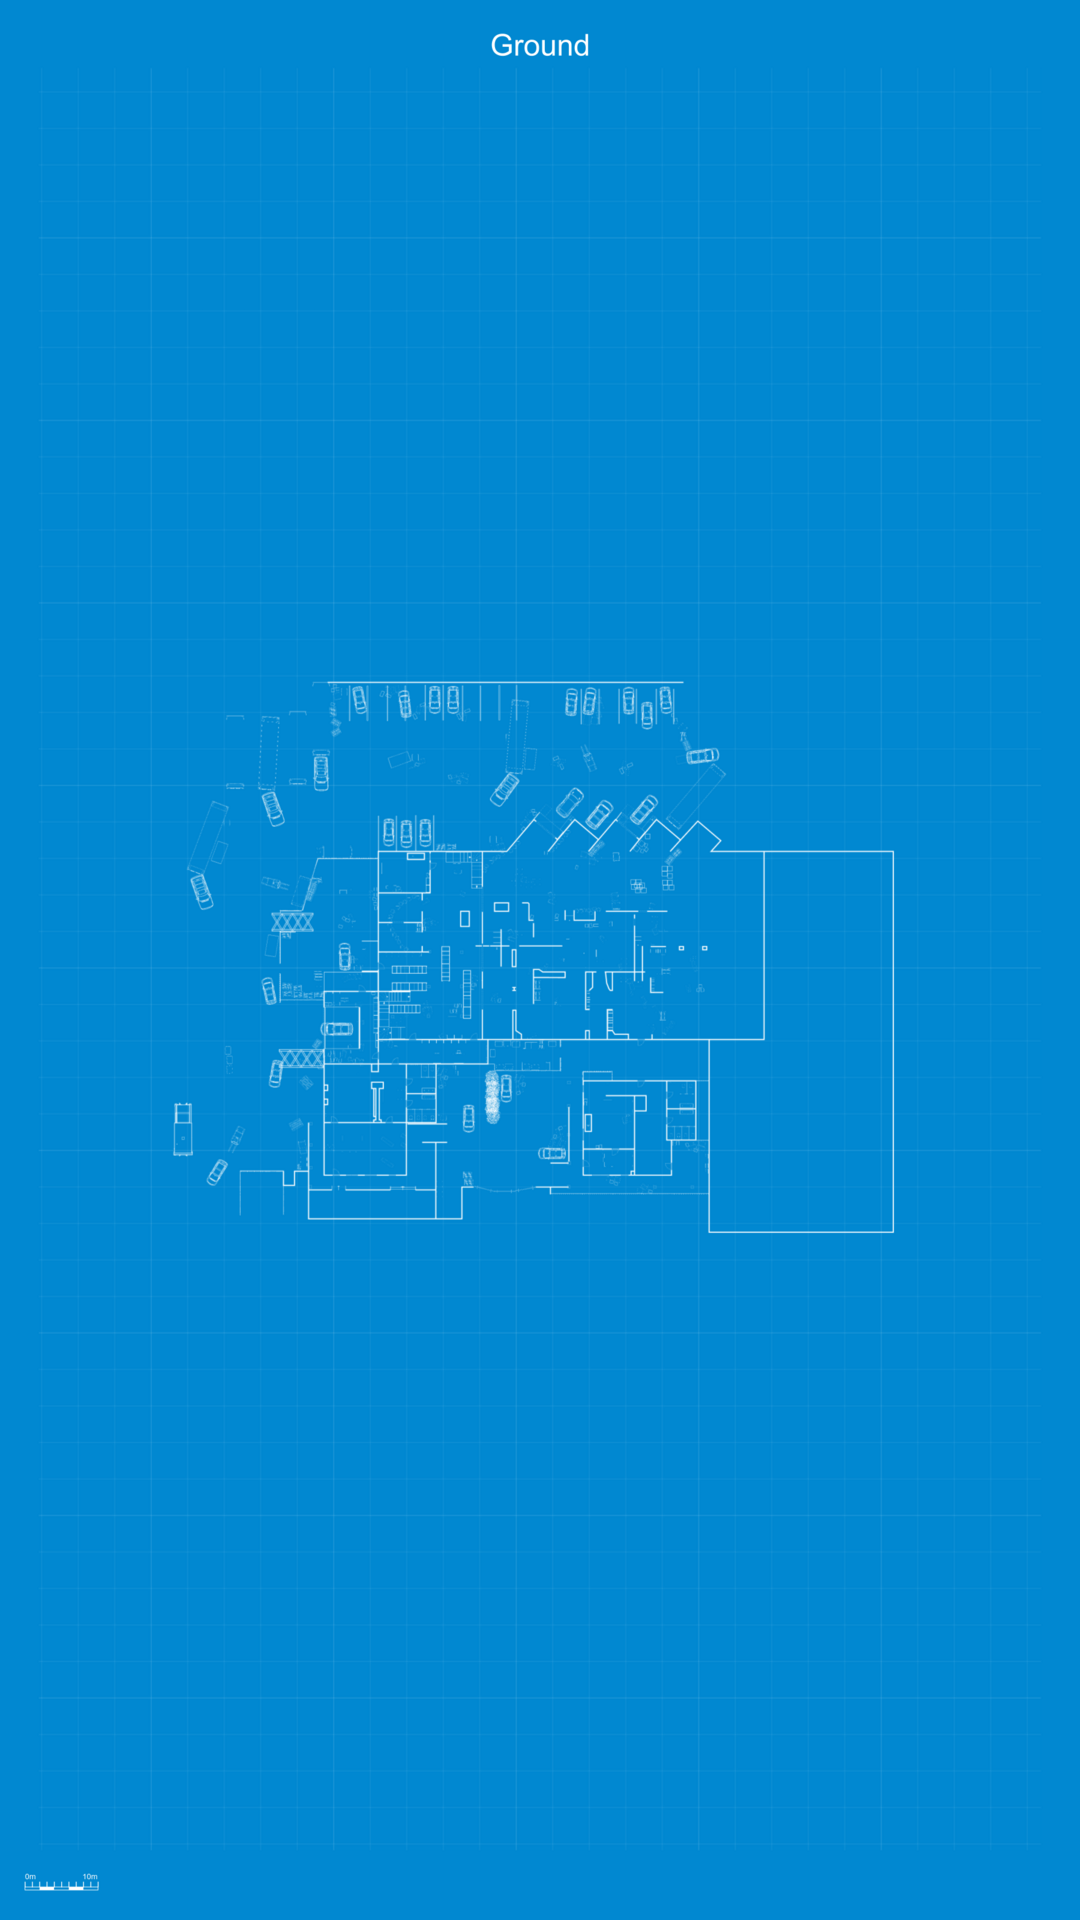
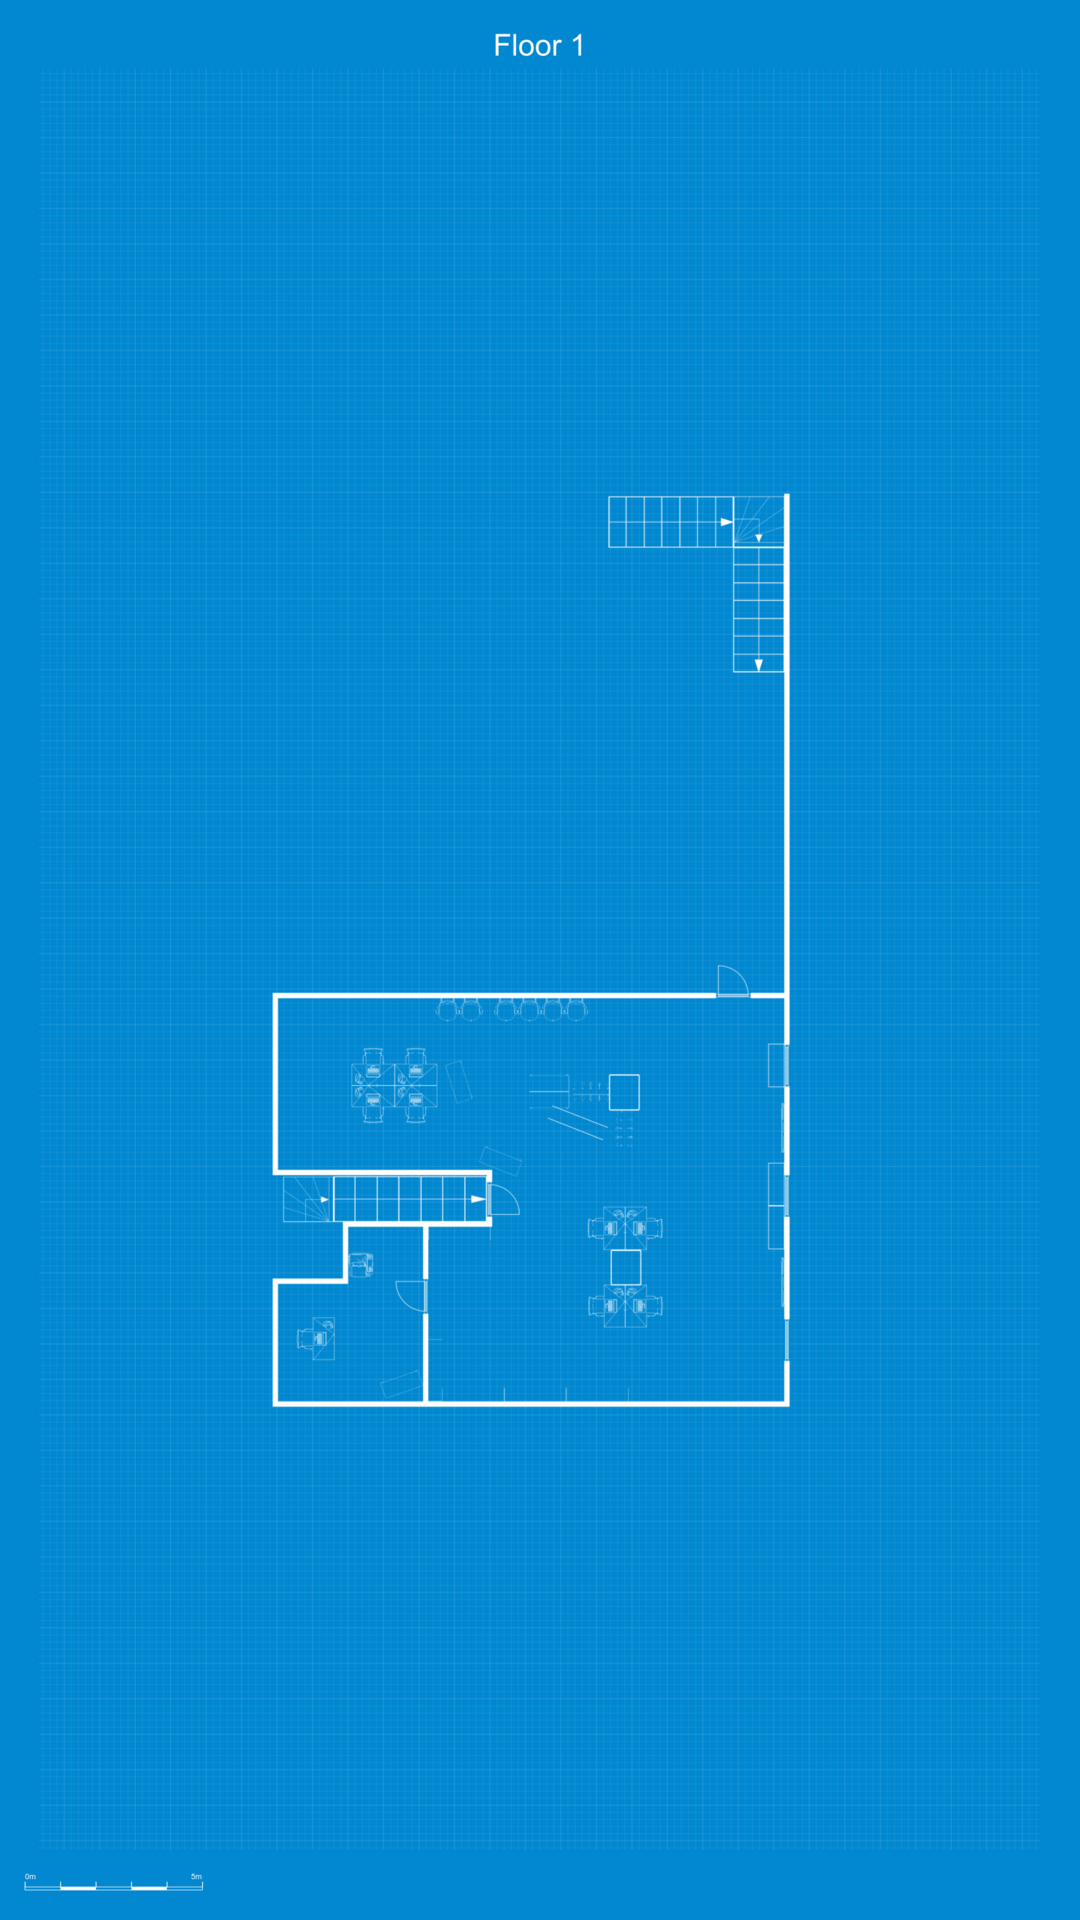
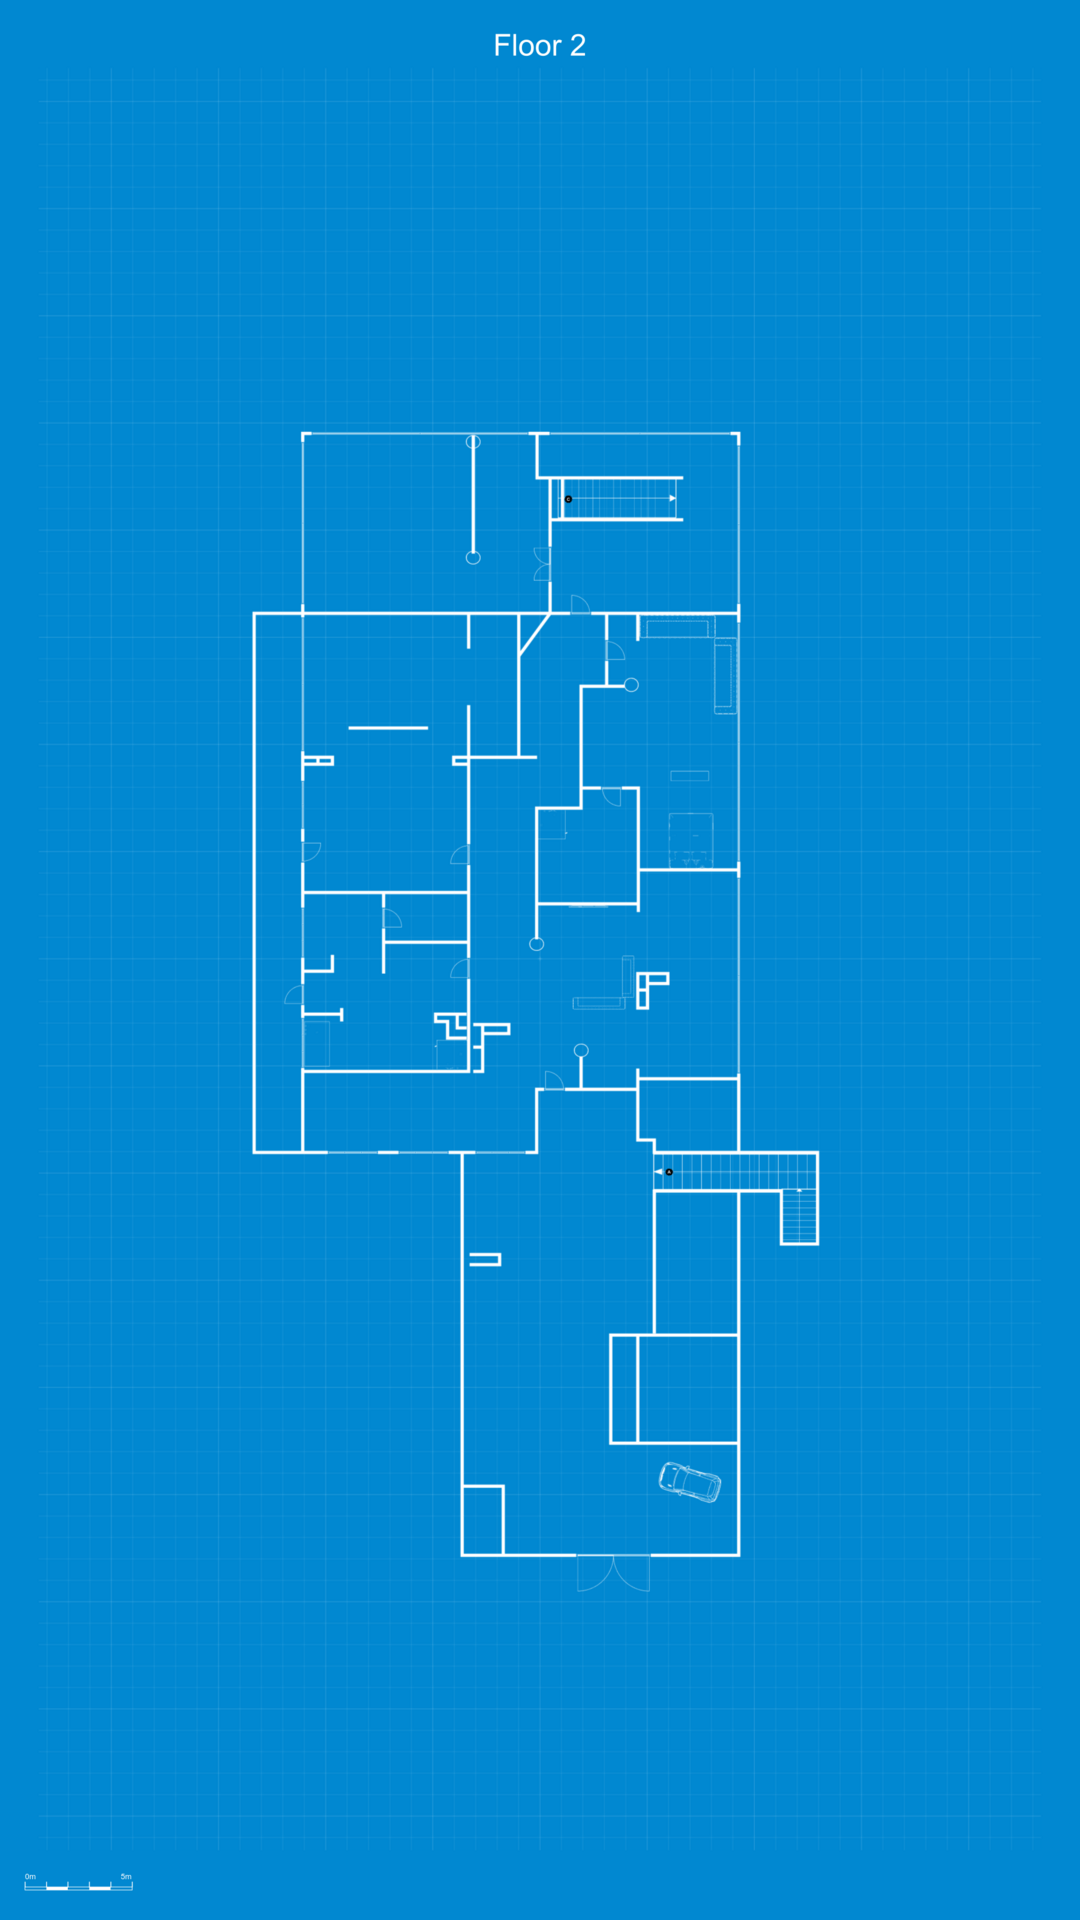
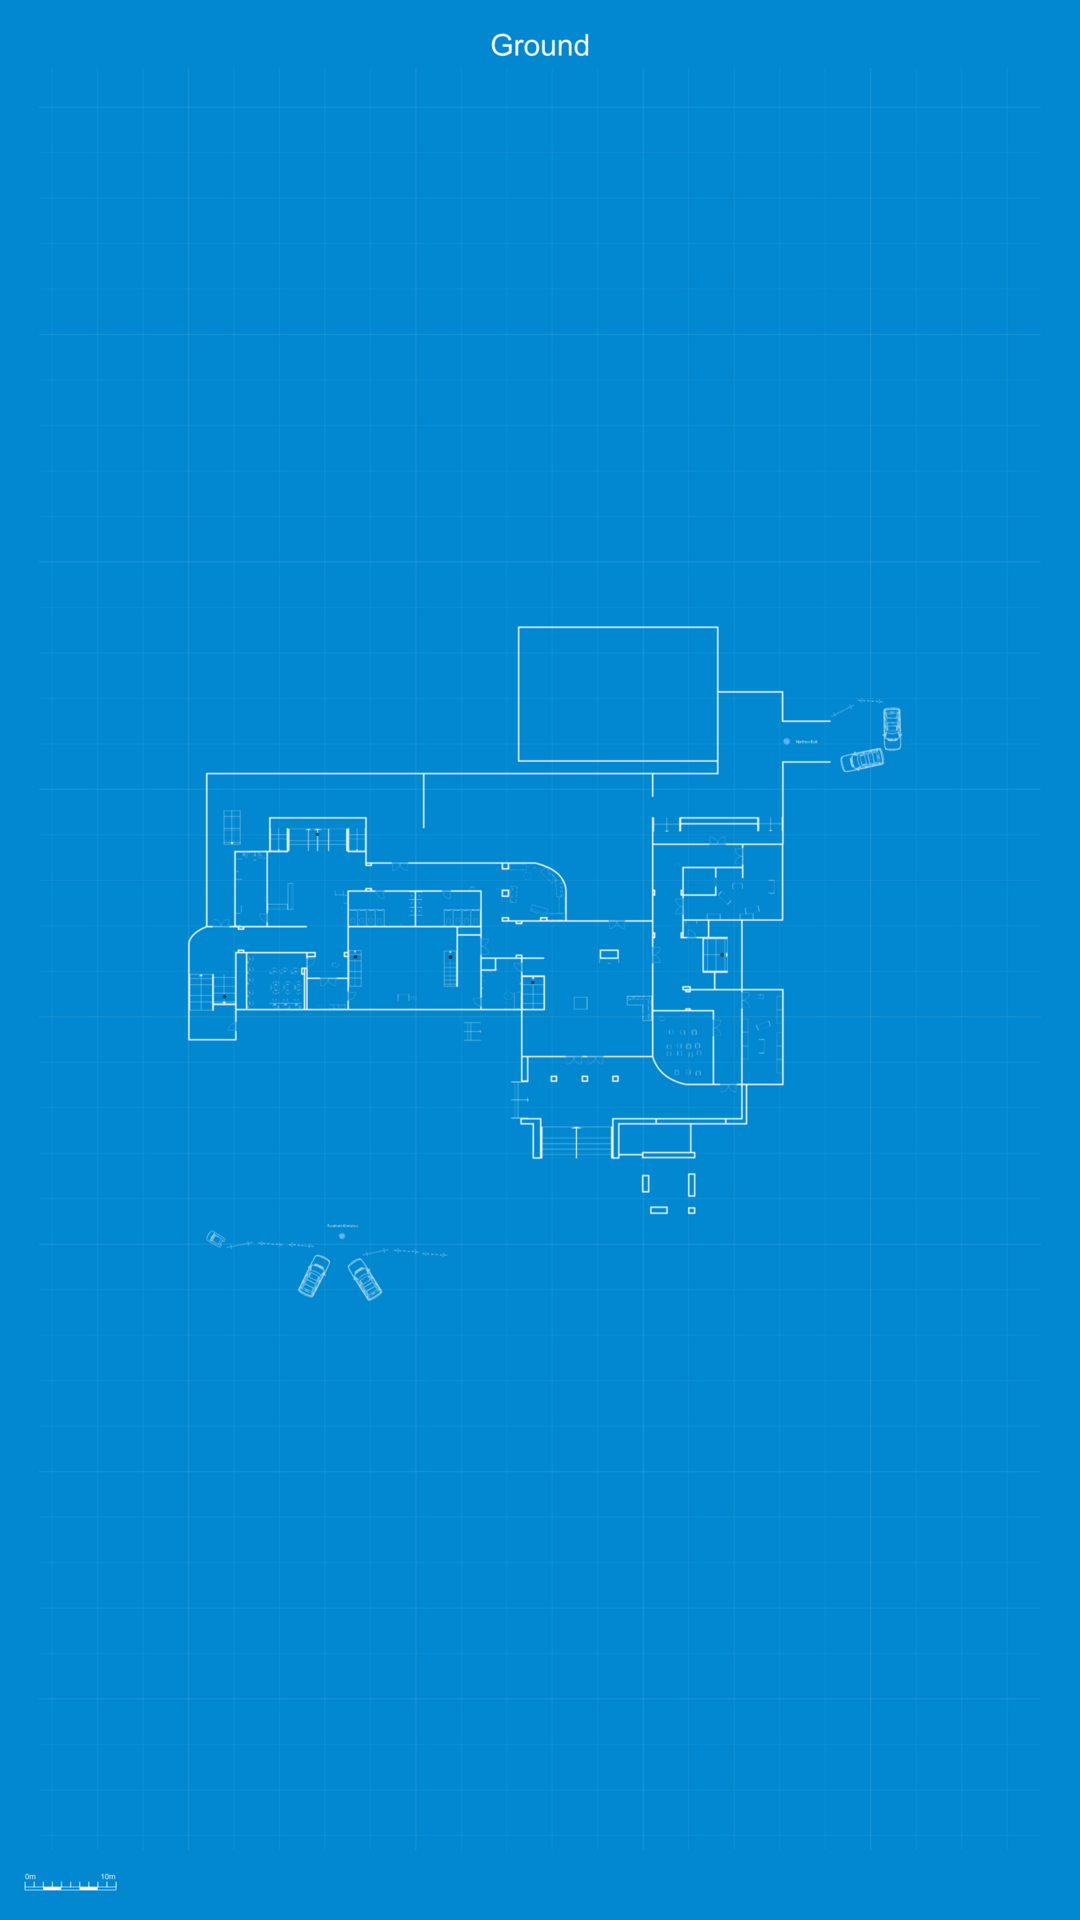
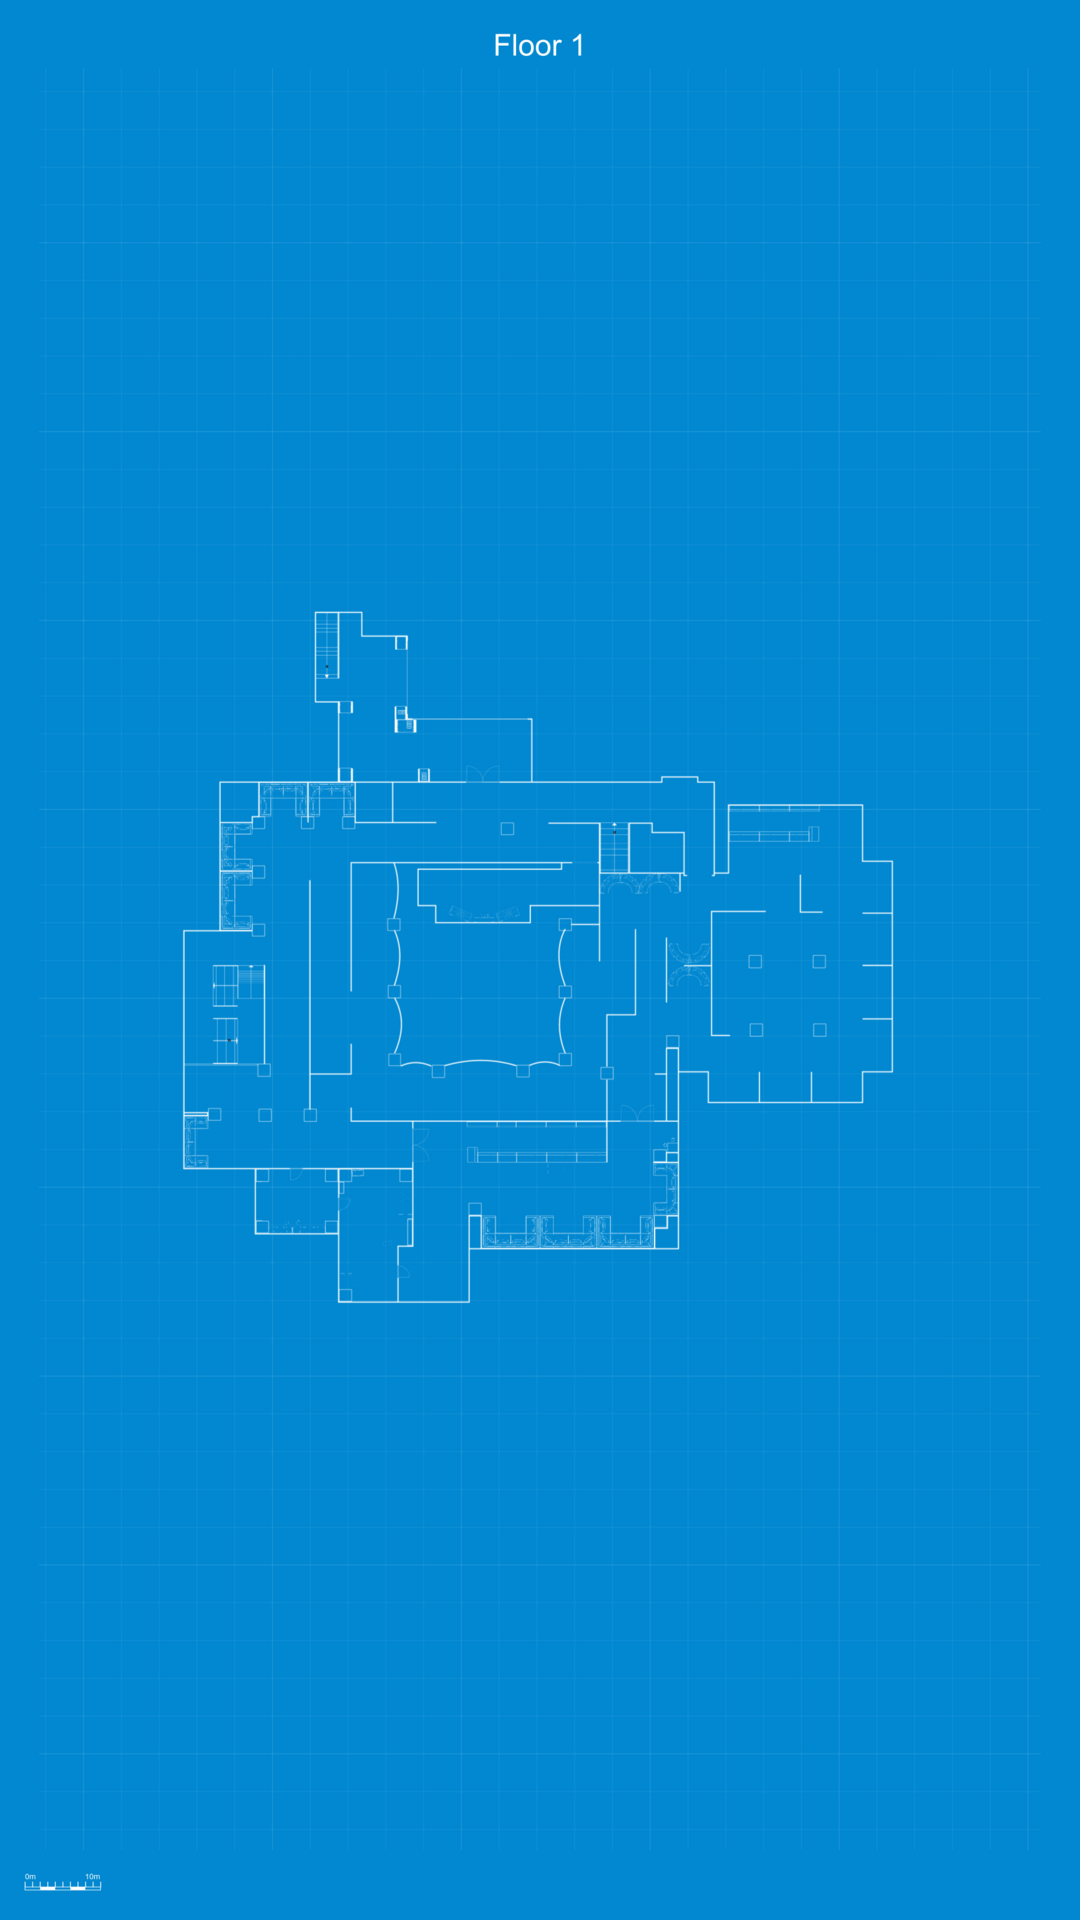
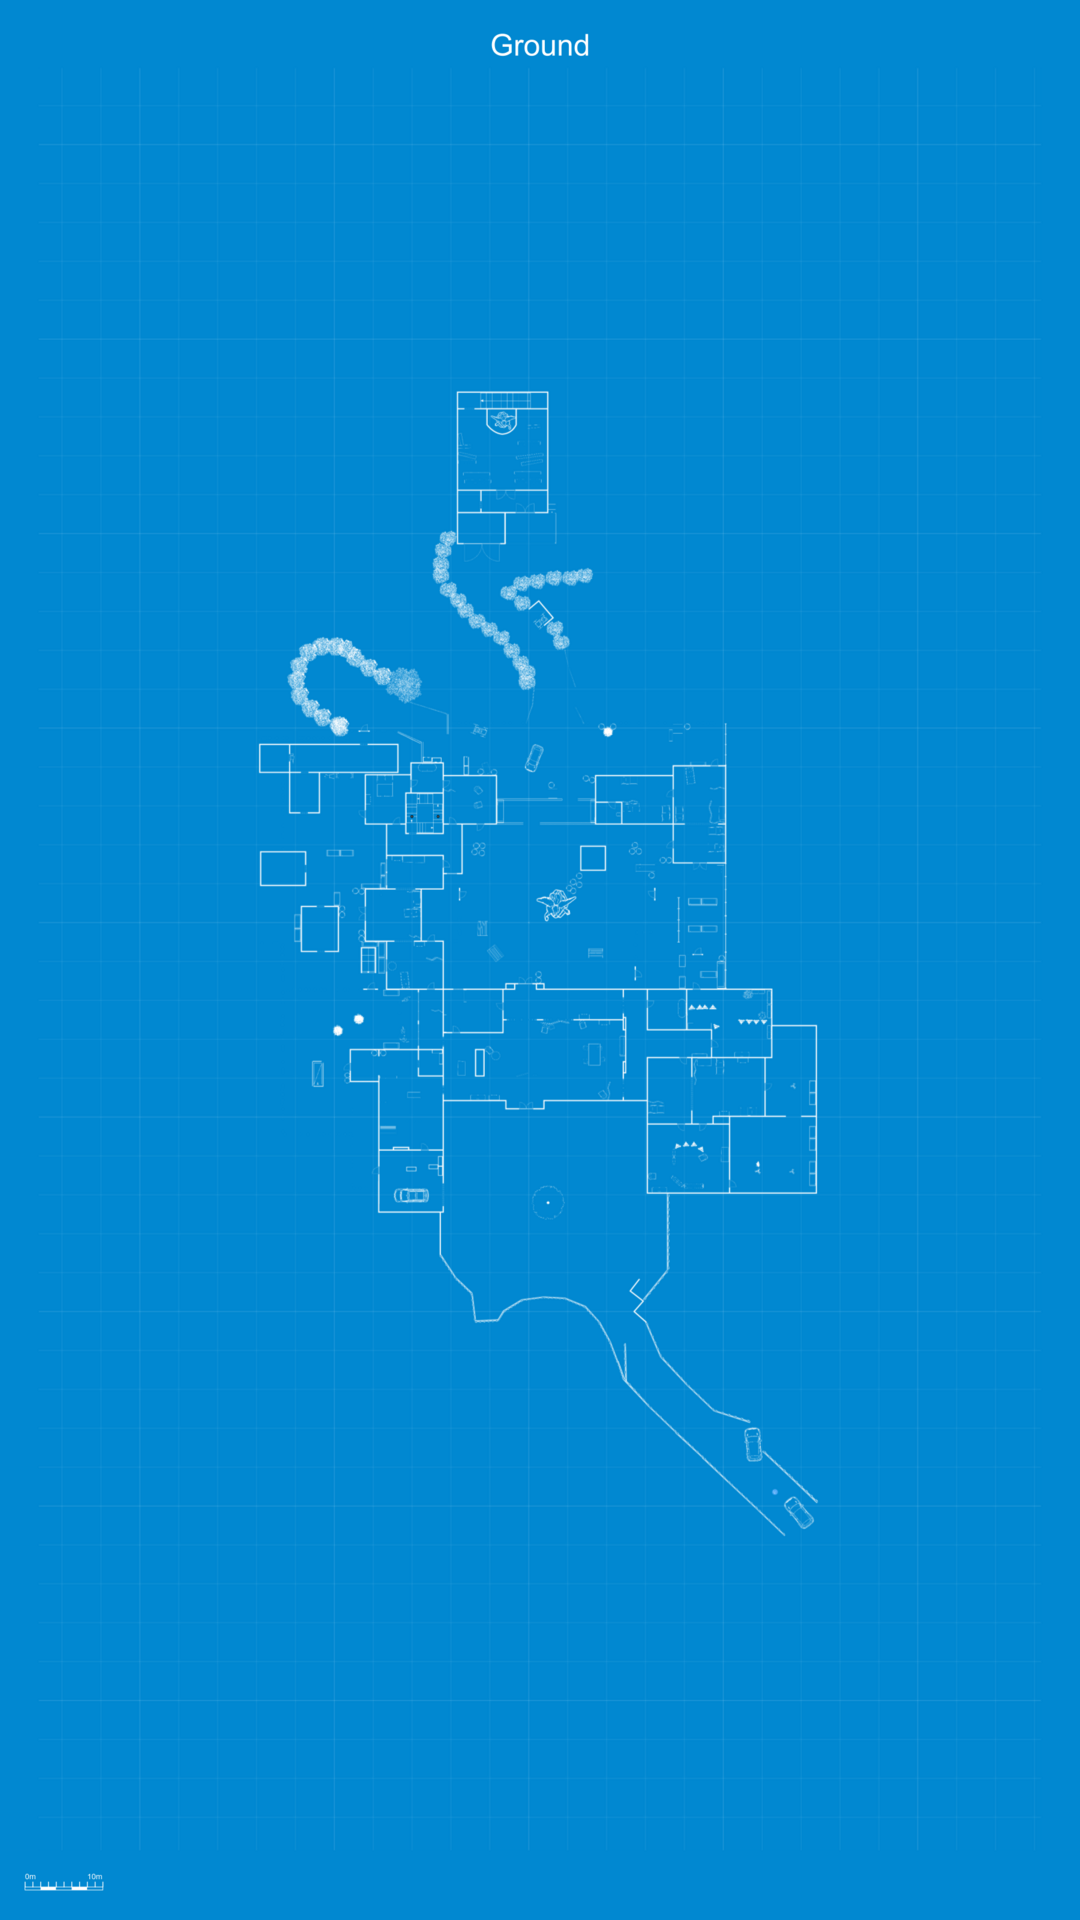
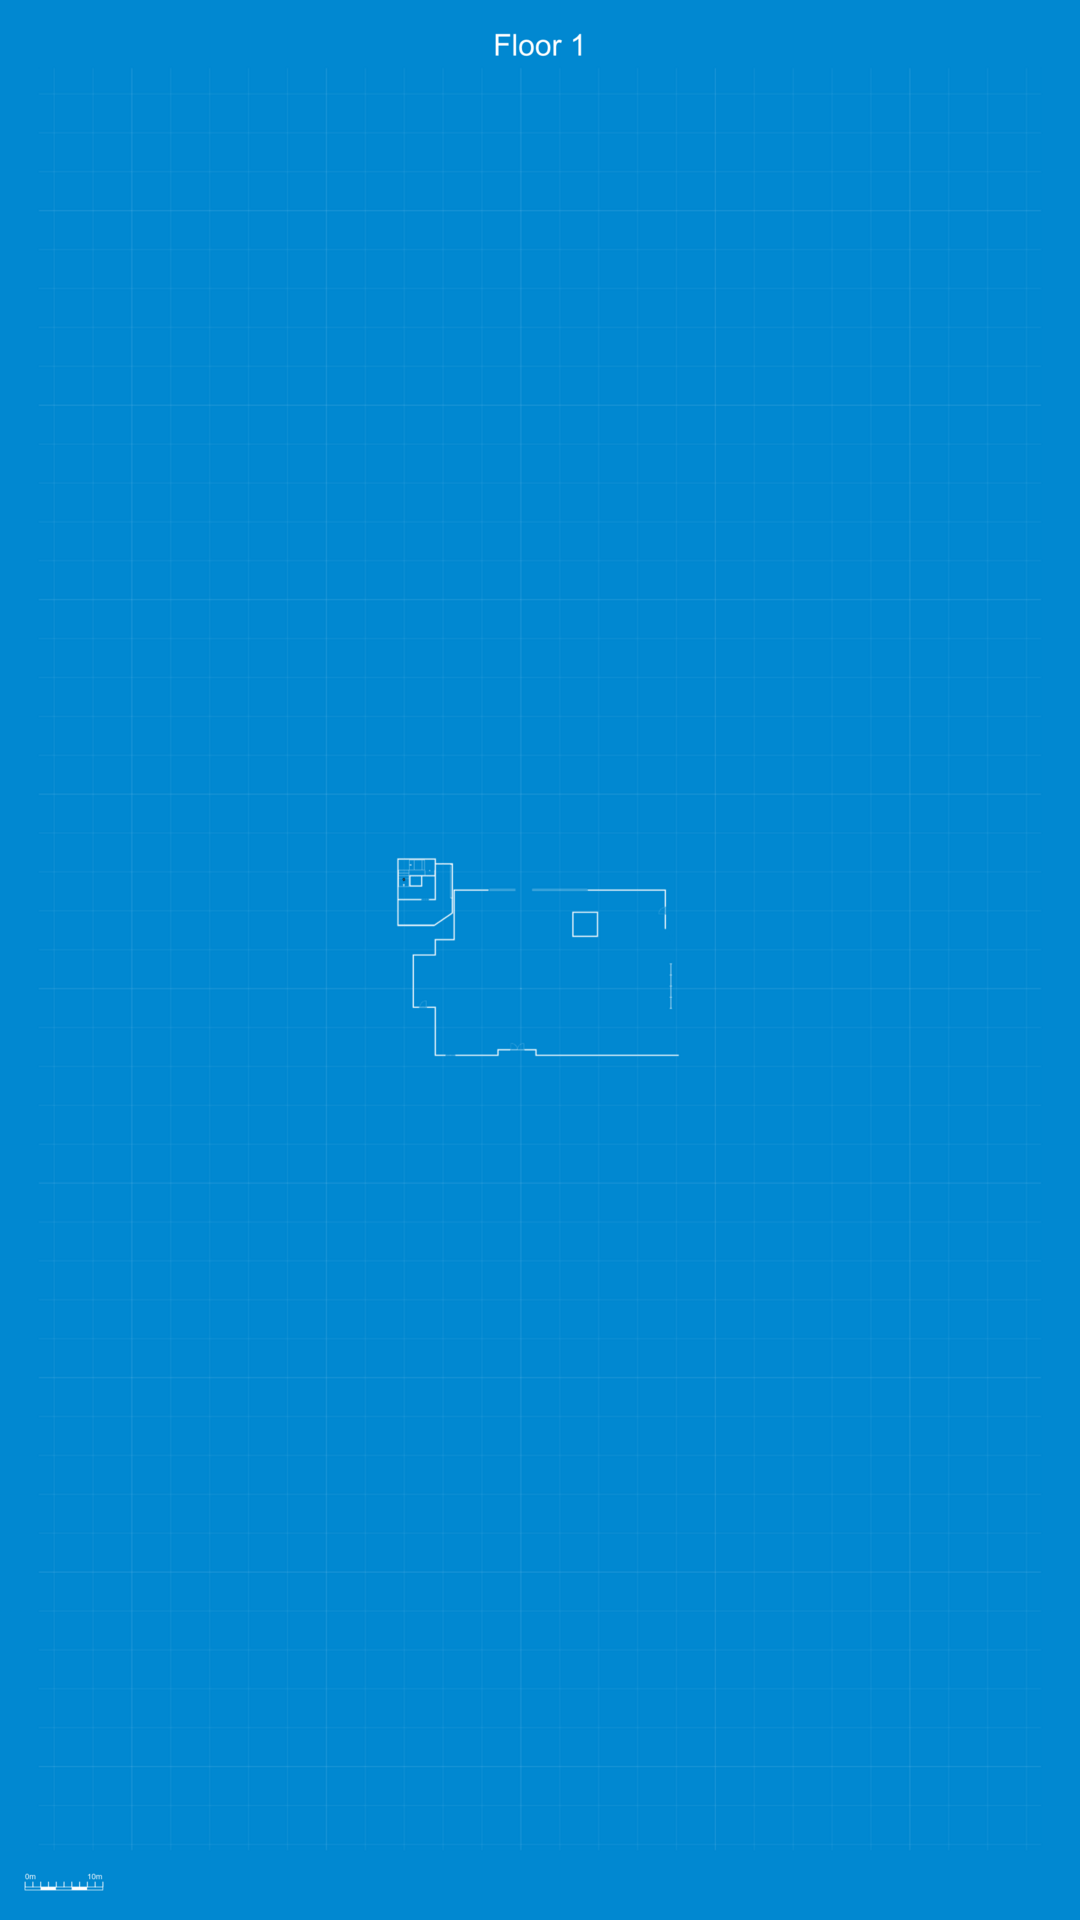
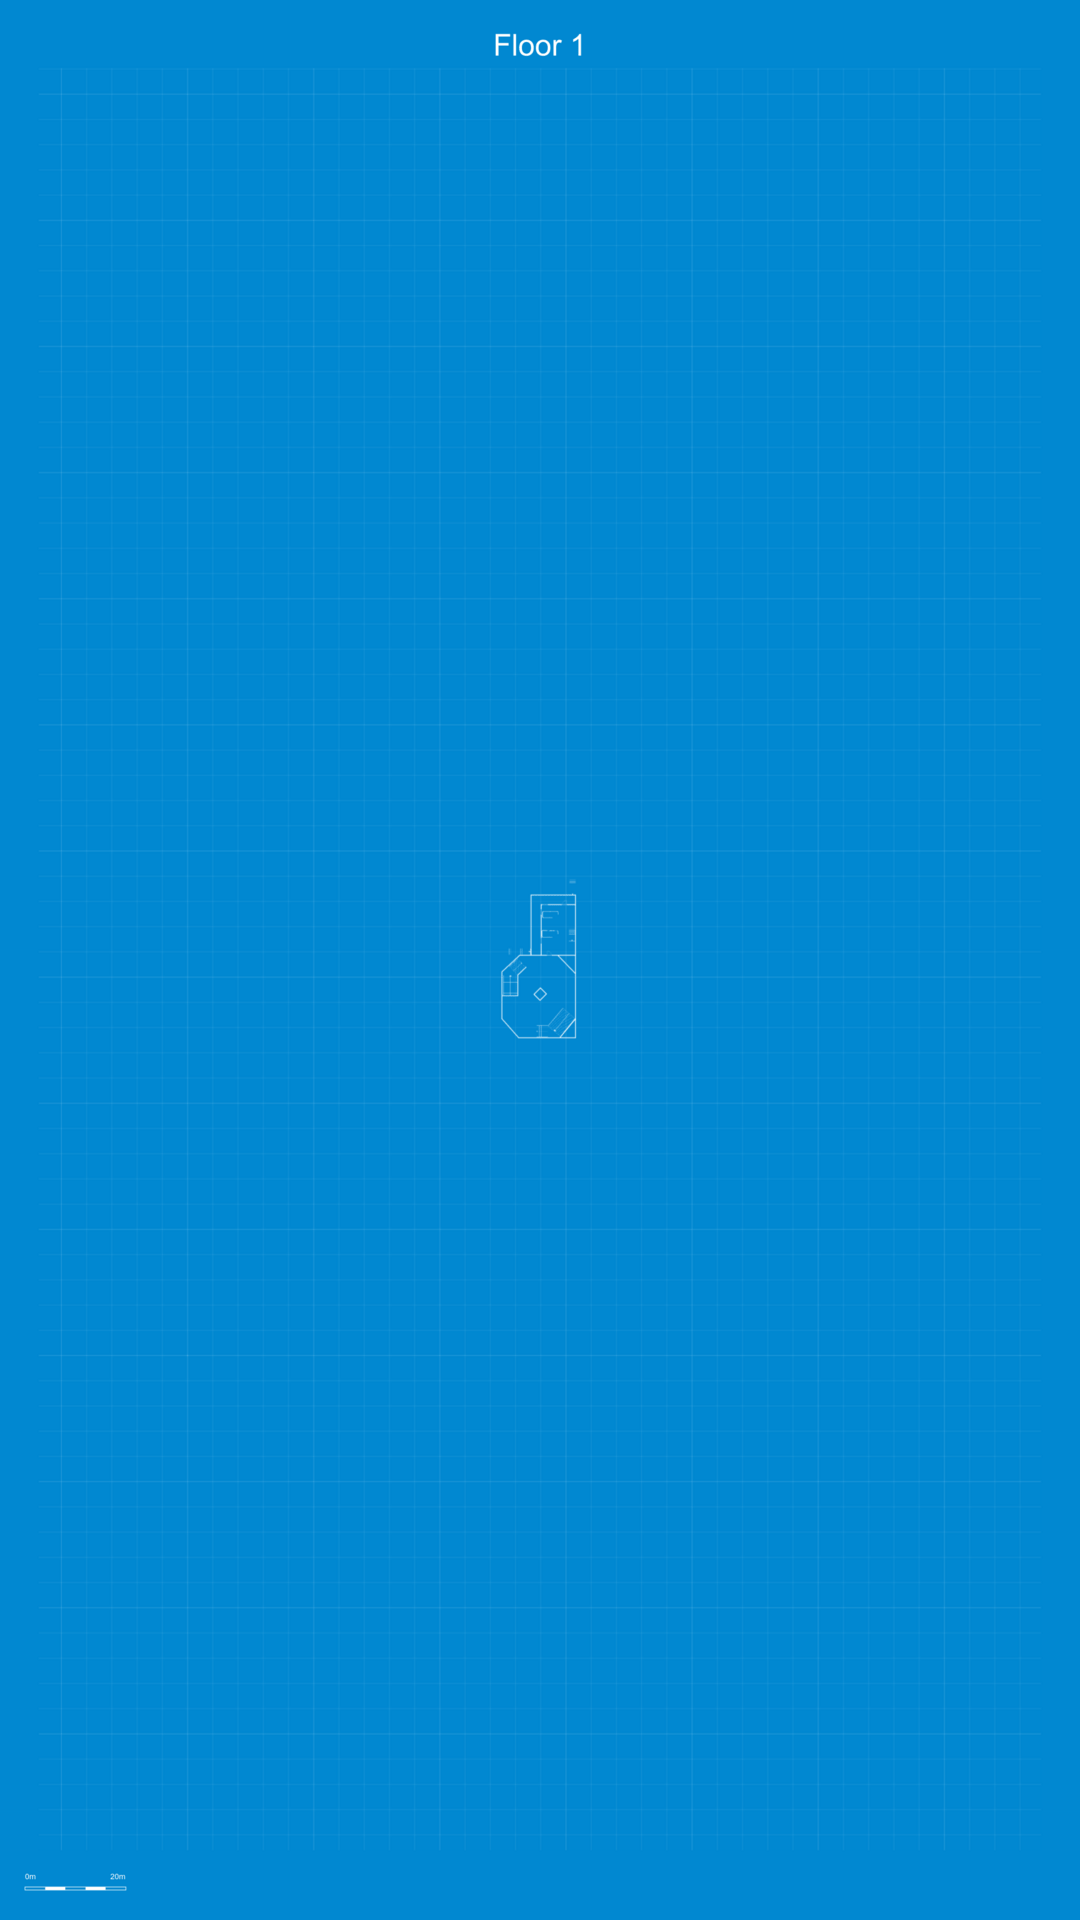
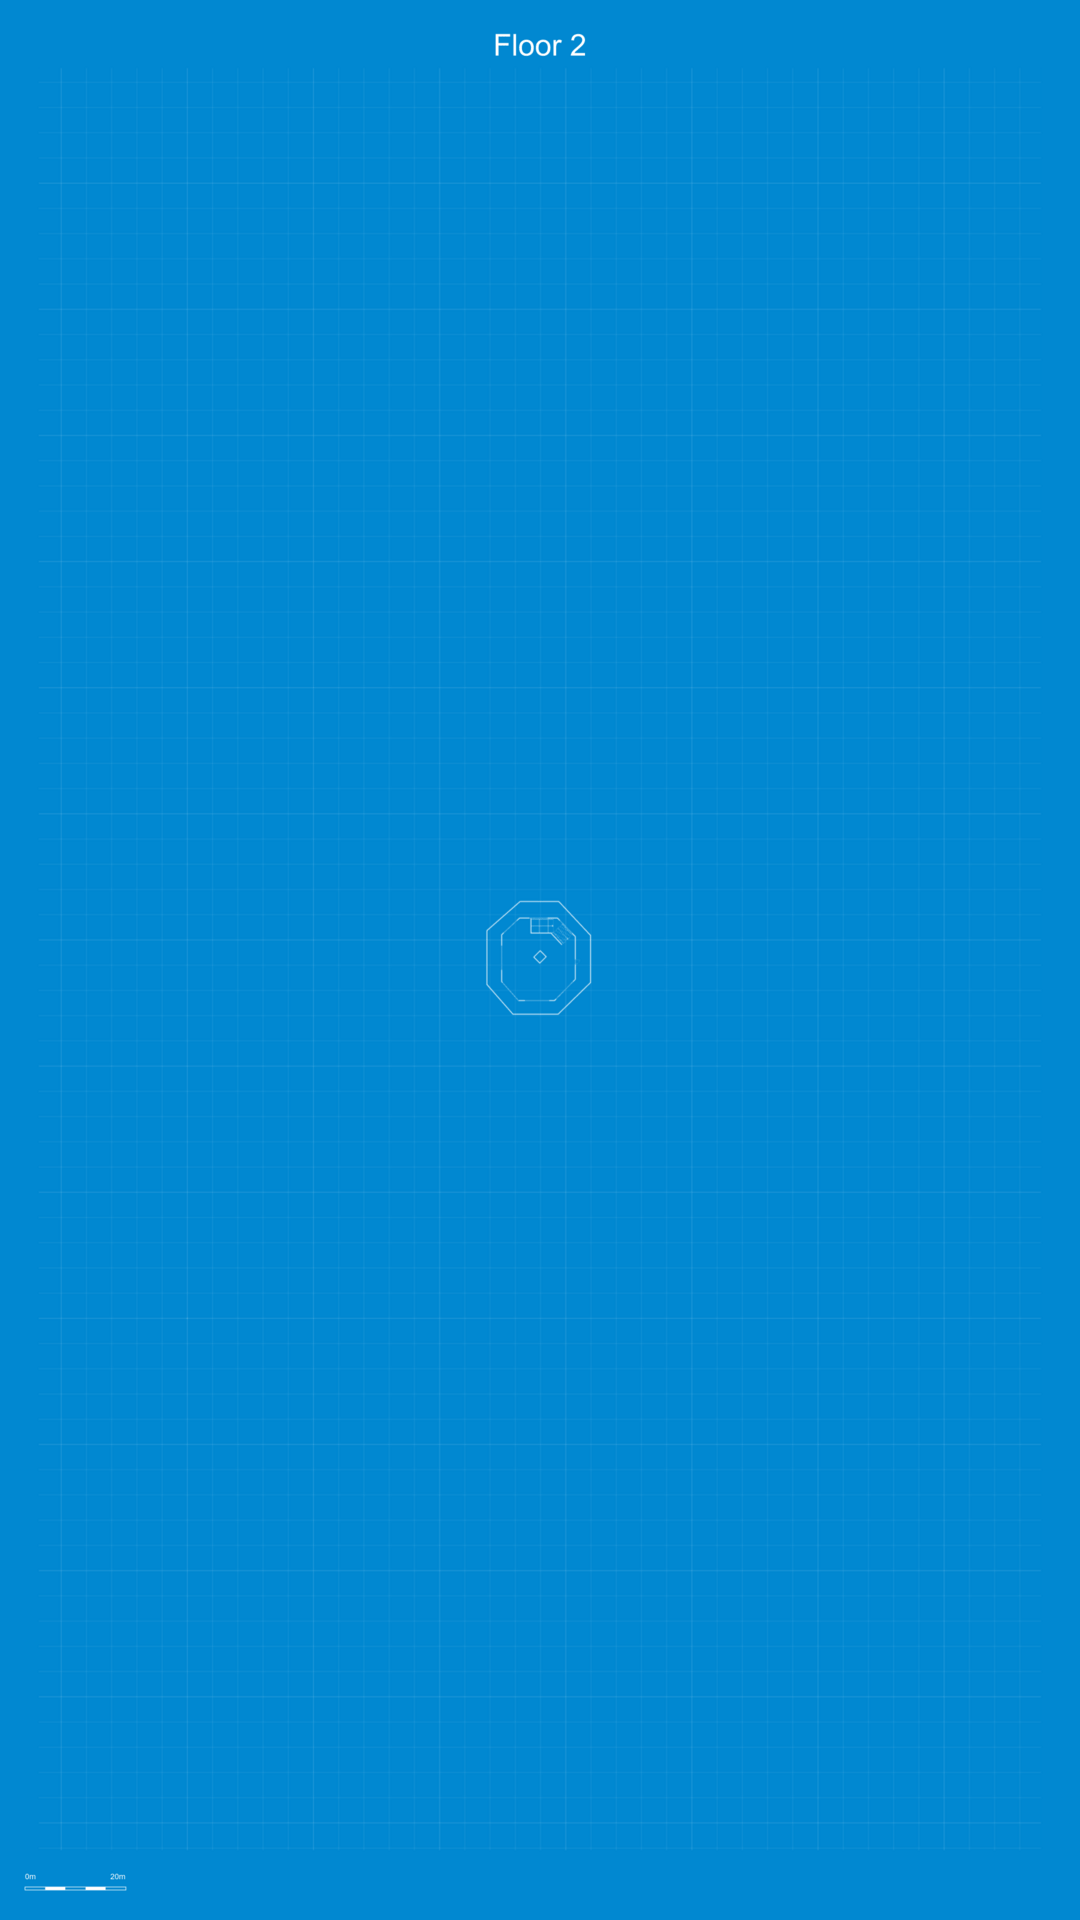
Mission: 23 Megabytes a Second / Map: San Uriel Condominiums
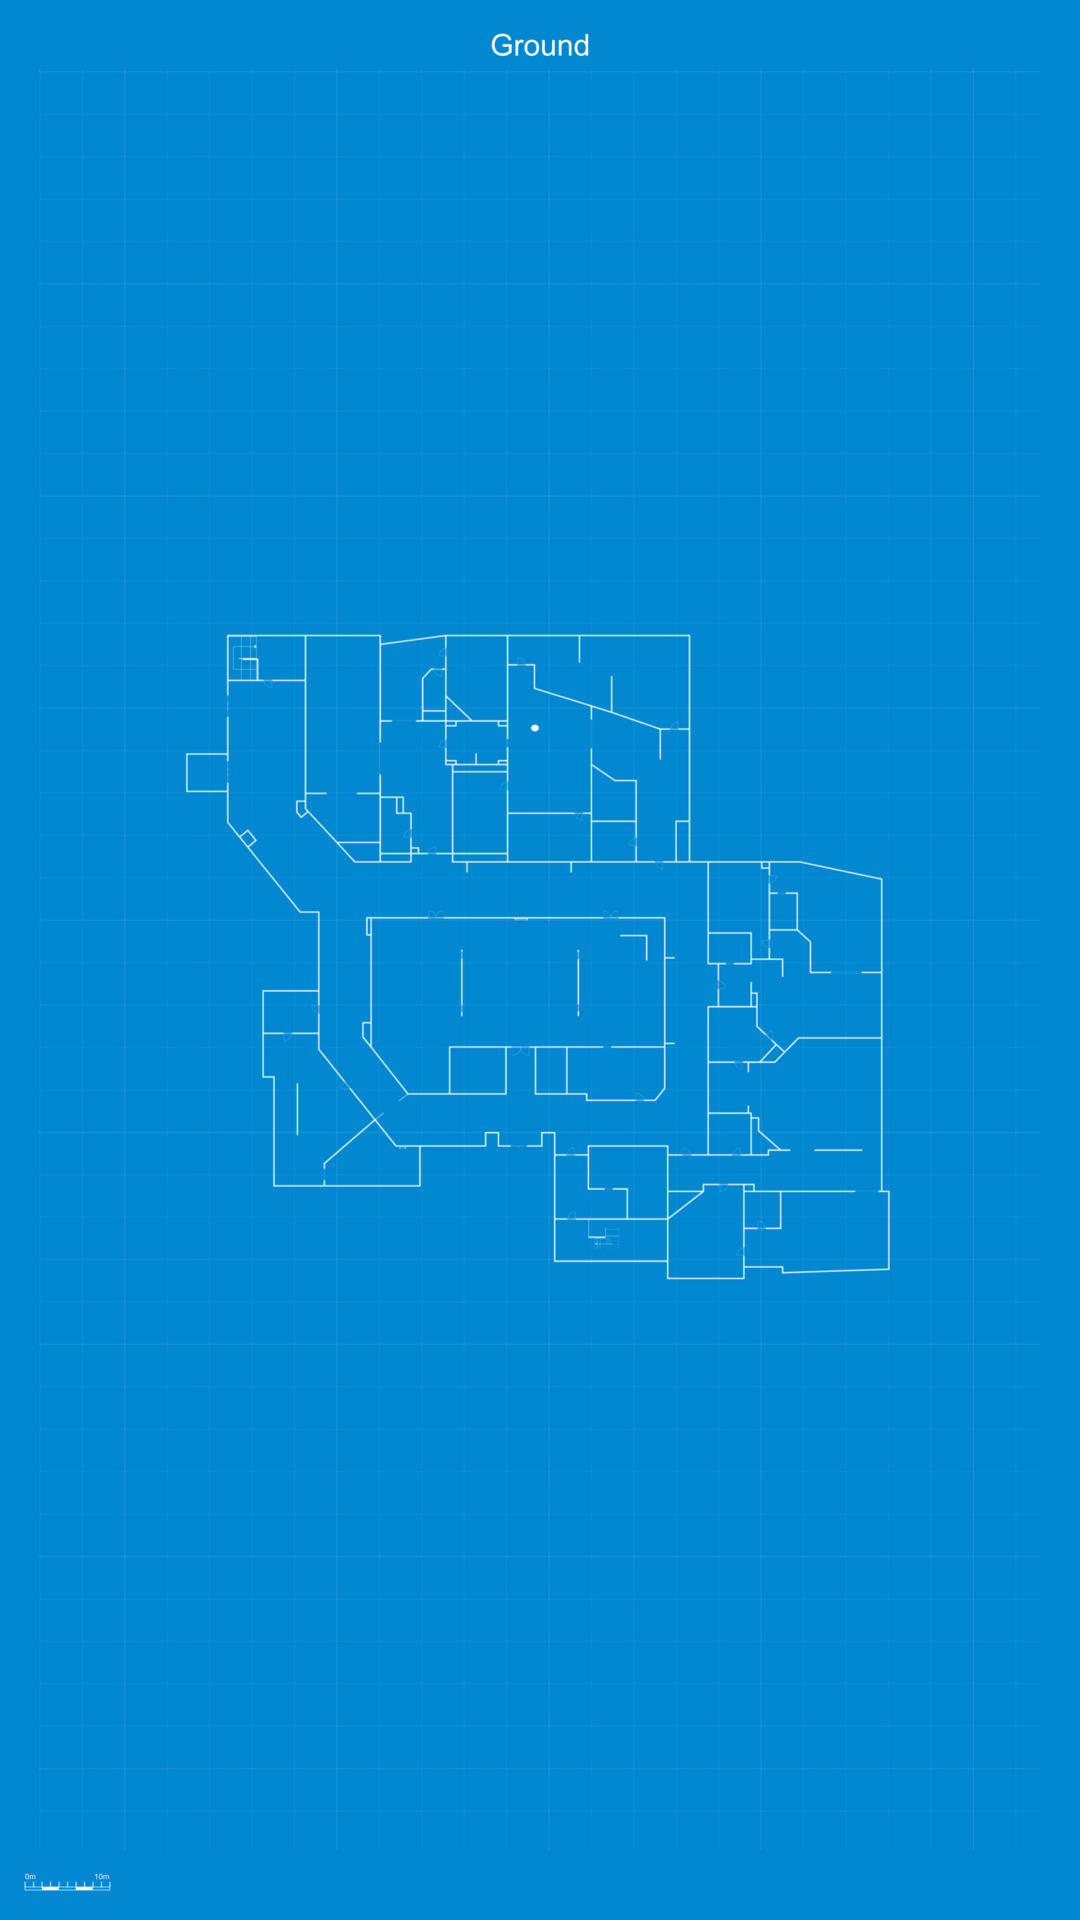
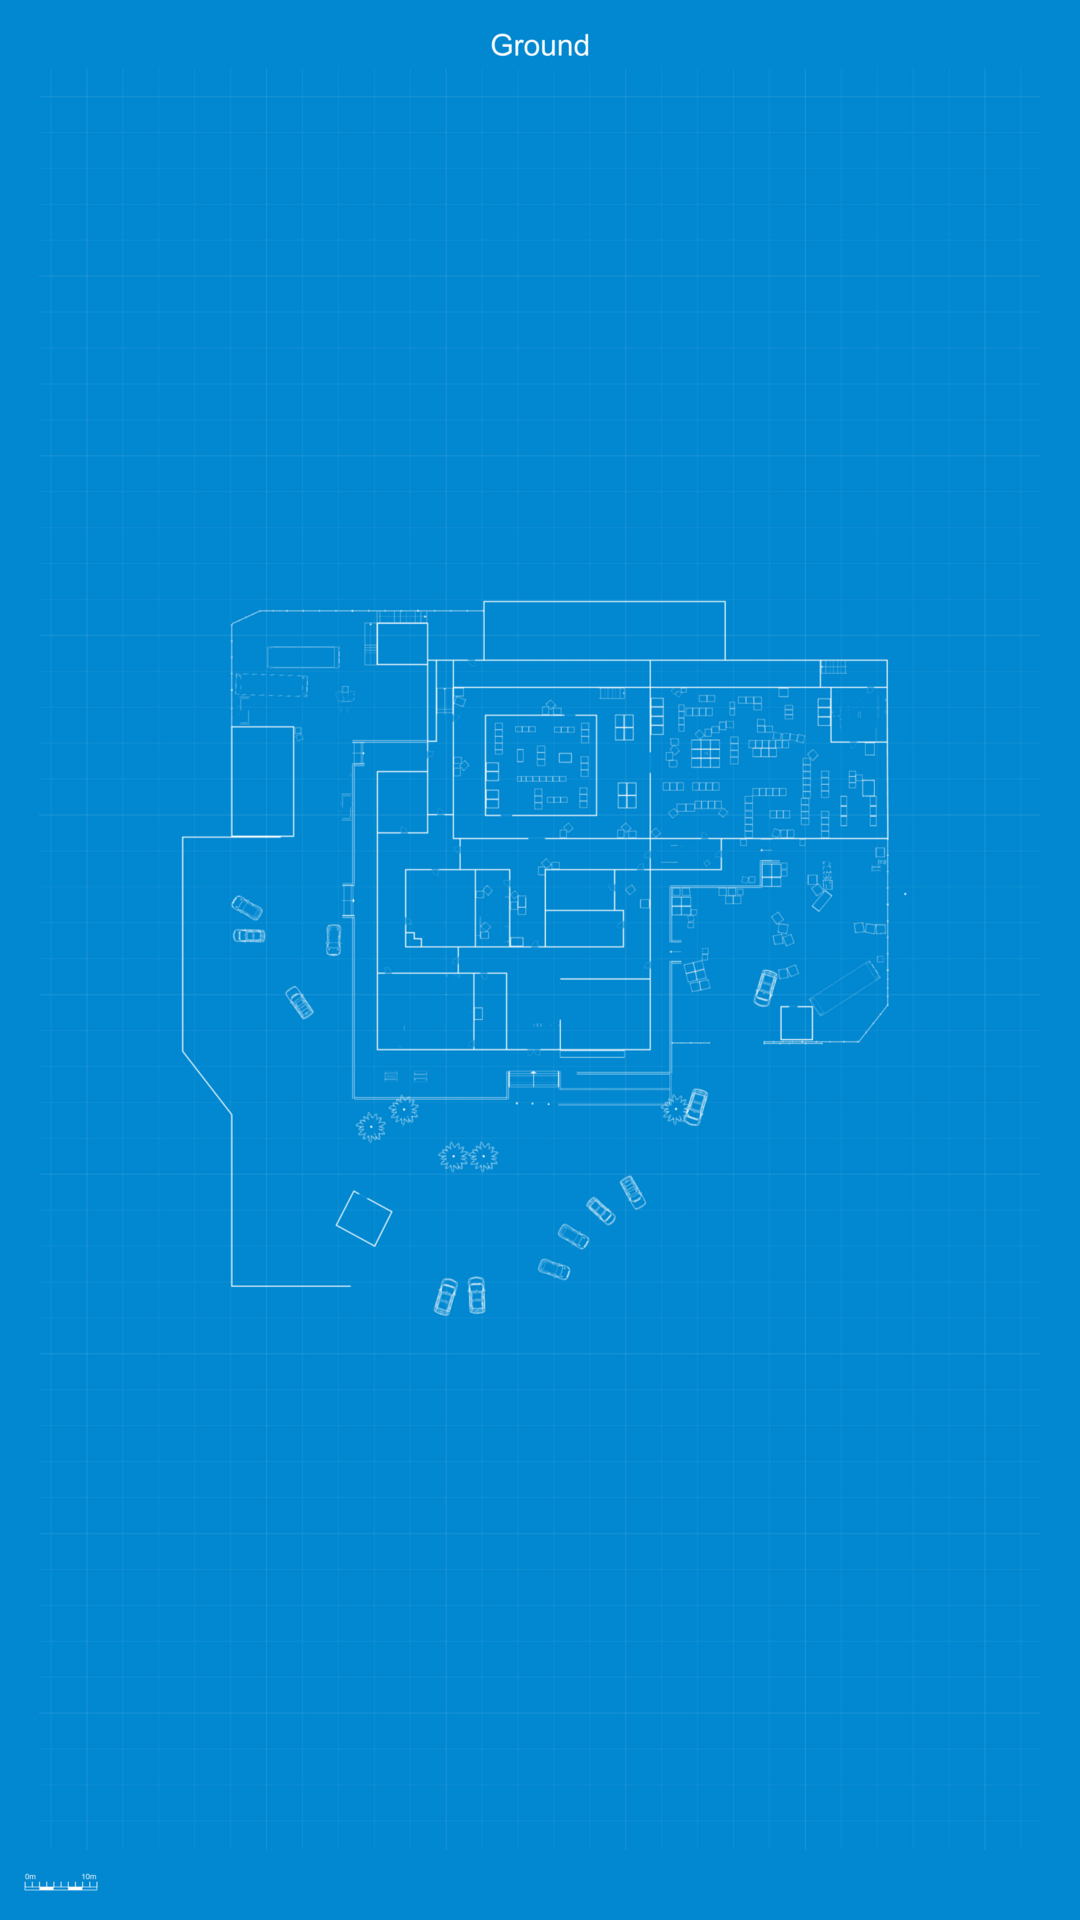
Ground
Floor #1
Floor #2
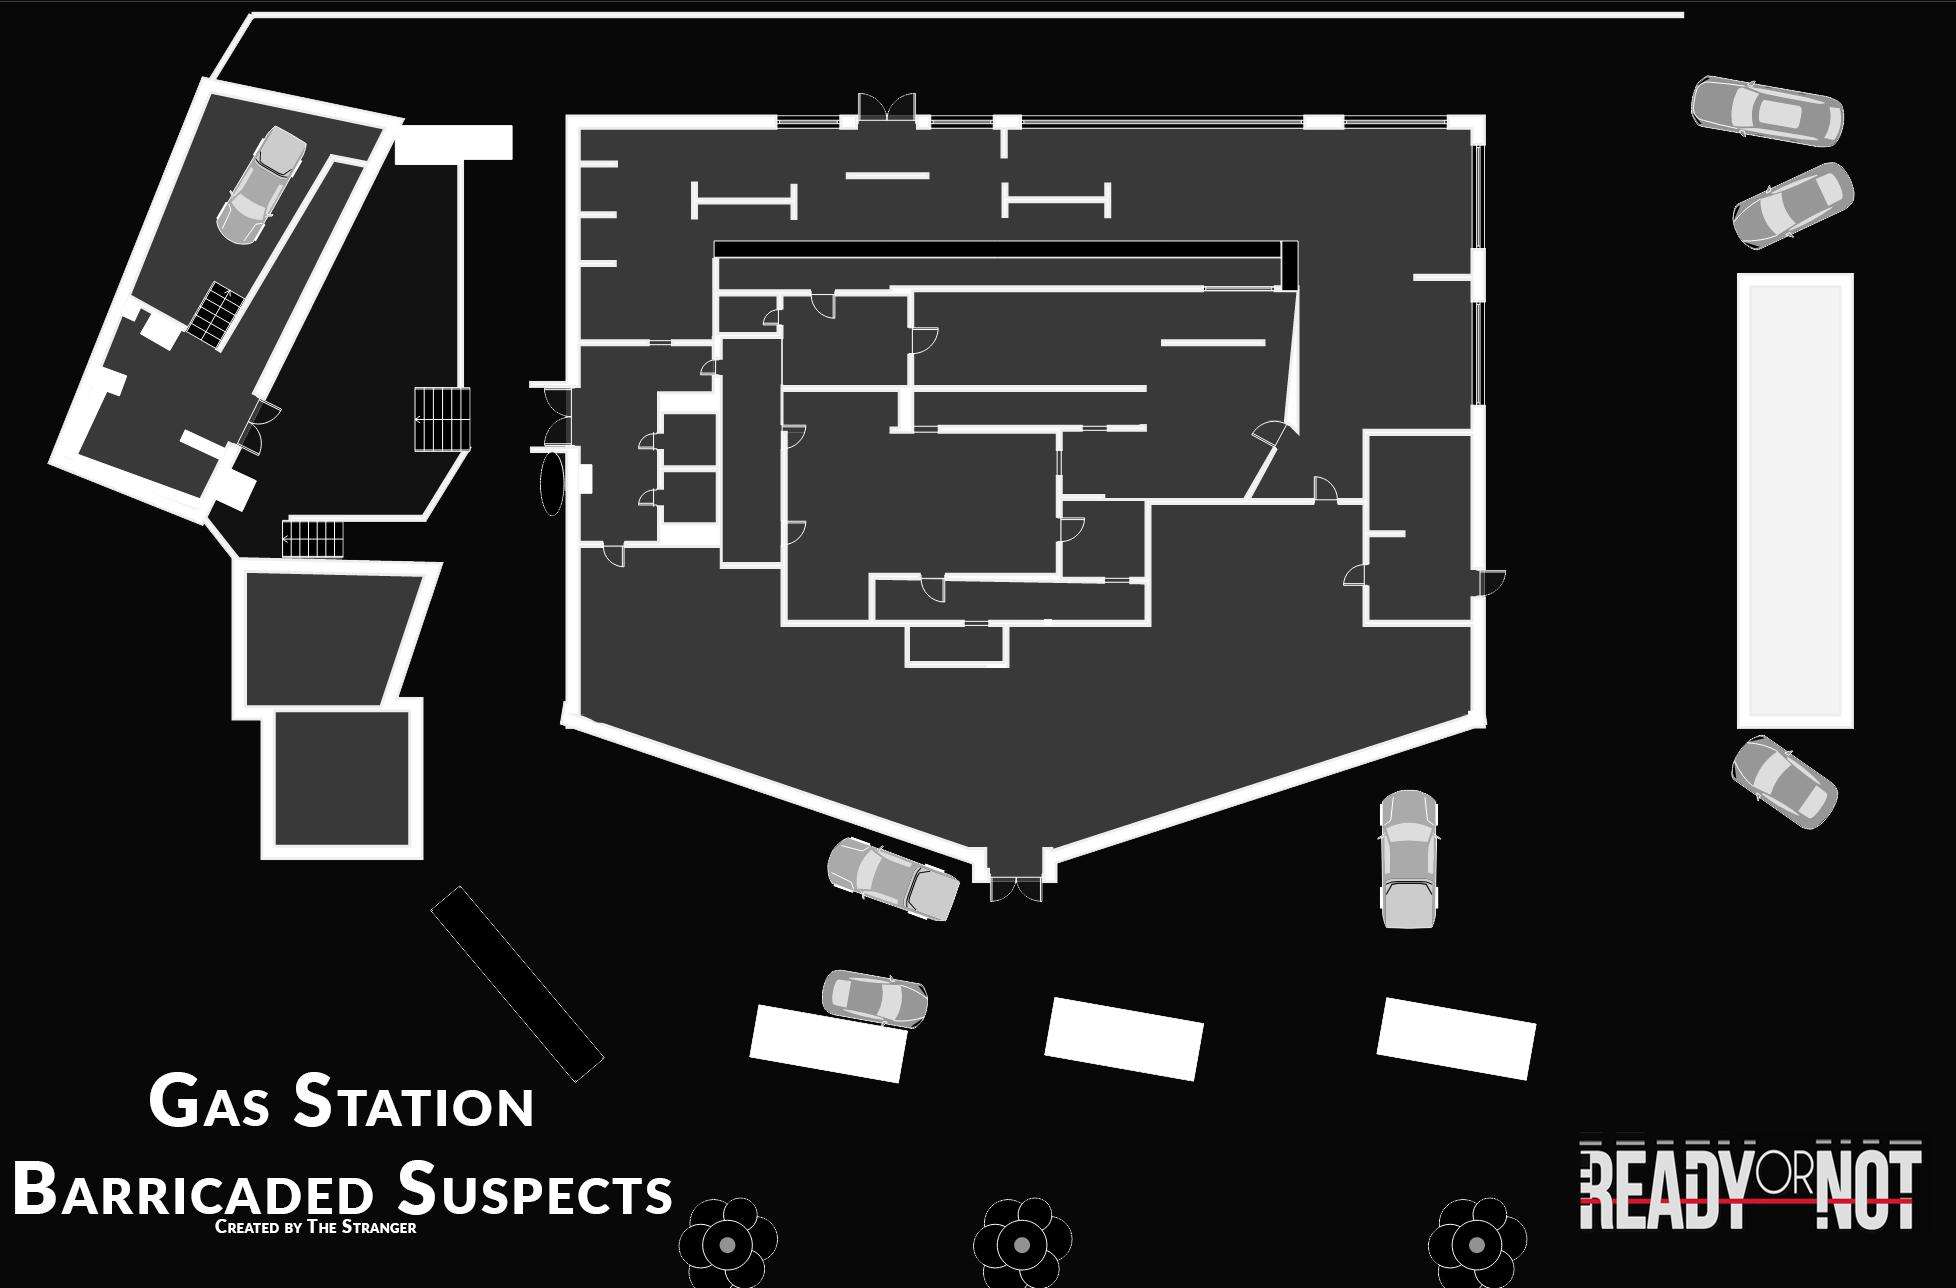
Mission: Thank You, Come Again / Map: 4U Gas Station
Ground
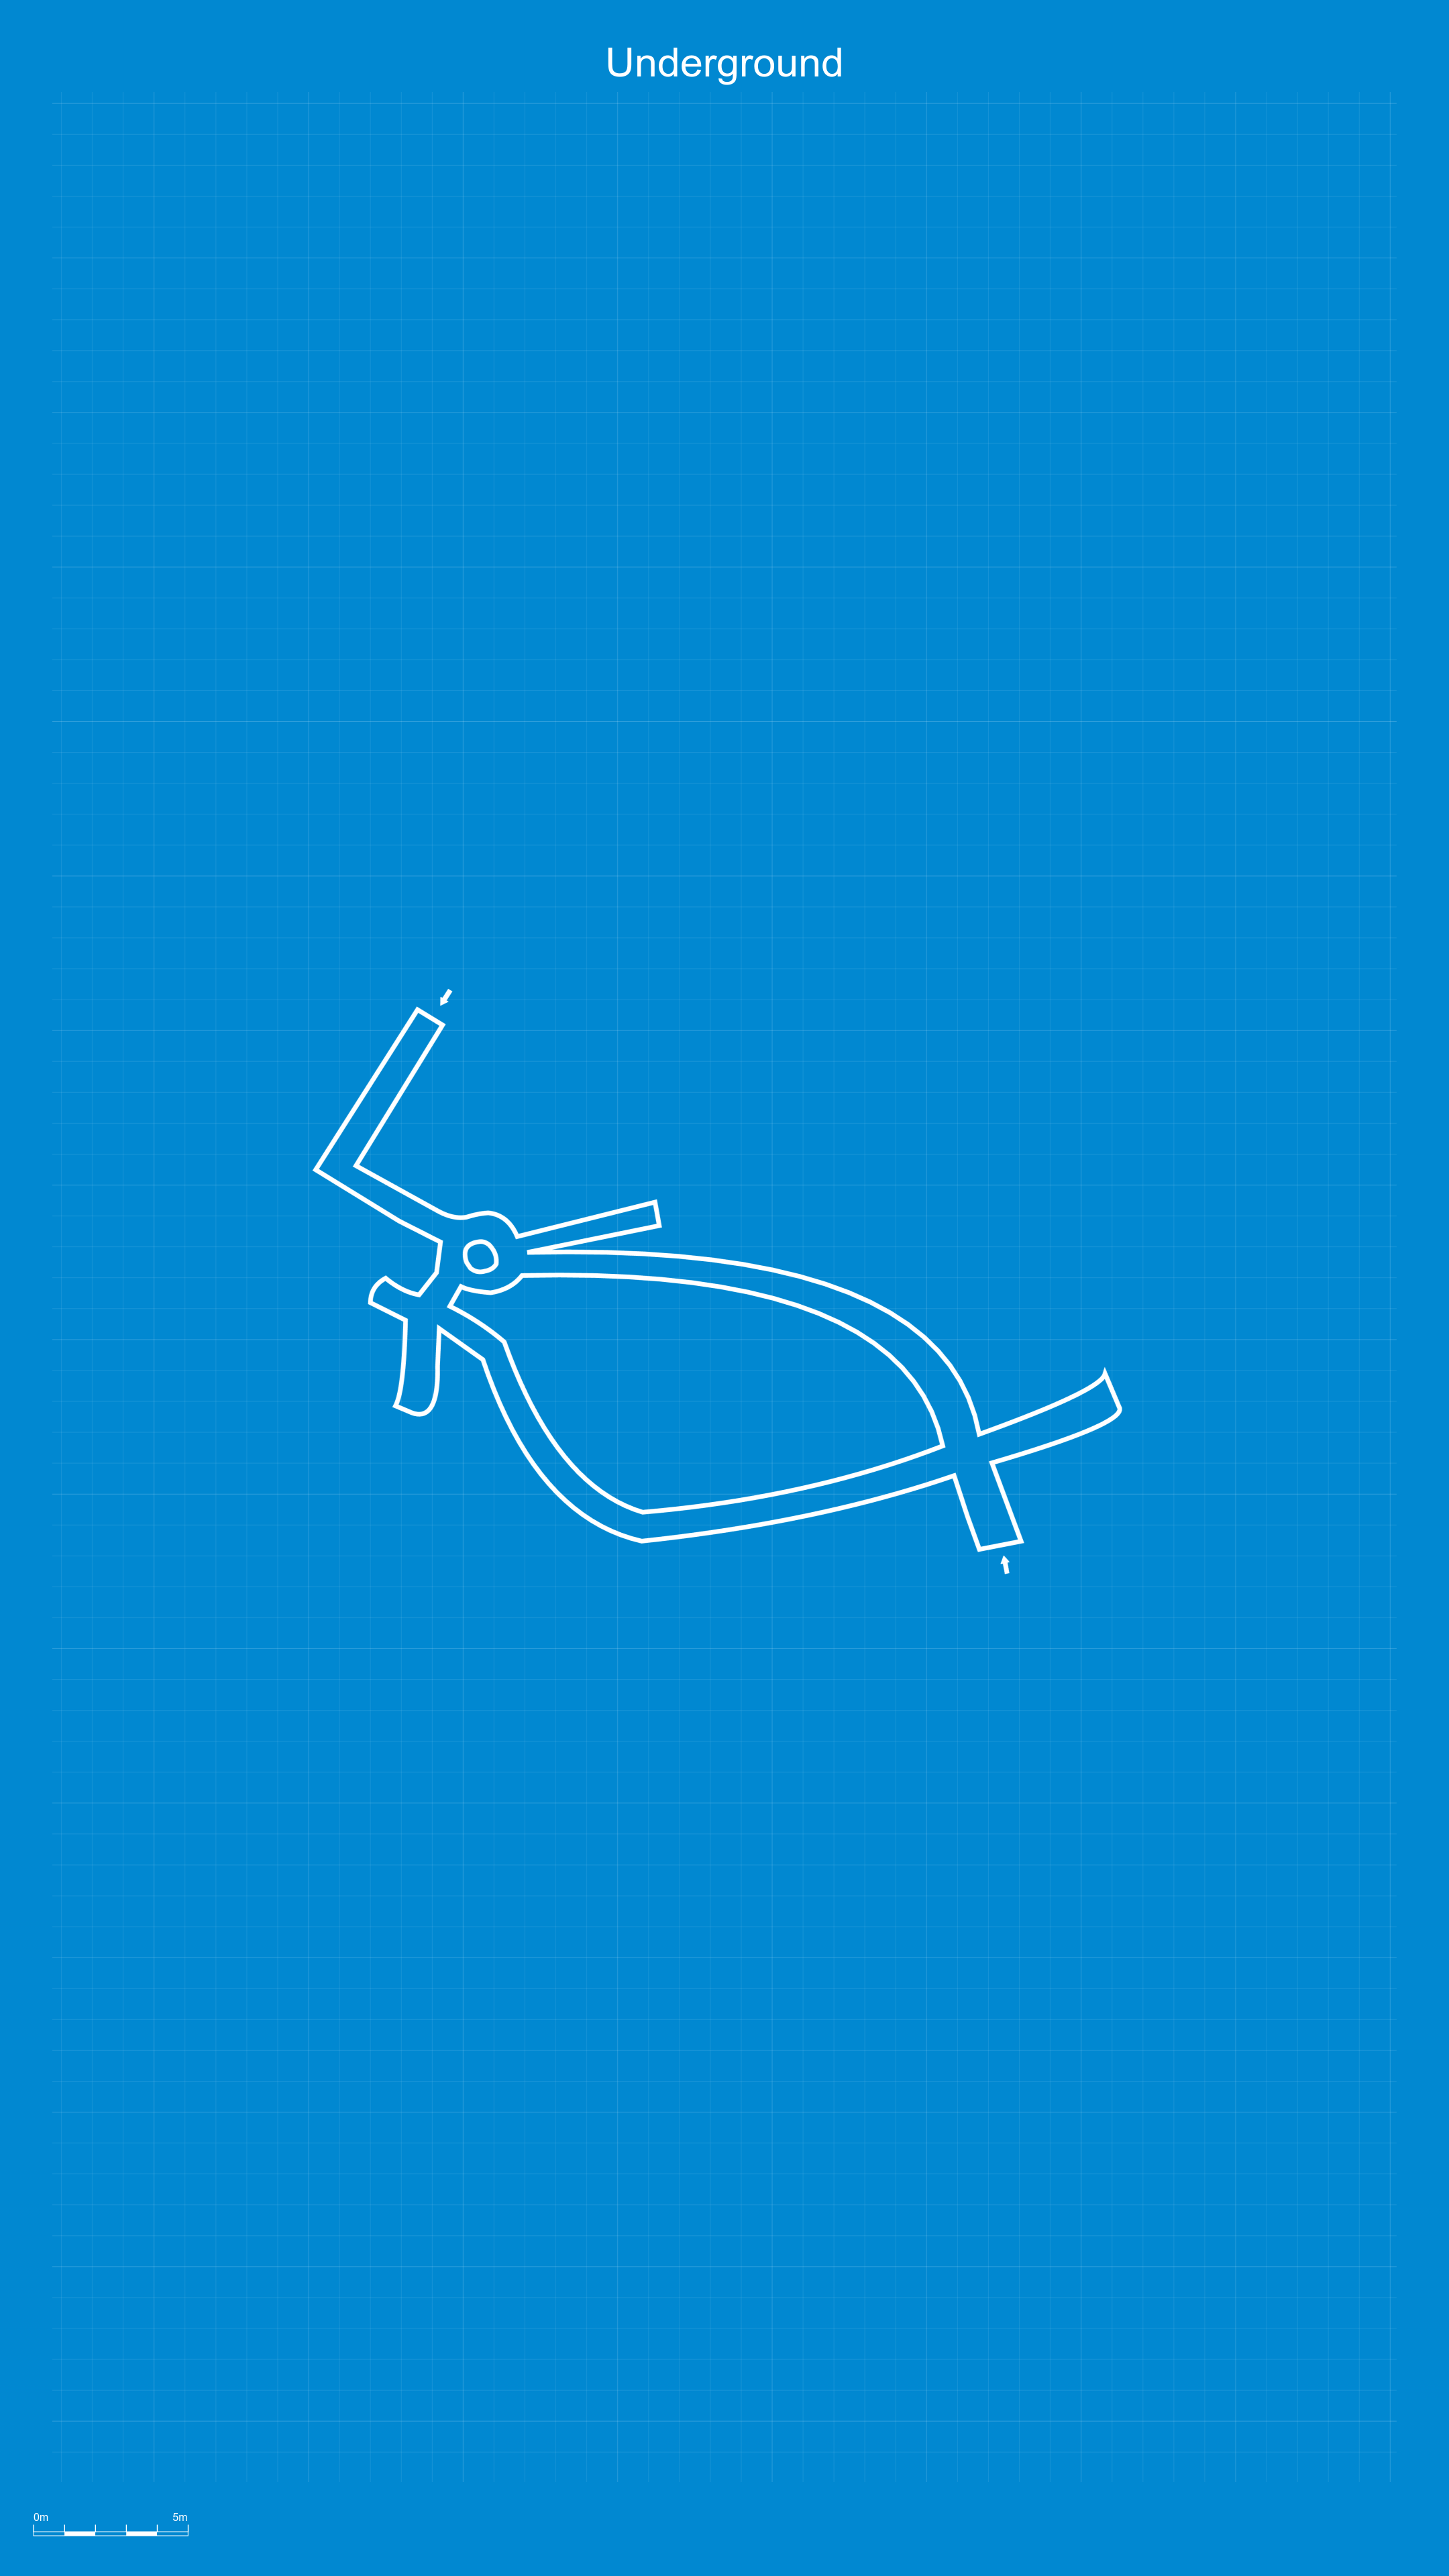
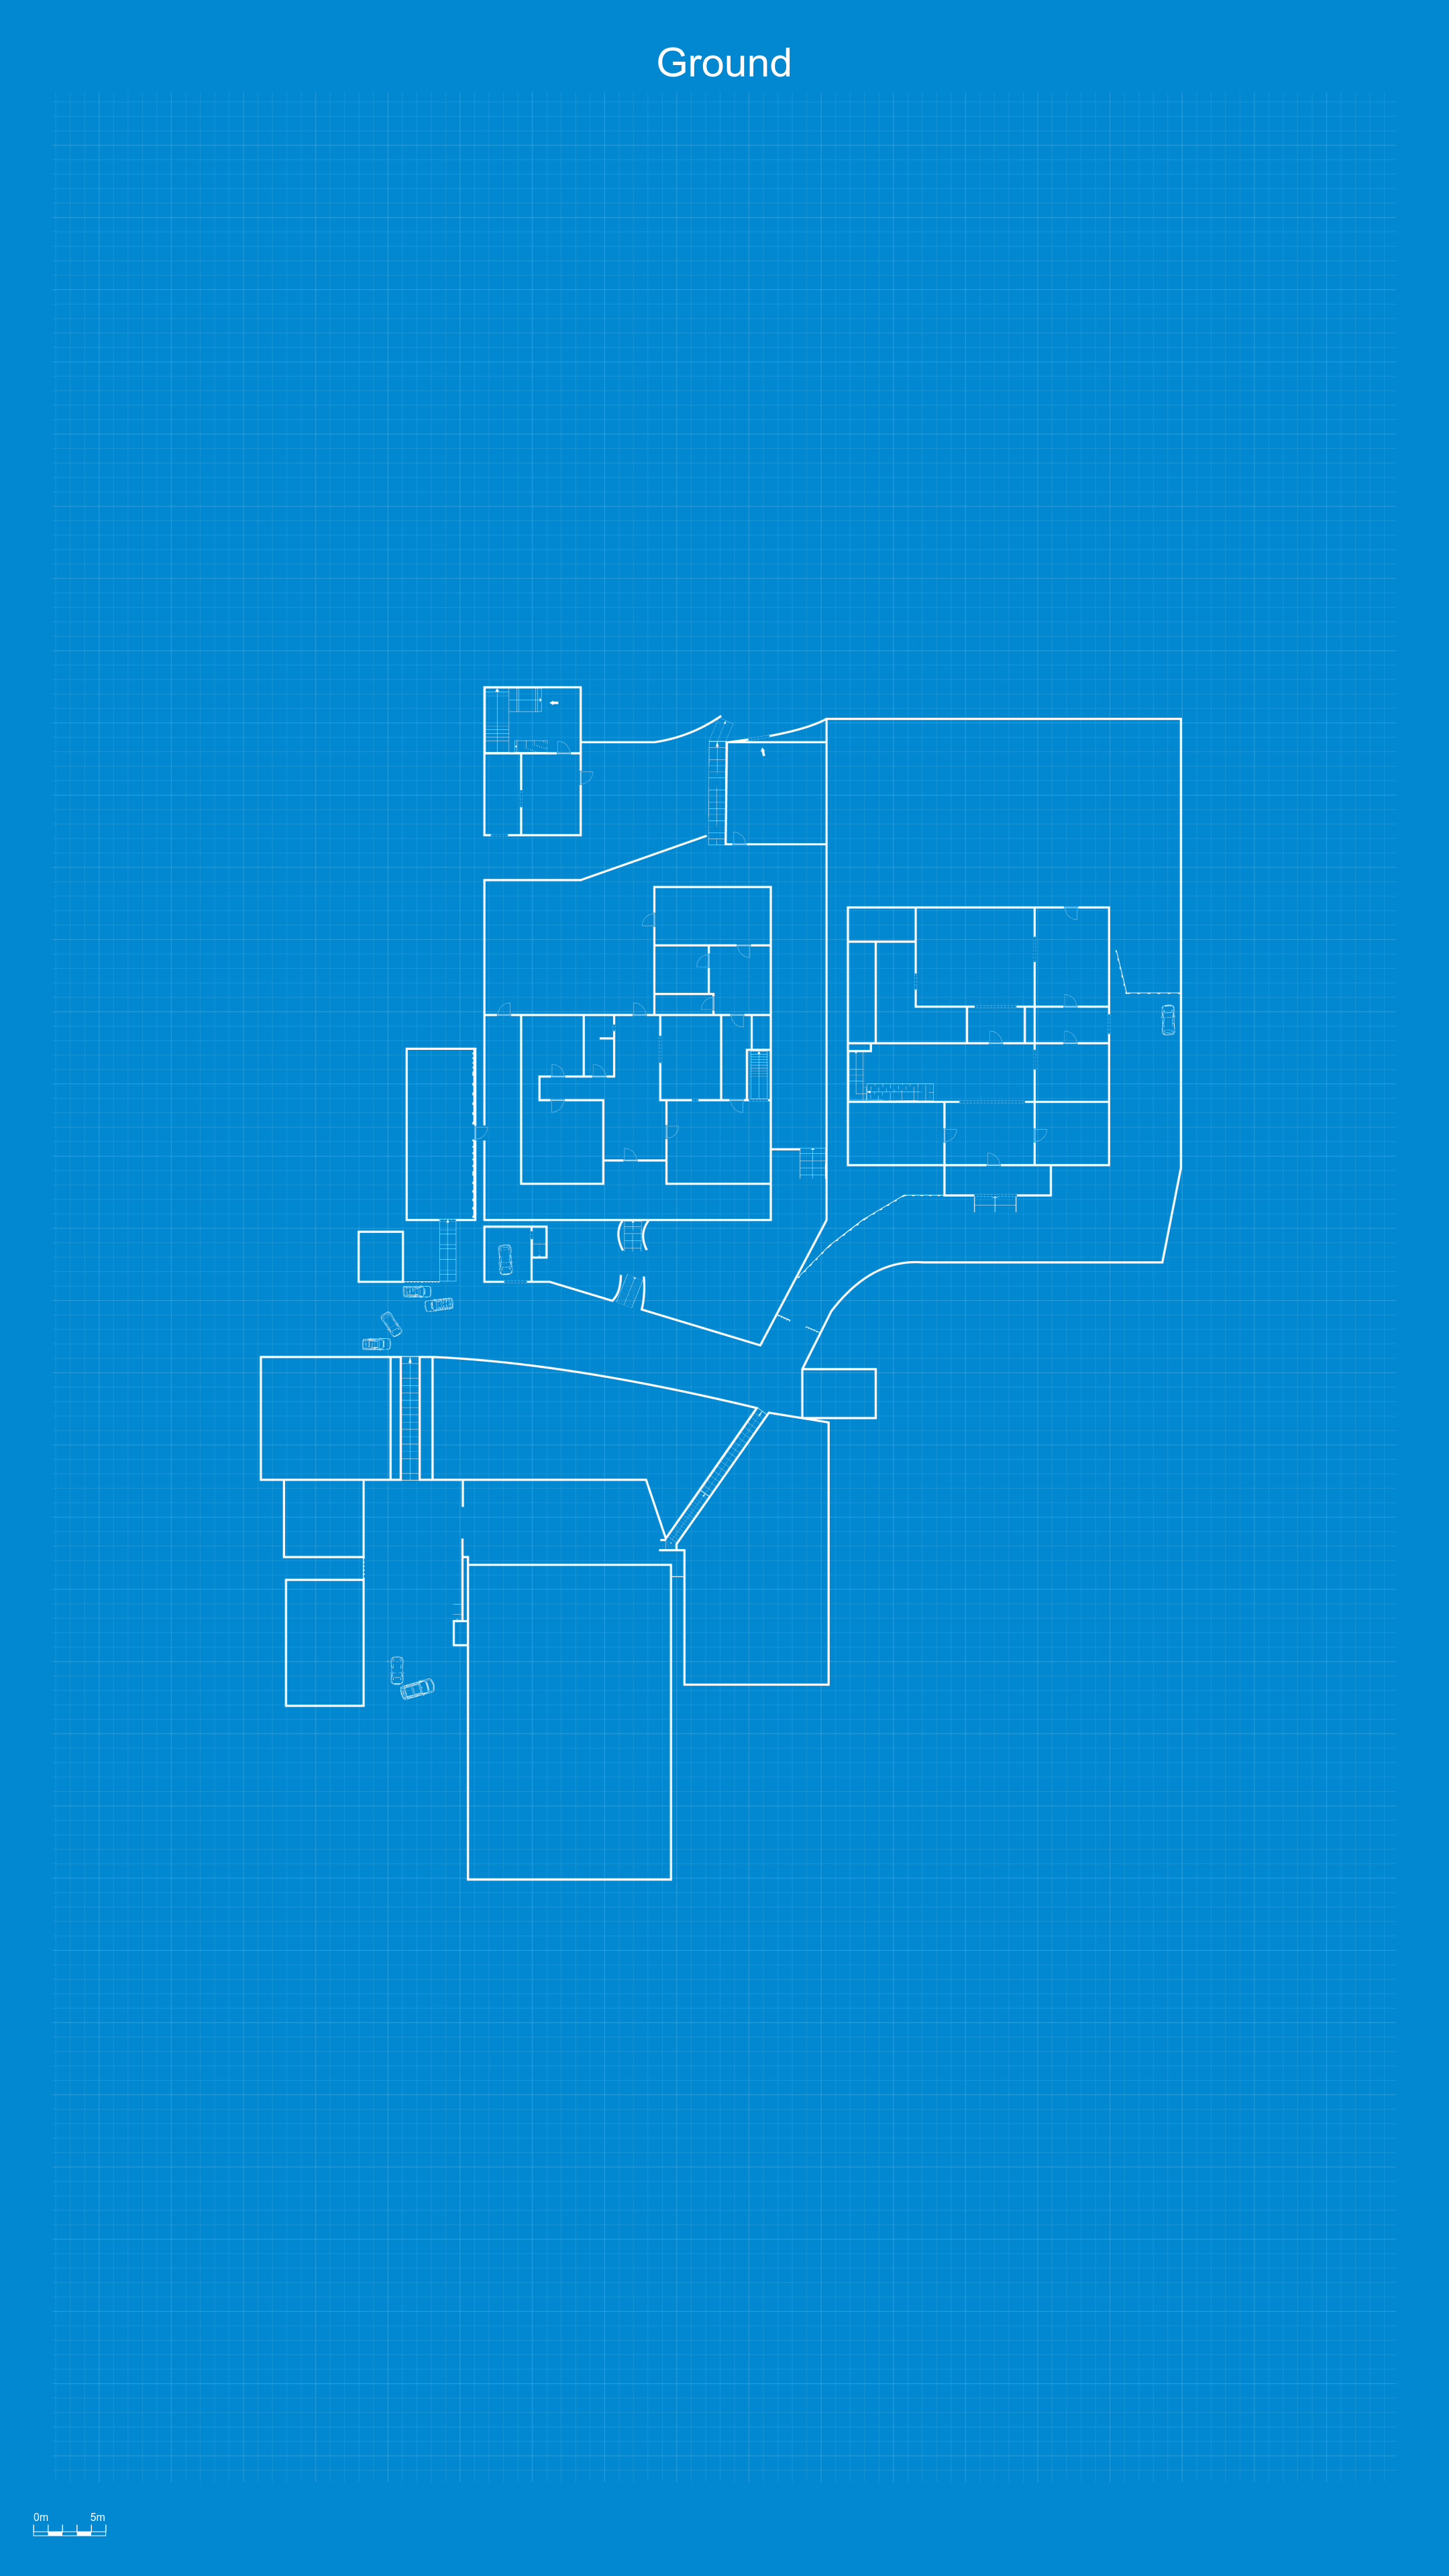
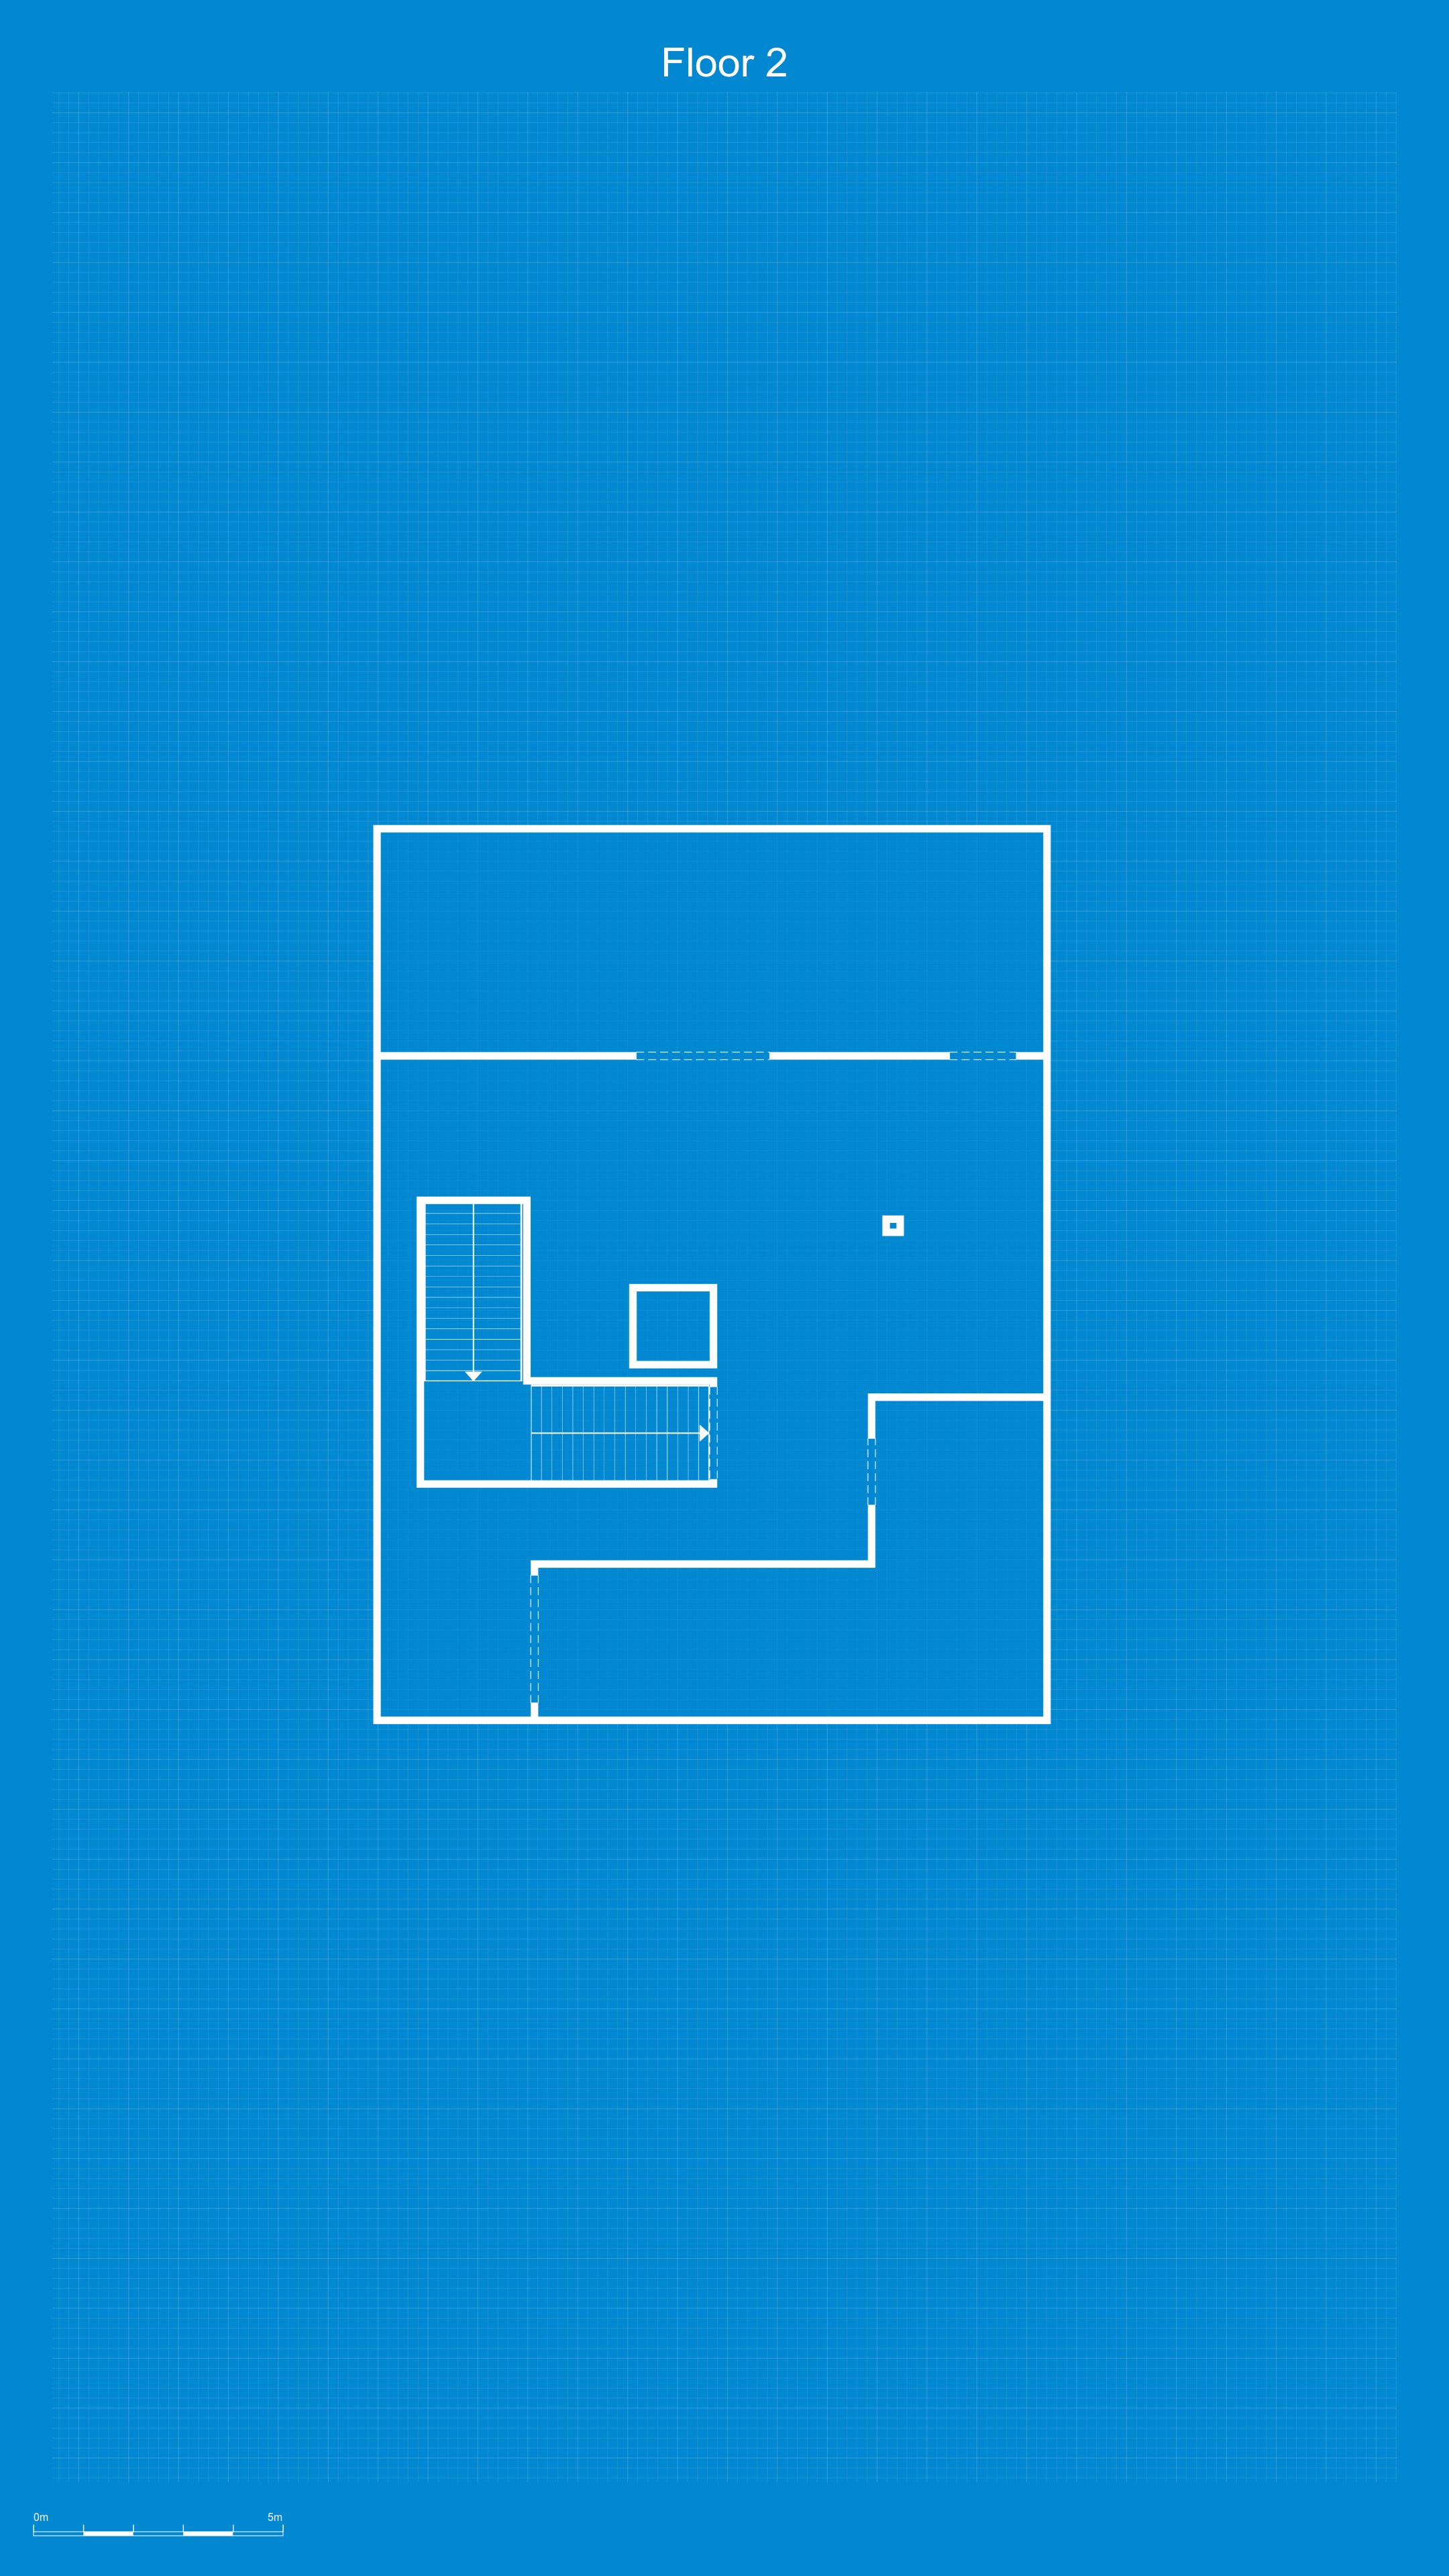
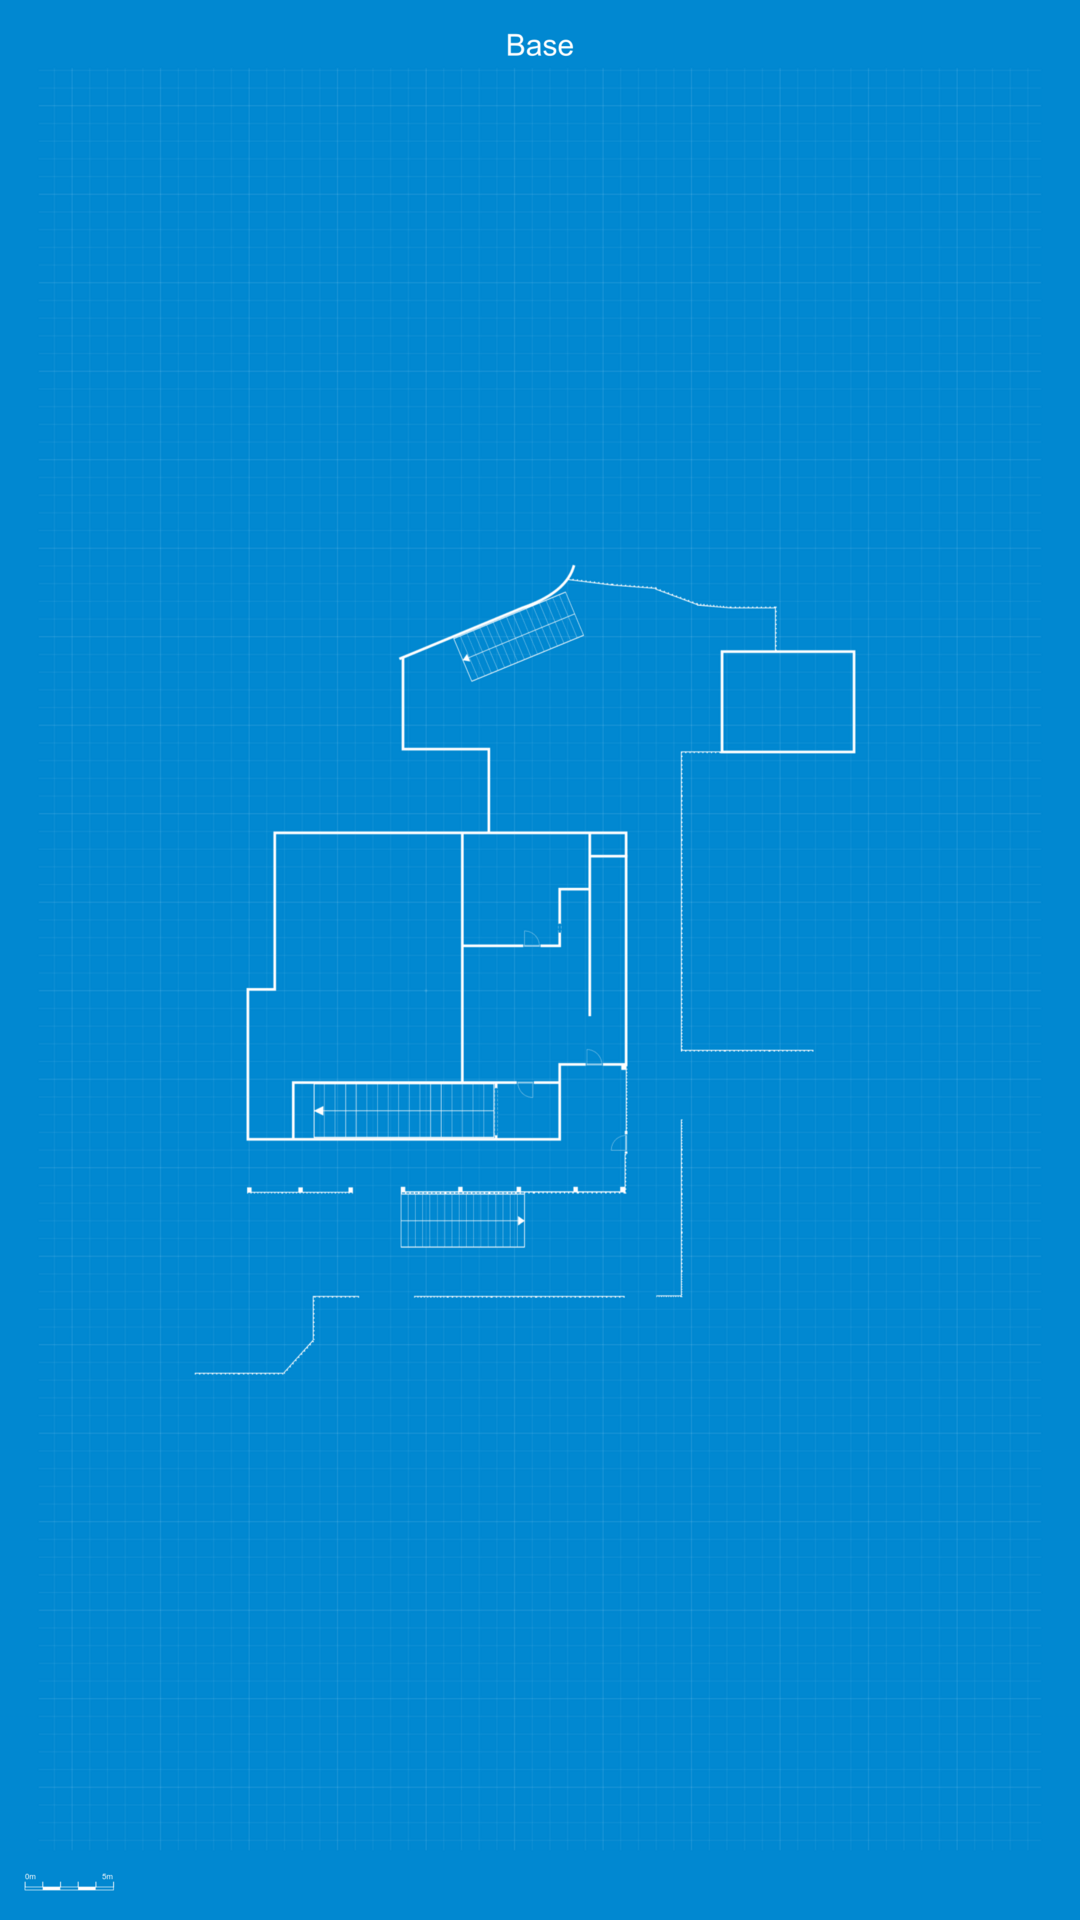
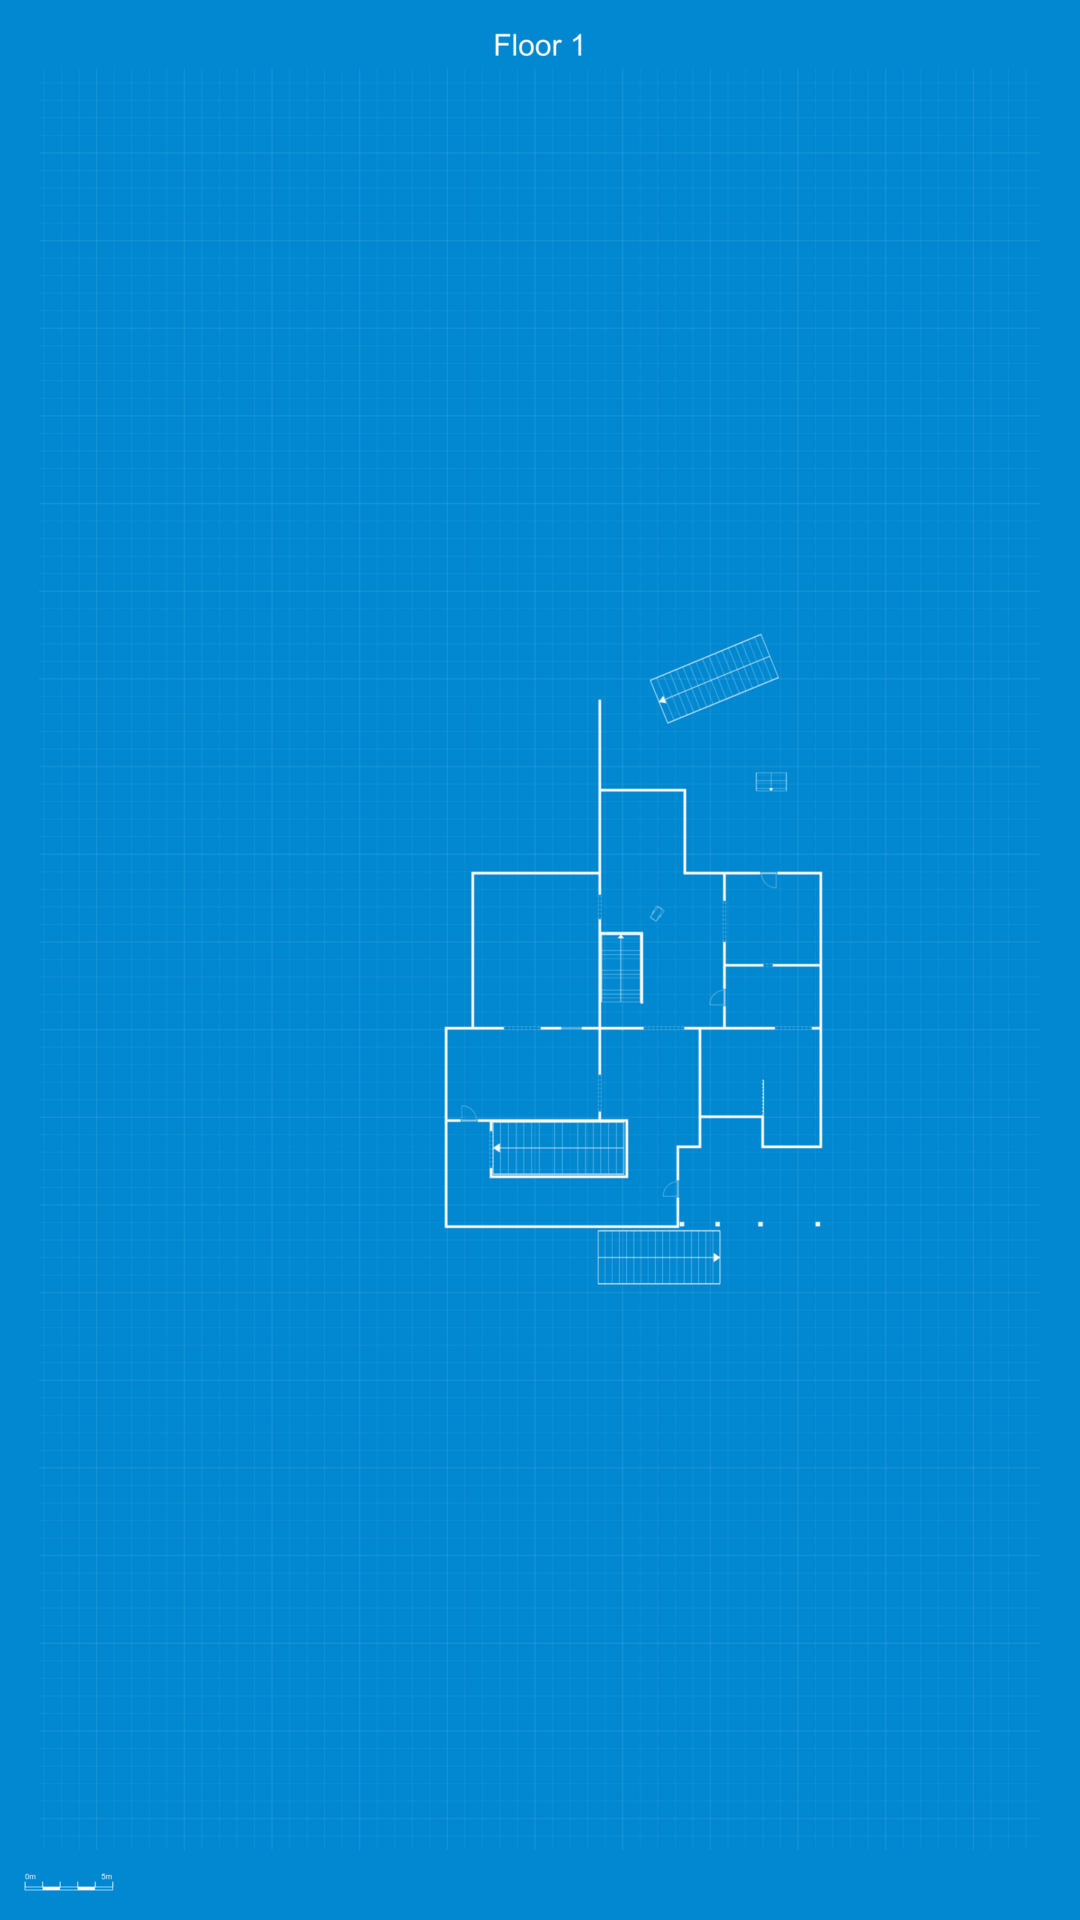
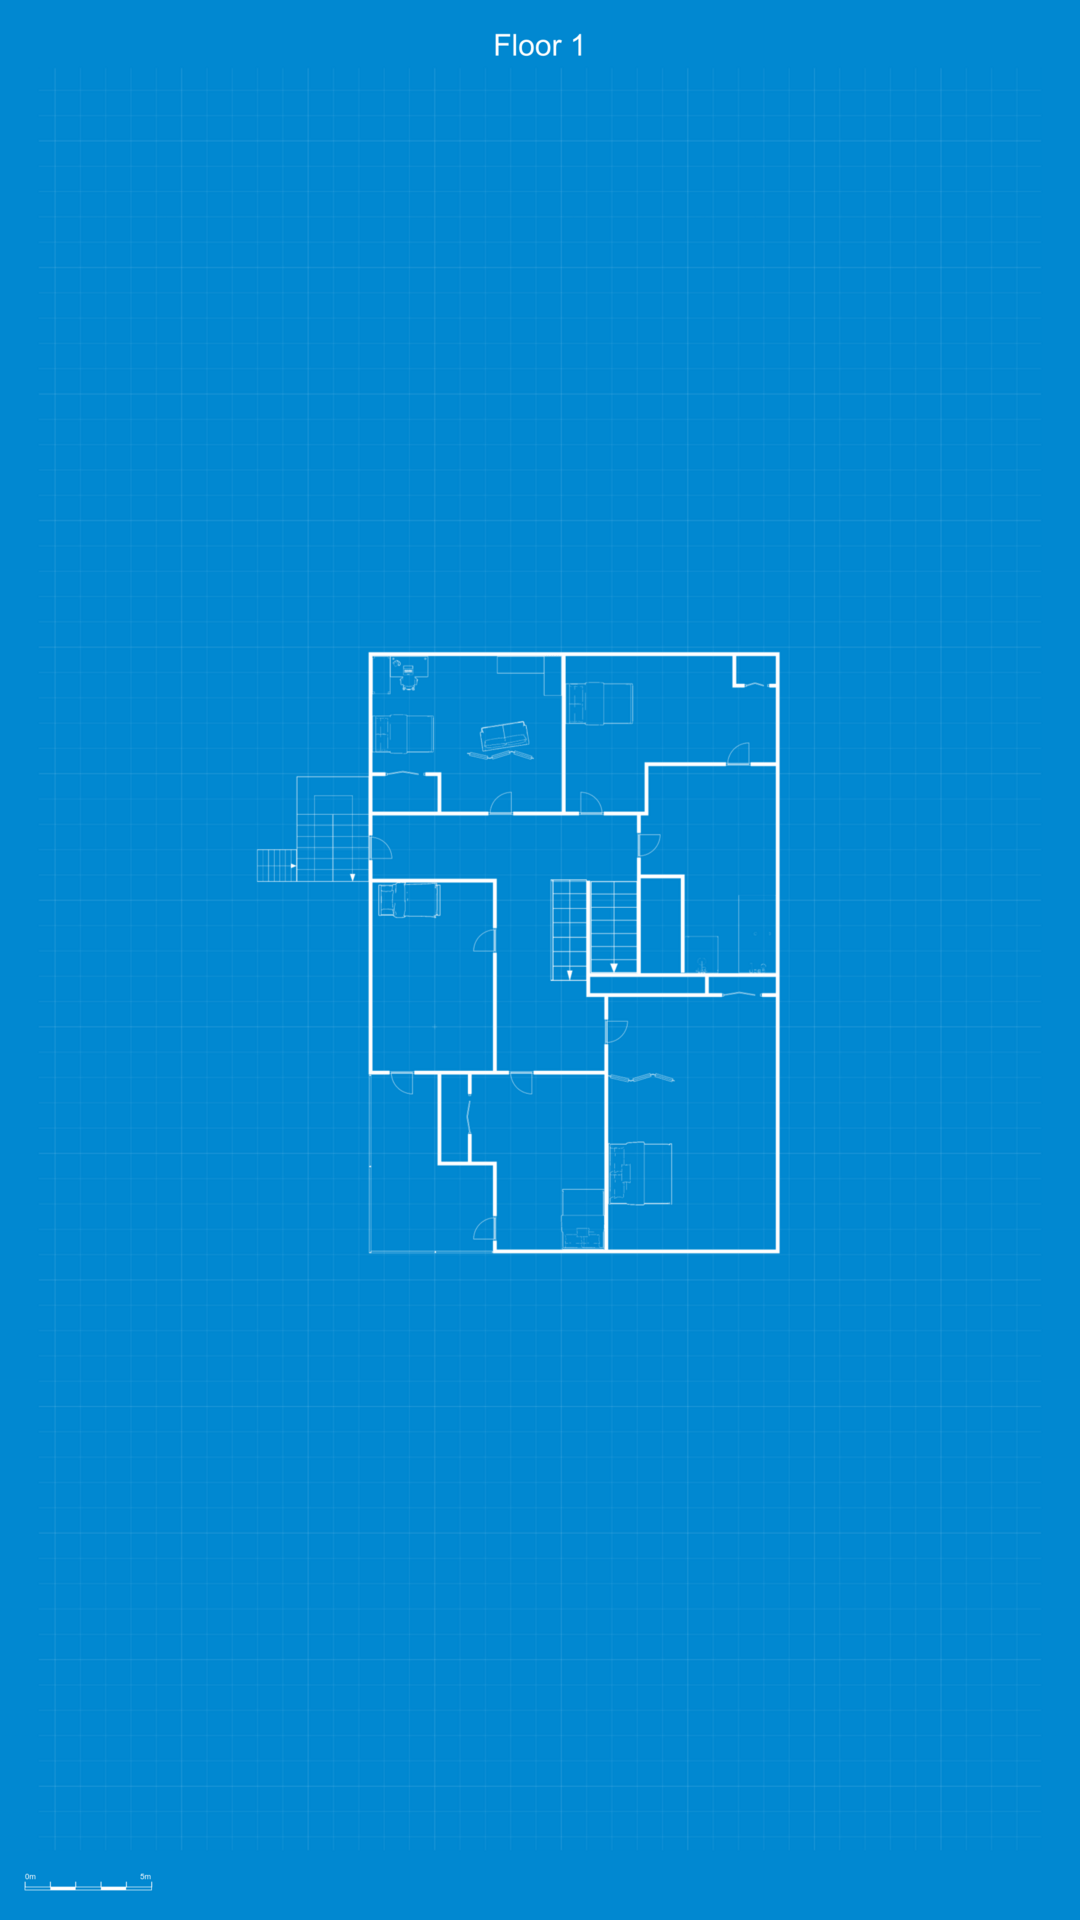
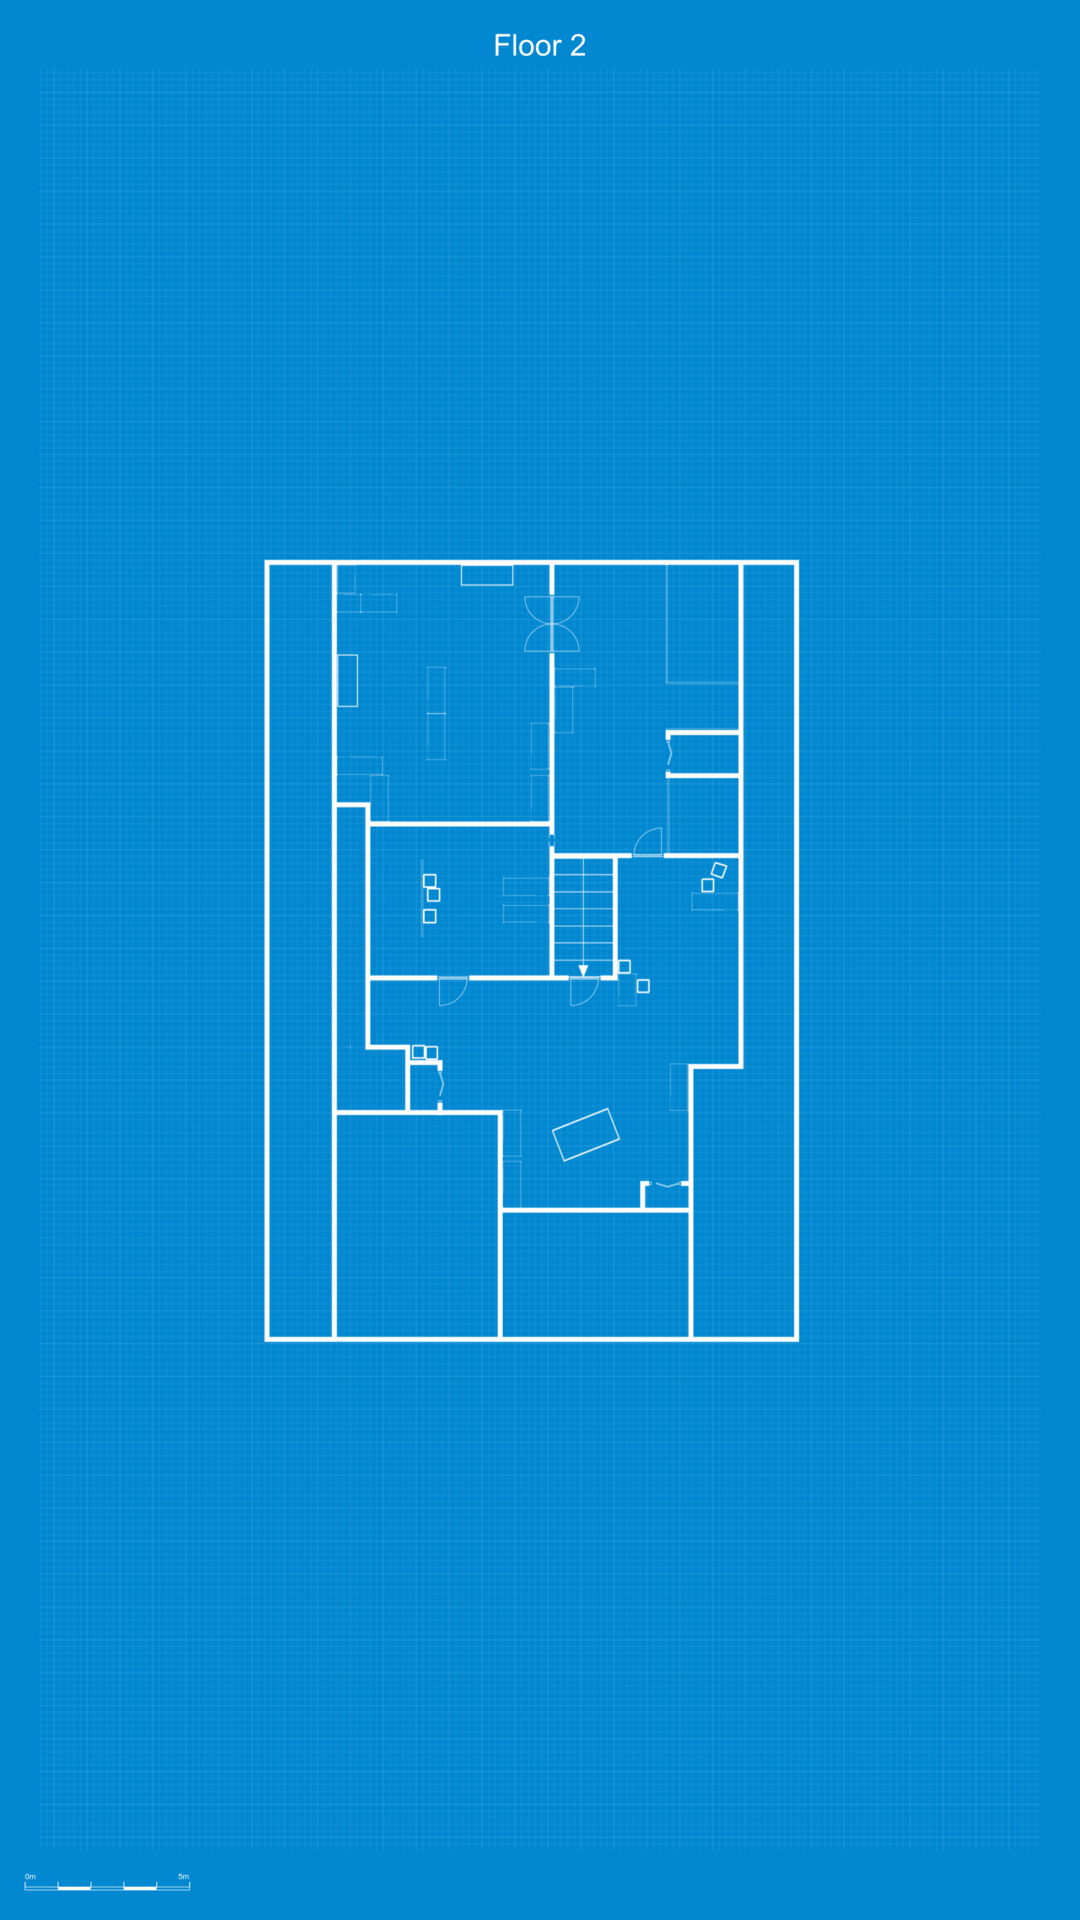
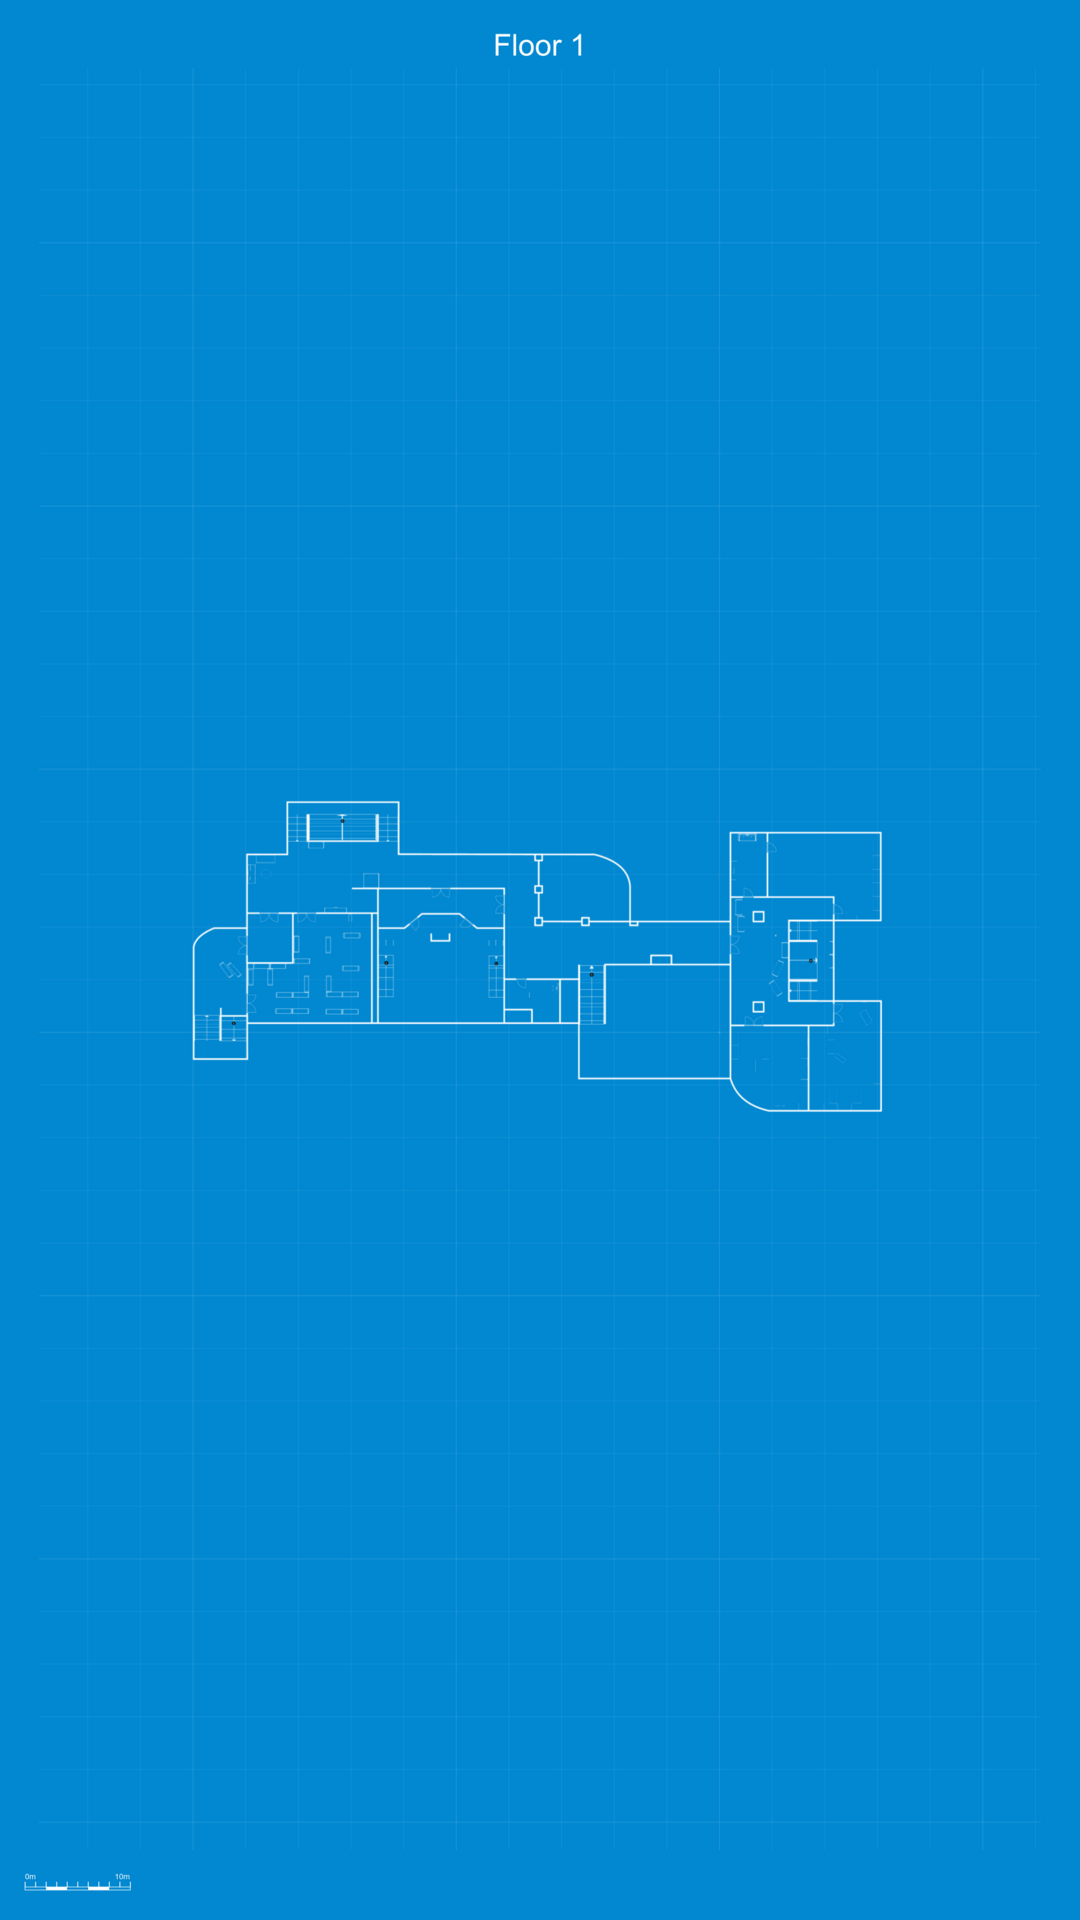
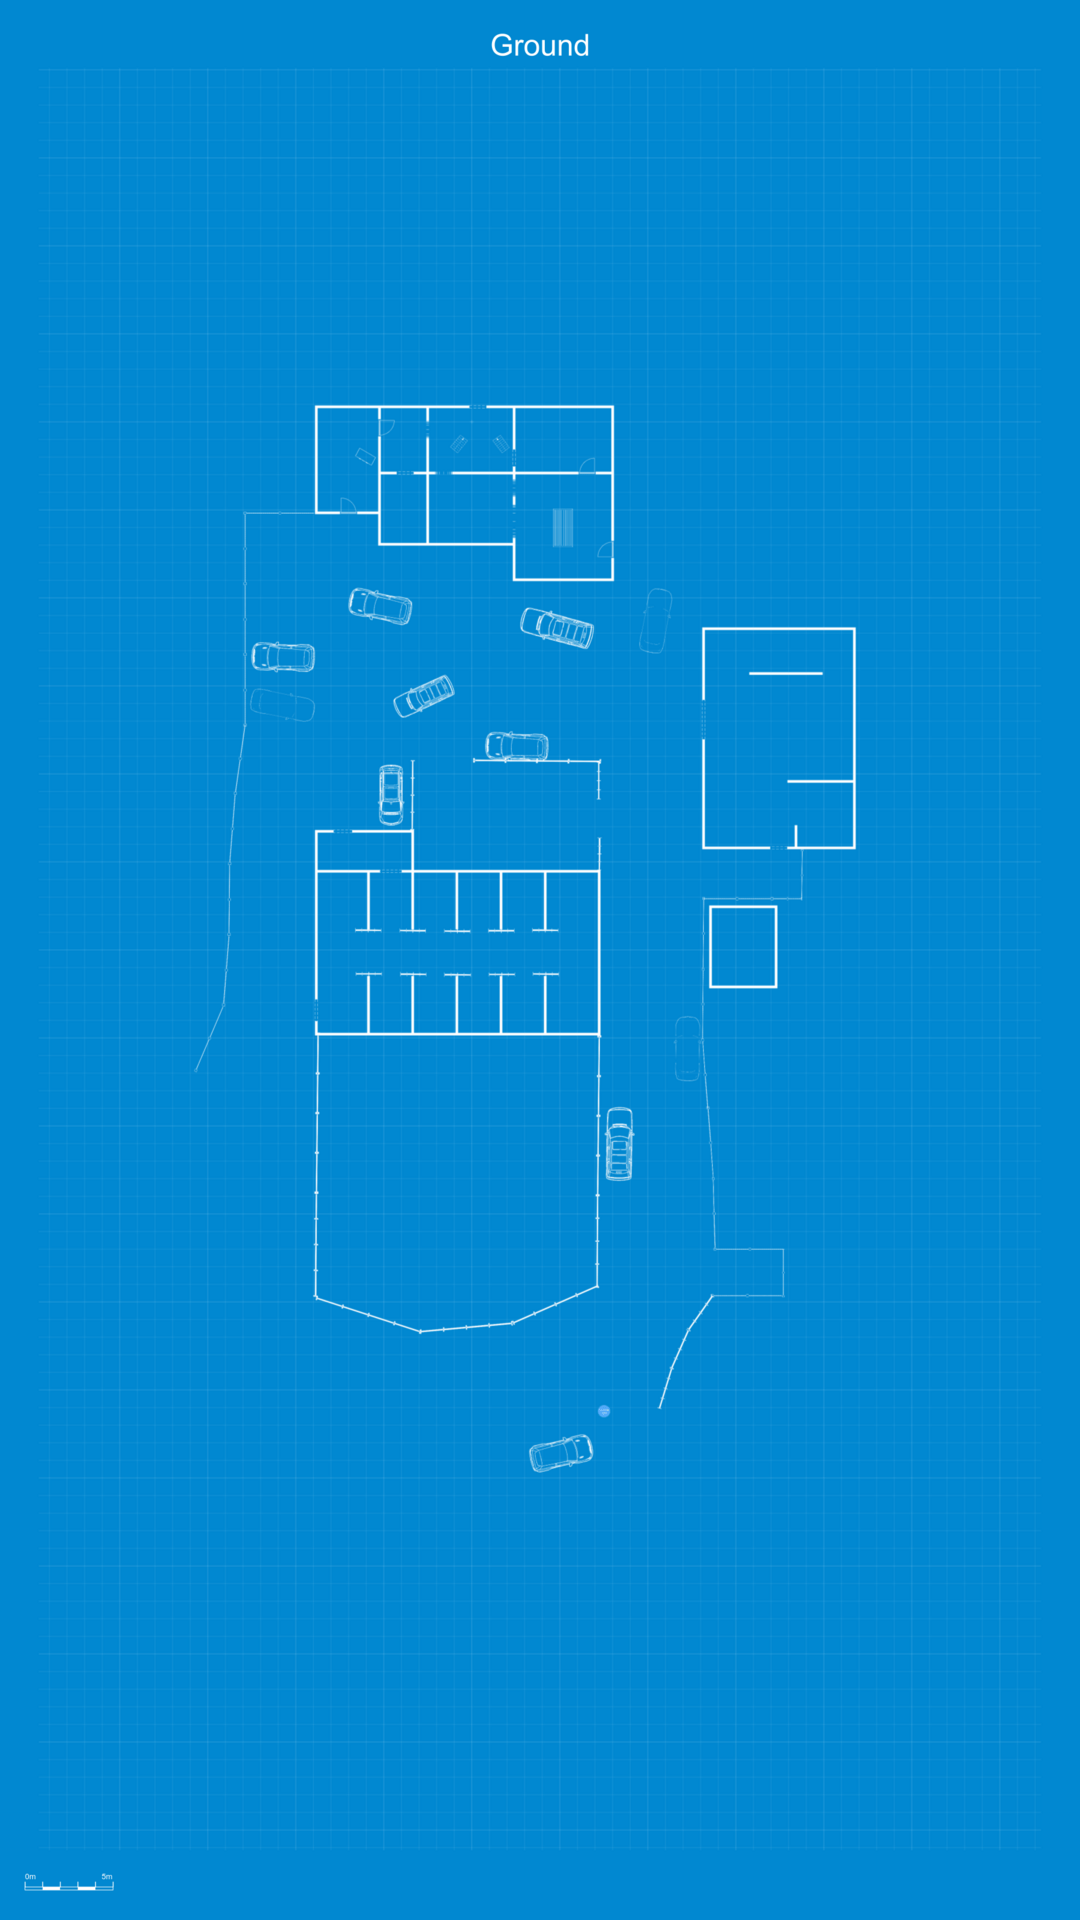
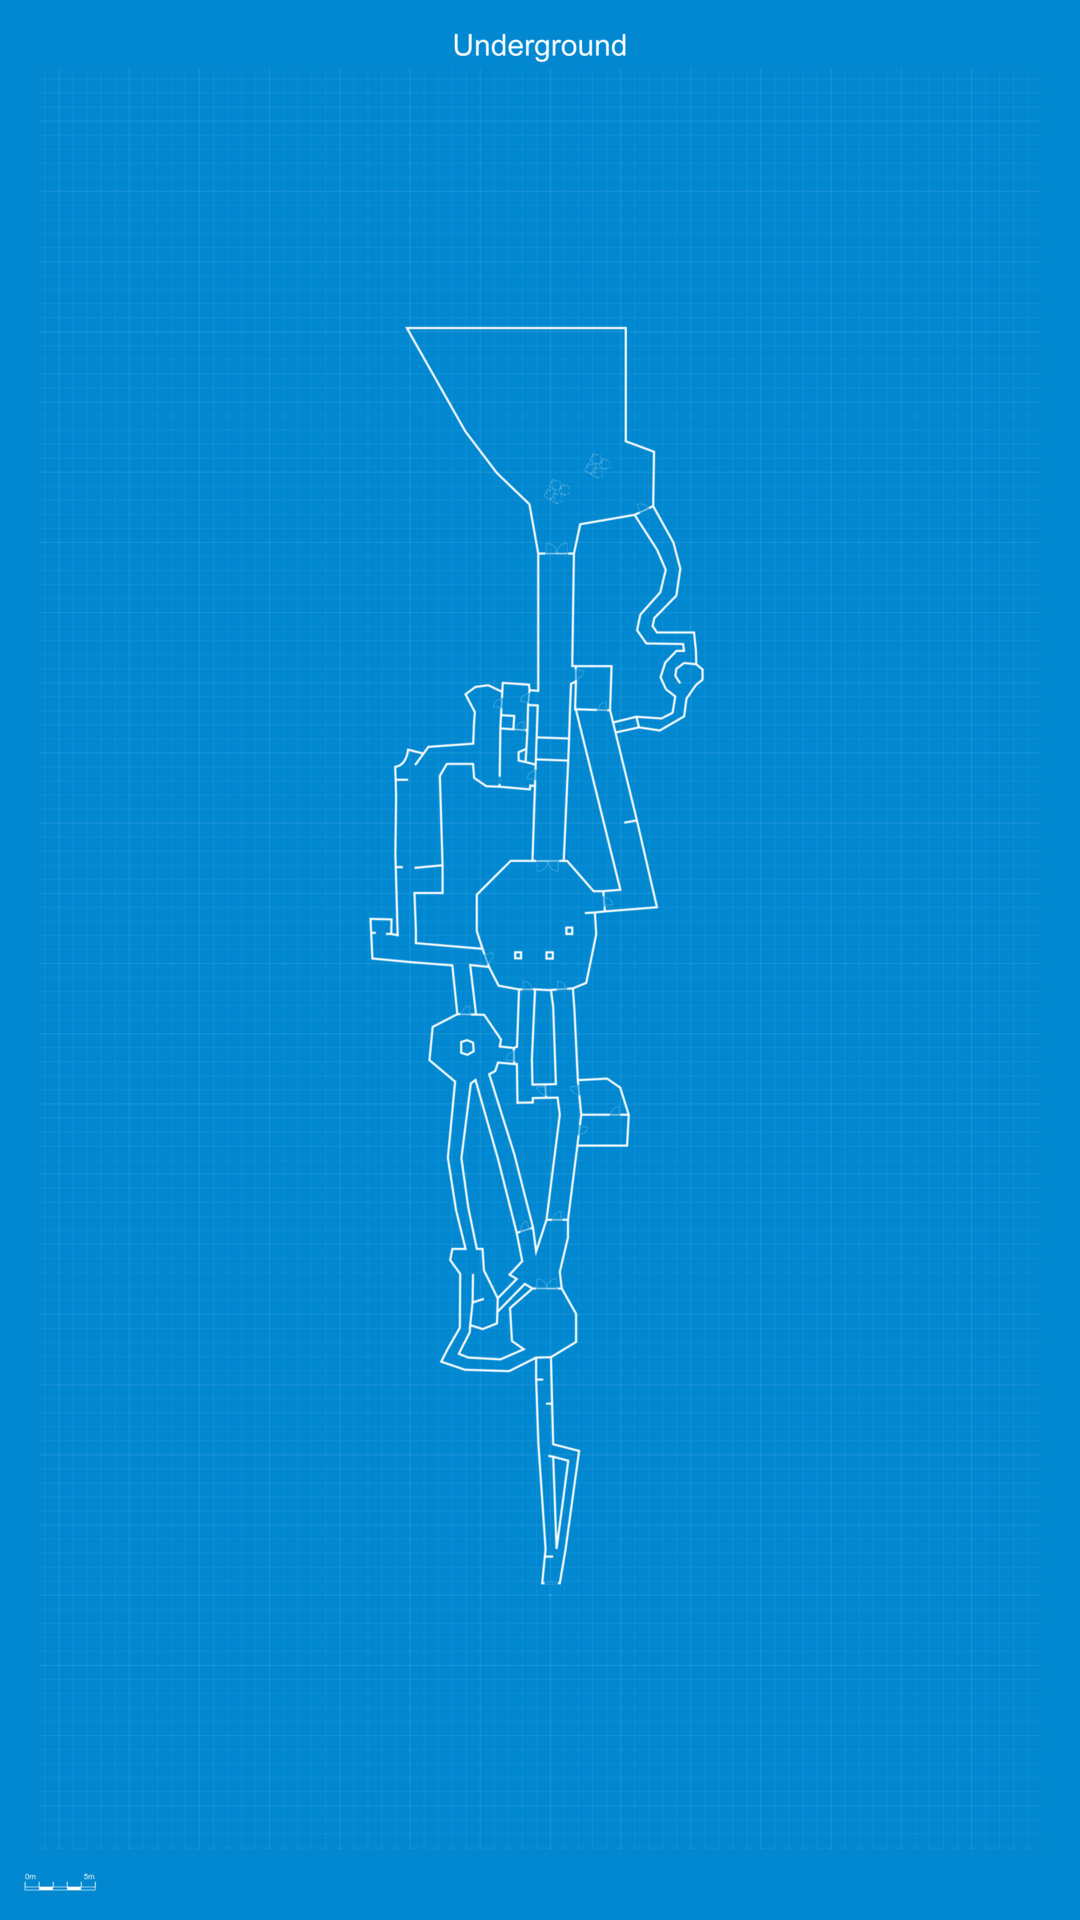
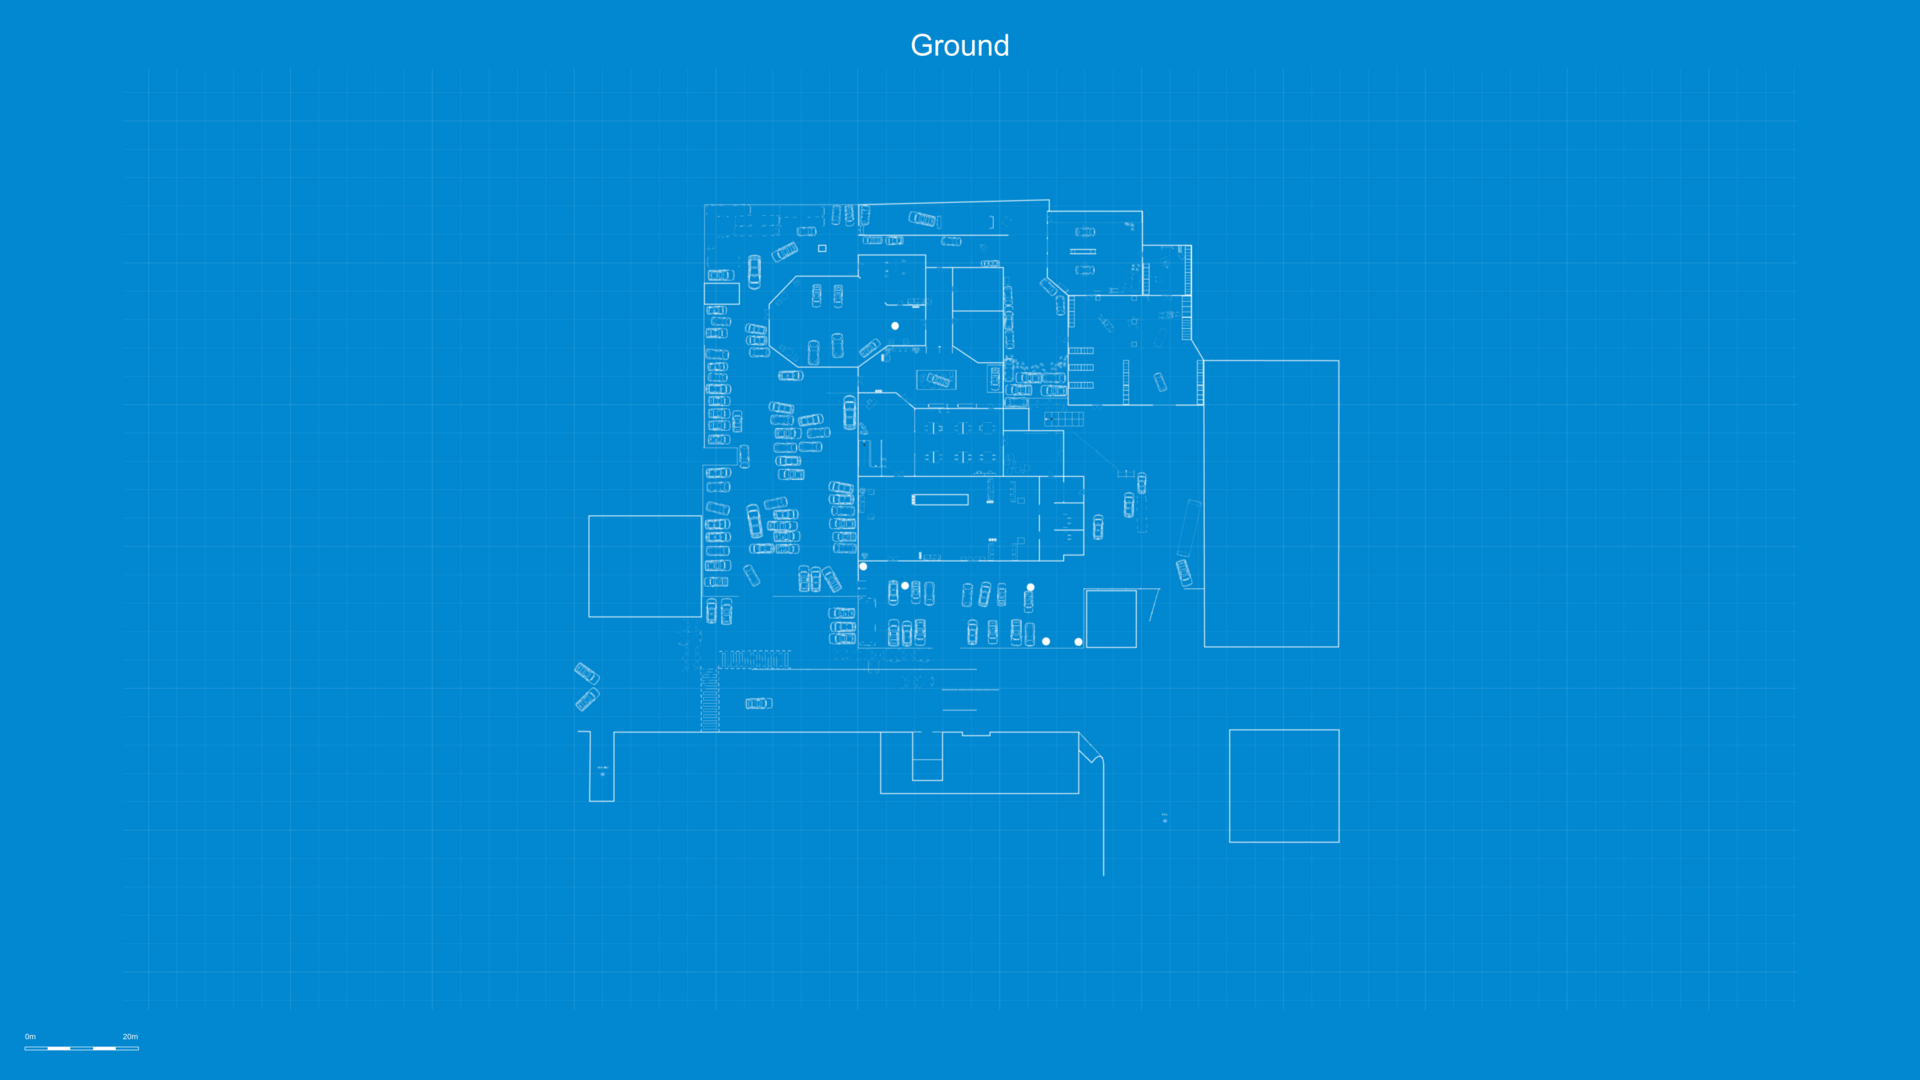
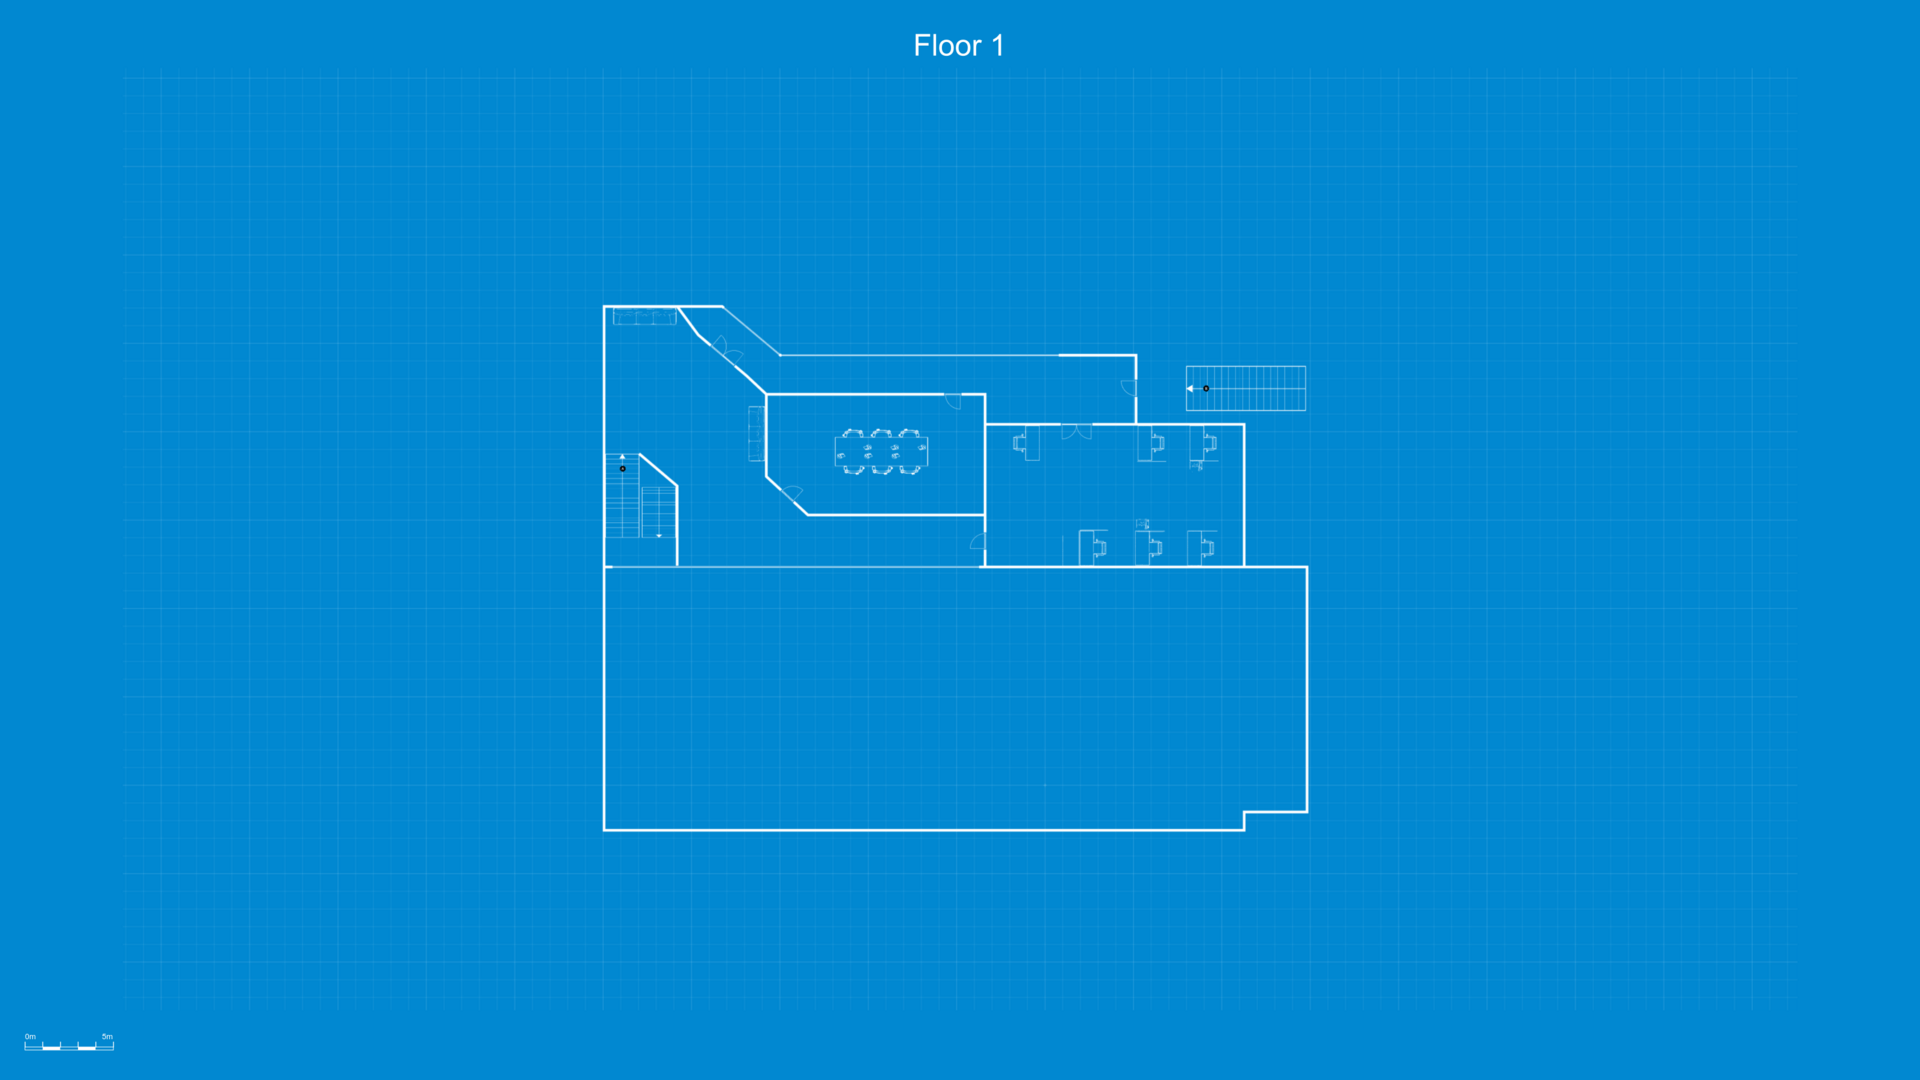
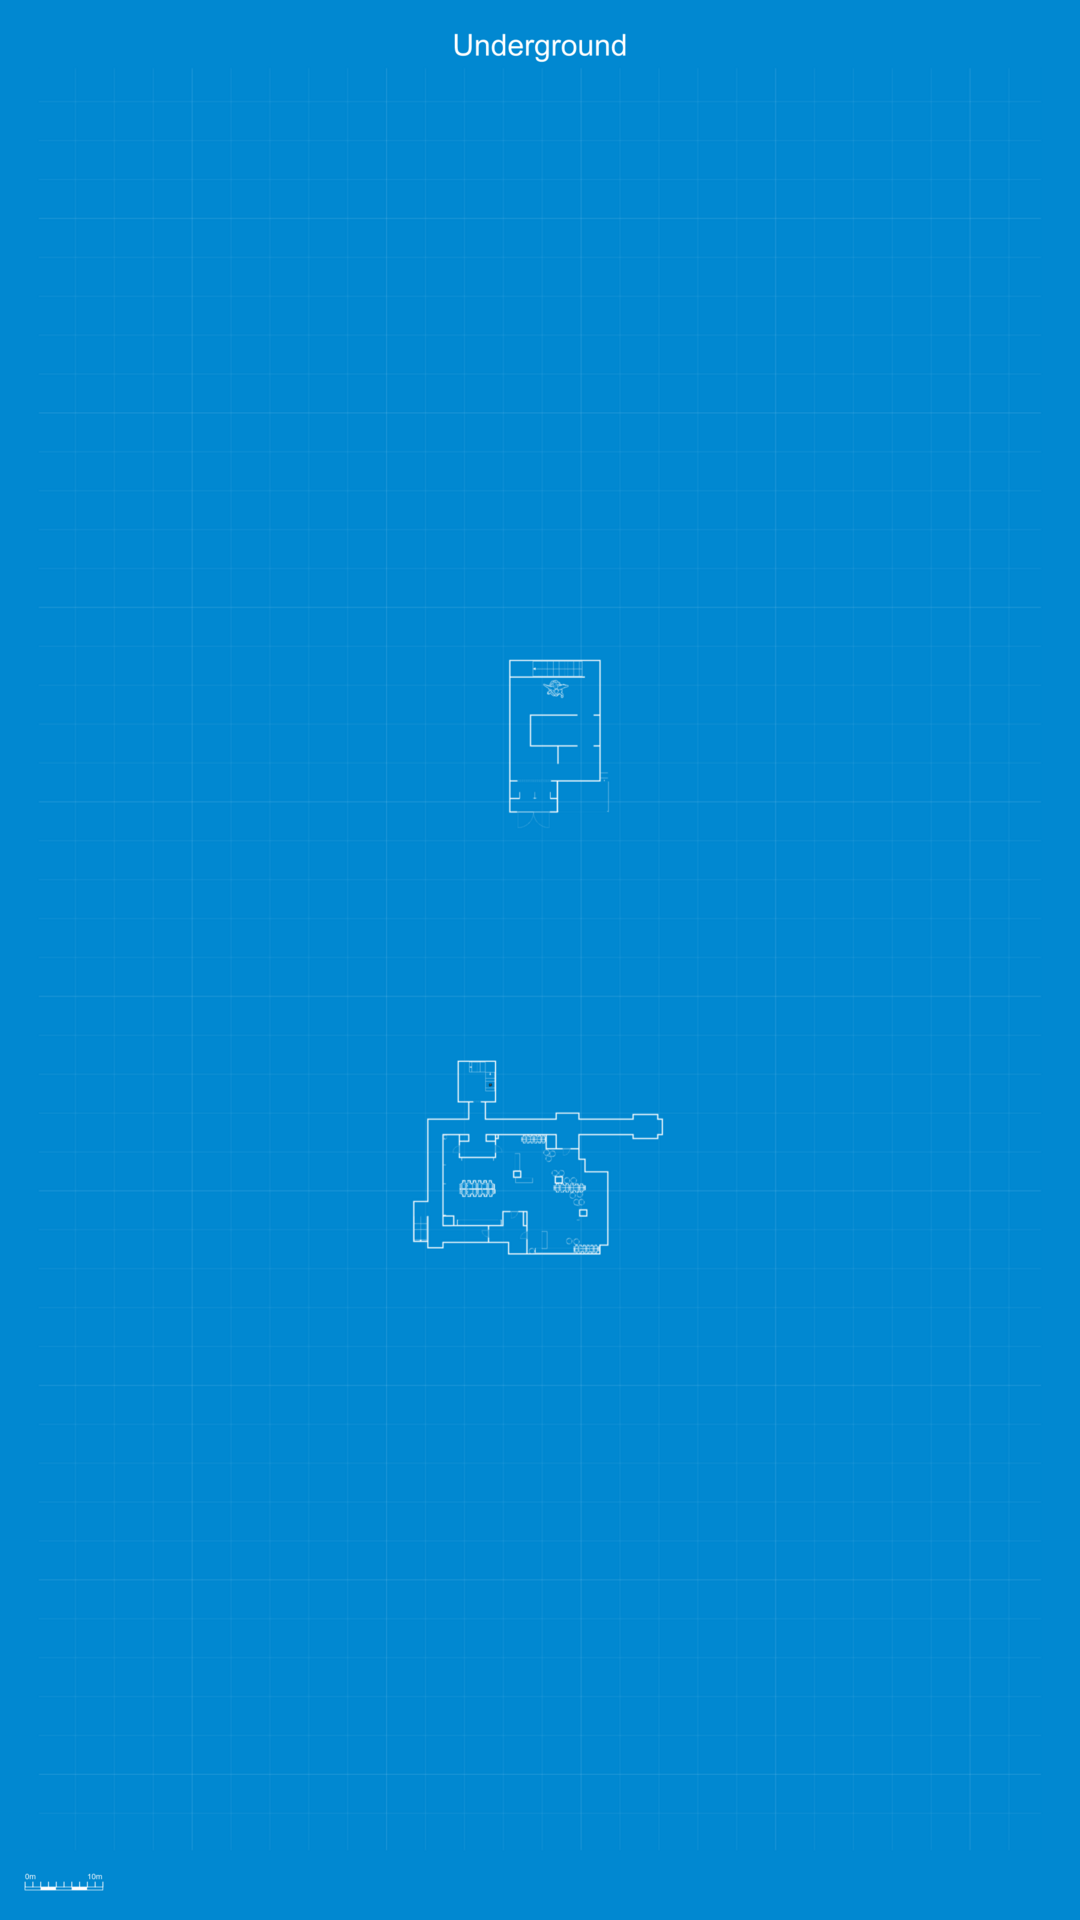
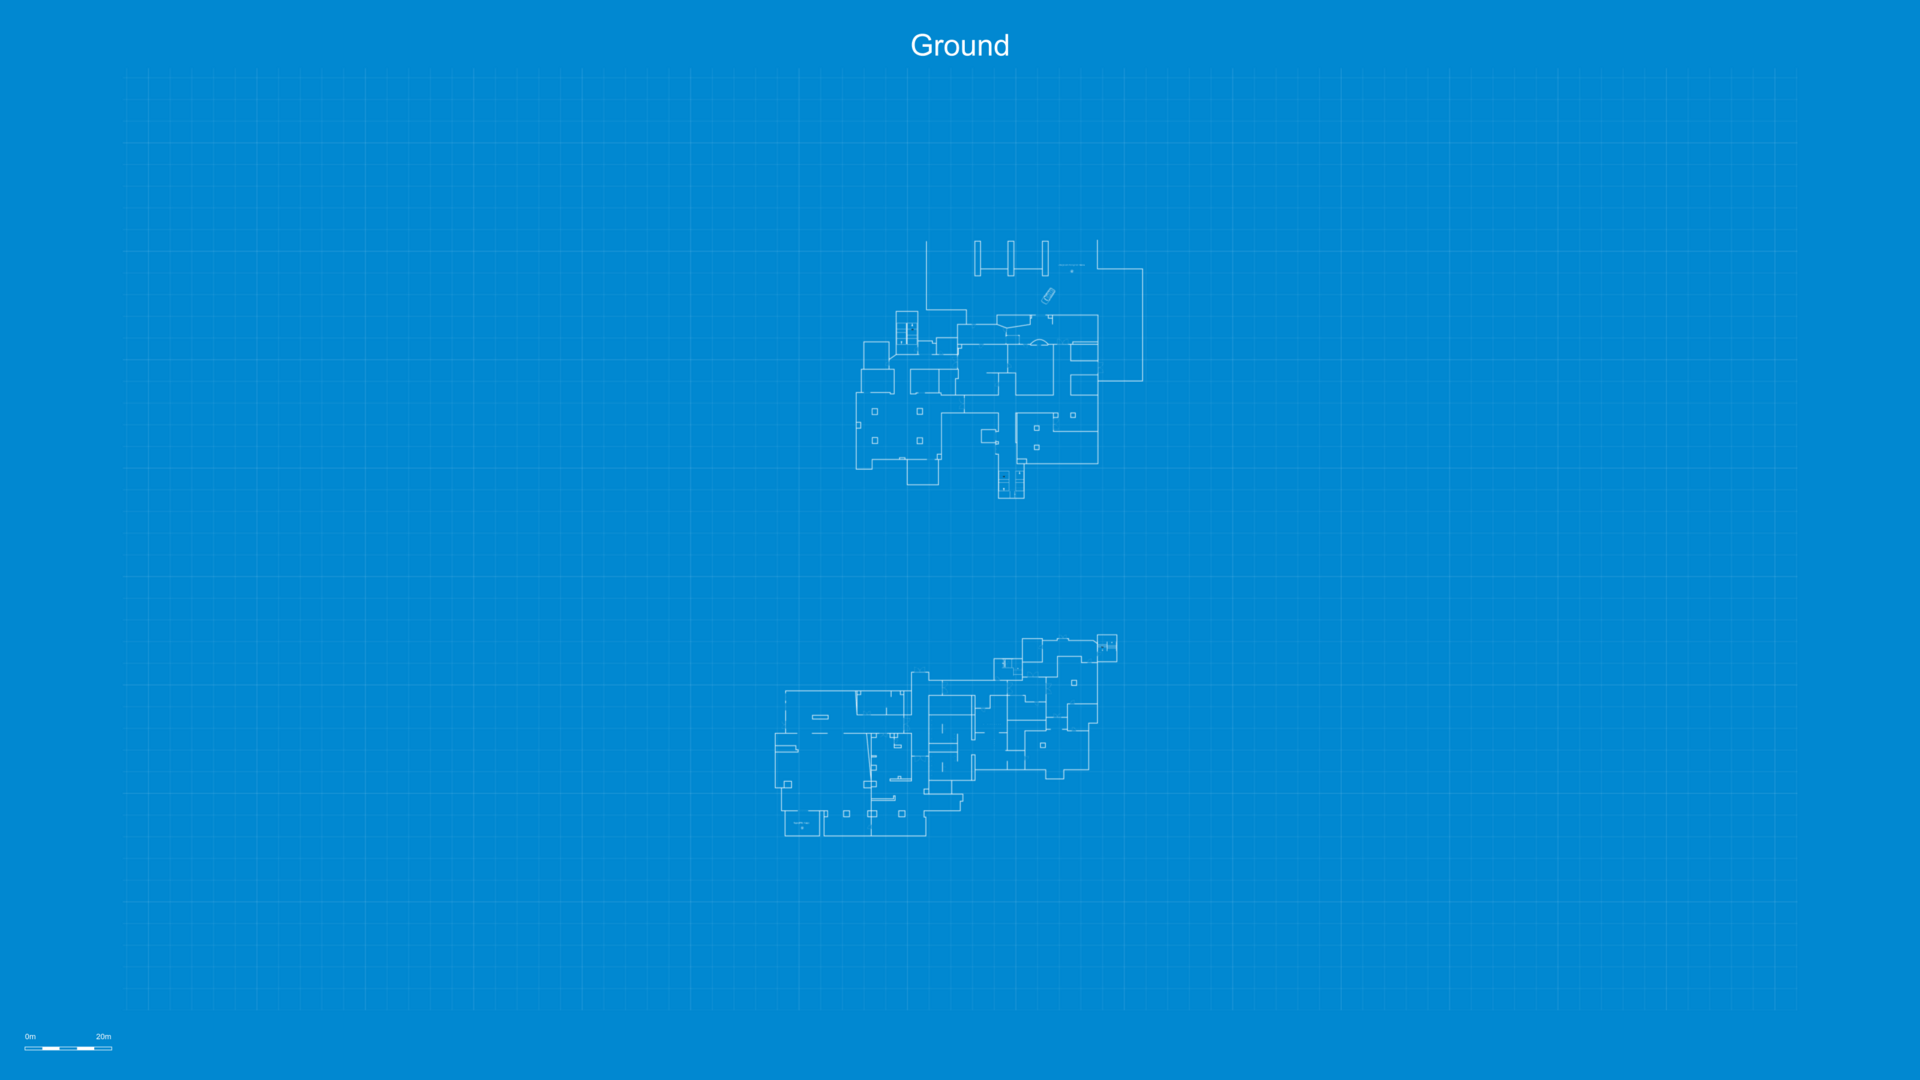
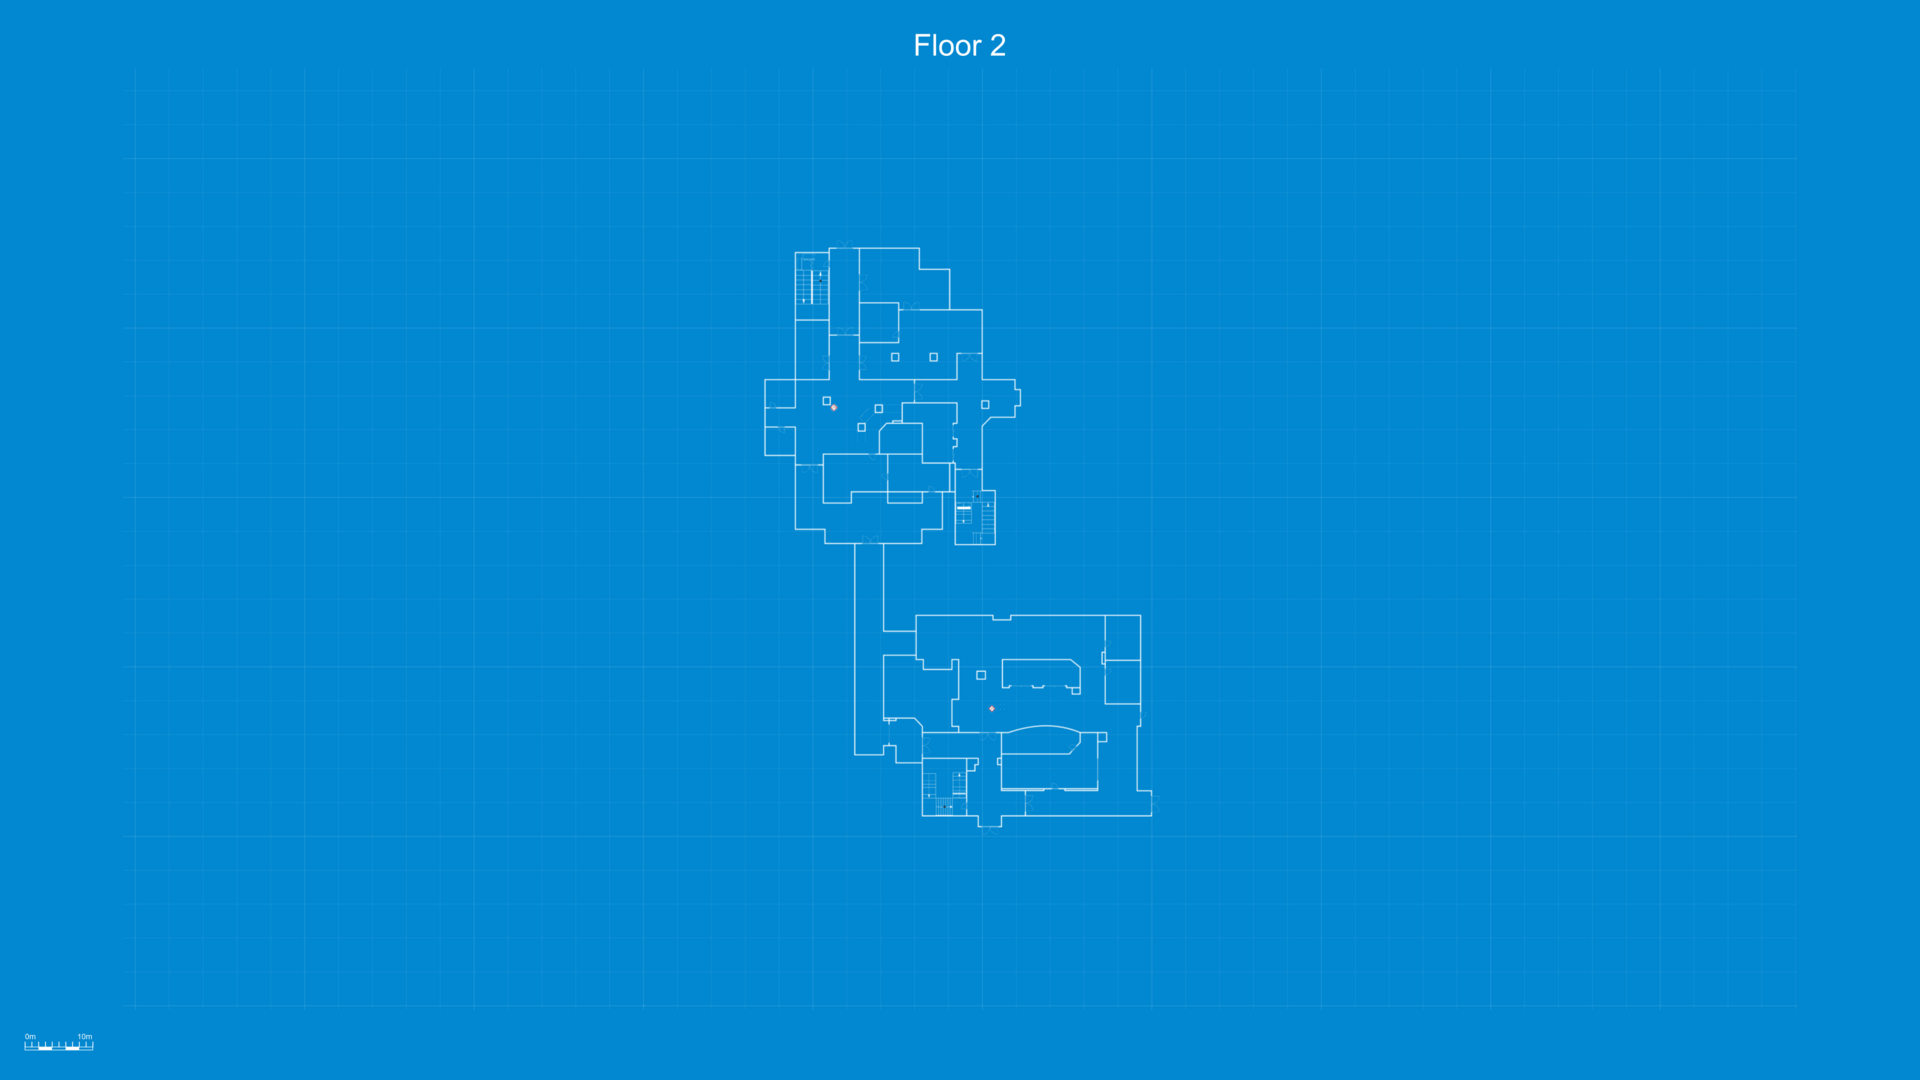
Mission: Twisted Nerve / Map: 213 Park Homes
Underground
Ground
Floor #1

Floor #2
Mission: The Spider / Map: Brixley Talent Time
Ground
Floor #1
Mission: A Lethal Obsession / Map: Sullivan’s Slope
Ground
Floor #1
Floor #2
Mission: Ides of March / Map: Brisa Cove
Ground
Mission: Sinuous Trail / Map: Mindjot Data Center
Ground
Floor #1
Floor #2
Mission: Ends of the Earth / Map: Kawayu Beach
Ground

Floor #1
Floor #2
Mission: Greased Palms / Map: Los Suenos Postal Service
Ground
Floor #1
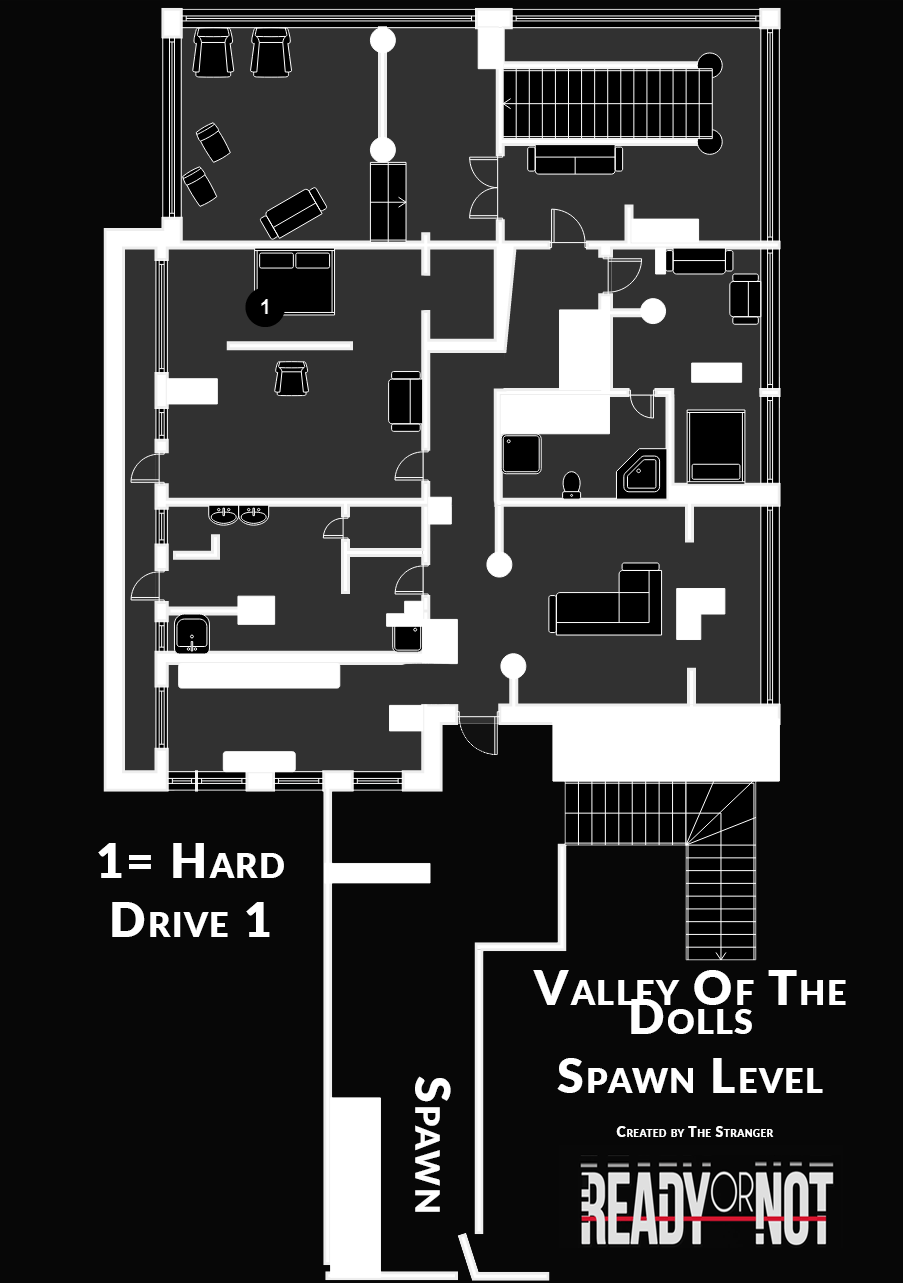
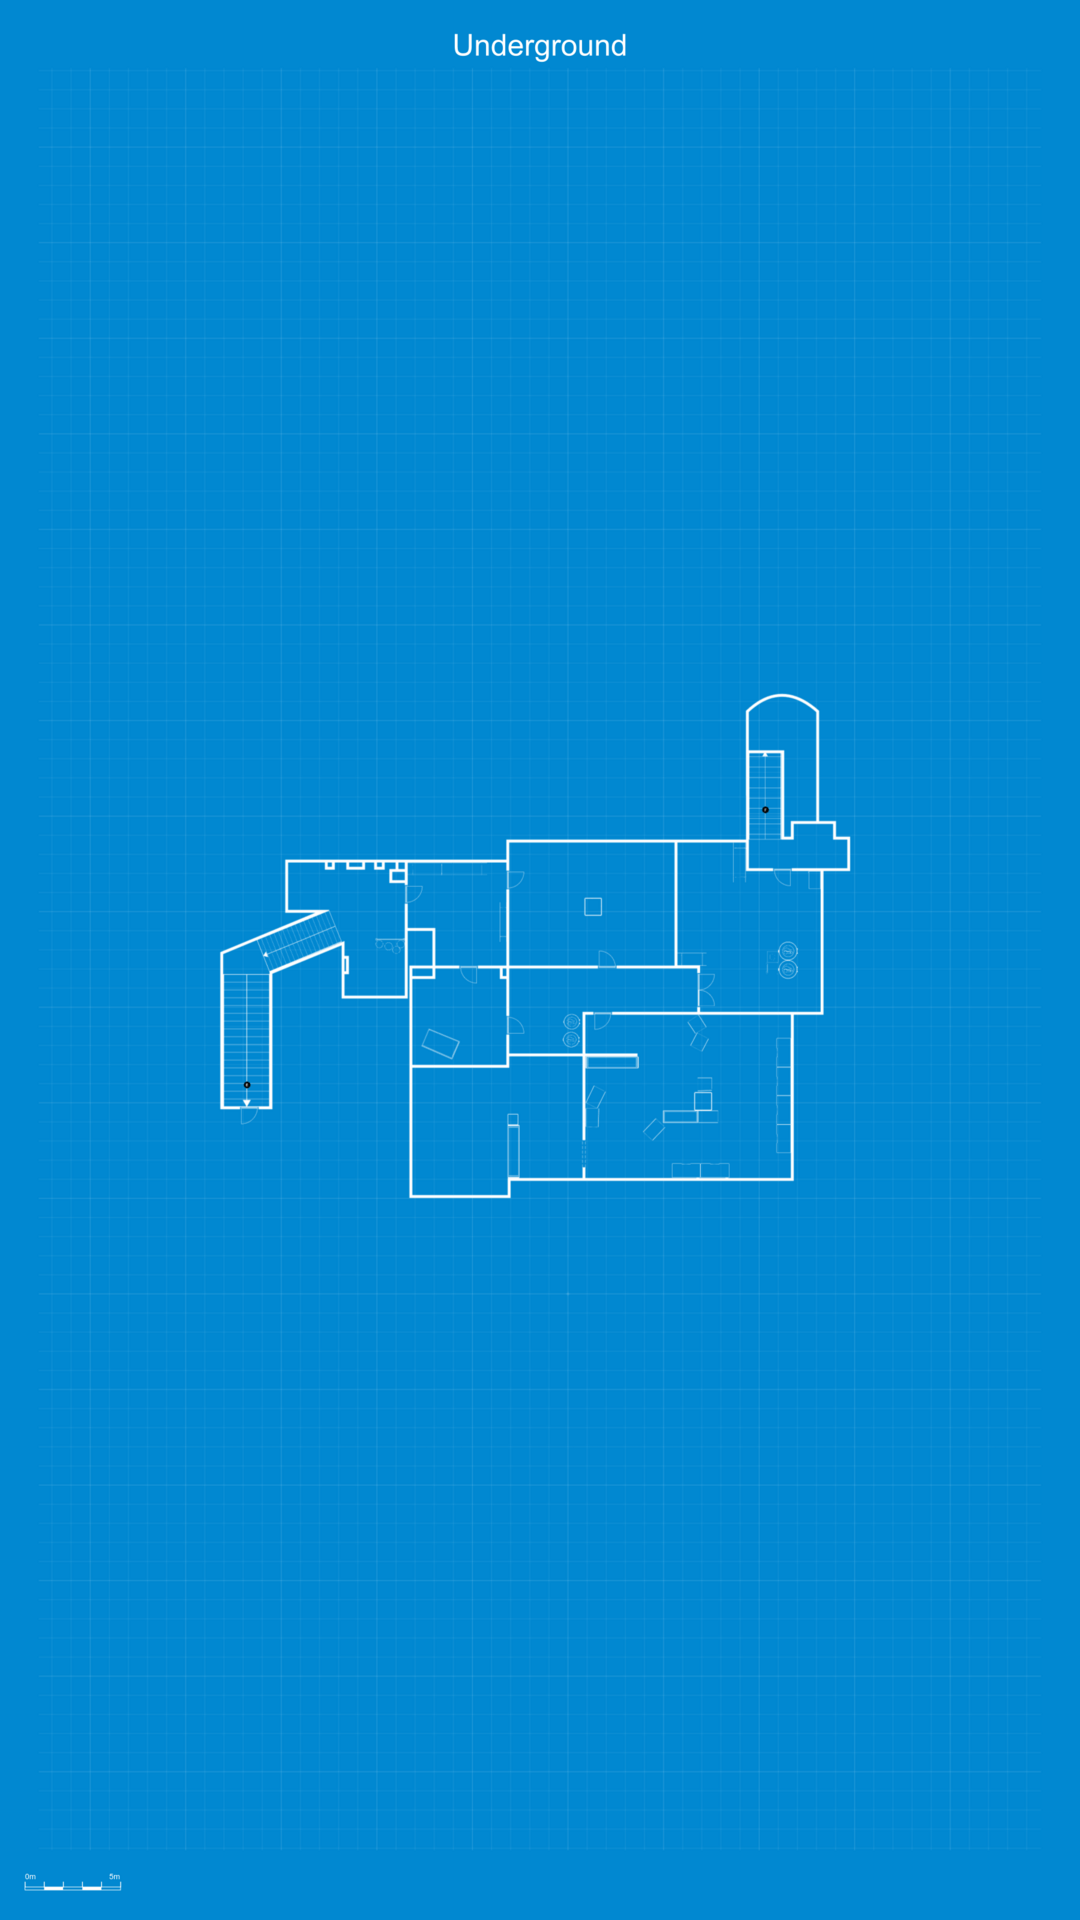
Mission: Valley of the Dolls / Map: Voll Health House
Floor #2
Floor #1
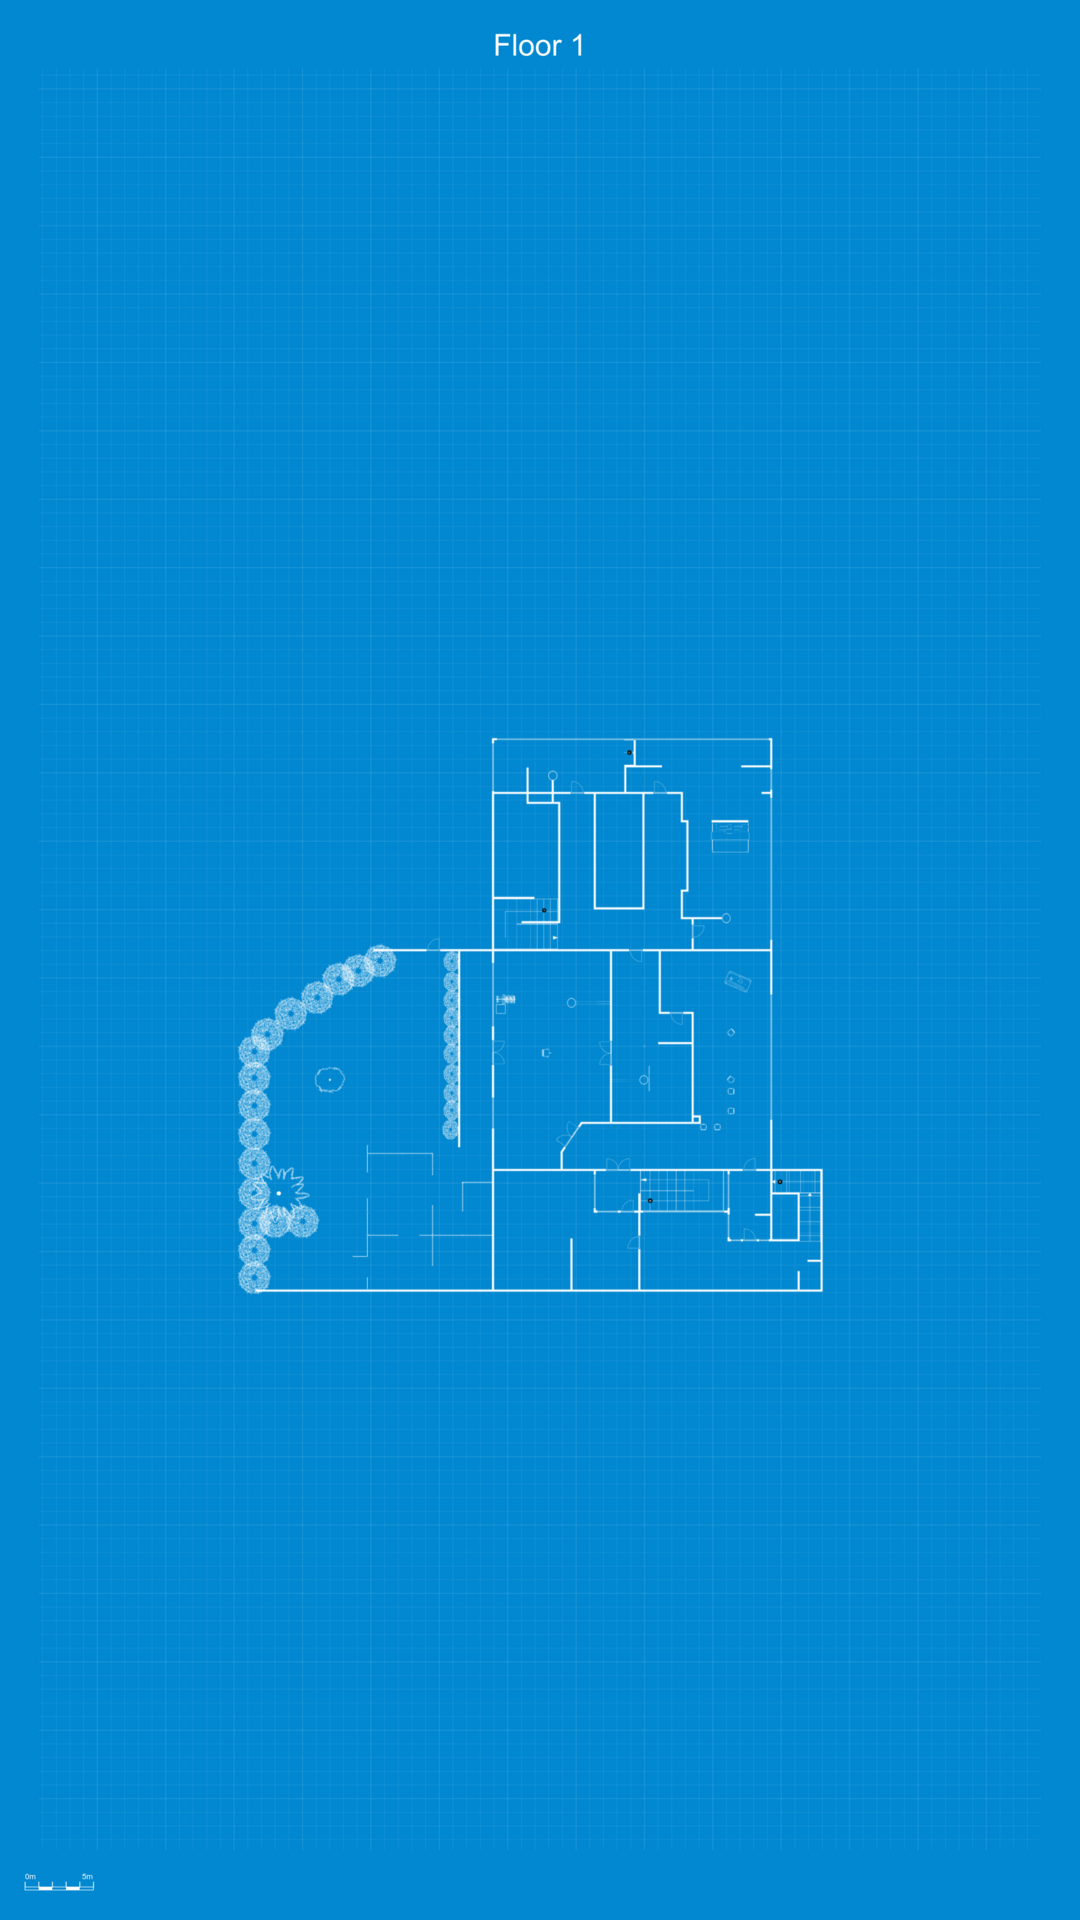
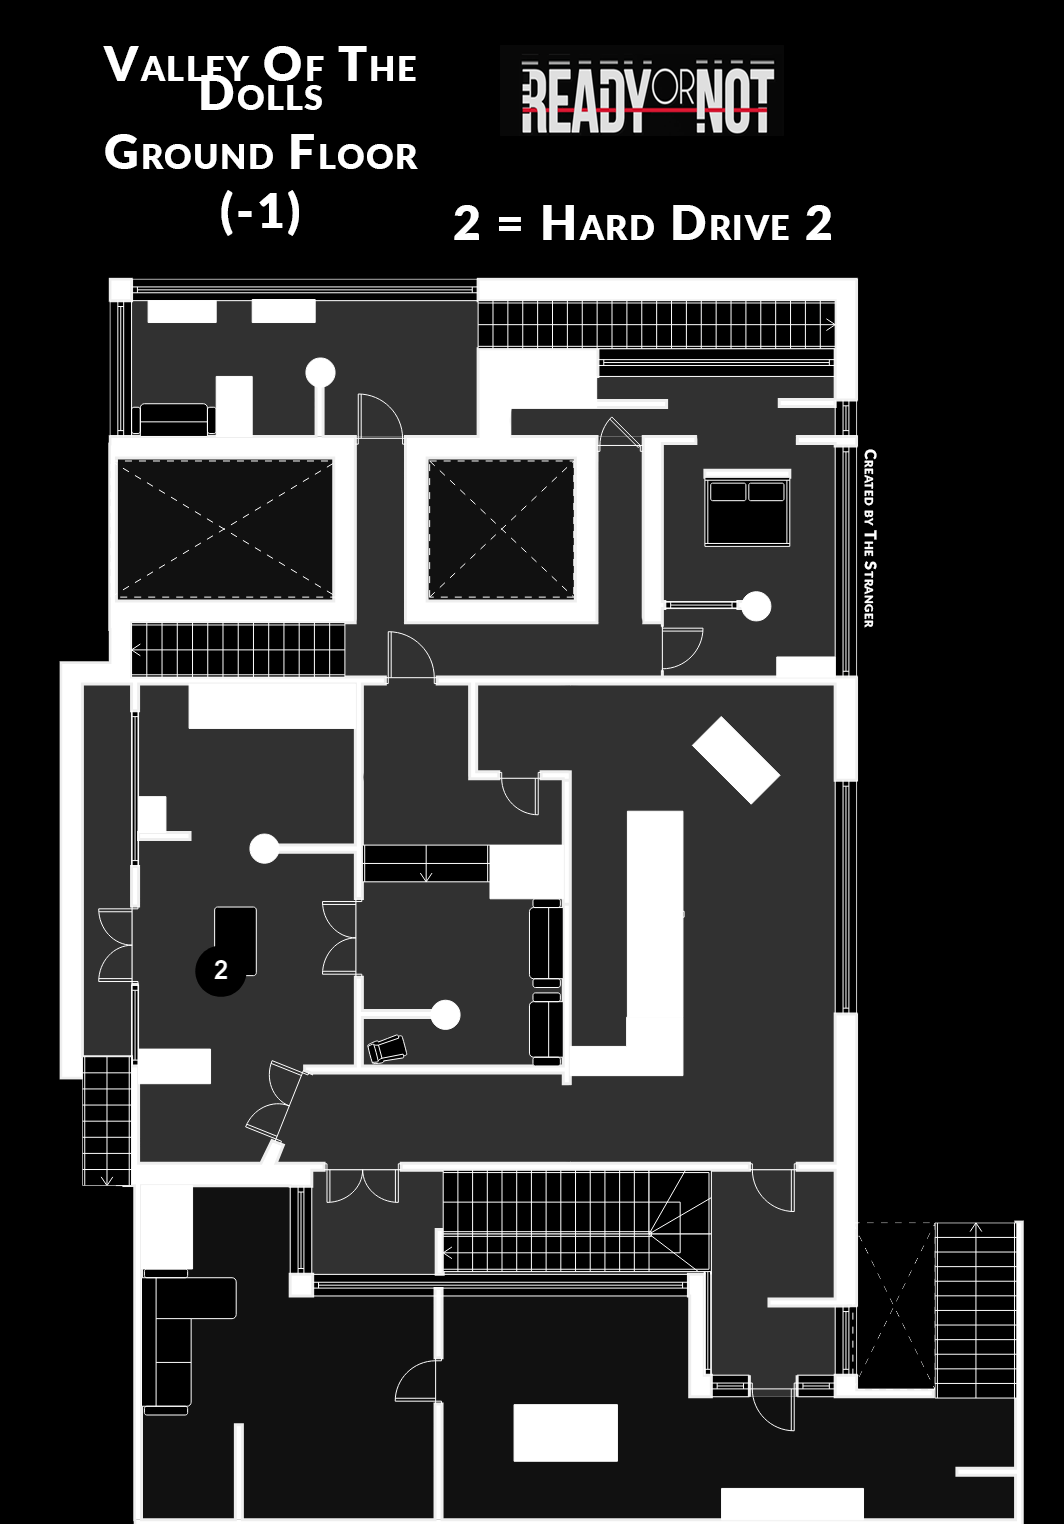
Ground
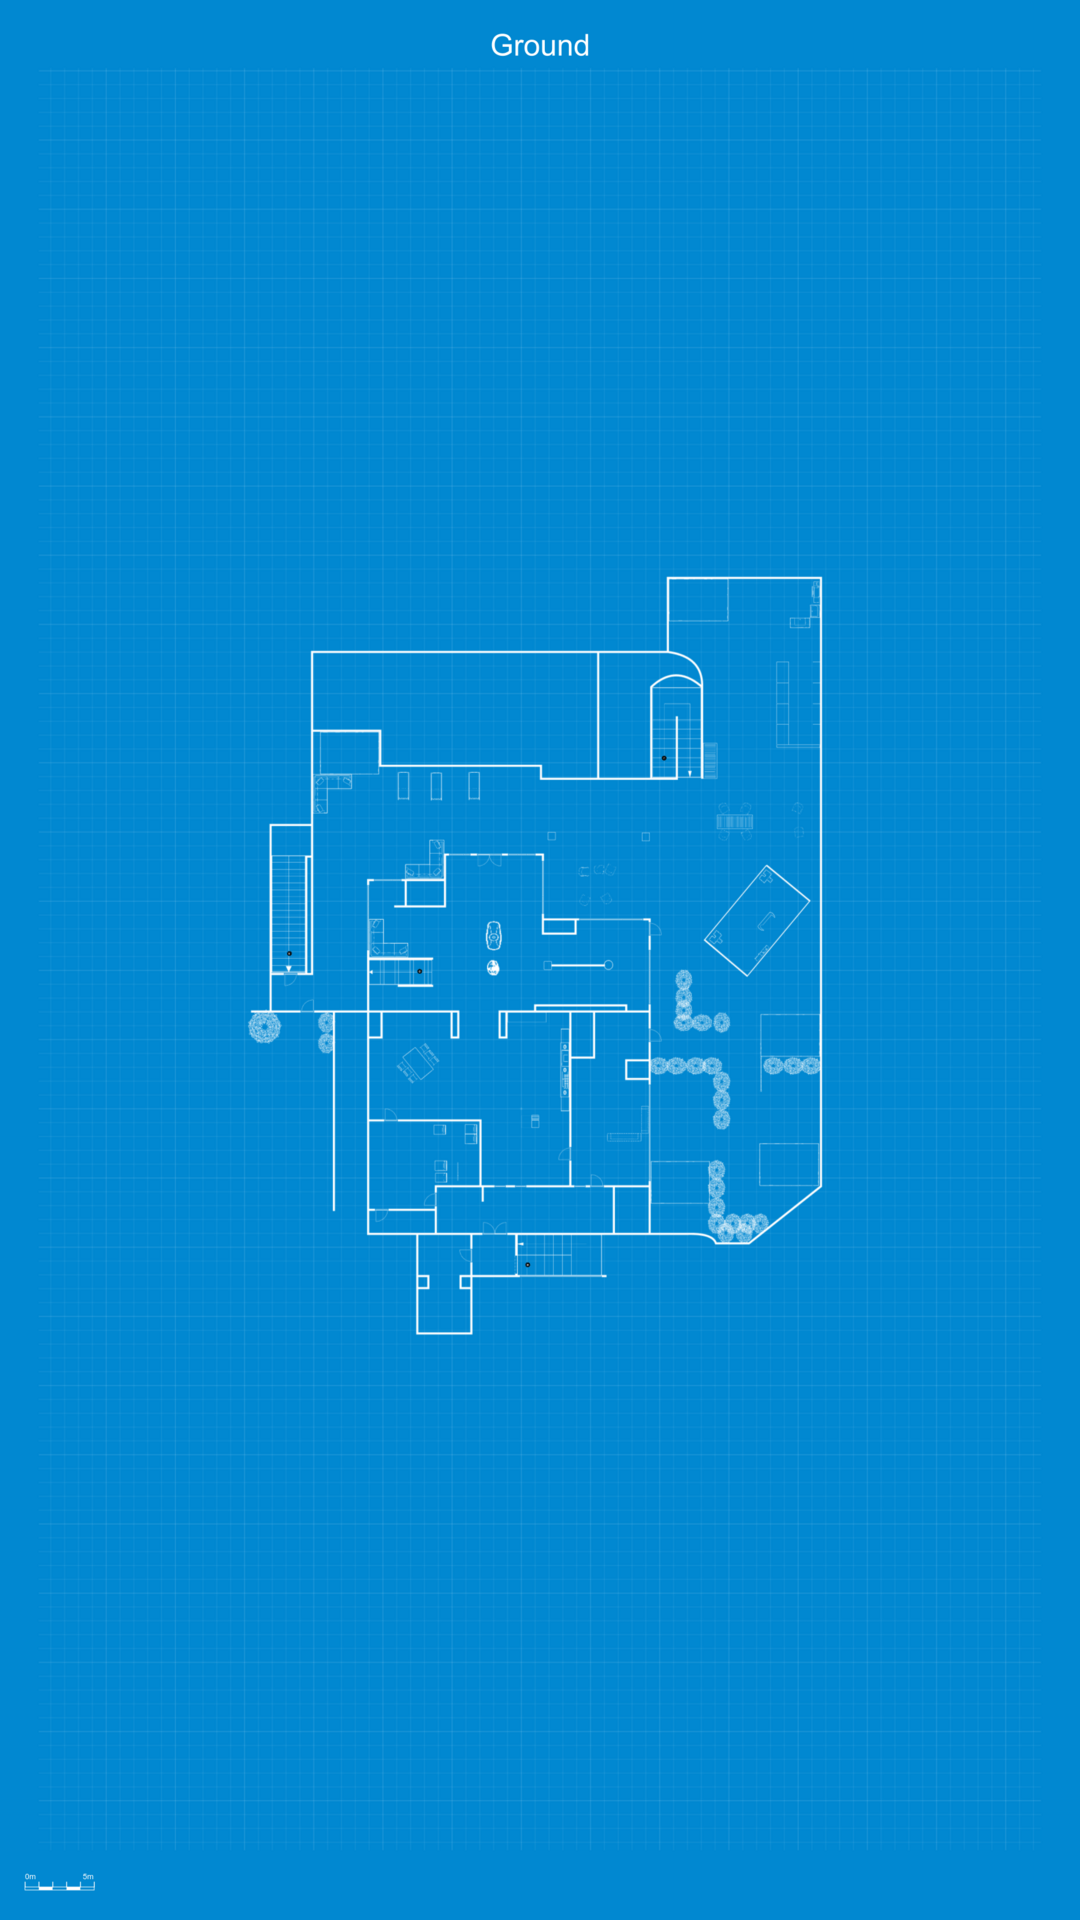
Underground
Mission: Elephant / Map: Watt Community College
Ground
Floor #1
Mission: Rust Belt / Map: Costa Vino Border Reserve
Ground
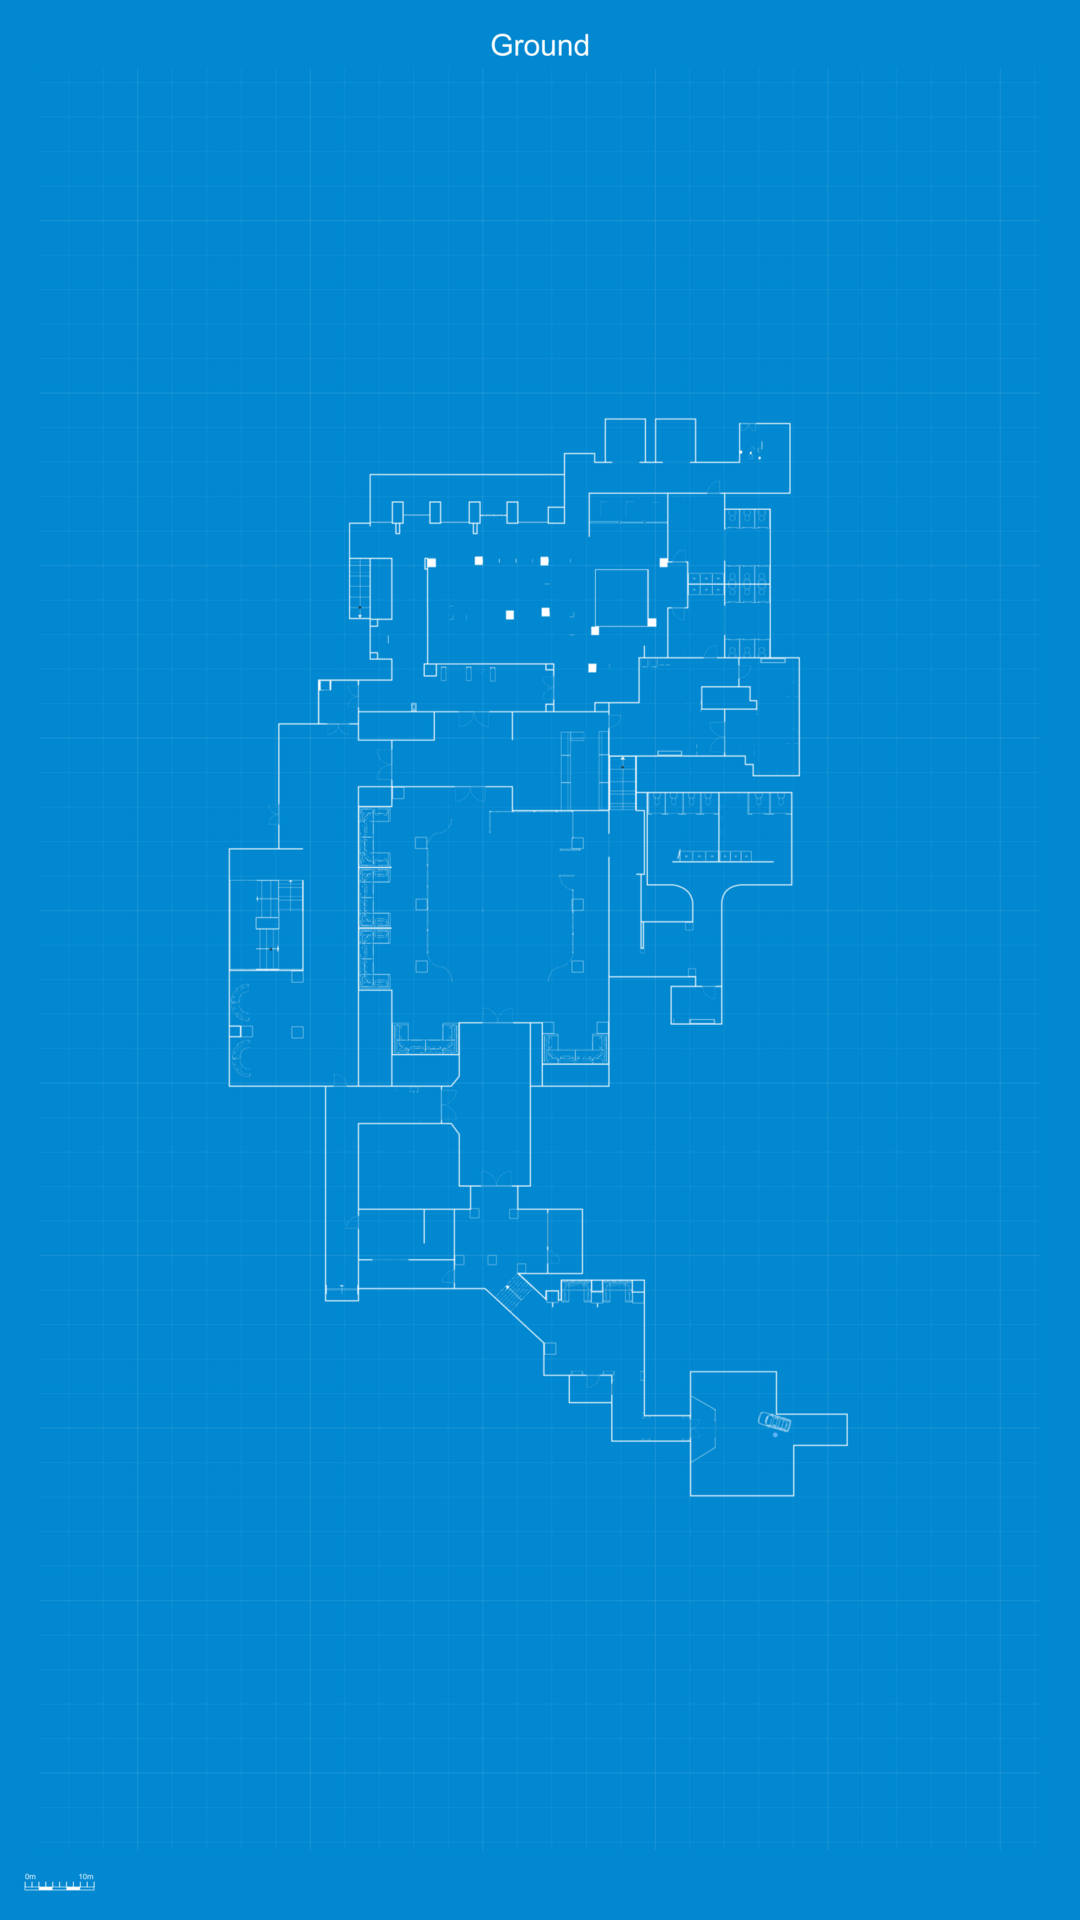
Undergound
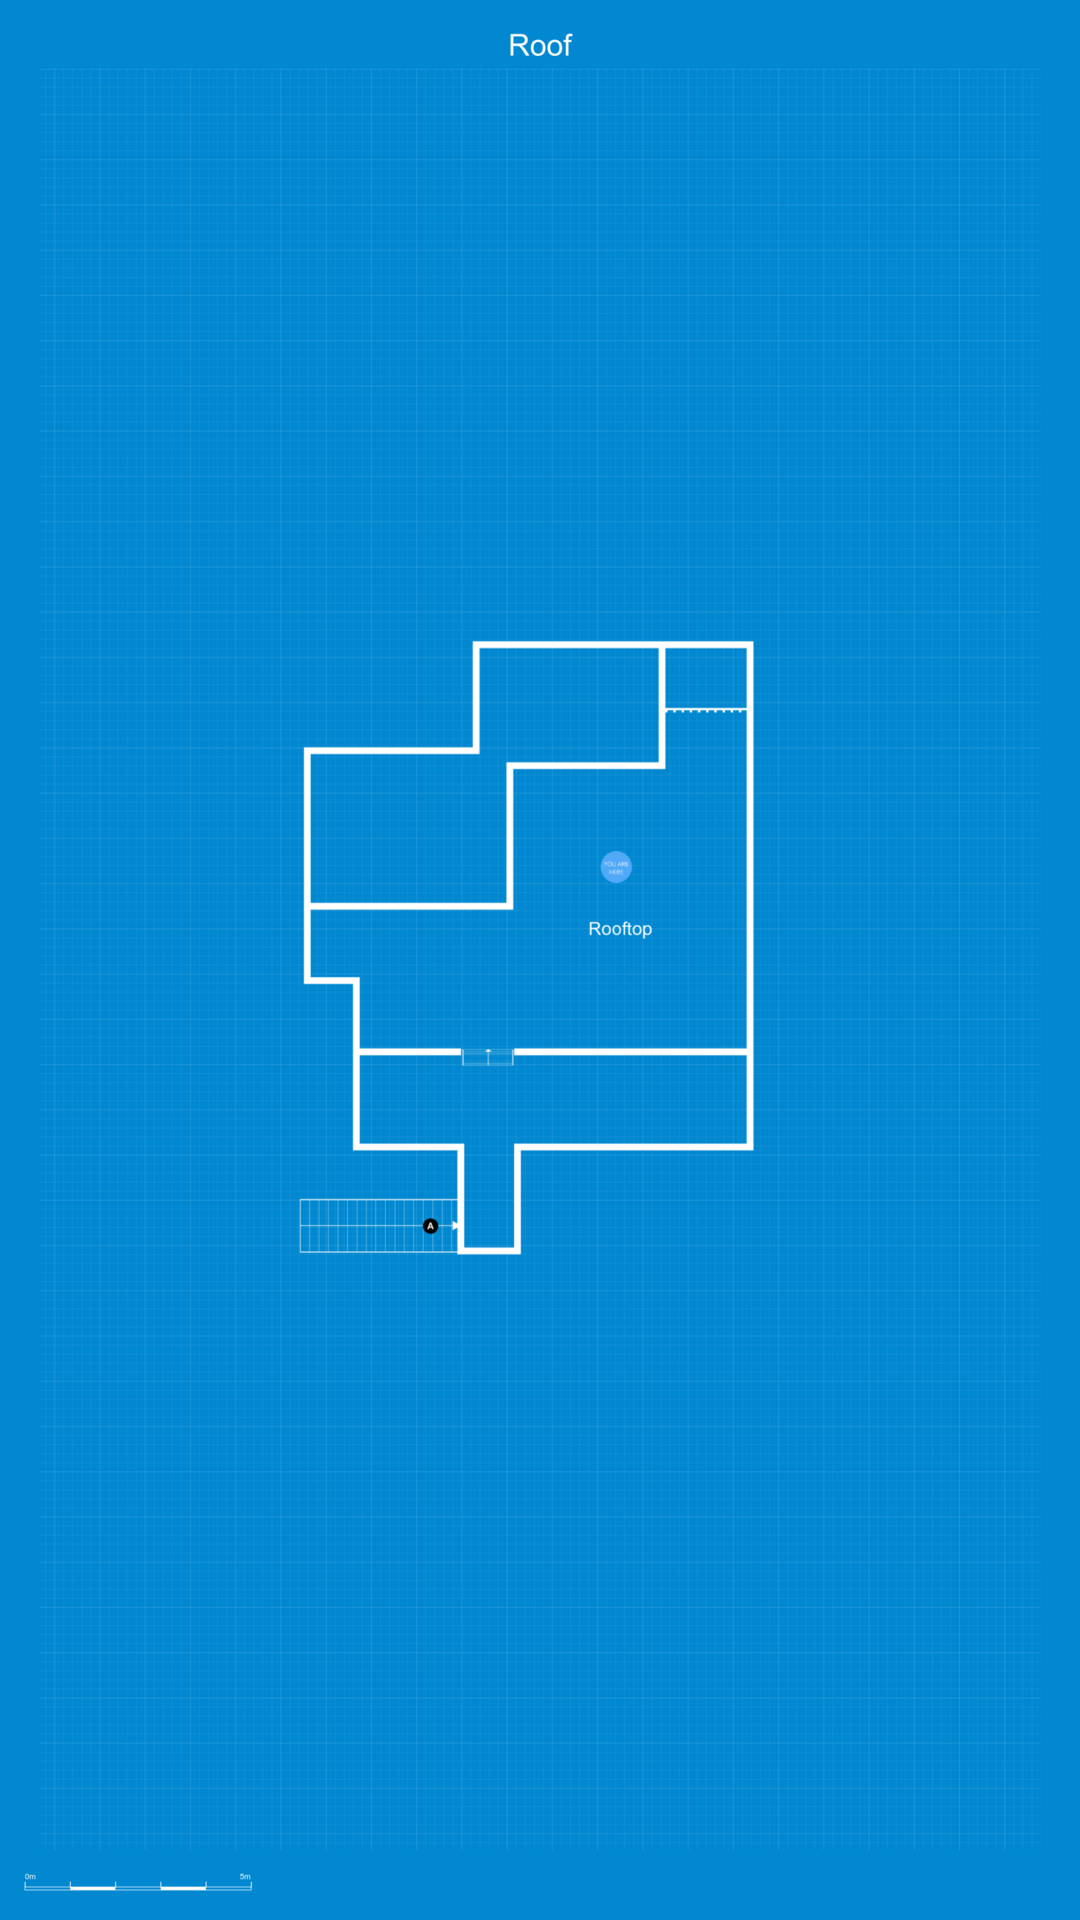
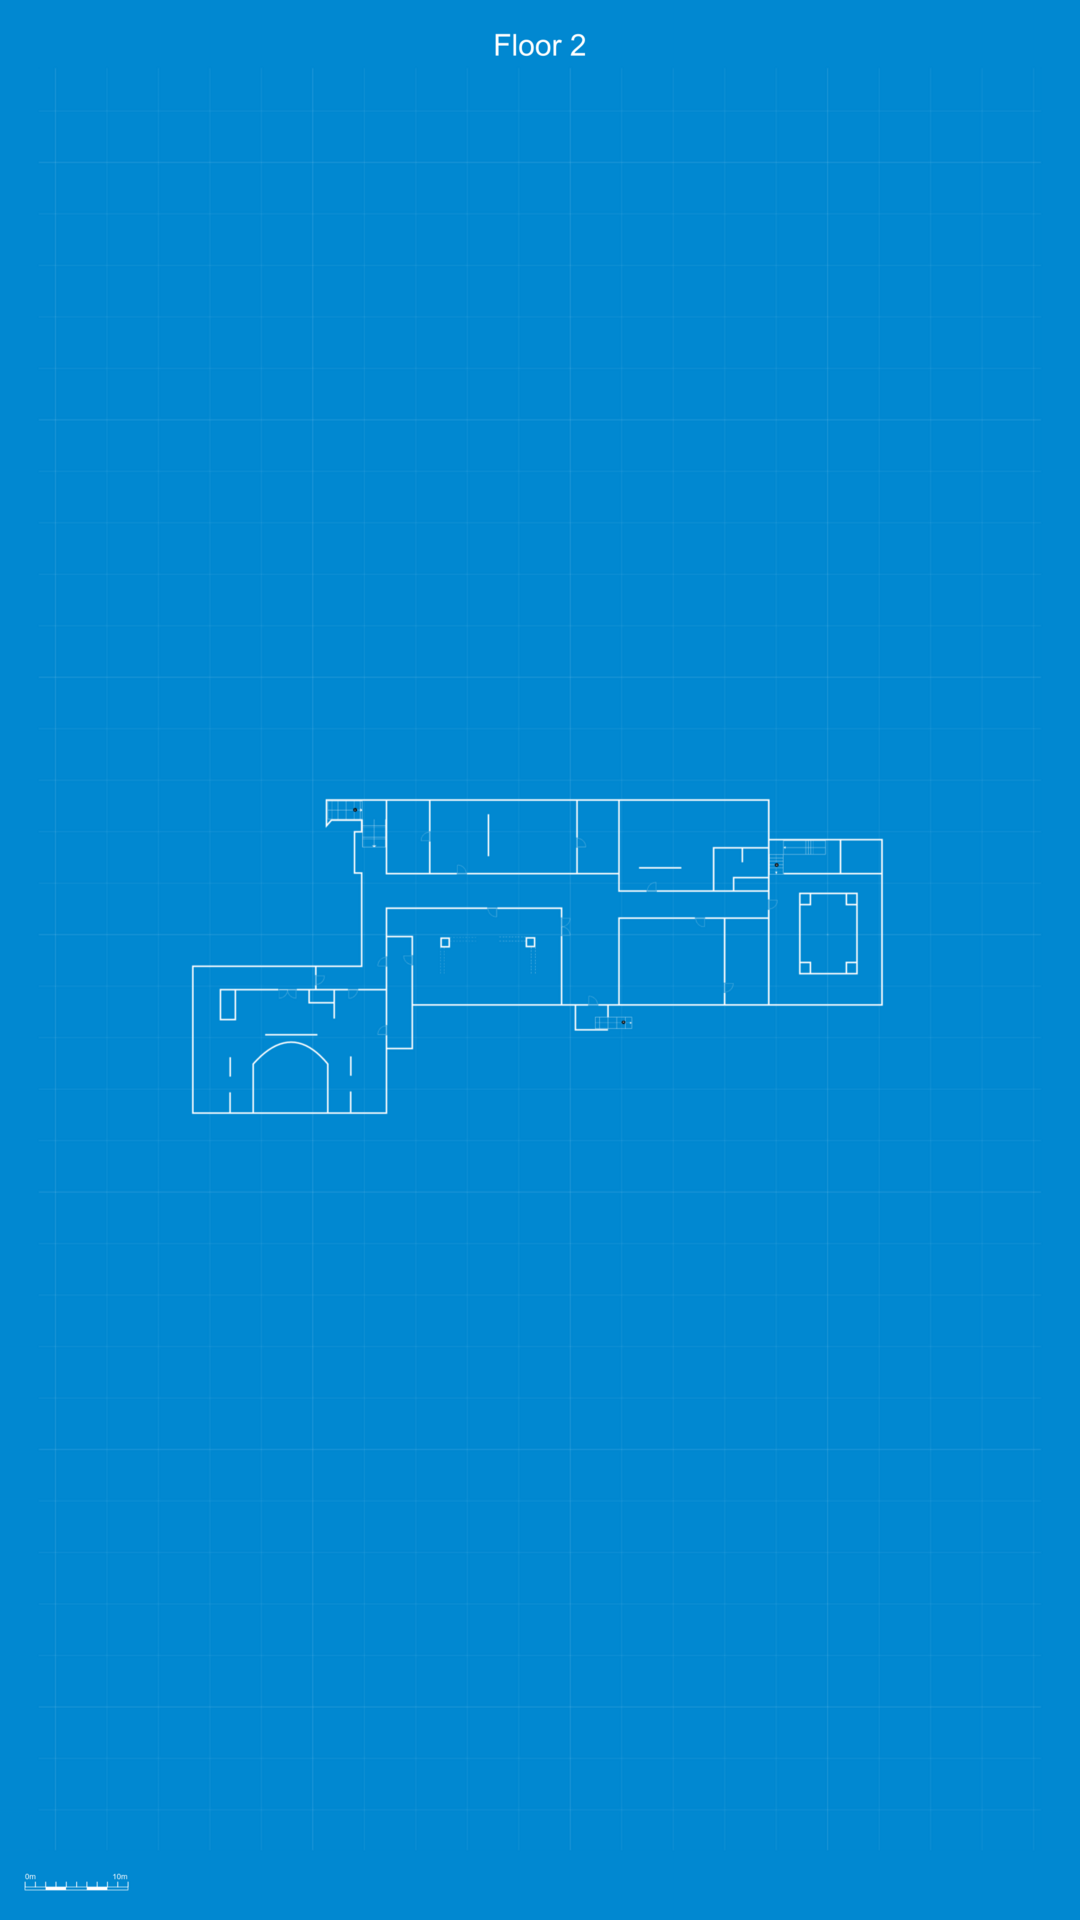
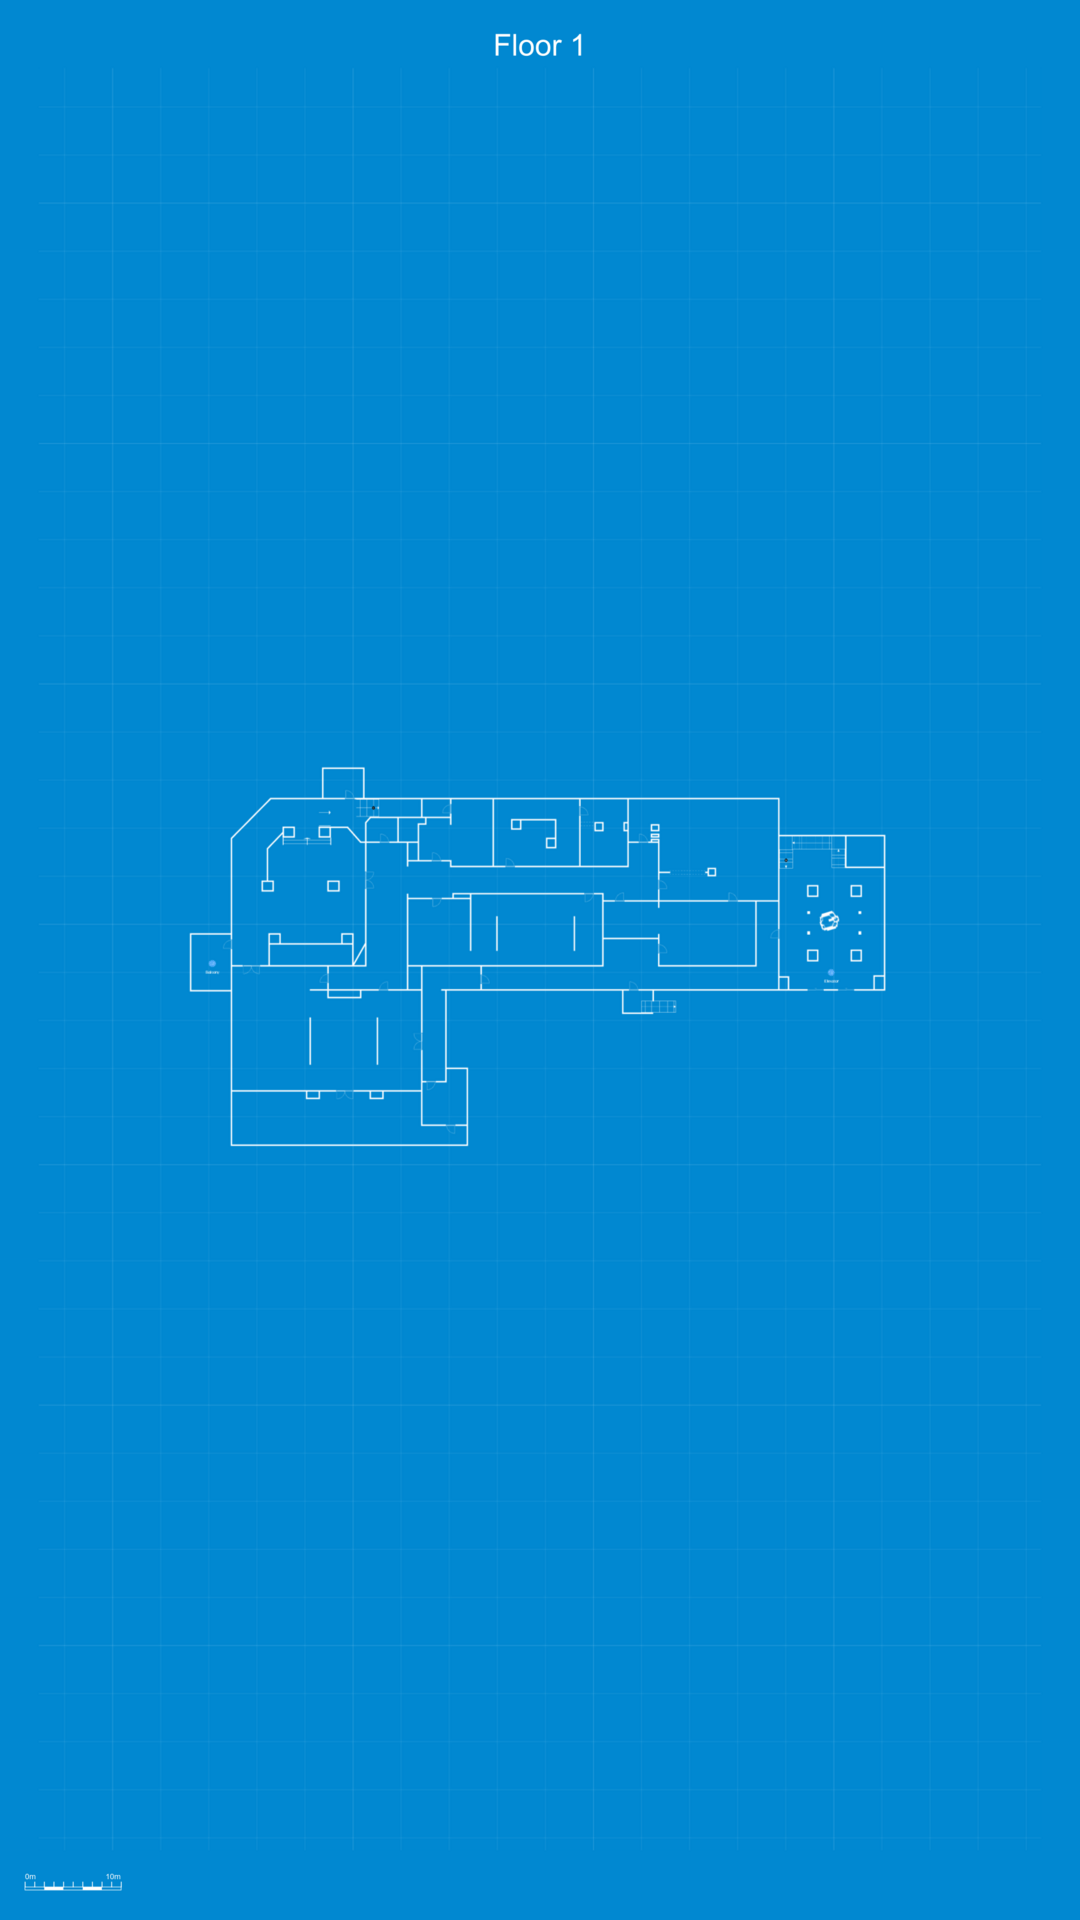
Mission: Sins of The Father / Map: Clemente Hotel
Roof
Floor #2
Floor #1
Mission: Neon Tomb / Map: Neon Nightclub
Ground
Floor #1
Mission: Buy Cheap, Buy Twice / Map: Ceasar’s Cars Dealership
Ground
Floor #1
Mission: Carriers of the Vine / Map: Cherryessa Farm
Underground
Ground
Floor #1
Mission: Relapse / Map: Coastal Grove Medical Center
Ground
Floor #1

Floor #2
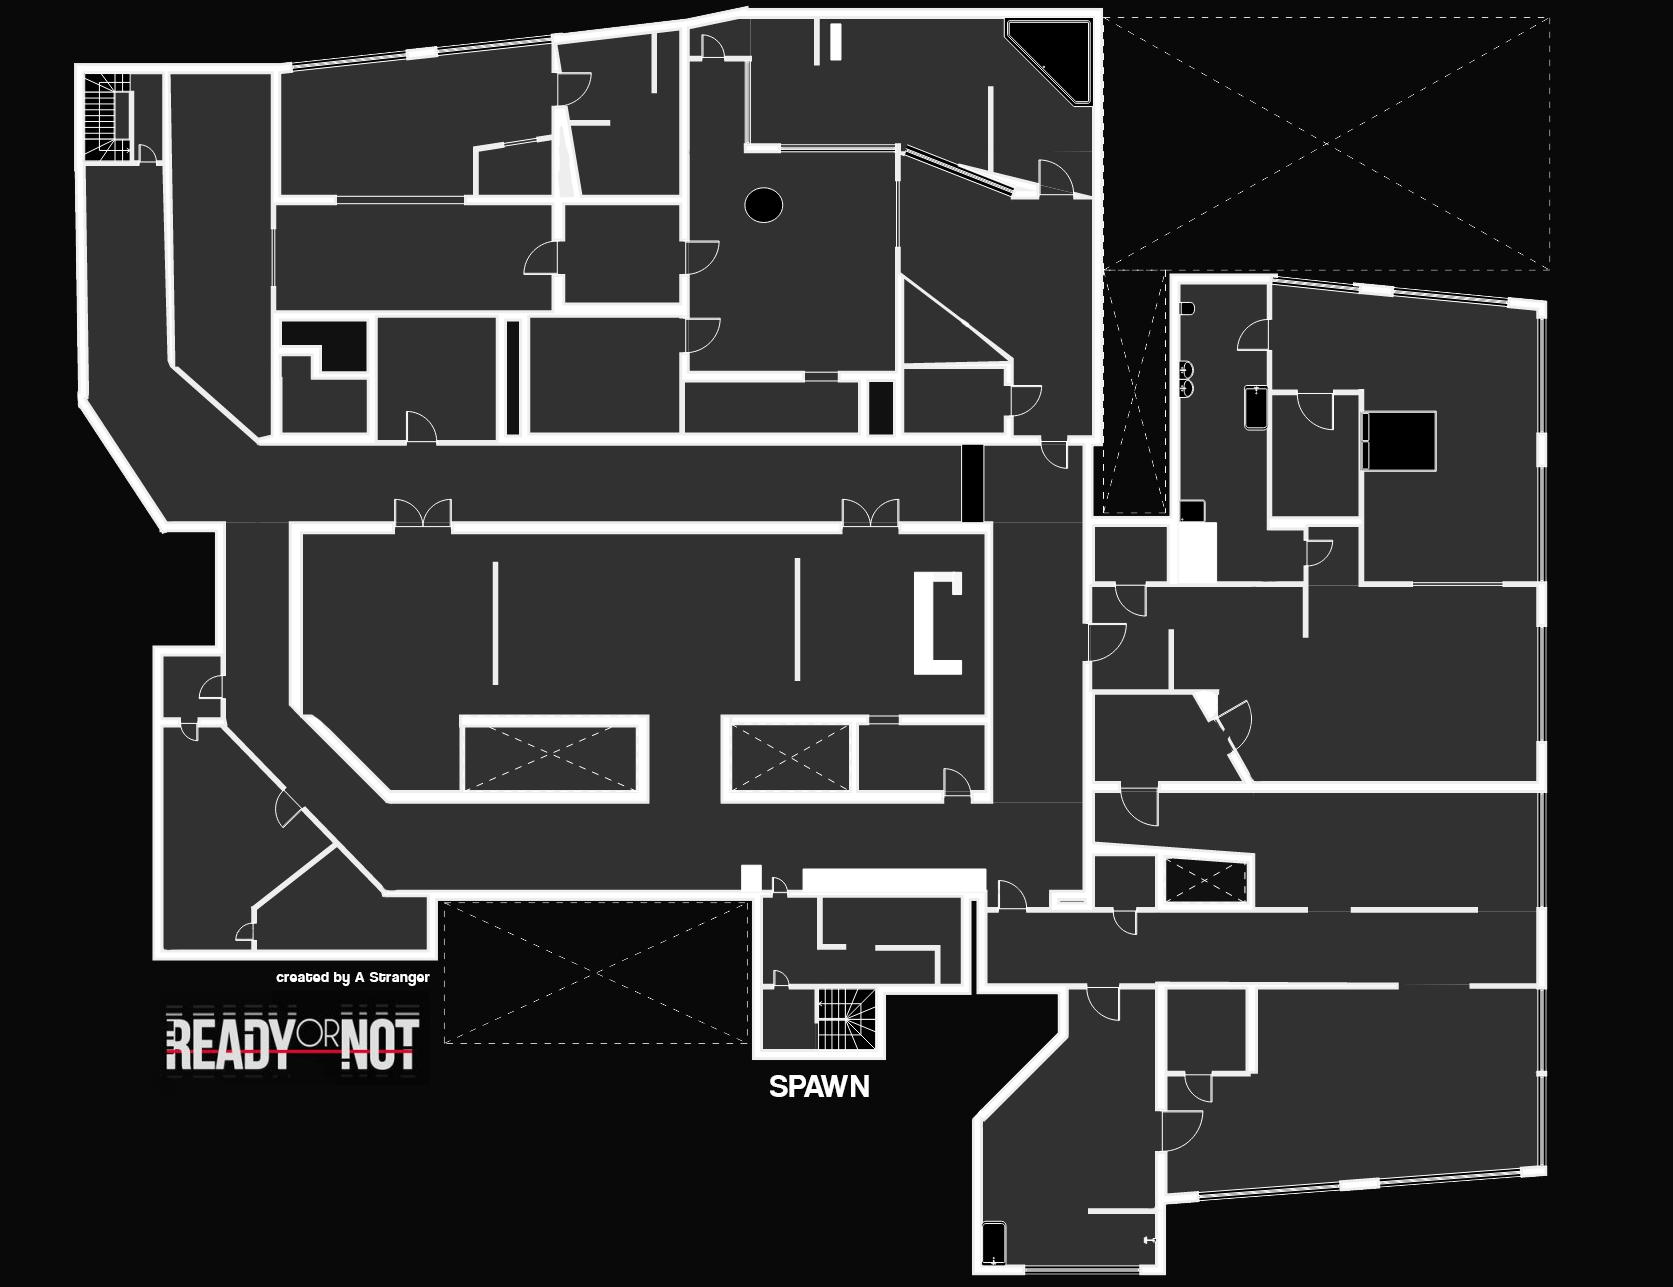
Misssion: Hide and Seek / Map: Port Hokan
Ground

Floor #1
Floor #2
Complete Mission Maps List
The mission list in the briefing room shows all levels in the order you unlock them in Commander Mode. If you’re playing co-op and want to follow the original order, you don’t have to guess.
Here’s the full list for reference:
| Missions | Map |
|---|---|
| Thank You, Come Again | 4U Gas Station |
| 23 Megabytes A Second | San Uriel Condominiums |
| Twisted Nerve | 213 Park Homes |
| The Spider | Brixley Talent Time |
| A Lethal Obsession | Sullivan’s Slope |
| Ides of March | Brisa Cove |
| Sinuous Trail | Mindjot Data Center |
| Ends of the Earth | Kawayu Beach |
| Greased Palms | Los Sueños Postal Service |
| Valley of the Dolls | Voll Health House |
| Elephant | Watt Community College |
| Rust Belt | Costa Vino Border Reserve |
| Sins of the Father | Clemente Hotel |
| Neon Tomb | Neon Nightclub |
| Buy Cheap, Buy Twice | Caesar’s Car Dealership |
| Carriers of the Vine | Cherryesa Farm |
| Relapse | Coastal Grove Medical Center |
| Hide and Seek | Port Hokan |


Where is the Port Hoken blueprint?
These should be on the screen in the team room.
It would be great if in Single Player, you could order your team to split and command team 2 to stack/breach on a flanking entry, to a room, without having to look at the target entry point.
Beautifully drawn, I wish these were in the game for planning phase. Perfect guide
wish the game had like a when you are loading on in the ready room they gave you the blueprints