
I’ll show you the best way to farm pickles at Bar as a Bandit. I’ve gotten over 1000 pickles in under 5 hours using this method. Some of you might not like it because it’s more about being passive than PVP. I’ll explain more about that later.
Pickle Farming Guide
Loadout
Here’s the loadout you should bring:
- An assault rifle or SMG
- 120 rounds of expanding ammo for your primary weapon
- A pistol with one loaded mag
- 60 rounds of 9mm expanding ammo
- 2-4 personal first-aid kits
- PVP armor (striker or better because of radiation)
- Bags of 9mm expanding ammo and personal first-aid kits
Optional items:
- Plates (use partially broken ones with 30% or more durability, picked up from Bar)
- A primary weapon (only if you need to hot extract, which isn’t recommended)
- Flashbangs (to get out of tough spots without being too aggressive)
Now lets talk about saving a pack at the vendor so you can get out there faster. If you know how to do this you can skip to the bold parts. So go to the vendor and click manage packs in the bottom
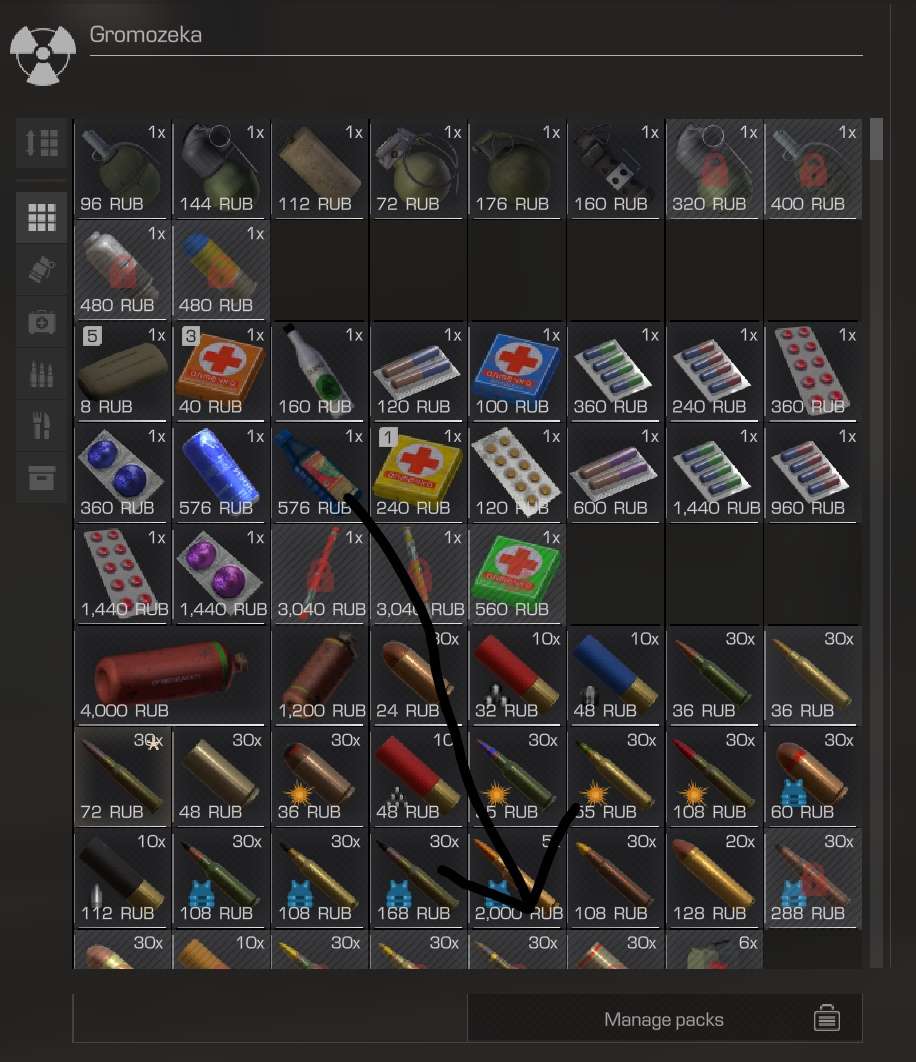
Now add 2 to 4 personal first-aid kits, 120 expanding ammo for your primary, and 60 9mm expanding. Now save it with a name of “Pickle Farm”.
Once you’ve done that exit the shop menu and press “T” (the default key) and you can quick buy this kit to get to the pickle farm faster.
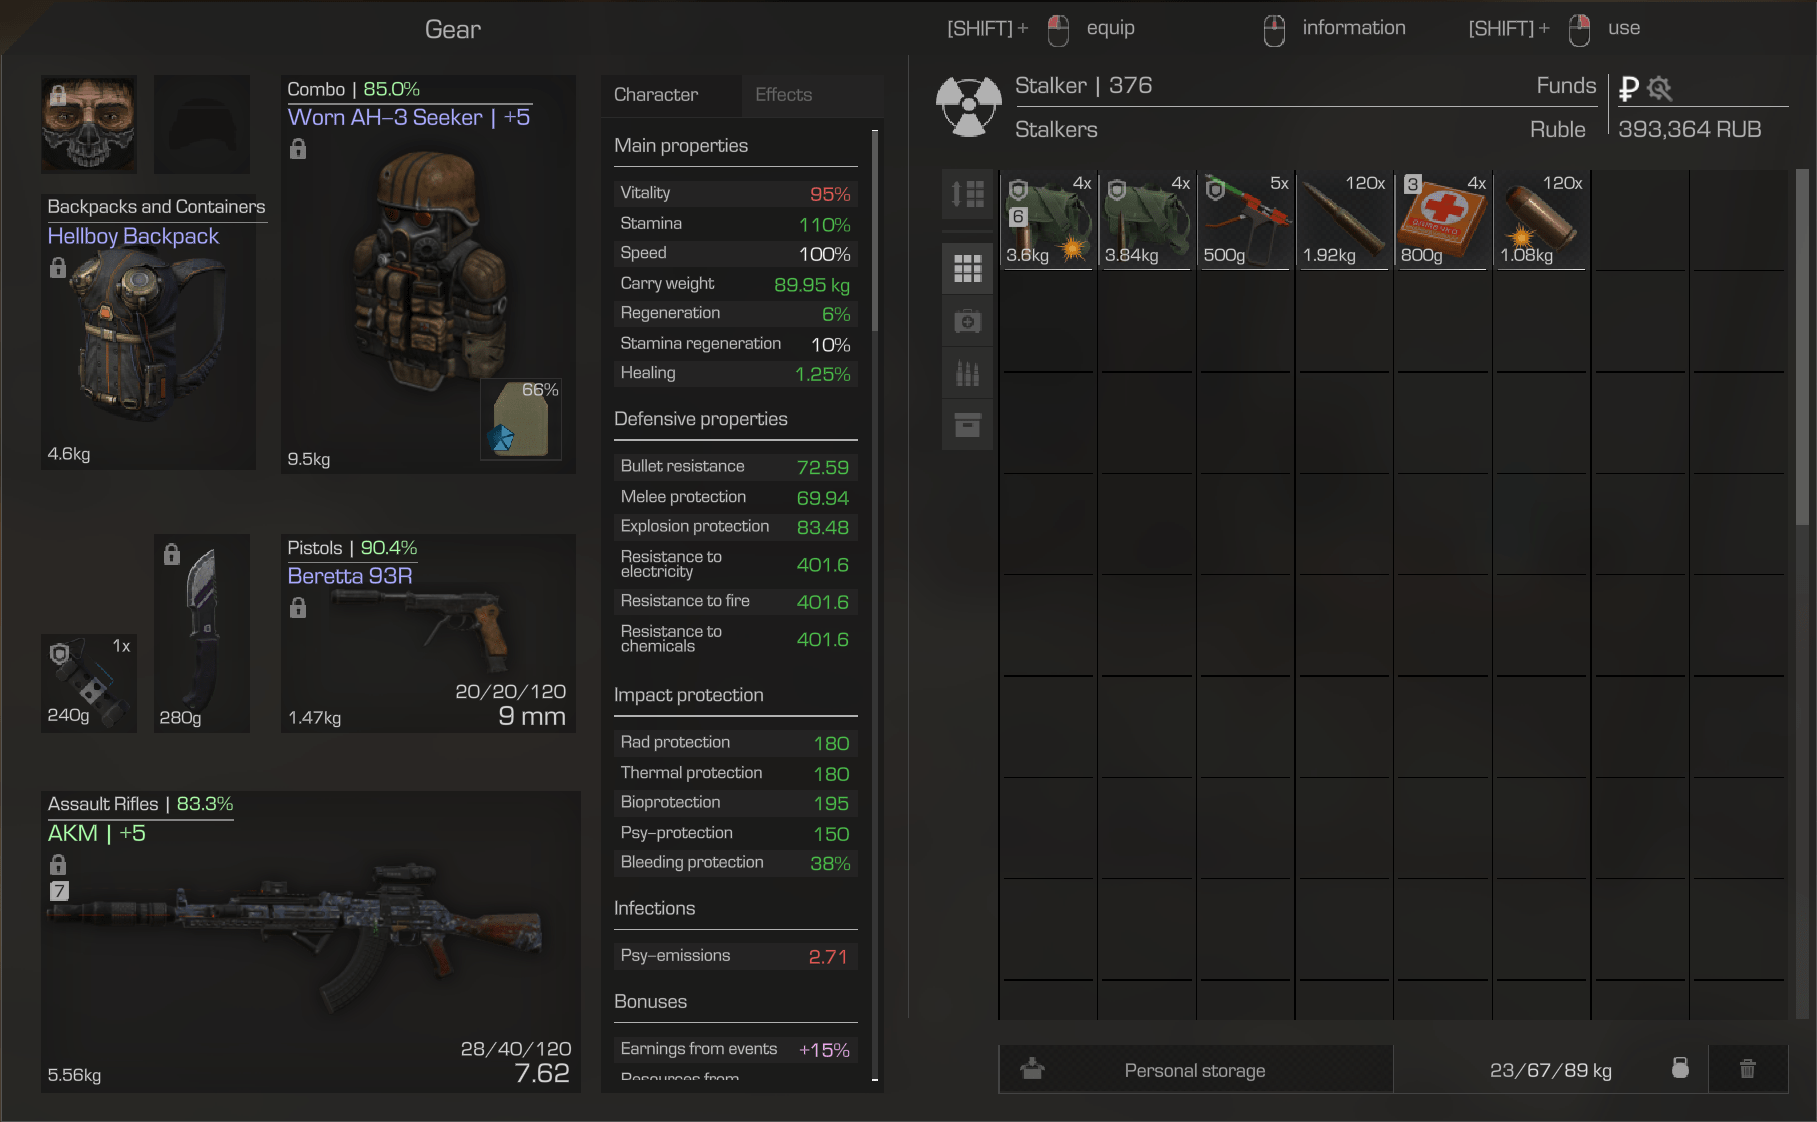
Here is an example of the kit that I bring with me (if I was running bandits):
- AKM: A very hard hitting mid range weapon to take out Stalker AI at a distance.
- Beretta 93R: My preferred pistol for the job, and obviously suppressed. The 3 round burst and perk of increased damage as enemy health drops make it possible to kill unarmored Stalker NPCs with 1 burst to the head.
- Worn AH-3 Seeker: It has the best Bullet Resistance of any armor that I have available to me at the moment.
- A 66% Plate: Found on the ground at bar, it has some protection but didn’t cost me anything.
Hellboy Backpack with Artifacts: This part of the loadout isn’t optimized, preferably you’d have bullet resistance and stamina or movement speed.
Bagged ammo and meds: This is here in case you are making an extended stay on Bandit’s side as bagged ammo isn’t dropped on death.
Tactics
Route and Tactics:
I’ll show you different routes, how to use them well, and how to handle fights. The main thing is to be stealthy and always check the player counter on your map. If it’s over two, hide and wait.
For AI, make them shoot as little as possible. Unsuppressed AI fire attracts players, especially lots of shots. Some AI have armor, so expect them to take more hits.
The main difference from the Stalker guide is that you’ll take most fights at a medium range of 20-35 meters, instead of 5-10 meters.
Here’s the part most people won’t like: don’t kill players unless you have to. That’s right, don’t PVP in the PVP game unless necessary. When you kill a player, that area will be swarmed by Stalkers and your pickle run is as good as dead. Your best option is to let the Stalker kill you, seriously. Note their name and try to message them to ask for the bag back (type “@Username: hey man i was pickle farming, can I get that back?” in chat).
Another method is to run around with only fists out. If a Stalker notices you, try spamming the surrender voice line. It works about 20% of the time, but it’s worth trying if all else fails.
Initial Route
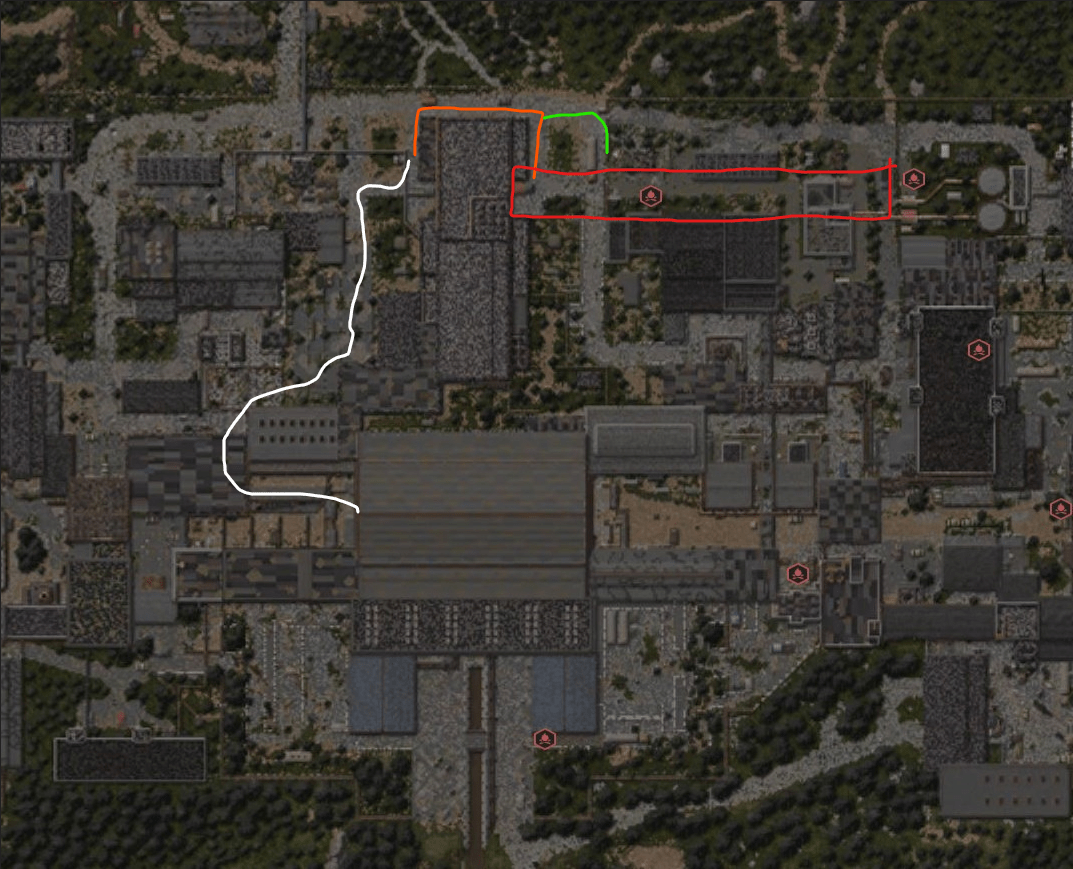
White: This Route is your initial run on Bandit side and can be done with fists out to go faster. When you come to the Rostok-Army line stick right up against the wall.
Orange: This route, if ran at full speed with fists out, allows you to get from one side to the other with full invulnerability. If you are shot at by players or AI you may be suppressed and run slower and not make it. Beware there may be a pack of 4 Stalker AIs on the Rostok side, if you encounter them either A) jump back over or B) run right and take cover behind the truck
Green: This route in an alternate to the orange route and provides a safer entry back into Rostok as there is a wall that you can use for cover.
Red: This area is going to be your first encounter Zone. here you will find 4-8 Stalker AI patrolling the area. Try and take them out as fast and as quiet as possible. if you get all 8 it may be worth it to just cut and run with the 24 to 32 pickles
Tier 1 Camps
Tier 1: This tier is the closet to your entry point into Rostok Stalker side but also one of the hardest to accomplish. Unlike Stalkers (who have an easy Tier 1) Bandits have to deal with this being the major route that Stalkers take to Forest. For that reason alone, if you see the other camps in Tier 2 available go for them first.
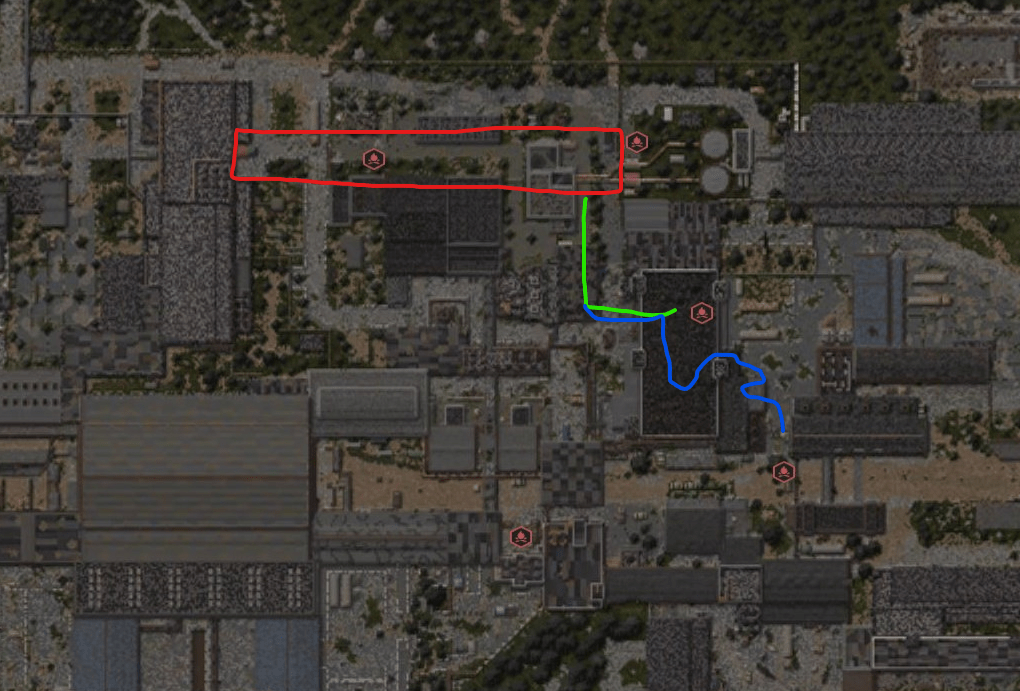
Green: (This camp should be taken using a pistol) This route is a tricky one and one that needs to be done with speed. This camp is directly in the path of Stalkers returning from Forest and should only be done if there are no other camps up.
Blue: (This camp should be taken using a pistol) As with green blue is also in a major traffic area for Stalkers. This one how ever can easily be taken out with a pistol at short range. Be warned Stalkers frequent this interchange as it connects two large PvE farming areas.
Tier 2 Camps
Tier 2: This tier is much easier than tier 1 as it is much less frequented by Stalkers and is off to the side of the farm area.
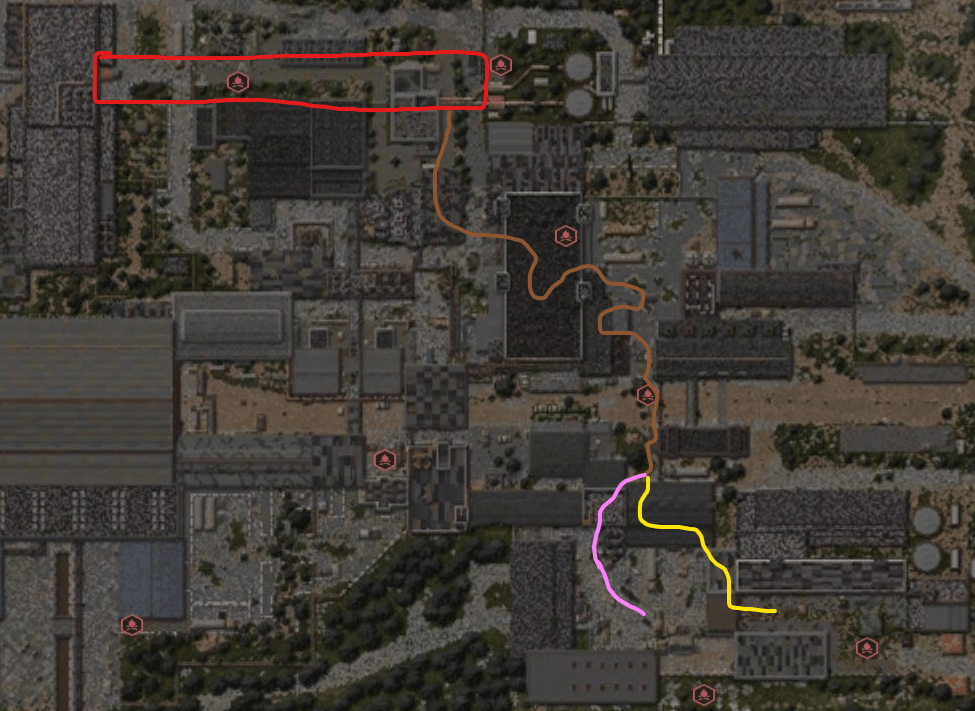
Brown: This route is what you use to get from red zone to yellow and pink routes. Stay up against the wall and once you pass the blue route from tier 1 hug the wall and be wary of Stalkers running out of their spawn.
Pink: (this route should be taken with primary out) This route should be taken first if the yellow route camp is also available. You will run through a warehouse and come into a clearing. Run around the boxes to avoid the AI detecting you. You will come up to a truck with concrete slabs on it, peak right of it and you will see the camp. Again take them fast and silent.
Yellow: (this route should be taken with primary out) This route will be taken by running through two warehouses and then you will come out and into a clearing, walk directly to the truck in front of you. You can peak left on the truck be beware of a whirlygig there.
Tier 3 Camp
Tier 3 camp: This camp should only ever be considered if you have no pickles to show for the run so far. This run brings you directly in-front of the Stalker spawn zone and is almost certain death.
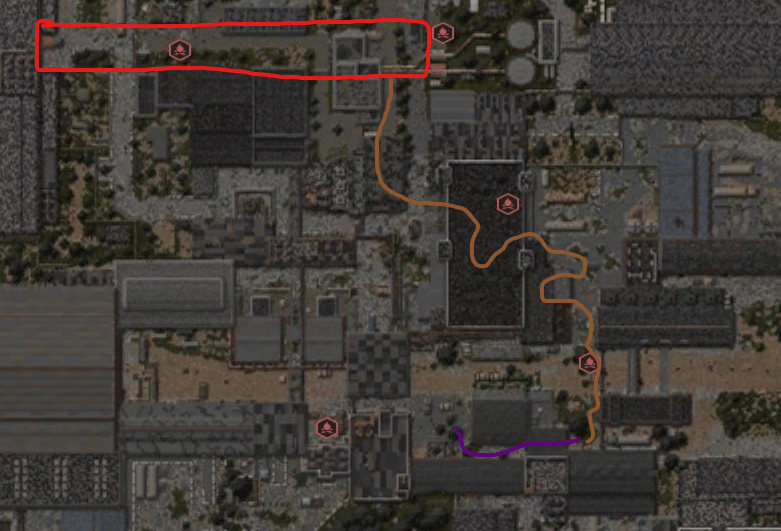
Brown: This route is what you use to get from red zone to the purple route. Stay up against the wall and once you pass the blue route from tier 1 hug the wall and be wary of Stalkers running out of their spawn
Purple: (this route should be taken using a primary) This route may seem short but it brings you directly inline of the Stalkers main exit from spawn into the PvE farming zones. This will almost certainly lead to your demise. This is your last option for pickles
Extracting
For all these routes, the best way to extract is to go back the way you came in. If friendly Bandits have pushed the Stalkers back, you might be able to leave through the south side of Rostok. When you reach the Rostok-Army warehouse line, it could be better to jump out on the east side and run along the edge until you get to the line between sides. But remember, there are Stalker AI where the Bandit and Stalker lines meet. If you jump over too early, you won’t have invulnerability.
Useful Tips for Fast Farming
Go from Rostok to Army Warehouse and cross to the opposite faction’s side. Then, go back into Rostok. There will be many patrolling NPCs who drop a good amount of pickles when killed (they can also drop the x20 pickle item). Kill them, loot, and then return to your side through Army Warehouse. You can also use spawn protection to run through AW more safely.
Another trick is to server hop. For example, if you kill all the patrol NPCs on server 4, go back to AW, then instantly return to Rostok. If you get dropped into server 3, all the NPCs will have respawned and be ready to be killed again.
I farmed all my pickles like this. It’s much easier than going the traditional routes.
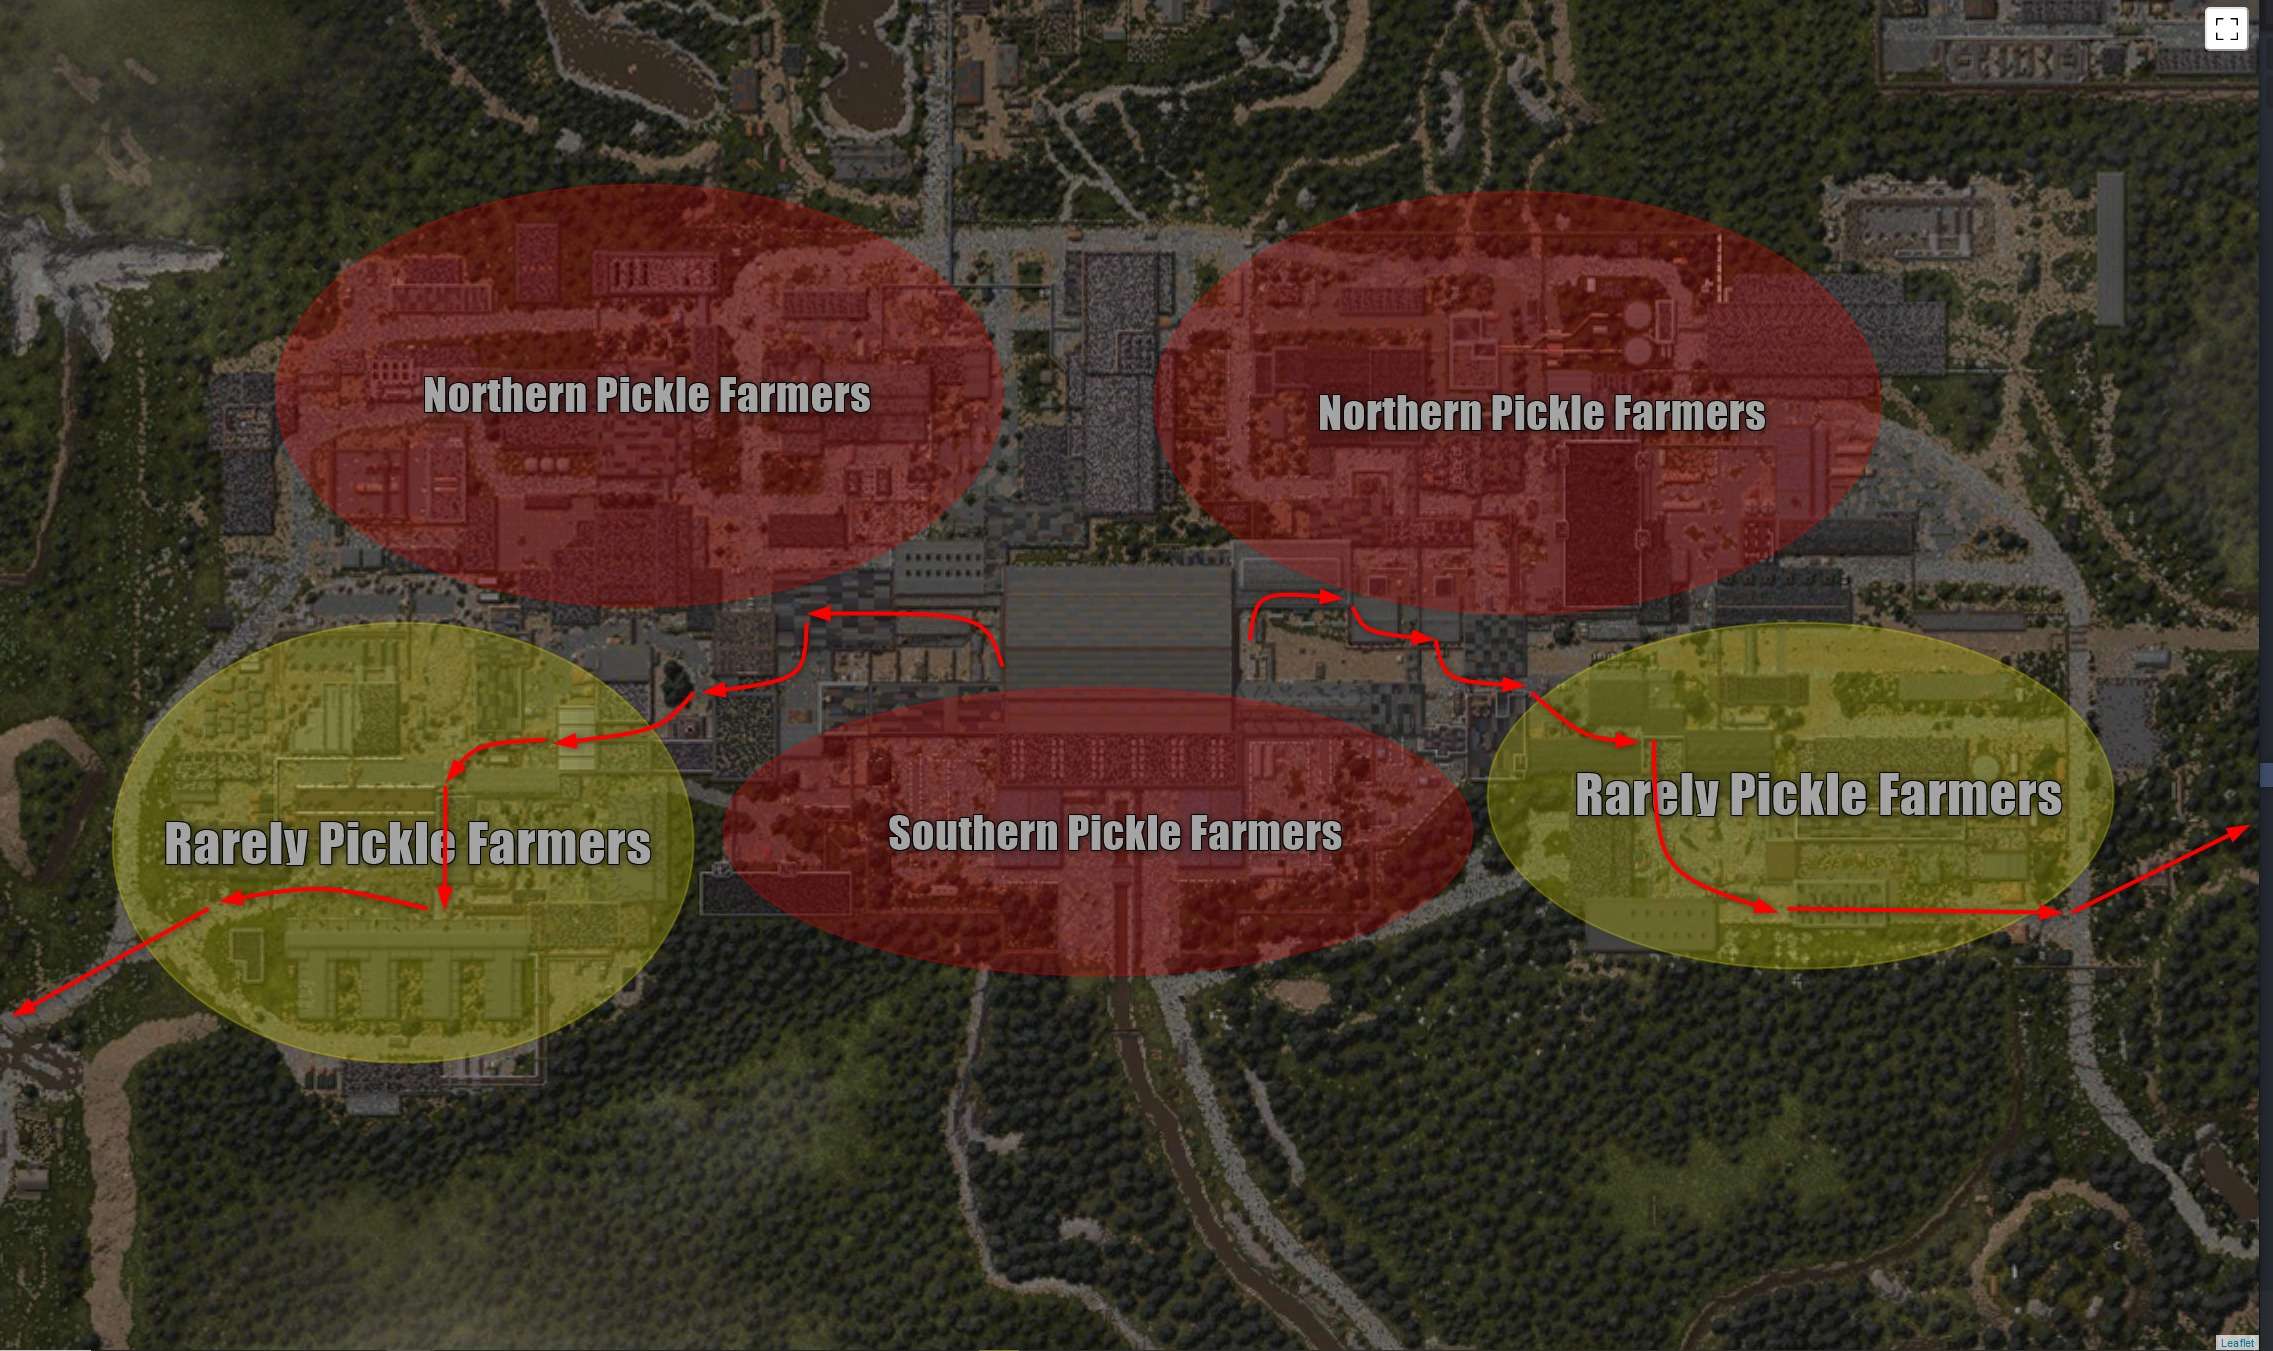
How to Avoid Pickle Farmers
Quick map on how to avoid (most) pickle farmers.
Click to enlarge…
Where can I get Seeker’s Hawk?
Doing main quest
How to check how many players are on your map?
That number in the top left of your map is nearby players. The beep noise you hear is players leaving or coming into the detection radius, its approx 30 blocks
Afk bar ran for half an hour 860 pickle farmed
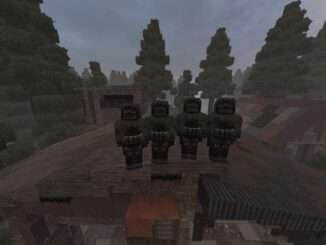
Something to note, when your bandit/stalker npc buddies spawn in middle; when they are killed they drop 3-5 pickles each. So if your lucky you can always resort to that so long as you don’t get sniped along the way
it’s not hard to farm pickles, what’s hard is to take yourself alive back to the bar
Lol just open crates around rostok they contain pickles sometimes its easier