
A breakdown of the puzzle mechanics in Taiji.
How Puzzle Mechanics Works
Terminology
These are the shorthand terms I’ll use:
- Toggle: The action of switching the color of a tile.
- Puzzle grid: The interactable area where you toggle tiles.
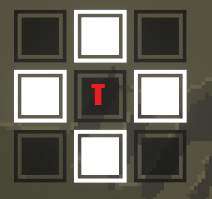
- Adjacent tiles: The set of four tiles immediately surrounding the one in question (above, below, to the left, and to the right).
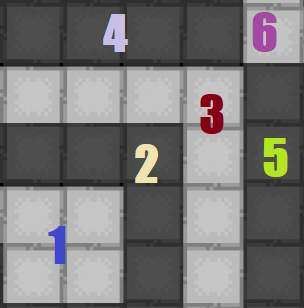
- Region: An area of the puzzle grid composed of a single color. A region is enclosed by tiles of the opposite color, or sometimes partly by the grid border.
The white tiles are all of the adjacent ones around the center tile “T”.
Each numbered area in this picture is a different region.
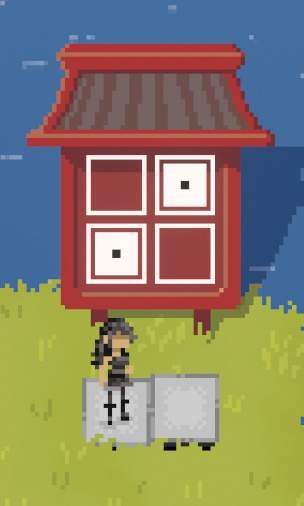
Block Statues
- Primary Location: Game intro / tutorial

What you see is what you get.
- White blocks in the statue represent white tiles in the puzzle grid, at the same location.
- Black blocks in the statue represent black tiles in the puzzle grid, at the same location.
- The tricky part is figuring out exactly how to solve the empty spaces. Wherever an empty space exists in the statue, count the number of adjacent white blocks and adjacent black blocks. The color for the empty space is whichever color has fewer adjacent blocks.
If there’s a region in the puzzle with more than one empty space, first work out the spaces that are possible to do using the blocks from the statue. Then make sure to count the color of the tile you just determined to work out any other adjacent empty spaces.
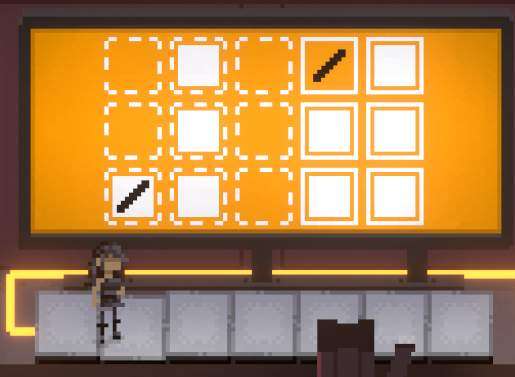
Teleporters
- Located all over the map
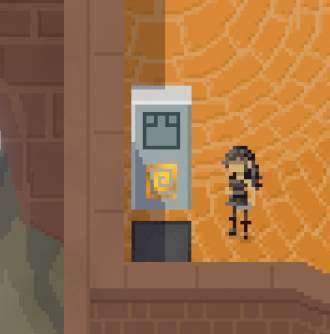
Sooner or later you’ll find gray stones with markings on them and a button you can step on. The button brings up a 3×3 puzzle grid. The symbol on the stone is something that can be drawn in the 3×3 grid. By entering the symbol correctly, you can use the stone as a teleport location.
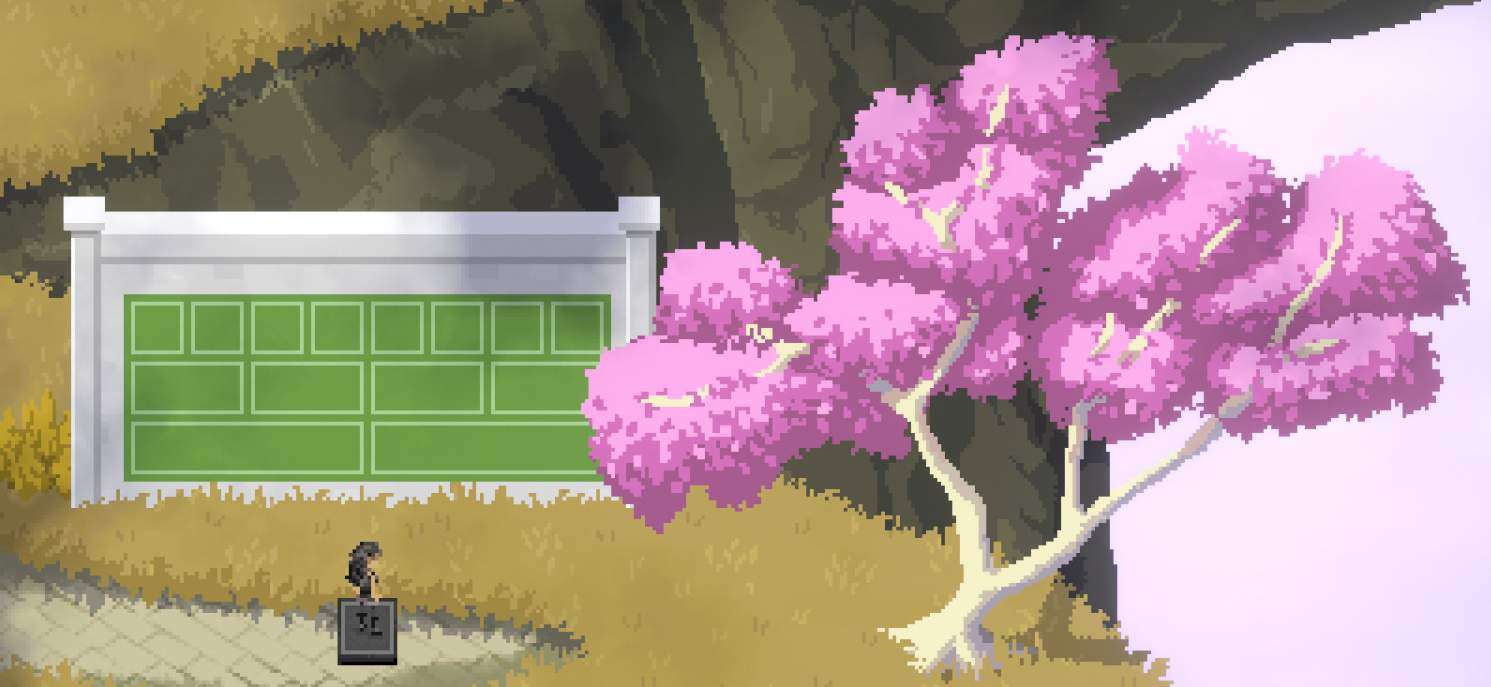
Painted Buildings
- Primary Location: Plateau

Notice that the black and white buildings on the plateau are damaged. The walls look as if they’ve broken or melted away. Also notice how the features of the buildings suggest an axis of symmetry. The goal of these puzzles is to reconstruct the symmetry in the buildings. To be specific, you will use the puzzle areas to re-draw the walls/pathways through the building in order to make it symmetric. Imagine the undamaged building. What should it look like?
Take note of the colors of the building walls surrounding each puzzle area. You will either need to use the same color scheme to recreate the symmetry, or invert the colors.
Zeroes and Ones
- Primary Location: Graveyard

The short nerdy answer is that the logical XOR of all the number sequences in each puzzle will give the solution (0 = black, 1 = white).
I’ll explain it better for everyone who isn’t a turbo geek like me. There’s more going on here than it looks at first: The digits, the dot indicator, combining, and overlapping.
The digits
- Anyone would probably look at a binary string of numbers and associate a zero with “off” and a one with “on”. In these puzzles, though, you can think of the numbers in terms of tile toggling.
- A zero represents no action to the tile in the corresponding location in the puzzle grid. A black tile stays black, a white tile stays white.
- A one represents a toggle to the tile in the corresponding location in the grid. A black tile turns white, a white tile turns black.
The dot indicator
- Each sequence of zeroes and ones has a dot next to the sequence, either to the left or right. The dot is there to show where the sequence begins.
- When the dot is on the left, the sequence of numbers is read from left to right. This matches the puzzle grid, which will always read left-to-right as well.
- When the dot is on the right, the sequence of numbers is read from right to left. In other words, the sequence is in reverse.
- Some number sequences don’t have a dot to the left or right. This will only occur if the number reads the same left-to-right or right-to-left. So the indicator wouldn’t make a difference anyway.
- By understanding the digits and the dot indicator, you can just step through the puzzle grid one square at a time, toggling a tile whenever you see a one, and leaving the tile alone when you see a zero.
Combining
- All puzzles in this area have more than one sequence of numbers, but combining is easy. Just toggle the tiles for one number sequence; then without resetting the tiles, toggle them according to the next number sequence; and so on.
- You can surely think of another process to combine, but this was the simplest one for me.
Overlapping
- Later puzzles of this type will involve sequences where the numbers are touching, or even totally overlapping each other. Don’t be confused. These are still just strings of zeros and ones.
- Try to imagine what the sequences would look like if you could physically separate them from each other. After you’ve done this, also make sure you know where the dot indicator is for each sequence.
- Take note of how many tiles are in the puzzle grid. That can help you figure out the start and end of each sequence.
Pillars
- Primary Location: Ruins
There are two main aspects to the pillar puzzles.
- Each pillar has a series of flared and non-flared edges along its walls. Wherever you see a flared edge, the tile immediately next to it is white. Wherever there is a non-flared edge, the tile next to it is black.
- All of the pillars appear to have a “pair” or a “partner” nearby. A pillar’s partner will always have the same exact solution, but with the tile colors inverted.
The later pillar puzzles will introduce some twists. Some pillars will be broken and laying on the ground. Imagine what the pillar should look like in its undamaged and upright state. Pairs of pillars will be inverses of each other assuming they are both standing upright.
In the last puzzle of the area, there is only one single pillar. Does this break the established rules? Well, try to imagine how this puzzle would work if it was split vertically down the middle…
Horizontal Lines
- Primary Location: Mill
I had so much trouble when starting out with the line puzzles, but I did grow to appreciate / tolerate them.
Here’s the deal with the horizontal lines:
- In the final puzzle solution, each horizontal line must be inside of a region that is an exact copy of the regions around any other same-colored horizontal lines. Additionally, the line has to be in the same location inside the region. Because of this last statement, you can never have two horizontal lines of the same color inside of the same region, since you would have lines in two different locations.
- The region color (black or white) does not need to be the same, only the region shape.
- There may be more than one color of horizontal line in the puzzle. Different color lines need to either have different region shapes associated with them, or the lines need to be located in a different spot within the shape.
Diagonal Lines
- Primary Location: Mill
The diagonal lines share all of the same characteristics as the horizontal lines. However, the big difference is that the region shape around the diagonal line is allowed to rotate. The region doesn’t have to rotate, but it can.
- If you have a shape containing a diagonal line, imagine rotating the shape a quarter-turn at a time, using the diagonal line tile as a central axis. Any of the resulting 4 rotations is a valid match between diagonal lines.
- Diagonal lines can be the same color as horizontal lines in the same puzzle. When this happens, the horizontal line shapes still need to be exact copies of each other. The diagonal line shape can also be an exact copy, or it can be any of the rotated forms.
- Remember that the diagonal line must still stay at the same “spot” within the rotated shape. The diagonal line tile is basically a pivot point. You can’t necessarily make a rotated shape and place the diagonal line anywhere you want inside.
- Beware of different line colors using the same region shape. This is even harder to do with diagonal lines in the mix. Different line colors cannot share the same and line location within the shape. This is true whether any given rotation is actually present in the puzzle or not. If you can rotate two different-color line regions to look the same, with the lines in the same position, that’s not allowed.
It feels like the line puzzles are the hardest to explain with words. Try working out the tutorial puzzles and thinking through why some solutions work, and others don’t.
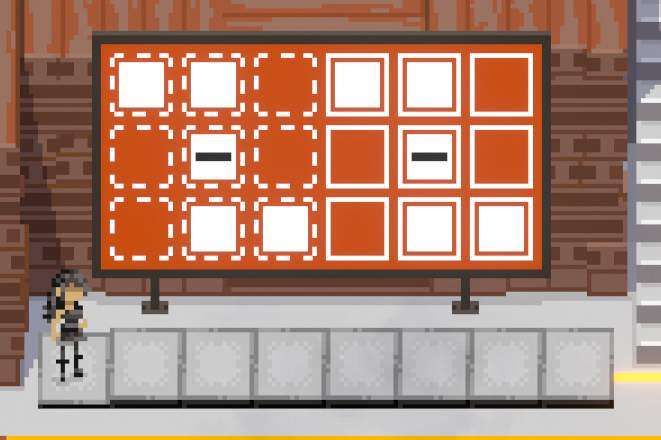
Die Dots
- Primary Location: Shrine
The die dots are another mechanic that seems simple at first, but gets pretty challenging.
- A region containing any number of die dots (greater than zero) must also contain a number of tiles exactly equal to the sum of all the dots inside. The same region can contain multiple dot tiles, as long as those dots are all the same color.
- Different colors of die dots are never allowed inside the same region.
- There are also “negative dot” tiles. Negative dots are larger, hollowed-out circles. A regular dot adds 1 to the dot total in the region. A negative dot subtracts 1 from the dot total in the region.
- If the dot total of a region is a negative number, that implies the region size must be negative. That’s impossible; therefore a region with negative dot total is never allowed.
- If the dot total from regular dots and negative dots is exactly 0, there is no longer any restriction on the region size.
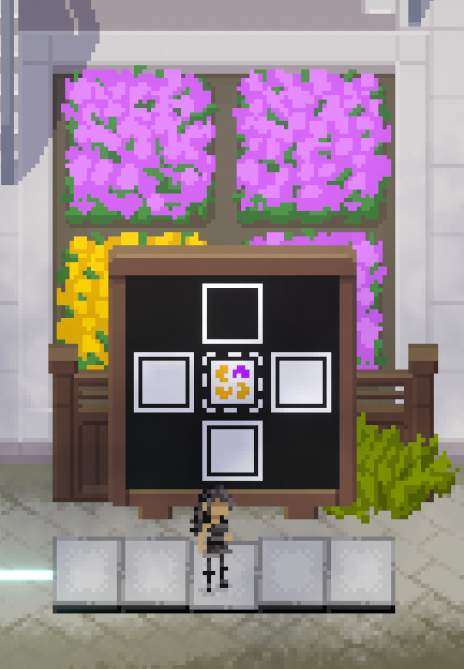
Diamonds
- Primary Location: Mine
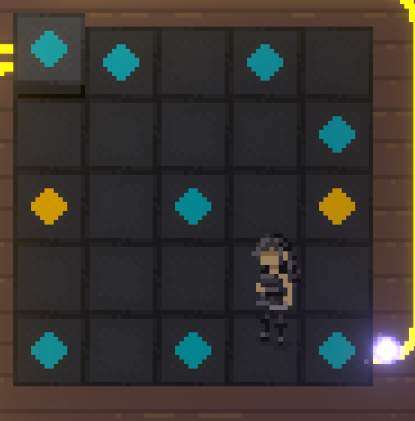
The rule behind the diamonds is simple, but makes for some crafty puzzles.
A diamond must occupy a region with exactly one other puzzle element of the same color.
In most cases, this means you’ll be making regions of tiles to connect same-colored diamonds to each other. However, these are the consequences of the rule:
- A diamond may be connected to some other same-colored element besides a diamond, like a colored dice dot tile, or a colored line, or a flower petal tile.
- A single region can have many diamond pairs, as long as all the pairs are different colors.
- A flower petal tile has two colors (purple and orange). A valid solution might have a region containing the flower petal tile, one purple diamond, and one orange diamond. It’s OK for both diamond tiles to pair up to the same flower petal tile.
Flower Petals
- Primary Location: Garden

I thought this was a fun and creative mechanic.
Each flower petal tile has between 0 and 4 orange petals. The number of orange petals is equal to the number of adjacent tiles that must match color with the flower tile itself.
There are 5 possible flower tiles
- 4 purple, 0 orange: None of the adjacent tiles have the same color as the flower tile.
- 3 purple, 1 orange: Exactly 1 adjacent tile has the same color.
- 2 purple, 2 orange: Exactly 2 adjacent tiles has the same color.
- 1 purple, 3 orange: Exactly 3 adjacent tiles has the same color.
- 0 purple, 4 orange: All adjacent tiles have the same color.
When a flower tile is on the edge of the puzzle grid, any adjacent “missing tiles” are ignored. They don’t count for or against the flower tile.
Trees
- Primary Location: Orchard
While many other puzzles fried my brain, the tree puzzles were a nice change of pace.
The introductory tree puzzles kind of toss you a red herring. You might interpret the rule to be about the leaves, but it’s really only about the branches. The final orchard puzzle makes this clear, as it has no leaves on the tree whatsoever.
The basic rule is that a long branch indicates an ON tile. A short branch indicates an OFF tile.
Maybe the most confusing part is the mapping of tree branches to the puzzle grid. In general, the bottom row of grid tiles represents the branches than come out of a common point in the tree trunk. The next row above that represents the branches that come out of the first row of branches, and so forth. In other words, all the “children” of a given branch are represented as the tiles directly above it in the grid.
Every time there is a new splitting point in the tree, turn the tile ON representing the long branch.
Folding Screens
- Primary Location: Gallery
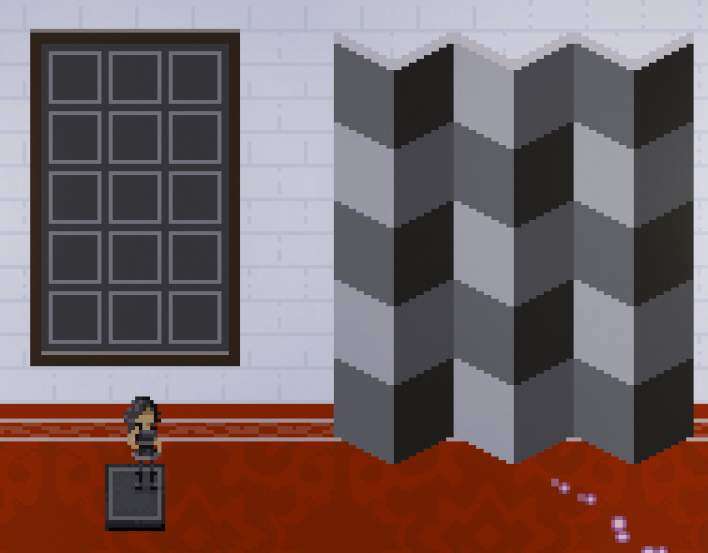
These puzzles have to do with light and shadow. I recommend starting with the folding screen puzzles on the top floor and working your way downstairs.
For all of the folding screens, imagine there is a light source shining onto the screen from the left. The left half of each folded section has brighter colors, and the right half has darker colors.
There are 5 rows in the puzzle grid and 5 rows in the folding screens. Within each row, the left-half-sections have 2 colors.
- The lighter color represents a white tile, the darker color represents a black tile.
The right-half-sections also have 2 colors within each row.
- The lighter color represents a white tile, the darker color represents a black tile.
The screen doors try to throw you off. On most of these puzzles the “darker color” of the bright side is an exact match to the “bright color” of the dark side. Try to tune out the noise. Start with just the first row. Look at only the bright sections of the first row, and determine which tiles are white and black. Then focus on the dark sections of the first row, and determine which are white and black. Then move on to the next row, and so on.
Colored Square Painting
- Primary Location: Gallery
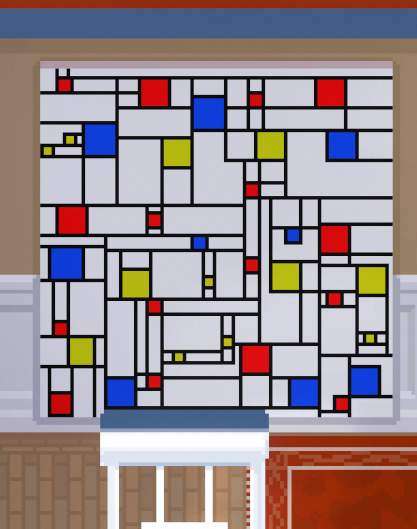
This is kind of a one-off mechanic. There is a painting in the gallery that looks like a Piet Mondrian piece.
Notice that the number of red squares in the painting is an exact match to the number of tiles in the red grid. Similarly, the same number of blue squares in the blue grid, and yellow squares in the yellow grid. Each color has large squares and small squares. See what I’m getting at?
Dot and Line Graph
- Primary Location: Gallery
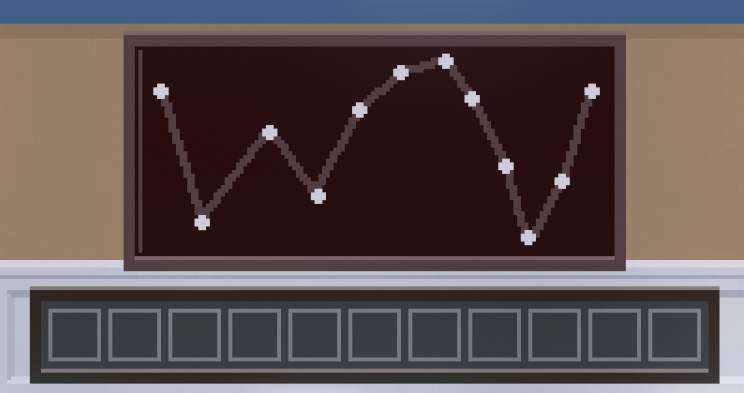
- You are only allowed to access one dot-and-line graph puzzle in the gallery until you solve it. This can be frustrating if you can’t figure out the rule on this single puzzle. Here are some observations.
- The puzzle has 11 lines connecting dots together. There are also 11 tiles in the puzzle grid.
- Inside of the picture frame there is an extra thin brown line, just to the left of the first dot. It doesn’t appear on any of the other 3 sides of the frame. This is an indicator of the start of the graph.
- As you scan the lines starting at the indicator, each line can be considered “getting closer to the puzzle grid”, or “going away from the puzzle grid”. In the first puzzle, the first line is getting closer to the grid, the second is going away, third is getting closer, etc.
- The lines only connect dots in order, starting at the indicator. There are no lines that skip across a dot.
The overarching rule is: A line that approaches the puzzle grid represents a black tile. A line that gets away from the puzzle grid represents a white tile.
However, later puzzles in this section will mess with your sense of perspective, and make it harder to judge where the “approaching” and “going away” lines are. In fact, all other puzzles after the first one don’t show the connecting lines at all.
The blue->yellow background puzzle has the top and bottom halves of the chart cut apart, and shifted from each other. Imagine what the chart should look like if it was not cut in half and shifted.
The red background chart has starting indicator lines along the left and along the bottom. Use the left line for the two horizontal grids, and the bottom line for the vertical grid.
The green background puzzle has two halves that look identical, with a puzzle grid in the middle. Imagine a mirror image reflection of all the bottom-chart dots inside of the top chart. In this case, the first dot from the bottom chart should be in the “bottom row” of the top chart. What would those 7 interconnecting lines look like?
Wine Cellar
- Primary Location: Gallery Basement

The answers to these puzzles are “hidden in plain sight”. The answers are represented literally in the immediate area of the wine cellar. This is more a test of observation rather than logical deduction. Look at the puzzle grid dimensions, and see if you can find features somewhere around the wine cellar with the same dimensions. When you’ve found the right feature, it should be immediately obvious what the answer to the puzzle is.
There’s actually one other puzzle inside the gallery (not in the wine cellar) where the solution is an environmental clue. I’ll leave that to you to find out.
Garden Door
- Primary Location: Garden
This door is really weird. It’s not like anything else in the game.
There are nine dots on the door. Some are grayed out and some are blue. You probably don’t need me to tell you that the dots have something to do with the rotating platforms directly south of the door.
Try playing around with the platforms. Can you figure out how to get the blue dot to light up on the base of each platform? Is it the same condition for each platform?
Endgame…?
- Primary Location: ?????

After finishing all the puzzles you could find, you might be asking if there’s anything else to discover in the game. I don’t want to completely give away anything here, but I’ll leave a series of hints to think about.
- When was the last time you looked around the intro area of the game? How about the area where you spawned when you started the game?
- Did you notice that there are two holes in the mountain at the very start of the game, and that there are lanterns visible?
- You can access that area inside the mountain by solving a puzzle.
- The puzzle to solve is very, very close to that secret area.
- Check out the block statue puzzles around the intro area. Also observe the landmasses that they’re sitting on. Notice anything unusual?
- All of the first few block puzzles have the same shape as their floating landmass, except for the very first puzzle.
- In the very first puzzle grid of the game, try entering the pattern of the first floating landmass instead of the first block statue.
- After looking around inside the mountain, you might have no idea how to proceed. Remember, the game just taught you to look for large-scale environmental clues to access this area. You now have nine puzzles to solve, and nine environments in the map to explore. Look around for things that could represent puzzle mechanics while exploring the map.
Missing a hint for the bonus blue pillar puzzle, so I’ll give one: notice that it’s reaching into the binary (graveyard) section.
Thank you so much for the guide! That very last hint in the endgame section was the exact thing my brain needed to know what to look for! ^w^ (Bearing in mind, I kinda discovered That Place right at the start because I noticed the difference of that one thingy almost immediately, so I hadn’t really had a chance to internalise that the puzzle that lets you access the Place was in itself a tutorial…)
Small thing about painted buildings, it is not enough to just recreate the symmetry, you also have to ultimately have a path (opposite of the walls colour) that is exactly one tile wide. You can recreate the symmetry on the final puzzle and it does not count as a valid solution.
I still have no idea how to solve any of the paintings in the gallery, the man on the bike I solved by brute force, but I don’t know why that was the awnser
The gallery is best done after you understand all the puzzle biomes. There are details in the paintings that will be familiar from other puzzles, especially if you apply the answer grid over the painting. (I understood most of them except the owl, until I realised why its head was like that.)