
This is essentially what you need to know when it comes to getting a save file started, and hitting the ground running with your first experience. I am not an expert, nor will I pretend to be. All of this information is stuff that I wish I knew before I began my first run…
(Basics Guide) Stuff I Wish I Knew, and Some Recommendations
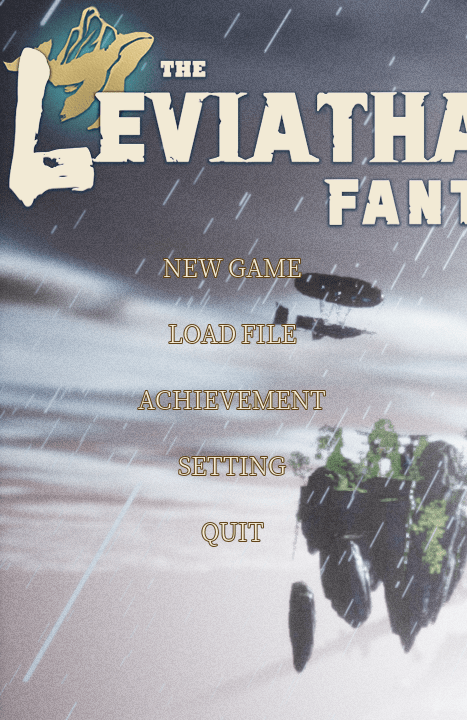
Setting Up English Translation, and Starting a New Save!
Here are some quick breakdowns of the opening menu/starting screen.
The game does have English translation. You can switch the game to English at the main menu. On the left side, 4 spots down, you will open the settings. The 1st section of the setting there should be only one option, and that’s the language setting. You can set the game to English from there if you desire, and from what I can tell the translations are pretty decent!
After your language is selected, pressing the “New Game” button will present you with a series of options to choose from. You will see at the bottom that you have 210 “Godsend Points”, which you will use to purchase different options for your starting run. Use these wisely (or just however you wish) as they can be pretty impactful on your playthrough- especially if this is your first go-round. I’ll tell you what I recommend as I go.
The Leviathan option is basically who you are and the land on which your starting town takes place. There is only one option here for now so don’t stress about this.
The Initial Script is basically what starting area your adventures will go to and what kind of tutorial you might face (haven’t tested the second half of that statement). The default and easiest one, from what I can tell, is Treasure Island. I’d recommend that one.
After hitting the “next” button you will see the next option for selecting your initial adventurers. These guys have a bunch of different stats, perks, and likes/dislikes based on who you pick, but each of them is essentially a different role. Who you pick doesn’t really matter, in my experience, but I’d recommend only selecting one or two if you decide to pick one at all. Sylvia is a pretty good ranger/archer for her cost (I like her the most), but Murong is a solid pick since you can use the points you save on him for much much better things.
The Favorite Unlock Section is, from what I can tell, a sort of “relic” selection that will grant you different permanent bonuses based on what you take. I still don’t know what all of them do entirely, but pay attention to what they promise and try to infer what might be the most useful. I struggled a lot with money on my first island so I like “Travel Code” which gives tourists more money to spend. “Badge of Bravery” is also good for keeping new adventurers around longer if you’re struggling to recruit them with what little time you have to win them over in early stages.
Hitting the “next” button again will take you to the Props section. Props are essentially items that can be redeemed for certain effects, like a chest that would sit in your inventory in a gacha game. The first row are research books, which you insert into a Lab building to gain a bunch of Tech Points per book. TAKE A COUPLE OF THESE (or all of them), SERIOUSLY! They make unlocking tech a lot easier and faster in the early game, which makes the slog of figuring things out a lot less tedious. You can get tech points anyway by throwing literally everything like wood and beds into the Lab, but it takes much longer. Other props include Beds which can be used to furnish hotels and pergolas (beds are pretty great too since they give adventurers a place to rest while generating income), items which can be sold in shops, and racial passives/skills that can drastically enhance adventurers however you see fit. I don’t mess with racial passives and skills too much since they are pretty expensive for a system I don’t expect to be using too much at first.
This next section is a pretty basic one. Pick an “Equip” that will be in your inventory when the game starts. If you want to power level a specific character, this can be a good way to establish a strong start for them. I often skip these entirely though, since they can be a bit pricey depending on what you want. The gold bow on Sylvia helped establish her as my strongest and most reliable adventurer in my first playthrough,I will say.
Hitting the “next” button one last time will bring you to your final set of options. “Initial Building” gives you buildings that start in your inventory when you begin the actual game. The first three rows are tower defense structures that can be utilized on the “initial script” treasure island/whatever you picked. I would not recommend these unless you know how to properly utilize them, which would be creating something like a farm, quarry, lumber mill, etc. then deploying these for automated, non-adventurer defense. They can be destroyed by even the weakest mobs and will be, even the legendary options, due to being overwhelmed without solid aid. Everything else in this section can be categorized as buildings and/or decorations that will help increase the revenue/attractiveness of your island. The Hotel and Restaurant are a great starting option for their price, benefits, and functions. Tavern as well.
And Finally, the “Initial Resource” tab. This basically just gives you a starting surplus of whatever you pick. Take The F Gold! All Of It. Honestly, just take a bit of everything if not all the options you can afford. Time-gating for resources can be a thing in this game if you aren’t managing your stuff correctly, but once you have your feet off the ground you can heavily alleviate that pain. Taking these resources will make getting your feet off the ground a LOT easier, especially the gold, stone, and iron.
All you have to do now is press the “start” button, but make sure that you don’t have any leftover points or that you are certain in the options you have selected. You can always go back and check out the choices you’ve made and reconsider. When you are ready, press that “start” button and get the Tutorial started.
Your next scene will be an introduction to the world and game! Keep clicking the right side of the screen/book to get through that.
Getting Through The Tutorial
This guide will be an extremely simple walkthrough of that tutorial.
General Rules:
- If you want to skip through most of what Sylvia is trying to tell you, selecting the bottom option of whatever your response choices are will push you through without her explaining anything to you.
- You can save/load game right off the bat if you happen to get stuck or miraculously break something. It doesn’t happen often in this game, but it has happened to me once or twice. Most things don’t require save/reload to fix, and will often just fix themselves as you play.
70% Of The Tutorial
The first section of the tutorial is a basic WASD/Mouse movement tutorial. I shouldn’t have to give any info here. If you do have trouble, talk to the devs or something since I most likely cannot fix an issue on that level. If you find something not working, try reloading your save or closing/re-opening the game
The next section will immediately throw you into the tech tree, one of the most important parts of this game. She will ask you to research the maintenance center, which can be found at the tech tree at the bottom right of your screen.
Welcome, To The Tech Tree! It has pissed me off a couple of times, but it’s got some neat stuff on it. Your first objective is to click on the maintenance center node directly below the center and then click on the “light” button that appears once you have it selected. This will be how you unlock every other node once you have access to them.
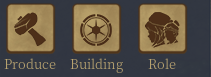
Once you have that Maintenance Building lit, you can exit the Tech tree and your next objective will be to place that building. Select the “Building” tab on the bottom left of the screen, NOT the “produce’ tab with the hammer on it (I know, it’s a bit confusing). Place that building wherever you want, I’m not gonna teach you how to rotate and all that.
The Maintenance Center is the key to building almost everything that you unlock via the tech tree and tech points.
Your next objective will be to make sure you never run out of those precious tech points by building a lab. To do this you have to research the lab and build it. Go back to the tech tree, find the Lab node, light it, and then you have to click on the Maintenance Center, click on one of the pluses in the maintenance center tab, and begin production of the Lab. It’ll take a quick sec.
Congratulations, You have just completed what 70% of this tutorial consists of. The general process if to research an item in the tech tree > go to the maintenance center to build it > then go the building tab to place it. I am not going to go back and forth and do this for every item of the tutorial, so keep that basic rotation in mind.
If you want to save time, go ahead and light up the the Lab, Handicraft Stall, the Fur Doll, the Adventurer Guild, the Pergola, The Workshop, The Plank Bed, The Crafting Table, The Trading House, and the The Village Dormitory. These are all of the nodes you need to complete the tutorial. Lighting up the stone roads and villager dormitory are good too, but your Leviathan will have to level up for some of those nodes.
If you don’t have enough research points, you can get them by using the lab to study literally anything. If you don’t want that to take forever, then you should have listened to me and taken those research books during the new game options back in the previous guide.)
Clarifications For None Research / Build Parts Of The Tutorial:
- The Lab interface is pretty straightforward. Any items that are on the left can be studied for tech points. Select what you want then move to the central section. The central section of the interface is for how many studies you’ve done total, and how many times you’d like to study a specified thing. Congrats, you’ve got tech points.
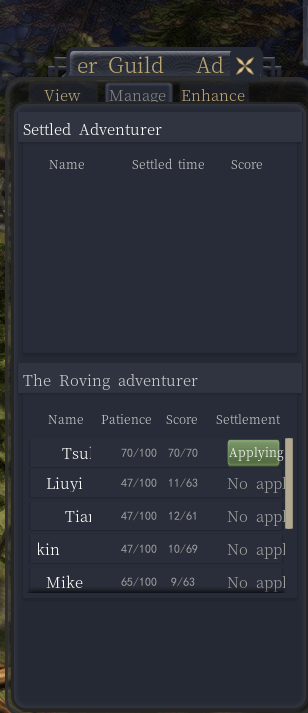
- The adventurer guild is pretty unimportant for the tutorial. The first tab doesn’t really do much except tell you what missions you’re actively running. Whenever an adventurer is ready to settle down (you’ll be notified), go to the second “manage” tab and accept their application.
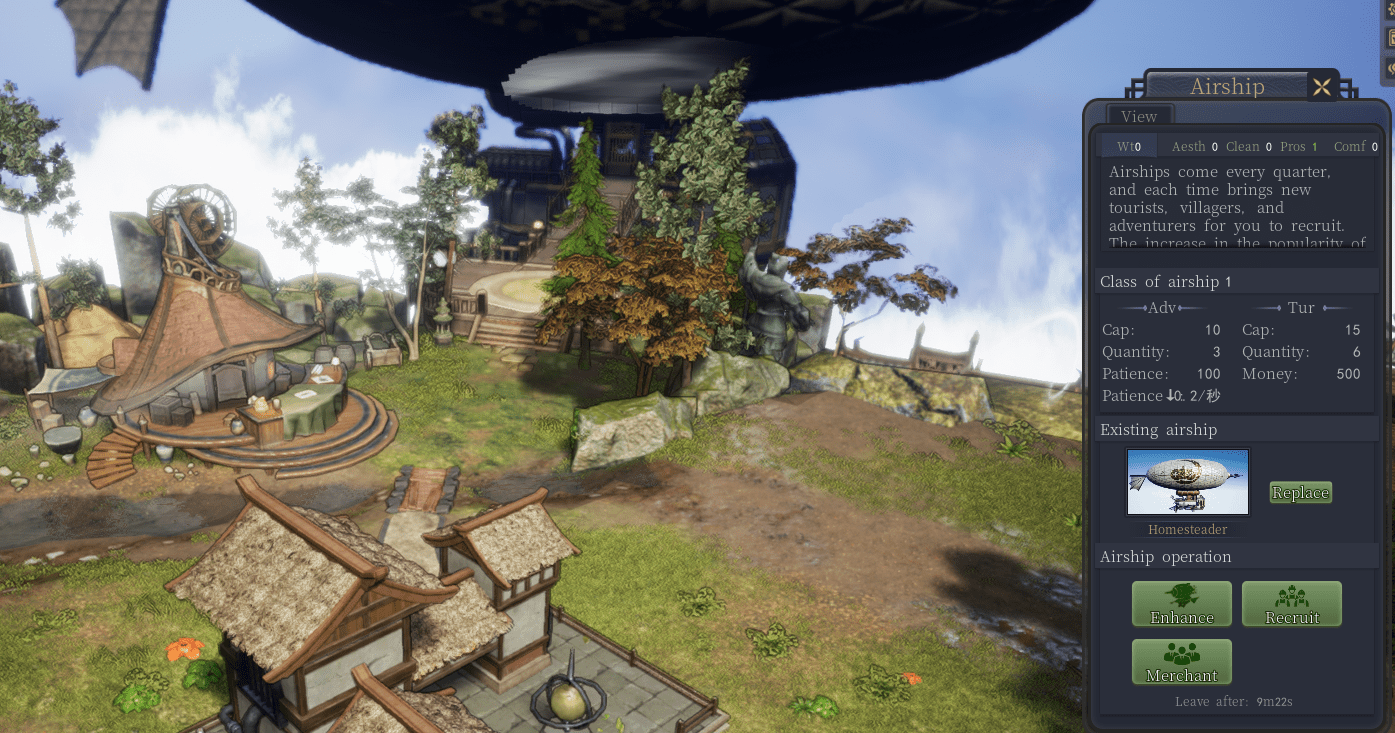
- The airship comes around and leaves in cycles, but it is essentially where you get new adventurers, tourists, and citizens. To find it you may have to rotate your camera around to find the platform depicted below. To recruit citizens for tutorial, you’ll need that recruit button.
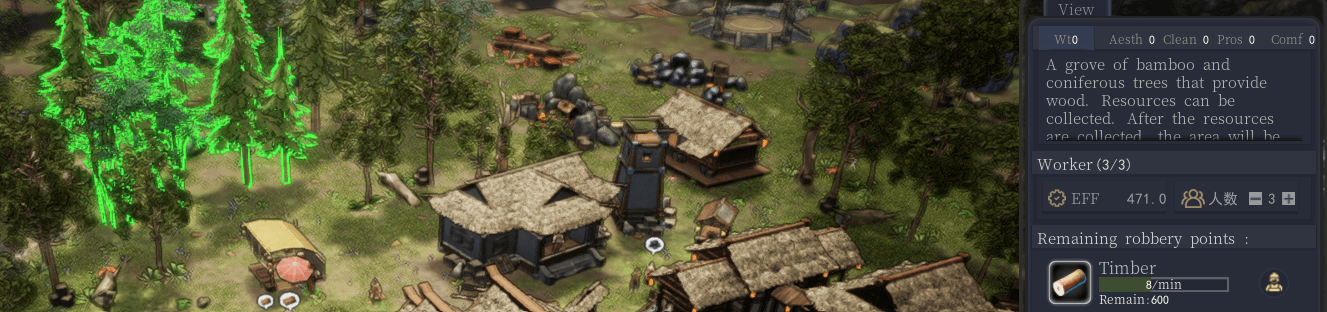
- You’ll probably start realizing your tight on space. To clear trees and other things, you’ll need to click on the obstruction and assign citizens/villagers to it. A depiction of that process can be seen below.
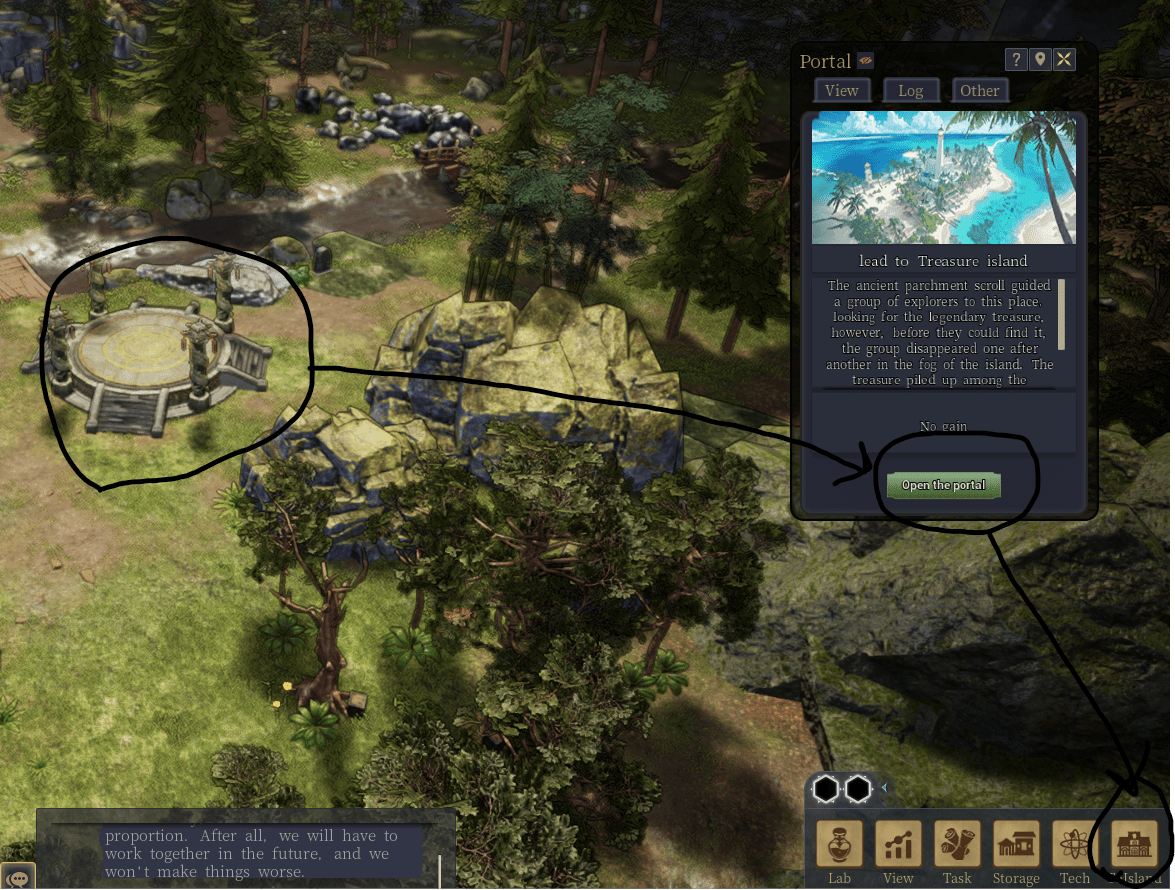
- Below is the portal. Opening this will unlock the island. The island can be accessed at any point by clicking the bottom right tab that says “ToIsland” (To Island).
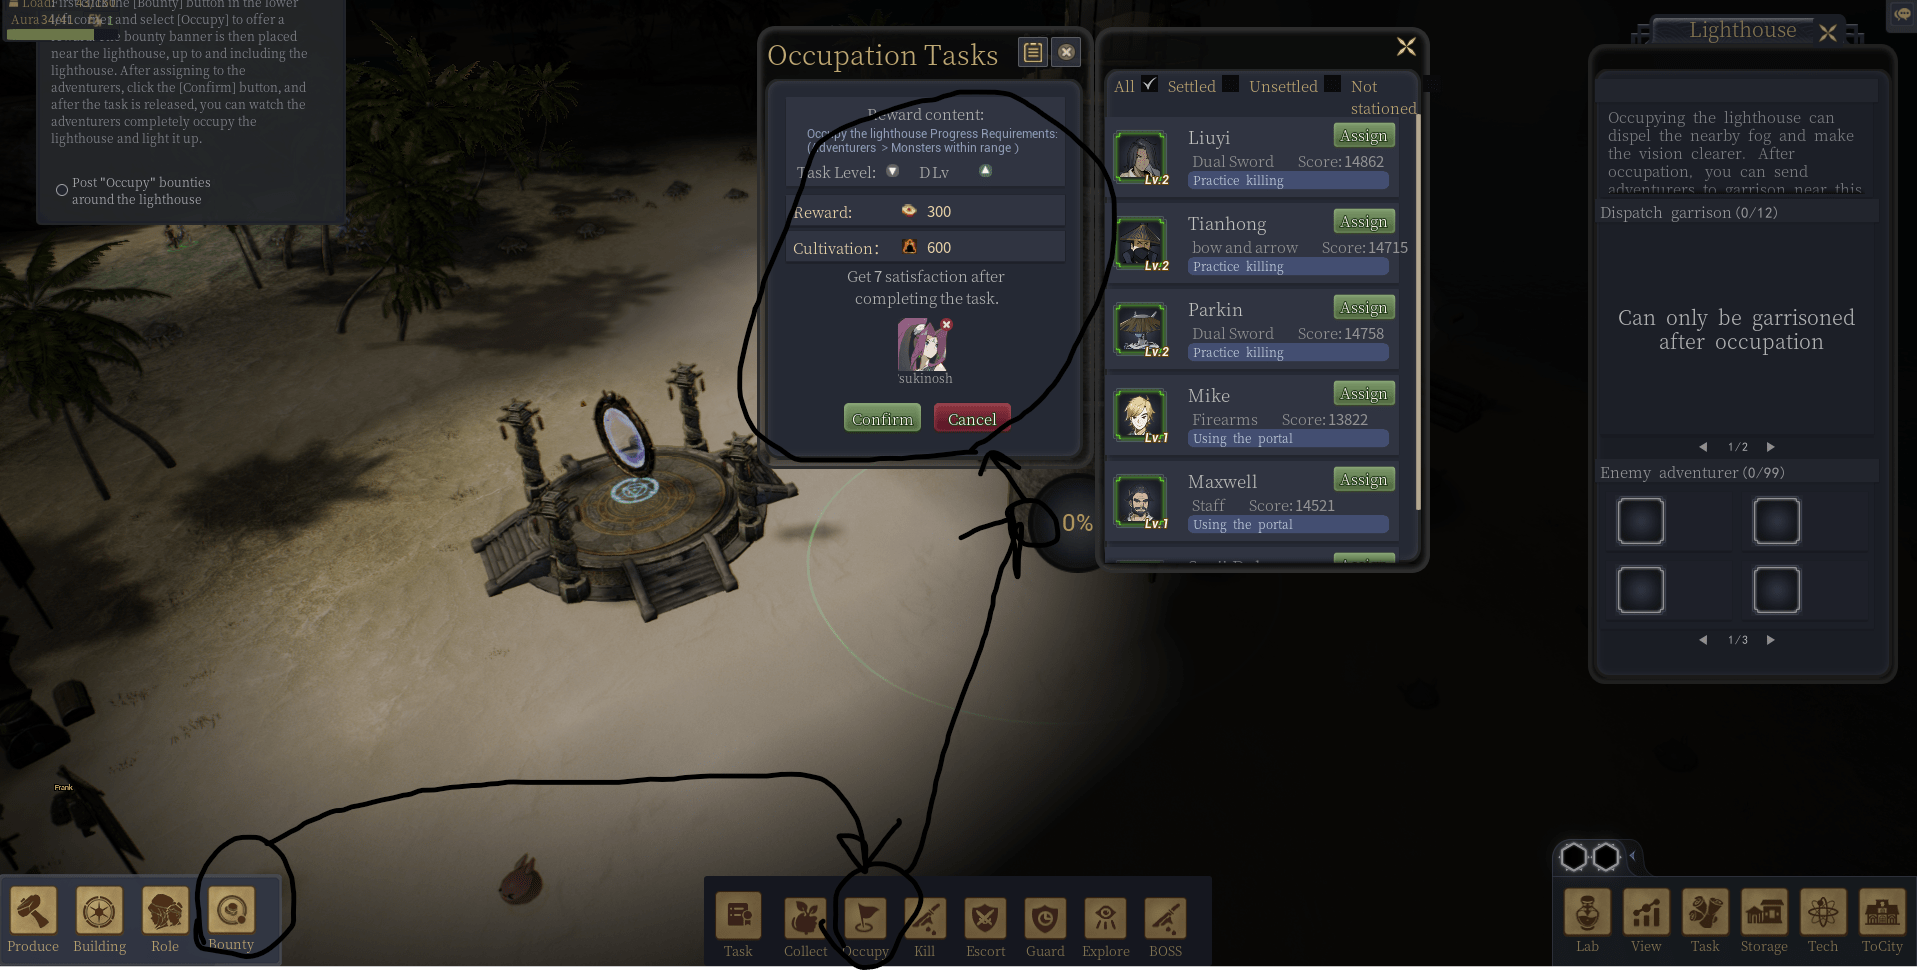
- The Island is where all your adventurers go to kill things, do quests, level, etc. Your first task will be to remove some fog of war by claiming a lighthouse. The lighthouse will not be visible at first due to a visual error that will require it to pop in after some time. Once you are able to see it you can’t miss it. Talk to the little guy at the foot of the lighthouse, first.
- To claim the lighthouse, you will have to create a quest for one of your adventurers. To do this, You will have to access the Bounty Tab, which is your general way to issue quests for any adventurer currently on your island. The Bounty Tab is on your bottom left and will bring up a bunch of different quests you can issue. You want the “occupy” quest for this tutorial mission. Select it, and then set the flag directly on top on your desired objective (in this case, the lighthouse). Now all you have to do is pick whoever you want to secure the lighthouse. It will take some time and they will be attacked, so pick someone who can handle whatever area the lighthouse is in (as a general rule).
- Now go back to the city. It will be the same as the “ToIsland” icon, just replace with “ToCity”.
- Next up, the trading house. You make this via research/maintenance center, but once placed it is essentially an auction house for whatever your adventurers decide to sell from their exploits. It can be a great place to get resources and rarities for cheap. HINT: Pick up Slime Jelly whenever you can. The merchant back at the airship will give you a hefty return on 2 orders of 20 (40 total) every time he returns to the city. He will also pay quite well for trading houses and village houses, if he asks for them.
- Workshop is next. This one works just like the maintenance center/lab situation. You’ll need to research the workshop, and then research the plank bed node. Once you have a workshop placed, access the “produce” tab in the workshop to begin developing the plank bed for the next section. You will also need to produce a fur doll for a future section, so pick up that tech as well.
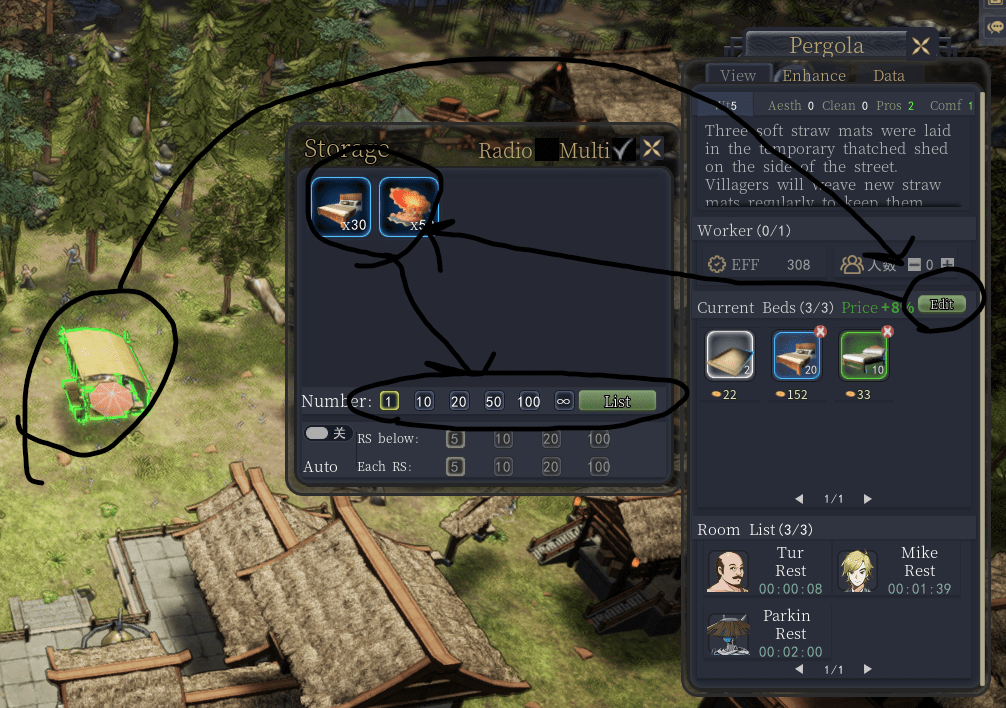
- The pergola is where adventurers come to rest after fighting monsters or upon taking too much damage. This is where you can make some pretty good early money, but generally the more places like this you have the better. Once you’ve made a bed, click on the placed pergola and list a bed.
- Same process for handicraft stall/doll.
Post-Tutorial, Tips and Where to Find Stuff
Congrats on getting through the tutorial, but there a few more things to do before you have a general understanding of things. I am going to breeze through this next section in a bullet point format.
Tips And Stuff That Might Help
- As a general rule, clicking on things and checking your tooltips (where they are available) is an excellent way to learn. Familiarize yourself with the interface. It may be clunky, but it is functional!
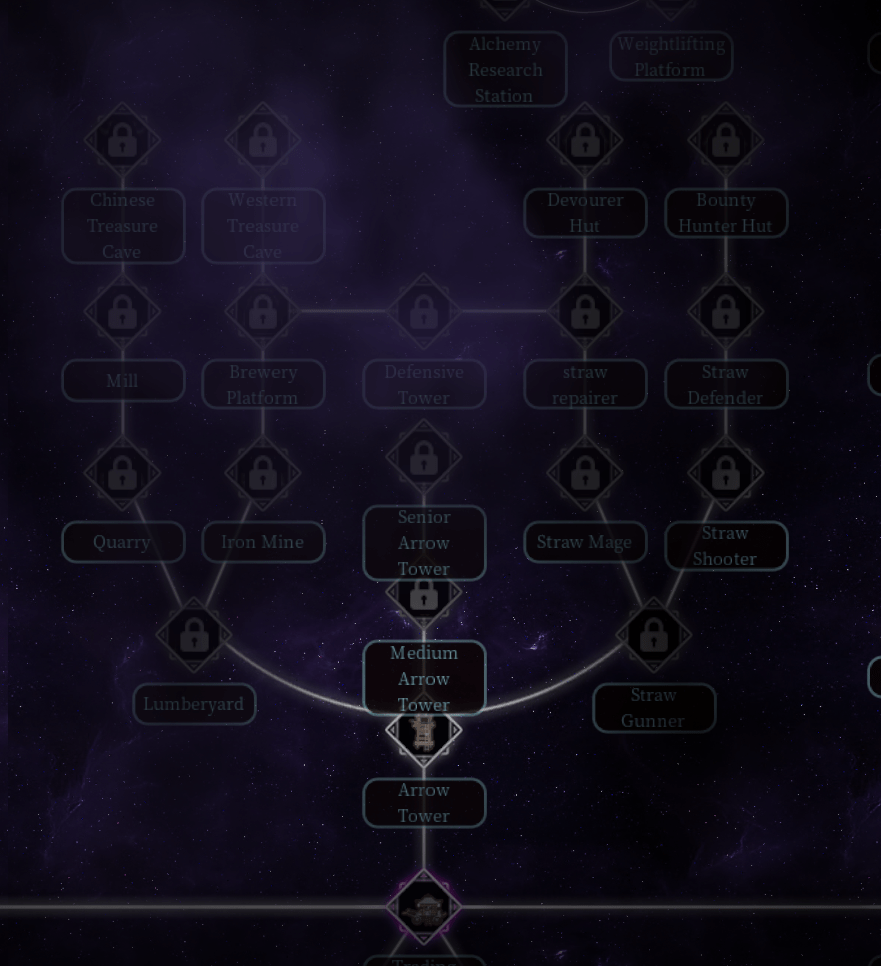
- The Quarry, Lumberyard, and Iron Mine are part of the Tower Defense/Island Building section. Just above the Trading House tech, after the arrow Tower, on the left side of the arrow tower. These buildings can only be deployed on the island, but are defenseless and susceptible to attack. To defend them, you’re gonna need to garrison some adventurers but even they need to take breaks and rest. Invest in some arrow towers and straw defenders who will actively patrol in a radius. These defenses can also be destroyed, so invest in a Straw Repairer that can both defend and repair damaged structures. Congrats, You Now Have Some Form Of Resource Generation!
- Straw defenders like gunners, repairers, etc. can pick up loot from whatever they kill- kind of like an idle game. Check on them periodically to see what they’ve accumulated!
- The bed and pergola quest should be easy, but just keep in mind that plank beds require wood AND fur. Fur can easily be obtained by clearing resources, production via alchemy station, or by purchasing it in bulk from the trading house/merchant.
- Adventurer Dormitory is how to secure adventurers permanently for your island, but the Adventurer Guild will let you know who is ready to join you or how close they are to joining you. These values can be seen in the “manage” tab of the Adventurer’s Guild. Adventurers will only apply to stay when they have sufficiently enjoyed their stay on your island. This is indicated by their “score” value, which has to be full in order for them to apply. The “patience’ value indicates just how fed up an adventurer is with your island, and they will leave when it hits 0. When their score is filled, their patience will also be boosted back up to its maximum and tick down from their just in case you don’t have a place for them to stay at the time of their application. An example is below.
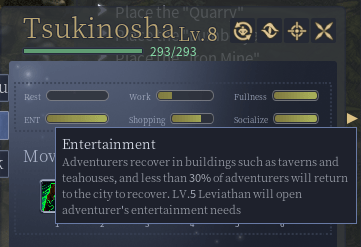
- That Chaotic Energy mission is a bit of a mystery to me. There are virtually 100 different ways to accrue chaotic energy so don’t stress this one too much. You’ll get what you need as you go.
- Don’t sleep on the “chat’ log at the bottom center of the screen once you get out of the tutorial. It will tell you what people are needing and their thoughts as they adventure. You can also just pay attention to what your units are saying as they walk around your town. You can also click on adventurers and scroll through their tabs to find out what they like, and what would attract them to your town.
- The general rule is to keep adventurers you want actively questing, and then to build places for them to spend their money once they are done with question. Designating quests costs YOU money as the one offering them a reward for their efforts.
- Just want to touch on that last point by saying EVERYTHING YOU DO WILL COST YOU MONEY. Producing items, building buildings, setting quests, purchasing things, etc. To offset this, find various ways to supplement your income such as creating resource farms, selling goods (the merchant is a great way to keep on top of things in the early game. Slime jelly ftw), etc.
- Your Leviathan (you) is constantly growing/developing! There is only so much weight that it can carry so pay attention to what you are placing and how long you have until it develops again to increase its carrying capacity. Your current level is also kept track of, and that will increase with time! Your level determines what kinds of techs you have access to! These can be tracked at the top left of your screen.
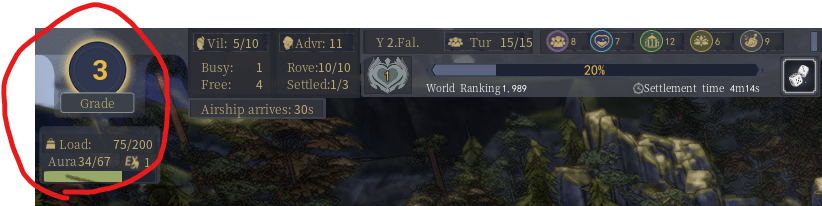
- Also at the top left of your screen is everything you need to know about your village/island. Population, tourism, comfortability, prosperity, etc.
- In addition to village/island statistics you will also see your Blessing Level! Blessing Level is a really cool feature that constantly keeps track of how you rank compared to the THOUSANDS of other Leviathans in your world! That’s right, you are not alone, and you even have some competition! Based on what your Blessing Level is by the time that meter fills up, you will receive random rewards that get better as your world rank increases!
- To Equip an item to an adventurer, it has to be previewed on them first. Once it is previewed on them, then you can equip it with “use”. Just make sure they aren’t in combat.

How do you generate more chaotic energy? I only ever get a little bit every 15mins or so. Asking since you mention there are like 100 ways to get chaotic energy. Thanks.
there are certain items that can generate it when consumed iirc, on top of actions that also yield it. In addition there is a deployable building called the “Fire of Civilization” that can generate chaos energy over time much like a farm would grant food or a quarry would grant stone. Set up a nice safe farm and it should help increase the rate. I do think it could be a bit easier to obtain, however.
Wish I could reference my save file to help more, but my game is currently crashing upon loading save file.
i guess i need more guidance. I have been able to get my hands on 2x “Fire of Civilization” but have not been able to setup a ‘safe’ farm. The farms eventually get overrun at some point even if i slot in adventurers to help defend, 10 towers + bunch of repair strawmen. I got those “Fire of Civilization” from a quest so they are gone now but those seem to be the most sure way to get a stream going early on.
A bit late, but you can build more Fire of civilization if you light up it in Secrets/nature.
I was misunderstanding about pop for a while. I thought it was “population” but it’s actually means “popularity.” :steamfacepalm:
To increase that kind of stat, I think it’s related to decoration building or overall stat of leviathans pts. (wit, aesth, clean, pos, comfort) but I’m still not sure and need more time to figure it out.
The enlightment tower can be researched in a second tab after 50% research is done. Sadly i have the same problem with the breeding of mounts…
this was helpful did you ever figure out where the enlightenment tower is? trying to unlock more cheats for my adventurers. Also i tried breeding a mount and it doesnt let me collect it, says something about select pre something first, but there’s nothing to select
another question, i tried moving to the fairy forest and my guys wouldnt attack anything and i couldnt do anything. and then it wouldnt let me leave the fairy forest. couldnt figue it out so I just went back to an old file, and how do you increase pop past 20
Can’t speak to the Fairy Forest issue, but my pop has increased past 20 due to what I assume is an increase in a variety of buildings in the city.