
This guide provides the same basic information contained in the first part of the SD70ACE tutorial included with the Sherman Hill route, allowing users with a second monitor to display the guide alongside TSW2. A further guide covers the second part of that tutorial: Changing ends.
Sherman Hill SD70ACE
All credit goes to tompallen !
Step 1: Enter the Engine
If you’re not already in the SD70ACE’s cab, enter the engine.
Step 2: Sit in the Engineer’s Seat
Note: Some startup procedures involve controls located on the back wall of the cab. While these can be accessed while seated, standing up and walking to the back wall strikes me as more realistic.
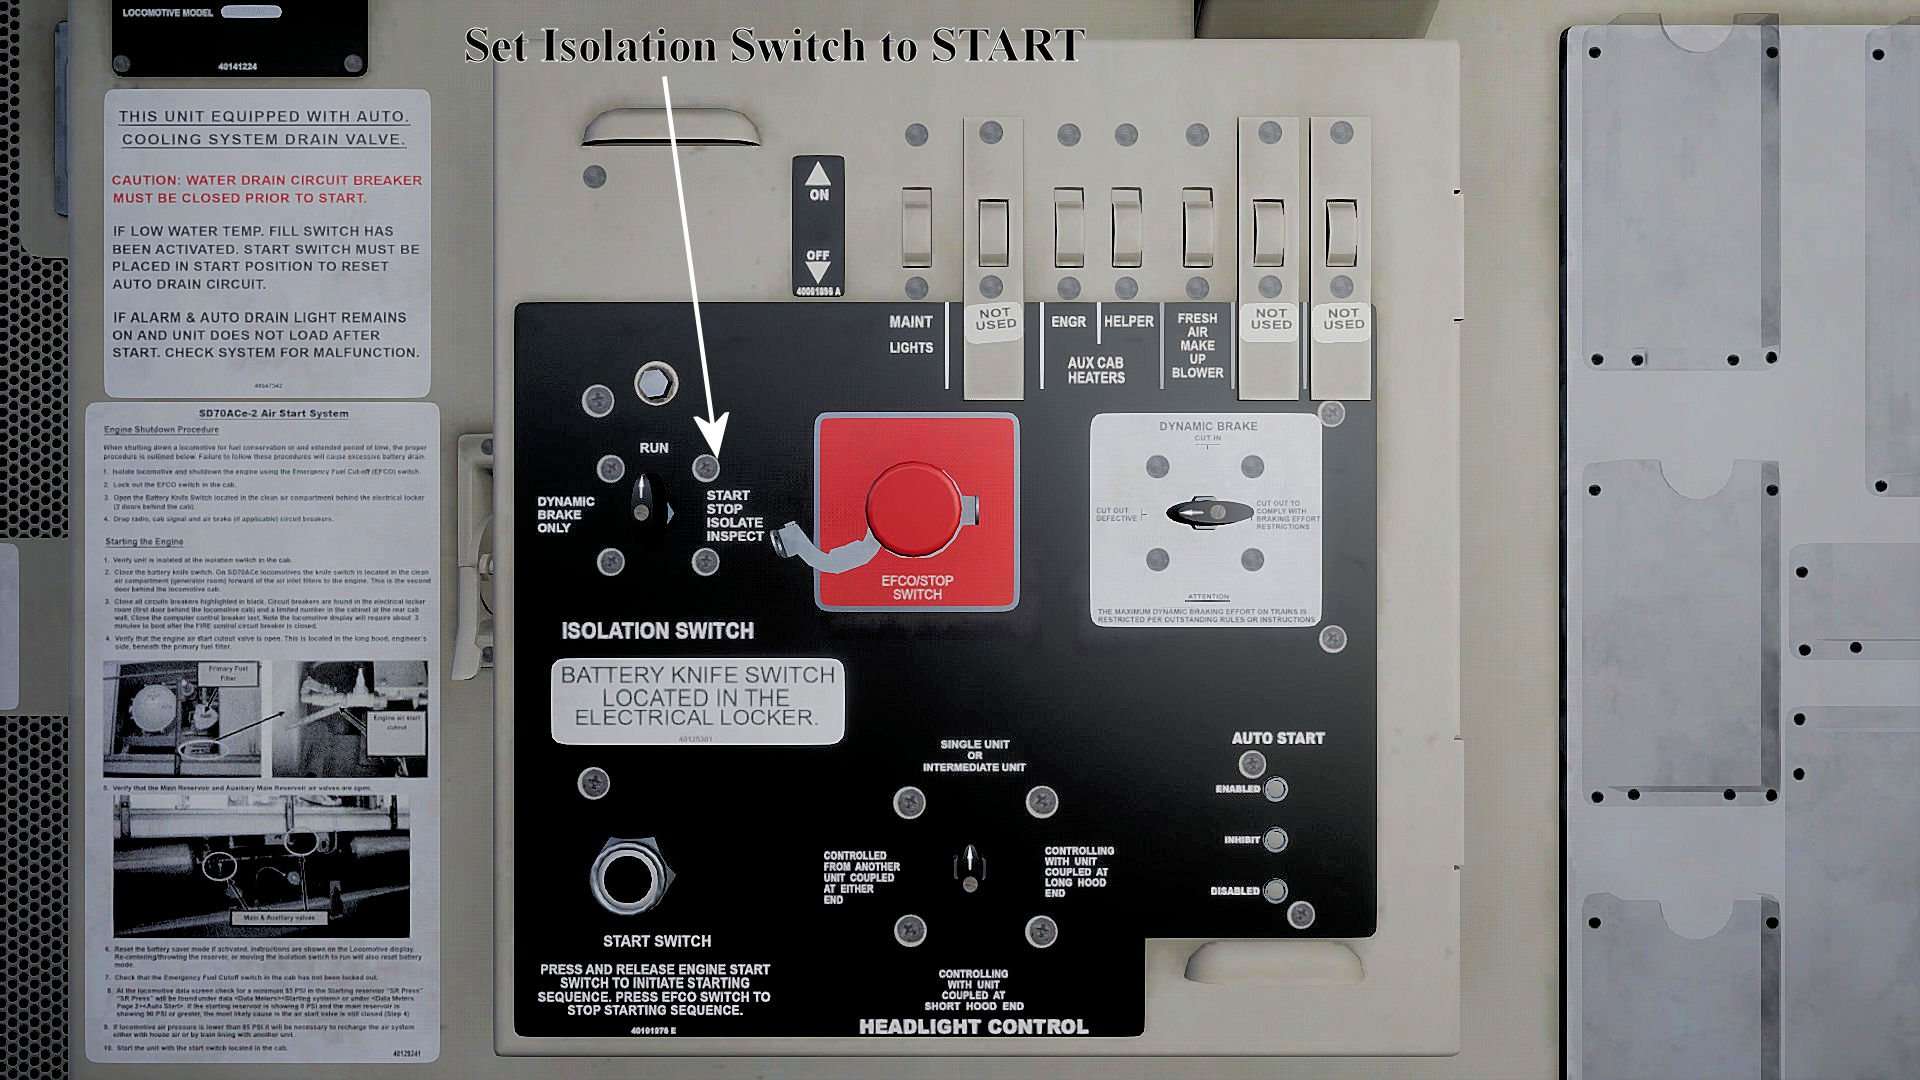
Step 3: Begin Start Engine Procedure: Isolation Switch
On back wall: Set Isolation Switch to START.
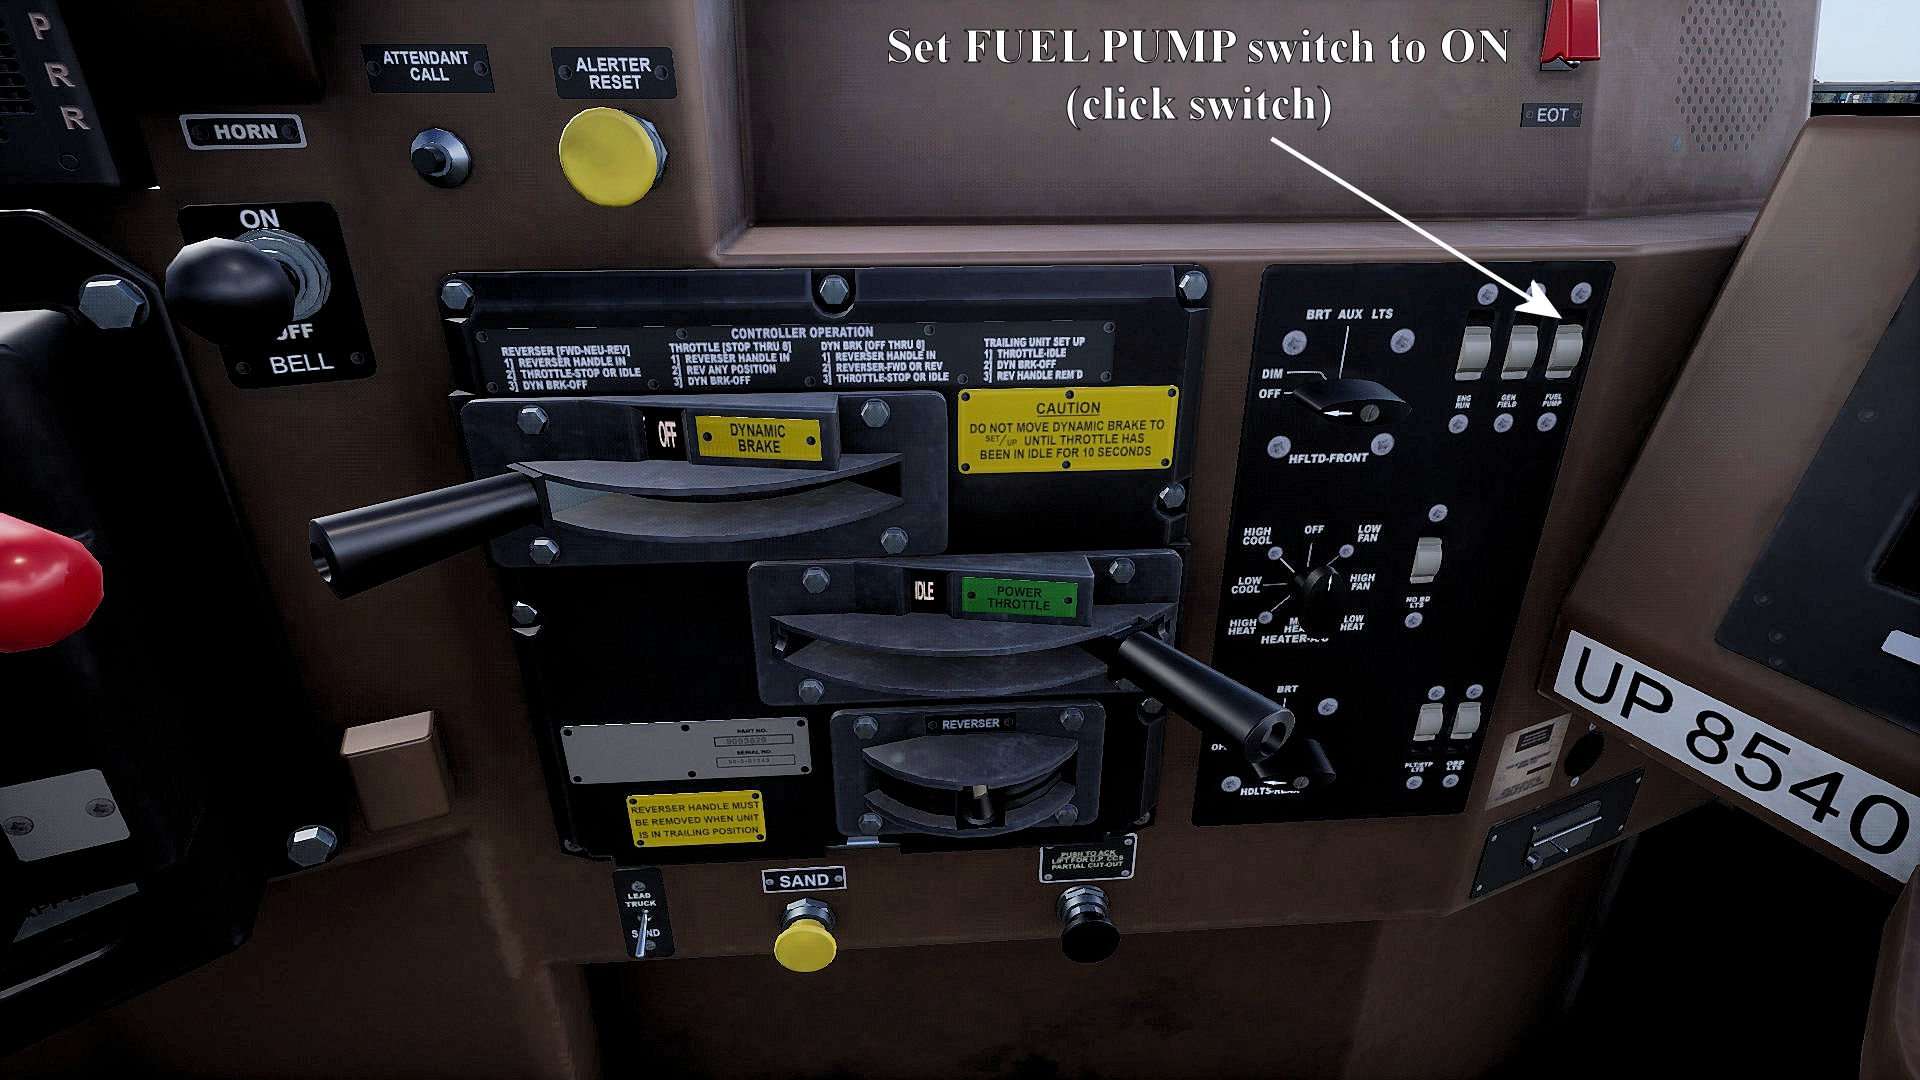
Step 4: Fuel Pump
Set FUEL PUMP switch to ON (click switch).
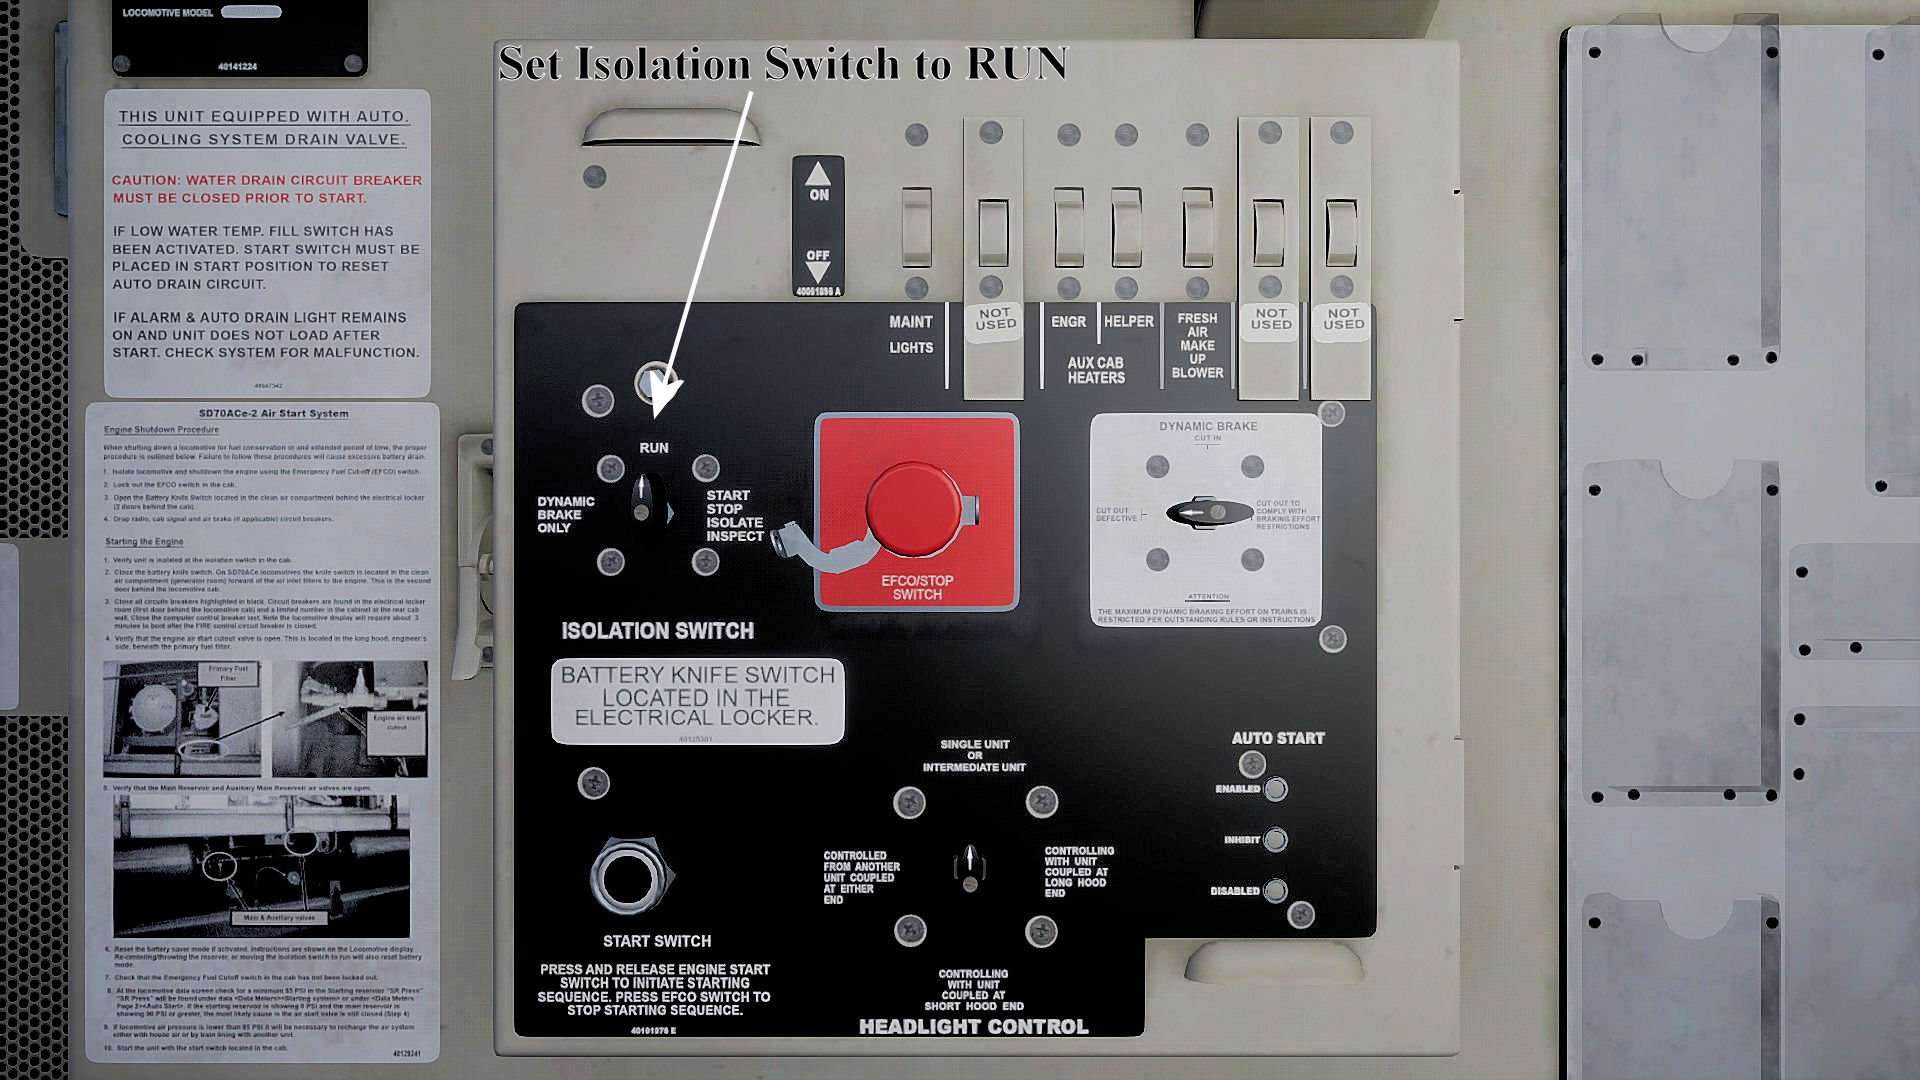
Step 6: Isolation Switch
Set Isolation Switch to RUN.
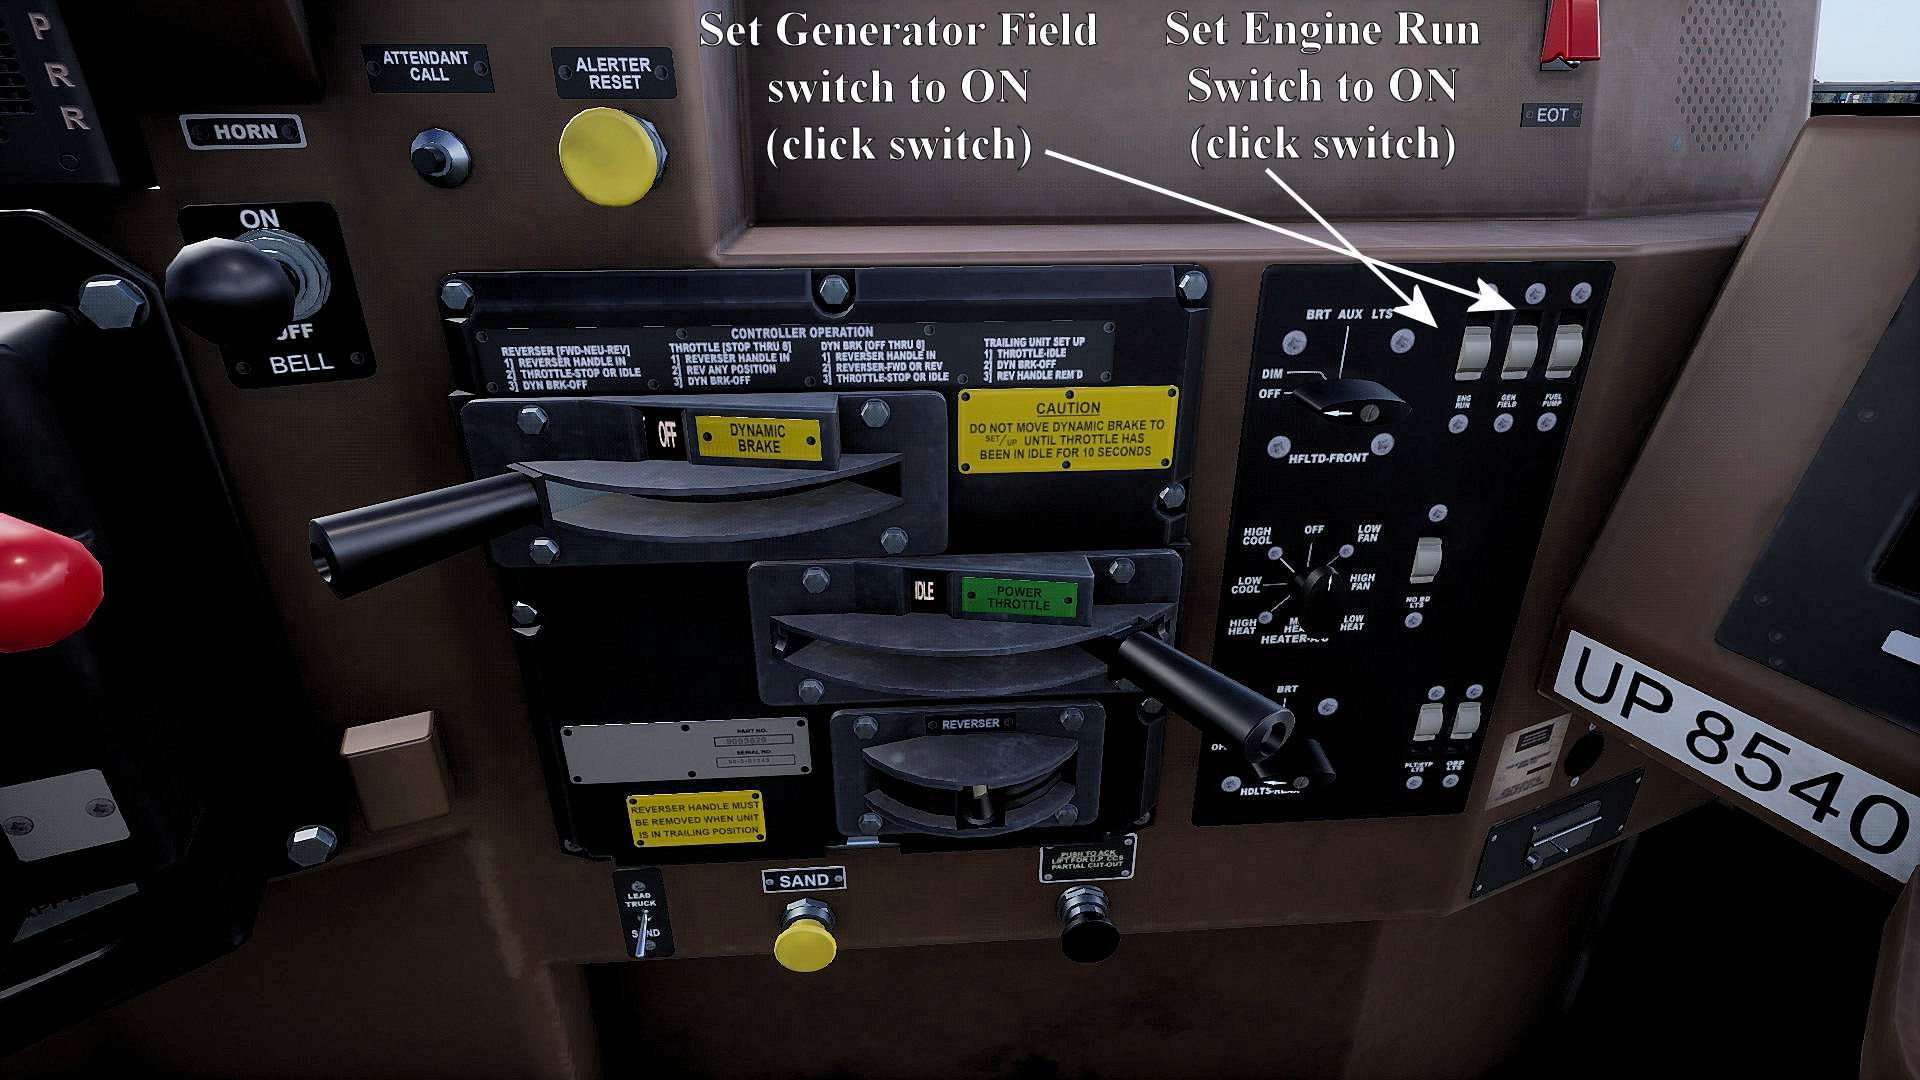
Steps 7 and 8: Generator Field and Engine Run Switches
Set Generator and Engine Run switches to ON.
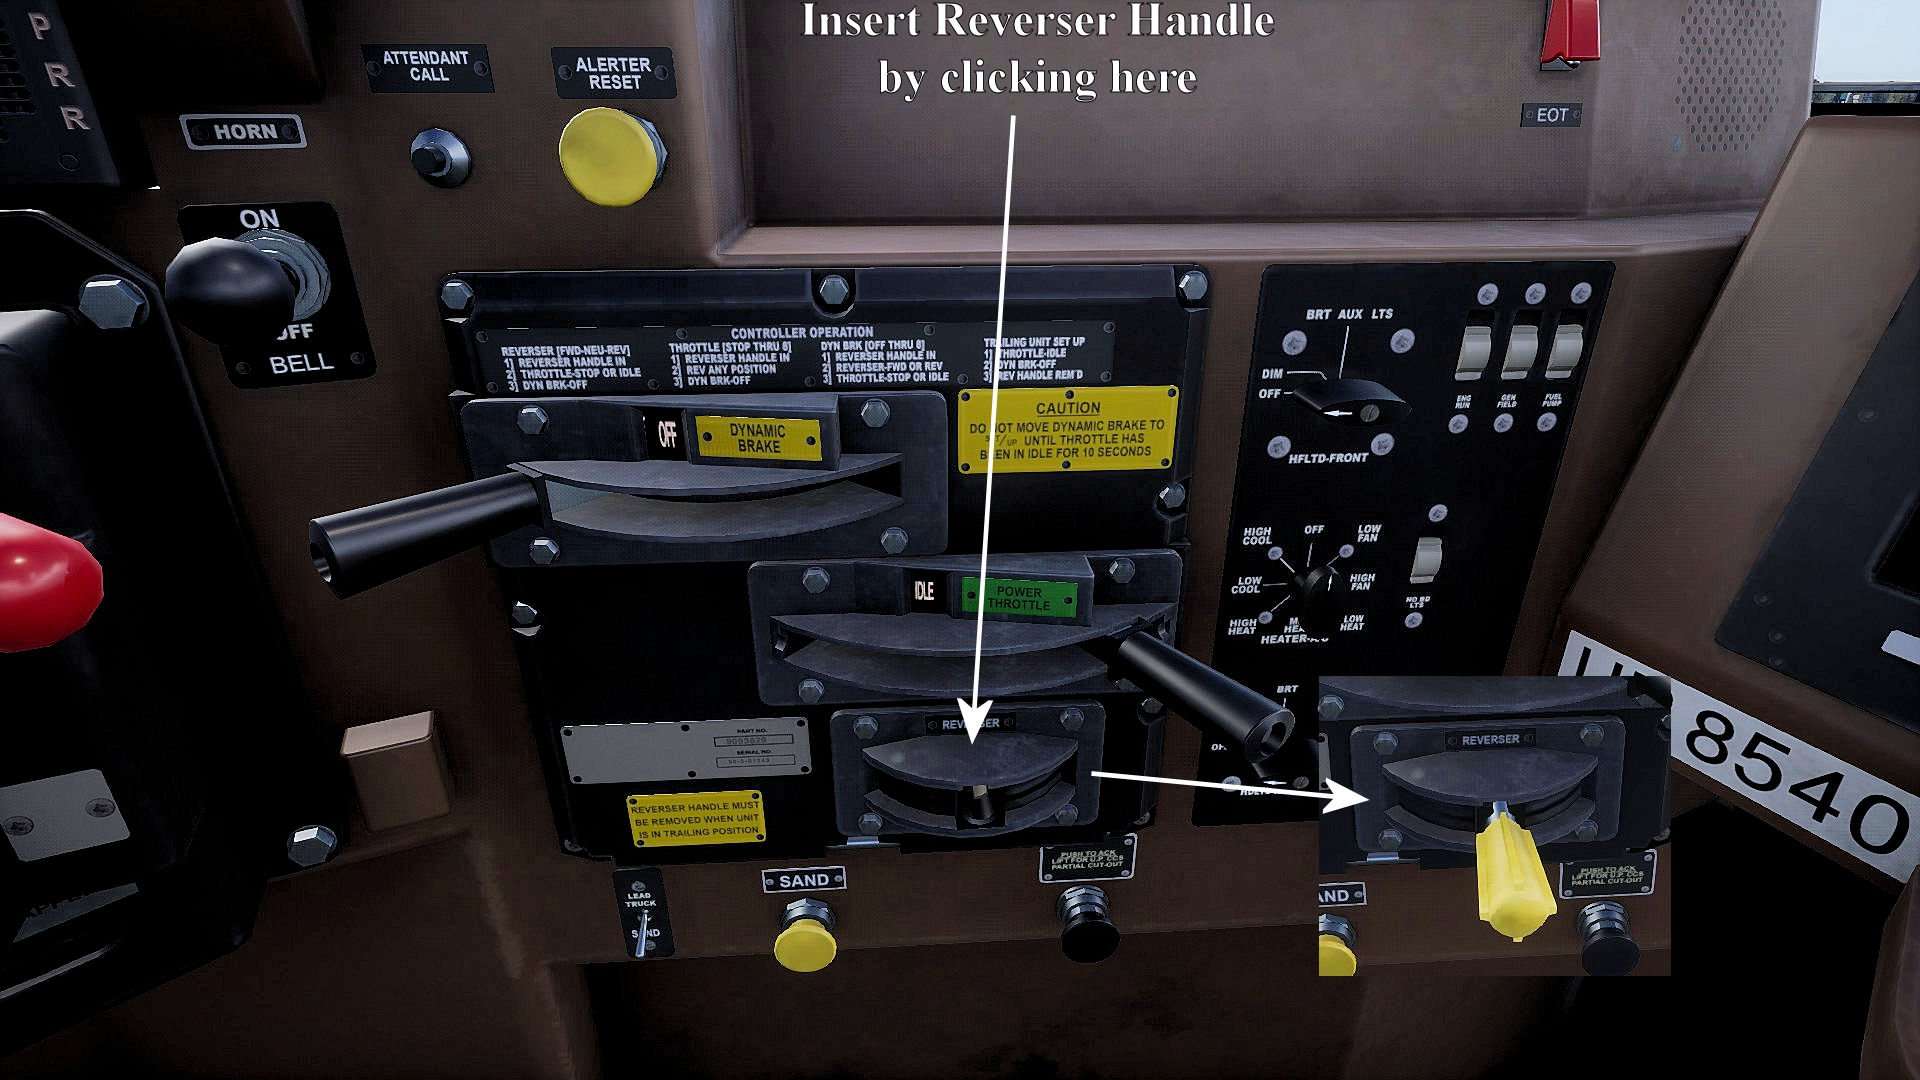
Step 9: Reverser Handle
Insert Reverser Handle.
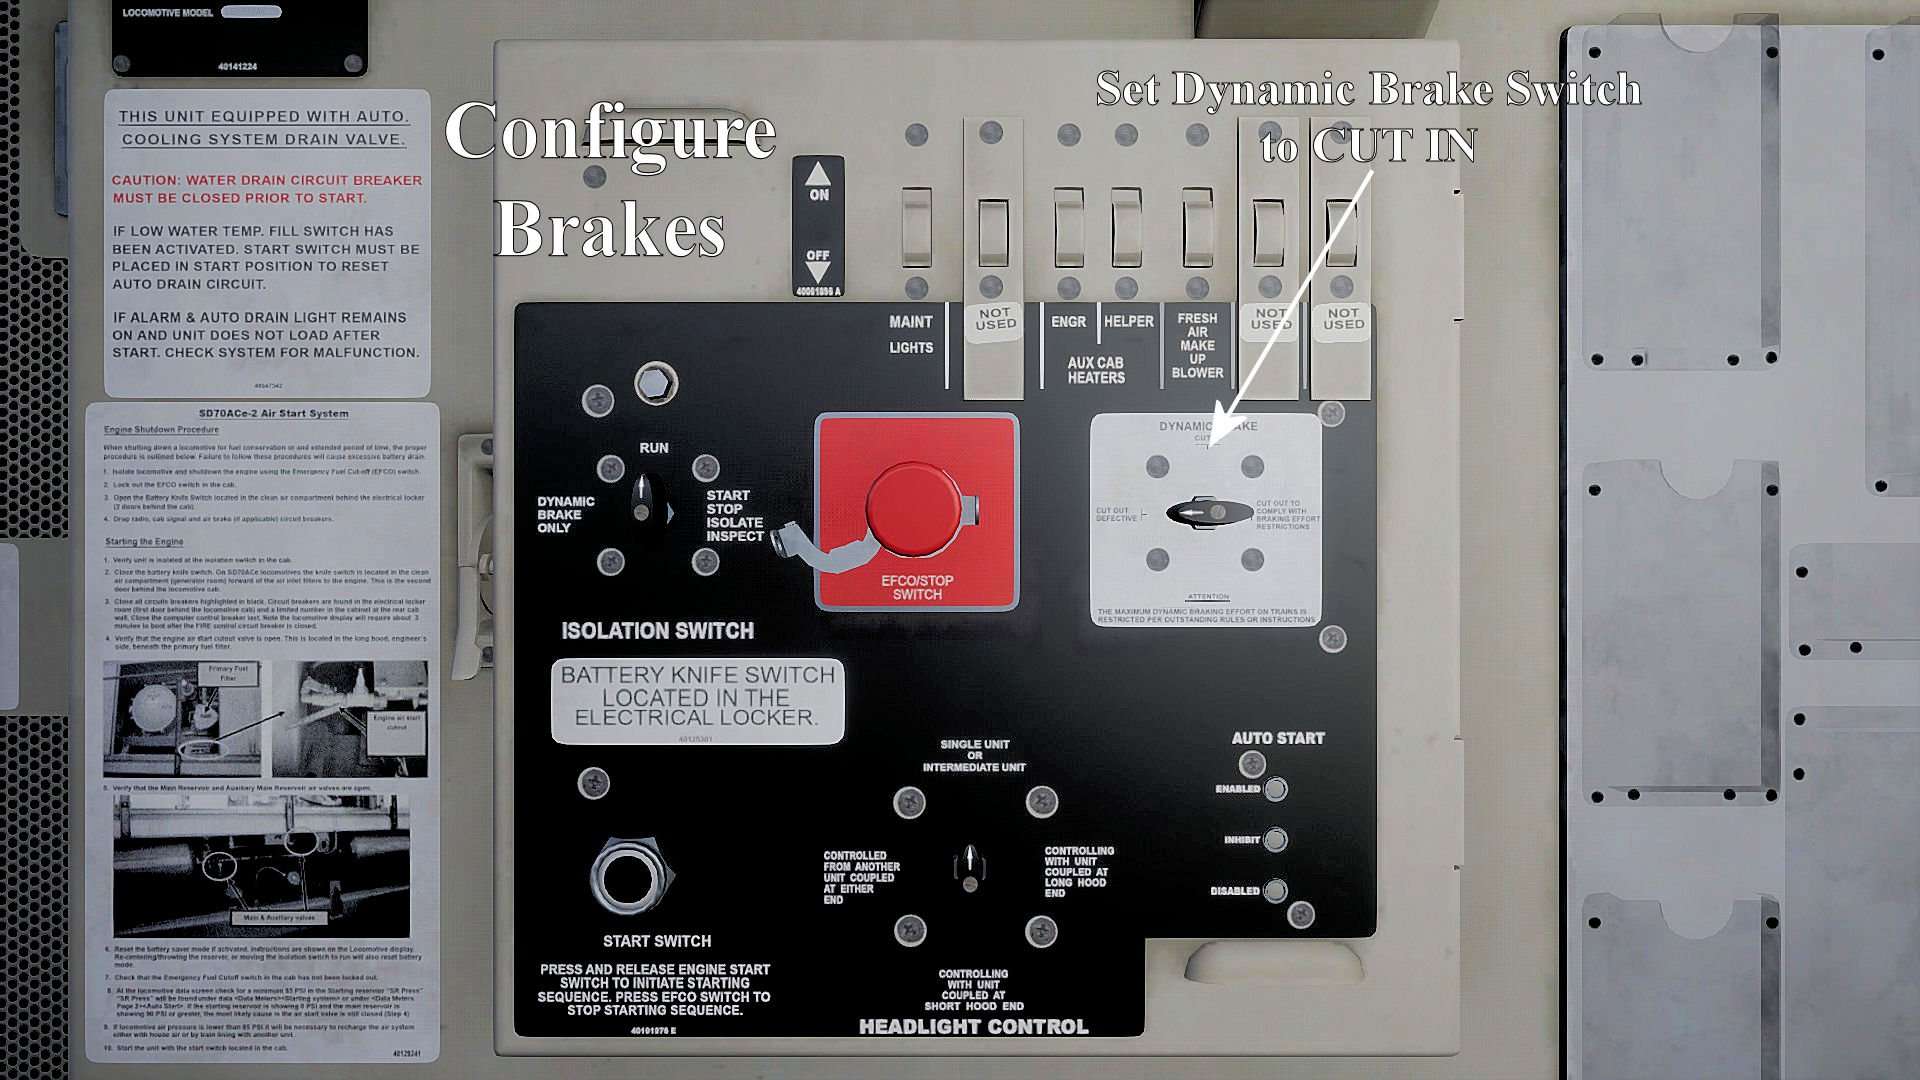
Step 10: Begin Confirm Brake Setting Procedures
On Back wall: set Dynamic Brake Switch to CUT IN.
Step 11: Access More Options Screen
Access More Options Screen by clicking indicated button.

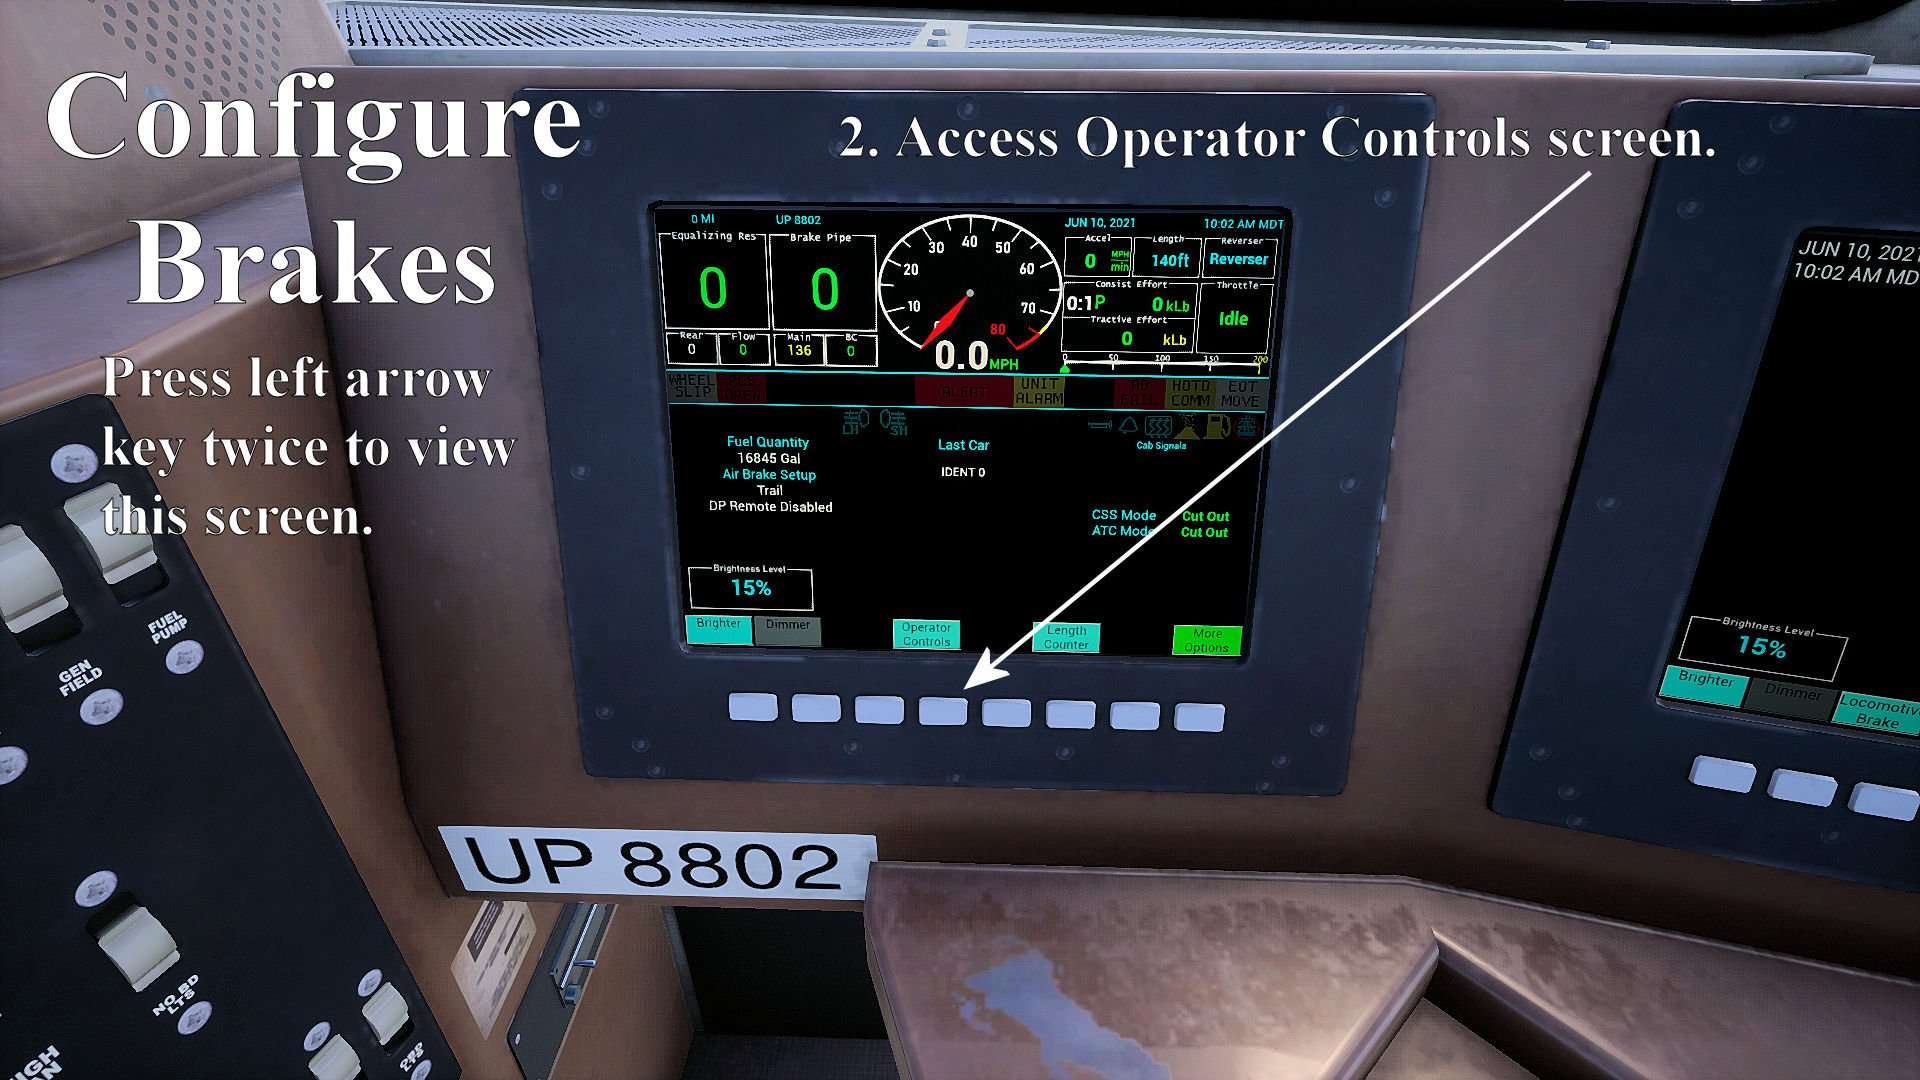
Step 12: Access Operator Controls Screen
Click indicated button to access Operator Controls screen.
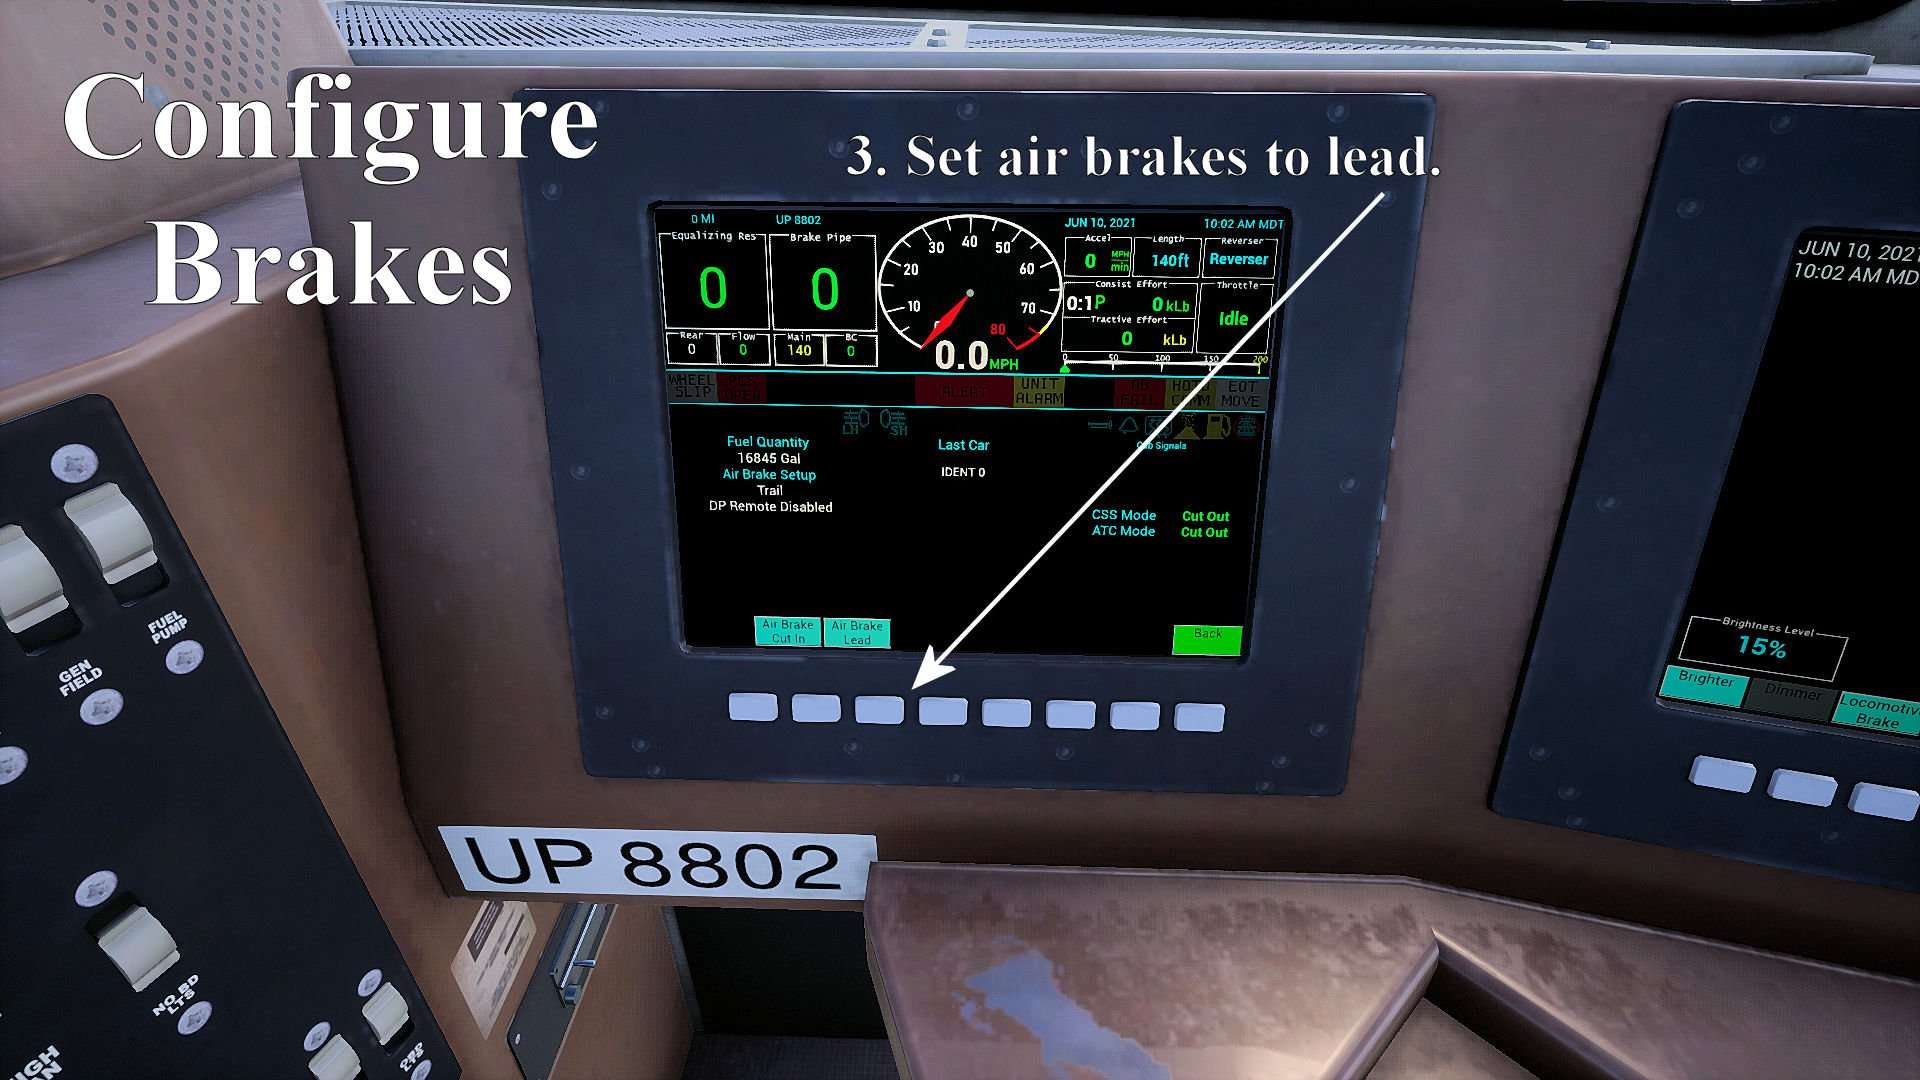
Step 13: Set Air Brakes to Lead
Set Air Brakes to Lead by clicking indicated button.
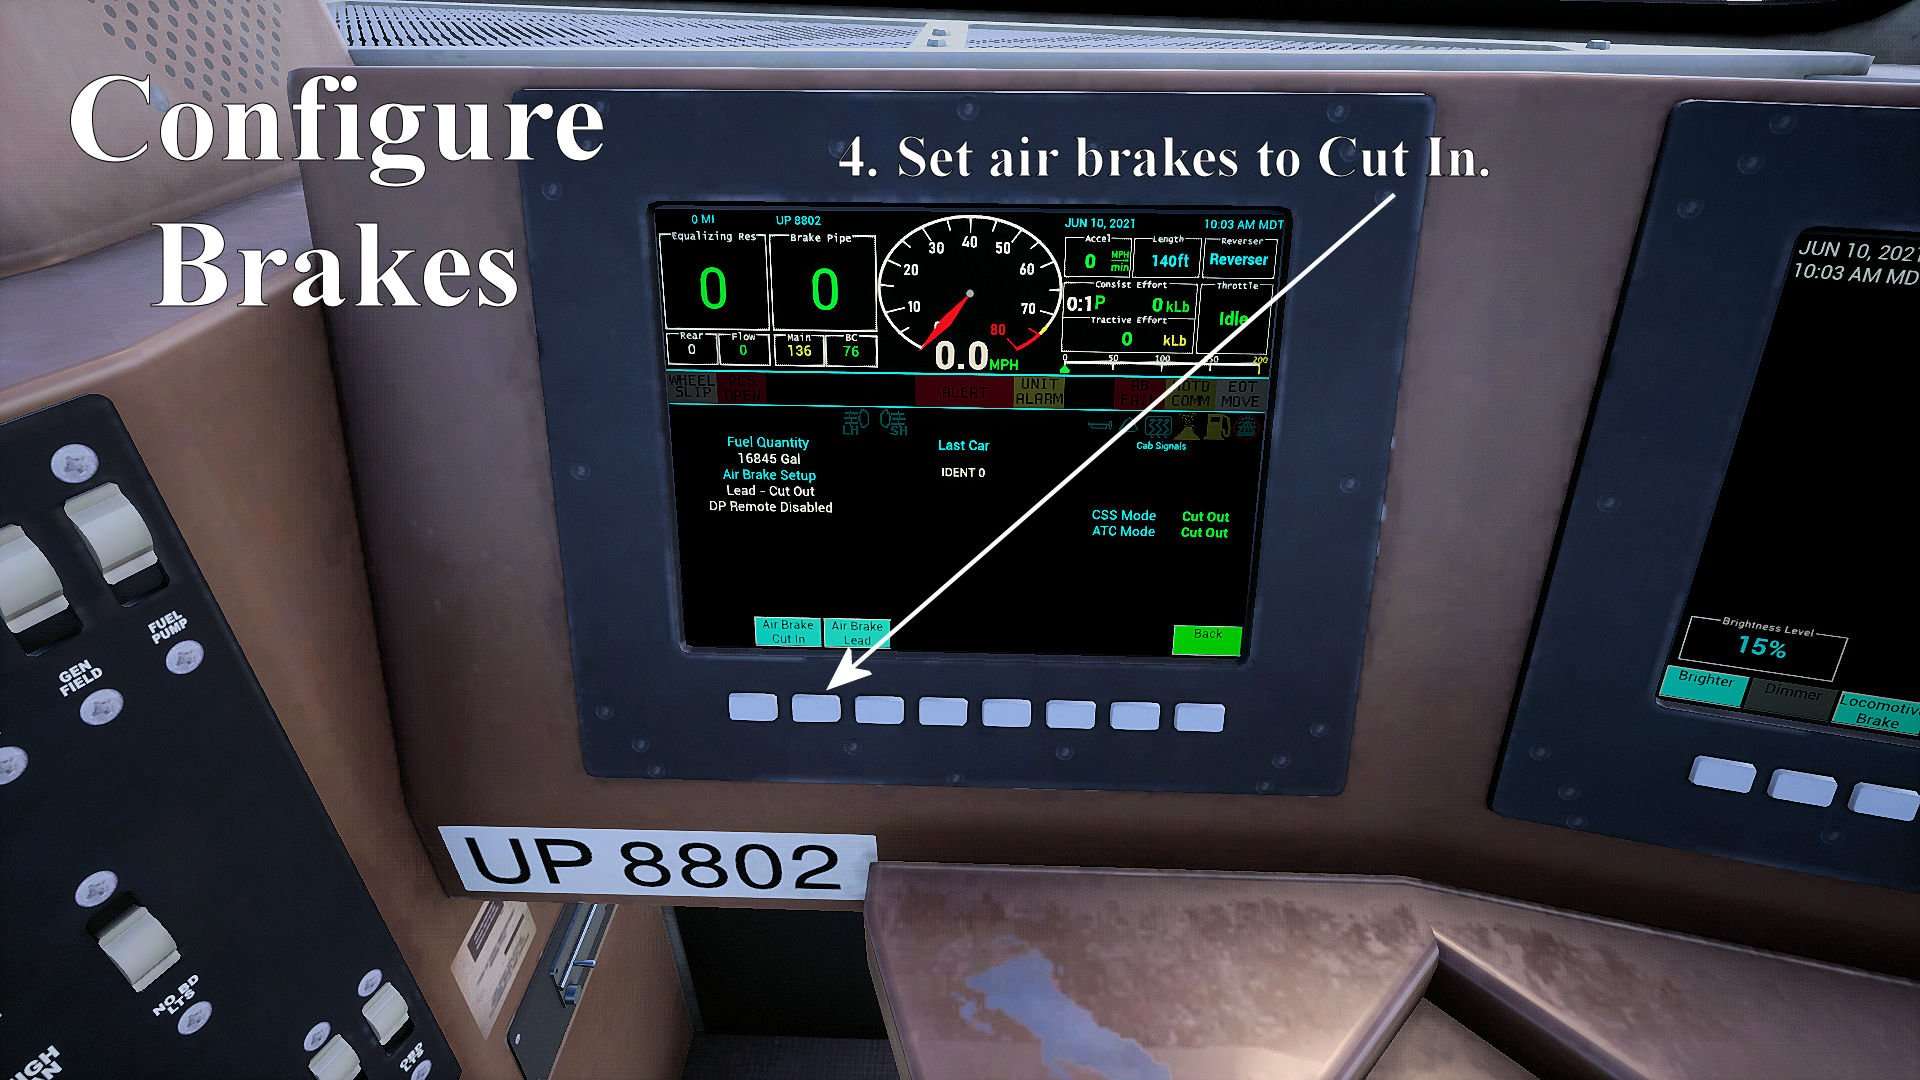
Step 14: Set Air Brakes to Cut In
Click indicated button to set air brakes to Cut In. This completes brake configuration.
Step 15: Automatic Brake
Set Automatic Brake to Release.

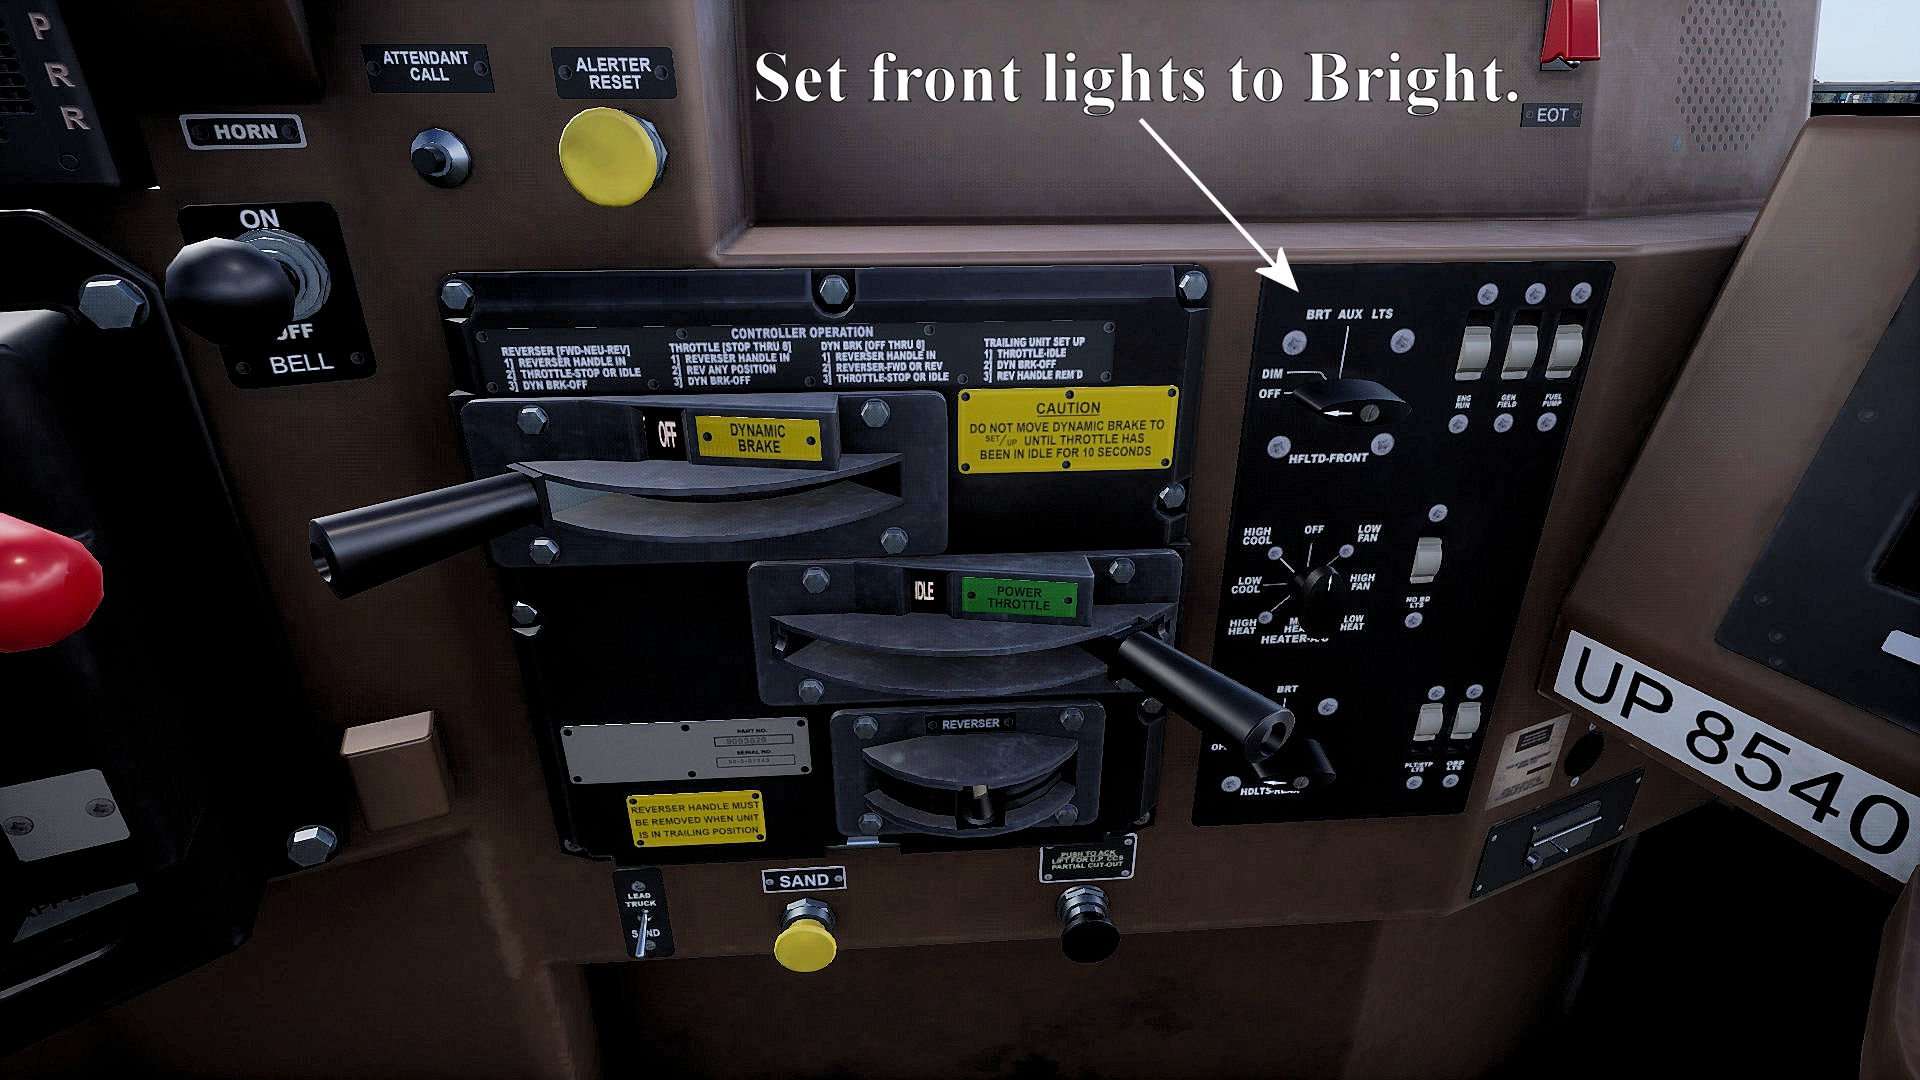
Step 16: Headlights
Set headlights to bright by rotating switch (or pressing >H< key)
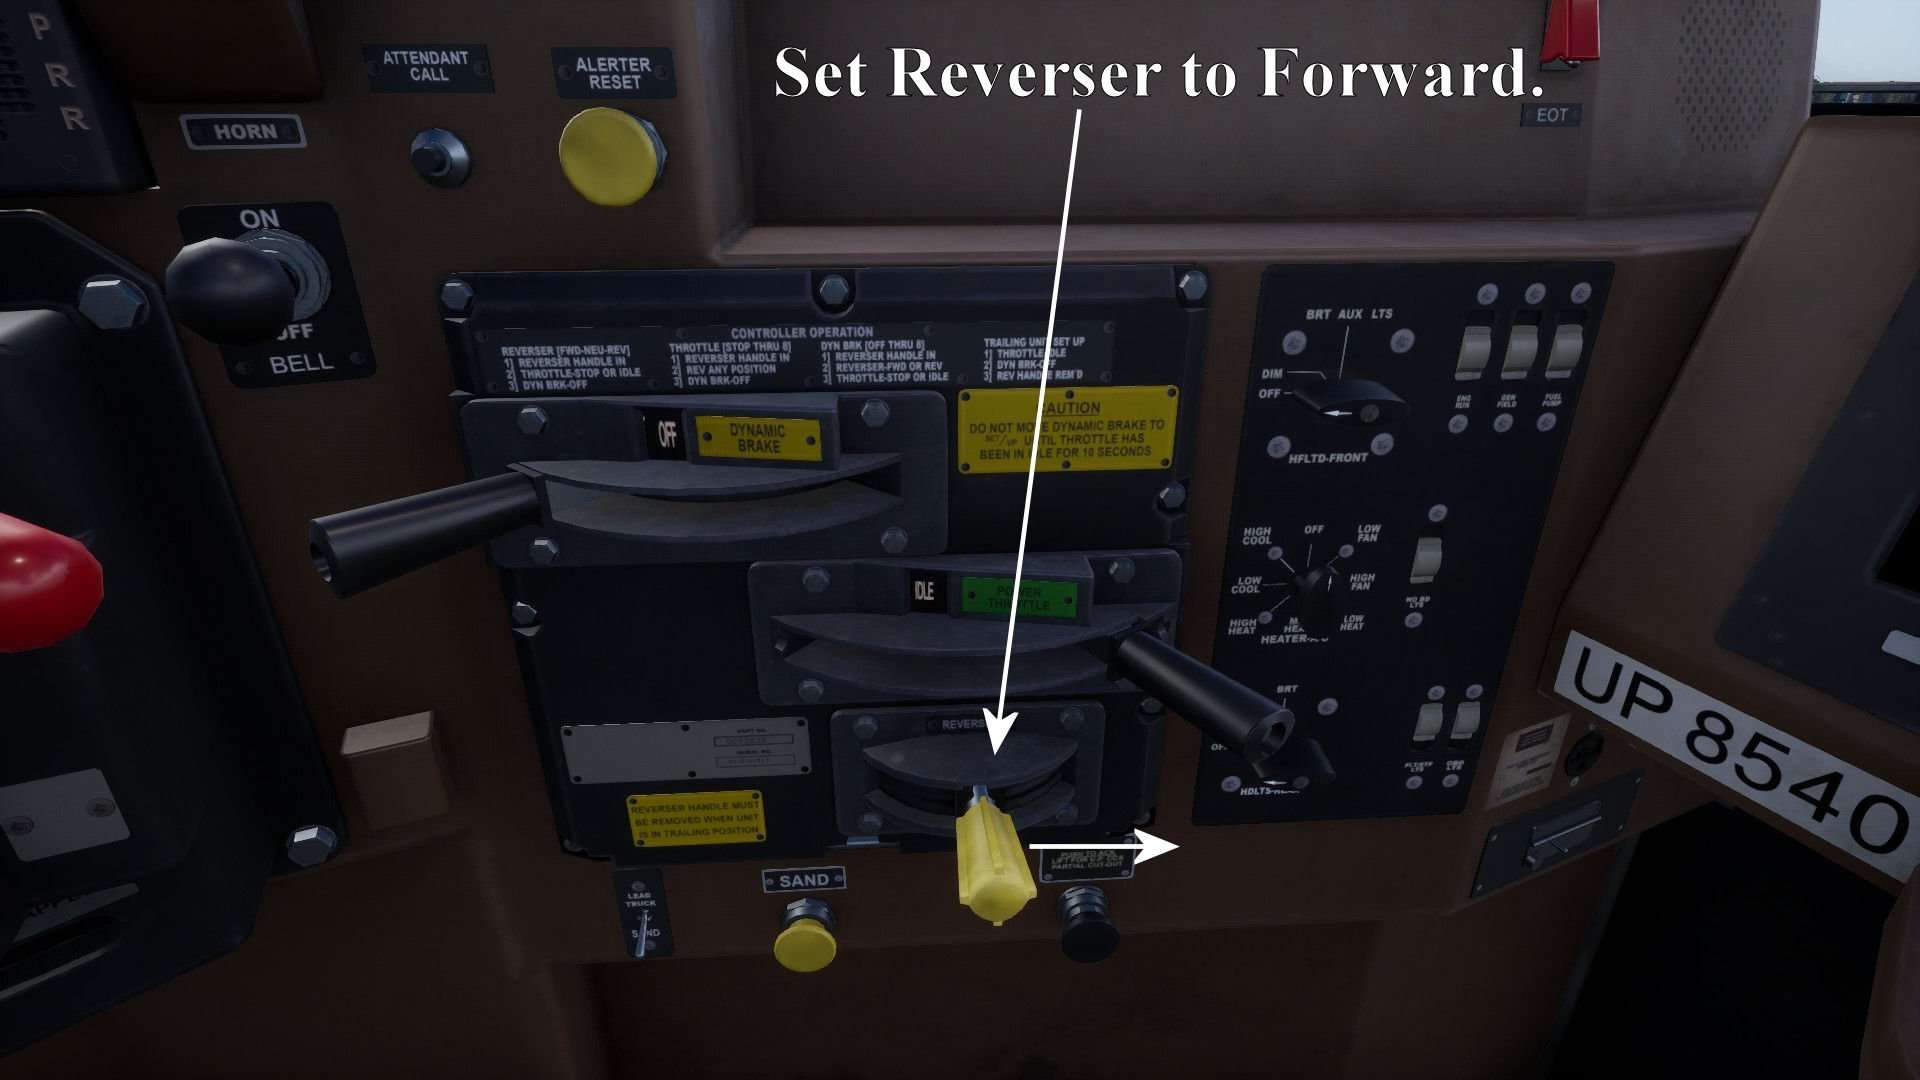
Step 17: Set Reverser to Direction of Travel
Use mouse or keys (>W< forward; >S< reverse) to set reverser.
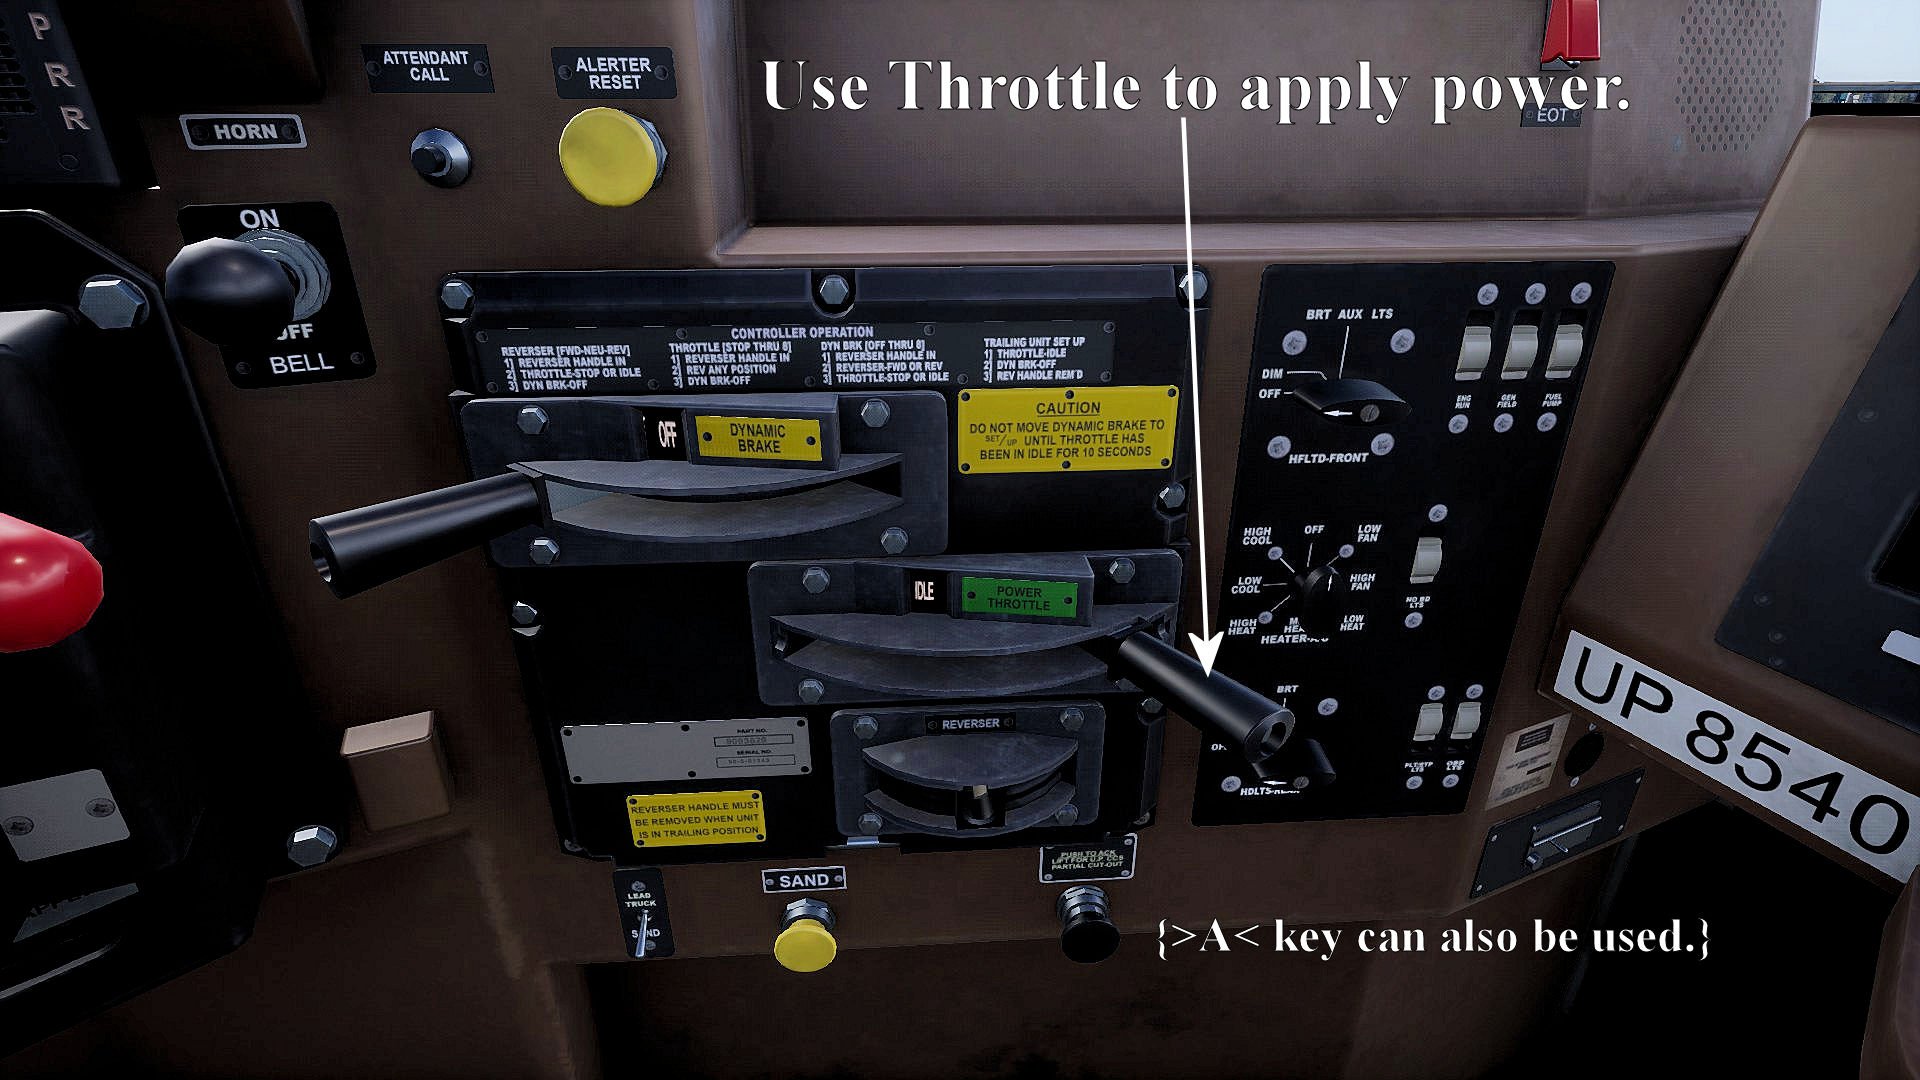
Step 18: Apply Power
Apply power using mouse or keys (>A< to increase; >D< to decrease).


Can I get the sd70ace please