
Some helpful tips and tricks as well as a loadout that will get you through your first rage mode playthrough.
Introduction
Hello! This guide will teach you some essential techniques and provide you with a strong loadout to tackle the game on rage mode.
The Basics
If you follow these ground rules you will survive and even breeze through the easier levels in the game, despite this due to the ridiculous AI on this difficulty you may still need to use some trial and error on the more difficult levels as it’s simply impossible to pull them off on your first try without some practice first.
- Slide as much as possible. – This one is absolutely essential, slide whenever possible as it allows you to dodge a significant amount of enemy fire, be sure to bind the slide button to a key that is comfortable for you to spam as you are going to be sliding everytime you come out of a slide and you are basically sliding the entire game. In order to keep up with the sliding you will need to chain enemy kills together to keep up your stamina which brings us to the 2nd rule.
- Take advantage of your cloak. – When you run out of stamina or focus be sure to use the cloak in order to get the jump on some unaware enemies to regenerate your focus and stamina, you can also make use of the cloak to reload and avoid taking unnecessary damage while doing so. The cloak also allows you to quickly reposition yourself when you are under heavy gunfire. Picking enemies off before the start of combat can also tip the odds in your favour.
- Make use of the grenade launcher. – Further in this guide I talk about using homing rounds on the grenade launcher and this is crucial on rage mode in order to allow you to generate focus from cover or from a safe distance, this is because you can just fire into the air and the grenades will lock onto an enemy giving you a kill which will regenerate your focus allowing you to get back into the action sliding around with shotguns again.
- Don’t use incendiary rounds. – On rage mode incendiary rounds are a quick way to kill yourself and cause frustration, on lower difficulty they are fun to use but as the enemies bodies burn after they die it will prevent you from sliding across enemy bodies to pick up any ammo or armor they drop which can be the difference between living and dying. If you slide into the fire you can also cause yourself heavy damage on rage mode and as you are moving around a lot this is very easy to do.
- Resupply between levels. – Make sure you are at maximum ammo, armor and grenade capacity before getting in the helicopter as you will need any small advantage you can take.
- Don’t attempt rage mode on the first playthrough. – It’s not worth doing because you will not have the dual wield serum or the attachments unlocked that are the most useful on this difficulty. You will also lack game knowledge and skill so it’s best saving this for your 2nd playthrough in my opinion. On the 2nd playthrough you can also play the levels out of order meaning you can tackle the most difficult ones whenever you want meaning it’s less frustrating.
- Be patient and take breaks. – This one is more to do with not getting annoyed at the game. It’s a marathon not a sprint so take some time to chill between beating levels.
The Loadout
In order to tackle the game on rage mode we are going to need a loadout that not only allows us to take out enemies quickly but also to regain focus and to take down stronger units in a safe manner. This brings us to the two weapons we will be using.
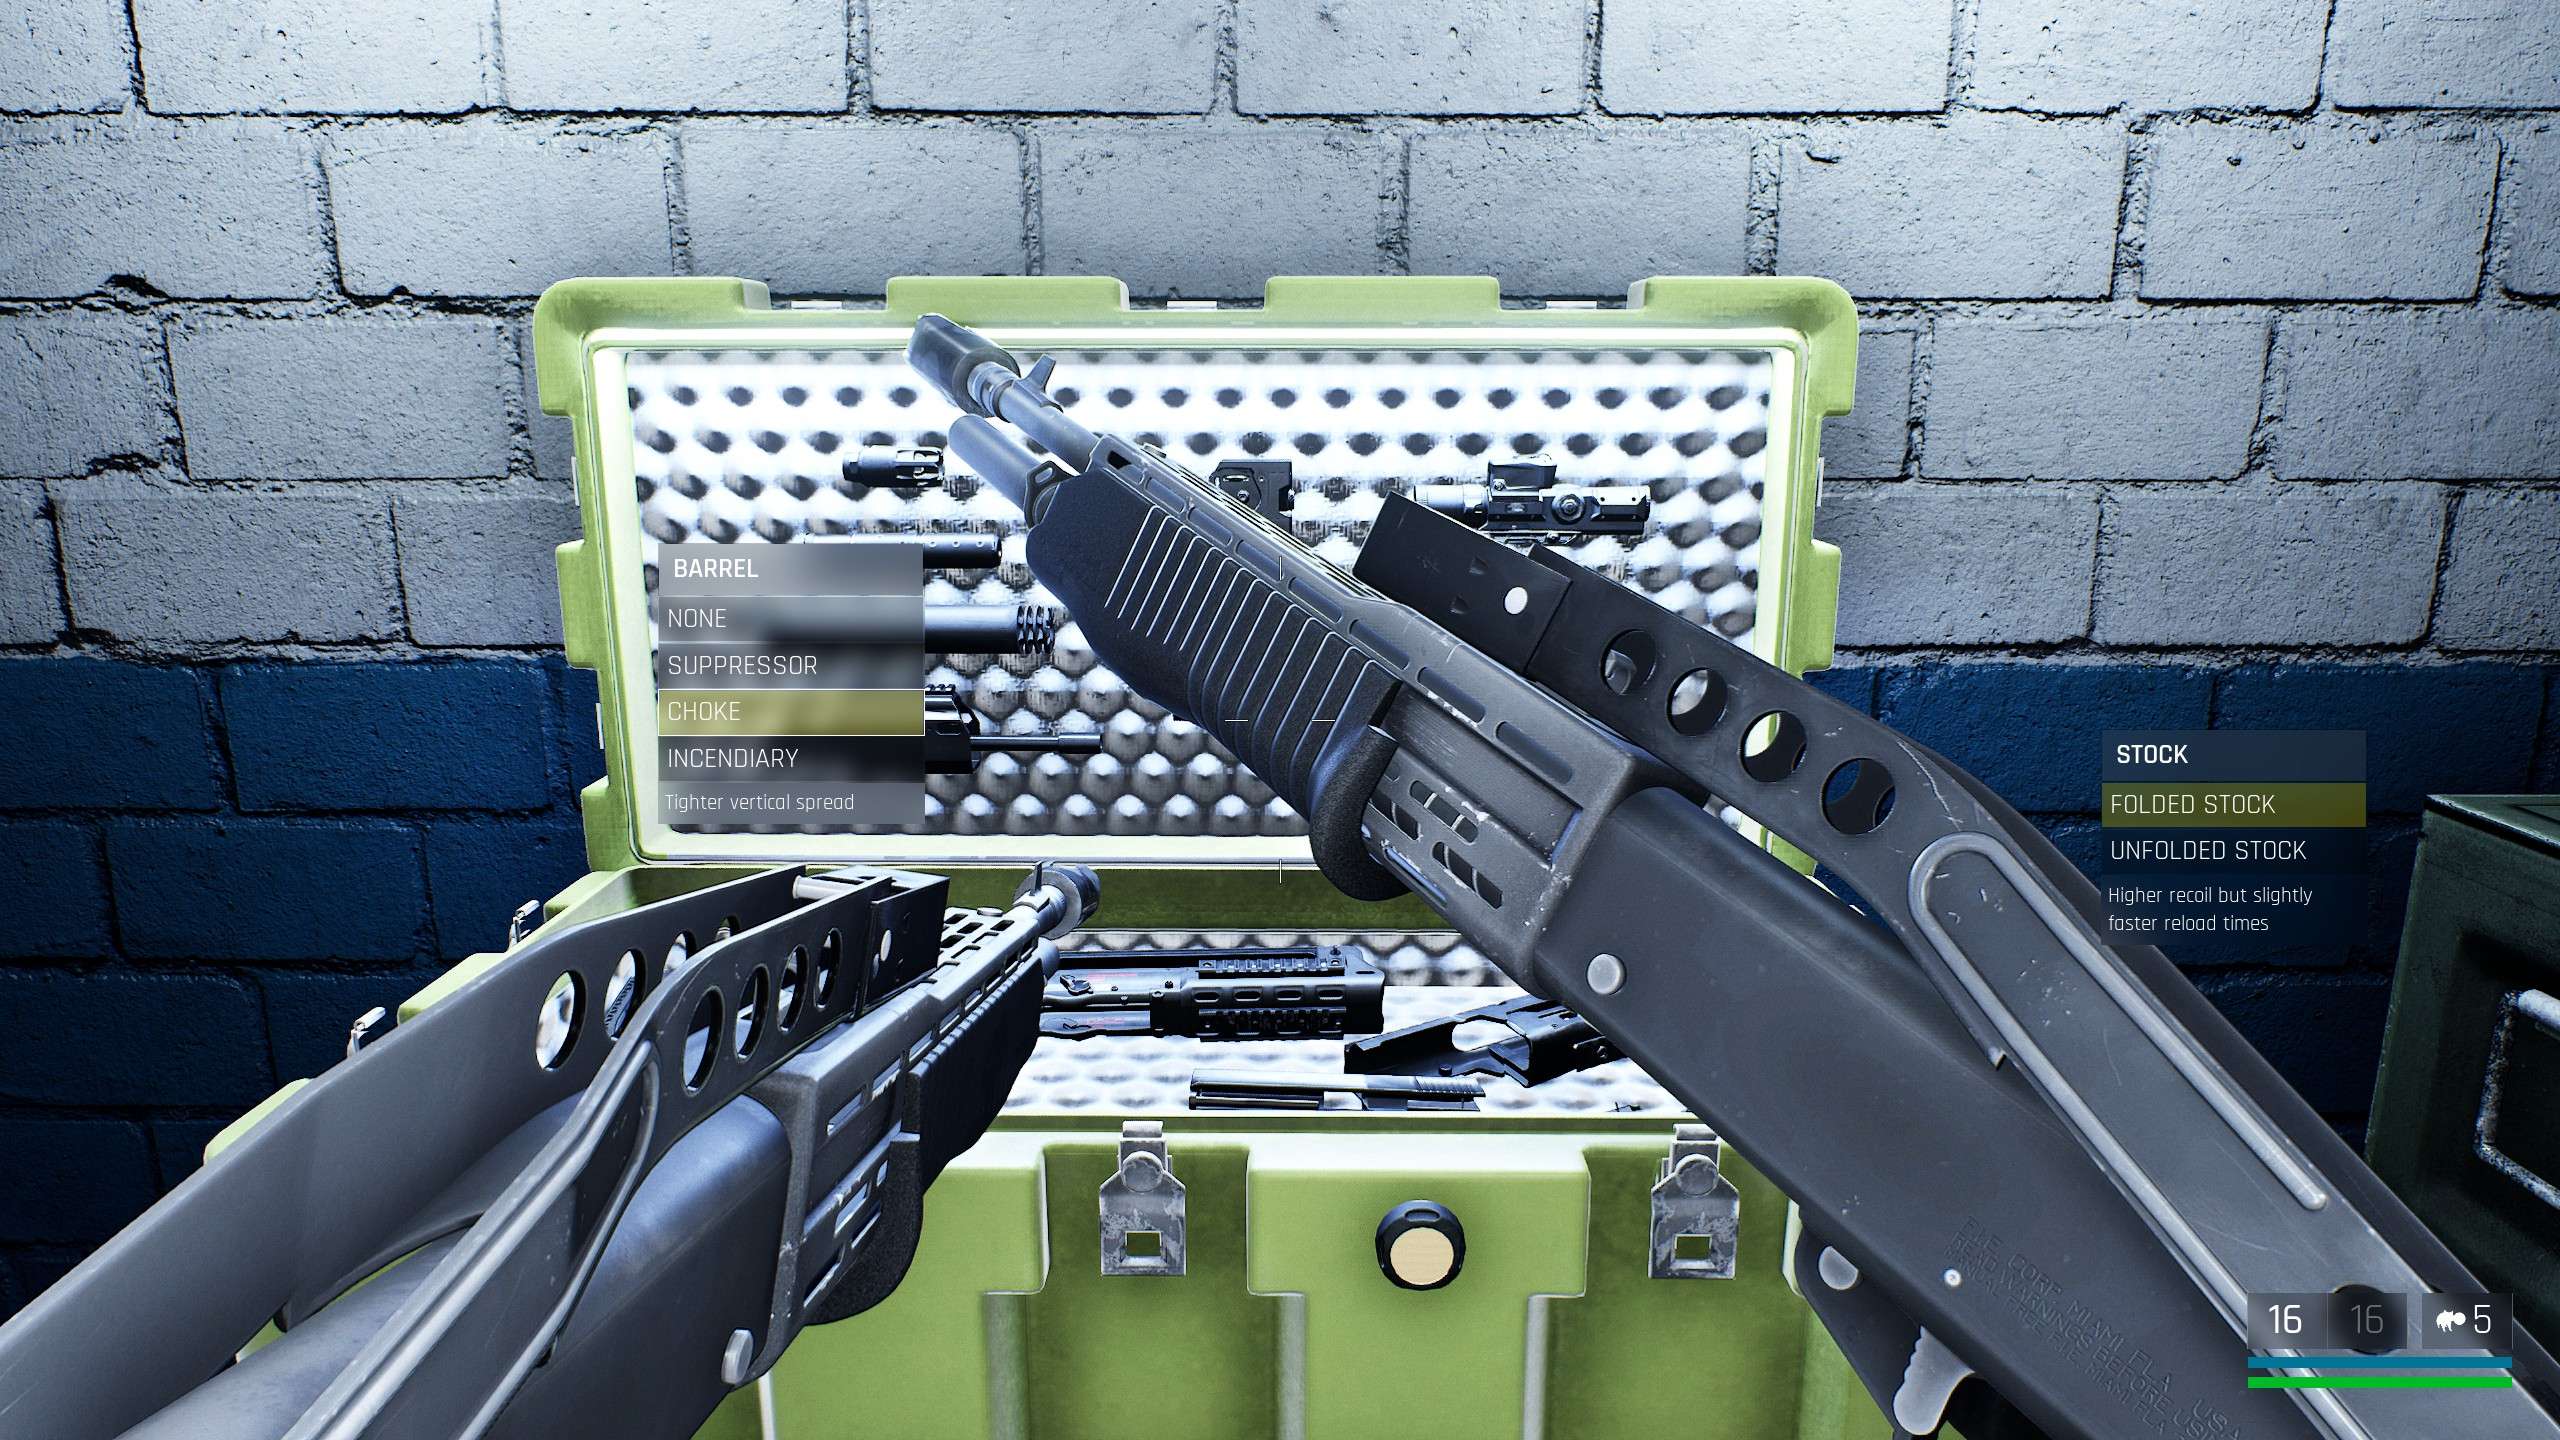
The Shotgun – The shotgun is by far the most useful weapon in the game due to it doing significant damage without burning through ammo, as the game encourages aggressive play and there are not many maps requiring long range combat this weapon is perfect as we can quickly take out enemies while sliding past them and in focus mode we only have to spend a small amount of focus to line up one or two shots saving us valuable amounts of time in focus mode. The attachments for the shotgun we will use are the choke and we will leave the stock folded. This allows for more accuracy in medium range encounters and the folded stock will allow us to reload quicker which is invaluable on the higher difficulty level.
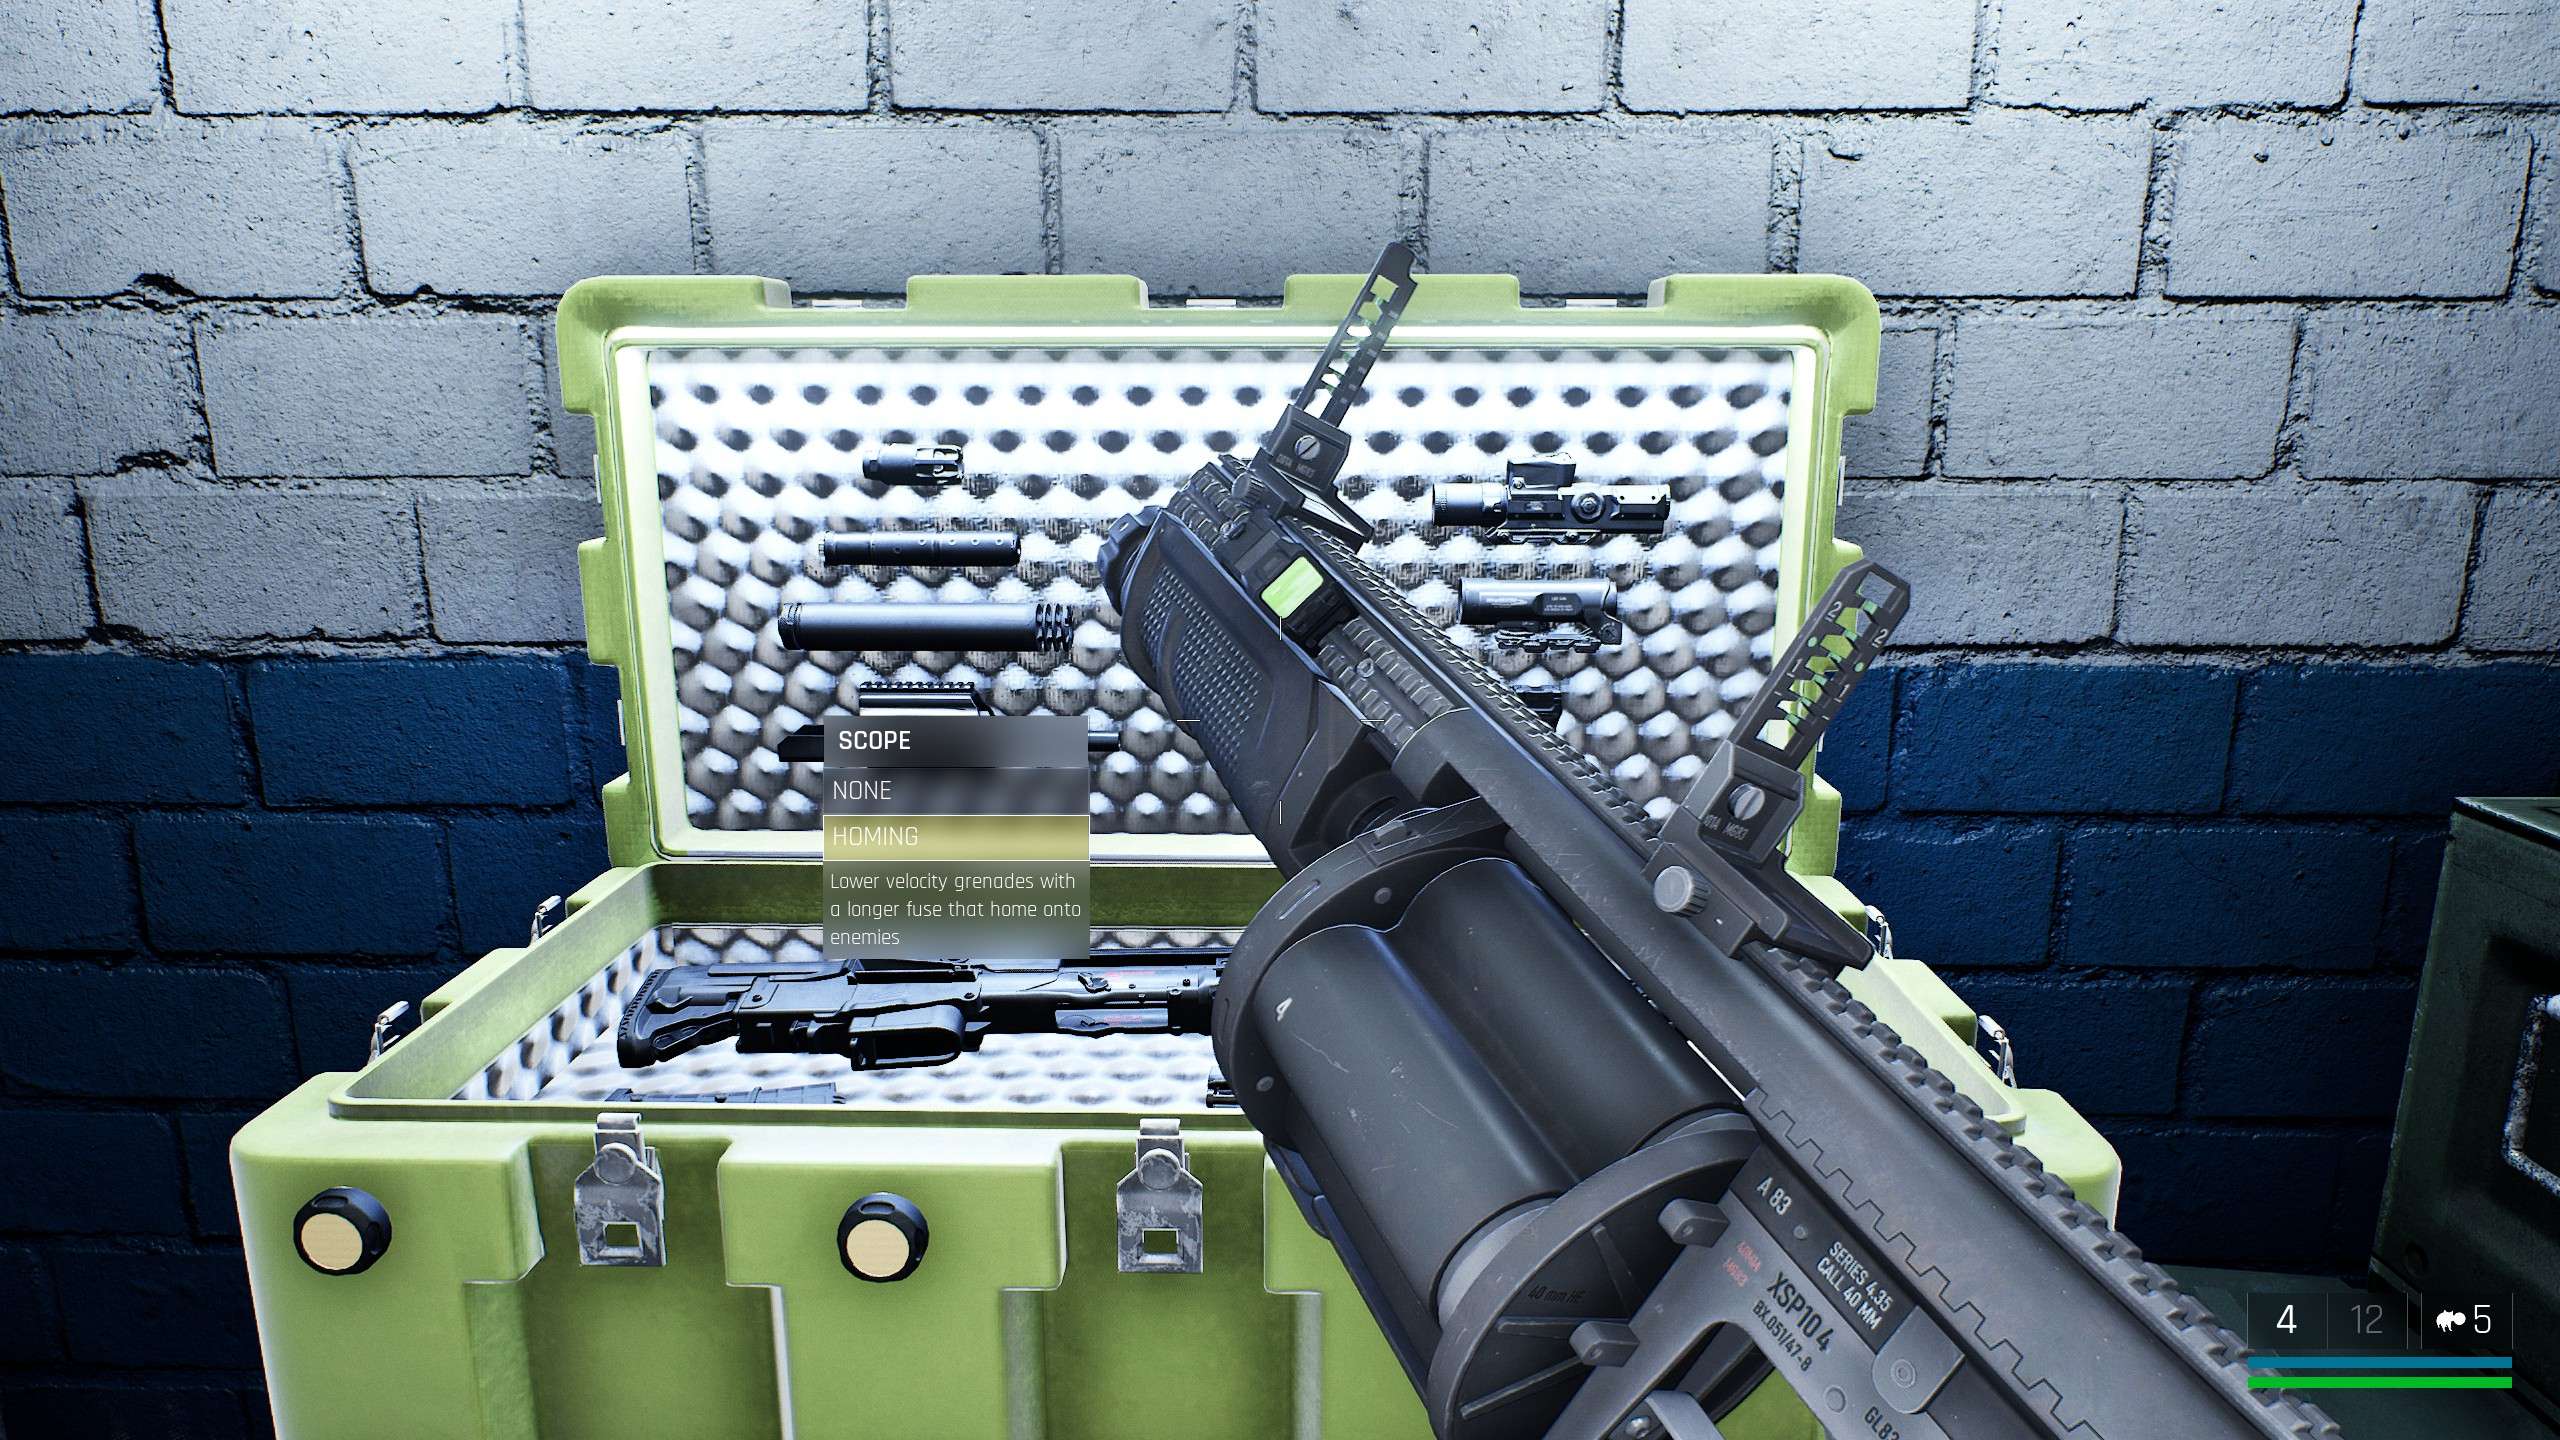
The Grenade Launcher – The grenade launcher is incredibly useful on rage mode as it can be fitted with the homing attachment making grenades automatically lock on to enemies. This means that when we run out of focus we can fire the launcher from cover or after repositioning with the cloak to get a kill that will regain our focus without putting us in the enemies line of fire. We can also use the launcher to attack juggernauts or boss enemies while keeping us at a safe distance.
Finally for our grenades we will be using the rat grenades as they move around the floor and lock onto enemies that get near them, this again allows us to get quick kills while maintaining our speed and safety as you can throw these without being very accurate and still pick up some easy kills.
Calling for Backup
In the majority of the side missions there are supply crates that allow you to buy guns and armour however you may not have noticed that you can also buy TF27 squads to assist you. If you scroll down to the bottom of the menu there are various units you can call in from recon units (the cheapest) to smartgun units (the most expensive). I would highly recommend using these when possible as the friendly AI can make incredibly frustrating stages a lot easier. They help a lot on wave based maps as fighting 30-40 enemies solo is incredibly difficult whereas with friendly AI killing them it becomes much easier. You can also use the grenade launcher or grenades in order to kill enemies without putting yourself in the line of fire in combination with these units to make some missions significantly easier.
The Patriarch
The Patriarch boss battle in Jorvik Castle is a particularly frustrating boss battle on rage mode. Mainly due to the fact that by that point in the level you may be running low on supplies and the boss will spawn minions between you damaging him, however, take solace in the fact that there is an autosave between the three stages of the bossfight.

When fighting the Patriarch it is worth taking the bolt launcher that is on the floor with a bunch of other guns when you enter the arena, I would recommend having both the shotgun and the bolt launcher for this. Use the cloak to get close to the Patriarch then shoot a burst of the bolt launcher at him and quickly back away from him, rinse and repeat this and make use of focus when you can and it should make the fight a lot easier.
When the Patriarch spawns in the goons between fighting you use the shotgun or your backup weapon in order to save your ammo for the bolt launcher. When the Patriarch comes back repeat the same steps as before.
On the third wave of the fight a Meat Golem will spawn, just ignore it and dodge out of it’s way and focus on the Patriarch as it is not necessary to kill the Golem in order to beat the boss. Expend all the resources at your disposal for this fight as it’s the last encounter of the level.
Horizon HQ / The Final Battle
For the most part Horizon HQ is a straight forward level considering it is the last one, however the last fight can be especially difficult due to you being under time constraints while trying to prevent the brain upload.
In order to make this fight easier try to pick off the first few enemies of each wave as they rope down from the helicopter onto the roof. Destroy the brains ASAP as well, between each wave the game will autosave so if you get the brain destroyed quickly and clear the enemies you can make your way through the first few waves with relative ease.
When the five or six brains pop up at once this is the penultimate stage of the battle. Be sure to ambush the helicopters as they come in and once again make your way round the brains as quickly as possible and destroy them. Once you destroy the brains you will be prompted to pick up some breaching charges, do not do this until you clear the roof of enemies as picking up the charges will spawn the helicopter which is the final battle.
If you clear the roof of enemies then you can just fight the heli on its own, you should do this as there’s no autosave between the final wave and the heli. Be sure to pick up a minigun off of one of the dead soldiers before activating the heli battle as well. This is because if you go into focus with the minigun you can basically shoot the heli down before it even has a chance to do any damage to you.
Congratulations!
If you’ve made it this far then hopefully you have managed to beat rage mode! Congratulations!
After the final battle and finishing Horizon HQ the achievement should pop, there is no need to play the epilogue on rage mode, after the achievement pops you can safely lower the difficulty for the epilogue.
I decided to follow through with the epilogue on rage mode. The name of the difficulty is very apt…
Good guide. I used the incendiary rounds the whole game because I liked how much adrenaline I got from the fire damage. But the fire damage did pose an issue, maybe I would have had an easier time if I saw your guide.
For the patriarch I liked using tomahawks because I can rush the boss with the bolt launcher then continue throwing tomahawks while walking circles around him and he retreats before I run out of adrenaline.
I’m currently attempting Rage Mode after my 1. Playtrough. I say if you beat the game on extreme you will also beat it on rage. At first I thought you will get one-shot everywhere you go but it’s just more like 2x the damage of extreme. Beside the damage-up you definitely have to manage your focus and stealth (it feels like both charge slower compared to extreme).
they do indeed charge less.
1 kill at 0 focus will give you half of what you need to even activate it.
Invisibility takes 15 seconds to fully recharge after it’s been used, and only lasts for 3-4 seconds.
what are your thoughts on the incendiary rounds for shotguns? IMO they are better at clearing waves as they stun the vast majority of enemies.
The incendiaries seem good at first because of the stun effect they have but if you don’t finish off an enemy and let them burn to death it will take you longer to get more stamina and focus, there’s also the issue of setting fire to the majority of the combat area and then having to potentially burn yourself and lose health unnecessarily. Incendiary rounds also mean that you have to wait until an enemy is no longer on fire to pick up armour and ammo off them.