
I will give you instructions on how to fix the connectivity issues of Tom Clancy’s Ghost Recon Wildlands.
Contents
Introduction
If you experience lag, disconnections or other problems regarding the game’s connectivity, there are a few steps you can try. I will list them in this guide, starting with the most basic ones. I recommend that you follow them in the order they are listed below.
Resent Network Hardware
One of the first things you should try when you experience lag or disconnections while playing is a hardware reset. This usually means resetting your router or modem. Sometimes, this process is also called power cycling.
It is very easy to do:
- First, please shut down all computers or consoles connected to your modem or router.
- Power down and unplug the modem or router.
- Wait for 60 seconds.
- Plug in and turn on the modem and router. If your device has lights on the front, you will notice them blinking. This is normal. It can take a while for the connection to be fully re-established.
- Start the computer or console again and allow it to completely boot up.
The reset is now done. Please test your game to see if the issue still persists.
Software Conflicts
If your game runs poorly or you experience lag, disconnections or other issues, a possible cause could be software conflicts. To prevent or stop software conflicts, you can try the steps described below.
Offline mode and proxy settings
First of all, make sure that Uplay PC is not set to run in offline mode. This is how you check:
- Click on the menu icon in the top left corner of the Uplay PC client.
- Select Settings.
- Click on the Network tab.
- Make sure Always Start Uplay in Offline Mode is unchecked.
In the same menu you can also check the Windows proxy settings. To do that, click on the button that says Change Proxy Settings. This will bring up your Windows Internet Options window where you can manage your internet options.
Security Software
Next, update any anti-virus or personal firewall software that may be installed on your computer. For third party software (such as ZoneAlarm, Norton AntiVirus/Internet Security, Mcafee, Avast) check with the appropriate software vendor for details on definitions and updating the software.
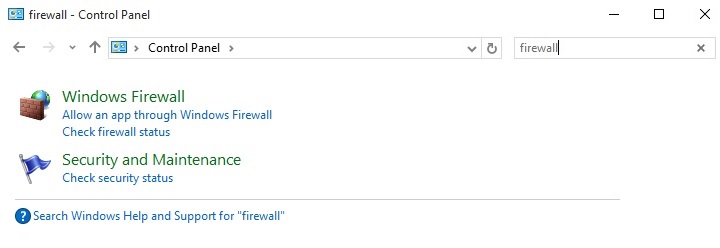
You also need to consider the Windows Firewall (accessed via Start > Control Panel > System and Security > Windows Firewall) which may block the game from accessing the Internet. To update your Windows Firewall you will need to install the current Windows Updates.
If updating these programs does not resolve the issue, you may need to configure the software to allow access to the specific application. This is generally done through the Exceptions List (may be named differently depending on your software). When adding the game as an exception remember to add the executable (exe) for both the game and Uplay PC.
Background applications
You may also encounter problems due to applications running in the background of your computer system. Please try closing all running background applications before starting your game. This is how:
- Click Start and type MSCONFIG into the search box and click OK.
- This will open the System Configuration Utility on the General tab.
- Click on the Startup tab and then click the Disable All button.
- Click OK and restart your system when prompted.
Keep in mind that this is a temporary solution and any changes can be reverted by returning to the MSCONFIG utility and re-selecting Normal Startup.
On Windows 8, Windows 8.1 and Windows 10 the start-up programs can be switched off directly from the Task Manager, see this picture:

Port Forwarding (Changing your NAT Type)
If you experience connectivity issues such as lag or disconnections during the game, you may have a firewall interfering with your connection. To prevent this, please configure the relevant network ports within your router. To do that, you will need to access your router from your PC (even if you usually play on console).
Directions for configuring ports are specific to the make and model of the router being used and can be found by visiting the manufacturer’s website or referencing the router’s manual. I will summarise instructions for the generalised process of port forwarding in this article. You can also contact your Internet Service Provider for assistance with this process.
- Directions for configuring ports for Windows firewall depend on which version of Windows you are currently running. Instructions can be found on Microsoft’s Website.
Be aware that you may need to configure a static IP address for your platform (PC, XBOX ONE, PS4) to ensure that your port forwarding settings work continuously.
Generalised steps to forward ports
Before you can start the port forwarding process, you will first need some information regarding your existing network setup. Please follow the steps below to obtain your current IPv4 Address and the Default Gateway.
- Press Windows Key + R on your keyboard.
- Type in cmd and press Enter.
- A black window with white lettering will appear. This window is called the Command Prompt.
- Within this window, type ipconfig and press Enter.
- The window will display a list of information about your network.
- Write down both the Default Gateway and the IPv4 Address that is displayed for you.
Alternatively, you can find the IPv4 Address and Default Gateway by navigating Windows: Control Panel > Network and Internet > Network and Sharing Center > Connections (the blue text saying either Local Area Connection or Wireless Network Connection) > Details.
Both IP Address and Default Gateway should be a series of numbers, clusters separated by full stops.
The format will probably look like this: xxx.xxx.xxx.xxx
Or like this or similar: xxx.xxx.x.x
Next, please log into your router. To do this, open up an internet browser of your choice (for example Google Chrome, Mozilla Firefox, Internet Explorer or any other) and type in your Default Gateway address in the URL search bar. Press Enter. It may take some time but eventually a login page for your router should appear.
This login page will require you to input a username and password. If you remember setting up a custom username and password combination for your router, please input that information in the proper fields. If you did not set up a custom username and password combination, the factory settings will probably apply. Check your router or its manual for a default username and password.
For some routers, the username and password fields are not required in order to log into the router. In these cases, simply pressing Enter with both fields blank may allow you access to edit your router settings.
After successfully logging into your router, you will be able to begin the port forwarding process.
You will notice that you can navigate between several different tabs or pages within your router’s interface. Locate a page or tab called Port Forwarding or Virtual Servers (additional names for the correct tab may include NAT or Applications). The correct page will allow you to input several pieces of information such as Single Port Ranges, Protocols, and Local IP Addresses.
If the page you are on has the option to input a second port range or an external IP field, you are on the incorrect page. Once you locate the correct port forwarding page, you can input your desired ports in the Single Port Range fields.
For the Protocol fields, you will need to select or input UDP, TCP, or Both. For the Local IP fields, you will need to input the IPv4 address that you obtained earlier.
These are the ports you need for Ghost Recon: Wildlands:
Uplay PC
- TCP: 80, 443, 14000, 14008, 14020, 14021, 14022, 14023 and 14024.
Game Ports
- UDP 3074 to 3083
After inputting all of your desired ports and their respective Protocol and Local IP values, you can Save or Apply the changes that you have made to the page and close your browser. At this point, please test if the issue in your game persists.
Please keep in mind that these steps reflect the most common way to configure port forwarding. It is possible that the steps will differ for you. For example, some routers cannot be accessed via a browser page but require a dedicated router app. Other routers cannot be accessed by using the Default Gateway but a specific address instead (for example hub/admin). If the steps described above do not work for you, I recommend that you check your router’s manual for assistance or contact your Internet Service Provider.
Resetting your Hosts File
The hosts file is a small text file which is part of the Windows operating system. It can be used to route online traffic or sometimes block a website. To rule out the hosts file as a possible cause when experiencing issues with the multiplayer part of a game, it should be cleaned or reset.
Resetting your hosts file is easy!
- If you use Windows 7, 8 or 8.1, please follow the steps in this Microsoft Article.
If you use Windows 10, please try the steps below:
- Navigate to c:WindowsSystem32driversetc
- Find the file hosts in this folder and rename it to hosts.old
- Create a new default hosts file:
- Right-click into an open space in the folder, select New > Text document
- Enter hosts for the filename, press Enter
- You will be prompted to check the file name extension. Click Yes to confirm that the file name extension will not be .txt
- Open the new hosts file in Notepad
- Copy the following text into the file and save file:
# Copyright (c) 1993-2006 Microsoft Corp.
#
# This is a sample HOSTS file used by Microsoft TCP/IP for Windows.
#
# This file contains the mappings of IP addresses to host names. Each
# entry should be kept on an individual line. The IP address should
# be placed in the first column followed by the corresponding host name.
# The IP address and the host name should be separated by at least one
# space.
#
# Additionally, comments (such as these) may be inserted on individual
# lines or following the machine name denoted by a ‘#’ symbol.
#
# For example:
#
# 102.54.94.97 rhino.acme.com # source server
# 38.25.63.10 x.acme.com # x client host
# localhost name resolution is handle within DNS itself.
# 127.0.0.1 localhost
# ::1 localhost
Flush DNS
The DNS cache stores the IP addresses of web servers that contain web pages which you have recently viewed. Sometimes these will contain obsolete information or bad results and need to be cleared to improve communication with web servers.
Please follow the steps below in order to flush your DNS cache. For each version of Windows, I recommend that you run the command prompt as Administrator user due to system security permissions.
Windows 10
- Ensure that you are on the Windows 10 desktop.
- Right click on the start menu and choose Command Prompt (Admin) from the menu.
- Type in the command ipconfig /flushdns
Windows 8 / Windows 8.1
- Make sure you are on the Windows 8 Start Screen.
- Simply type cmd and the Windows search bar will appear on the right hand side with search results.
- Right click on Command Prompt and click Run as administrator.
- Type in the command ipconfig /flushdns
Windows Vista / Windows 7
- Click the start button and navigate to the command prompt (Start > All Programs > Accessories > Command Prompt).
- Make sure that you right click on the command prompt application and choose Run as Administrator.
- Type in the command ipconfig /flushdns
Note: It is also possible to type in cmd into the Windows Vista / Windows 7 start menu search field and then right click on the cmd.exe result rather than having to navigate through the various sub-menus.


Be the first to comment