
The whole map, with all pickups, bosses, spirits, lore texts, etc marked on. This awesome map was created by Demajen.
Full Game Map
Click to enlarge…

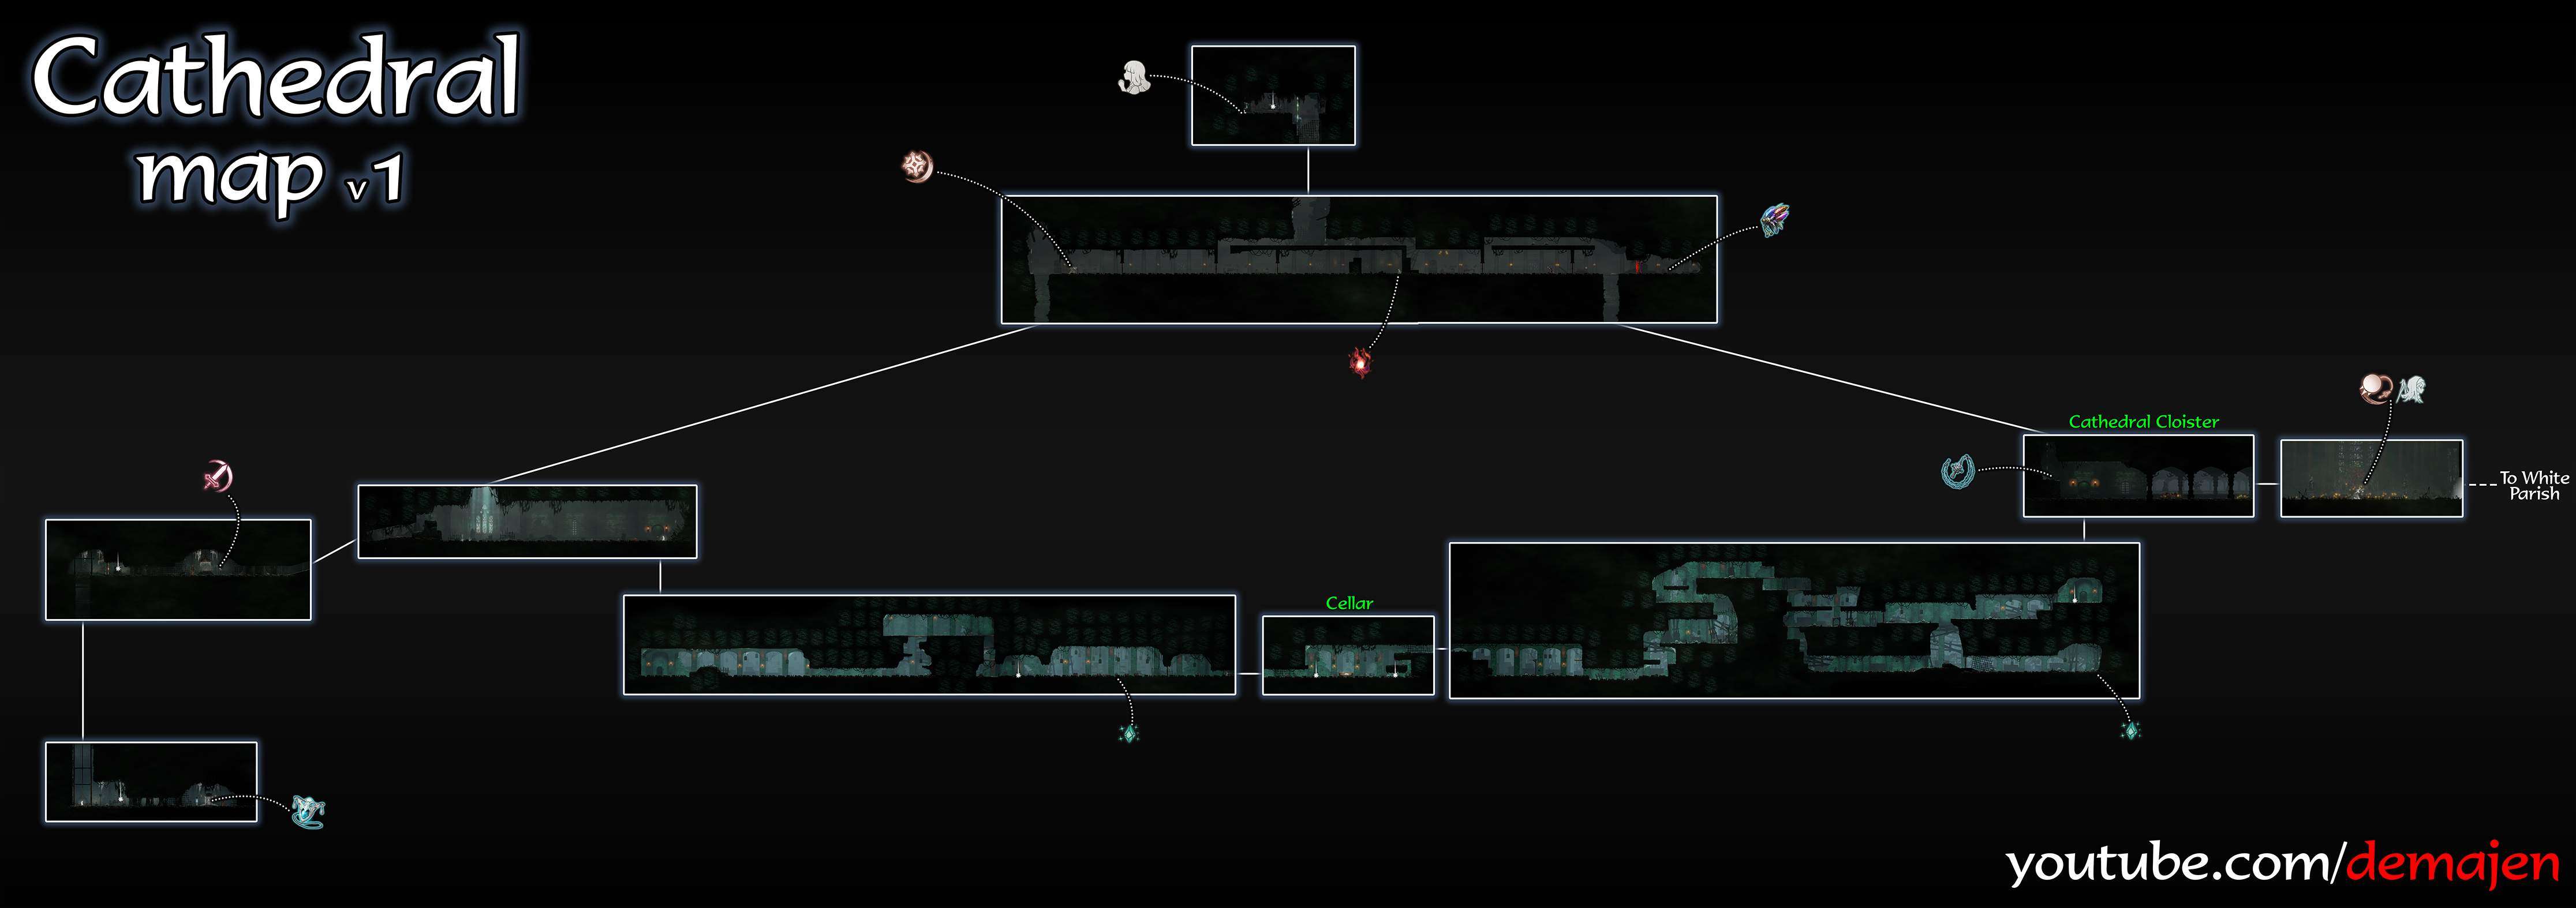
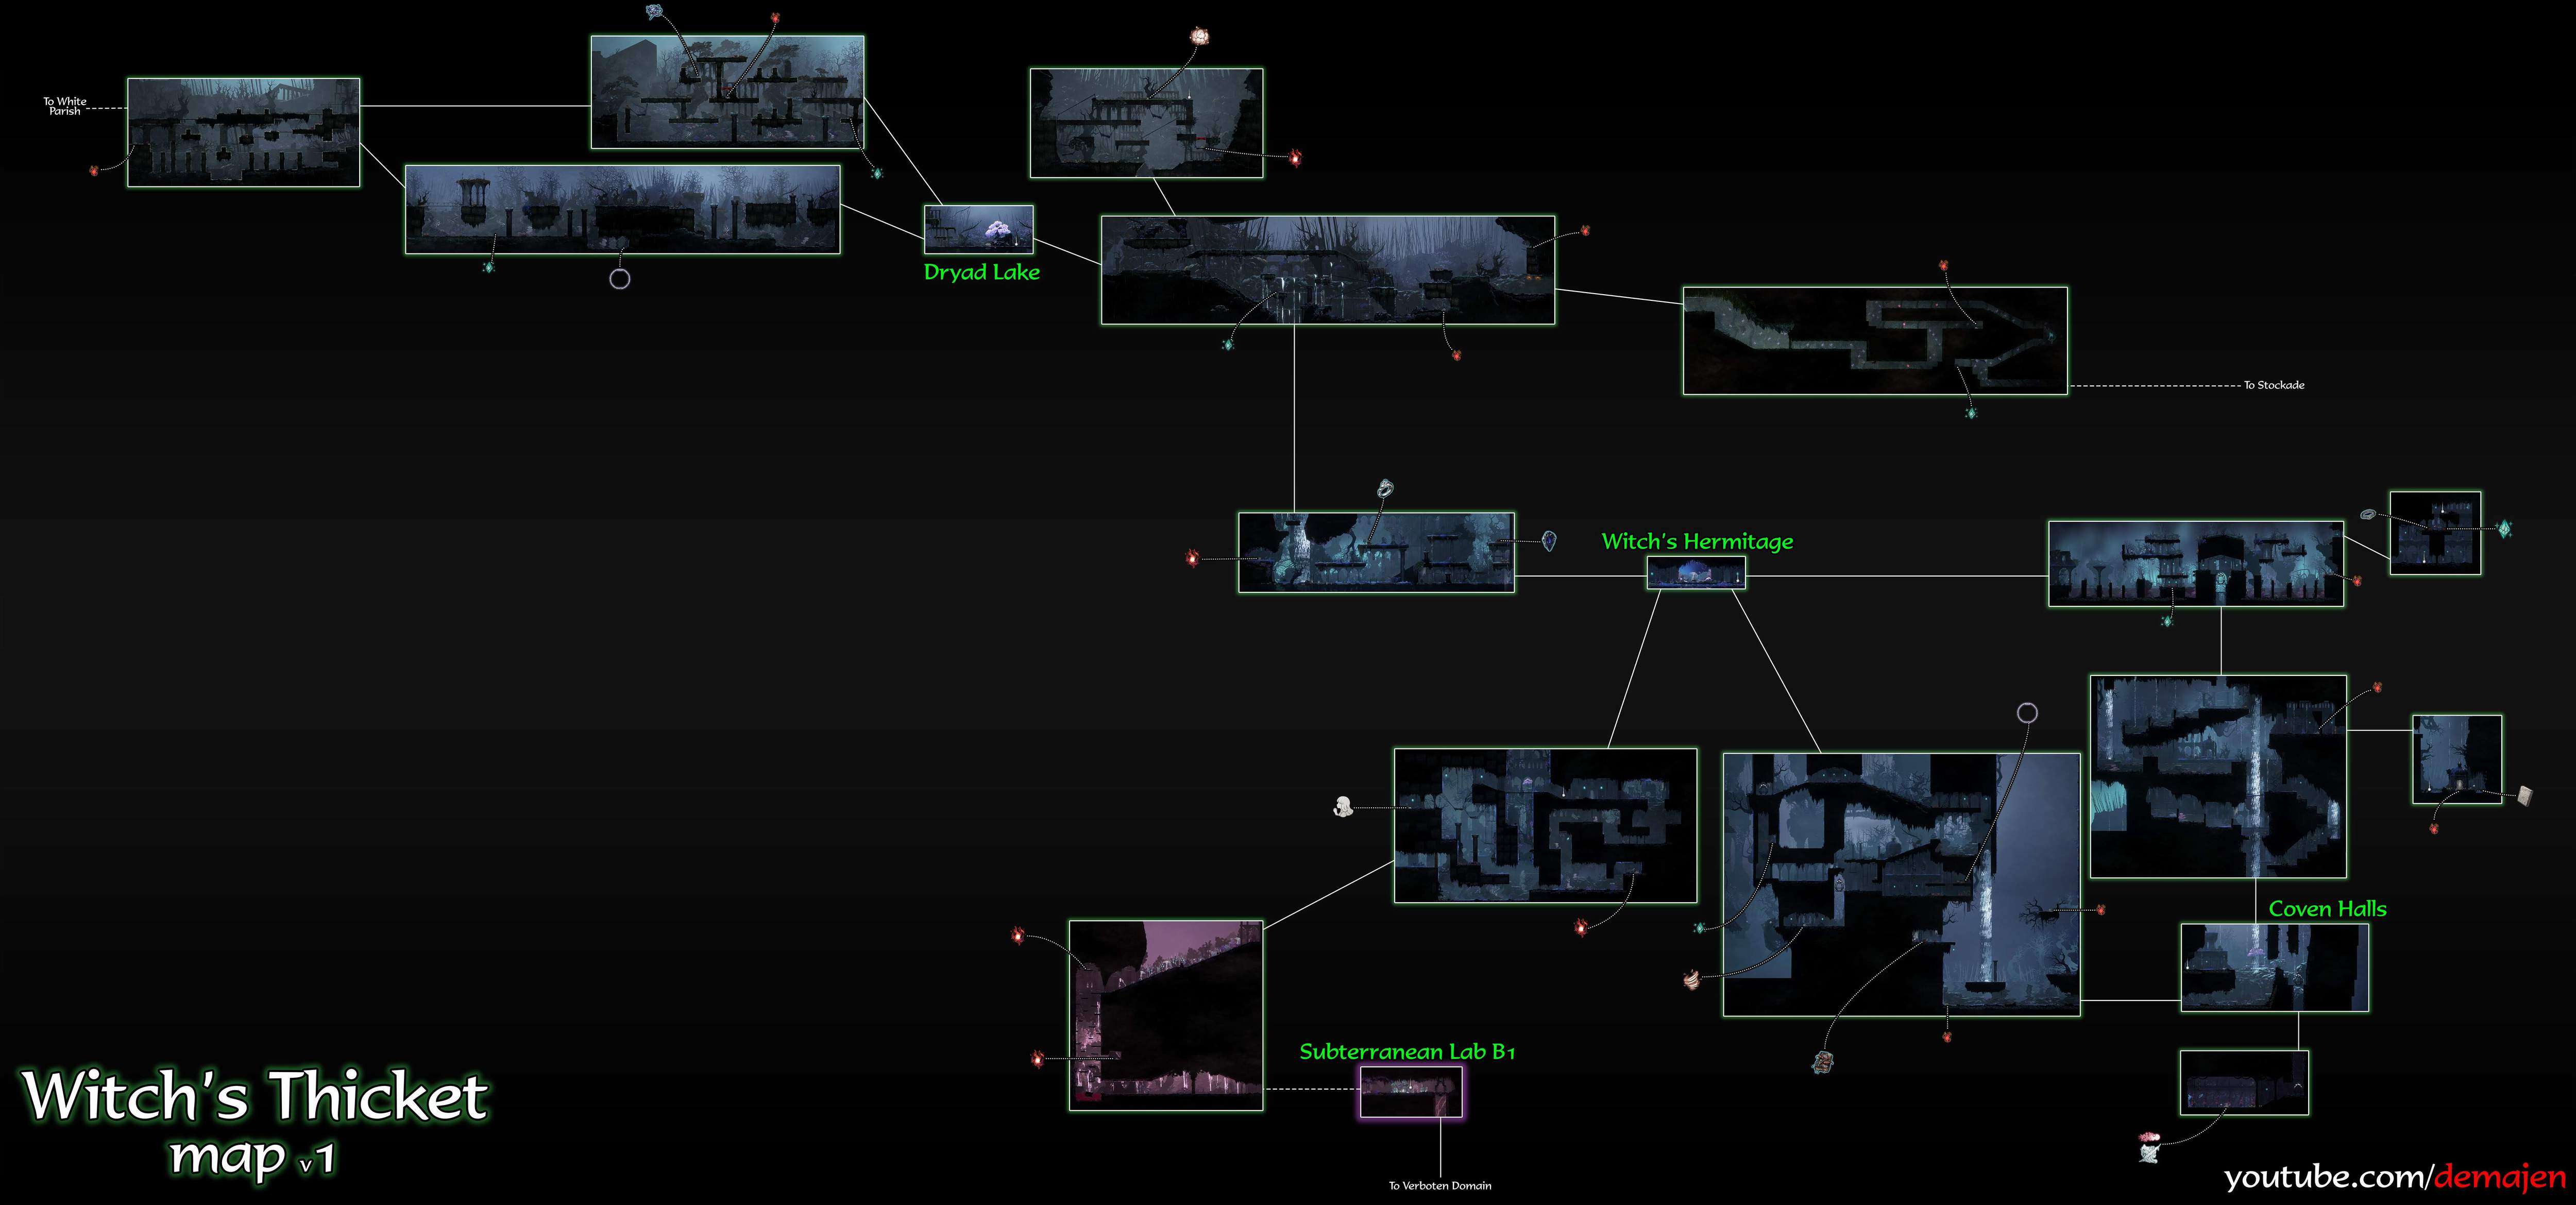
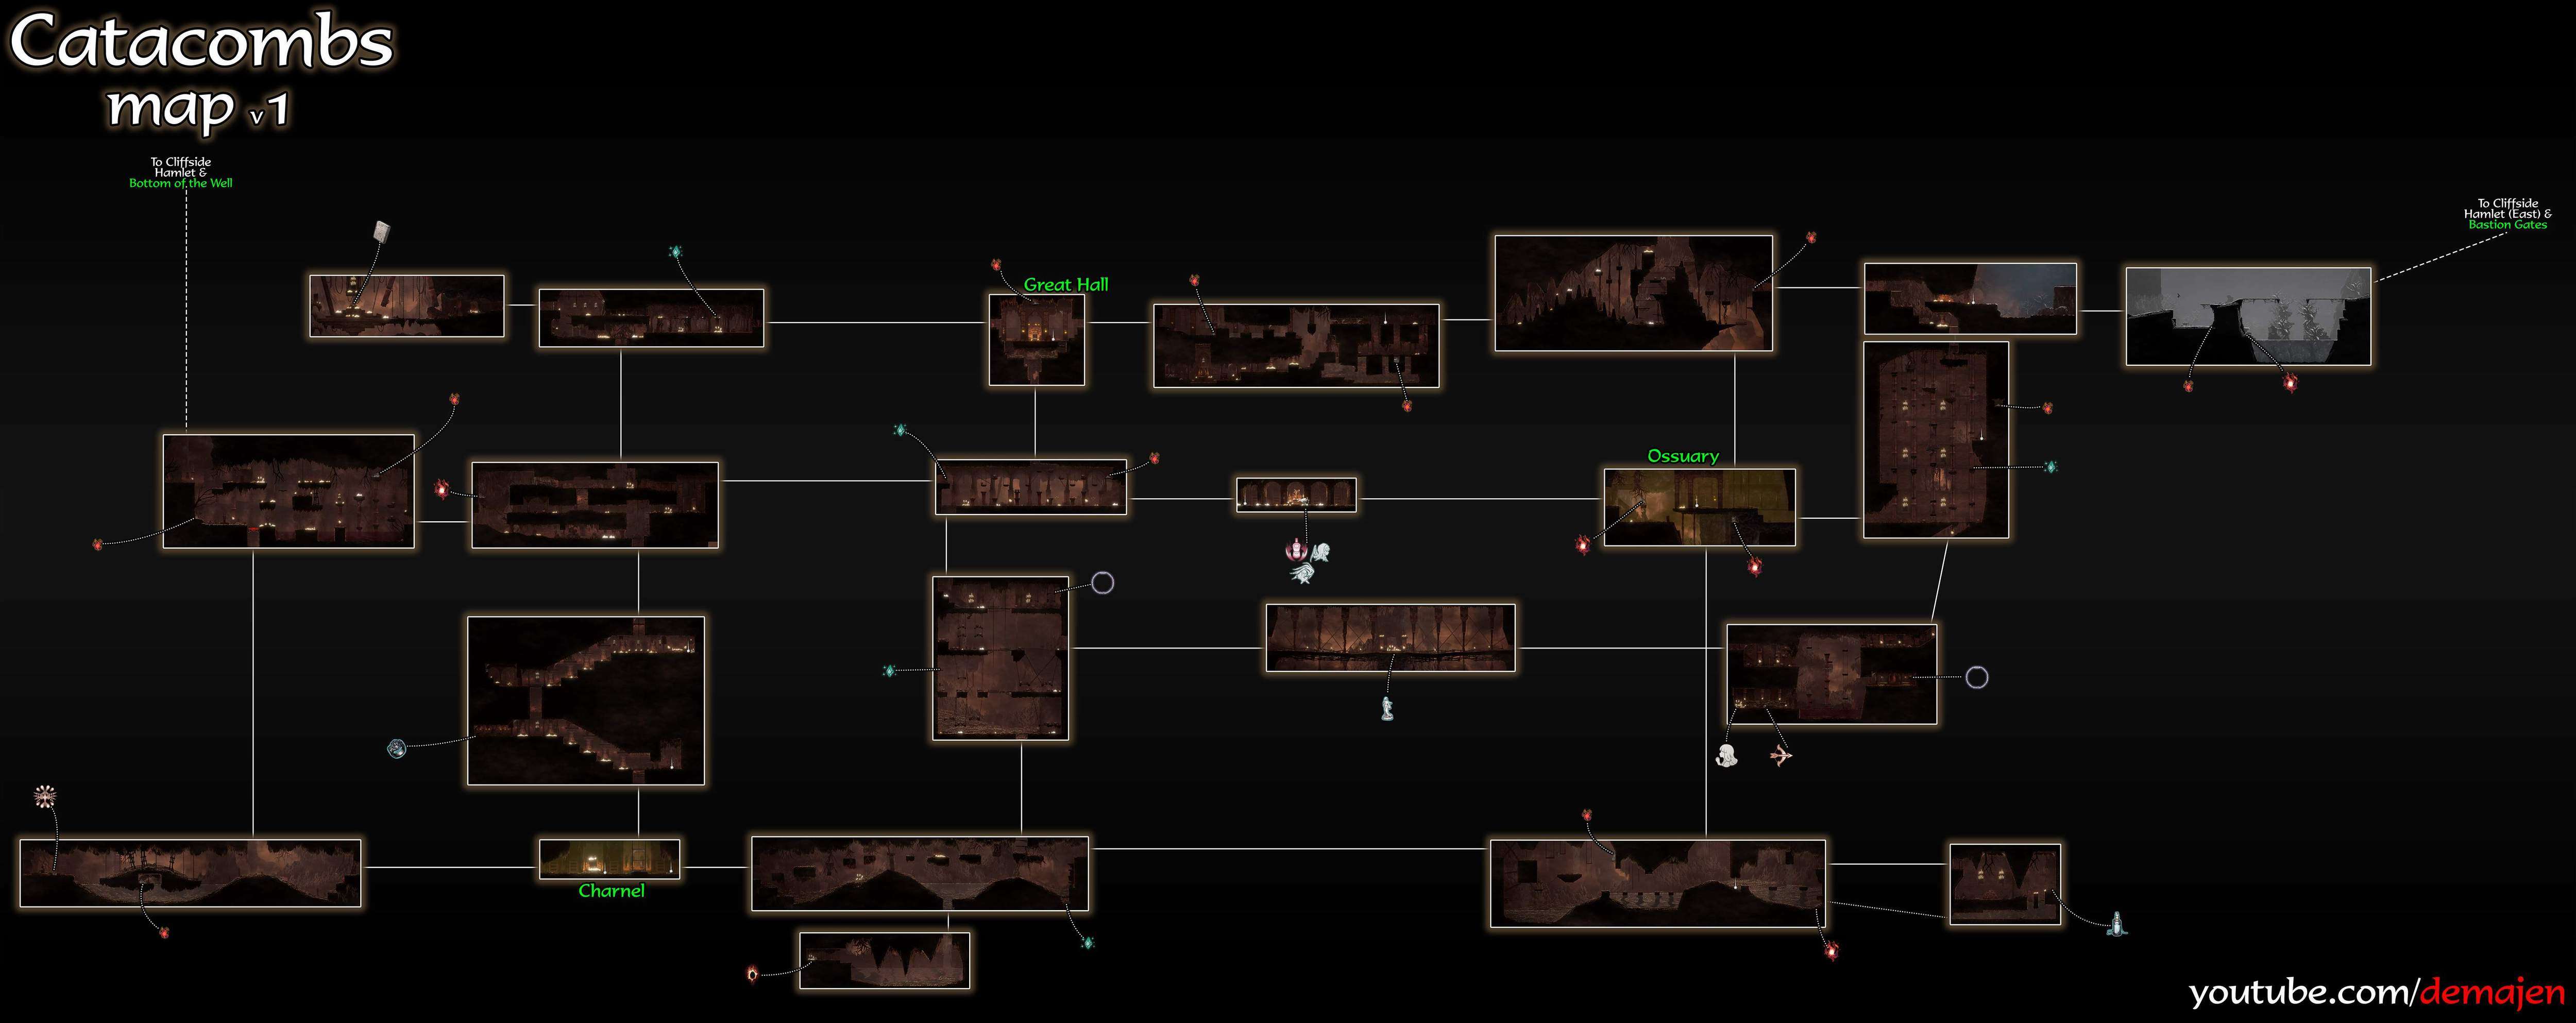
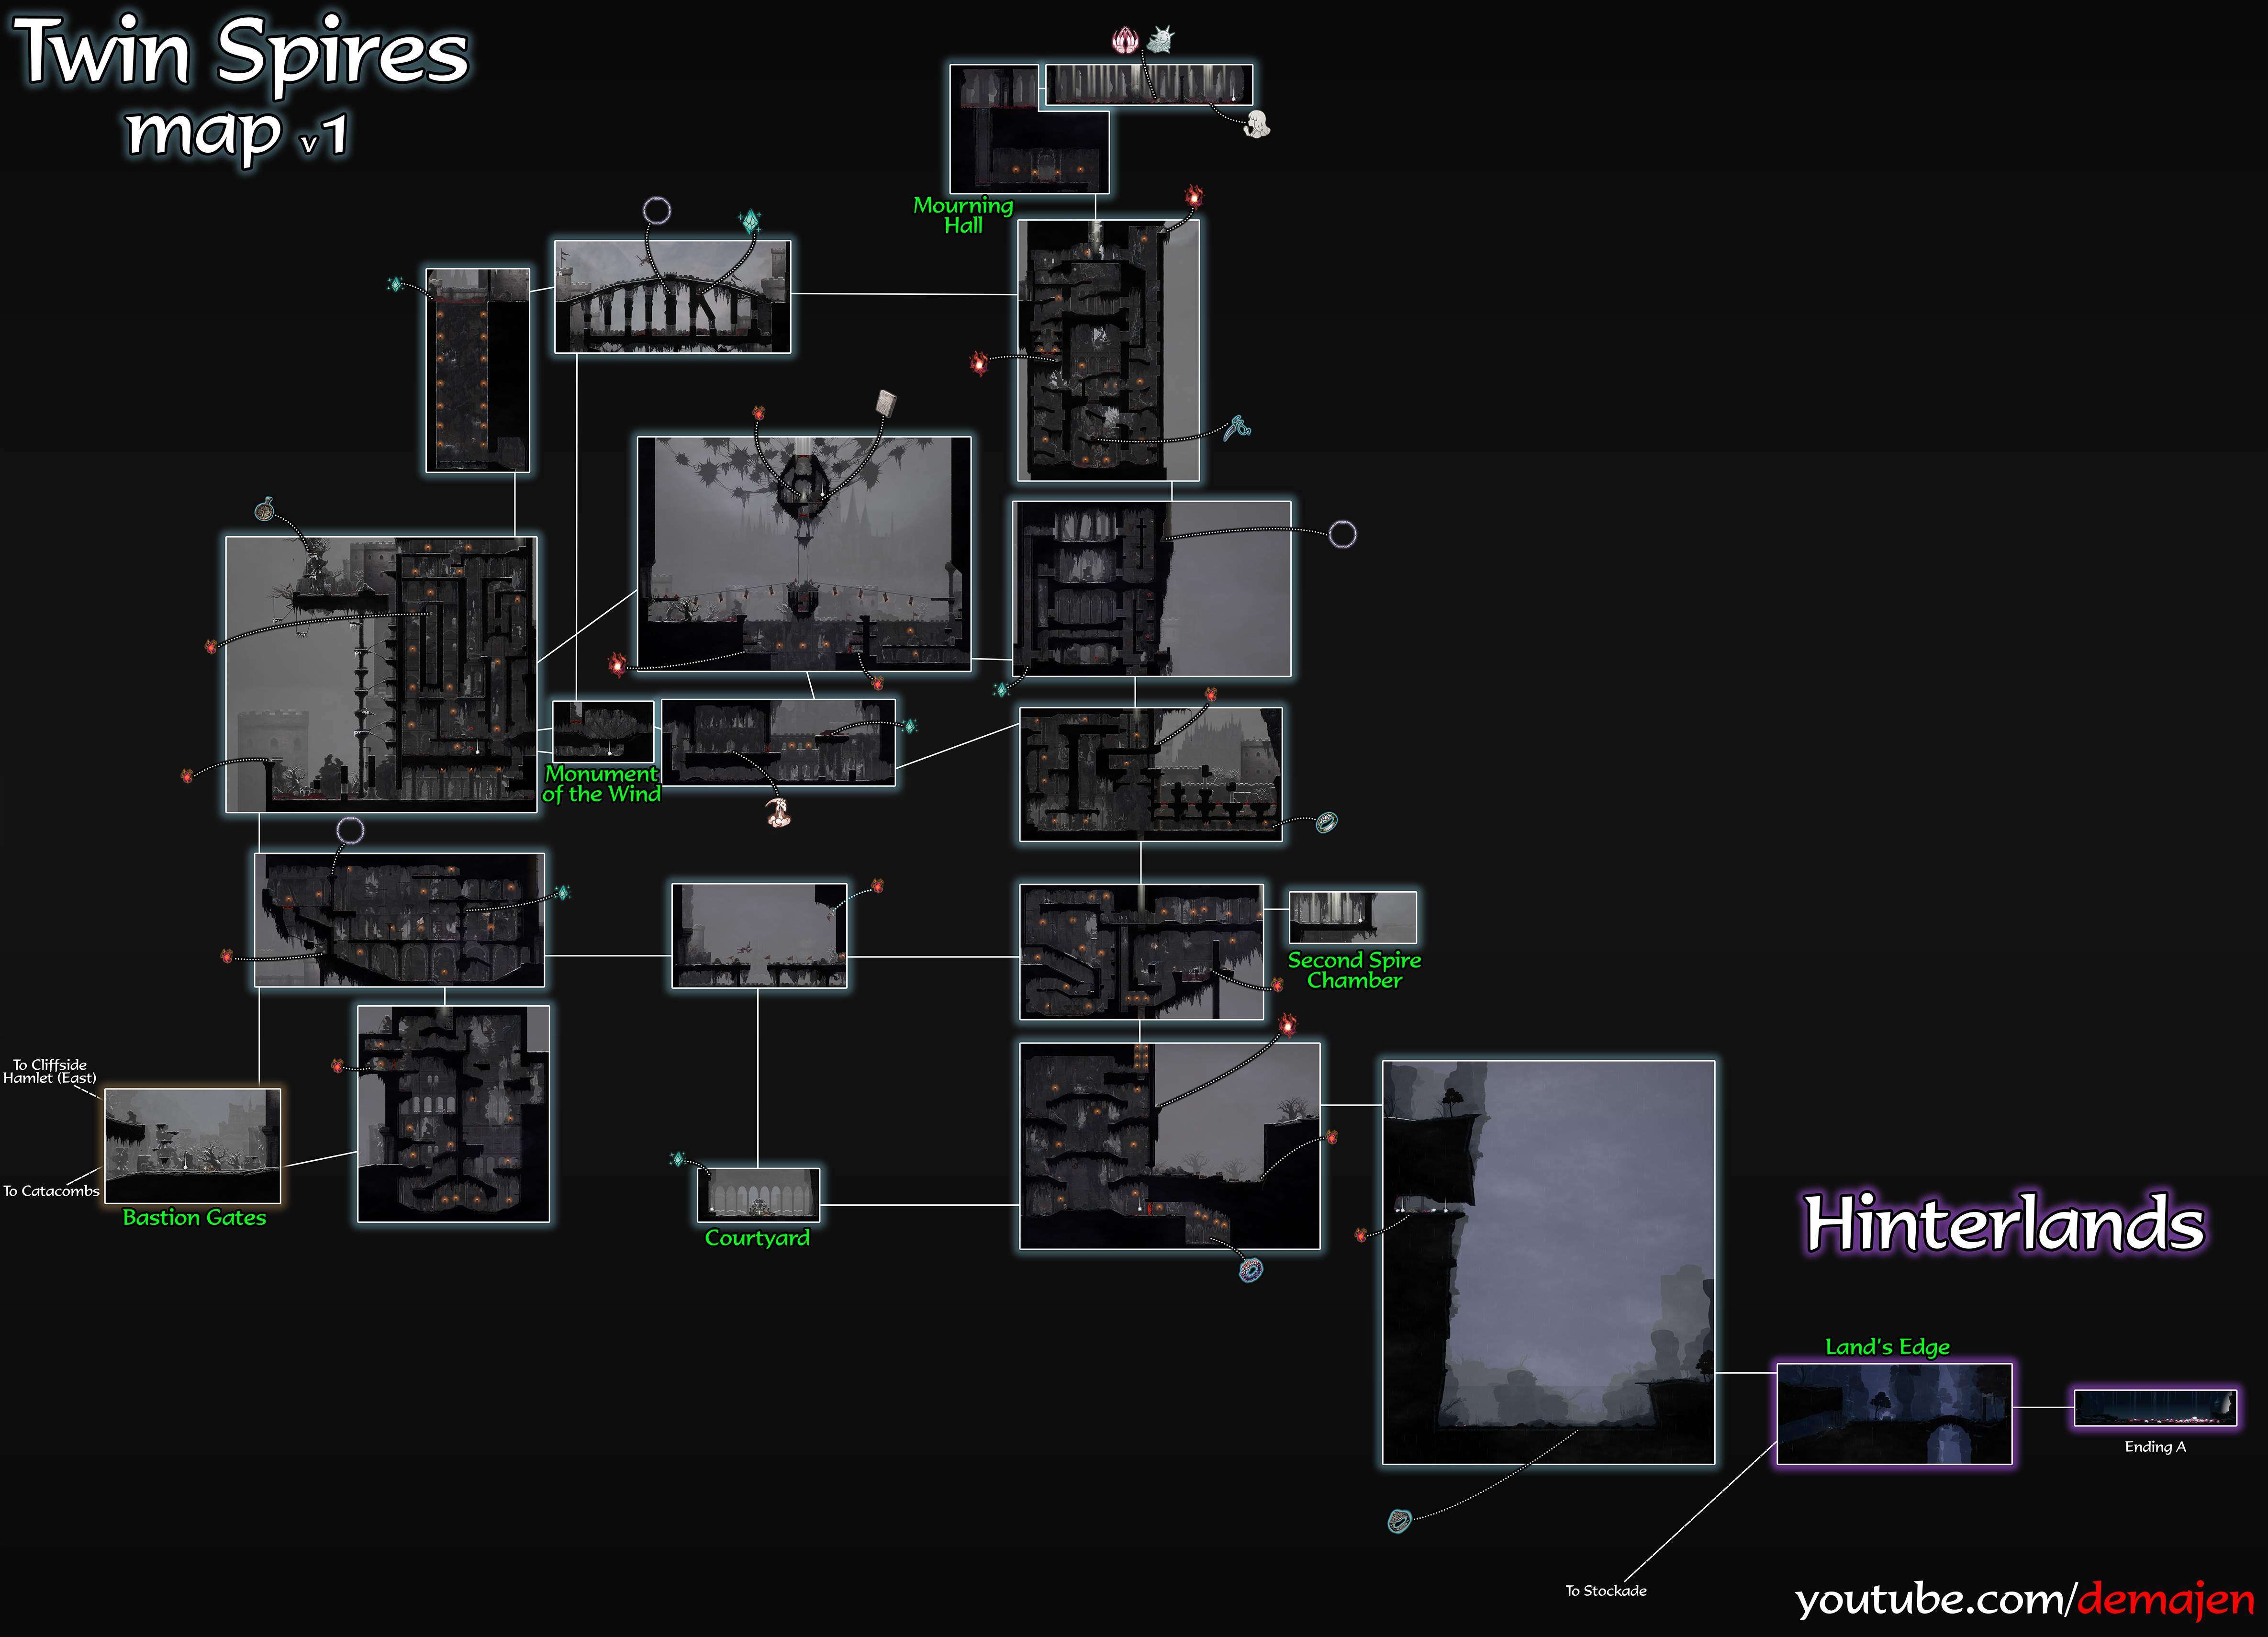
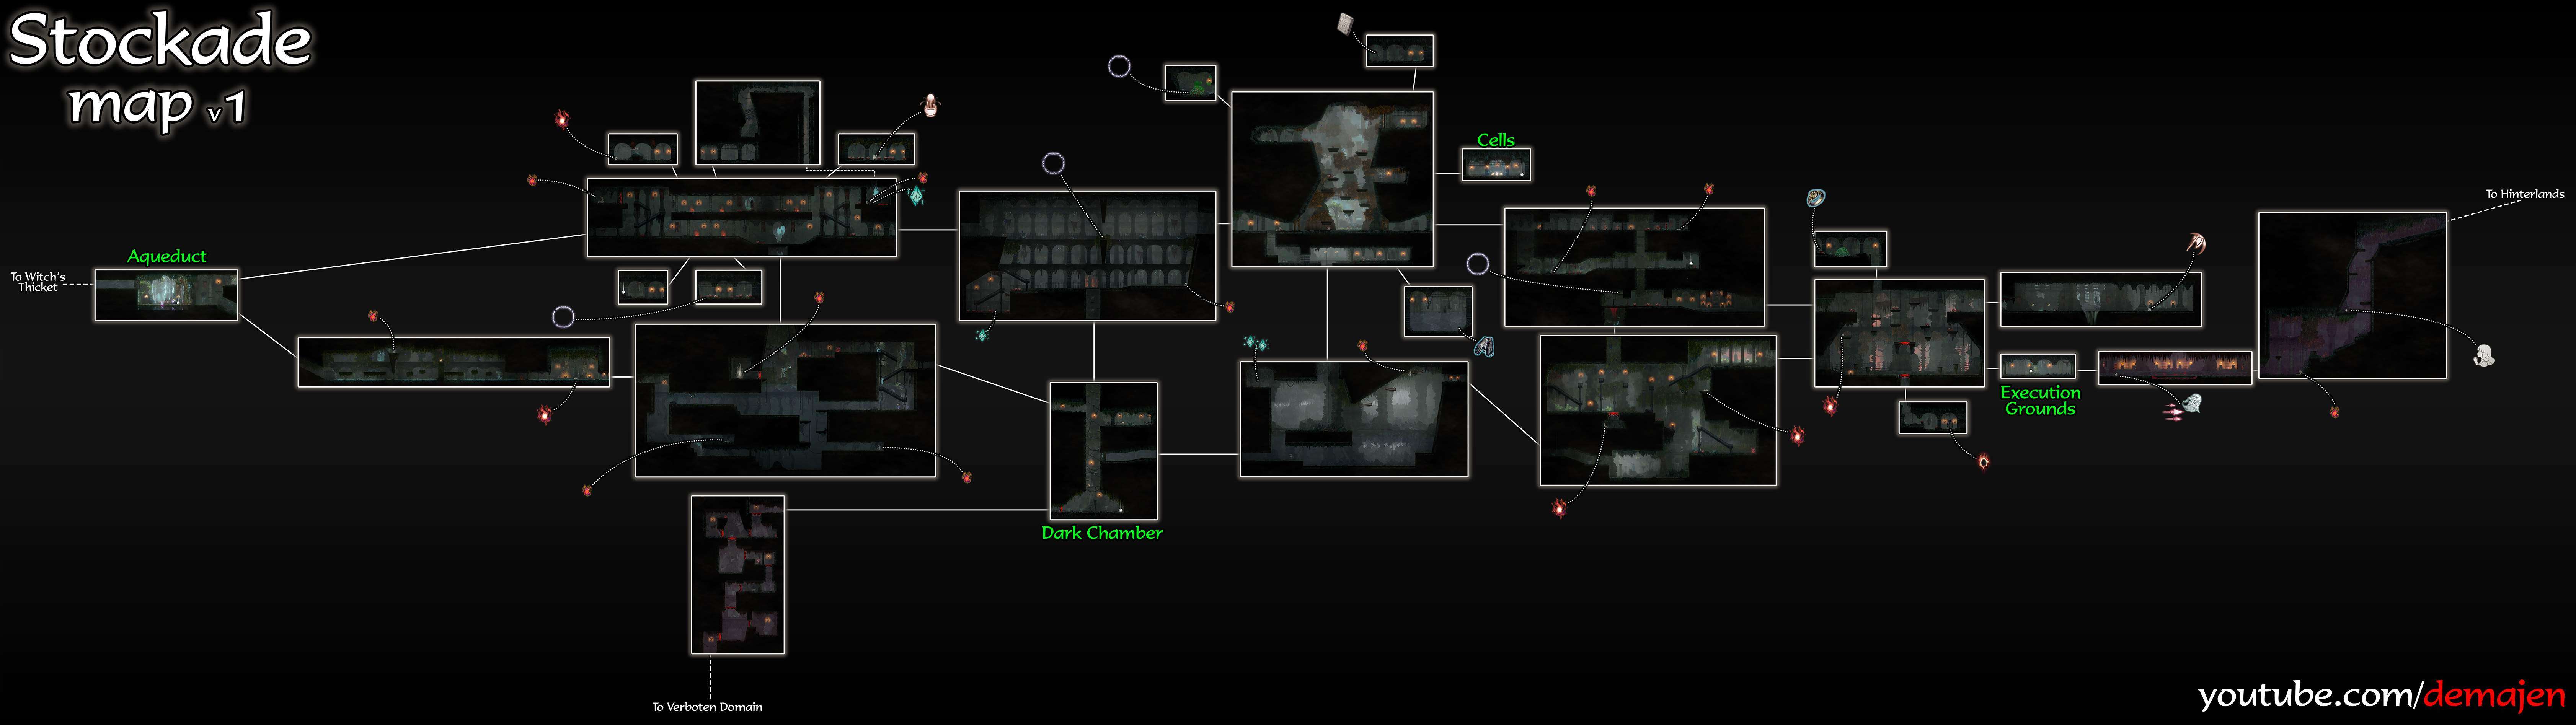
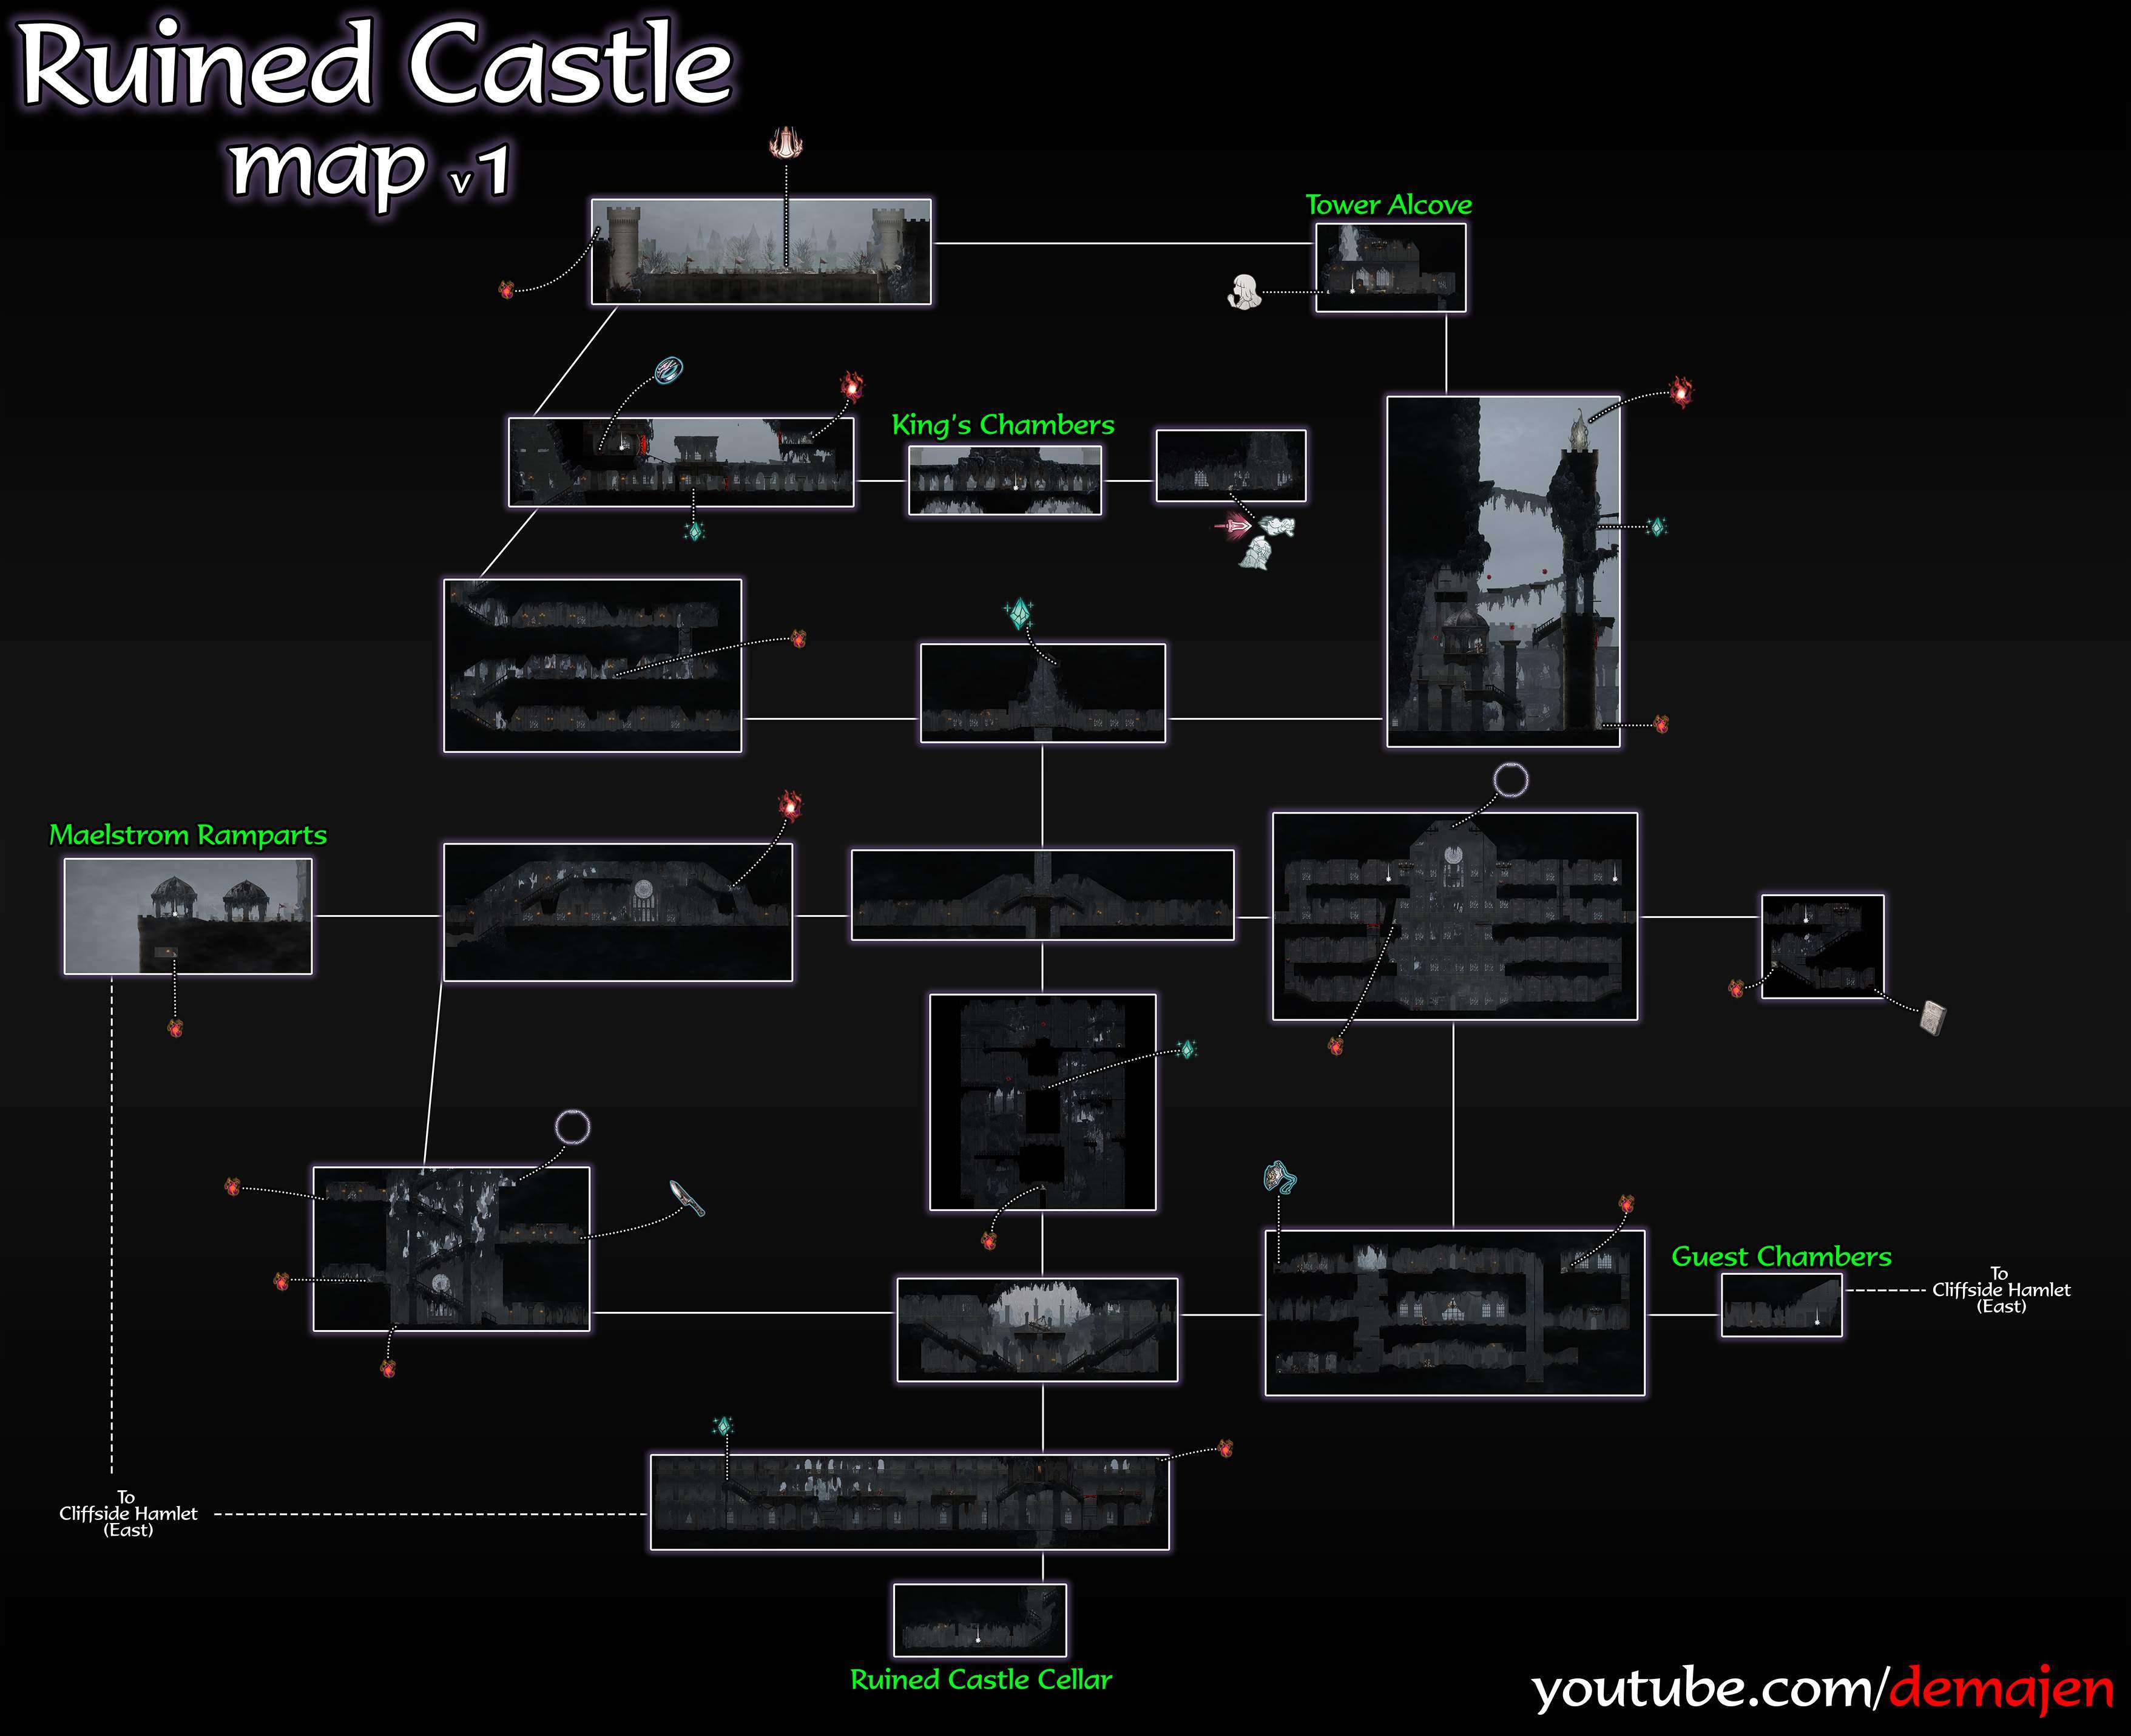
Individual Area Maps
I made these maps over about 4 hours each by combining many screenshots, similar to how I created my Carrion maps a few months ago.
Since I used my completed save file to create these maps, all doors were already open, all switches and levers were activated, and all breakable walls were destroyed.
I’ve manually added back all the red breakable walls – both the darker ones that don’t need much force and the brighter glowing ones that require a fully-charged spectral lance.
Note: The numbers on the maps don’t necessarily show the recommended progression order – though based on my skill level, they probably show the order I would tackle them in.
01 – Cathedral
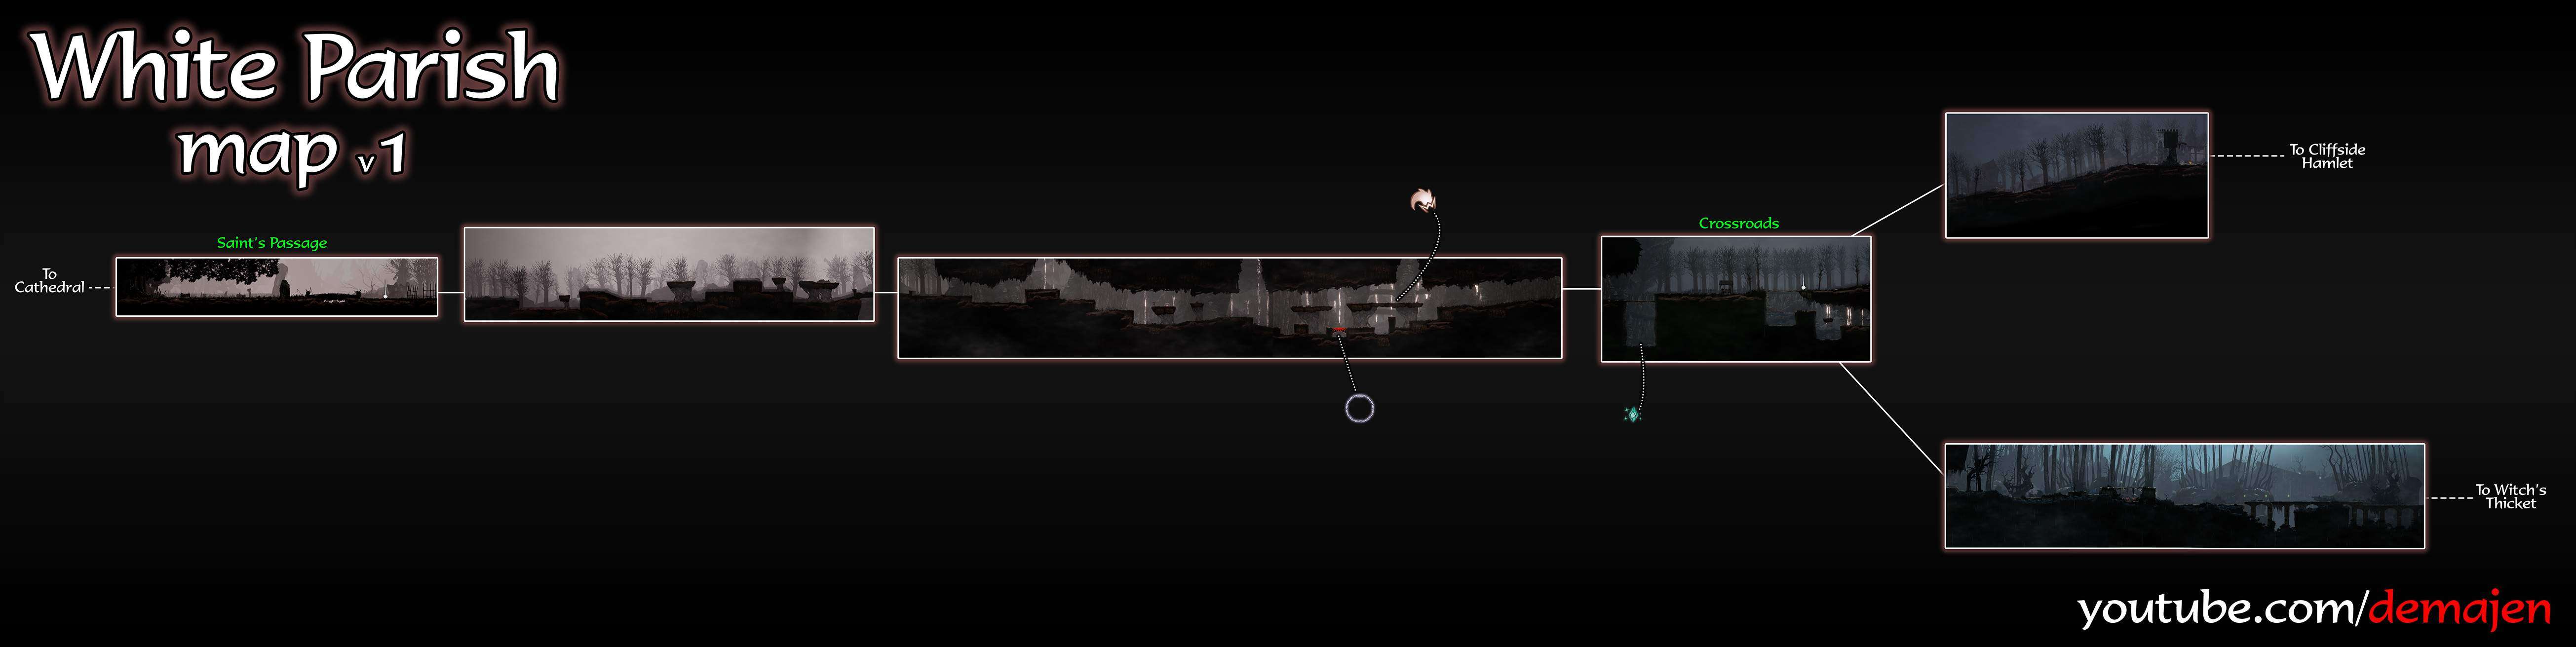
02 – White Parish
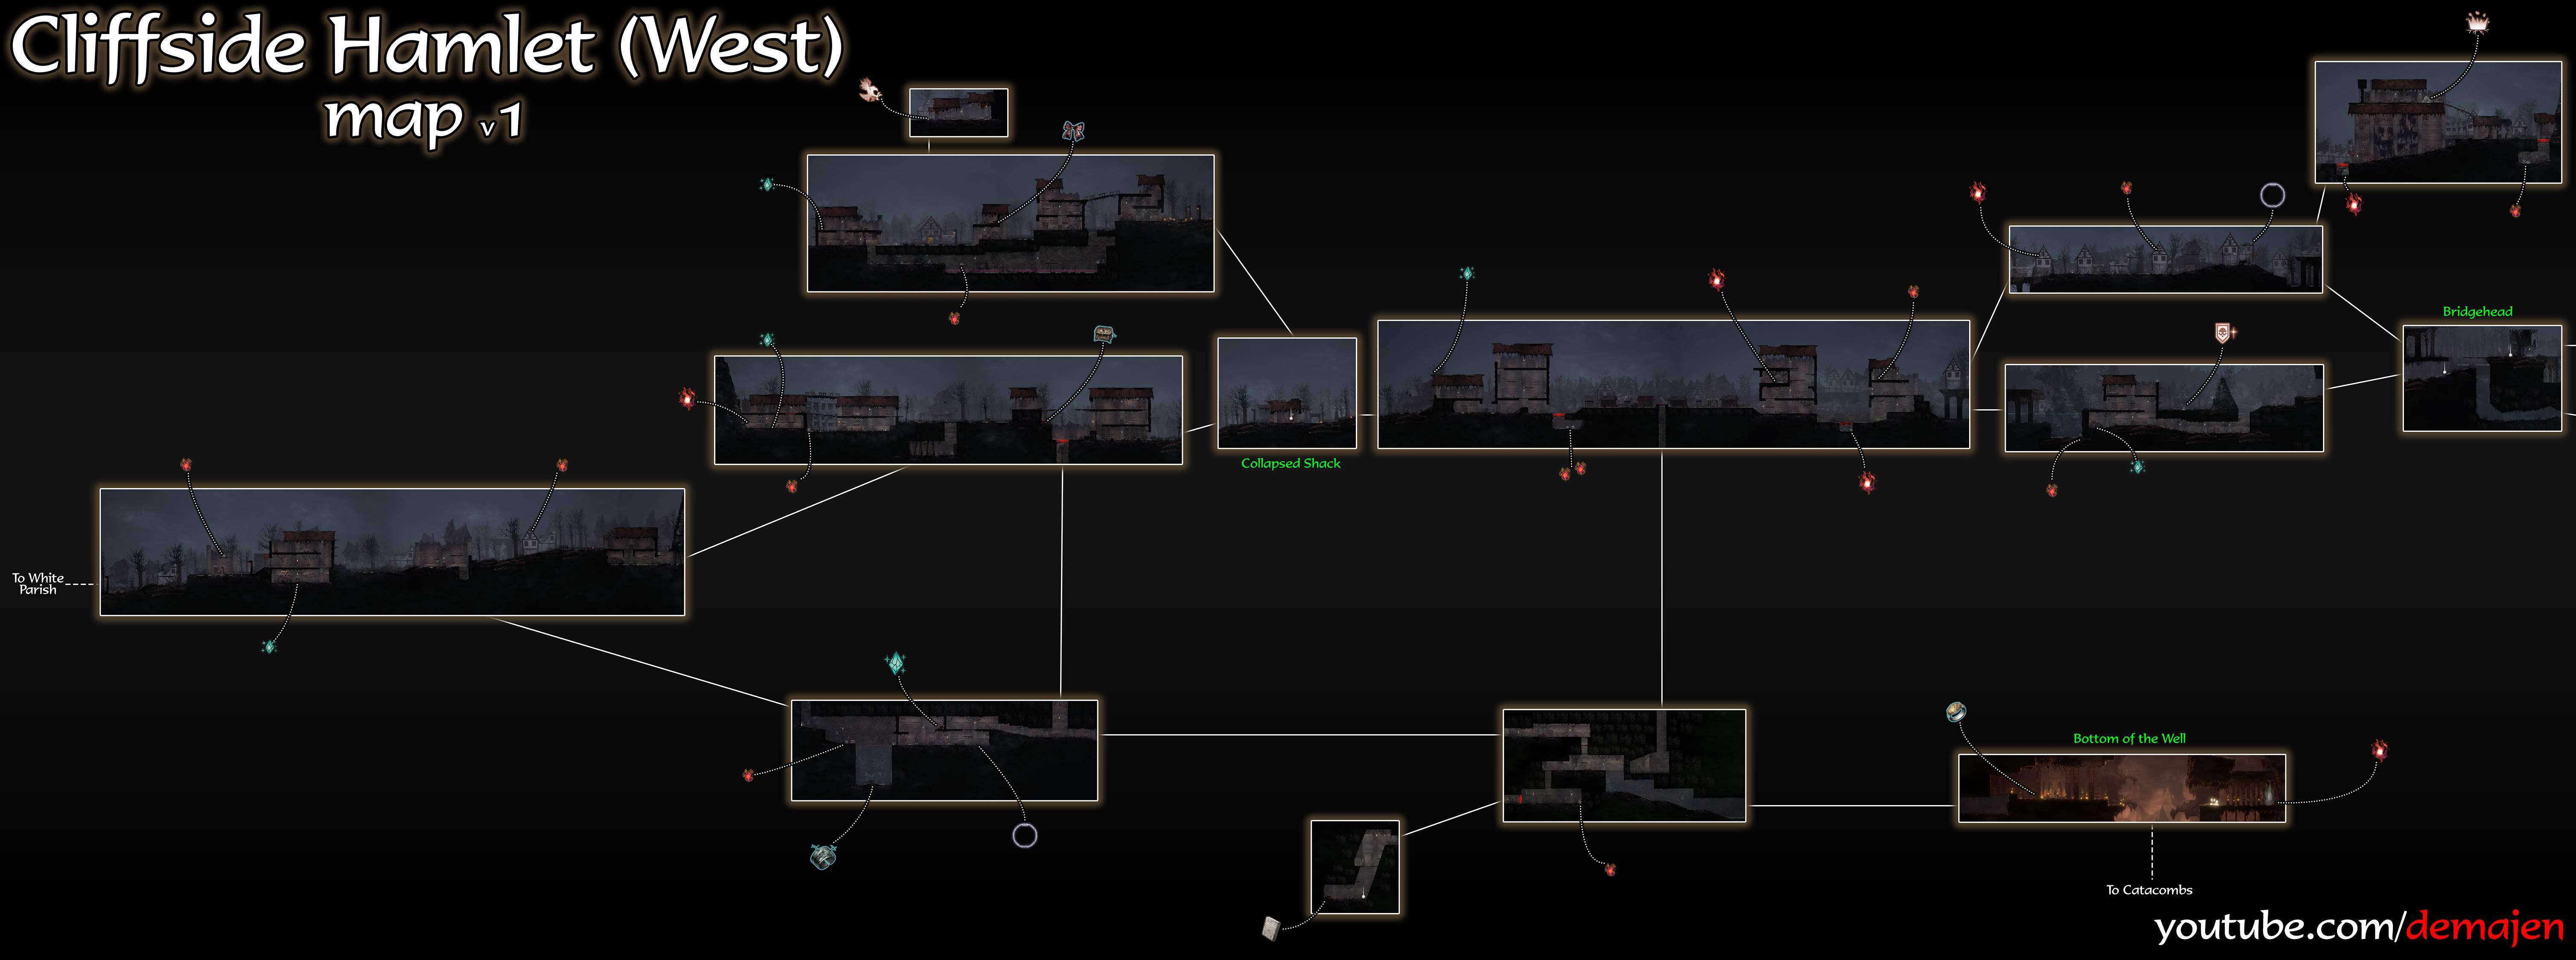
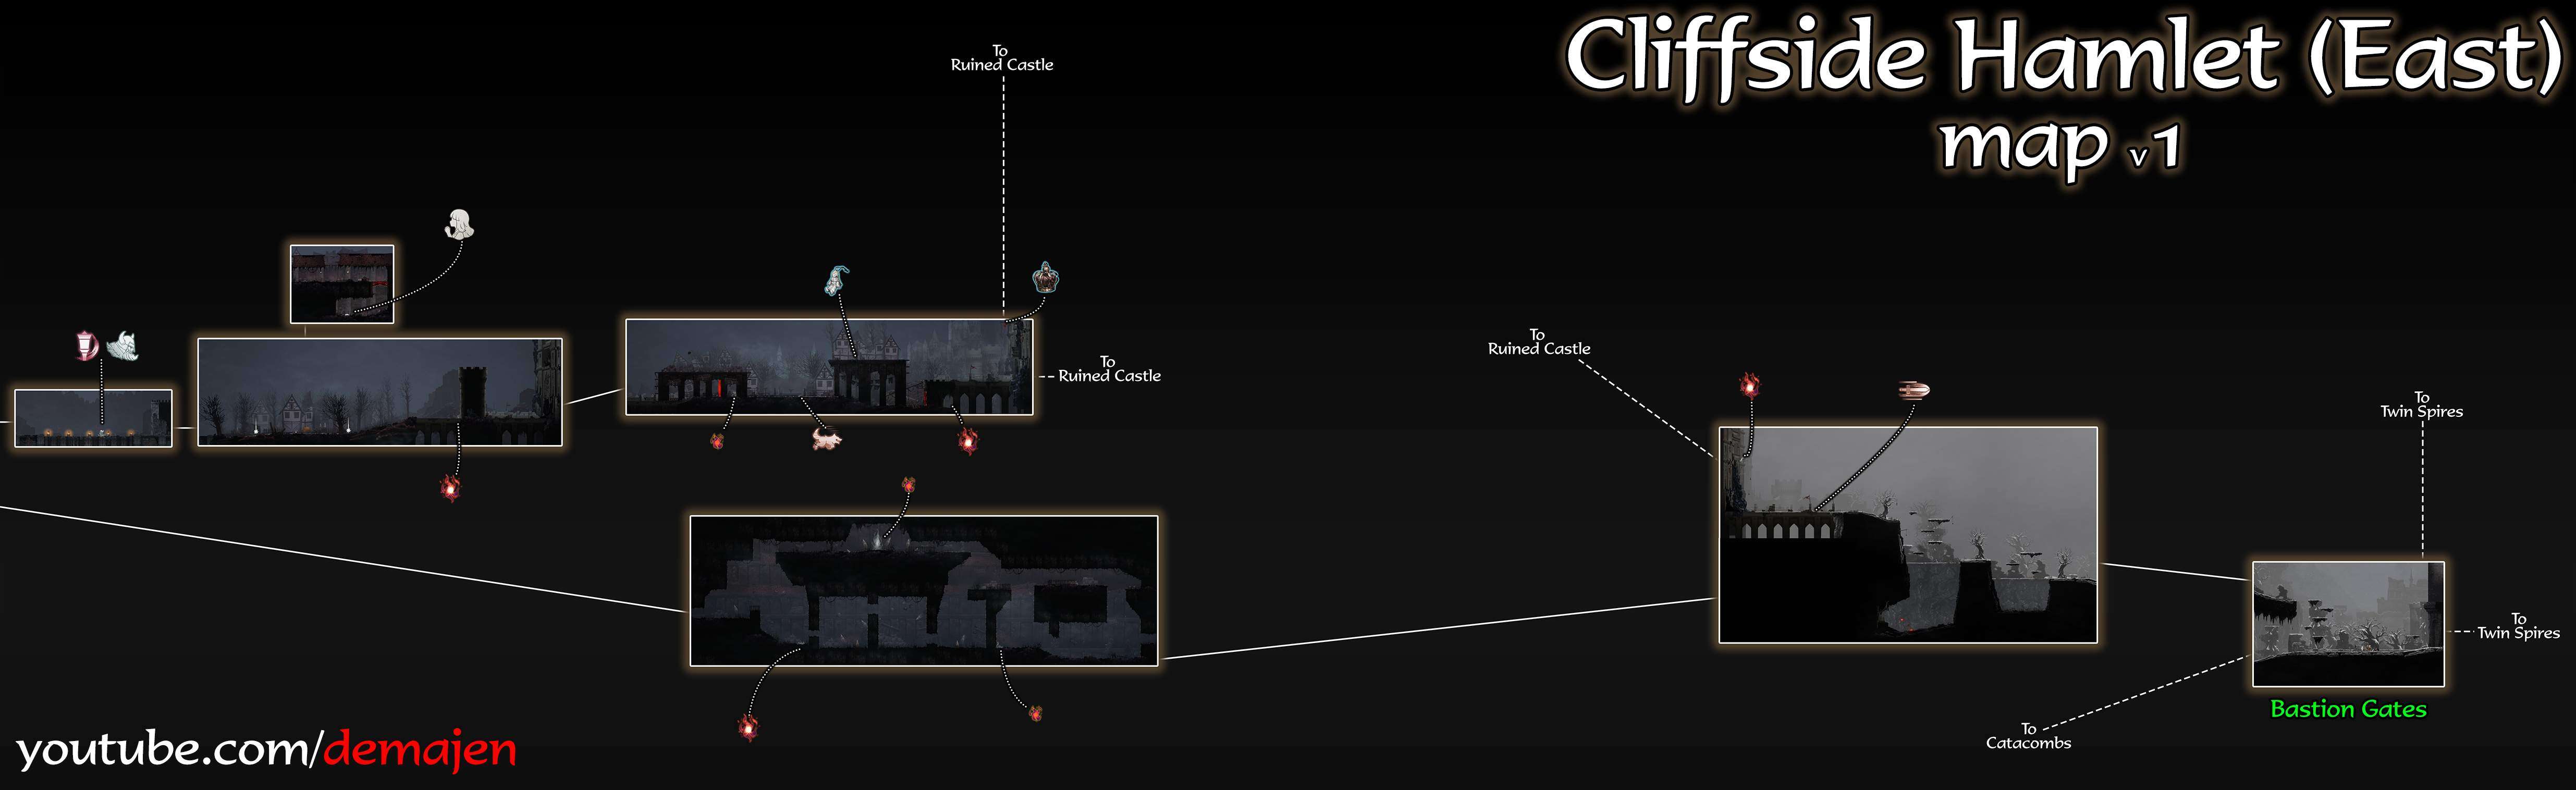
03 – Cliffside Hamlet
04 – Witch’s Thicket
05 – Catacombs
06 – Twin Spires & Hinterlands
07 – Stockade
08 – Ruined Castle
09 – Verboten Domain & The Abyss


Thank you for making these maps. They were excellent and helped me platinum the game.
I must mention on the 9th map the room after the subterranean lab B3 there is a purifiable body on the left wall which is placed wrong. It should be a layer under where its placed just above the entrance to the bench not the entrance to the room from above. hope this helps anyone struggling to find it like me 🙂
Thx for the guide, some of these collectibles are hidden way too well :/
would you happen to know the best areas on the map for grinding blight for upgrades? I kind of did an idiotic thing and divided my blight equally among all of the abilities so as a result I have a bunch of level 4 and 5 things and need a bunch of blight in order to get the achievement for getting 5 spirits to max level. it’s the only achievement I have left to get.
pretty minor, but in the verboten domain map, in the room just to the east of lab B3, the blight is found at the end of the tunnel below the one it’s portrayed to be in (right above the entrance to the lab)
Thanks man, I’m almost desperate xD
Thank you very much, I was going crazy looking for the amulet that I needed
will the last area of the final boss always stay blue on the map? i cleared all endings and have all achievements, yet its still blue. thx for this amazing guide, helped me so much 😀
Thanks for all the good work on this guide plus the detailed map!
Thank you so much for all your effort! It was thanks to you that I was able to obtain the 100% of the game! You’re great!! <3
This is amazing work! One thing I personally would appreciate was a list of relic names along with the general location for each relic. That would make it a lot easier to find a relic you know about but can’t recall in which area it is. The full map shows their names, cost and function but the map is quite large so it can take a while to go through each blue text on the full map just to find the one you are looking for, and the area maps are using icons instead of relic names or descriptions. This is why I think why it would be really helpful to have a list of relic names, function and general location. For example something like: White Priestess Statue, Healing Prayer +1 (Catacombs). Then one could find the relic in the list and go to Catacombs area map or full map to look for more details such as slot cost or where it is located in the area.
Thank you so much for this I was tearing my hair out looking for a last couple items.
Thank you for the great work you do in creating this kind of maps.