
A guide to help newer players better understand the game and how to succeed without telling them how to play. Structured as a FAQ so you can skip around to just the parts that interest you.
New Player FAQ
Preface
What is this?
This is a guide to help you understand some of the less obvious mechanics and rules in Battle Brothers, and to impart some broad tips and tricks I’ve picked up along the way.
If you enjoy the game (or want to enjoy it) but struggle to make money or survive past day 30, this is for you.
What is this not?
A strategy or build guide. I won’t tell you how to beat specific enemies or what formations to set up or what perks you should take or anything like that. I think build guides tend to put blinders on newer and struggling players – I encourage you to instead come up with your own builds and see what works and feels good.
Why does this exist?
I think a lot of Battle Brothers guides suffer from being too technical and too bogged down in specifics with builds, strategies, and ironclad rules about how you “should” play the game. I wanted to make something less prescriptive. My hope is that you will find this guide informative, straightforward, and to the point.
No need to read this top to bottom or all in one sitting. I’ve structured it as a FAQ so you can jump around to specific questions you’re interested in and skip ones you don’t care about.
How do I make money?
The single dirtiest secret in Battle Brothers is that you don’t make money by completing contracts; you make money by being an arms dealer. If it ever seems like you aren’t getting paid enough, remember that you get battle loot and salvaged enemy equipment on top of that payment.
At a certain durability/value ratio, you make more money by repairing items before selling them. You can fine tune exact values and come up with formulas, but here’s an easy guideline: Repair “tier 2” weapons and above before selling them.
If you’re not sure what a “tier 2” weapon is, don’t worry – there aren’t explicit weapon tiers in the game, it’s just nomenclature the player base has adopted. Basically, if it’s a purpose built weapon and not just a farm tool, it’s worth repairing. Handaxes, not hatchets. Scramasaxes, not Meat Cleavers. That sort of thing.
Also, where you sell matters. Every town has its own price modifiers that adjust up and down over the course of the game. You’ll make very little money selling in a tiny village with the Terrified Villagers situation – you’ll make much more selling in a large city with the Ambushed Trade Routes situation.
There are other ways to fill your coffers, of course. Contracts will net you money and selling trade goods (and food) can absolutely turn a profit – but in my experience these are for managing your recurring expenses. If you want to grow your company by investing in particular gear or highly trained mercs or what have you, those funds come from selling weapons.
This probably goes without saying, but you should keep the best weapons for yourself to use.
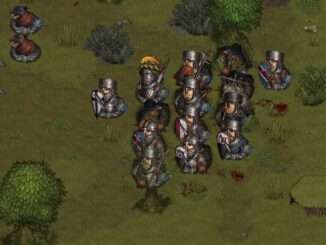
How do I deal with losses?
One thing to get out of the way first – it’s ok to lose some bros. Obviously you don’t want to lose anyone, but sometimes it happens and that’s fine.
This is especially true in the early game. It is very much worth it to send that Cripple you hired yesterday for 30 crowns to his death if it gives your other bros the chance to take down a more dangerous opponent.
Early on, equipment is usually more important than bros. One common thing players do is try to fully kit out every man they hire in decent armor and equipment. I would recommend against this, as it gets very expensive. You’ll almost never lose a bro’s weapon when he dies, but if his armor gets destroyed it goes with him. A lot of campaigns end because players spend too much money on armor for bros who quickly die, and then on armor for their replacements, and then on armor for their replacements’ replacements, and so on. If you want to give that 30 crown Cripple a greataxe, go for it. Just maybe don’t give him your shiny new suit of chainmail right away.
You should expect to lose fewer men as you get further into your campaigns, as they’ll generally be better equipped and have a few levels under their belts. Often, dealing with a losses in a campaign is simply a matter of surviving the early game meatgrinder. If you still find yourself losing lots of men later on, that probably suggests a tactical error rather than your bros or equipment not being good enough. Try different approaches and see what works.
In both cases, keep a clear priority of who your most important bros are. Sacrifice the rest of your company to keep them alive if you need to. It’s all about calculated risk.
Who should I hire?
Again, something to get out of the way first: you don’t need great bros to beat the game’s content. Most hires are usable. I’ve taken Vagabonds and Beggars with permanent injuries into the hardest fights in the game, and they’ve come out alive – It’s just about using them correctly. A craven, dastardly cripple won’t ever be a good frontline fighter, but he might be a perfectly adequate ranged unit.
That said, there are two primary things to optimize for when hiring: cost, and value.
Often, you just need a warm body to poke things with a spear and eat a hit or two before dying. Don’t spend 400 crowns on a Farmhand or Thief for this purpose, hire a Beggar for 80. This is what I mean by “optimize for cost” – spend the least you can for the role you need.
Some backgrounds have really good stats relative to their hiring cost. In terms of raw stat ranges, Hedge Knights will almost always be better than Brawlers, but Brawlers are still really good and can be hired for less than 200 crowns, while Hedge Knights more typically cost a few thousand. This is what I mean by “optimize for value” – hunt for bargain hires.
You’ll develop a sense for what backgrounds you like over the course of your campaigns. You can check the game’s wiki[battlebrothers.fandom.com] for a detailed list of statlines, but if you’d rather not dig quite that deep, a more basic rule of thumb is that expensive backgrounds, and backgrounds that have experience fighting, tend to be pretty good. A Militia will typically be better starting out than a Historian.
Another thing to note is that you pay for the equipment of bros you hire. This is one of the reasons why “premium” backgrounds like Hedge Knights and Adventurous Nobles are so expensive: you aren’t just hiring Kurt, you’re hiring Kurt and his scale armor and his giant two handed hammer. You actually get a decent price on this equipment, so if you want scale armor and a two handed hammer, maybe Kurt’s a decent hire just for his equipment. That said, you generally want to hire bros with cheaper gear so you can spend less overall.
Why do my bros keep missing?
A unit’s chance to hit is, at it’s core, that unit’s attack stat minus the target’s defense stat. If a bro with 65 melee skill attacks an enemy with 15 melee defense, he’ll have a 50% chance to hit. It’s (almost) that easy.
There are numerous other factors that affect this, of course. Having height advantage on your target grants a flat +10% to hit, while height disadvantage imposes a -10% penalty. Every ally adjacent to your target grants a +5% chance to hit in melee. Spears add a flat +20% to hit, swords add a flat +10%. Confident morale increases your melee skill by 10% of it’s total value, while Wavering morale and lower decreases it.
So if you have a bro with 45 melee attack, he’ll have a 45% chance to hit against something with 0 defense. But if you give him a spear, height advantage, and 3 allies granting surround bonus, his chance to hit will increase by 45%, effectively doubling.
All this to say, hitting the enemy is a multi-faceted problem. Your bros miss so much not because they have the wrong equipment, or because they’re fighting uphill, or because they don’t have high enough stats – it’s because a combination of all those things.
On the flipside, the game gives you several tools to solve this problem. You can make up for low numbers with high ground and the right weapons. You can make up for equipment with veteran fighters who have high base melee skill. You can make up for low base melee skill with perks like Fast Adaptation and Backstabber and so on.
Don’t play fair. Use every dirty trick in the book if you have to. Fights in Battle Brothers are rarely determined by a single blow, so don’t just swing and hope that luck is on your side for one attack. Employ tactics and gear and bros that let you get more hits in the long run.
Is the game’s RNG rigged?
It isn’t. This can be particularly frustrating for players coming from games like X-COM, Fire Emblem, or Darkest Dungeon, which explicitly fudge their numbers to “feel better”. Battle Brothers does no such fudging – an 80% chance is a true 80% chance. That’s as true for the AI as it is for you.
If you notice a streak of exceptional rolls one after the other, keep in mind that the game doesn’t show you all the rolls in the combat log. Morale checks, damage, whether an attack hits the head or the body, and so on are all hidden from the logs. What might look like a series of several exceptional 95+ rolls in a row is likely not “in a row” at all – it’s just bad (or good!) luck.
What is morale and how does it work?
Morale represents a unit’s overall drive and belief they can win in battle. There are 5 morale states, ranging from Confident to Steady to Fleeing. Confident gives a +10% bonus to attack and defense stats, Steady gives no modifiers, and the other morale states all impose debuffs of varying severity. These debuffs also notably apply to Resolve.
As a practical matter, when a unit is more confident they’re a better fighter, and when they’re less confident they’re both worse at fighting and easier to demoralize further. When a bro goes all the way down to Fleeing you lose control of him, and he’ll spend his turn trying to run away from the enemy – even if he’s engaged and retreating would trigger attacks of opportunity! This is a very dangerous situation to be in (or a fortuitous one, if its the enemy that’s running). A Fleeing unit will only make 2 attempts to escape engagement per turn, but often this is enough to seal their fate, especially with the -30% debuff to defense.
Units have a chance at the start of their turn to automatically recover to the “Wavering” state and be controllable once again, provided there are no adjacent enemies. Because of this, it’s often worth keeping fleeing enemies engaged even if you can’t kill them right away, as it will prevent them from recovering.
Morale is adjusted up and down during battle by various conditions that trigger rolls against a unit’s Resolve. Being engaged in melee by multiple enemies in a turn, taking 15 or more damage to hitpoints, or seeing an ally slain will all trigger rolls to lower morale state. Several enemies have active abilities that directly target morale as well, such as the Geist’s scream skill. Conversely, slaying enemy units and being rallied by the “Rally the Troops” perk trigger rolls to raise morale.
When a unit is killed, the difficulty of the roll scales with distance; it’s very easy to lose your nerve when the man beside you is struck down, just as it’s hard to feel confident simply because an enemy on the other flank was slain.
Formation matters, too. It’s harder to break when you’re surrounded by allies (3% harder per ally, to be exact), but by the same token it’s harder to succeed rolls when you’re on your own with enemies adjacent all around. Most important, of course, is the unit’s Resolve stat itself. The higher your Resolve, the less likely you are to break and the more often you become Confident.
What difficulty should I play on? How does difficulty scaling work?
You should play on whatever difficulty you have fun with! I will recommend at least starting on Beginner, though – suffice to say there’s a reason none of the difficulties are called “easy”. Battle Brothers doesn’t fudge rolls behind the scenes or give enemies extra abilities or better AI on different combat difficulties. An Orc Warlord on Beginner is the same as an Orc Warlord on Expert, so you don’t need to worry about missing the “true experience” if you don’t play on the hardest difficulty.
Economic difficulty affects your starting funds, market prices, and contract pay. Lower difficulty = more money. Combat difficulty only affects scaling, with one exception: on Beginner, the game grants a +5% chance for your bros to hit, a -5% chance for you bros to be hit, and a +10% bonus to XP gain. This isn’t hidden or anything, the game tells you and the numbers you’re shown in combat are accurate, it’s just easy to miss.
As I said above, enemies don’t get better stats or smarter AI as the game scales; instead, scaling is mostly a matter of what you fight when.
On Beginner combat difficulty you’ll fight easier groups – Brigand Thugs instead of Brigand Raiders, for example – for longer. On Expert, you’ll fight harder groups earlier. Eventually, well after the end game crisis, scaling will max out and the game won’t get any harder. At this point Beginner will still be easier than Expert, but the differences will be less pronounced. Most players end their campaigns before max scaling, however, so this is something of a moot point regardless.
Additionally, contract difficulty scales with the number and level of bros you have. The more bros, and the higher their level, the harder the contract. This typically only looks at your 12 highest level bros, so don’t worry about making things harder for yourself if you take on an 18th hire.
Enemies in camps scale with campaign length. A camp at day 80 will have harder enemies than it did at day 20. The types of camps that spawn get harder as you get further away from civilization – you won’t find a massive orc war camp next door to a noble house citadel – but the inhabitants of the camps scale only with time. An orc war camp encroaching on civilization is just as hard as one at the edge of the world.
Lastly, a note on Ironman. I recommend that you don’t play on Ironman right away. The most important part of succeeding in Battle Brothers is having a sense for what fights you can and can’t win, and a big part of that comes from accruing knowledge of different enemies and their equipment and perks and tactics. This doesn’t happen all at once, but in waves – you’ll learn Brigand Thugs only to be met with Brigand Raiders, raiders only to be met with orcs, orcs only to be met with undead legions. Ironman slows this process immensely: if you lose your company on day 40, you have to start over and play another 40 days to get an opportunity to try those challenges again.
Once you’ve got a better handle on this part of the game, I highly encourage you to play on Ironman. It’s fun.
How do I get better gear?
There are two ways to get gear: buy it, or loot it.
Typically speaking, if you’re buying gear you want to do in the right place and at the right price point. A half-destroyed hauberk you pick up in a marketplace will be much cheaper to buy and repair than acquiring a pristine one from an Armorsmith. Similarly, small villages tend to sell equipment at less of a markup than big cities – their selection is more limited, but tends to be more affordable. Weapons are usually cheaper and harder to lose than armor, so if you’re going to splurge on new gear keep that in mind.
Most of your gear upgrades, however, will come from looting. If an enemy is using a piece of gear, and you kill that enemy without destroying their gear, there’s a good chance it will show up in the post-battle loot screen. There are many vagaries to this, which I won’t get into. The basic guidelines, however:
- The secondary skill of most daggers, “Puncture”, deals damage directly to hitpoints without damaging armor. Many guides and players will talk about “daggering down” or knifing enemies for gear – this is what they mean. Brigand Leaders and Fallen Heroes are classic targets for this tactic, as they tend to wear high durability, valuable armor and can usually be fought one or two at a time.
- The secondary skill of one handed flails, “Lash”, will only ever hit the head if it connects. If you want someone’s body armor, but don’t care about their helmet, this is another good way to kill them while leaving equipment intact.
- Durability affects whether or not gear drops, but not its chance to drop. That is, if an item is below a certain durability threshold, it will never drop. If it’s above that threshold, it will always drop unless prevented by some other condition (helmets, for instance, have a flat 30% chance to not drop – this is unaffected by durability).
More dangerous enemies have more dangerous gear. By the same token, you become more dangerous when you acquire that gear. The most common early power spike is to fight Brigand Raiders and acquire their weapons. This equipment upgrade is often one of the most important inflection points in a campaign, and reaching it is a great goal for new players to work towards.
As mentioned above, combat difficulty affects enemy scaling. On Beginner it will take longer for the game to start sending raiders (and other harder enemies) at you, and it will do so in smaller numbers. On Expert, the opposite holds true. Because of this access to better lootable gear, Expert campaigns can snowball earlier, at cost of increased risk. Something to keep in mind if you’re wondering how some players get all the gear they do so early.
What are named items? How do I get them?
Most weapons and armor in the game have what are called Named variants. Not just a “Greataxe”, but “The Wolf’s Widowmaker”. Not just a “Noble Mail”, but “Barabas Brimstone’s Masterwork”. These named versions have different visuals and improved stats over the base item. For armor, this means more durability and a lower fatigue penalty. For weapons, this means more durability and two other buffs (e.g. more damage, less fatigue buildup on skill use). These can be very powerful!
There are a few ways to acquire named items. Particularly dangerous enemy locations deep in the wilderness may have them as post-battle loot, and of course you can always buy them if you find one for sale and have the money. These tend to be some of the most expensive purchases in the game, however, so usually looting is the way to go.
Tavern rumors can sometimes indicate the existence of named items in locations. If somebody tells you they saw goblins steal a magnificent piece of armor and drag it towards the forests to the northwest, that means there’s a goblin camp in the forests to the northwest with named armor. You’ll still have to do some searching, mind you; these location are often quite far away from the taverns in which you hear about them.
The Warriors of the North DLC introduced Champion units, which are another source of named items. Champions are more powerful versions of enemy units that are guaranteed to spawn with named gear (and guaranteed to drop it when they die). They’re very powerful foes and rarely show up until you’re well into the end game crisis, so approach with caution.
It’s worth noting that 3-skull contracts are more likely to spawn champions, and that 1- and 2-skull contracts, when accepted, will clear any named items from a location’s loot. If you want to get more named gear, take the hardest contracts!
This contract is super hard! What gives?
There are three difficulties of contract, denoted by “skulls” on the town screen. 1-skull contracts are easier, 3-skull contracts are harder. It’s worth noting that “skull difficulty” isn’t normalized across contract types! A 1-skull noble contract to go fight orcs will likely still be a greater challenge than a 2-skull village contract to deliver an item to the next town over.
However, even within that framework, the game’s scaling is complex, and many elements of contracts are randomized. It is wholly possible to get unlucky and have what seems like it should have been an easy job throw a particularly hard fight at you. Handling these curveballs is a part of the game. If the enemy has too many archers, try to fight at night. If you’re worried your bros’ stats are too low, try to take the high ground. If you don’t think you can win at all, retreat and live to fight another day.
In short: this is somewhat normal. There’s no guarantee that you’ll be able to beat every fight the game throws at you. That said, if you weren’t paying attention to contract skulls, do so – they make a big difference. Combat difficulty and the number and level of your bros also affect contract scaling, as mentioned previously.
One final thing to note: pay is often a good indicator of danger. If someone’s offering you 800 crowns to fight some brigands when every other contract is for half that reward – there’s a reason.
Do I have to accept or decline contracts right away?
You do not! I like thinking of contract-taking as having two phases: negotiation, and signing.
Negotiation is the part where you haggle over how (and how much) you get paid. You can ask for more money, money in advance, and so on. Once you’re done haggling, there are two options: “I accept your offer.”, and “Forget it, this isn’t worth it.” Accepting the offer does not accept the contract! It simply says “Ok, I’ll stop arguing over the terms of payment now”.
Signing happens on the next screen, and it’s there that you’ll be able to accept and start the contract, decline it, or say you need to think it over. Thinking it over means you can go back into the town market and buy things, negotiate different contracts, and even leave and go to other towns. You can come back later and accept the contract at the previously negotiated terms. Keep in mind that contracts do eventually time out, so if you want to take one, don’t wait too long!
What are origins?
Origins are a feature that was added in the Warriors of the North DLC, with each other DLC adding additional ones. They offer different starting bros and equipment, and impose unique rules on the campaign. The Peasant Militia origin, for example, lets you take up to 16 men into battle instead of the normal 12 – but prevents you from hiring many of the best backgrounds in the game entirely. The Northern Raiders recover more loot from battle, but start hostile to most of the noble factions and must constantly be vigilant against house soldiers out for blood.
Most origins are more difficult than the default start; all are more complex. You should absolutely try different ones out to see which of them suit your playstyle best, but don’t go in expecting them to make the game easier.
What stats should I level up?
All of them! Mostly. Kinda.
Every stat is valuable and important, but some are more important than others, and which ones to level depends on the bro, how late into the campaign you are, and so on. I won’t offer any stat breakpoints or hard and fast rules, but I do have some broad suggestions:
- If a bro is expected to engage and hit in melee combat, he can never truly have enough Melee Skill or Melee Defense. Similarly, a bro using ranged weapons will never have too much Ranged Skill.
- Bros who are expected to engage in melee will also need some Resolve. They’ll get surrounded and take hitpoint damage more often, and thus suffer more frequent morale checks. Backline bros with polearms or ranged weapons need less.
- Hitpoints are especially important for frontline bros who eschew heavy armor, but heavy armor bros need it too.
- Fatigue is especially important for heavily armored bros, or bros who want to make a lot of attacks per turn or use special abilities like Shieldwall or Adrenaline. For reference, you recover 15 Fatigue at the start of each turn.
- Initiative is mostly important on specific builds. You can usually skip it on bros with heavy equipment. Bros with Dodge and Overwhelm will obviously get more out of it.
- Ranged Defense is usually not worth leveling for two reasons. First, the AI heavily prioritizes targeting bros it can hit. The enemy will often ignore a bro with lots of Ranged Defense in favor of one that’s easier to shoot. Second, most factions will engage you more in melee than at range, and so your investment in Ranged Defense would arguably have been better spent on Melee Defense or Health (for example). I’m not usually comfortable with bros having negative defense, though.
The key here is to tailor leveling to the bro. A Swordmaster maybe doesn’t need as much attack skill, but his low health needs patching. A Deserter needs extra attention to Resolve. Rather than following strict rules about what to level, you should adjust what you take for an individual bro and his role.
What are talents?
By default, the amount a bro’s stats can increase each level is random within a per-stat range. Melee Skill and Melee Defense can increase by 1-3 per level, Initiative by 3-5, and everything else by 2-4. Talents increase these roll ranges.
Every bro has 3 stats they’re talented in, represented by little stars over the relevant statbar. Each star increases the minimum roll for that stat. For example: By default (no stars), Melee Defense rolls +1-3 each level up. 1 star of talent in Melee Defense means a bro would instead roll +2-3 each level, while 2 stars means +3 each level, and 3 stars +3-4.
If that’s more than you want to remember, instead just know that being talented in a stat means that a bro can usually increase it more per-level than a non-talented bro.
You shouldn’t necessarily level a stat just because a bro has talents in it – a Poacher with no stars in Ranged Skill will still be a better archer than a Wildman with 2 stars, and 3 stars in Initiative won’t help a bro with the Paranoid and Hesitant traits. Still, the right stars on the right bro can be build defining.
Is there a level cap?
Yeah, kinda. In Battle Brothers there are “regular levels” and “veteran levels”.
Typically when a bro levels up, he gets a perk point and can pick 3 stats to increase, which roll within a particular range (as described above). These are “regular levels”.
This changes after level 11. Levels 12 and up are considered “veteran levels”, and stat increases are capped at +1 for any stat, regardless of talents. Further, you don’t get any additional perk points. Thus, while you can technically continue to increase stats after level 11, you only get 10 level ups with full rolls and 10 perk points with which to define a bro’s build. Thus, as a practical matter, you can think of level 11 as the “level cap”.
What perks should I pick?
As mentioned above, this is not a build guide. You should pick whatever seems interesting to you!
In general I’m a little wary of suggesting builds or build guides to newer players; I think it tends to put blinders on them and leads to rigid companies that have a hard time adapting to unfamiliar challenges or encounters. Turtle’s Perks Guide, also linked near the top, has some really in-depth analysis of perks and their advantages and disadvantages. If you’re trying to decide if a particular perk is worth it, I’d strongly encourage you to go to that guide and read Turtle’s analysis.
That said, there is one general guideline I’ll throw out there, which is that most bros should get one of Nimble or Battleforged, available at level 7. These perks vastly increase survivability, and are incredibly important on almost every build and role. You should only skip these under exceptional circumstances.
Also don’t take Bullseye, it’s a bad perk and it should feel bad.
What is Renown? How do I get more?
Renown is a measure of how famous and reputable your company is. It affects a number of things, but most importantly contract pay. The more renowned your company is, the more employers are willing to pay you. It’s worth noting that having more Renown doesn’t increase difficulty.
In order to get contracts from noble houses, you need to complete an ambition to get noticed by them – mechanically, this means having about 1,000 Renown. If you’ve wandered into a fort or castle and seen a contract with a lock over it: you need to complete that ambition before you can be offered the job.
You get a small amount of Renown each time you win a fight, and lose it by retreating or failing contracts. The primary way to increase it, however, is by completing contracts and (especially) fulfilling ambitions.
What’s an end game crisis?
Later on in the campaign – usually somewhere between day 80 and day 120 – the game world will be confronted with a “crisis”. These crises tend to throw unique enemy compositions, difficult contracts, and more dangerous roaming parties at the player. For many, “beating Battle Brothers” is synonymous with surviving these crises.
When you beat a crisis, you’ll be given an opportunity to continue playing the campaign. If you take it, the game will eventually throw a new, different crisis at you. This cycle will repeat as long as you continue the campaign, but your bros will likely become so powerful that these crises stop providing a meaningful challenge after a point. When you feel you’ve mastered them, you should consider trying to defeat the game’s legendary locations.
What are legendary locations?
Legendary locations are special locations on the world map with their own associated events and spawn rules (some only appear in swamps, some only in the north, and so on). The Beasts & Exploration DLC adds many of these, and a number of powerful boons can be acquired from them: a golden goose that generates gold every day, for example, or a towering spire that reveals the surrounding landscape. The other DLC add their own, as well. All legendary locations will spawn on a map at the start of a campaign (so if you install a DLC partway through a campaign, that DLC’s locations won’t show up, but the others will).
Perhaps the most important legendary locations are those with associated fights. These take place on special maps with specific enemy compositions, and are considered the hardest challenges in the game. If you really want to test yourself, try to beat all of them in a single campaign!

Be the first to comment