How to Complete First Mission
Zindah Province (First Contract)
Starting in this area, you will be inserted on a dirt path, with a fairly straight forward path forwards. Up the ways, you will come across some soldiers, and looking a bit right and up, a spotter. Your options here are:
- Engage the troops.
- Bypass the ground troops and eliminate the spotter.
- Avoid both and keep to the side.
Personally, I opt to take out the spotter quietly and interrogate him to make life easier in the next area.
This next area has 2-3 regulars near the front on a small rise, with a radio, as well as 3-4 regulars patrolling throughout the tents, and one spotter in the back keeping watch. Easiest way through them is to hug the right hand side of this area, keeping in the bushes and avoiding the troops entirely, however you can eliminate the spotter if you like.
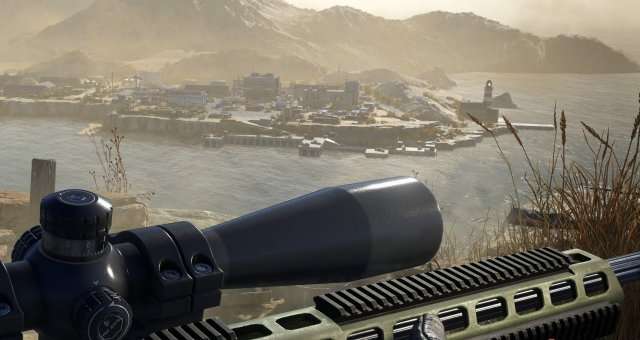
Moving on, there is a small area you pass through, and going upwards a bit, you will be coming up on your first long range target. Scattered around the area are several troops, distractions, and other items of interest. Your first time around, you will be very hard pressed to do this without raising the alarm, however when coming back to 100% this region, I find the following setup works very well:
- Using a heavy or medium rifle.
- Max regular ammo, and I find luring & agile ammo to be most effective. You want minimum of 5 each so be sure to slot in the relevant magazine for your rifle.
- The sentry turret with the upgraded range can help with ~4 of the enemies here, namely the regular on the docks that paces left and right at ~980m, and the spotter that waltzes between the sandbags overlooking the docks.
If this is your first run through this area, you can shoot the door control where your target and the weapons dealer meet ahead of time, allowing you a good shot on both of them at the same time. Just make sure to hit the soldier that is inspecting it before you do so.
If you are going for the challenge for clearing the port with no alarms, keep the following in mind:
- Shooting the distraction objects, namely control panels, the overhead crane, and the sprinkler control system are all save spots. Enemies you kill before these will disappear if you reload the checkpoint, allowing for something akin to save scumming.
Next Area Notes (Harbor Village)
Two regulars on the bluff you emerge from. easy kills but no necessary.
Multiple paths through this section. Keeping right and swimming, emerging in the tunnels with an enemy on the dock. Keeping left, going up the road, two patrols of 2 regulars, first is easily avoided and second set as well using distraction stones. the roadblock has one forward static patrol facing each other that are easily distracted, using a silenced pistol and keeping the the left path makes it easy. there is a spotter on the top right tower, and tow roaming regulars behind him on ground level. you can avoid all three or wait for the roamers to split, killing the one on the road quietly, then the one in the back, and finally the spotter, or avoid all of them by keeping to the left and staying out of sight.
From the roadblock you can go left into the tunnels, where there are multiple guards, however throwing a stone to the far right and distracting them so you can sneak by their left and drop in the water allows you to stay quiet. If instead you go straight, you will go through a straight path overlooking the previous harbor village, and enter into a different set of tunnels. On this path there is a single guard walking, easily interrogated or sniped.
Once inside the tunnels there is a regular roaming the docks, as well as one using a shovel behind and above him out of sight. Eliminate these two, and proceed further into the tunnels to begin the satellite dish portion of the contract, or path left and up to eliminate the second target.
Dish section, the starter rifle is recommended as it is a heavy rifle and lets you tag enemies with body shots or a headshot for the heavy.
Method for clearing the base, name groups, two snipers. Start with left tower, right high sniper, mid low sniper, truck worker under truck, left 1-1 leaner, left 1-1 sitter, wait for 1-2 sitter to be out of sight from 1-2 roamer, kill sitter first then roamer, road roamer, 2-1 leaner and quickly follow up with 2-1 roamer while he is messing with the boxes. Wait for the heavy to start walking towards the fenceline then plug the generator, while the 2-2 leaner goes to check the generator, shoot the heavy in the head with either a heavy rifle or an AP round, then go for the 2-2 leaner by the generator. Next go for the roaming central patrol, using a luring round to split them up, shoot the lure towards the bush near the blue container, then wait for them to split, eliminating the baited regular then the other patrol. Shoot the 1-1 and 1-2 breakers then wait 15 for target to emerge. Target will be trailed by officer from building trio, allowing you to kill the two regulars with a two-for-one shot or a very fast follow up shot. Target and trailer officer will go up stairs, trailer will wait on stairs, eliminate him and wait for target to drop the shutters. Once shutters drop, two new regulars spawn on roof + a control box. eliminate the right hand regular once he is away from the other, then take out the remaining regular and the control panel. Wait for target to begin walking back to his building, and eliminate him on the flat section of the stairs. Finally, eliminate the 2-1 and 2-2 breakers.
Second Target
On route from last area, you will come across some ruins. there are two up top, one mid roamer, and a low roamer. These 4 should be easy stealth kills either through melee or distractions and the pistol or bow. Once in the spider hole, scout the base, two snipers, one far left one far right. Sniper left roams, sniper right is stationary at 1400m. eliminate both. Next, take out the berm roamer. Take out the dish to split the camp patrol. eliminate whichever one inspects the damage. Rliminate the second camp patrol once he is leaning against the barricade and smoking. Next, wait for Payne to near the vehicle lifts. shoot the right hand vehicle towards the back to set off the alarm, drawing Payne near. Quickly shoot the left hand lift control box, and Payne will walk below the second lift, and place a phone call. Shoot the remaining control box, and turn Payne into Payn’t.
Congrats! First region complete!


Be the first to comment