
A guide to Timberborn of “gee, I wish I knew that” and other useful information.
Ultimate Guide to Basics
Beginnings of Beaverton
You’re starting a game in a post-apocalyptic setting. The survivors are water dwarves, which people often call beavers.
These creatures are known for building dams and farming. You and the beavers will work together to change the land to support your needs, focusing on building industries using renewable resources.
This guide is meant to help you understand how to work with the beavers to survive and do well. I had some trouble with certain game mechanics, and I want to share what I learned so others don’t have the same problems.
I might not cover everything, but I will go over some basic things and then talk about some less obvious or unexpected mechanics that I discovered.
Basics on Resources
Resource: an Overview
There are multiple visible resources, and several resources which are not immediately visible but also must be tracked, in Timberborn.
Resource management is important when building and planning your beaveropolis. Most resources are renewable and can be generated quickly and managed easily. We will look at the ones immediately visible on the UI first.
At the top of the screen, you will see this bar. From the left, we have:

Well-being | Science | Various Goods | Food | Logs | Stored Water
We are going to break them down in reverse order.
Stored Water
Stored water is the amount of water your beavers have stored in water towers across the town. This is the overview of the amount of water you have saved for when drought comes. This is not all available water, as water trapped in a reservoir is a different resource. Beavers will die of thirst without stored water.
Logs
Logs are raw timber, which can be used to make most basic buildings, and can be processed into planks and then into other materials. Logs are harvested from trees, with varying returns based on tree types.
Food
Food is the stuff that keeps your beavers beavering. If there is no food, the beavers will starve. Food comes in multiple types, with multiple ways of acquiring it. In the early game, berries harvested from berry bushes will keep your early populations running. Later on, food will become more available as wheat and potato fields cover the land.
These three make up the backbone of your beavers civilization. Without them, there is no growth.
Various Goods
Various goods is an overarching term for a lot of other goods that are available to be produced and stored. Some various goods are some kind of inbetween in a production chain, i.e. potatoes become food when they are grilled.Some various goods are building materials, i.e., logs can be milled into planks, the first advanced good needed.
Science
Science is created by inventors and stored as points. New buildings can be unlocked using these points. Be warned that some things can be unlocked out of order: i.e. in order to create a platform, planks are required. However, the platform can be unlocked before planks can be created, leading to an unlocked tech that can not be built.
Well-being
Happiness is the overall score that determines how content the population is. The higher the score, the more productive our little industrious water dwarves will be. The thing about happiness is that it has multiple requirements, and comes with a handy-dandy sheet, which is available by clicking on the happiness stat.
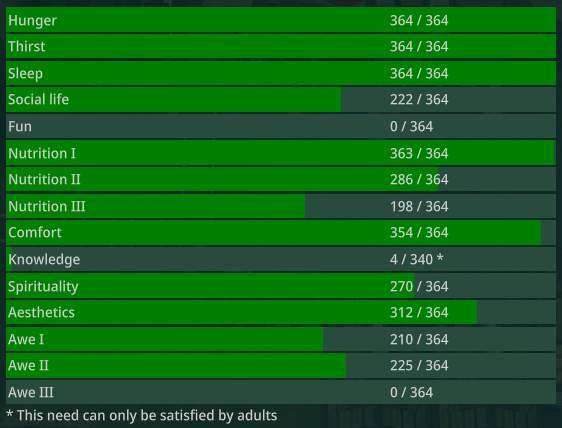
Each individual stat comes with a bonus, varying from +% life expectancy to +% move speed. Each one is satisfied by a specific requirement, and there are no overlaps (as far as I can tell). Nutrition 1 requires beavers to be eating carrots, while Nutrition 2 will be satisfied if they have grilled potatoes.
Individual beavers can be clicked on to assess their individual well-being, as well as clicking within a district will show the overall well-being of the district.
Maximizing well-being isn’t incredibly complicated, and is very rewarding.
Beaver Basics and Other Resources
Let’s Talk Beavers
Beavers are, by definition, our most valuable resource. After their well-being stated above, there are other important beaver-related information to cover.
Population
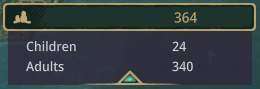
Beaver population is broken down into “adults” and “children”. Adults are your working population, and they can produce more children. Children, of course, need time to mature into adults.
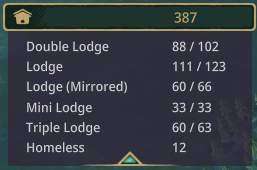
When it is time to sleep, beavers will sleep anywhere they want, though they prefer to sleep in proper housing. Housing provides comfort, which is a stat in the Well-being group.
Providing adequate housing for our beavers is also important because Folktails will reproduce when there is extra housing. As far as my games have gone, beavers will not produce new beavers if there is not adequate room! This also means that overbuilding housing can cause a baby beaver boom.

This tab will track your employment. Unlike most city builders, unemployed populations do not seem to drag down happiness. They will idle around, eat food, drink water, and visit leisure buildings and wait for work. The life of an unemployed beaver is good.
They are a resource to use, though, and tracking our unemployed beavers is important. Migrating the unemployed to underemployed districts is the key to successful growth and expansion to new areas.
Let’s Talk about Hidden Resources
“Hidden” resources are ones that are not expressively visible in the UI or the game itself. They are not secret, but rather may not be things that are thought about or discussed. However, they are important bits of information to be aware of.
Land
Probably the most obvious, and yet probably extraordinarily underlooked is land.
Land comes in two types: arable and non-arable.
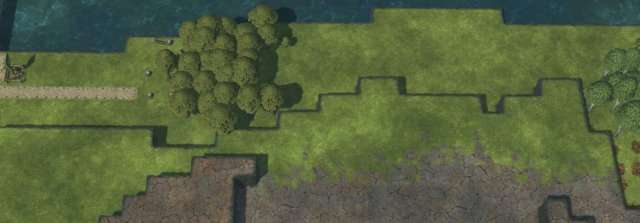
Arable land is green, and is caused by water being nearby. The distance can be changed by terrain height, type of water source, but not depth of water.
Pay attention to land during the non-drought seasons. This land is valuable, as it is the land that can sustain agriculture. Tracking river and lake’s ranges and the arable land produced is important when choosing to dam or change river flows. Using arable land for buildings can sometimes strangle food and timber production.
Creating more arable land requires use of either irrigation towers (Folktail only):
Or building large structures like an aqueduct:
Or terraformed by dams and lakes.
Non-arable land still has its value, though. It can be transformed into arable land by various methods, both mentioned above and beyond. However, non-arable land is also useful for building housing and industry on, as the beavers do not mind where they live. Finding areas of land that are not going to arable leads to great places to set up housing centers.
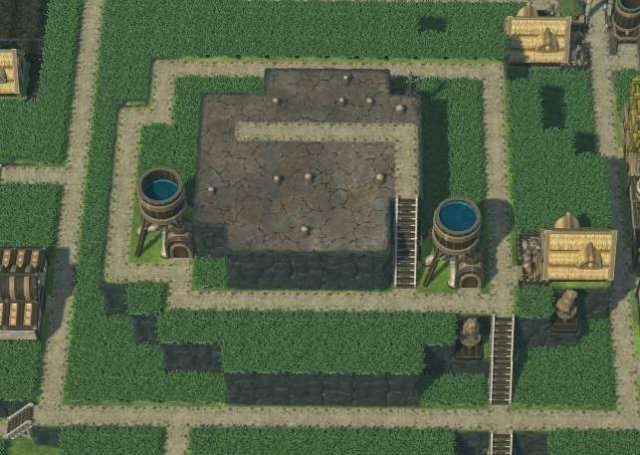
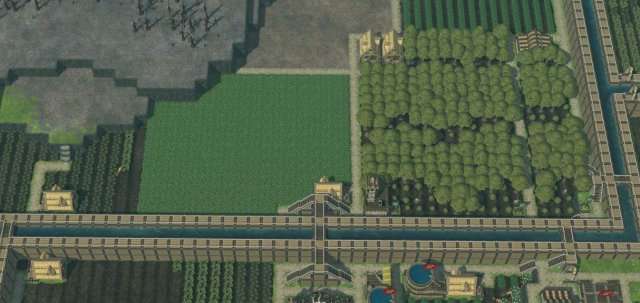
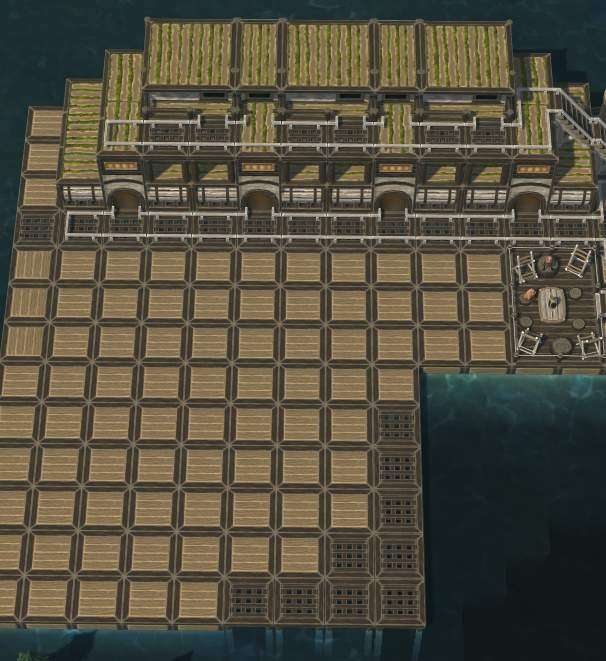
In this photo, you can see that roughly half of the districts’ land will be arable, and roughly half will not be. Try to focus building buildings in the non-arable land, so that the arable land can be used for agriculture. The stacking buildings mechanic can be a major boon for this building style.
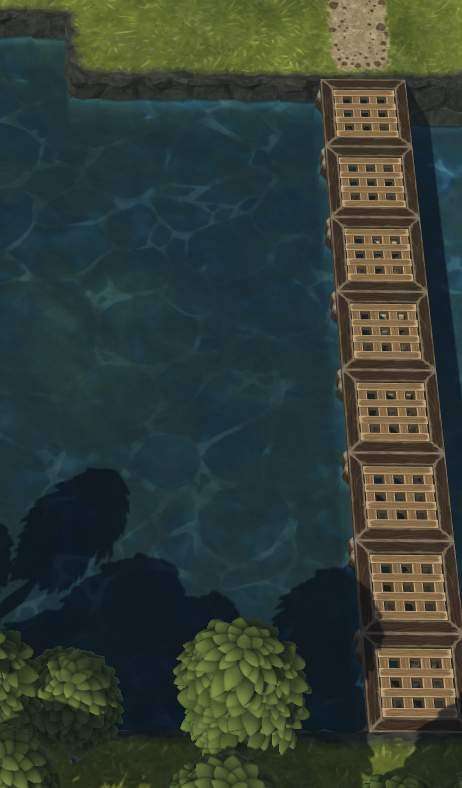
And remember that buildable land can be created:
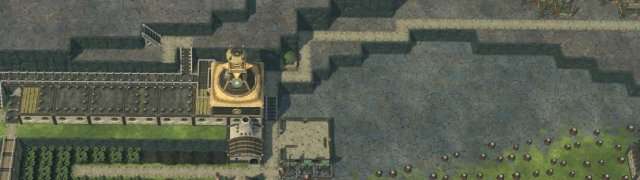
Be aware that some buildings must be built on solid ground, like the campfire and the temple.
Learning to use land effectively will increase our chances of survival.
Time

A weird little concept we humans stick to, is time. Our denizens will work according to this clock, which we can set via the +/- buttons. The dark section of the circle is, of course, nighttime, and should be reserved for sleeping.
By default, our beavers will work for 16 hours a day, and sleep for 8. This will leave little time for socialization, leisure, or producing new beavers, unless they are not working (or unemployed). By reducing the work hours to 15 or 14, this will reduce production of goods, but will allow the beavers to have leisure time.
If you are having population issues, make sure there is extra housing available and try giving the beavers some downtime.
Rivers, Dams, and Waterways
One of Timberborn’s major selling points is the water mechanics. Droughts, rerouting water, damming rivers, and other terraforming is a key selling point of the game. There are plenty of methods of securing water for the dry seasons.
Let’s look at some water mechanic basics, some general tips, then we will look at our structure pieces, and finish off with some buildings.
Water Flow Basics
Water in this game can be easily managed, and follows basic rules of pressure, more or less.
- If you have a 5 x 1 river mouth and you put it a 5 x 1 dam on it, you will fill up the dam and then water will flow out.
- If you have the same 5 x 1 river mouth and you stick a 4 x 1 dam and block the rest, you will get faster moving water (helpful later for waterwheels).
- If you have the 5 x 1 river with the 4 x 1 dam, and then you add a 6 x 1 dam after that, you are going to slow your water down.
- If you block the 5 x 1 river, you will get a reservoir, until it eventually breaks out over the walls.
- If you block the 5 x 1 river and it’s not making a lake, check for leaks around the lake. If water touches the edge of the map, it will flow out.
In summary
- Water flows from high to low.
- Forcing the water into tighter spaces makes the water go faster (and may cause flooding).
- Giving the water lots of space to spread out will slow the water down.
- Check the area before building a dam.
Some Other Notes
Swimming!
Yes! Your beavers will swim! They will follow paths that may be underwater, and complete constructions that are in water without much thought. They also do not seem to mind being in an area that is flooded. At a certain level of water, though, they seem to seek higher ground and will not do things like harvest trees or crops.
Building From Above
Beavers can build from above or below an object, meaning that they do not need direct access to build something. They can place levee pieces in the water multiple levels below them, or build a power component on a platform above them.
Building Pieces
Dam
The basic building block used in hydroengineering. The dam piece allows water to flow over it, once the water has reached a certain height. Dams come unlocked and are considered a solid object, meaning you can put buildings on top of it.
Levee
The levee should be one of the first pieces of dam technology unlocked, as levee’s are what allow us to make a solid wall. Levee’s can be stacked, and will stop water flowing — until the water flows over them. Dams and other objects can be placed on top of levees, but levees can not be stacked ontop of anything else.
Before we dive in, I want to point out that I am by no means an engineer, so please correct me if I use the wrong terms.
What About Floodgates?
Great question! I have not used them, as they require close monitoring and manual activation. I can not write a guide or an opinion on a piece I have not used!
That being said, they probably have great and very useful applications, but I can not attest to that.
Structures
It’s a Weir
The first water-stopping structure we will be producing is probably going to be a weir.
A weir is low damn that stops or slows water. In the early game, building a weir or two along the starting river will trap water for the summer. Weirs are made from dam pieces that cross the river. This will slow down water movement, and can cause your water wheels to stop flowing correctly.
In this picture, you can see that I replaced some of the dam pieces with levee pieces to block some of the water flow. This means that the water has fewer escape points, and will flow a little bit faster in that area.
Dam It All!
A dam is going to involve multiple levee pieces with a spout that allows water to escape somewhere.
This dam is 2 levels deep (with some 3 deep in the middle), and so during the dry season, the dam will retain a lot of water. Dams should be built on river mouths and are used to create lakes behind it. When damming a river, it is important to remember to let the water flow out somewhere, otherwise there will be flooding.
To reduce issues with flooding, retaining walls near the spout can be made (as are being constructed in the photo). Having the water go into a wide area can also slow down the water exiting your dam.
Lastly, you can also make a sluice:
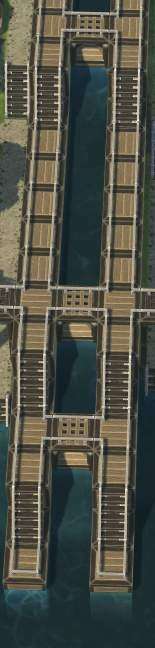
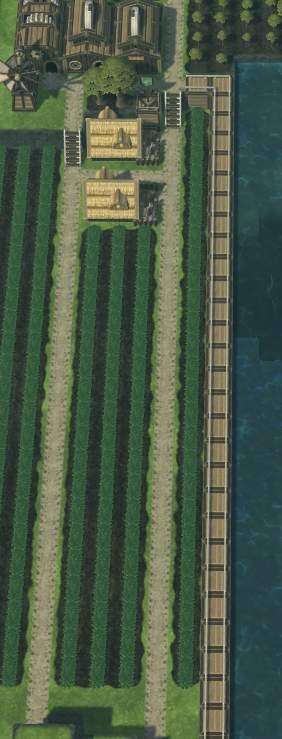
Aqueducts
Aqueducts are a great way to move water from one point to another.

As talked about above, aqueducts create a lot of arable land, which is a massive boon for agriculture. Aboveground, they are costly to make, and take up quite a bit of room. Aqueducts can be carved into the ground using explosives, as well.
Pumping Stations
There are water pumps that will dump water out into an area to create an artificial lake. I have not explored this option yet, as it seems very labor intensive. For now, I stick to my natural water sources.
So You’ve Got a Lake…
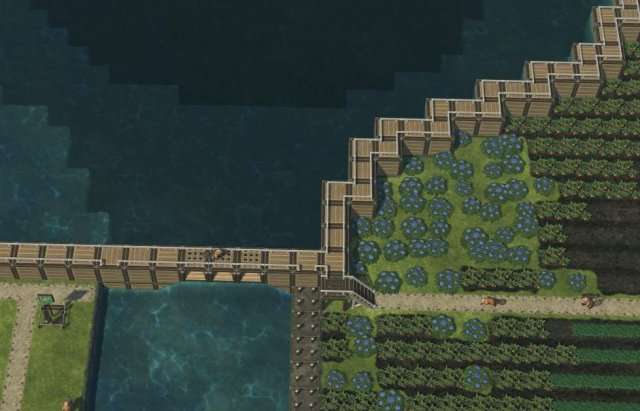
Remember that lakes can be built upon! You can produce a lake, and then move your housing and industry on top of platforms.
Lakes will stay during the summertime, and will offer a lot of water to our beavers. Make sure that they are actively pumping from it, though, as just because we have water in the lake does not mean we have stored water!
Districts
Districts in Timberborn are kind of a complicated beast at first, but are a powerful tool when used as intended. Together, we are going to look at how to create a district and how to use them to expand without accidentally starving your population.
Districts 101
Welcome to the first day of class, beaver building bureaucrats! It is time to talk about a controversial and yet fundamental piece of Timberborn: districts.
Simply put, a district is a section of the city that is marked by a central building (the district center) and the edges are marked with gates.
Districts are an interesting concept because they represent wholly independent units and can be perfectly fine while neighboring districts are dying.
Unlike most city builders, where resources can be shared and all pops can access storage evenly, each district acts like a new city. Food, logs, and all other resources are shared only within the bounds of the district, and do not cross the lines. This means when a new district is placed down, it is functionally an entirely new colony and should handled as such.
With this in mind, it can be easy to feel overwhelmed or think it is a bad mechanic. After all, how are we supposed to expand if our districts are limited?
There are some methods to moving goods from district to district, and some ways to properly (and improperly) create a new district. One large feature of the district system is that if a district is stable, and a new district is created, there is an opportunity to expand with reduced risk of destabilizing the existing districts. Overexpansion does not necessarily mean the death of the whole city.
With this frame of mind in place, we will discuss how to move forward with districts.
District Functions
Districts are basically a singular hub of action. Think of them like a city center. Before making a new district, think about some things:
Why do I need to put a district there?
- Building a dam? Expanding farmland? Need to cross a mountain? Colonize a new island?
Does it have access to food and water?
- Importantly: if the drought season comes, is there enough supply to last? Is this district going to suffer from drought?

Man…. thanks so much for the guide. I really appreciate the time you spent writing all this down. It helped me a lot to understand important stuff as I just started playing the game. Well written, simple and full of information. Thanks again. 10/10!!
I only tested once. So there is a margin of error.
Berries seem to saturate better. Thanks!
Thank you, very helpful
I hope you’ll find the time to widen it and keep updated