A detailed achievement guide and walkthrough to get you your 100% as quickly and effortlessly as possible. Step by step instructions.
How to Obtain All Achievements
Introduction
- Estimated difficulty: 4.5/10. (Depending on skill, difficulty played on, and DLC boosters.)
- Estimated 100% time: ~50-70+ hours.
- Offline/online achievements: 47 offline / 0 online.
- Number of playthroughs: 1.
- Glitched achievements: None.
- Missable Achievements: 1 possibly. Ceaseless Chatterbox
Walkthrough
Complete the main story
Start by completing the main story, and collecting all 32 regular owls along the way. You can do any other side content you have access to at the moment, but we will unlock the majority of subquests in post-game, so feel free to save them for later. Along the way you will also unlock any storylined recipes, artifacts, and resources we need for other achievements. You should also remember to constantly rest at a campfire after unlocking the ability to chat with your teammates as it has an hour cooldown. Lastly, always check for skits. This is potentially missable, so be diligent about it.
Complete all subquests except Otherworldly Visitors and The Reminiscence Machine
After completing the main story and loading your completed save you should have just about every subquest available to you. Refer to my subquest section to see which ones you need to complete to unlock further quests, or which ones have specific triggers. After completing every subquest you should be ~Lv. 55-60 and have the majority recipes, artifacts, weapons, skits, and skills.
Clean Up
Once you’re ~Lv. 60 you can start the Otherworldly Visitors subquest. This is a very long quest chain that will level you up to ~90 by the time you finish it. From here, you can farm the final boss of the quest to reach level 100. Complete any remaining subquests, collect any remainig items, fish all the fish, and do anything you need to at the Training Grounds. By the time you’re done here you should have enough SP to buy 400 skills, enough mats to make the majority of the 100 weapons, and you should have unlocked the 300 skits along the way!
Emissary of Liberation
- Story related. Will unlock after defeating Lord Balseph at the top of Glanymede Castle.
Vanquishers of Darkness
- Story related. This will unlock once you defeat Lord Ganabelt in Riville Prison Tower.
Comrades in Freedom
- Story related. This will unlock after departing from Elde Menancia, when both Dohalim and Kisara join the party officially.
Retired Avenger
- Story related. This will unlock after defeating Lord Almeidrea aboard the Mobile Fortress Gradia.
Liberator of Dahna
- Story related. You will earn this after defeating Vohlran.
Invasion Averted
- Story related. You will earn this after killing the Eljarania in the Wedge.
The Truth
- Story related. This will unlock once Hevrekt-35 begins repairs on your ship.
Destined Liberator
- Story related. You will unlock this for finishing the main story. Going into the final boss sequence I was level 50 on Normal and had next to no issues.
The first part of this sequence pits you against the Great Spirit v1, we’ll call it. I found hanging out behind him and taking potshot combos, while letting my Boost Attacks do most of the damage worked pretty well. Whenever Alphen’s finisher move was filled I would use that to stun the Great Spirit and unload my high damage combos on it. The only attack you really have to watch out for is when it places a ring of darkness around its feet. At the half-way point it will summon elemental orbs into the field. These things can be a nuisance and do a lot of damage. I took the time to kill them all before returning to my strategy for the Great Spirit. After a little less than a quarter HP, it will periodically spawn 1 or 2 of the elemental orbs. At this point, however, I opted to ignore them and just nuke the last bit of HP.
The second part pits you against 2 hammer bros, and a few flying enemies. Do whatever you’ve done to kill these enemies prior and try not to waste too many resources here.
The third phase is against the Great Spirit v2, but he’s downgraded to large weak points for us to wail on. How thoughtful. Target one hand at a time until you’ve broken the core as this will stun him for quite a while, giving you the chance to damage the other core uninterrupted. Just like part 1, I would do small combos before backing out and guiding any of his AoE or tracking attacks away from my teammates. Once Alphen’s bar was filled, I finisher moved him to stun him for more uninterrupted damage. After one core, he will start using his signature move: Black Hole. Spamming the dodge button worked well for me. There seemed to be a timing to it as I would take damage rarely, but it worked either way. Once his health gets low enough he will spawn the elemental orbs again> I completely ignored them and continued to just lay into him while he sat still casting Black Hole.
The final section pits us against Vholran one last time, except he’s pretty basic this time around. We only need to take out half of his health for this part, and he will mostly sit around casting easily dodged AoE attacks. Poke at him in between to fill your finisher, then use it to stun him and get good damage in. When he goes into his overdrive state, I chose to run around and let him get his tantrum out before returning to my strategy as you can’t stun him in this mode. Once you dealt with half of his health, you’ll enter the second phase. During this phase you can’t die. Simply keep spamming Explosive Ring (you learn this during the fight) and let him continue to attack you. You’ll be 100% safe. Once your finisher fills, spam that until you defeat him. Congrats!
Wall Smasher
After leaving Messia 224, you will gain the ability to talk to companions when resting at a campfire to learn more about them. This is denoted by a […] next to their name. If you don’t see this symbol, you don’t need to chat with them at the moment. After doing so, there seems to be a cooldown of ~1 hour before you can initiate another conversation with any character. It takes ~5-7 conversations to reach max bond. You can tell which characters are maxed by the smiley face next to their names.
Intertwining Hearts
- Refer to Wall Smasher for more info.
An Honest Mage
- Refer to Wall Smasher for more info.
Role Model
- Refer to Wall Smasher for more info.
A Modest Dream
- Refer to Wall Smasher for more info.
Drink ’til You Drop
- Refer to Wall Smasher for more info.
Owl Homecoming
Owl #1
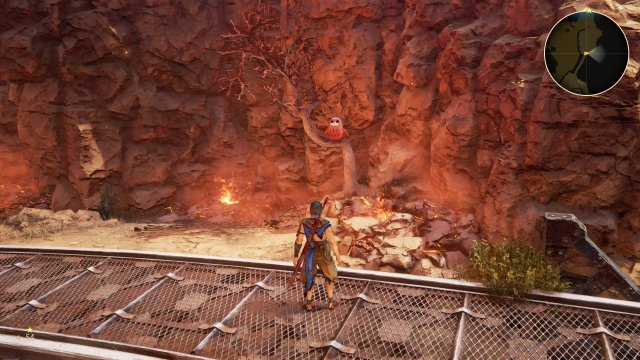
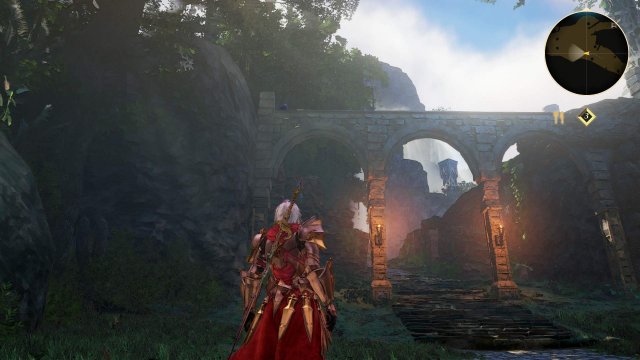
Shortly after resting at your first campfire of the game, you’ll eventually reach a metal bridge with a powerful zeugle up a cliff face. Clear out the Armadillo just ahead to find the owl on a branch to your right.
Owl #2
After arriving in Ulzebek, head to the building where your objective marker is. After the cutscene where you get a change of wardrobe, head up the 2 ladders in the same building to find the owl.
Owl #3
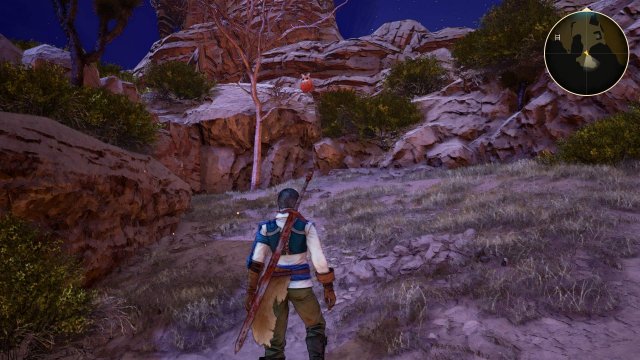
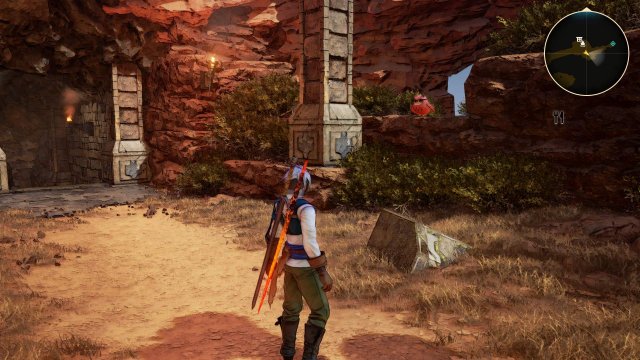
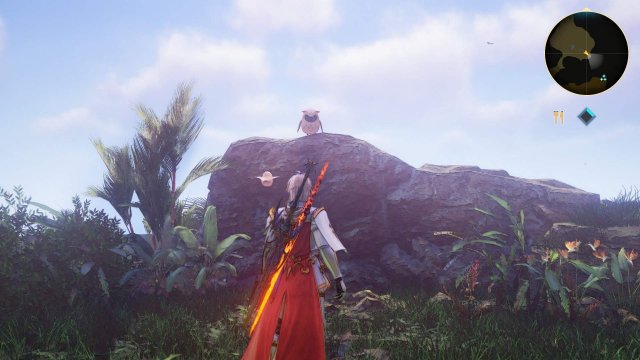
After entering Iglias Wastes, head forward until you reach the large stone pillars in the middle of the zone. Hook a left and continue on to where 3 Wolves are. Just past them is a guy guarding a boulder and an ivy wall you can climb across from him. Climb the wall to locate the owl at the top of the hill.
Owl #4
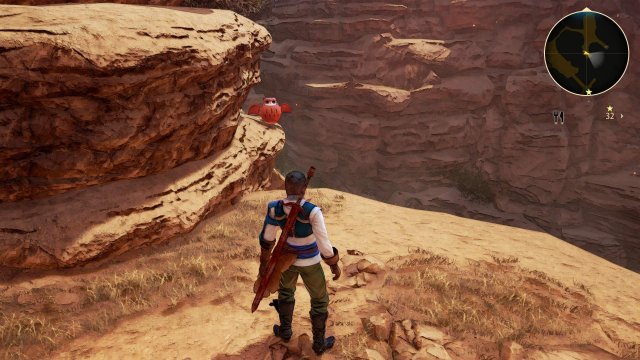
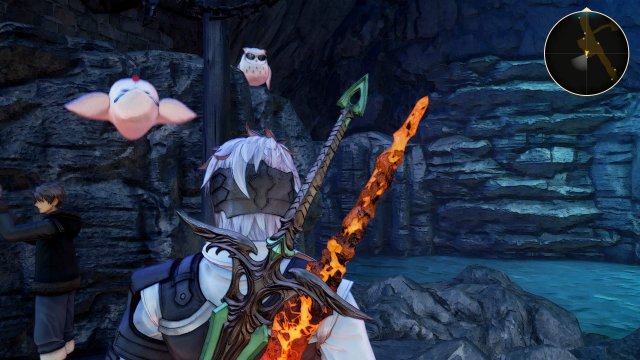
After entering the Kyrd Garrison, make your way through as normal. Once you reach the far end leading to Mosgul, look left for a small path leading to 3 Wolves. The owl is near the cliff face that looks out towards the Mosgul gate.
Owl #5
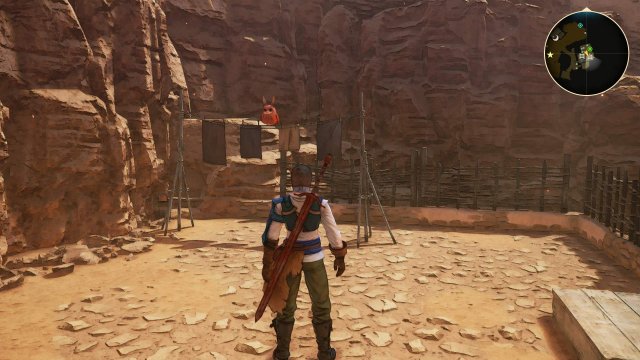
After saving Doc in Mosgul, head to the metal bridge on the right to find the owl behind a low wall.
Owl #6
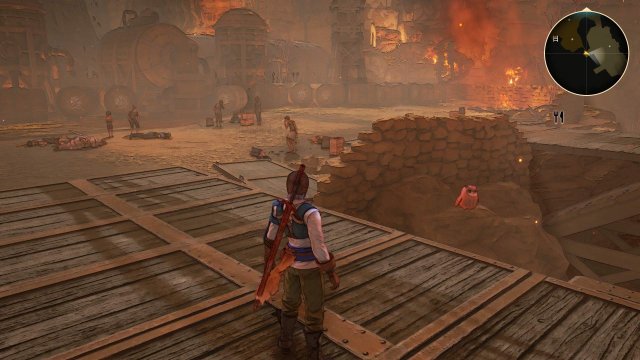
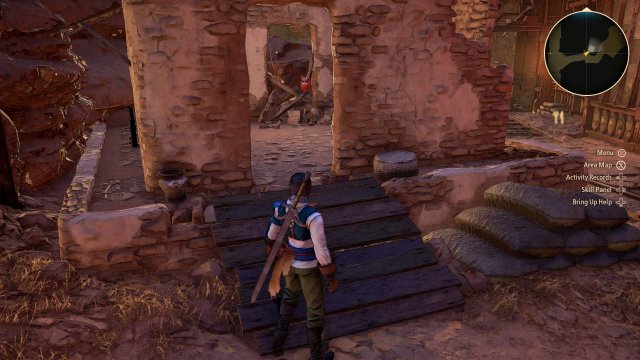
After taking the elevator up to the Trench of Flames, you’ll shortly pass Zephyr and friends by a barricade. The owl is in the first house directly to their right.
Owl #7
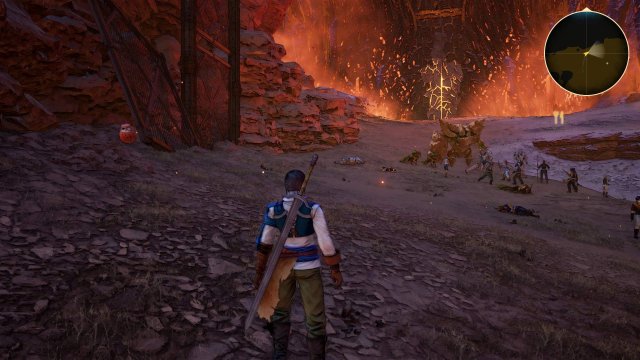
Immediately after Owl #6, transition to the Gate of Fire area. Up ahead is a large group of people fighting a golem. Look to the left to find the owl behind a metal gate.
Owl #8
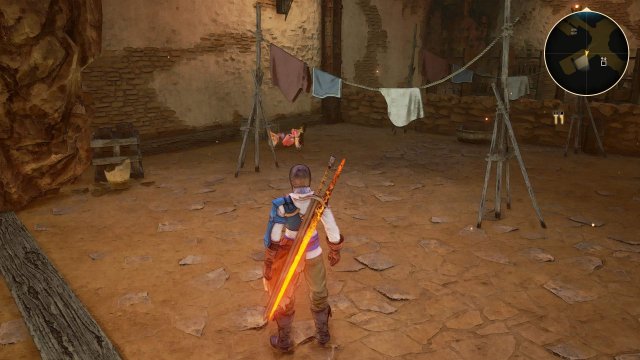
After reaching the 3rd floor of Glanymede Castle, look in the room directly to the right of the elevator to spot the owl amidst a group of chickens.
Owl #9
Directly to the right of the campfire in Lacerda Cliffs. Almost impossible to miss.
Owl #10
On your right after crossing the stone bridge in White Silver Plains. Directly before the transition to Messia 224.
Owl #11
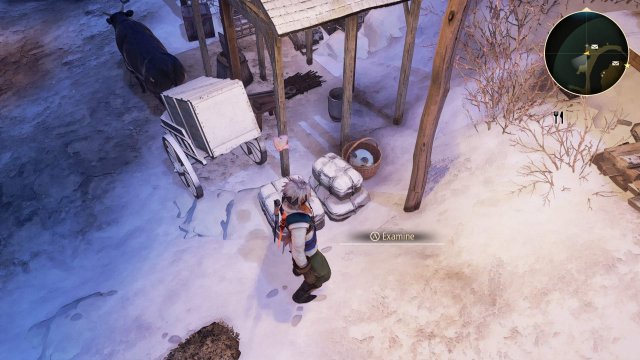
After entering Messia 224, take the hill to your left. The owl will be in a bucket behind the ox cart.
Owl #12
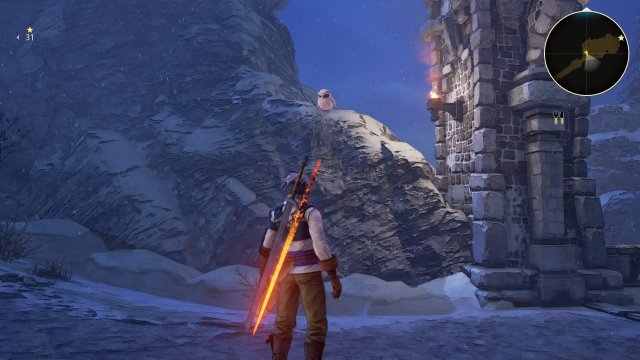
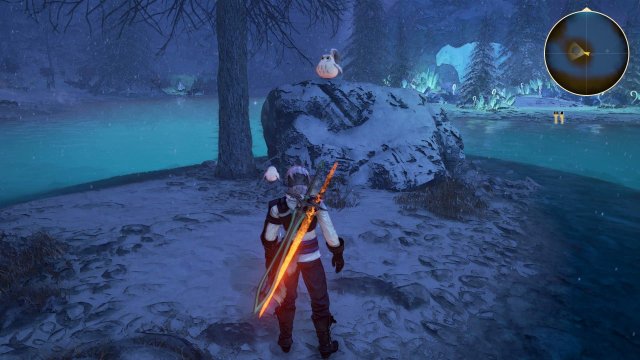
Shortly after entering the Nevira Snowplains you’ll come to a fork in the road. Take the left path and you should spot a lake down below you. The owl is on the island in the center of that lake.
Owl #13
After entering Cysloden, follow the only path through until you reach a market. Look to your right and you’ll spot a small pool of water. The owl is on the rock to the left of the water.
Owl #14
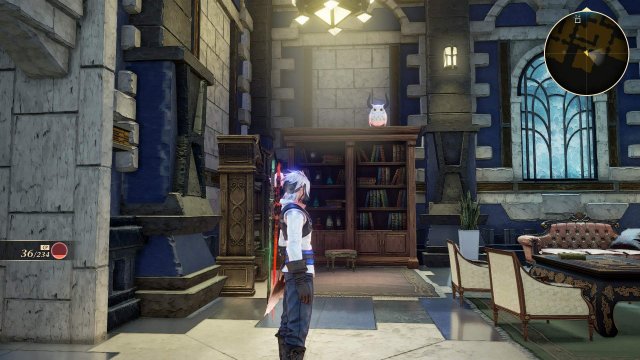
After locating the F3 elevator control panel on the 2nd floor of Riville Tower Prison, head into the room directly to the right and look to your left. The owl will be on top of the bookshelf.
Owl #15
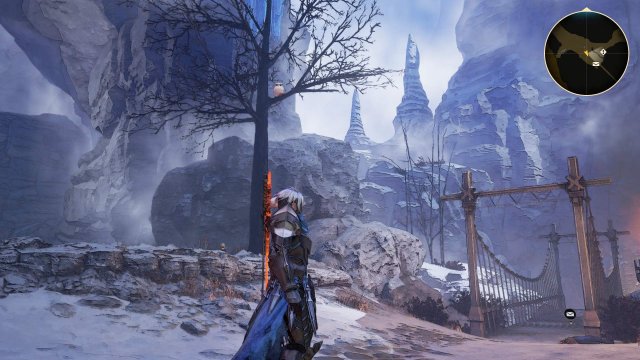
in the Frozen Valley, you can find this owl on a tree just before the wooden bridge leading to the Safar Sea Cave.
Owl #16
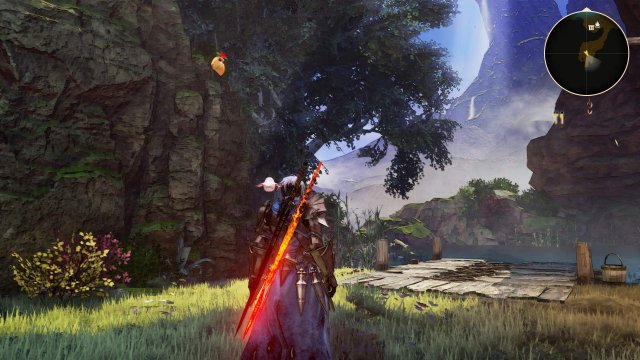
After reaching the campfire in Overseer Hill, hook a right to the fishing spot. The owl is on a tree to the left of the dock.
Owl #17
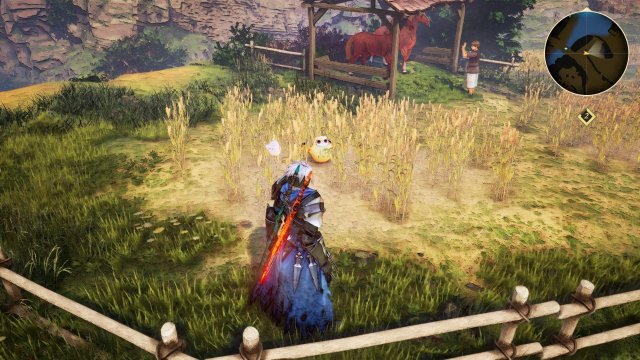
In Traslida Highway, you’ll eventually cross a bridge leading to a stable on your left with 2 horses. The owl is in the wheat field in front of the horses.
Owl #18
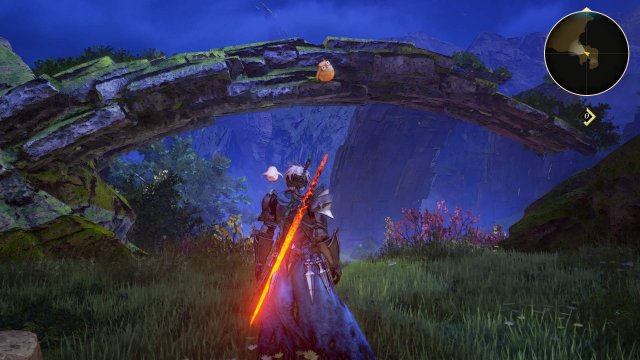
Before moving on to Viscent, there is another zone just off the path near the campfire. Once you enter Tietal Plains, hook an immediate right. The owl will be on the arch above the NPC you can heal.
Owl #19
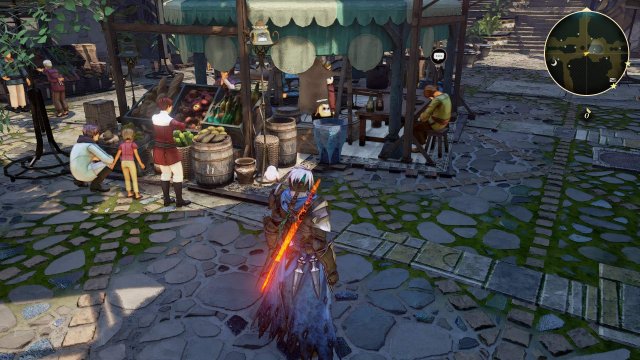
Sitting behind a blue vase in the middle of the Viscent market.
Owl #20
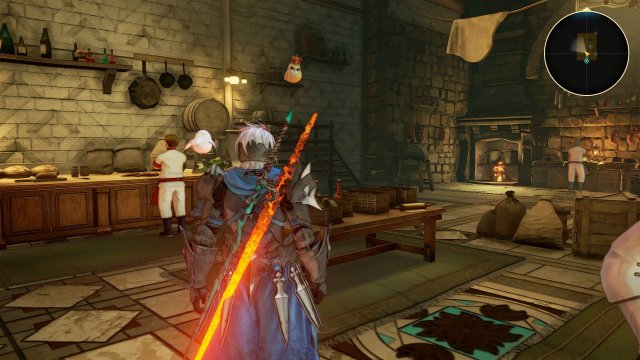
After your meeting with Dohalim, you’ll find yourself on the 2nd floor of the Autelina Palace. Head over to the entry plaza and down to the first floor. Take any door further into the palace and locate the kitchen. The owl is on the left as you enter.
Owl #21
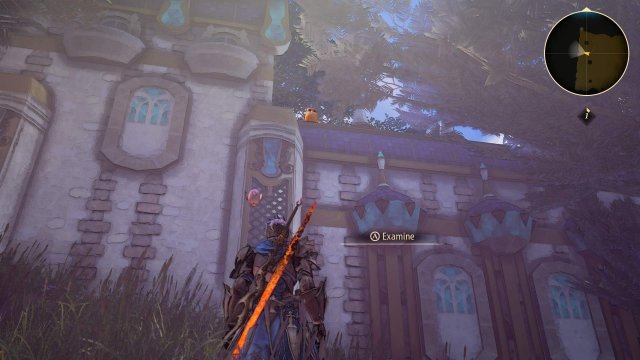
After entering the Talka Pond Road, cross the small bridge and hook an immediate right to find this owl on top of the wall.
Owl #22
After entering the ruins of Niez, continue straight at the fork to find this owl next to the broken statue in the market.
Owl #23
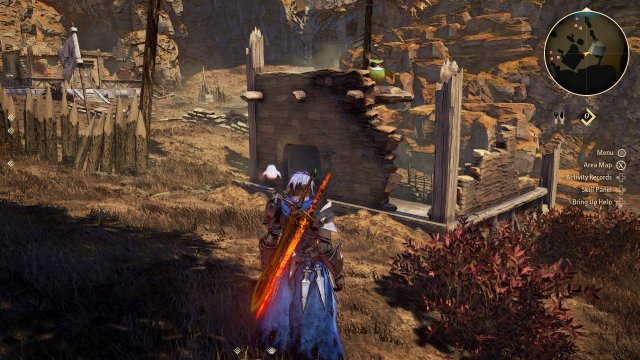
Once you enter the Aqfotle Hills from Niez, head up the road a bit and check behind the first destroyed building on your left to find the owl.
Owl #24
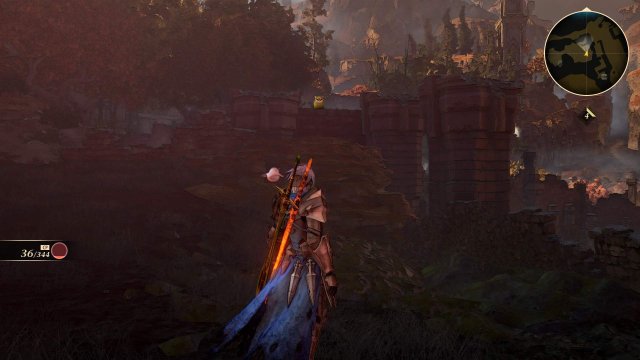
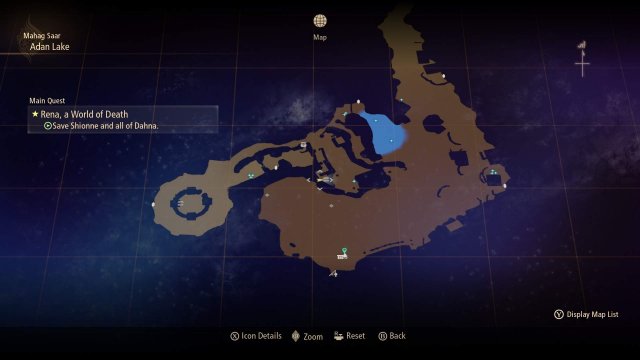
From the previous owl, take the area transition nearby to Adan Lake. Once there, head to the small patch of water and you should see an iron gate that you can enter. On the other side is a giant archway with multiple red ivy leading up to the top where a bunch of wolves are hanging out. The owl is on top of the arch itself.
Owl #25
After entering the Adan Ruins, push forward until you spot 2 ladders on your map. The owl is on a small platform across from the icons, overlooking the water.
Owl #26
Once you’ve boarded the Mobile Fortress Gradia, progress until you reach the level 2 of the sip. Head to the right and you’ll receive a cutscene about the engine. From here, head to the 2nd furthest room to the right. If you miss this owl, it will wash up on the shores of Thistlym after the ship is destroyed.
Owl #27
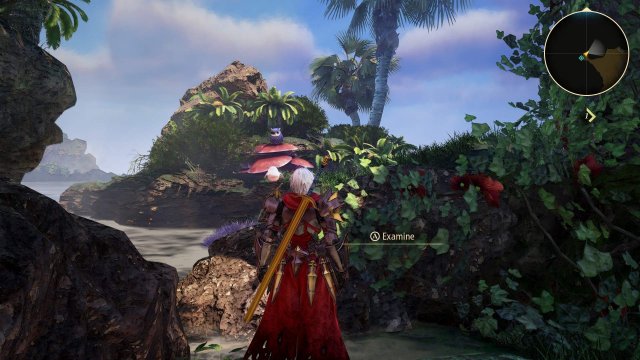
This owl can be found on the Tuah Seashore, almost on top of the area transition into Thistlym.
Owl #28
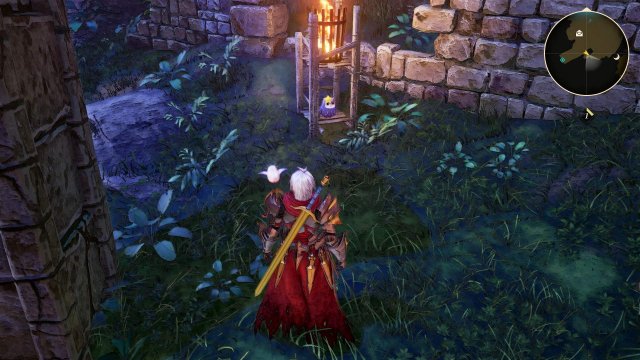
This own can be found in Thistlym, under the lit torch near the transition to Shinefall Woods.
Owl #29
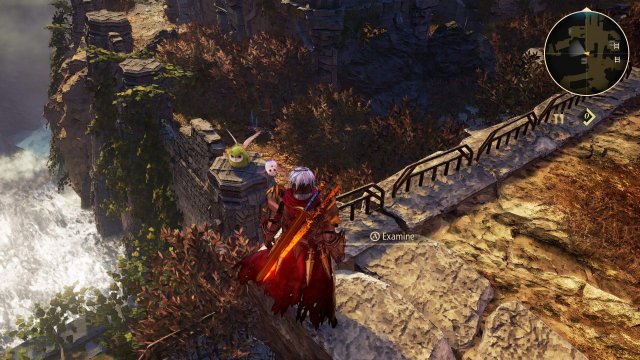
In the Shinefall Woods, directly between the level transition to Thistlym and the one to Aureum Falls on the map is a thin stone bridge. You can climb on top to find the owl.
Owl #30
Climb up to the 3rd level of the Lavtu Marshlands where you can locate owl near a red ivy ladder. It’s near the fishing spot.
Owl #31
After lowering both drawbridges in Del Fharis Castle, climb up the now accessible stairs all the way to the top. You should spot a glowing healing circle. Look above the ledge you can drop off of to spot the owl.
Owl #32
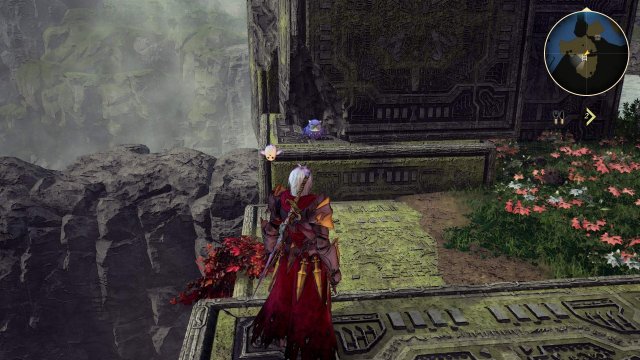
After liberating Pelegion, take the elevator down to level 2. As soon as you arrive, head right to find the owl on a ledge above you. Near the quest spot for the foodie.
After main story and finding the previous 32 owls
Owl #33
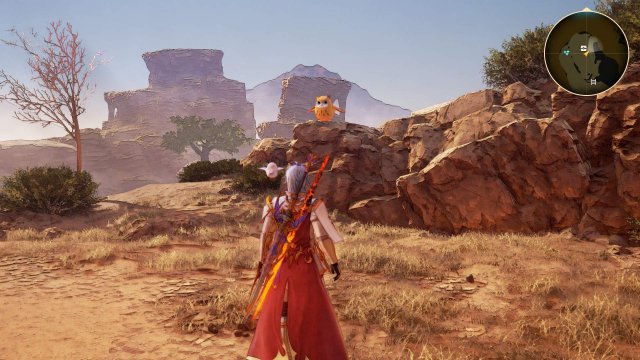
Return to where we found the owl in Iglia Wastes. You should see an exclamation mark on the minimap nearby that Dohalim can use to create an ivy ladder. The owl is at the top.
Owl #34
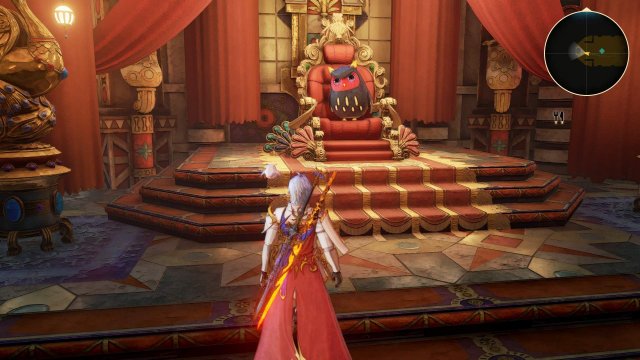
Return to the Lord’s Chamber in Glanymede Castle to find this owl on the throne.
Owl #35
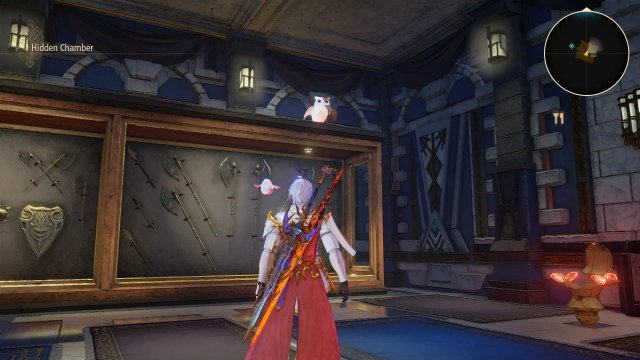
This owl can be found in the Hidden Chamber area of Riville Prison Tower.
Owl #36
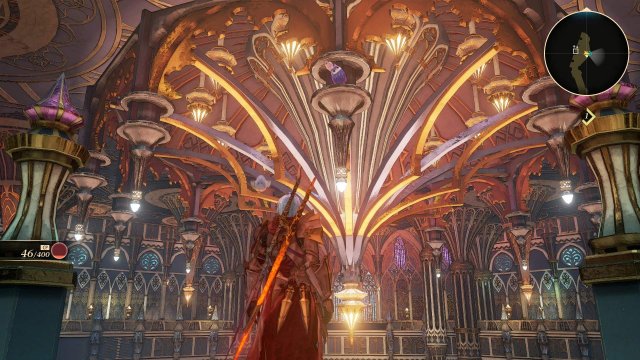
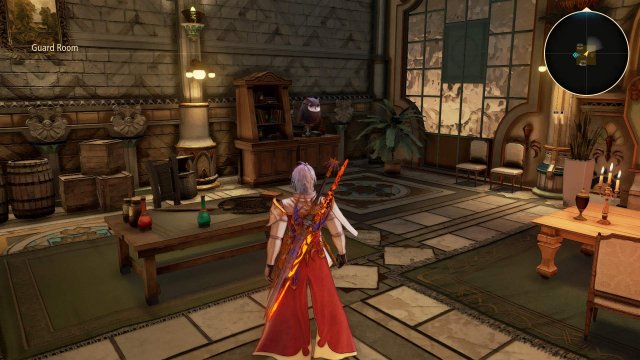
In the Guard Room of Autelina Palace.
Owl #37
Return to the Tuah Seashore and you’ll receive the quest, “Beyond the Grave”. Head to the Hidden Wharf and talk with the boat captain to take you to the uninhabited island. Follow the path to the objective marker where you’ll be attacked by a level 59 monster. After killing it, the owl can be found to the left of the large tree.
Owl #38
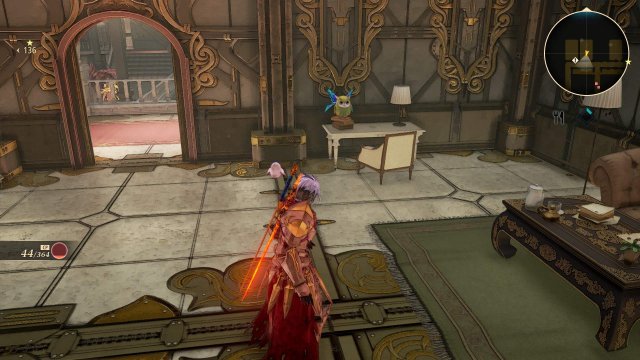
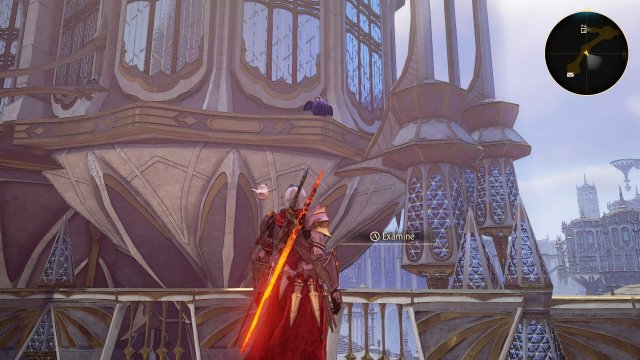
The final owl can be found in the Lord’s Chamber of the Del Fharis Castle.
Rebellious Spark
- Refer to Problem Solver for more info.
Problem Solver
There are 70 subquests in the game and you must complete them all. I recommend waiting until after you’ve completed the main story for this, as you will have most of the quests available to you by that point. You can see where quests you need to pick up are, by viewing the map list and looking for an envelope icon. You can also view where objectives are by looking for the star outline icon. Almost every subquest is straightforward aside from a few of the major ones, but these all have achievements tied to them and I go into detail in their relevant sections.
Calaglia (11)
Supply Procurement
- Story related.
Giant Zeugle Hunt
- Unlocks after completing Supply Procurement.
Hunger Averted
- Unlocks after returning from the Fagan Ruins.
Forging From Scratch
- Story related.
The Hunt for New Arms
- Defeated Balseph.
Shionne the Fashion Critic
- Defeated Balseph.
Taking Root
- Defeated Balseph.
Doc’s Secret Ingredient
- Defeated Balseph.
Into the Grotto
- Defeat the Efreet boss to obtain the Secret Key, then return to the locked room near where we originally entered Glanymede Castle from.
Mixed Feelings
- Unlocks after visiting Rena.
Global Connection
- Unlocks after visiting Rena.
Cyslodia (12)
Fire Beneath the Ice
- Reached Messia 224.
Hard Liquor
- Reached Messia 224.
Thawing Relations
- Reached Messia 224.
The Owl Forest
- Story related.
Gathering of Zeugles
- Unlocks after meeting Meneck.
Gourmet Saga: Berry Scavenging
- Defeated Ganabelt.
Culling the Snowplain Herd
- Defeated Ganabelt.
Survey Says…
- Completed Culling the Snowplain Herd.
Opening Up trade
- Completed Survey Says…
In Sync
- Unlocks when you revisit Cyslodia from the Forland Mountains.
Brave New World
- Unlocks after visiting Rena.
A Humbling Lesson
- Completed Brave New World.
Menancia (21)
A Healer and Her Patients
- Story related.
Refreshing Roughhousing
- Story related.
Pharia Ranch
- Arrive at the Traslida Highway.
Training Grounds for All
- Story related.
Gourmet Saga: Palace Delicacy
- Arrive at Viscent.
Claiming a Bounty
- Arrive at Viscent.
Taste-Testing Tusks
- Arrive at Viscent.
Getting Rusty
- Arrive at Viscent.
A Boorish Boar
- Defeated Venoflage.
Walking Crag
- Defeated Venoflage.
Dohalim, Big Game Hunter
- Defeated Venoflage.
Bibliophile
- Defeated Venoflage.
An Invitation to Fish
- Story related.
The Phantom Flower of Nevira
- Return to the library in Autelina Palace after revisiting Cyslodia from the Forland Mountains.
An Eternal Rivalry
- Return to the Training Grounds after revisiting Cyslodia from the Forland Mountains.
The Stud From the Ranch
- Unlocks after receiving the 5th ranch slot and revisited Cyslodia from the Forland Mountains.
Spirit Temple
- Revisited Cyslodia from the Forland Mountains.
Dahna’s Tastiest Pancake
- Unlocks after visiting Rena.
Record Collection
- Completed Global Connection.
Another Hillside Anomoly
- Completed Spirit Temple.
Otherworldly Visitors
- Completed Another Hillside Anomoly.
Mahag Saar (8)
City Renewal
- Unlocks after meeting Dedyme.
Kisara’s Initiation
- Unlocks after meeting Dedyme.
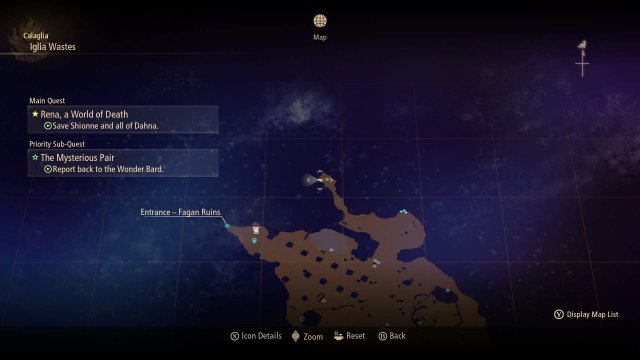
The Mysterious Pair
- Completed A Healer and Her Patients, then met Dedyme. The location of the item:
Gourmet Saga: Prairie Scent
- Arrived at Aqfotle Hills.
Echoes
- Revisited Cyslodia from the Forland Mountains.
Skybound Swarm
- Revisited Cyslodia from the Forland Mountains.
Farewell, Mage
- Unlocks after visiting Rena.
Owl Sanctuary
- Unlocks after visiting Rena.
Ganath Haros (12)
Fishing Fiends
- Defeated Almeidrea.
Master of Nature
- Defeated Vholran.
Gourmet Saga: Soft and Fluffy
- Defeated Vholran.
Pelegion’s Zeugle Mascot
- Defeated Vholran.
Catching Up
- Defeated Vholran.
Missing Lover
- Revisited Cyslodia from the Forland Mountains.
Seaside Tornadoes
- Revisited Cyslodia from the Forland Mountains.
Her Place
- Revisited Cyslodia from the Forland Mountains.
Untamable Rage
- Revisited Cyslodia from the Forland Mountains.
A Talk With Tilsa
- Completed the events at The Wedge.
Their Future
- Completed Missing Lover, then visited Rena.
Beyond the Grave
- Revisit the Tuah Seashore after visiting Rena.
Others (6)
Renans and Their Lords
- Story related.
Tissue Sample
- Found in Daeq Faezol after you visited Rena.
An Ambition Fulfilled
- Completed Tissue Sample.
The Super Zeugle
- Completed An Ambition Fulfilled.
The Ultimate Zeugle
- Completed the Super Zeugle.
The Reminiscence Device
- Unlocks after completing the main story.
Skilled Angler
- Refer to Godly Angler for more info.
Godly Angler
There are 44 different fish in the game, each having a specific location, lure, and input sequence to make catching them easier. I recommend not starting this until you acquire the fishing rod for completing Kisara’s Ultimate solo training, as it is the best rod you can get. Once you’re at a fishing spot, you can check which fish are there and what their combo is by changing your lure and looking at the bottom right.
Fish
Cave of Solitude
- Cave Sea Bass
- Amber Mackerel
- Coral Flatfish
- Karasuba Sea Bream
- Lacerda Salmon
Nevira Snowplains
- Pond Tilapia
- Berseker Piranha
- Tricolored Catfish
- Polar Bass
- Nevira Piranha
- Armored Sturgeon
Frozen Valley
- Hawksbill Trout
- Pearly Pike
- Polar Bass
- Azure Tilapia
- Cyslodian Salmon
Overseer Hill
- Pond Tilapia
- Berseker Piranha
- Hawksbill Trout
- Menancian Bass
- Traslida Arowana
- Golden Catfish
Talka Pond Road
- Dahnan Bass
- Pond Tilapia
- Hawksbill Trout
- Menancian Catfish
- Talka Trout
Adan Lake
- Dahnan Bass
- Berserker Piranha
- Tricolored Catfish
- Azure Tilapia
- Muddy Piracucu
- Aureum Arowana
Adan Ruins
- Hawksbill Trout
- Cave Sea Bass
- Emerald Salmon
- Lesser Pirarucu
- Aqfotle Arowana
Hidden Wharf – Fishing Trip
- Vesper Sea Bass
- Sardonyx Grouper
- Garnet Sea Bream
- Blueback Tuna
- Mahag Saar Barracuda
- Silver Marlin
Shinefall Woods
- Dahnan Bass
- Ganath Haros Piranha
- Triclored Catfish
- Ganath Haros Catfish
- Green Pike
Lavtu Marshlands
- Dahnan Bass
- Tricolored Catfish
- Lavtu Tilapia
- Lavtu Arowana
- Lesser Pirarucu
- Cobalt Trout
Fogwharl Limestone Caverns – Inner Sanctum
- Ganath Haros Piranha
- Pearly Pike
- Azure Tilapia
- Ganath Haros Catfish
- Fogwharl Pike
- Cygni Pirarucu
Uninhabited Island
- Vesper Sea Bass
- Tsuyukusa Mackerel
- Mahag Saar Flatfish
- Zesti Grouper
- Gluttonous Barracuda
Lures
Disarming Lure
- Purchase from the Cyslodan Inn.
Trembling Lure
- Purchase from the Viscent Inn.
Charming Lure
- Purchase from the Niez Inn.
Rock Slapper
- Purchase from the Pelegion Inn.
Flaptrap
- Found in a chest in Adan Lake. Head through the iron gate where the water is and it will be in the building past the first group of enemies.
Subsurface Mirrage
- Found in a chest in Adan Ruins. Take the ladder down into the water to reach the chest.
Stick Lure
- Found in a chest in the Lavtu Marshlands.
Bienfu Lure
- Found in a chest in the Forland Mountains – South Hiking Trail.
Rappig Minnow
- Complete the In Sync subquest.
Zapie Doppelganger
- Found in a chest directly next to the fishing spot in the Fogwharl Limestone Caverns – Inner Sanctum. You have to finish the Untamable Rage subquest to unlock this area.
Celestial Whale
- Completed Kisara’s Novice solo training.
Mieu Sinker
- Completed Kisara’s Advanced solo training.
Beginner’s Popper
- Story related.
Elegant Swimmer
- Catch 3 different fish then talk to the Fishing Expert at Talka Pond Road. This applies to all of the following lures.
Portly Mudslinger
- Catch 5 different fish.
Round Popper
- Catch 15 different fish.
Marine Floater
- Catch 25 different fish.
Uber Spinner
- Catch 30 different fish.
Teepo Lure
- Catch 35 different fish.
Silver Fang
- Catch 40 different fish.
Speedy Chef
- Story related. Simply cook your first meal.
Globetrotting Foodie
- There are 38 total recipes in the game, but you only need 30 for the achievement. The majority of them will come from completing the main story and the subquests.
Porridge
- Story related.
Vegetable Soup
- Story related.
Vegetable Juice
- Story related.
Cheese Fondue
- Story related.
Gnocchi
- Story related.
Leaf Wrapped Fish
- Story related.
Grilled Mushrooms
- Located in a chest in Kyrd Garrison.
Grilled Fish
- After defeating Balseph, return to Mosgul and look for the chest behind where Alphen slept.
Steamed Potatoes
- Complete the Hunger Averted subquest.
Kebab
- Complete Doc’s Secret Ingredient subquest.
Lohikeitto
- Complete the Hard Liquor subquest.
Apple Pie
- Complete the Gourmet Saga: Berry Scavenging subquest.
Omelette
- In a chest in the Autelina Palace library.
Pork Bun
- In a chest in the Autelina Palace Guard Room.
Beef Stew
- Complete the Gourmet Saga: Palace Delicacy subquest.
Pancake
- Complete the Bibliophile subquest.
Horse Sashimi
- After entering the Dark Wings hideout in Niez, head upstairs to find this in a chest.
Bouillabaisse
- Located in a chest in the tower at Adan Lake.
Ice Cream
- In a chest at the Adan Ruins. Drop down a large well to find it.
Roasted Chicken
- Complete the City Renewal subquest.
Curry
- Complete Kisara’s Initiation subquest.
Sandwich
- Complete the Owl Sanctuary subquest.
Vitamin Smoothie
- Complete the Gourmet Saga: Prairie Scent subquest.
Sushi
- Complete the Untamable Rage subquest.
Grilled Rappig
- Complete the Missing Lover subquest.
Sashimi
- Heal an unconscious NPC in the Lavtu Marshlands.
Fish Steak
- Complete Pelegion’s Zeugle Macot subquest.
Mabo Curry
- Complete the Gourmet Saga: Soft and Fluffy subquest.
Hamburger
- Located in a chest in the Forland Mountains – South Hiking Trail.
Fancy Parfait
- Heal an unconscious NPC in Residential Zone 16 on Lenegis.
Shortcake
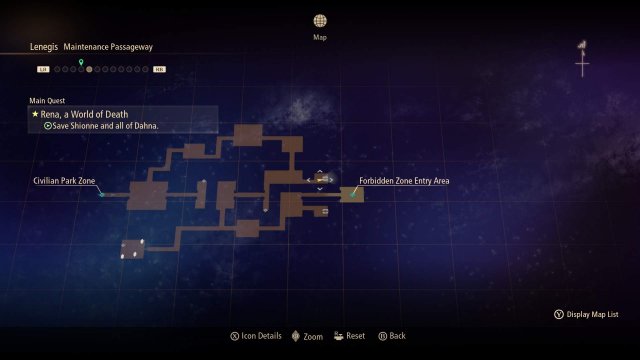
- Located in a chest in the Maintenance Passageway on Lenegis.
Shionne Pancakes
- Complete the Dahna’s Tastiest Pancake subquest.
Dohalim Pancakes
- Complete the Dahna’s Tastiest Pancake subquest.
Hootle Pancakes
- Complete the Dahna’s Tastiest Pancake subquest.
Murus Flegit Porridge
- Rest at a campfire after completing Dahna’s Tastiest Pancakes.
Wiener
- Complete the Into the Grotto subquest.
Meuniere
- Found in a blue chest just after defeating the boss of the From Beyond the Grave subquest.
Glanymede Donuts
- Complete the Global Connections subquest.
Arms Stockpiler
- You must craft 100 of the 103 weapons in the game. The majority of these will come from the main story as you upgrade your gear. You can check which weapons you’ve crafted by looking for the green “Created” star under the materials needed for the weapons. You can also check the Enemy Info section of the Field Guide to see which enemies drop the mats you might be needing to craft weapons. There’s also accessories that increase item drop chance that could be helpful.
Jeweler
- You simply need to make 30 accessories total, they don’t need to be unique. You can even make the same one over and over.
What’s in a Name?
- Refer to Myriad Monikers for more info.
Myriad Monikers
- Purchasing 400 skills will likely be one of the last achievements you earn as not only do you need a ton of SP, but you also need to unlock the majority of the characters skill trees to even be able to purchase them. The majority of these trees will simply come by completing the main story and subquests. A few come from fishing, completing certain characters Basic solo trainings, and cooking certain meals. You can check how to unlock any missing trees by hovering over them. I suggest not even worrying about this until after you’ve done pretty much everything else, as by that time you’ll have most of the trees unlocked, a ton of SP from combat and subquests, plus the artifacts that boost SP gain.
Hundred-Hit Smackdown
- This will come naturally as you progress through the game. it’s easiest attempted on the many large bosses you’ll encounter throughout. To start off, I recommend having everyone’s boost attack bar full, then get a regular combo chain of ~20-30 going. Once you’ve done that, start to weave boost attack > regular combo > repeat.
- A good spot to knock this out early is the overdrive tutorial. Instead of following the instructions, just keep wailing on the enemies until you have the achievement.
One-Hit Wonder
- This will come naturally on your path to the other achievements. I earned this around the time I was level 45 by critting on a finisher move. Alternatively, once you start revisiting early-game areas after the story, you’ll be hitting well over 10,000 pretty often.
Diligent Counterattacker
- This will come naturally as you play the game. To counterattack, you simply have to press the dodge/block button as an enemy attack would land. You’ll glow blue and can hit the attack button to warp to the enemy and counterattack.
High Roller
- 400,000 seems like a lot, but you’ll get this naturally by simply upgrading your weapons and restocking healing wares. I earned it well before finishing the main story.
Peak Strength
- After completing the main campaign, you should be somewhere around the level 50 mark. From here I suggest clearing every subquest except for “Otherworldly Visitors” and “The Reminiscence Device” as doing so will give you access to the XP and Mega XP boost artifacts. Now it’s time to tackle Otherworldly Visitors.
- I went into this quest at ~level 56 and finished it at level 90. You will gain a LOT of XP for simply killing the enemies and bosses within the 6 zones. Once you’ve defeated the final boss, Chronos, you can talk to him over and over to repeat his battle. Each time you defeat him will give you a few level ups, even in the 90s, especially if you fight him repeatedly and build a chain.
Encyclopedia Zeuglica
- I earned this near the end of the main story, however you will earn this naturally on your path to doing the other achievements. There’s 181 enemies in the game, and you will need to kill almost all of them for the 100% so long as you’re not actively avoiding fights or enemies.
Unrelenting Blaze
- Story related. You will unlock this after defeating the Efreet in the Berg Volcano. This boss is more of a gimmick than any kind of actual boss fight. You just need to clear 3 waves of basic enemies from the area.
Night Blossom
This is an optional boss found during the Phantom Flower of Nivera subquest. To start, head to the library in Autelina Palace. An automatic cutscene will trigger with Rinwell reading through a book. Afterwards, head into the Nevira Snowplains and down to where we found the owl in this area. The fight will trigger in the area with all the strange crystals. I recommend being lv. 50+ before attempting this fight.
Meneiys is a pretty simple but fun fight. it will start off just charging you and trying to kick you with its hooves. Once you’ve depleted about a quarter of it’s HP, it will transform into a fire version of itself. After another quarter it will turn to ice, and on the final quarter it will be lightning. During these phases it will use its basic attacks from its normal stage, but it will mostly throw in slow AoE spell attacks that can be easily avoided by hanging back a bit. Once it throws out a spell, rush in for a few combos, then back out. Rinse and repeat.
Quaking Continent
This is an optional boss found during the Spirit Temple subquest. To start, head to Traslida Highway and talk to the people near the carriage. Once you received this quest, head to Tietal Plains to find a large temple has appeared. Entering will trigger a dungeon crawler like sequence where you need to navigate room to room killing enemies to locate the next portal forward. Once at the end you’ll reach the Grand Gnome. I recommend being level 55+ for this fight.
Much like the Efreet fight, Grand Gnome is more of a gimmick than a boss fiht in the sense that you simply have to kill a wave of enemies, followed by a miniboss named Vas Phein. During the fight with Vas Phein, the Grand Gnome will be shooting rows of lasers into the arena. I recommend fighting on either the left or right end so you don’t have to worry about getting hit by them. Vas Phein itself is fairly simple, mostly acting as an oversized bird enemy. Once you’ve reduced his HP to half, a couple of regular enemies will spawn in that I recommend taking care of so you don’t get overwhelmed. Finally, Grand Gnomes core will be exposed and you simply need to lay a few combos into it to kill it.
Billowing Cyclone
This is an optional boss found during the Farewell, Mage subquest. To start, head to Niez and talk to Baephon after comleting the subquest called Echoes. Once you received this quest, head to the Ridge – Mount Dhiara and enter the tall tower that was inaccessible earlier in the story. Head all the way to the top to initiate the fight. I recommend being level 50+ for this fight.
Procella Sylph is pretty much identical to the Efreet boss fight in the sense that it’s a large boss that’s more of a gimmick than an actual boss fight. You’ll start out by fighting 2 waves of level 66 birds, but they’re pretty easy to take care of. After which, a miniboss dragon named Sylph Zloa will spawn. Fighting it is the same as any of the other dragons you’ve fought throughout the story, just with the addition of Procella Sylph shooting giant laser beams at you occasionally. Once you’ve reduced Sylph Zloa to half HP, more birds will spawn. I recommend taking them out so they don’t get in the way. Once you’ve killed the dragon, be prepared for a QTE event followed by jumping onto the back of Procella Sylph Shadow of the Colossus style. Ignore the enemies on its back as they’ll endlessly respawn. instead, just keep attacking the large core. It doesn’t take much to destroy it.
Raging Current
This is an optional boss found during the Untamable Rage subquest. To start, head to Thistlym and talk to the NPC near the top of the cliff. Head into the Shinefall Woods and locate the entrance to the Fogwharl Limestone Caverns near the camp site at the bottom of the map. Proceed through the dungeon to find Luo Undine at the end. I recommend being lv. 50+ before attempting this fight.
The first part of this fight is almost identical to the boss in the Underground Passage in Cyslodia. The only attack I really had to worry about was its leap attack. I opted out of killing the Slimes it spawns as more would appear by the time I killed the others. Instead, focus on the boss and use Rinwell’s finisher to cancel their artes attacks. Once you’ve finished the first bar, the boss will grow larger and you will have to kill it again. This time, it will spew acid all around it and summon large whirlpools that you should definitely dodge out of. I actually found this phase to be easier, since their were no adds to watch out for.
Big Game Hunter
- There are 20 Gigants in the game that you need to kill. The majority of them come from sidequests, with a few of them just hanging out in the world.
Mantis (Lv. 43)
- On a side path near the owl spot in Sandinus Ravine. There is also a subquest to kill it.
Toxidillo (Lv. 13)
- Ganymede Castle 4F.
Boisterous Roper (Lv. 15)
- Down a side path near the exit of Ulvhan Grotto.
Polychephus (Lv. 21)
- Survey Says… subquest.
Great Dragon (Lv. 26)
- Will show up randomly when in battle in the Traslida Highway. There is also a subquest to kill it.
Flamewrecker (Lv. 28)
- Walking Crag subquest.
Relentless Charger (Lv. 26)
- A Boorish Boar subquest.
Alpha Reaper (Lv. 25)
- Dohalim, Big Game Hunter subquest.
Stormbringer (Lv. 42)
- Seaside Tornadoes subquest.
Elemental (Lv. 42)
- Master of Nature subquest.
Regent Bee (Lv. 45)
- Her Place subquest.
Agony Keeper (Lv. 39)
- In Sync subquest.
Mother Boomy (Lv. 42)
- Skybound Swarm subquest.
Ruthless (Lv. 43)
- Echoes subquest.
Thunderite (Lv. 53)
- Mixed Feelings subquest.
Calamity Arms (Lv. 54)
- Tissue Sample subquest.
Masher Bull (Lv. 56)
- The Super Zeugle subquest.
Masher Mare (Lv. 56)
- The Super Zeugle subquest.
Ezamamuk – (Lv. 59)
- The Ultimate Zeugle subquest.
Sword Dancer (Lv. 56)
- After arriving in the Astral Energy Convergence Zone on Rena (just before the final boss), enter the Water Astral Energy Separator.
Otherworldly Survivor
This requires you to complete a very long quest chain of subquests. To begin, you first have to gain access to the 4 “lights” enemies near the end of the story. These include Meneiys, Grand Gnome, Procella Sylph, and Luo Undine. Refer to their specific sections if you still need to find and complete any of their quests. Once done, head to Viscent to find an NPC with a cow who will give you a new quest to explore the Spirit Temple in Tietal Plains once more. After entering, speak with the Renan researcher and they will task you with finding 6 keys hidden inside 6 dungeons that increase in difficulty, culminating in a final boss of level 95. I recommend being at least level 55-60+ before attempting the dungeons, however, you will almost reach level 100 by the time you’re finished with this quest.
Once you’re ready, enter the first dungeon which consists of enemies between the 55-60 range. At the end, you will meet Edna from Tales of Vestiria. Her boss fight is pretty simple, if not a little long. She attacks very slowly when using her umbrella, and will cast spells of varying elements and patterns throughout.
The second dungeon consists of enemies in the mid 60’s, and the boss is the exact same as Valclynimus from Rena. You can deal with it the exact same way you did that boss. In fact, I found this one to be even easier.
The 3rd boss is a trio of the Meneiys boss. Instead of one that switches between elements, it’s a lightning, fire, and dark version that all attack you at the same time. This battle can be a little tricky, but as long as you enter within the 70-75 range you should come out just fine. There is a few Gold Gel you can find throughout these dungeons, which can definitely come in handy.
The 4th area will have enemies in the mid to high 70’s leading up to Eizen from Tales of Berseria. Eizen is level 81, but his fight is one big pattern. He will always attack 3 times in a row, varying which elemental punch he throws out. You can simply strafe near him to avoid his attacks, then hop in for a combo or 2. When he uses his Mystic Art, he will fly into the air and slam the ground creating a large shockwave. Once again, running around basically shuts this attack down.
The enemies in the 5th area are in their low 80’s and the boss is a joint boss consisting of both Edna and Eizen. They’re movesets are exactly the same as their solo fights, so who you choose to target first is mostly a matter of preference.
The final boss is Chronos. Despite being lv. 95, he’s actually a pretty easy boss. He only has a few attacks that all leave him wide open for you to get plenty of hits in. A 3-hit slash attack, a large explosion around him, and a purple beam. During his later stages these will change slightly, such as adding an extra hit to the multi-slash, or following certain attacks up with a large beam of light from the floor. His Mystic Art is a large beam that can easily be avoided by simply circling him. Finally, he has the ability to completely freeze time and deal massive damage to you, though he uses this rarely. You can also dodge just as time freezes to avoid damage.
Once you’ve defeated him, return to the Researcher for the achievement.
Putting the Past in its Place
This achievement is earned for completing the Reminiscence Device subquest. A boss rush consisting of the following fights:
- Lv. 95 Balseph
- Lv. 96 Ganabelt
- Lv. 97 Dohalim
- Lv. 98 Almeidrea & Mesmald
- Lv. 99 Vholran
- Lv. 99 Balseph, Ganabelt, Almeidrea & Mesmald, and Vholran
- Lv. 100 Zephyr
You can start this mission by revisiting Daeq Faezo after completing the main story.
You must complete every fight back to back so I recommend leaving this mission alone until you’re level 90-100, and have a decent stock of healing wares. At lv. 100, I only needed 1 Gold Gel and that’s only because I play extremely recklessly. All of the lords fight exactly as they do in their story counterparts. When it comes to the multi-lord showdown, they thankful have their stats nerfed (such as health and defense) so taking them out isn’t as much of a hassle. Who you decide to target first is really a matter of preference, but my order was Balseph, Almeidrea, Vholran, and finally Ganabelt. Zephyr’s fight is thankfully pretty easy as well. If his attacks land he can do massive damage, but like many bosses in this game he attacks very slowly and has long animations that allow you to squeeze in combos. Make sure to utilize Law and Alphen’s Boost Attacks as they can stun Zephyr momentarily. As long as you come into this mission well prepared, it really isn’t too difficult.
Elite Vanguard
This is awarded for completing the Ultimate Group Training in the Training Hall. This fight consists of a Lv. 99 Sword Ranker, a direct copy of the Sword Dancer gigant. What makes this fight semi-difficult is that it’s a 2-phase fight and you can’t use any items. So if your healers go down or you run low on CP you have no way of fixing that. My party for this fight was Alphen, Shionne, Dohalim, and Rinwell.
The Sword Ranker himself isn’t too crazy to deal with, for the first phase it will mostly use large sweeping attacks in combos of 2, or a large dash attack. Both of which should be easy to avoid and counterattack. Definitely make sure to utilize Alphen’s Boost Attack to stun the boss for a good amount of free damage. During phase 2 it will get a lot more mobile and aggressive, but it still has a few good attacks that leave it open. It shoots a purple laser beam that’s perfect for attacking from the side as the animation is quite long, a large spin attack where it takes a second or 2 to recover from, and an attack where it sprints across the arena. I usually avoided that last one. If you want to trivialize this fight, you could even switch to Shionne or Rinwell and attack safely from a distance.
Dilettante
- Refer to Curious Hobbyist for more info.
Curious Hobbyist
There are 23 artifacts in the game, but we only need 20 for the achievement. The majority of these will simply come from completing the subquests.
Crocodile Crusher
- Story related.
Devil Statue
- Dohalim’s Ultimate solo training.
Blade of Sealing
- Can be found in a red chest under the large tower at Adan Lake. Head across the small patch of water and through the metal gate to reach it.
Hellmask Fiend Skull
- Dohalim’s Advanced solo training.
Mechanical Doll Accessory
- Open the chest behind Chronos after defeating him.
Silver Suit of Armor
- Their Future subquest.
Golden Suit of Armor
- Spirit Temple subquest.
Lucky Cat Statue
- Echoes subquest.
Golden Lucky Cat Statue
- Untamable Rage subquest.
Drums of the Master
- Once you’ve reached the very top of Aurum Falls, there’s a path you can drop of to fall all the way back down to a new path. Climb up the long ladder to find a chest with the Drums.
Drums of the Legend
- Farewell, Mage subquest.
Glutton’s Maze
- Gourmet Saga: Prairie Scent subquest.
Glutton’s Code
- Global Connection subquest.
Glutton’s Guidebook
- The Phantom Flower of Nevira subquest.
Quivering Candles
- The Mysterious Pair subquest.
Golden Fairy Statue
- A Humbling Lesson subquest.
Metal Miner’s Cap
- Uninhabited Island special owl.
Broken Machine Gun
- Riville Prison Tower special owl.
Ancient Excavator
- Autelina Palace Guard Room special owl.
Battle Maiden’s Shield
- Special owl in the Lord’s Chamber of Ganymede Castle.
Trident
- Special owl in the Lord’s Chamber of Del Fharis Castle.
Machine Beast
- Find all 38 owls.
Vivid Sphere
- Special owl in Iglia Wastes.
Novice Rancher
- Refer to Veteran Rancher for more info.
Veteran Rancher
- After first arriving in Traslida Highway, you will pass an unconscious NPC. Talking to him will start the questline for unlocking the ranch. Once you finish, you can start to raise animals from the ranch itself, or campfires. You simply have to gather animal parts from mature animals 50 times. Note that each mature animal equals 1 towards the progress, regardless of how much meat is received.
Owl Spotter
- Refer to Owl Homecoming for more info.
Owl Scouter
- Refer to Owl Homecoming for more info.
Ceaseless Chatterbox
This is potentially the only missable achievement in the game. During your adventures and various tasks you will receive a prompt at the bottom left of your screen to trigger a skit. There is 320 total in the game and you must trigger 300 for the achievement. My best advice is to constantly check for any available skits, especially before leaving every area. If you miss one, they will show up at a campfire for you to watch, but I don’t know if every skit does this or if they stay there indefinitely, so best to be safe until more info is known.
You will also get skits from the following:
- Main story progression (I ended with ~250).
- Subquests.
- Collecting + cooking every meal.
- Certain fishing actions, such as going to the Fishing Spot at the Hidden Wharf, or catching boss fish.
- Training Grounds missions.
- Revisiting areas after the story.
- Collecting Artifacts.
- Minor specific actions such as spending a lot of Gald at once.







Be the first to comment