Guide to Arena
Are you wondering why your fists don’t seem to be connecting with your fellow grunts’ faces, or why bullets seem to come out of the other end of the gun when you Clearly seem to be holding it the right way round? Have a look at this guide and you might be able to make something of yourself!
Overview
Well, you’ve survived reading this so far, so i think you’ll be up to the task of arena mode. Today this guide will show the the basics of arena, what characters are present (as far as i have discovered) and any other neat things I’ve discovered along the way. They will be presented in this order:
- Characters
- Basics
- Rooms
Let’s begin, shall we?
Characters: The More, The Merrier!
You’ll be meeting some friendly and some not-so friendly faces during your journey, i will be talking about your general squad of characters that make up your company. I am still currently going through arena so i apologise in advance for anything i’ve missed.
Bossman (High Management)
Remember that old hag you beat up earlier? well, he’s actually pretty important. This guy knows a lot of people and is generally your go-to for new recruits (or meat shields). He can round up potential hirelings for a small fee of 50$, then you can hire from the pool of recruits. He can also fire any hirelings that you think are a waste of your time.
Doc (Guide)
The person that brought you back in order to start up a new business. he’s usually the one who gives you the contract missions which open up the story and progress the game. He’s also available to help you when you’re feeling lost. he’s usually located in the lobby or station hub.
In short: Provides help and contract missions.
Q-Bert (Quartermaster)
Shady, yet efficient business dealers. He’s your go-to guy for weapons and armour. The more missions you complete, the better gear he has in stock. It can range from rusted scrap and rags to electric longswords and juggernaut-standard armour. He takes up residence in the quartermaster room.
In short: he sells weapons and armour, located in quartermaster room.
Chopper Dave (Pilot)
He’s a Half-drunk, half-crazy, fully functional man. This guy knows how to pilot a chopper, andis your main gateway to getting to and from missions. You can rescue him from a gang of thugs near the start of the game.
Skinner (Medic)
Big, soft and chuck-filled with love, Skinner loves putting people back together. He’ll make sure your hirelings are cared for if they go down in a fight. You can also purchase health insurance (Cloners) to instantly bring back people at a cost.
3-Chef squad (Soup Chefs)
Remember those Italian-looking guys you beat up? Now they’ll make sure your hirelings keep their stomachs full and ready.They also give you access to the tinker bench, which allows your guns to be tinkered with. They’ll also sell you tinkered and rare firearms for a low (Or high) cost. some of which include but are not limited to:
- Flamethrowers
- Laser weaponry
- Miniguns
In short: Adds +4 to hireling cap, sells rare and tinkered weapons. Found in dormitory.
“Fence” (Nexus Dealer)
The person you met before during the vampire mission (which sucks by the way). He grants you access to additional dyes/tans and augments, which improve parts of you and your hirelings’ abilities. For example: The chameleon veil, which makes tac-defence 100% more effective. They’re found just outside of the main building.
Basics: Gotta Start From Somewhere!
Right, now you’ve got your ragtag team of boys up and running, you’re wondering how you actually become a grunt Giga-chad. Well, you’re in luck! i have just the basic thing for You!
Hirelings: Your Own Minions!
Hirelings are the people you recruit to your cause. They don’t gain skill like you, but instead level up, which increases their general abilities. You can equip them how you like, whether it be meat shields, bruisers, tanks, snipers, whatever. It’s all up to you! Just make sure to remember to keep them equipped with better gear.
Hirelings can be rounded up by bossman in the lobby.
Abilties: How to Use Em’.
Various abilities are also obtained throughout the game, and they can prove to be really useful.
Here’s a list of the ones I’ve come across so far and how to utilise them effectively:
- Warchest: Obtained at the beginning of the game, this ability allows you to swap out weapons and access your storage between waves. The main benefit of this ability is to teach you to buy extra weaponry so you have a decent supply of firearms and weapons for the whole mission in case you run out of ammo or something similar.
- Call for aid: Obtained slightly later in the game, this ability allows you to call for soldiers to Aid you during combat, for a cost. Upgrading this ability allows stronger soldiers to join your fight, at the cost of them being more expensive to deploy.
Training: No Pain, No Gain!
Right, so that old hag showed you this wonderful machine that lets you train forever. It’s good for getting those last points in training, but nothing beats good ol’ life experience, and pain too.
Unarmed: Crouching Grunt, Hidden Badass
Unarmed skill is basically how well you do without a weapon. It’s generally less effective that weapons but if used correctly, gives you a distinct advantage.
It’s trained by using your fists (Duh) to give people broken jaws and concussions. I’d recommend training while in baby mode, as to not get overwhelmed.
Strength and force generally help with using your fists, as concrete abs work better than noodle arms.
Melee: Bat Goes Bonk!
Melee is your skill in handling melee weapons, which consist of clubs, hammers, swords, or anything you can swing around. The more skill you get in this, the easier it is to kill hordes of enemies with ease without having to rely on your firearms.
Dexterity, Critical and lethality all help in these skills.
This is usually your most-used style, so it’ll level up naturally as you go along. Make sure to grab the core skills to make your swings faster and more efficient, There’s a difference between hacking a guy’s jaw off and easelessly slashing a guy in two. Know it.
Firearms: Bang, Bang, Bang!
Firearms are weapons that fire projectiles, such as crossbows, flamethrowers or plain old guns. This skill allows you to handle firearms better and carry more ammo on you, so you don’t end up running like a sissy when you run out of ammo.
Senses and tactics are the main stats to look for when going in guns Blazing. I’d rather you hold the gun the right way round than blow your own face off.
This is usually your Second main skill, so it’ll build up over time. However, you can just replay an earlier mission and use the enemy’s guns to build up skill.
Acrobatics: Become The Matrix
Acrobatics is your ability to perform complex movements, such as dodging or kicking a weapon into your hand. Athletics and tactics are the main traits that help with acrobatics.
Get tactical skills as early as possible. That TAC-BAR is a lifeline, i swear. Acrobatics is usually trained up by dodging, throwing items, or using your TAC-BAR.
I’d recommend dodging instead of blocking, and using throwing weapons such as mini javelins if you want to train this skill up.
Rooms: Home, Sweet Home!
Great! you and your hirelings are now ready to face danger, but what about making your home comfortable? you’d rather sleep on a bed than the floor, and eat home-cooked soup instead of ramen, right?
Lobby: Please Wait
The room you first walk into and the room that bossman stays in. Hirelings are gathered here by your bossman to either be hired or shooed out of the door. It also leads to the bus stop which is where some of your missions will take place.
Quartermaster: Gear Up!
Your main weapons and armour room, where you can tinker and customize to your liking. Is also shared by Q-Bert. ‘Nuff Said.
Dormitory: Soldiers Gotta Sleep
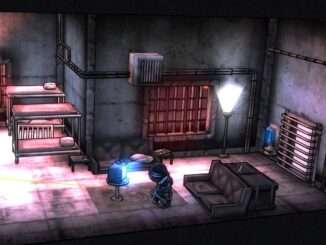
The dormitory is where your hirelings and soldiers sleep, eat and breathe (Maybe). There are a few features here, so i’ll list them off.
- Kitchen: Where the 3-cook squad resides. You can upgrade it to add a +4-hireling cap each time, this is also where some rare weapons are sold.
- Barracks: Where your hirelings sleep. You can upgrade it to add +1 To your hireling cap.
- Soldier stations: This is unlocked pretty early in the story. This allows you to send for reinforcements during a fight at the cost of cash. This can also be upgraded to give yourself stronger soldiers. However, this also drives up the squad’s cost for deployment.
- Medical: And that’s how i lost my medical license.
- The medical room is where your hirelings (and you) get patched up and put together when you go down. You can spend money to get people back early or just wait for them to heal.
- Skinner, the love-filled maniac also resides here. Just be warned that he’s not liable for being sued for malpractice.


Be the first to comment