
A guide to help you get started down the right path in Welcome to the Game II.
Other Welcome to the Game 2 Guides:
Introduction
Okay, so this game is harder than the previous one, and players are having trouble figuring out how to progress. This guide is based on my gameplay and observations of streamers.
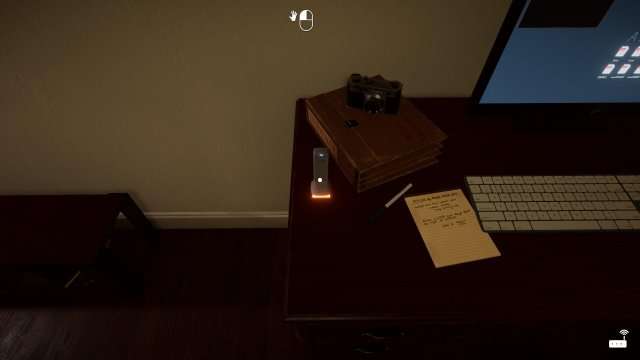
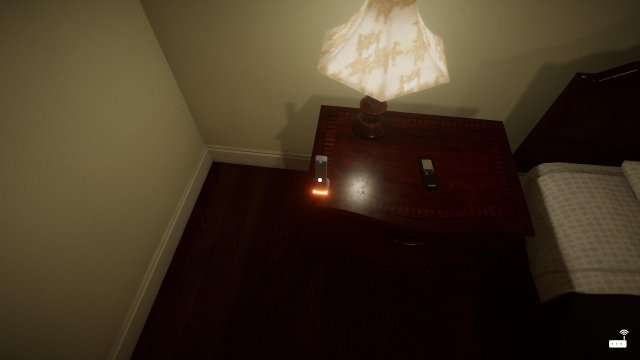
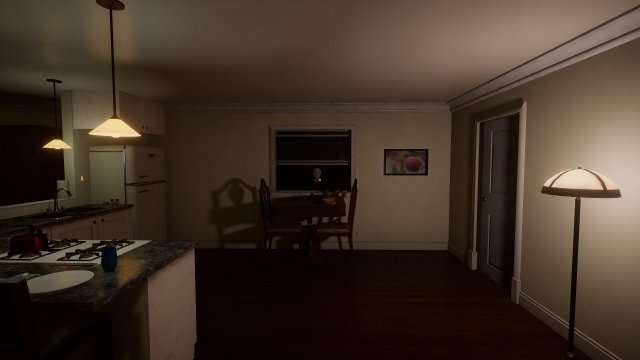
Note: When starting a new game, get the flashlight. It’s on the nightstand by the bed. To turn it on, press the F key. This is useful when the power goes out.
Flashlight Location:


DOS Coin Mining / Farming
Now, if you’re reading this guide, then you’re probably having a really rough start and don’t know where to begin. During the phone call with Adam, he mentions buying you a remote VPN to start you off mining DOS coin.
This remote VPN can be retrieved from the alleyway by taking the stairwell to the first floor, exiting the lobby and walking all the way to the end of the alleyway where the fence is. If you immediately run down to get the VPN, it will take a while, but you will eventually hear the drone overhead, ultimately dropping it down on a couple of boxes.


From here on out, this will be where you retrieve your other physical items (if you so decide to purchase more items). Now, you’re not going to immediately have the VPN: you need to go back to your apartment, where you will find it sitting on a shelf right in front of the door the moment you step into your apartment.

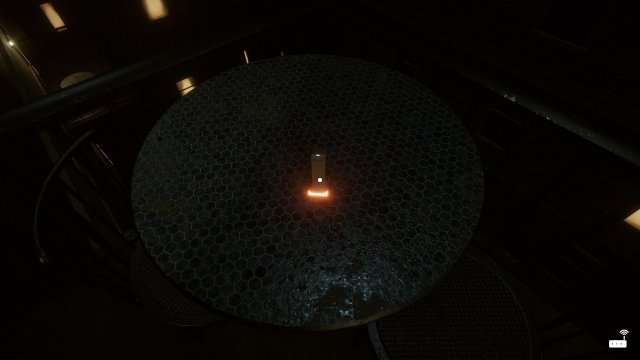
Now comes the tricky part: where to put the VPN. The best DOS coin farming locations are always random, so where you might get 5 DOS coin every 200 seconds in one run, you might get 0.94 DOS coin every 1400 seconds in another run. Also, on a sidenote: if you happen to find a really good spot, that gives, let’s say, 5.43 DOS coin every 250 seconds, and try to place a remote VPN in the same exact spot, or near the area, during the same save, you will not get the same amount of farm from the VPN that is getting 5.43 DOS coin every 250 seconds.
When looking for a suitable location for your remote VPN, you will notice that when you’re deciding where to put the VPN, the VPN’s shadow appears on the wall in one of three colors: red, yellow or green. As I’m sure you can tell, the different VPN shadow colors directly correlates to how good of a connection your VPN has/how good of DOS coin the VPN is farming. Below will be screenshots of how the VPNs will look depending on their DOS coin mining strength:


skyBREAK / WiFi Hacking
Now that DOS coin farming is partially out of the way, onto everyone’s favorite part: WiFi hacking. This part is the most tedious because if you’re not diligent enough, or don’t have enough networks to switch to, the swat team comes busting down your door and it’s game over. So the best thing to do, to begin, is move your modem around and get the passwords for all the WEP networks.
Modem Locations:
This will at least get you a jump start in starting to look for keys and hashes.
How Hacking WEP Should Look:
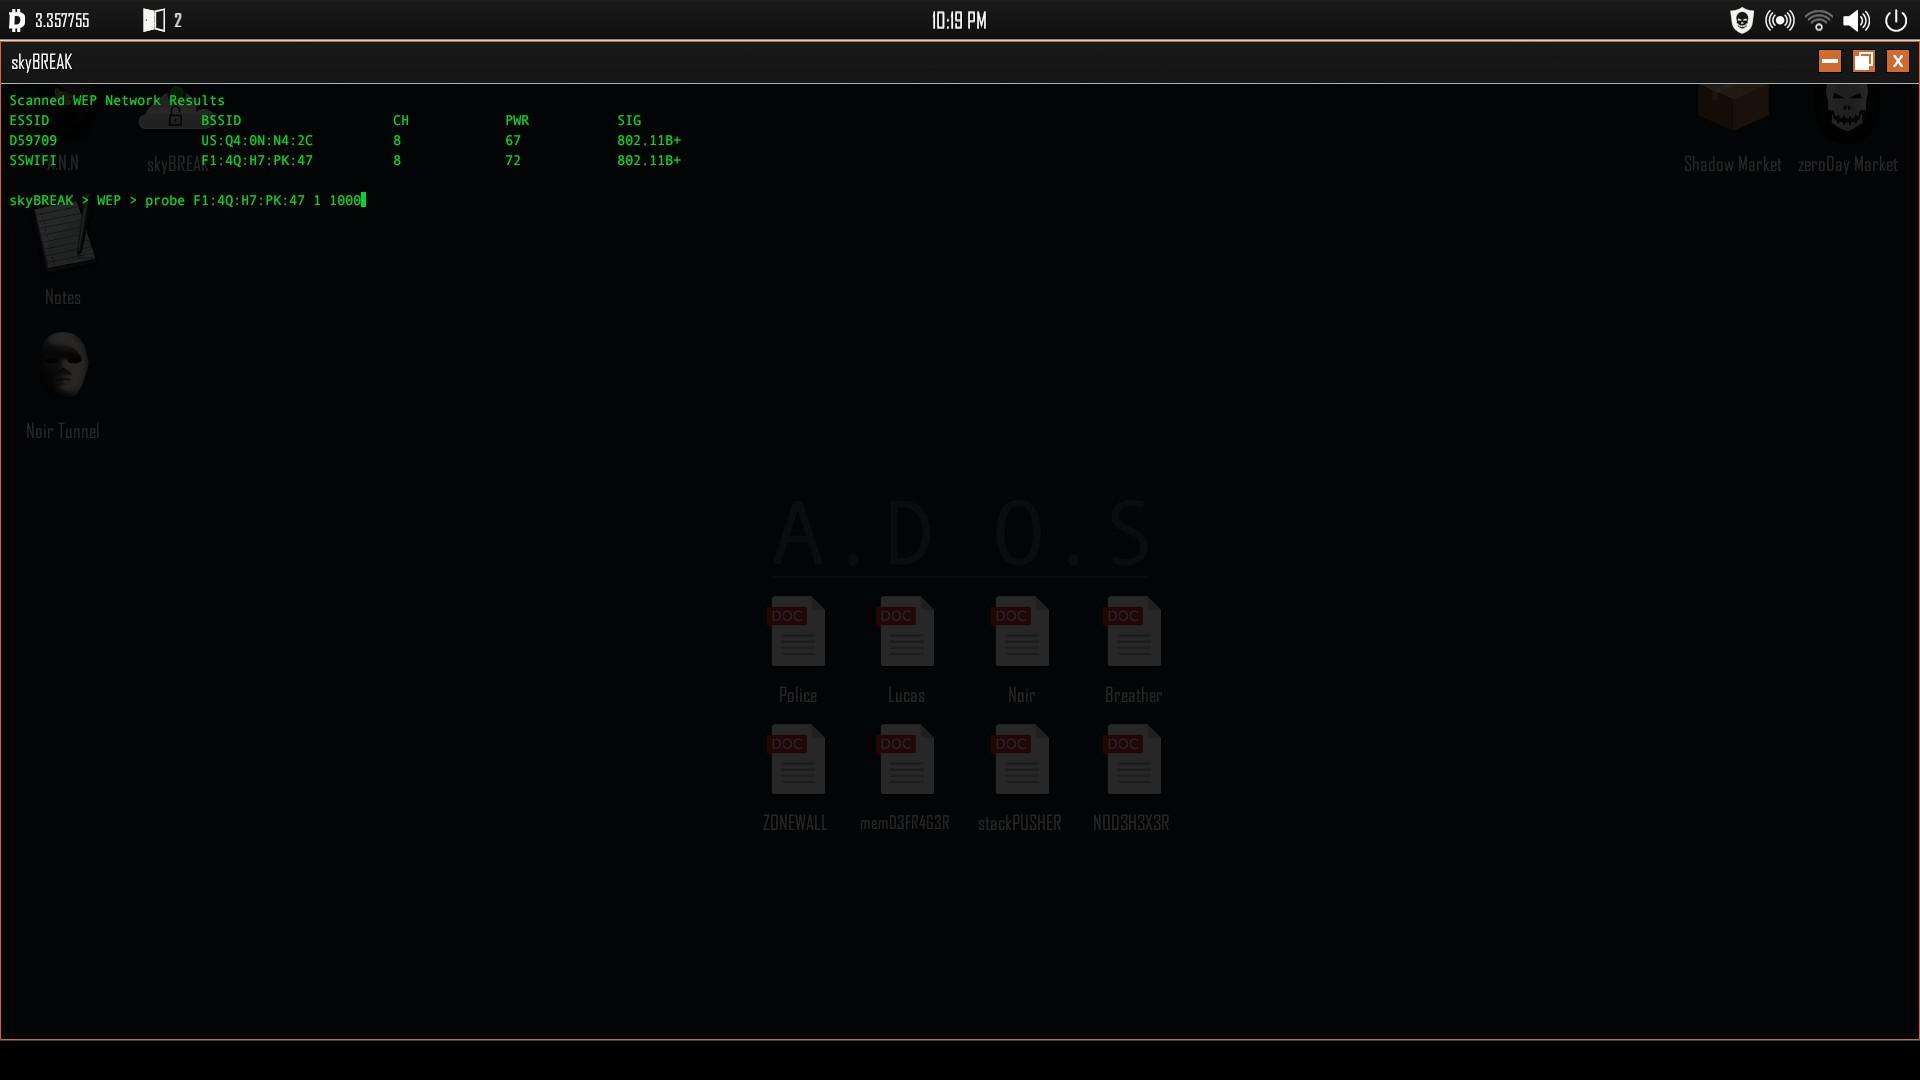
However, because WEP networks are slower than your remote VPNs farming DOS coin, you’re going to want to upgrade your skyBREAK to allow you to crack WPA2 networks as soon as possible. BUT, cracking WPA2 networks is a whole other beast from cracking WEP networks. Instead of probing, you’re tasking with injecting networks with deauthorization packets until the network opens and you can crack it. This process is lengthier than finding the keys themselves, but it allows for much faster connection speeds.
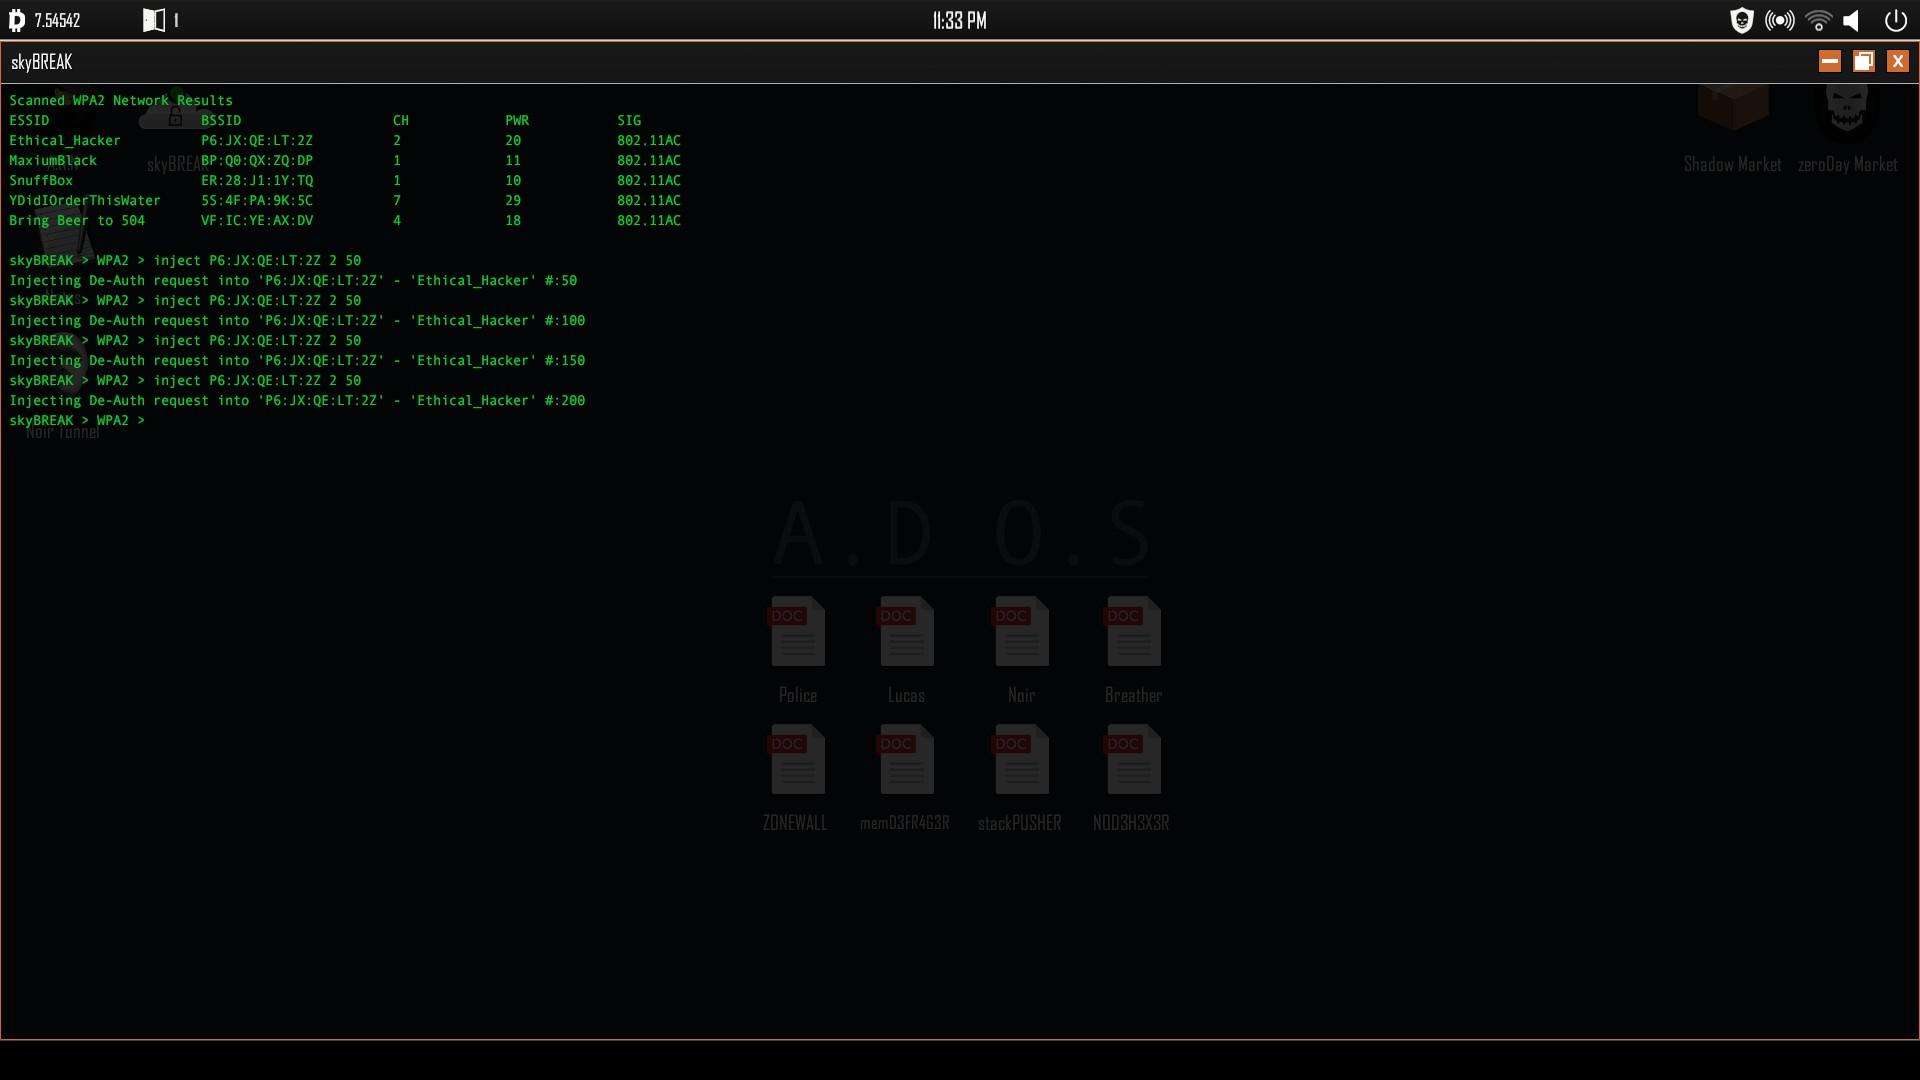
The method to injecting WPA2 networks that I find works best is “inject <XX:XX:XX:XX> <CH> 25”, the last number being how many packets you will be injecting. If you’re impatient like me, you can push it a little further and do 50 packets instead of 25 and see how that works. Now, once skyBREAK has injected the specified amount of packets, I literally just count to 10 in my head and then do it over and over again until the network is ready for cracking. Some networks will crack in less than 100 packets, and some can even take up to 900+ packets to crack: again, completely random.
How Hacking WPA2 Should Look:
Key / Hash / Deep Wiki II Hunting
Finally, the moment we’ve been waiting for: where are the keys and hashes? If you thought, or said, “They are randomized,” you are correct. Like the first game, the keys and hashes are randomly placed on different websites. However, unlike the first game, the Deep Wiki II is not accessed through the same site/puzzle as Welcome to the Game II. The keys and hashes are found on the site pages, but the link to the Deep Wiki II is located in a page’s source code.
I have found the link to the Deep Wiki II, and friends have also found it, always in a site’s source code. To access the source code, click the magnifying glass to the left of the URL search bar. You know you have found a key when you are scanning a picture or text box, and your cursor changes to the Click icon. Some keys appear on your desktop when found, and others are revealed in the page’s source code.
External Threats
If the game weren’t hard enough as it is trying to find 8 keys/hashes with absolutely no indicator that a key might be on the page you’re looking at, you also have to worry about multiple external forces trying to kill or capture you. As of right now, there are a total of 5 external threats you can encounter while playing: the police, the Dollmaker, Lucas, the Noir and the Breather.
The Police:
The police are pretty simple to understand. You can only get caught by the police if you get too lazy and don’t swap your wifi networks. In the case that you are that lazy, and the Noir were polite enough to open your window for you, you can hear sirens, an indicator that the police are on their way.
If you find yourself hearing the sirens growing louder and louder, simply disconnect your computer from the whatever network you’re connected to, turn off your PC (optional) and hide in the shower, as it’s the only place they don’t search. Give it about 5 minutes before returning to your PC and hunting down keys again.
The Dollmaker:
The Dollmaker has to be by-far one of the most interesting interactions you can get in the game. Encountering The Dollmaker is triggered just by visiting the website. It might seem like nothing at first, but you’ll eventually start to hear faint music. In the case that you find yourself in this situation, fret not.
All you have to do is go to your door, look through the peephole, which you will then find yourself in the Dollmaker’s quest. As to not spoil the quest itself, I won’t go any further into detail on what will happen and/or what you should do. But, one thing to keep in mind during the Dollmaker’s quest is that room 801 has a broken lock.
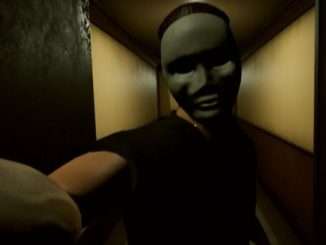
Lucas:
Lucas is a pretty random encounter from what I can tell so far. There isn’t anything in particular that I’ve done that seems to trigger him, or at least that I think. There are a couple of things to keep in mind in order to avoid Lucas. To start, I would highly advise against listening to or watching anything while playing Welcome to the Game II, as the game heavily relies on audio queues. For Lucas, there is only 1 audio queue I have been able to pick up so far.
While using your computer, you might hear the sound of your door knob jiggling. If that’s the case, check the peephole, and if you see Lucas lockpicking your door (assuming you locked it in the first place), make your way to the closet and hide. Now here’s the part where I’m not entirely sure what to do next, as I hid in the closet for roughly 5 minutes, went back to check the peephole and Lucas was sitting there waiting for me, shooting me through the peephole.
The other encounters with Lucas are pretty unavoiable and basically mean you are dead. He can get you while you’re on your computer or he can also get you as you’re coming out from hiding in the bathroom/shower.
The Noir:
Thankfully the Noir were nerfed, otherwise this game would still be 20x as hard. Before the nerf, if you ran into the Noir, there was no running or getting rid of them. So if you found yourself in the alleyway picking up a package, turn around and the Noir is sitting at the end of the alleyway, it was pretty much game over. Now, with the nerf, if you happen to run into the Noir, stay calm, back a decent distance away from the man, turn your back to him and count to 30. Once you finish counting to 30, the man with the mask should be gone and you should be set.
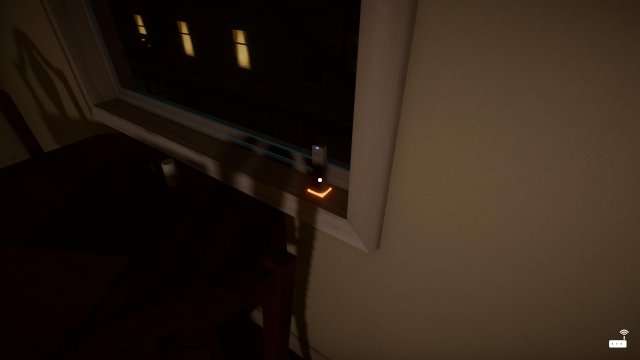
DO NOT run into the masked man if you see him, you will be attacked by the masked woman and die. As for where the Noir spawn. There are 2 total places the Noir can spawn (one being entirely random). If you’re browsing the deep web and find that you click on a link but it does absolutely no loading, back out and check your window, because it will most likely be open. At that point, you will need to constantly check your window in order to avoid the Noir from killing you.
In the scenario that you see the Noir standing in your window, do the same thing as before (turning your back and counting to 30) and you should be fine. The second place the Noir spawn is entirely random. If you’re out and about roaming, you can run into the Noir for absolutely no reason. At this point, it’s the same process, just rinse and repeat. But whatever you do, DO NOT physically run at, or into, the Noir. I will provide a couple of screenshots of what it will look like if you find the Noir spying on you through the window:
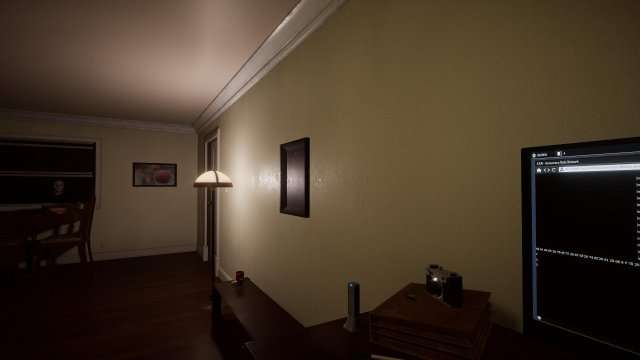
Window Closed

Window Open
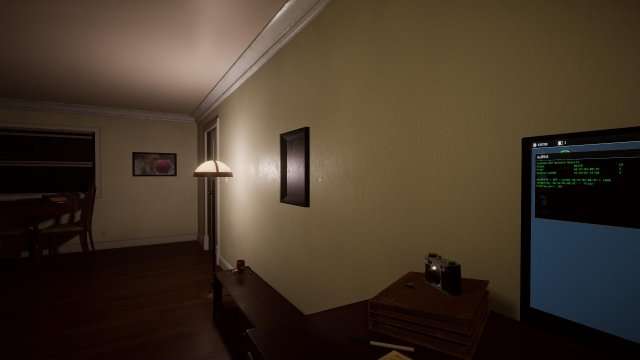
Noir in the Window
Getting Rid of the Noir
The Breather:
Unlike the first the game, Welcome to the Game II does not give you any indicators that the Breather has arrived. Also unlike the first game, the Breather does not ever actually enter the apartment complex, which is nice. The one place that you can run into the Breather though is the alleyway. Don’t worry, when you go to get your first remote VPN, he isn’t a threat yet, but after 11 PM would be a safe bet to assume that he could appear at any moment.
If you find yourself entering the alleyway after 11 PM, there are a couple of things to keep in mind. If you’re making your way to pick up a package and you either; can’t pick up the package, pause the game or open the door in the alleyway, you’re going to die. There is no way around it, and if you approach the end of the alleyway, the Breather will jump out from behind the blue dumpster and kill you. In order to avoid this, whenever I enter the alleyway after 11 PM, the first thing I do is open the door, hold the door and peekthrough the window at the top of the door while waiting for about 5 minutes.
Once the 5 minutes have passed, I pick up the package, then open the door and hide for about another 5 minutes again. Then you should be good to return to the inside of the apartment complex. Someone has told me that there is another encounter with the Breather where he chases you as you try to pick up your package. If there is, I haven’t experienced it yet.


The Breather showed up before 11 pm. Other than that it helped me a lot
As far as i can tell the breather actually has a indicator. I usually hear heavy footsteps when he is there.
The thing about the breather sprinting at you is true. Happened in Markiplier’s video.
Just a few things:
1. Lucas searches your apartment for up to 5 minutes if he knows you’ve been home (lights/computer on). Pre-emptively turning off all but one of the lights gives you time to react when Lucas shows up. Once the final light and computer are off, he’ll get into the apartment, but cancel his search after a short wait, believing you not to be home. He’ll sometimes only pretend to leave, so you should wait for several seconds of uninterrupted silence rather than ditch your hiding spot once the door can be heard closing.
2. You mixed up “queue” (a line of people) with “cue” (hint/signal, such as a sound or hand gesture).
3. I think the sirens are just ambience and a thing in the game made to scare you (such as the fake FBI surveillance van network)
The open hours for the websites are fixed, though of course, if you can’t load a webpage during its open hours, it’s a strong possiblity that Noir is watching you from the window.
Right so it’s 2AM, i have three keys 2 motion sensors 3 vpns and 4 cracked wpa2s. I go on the Red Triangle site and my key cue alerts me there is a key. I hover over every text and check the source. I refresh the page multiple times and even try refreshing when on a different wifi. I can’t find it anywhere. Is there a specific area on the page i should be looking, or has this bug happened before. I hope i dont have to reset my save.
this artical also helps gose more in depth with searching and the computer stuff
https://welcometothegame.fandom.com/wiki/Welcome_to_the_Game_II_Walkthrough
okay on my 8th time refreshing the page it was in the image on left. If this is a bug it need fixing soon because i wasted almost 30 minutes on this key
this game is very complex thanks for the help with lucus!
“The Noir” also makes an almost audible breathing noised when he spawns in your balcony. I was going to my door to see if Lucas is out there and heard some breathing noises when I was just about to see through the Peephole (nearly pissed myself when I heard it). For a second I thought it was Lucas behind the door listening to the sounds but then I looked around the apartment and saw “The Noir” in my balcony.
Lucas only seems to spawn when you find your first key. Breather spawn on first entry to the alley is next to impossible (seen it happen once tho). For getting DOS coin installing backdoor hacks and passing hacks successfully also gives you quite a bit (varies on difficulty).