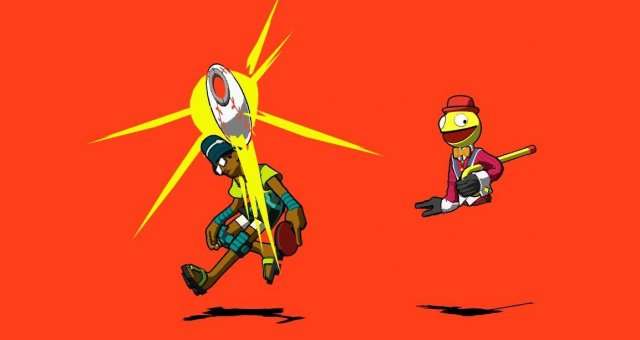
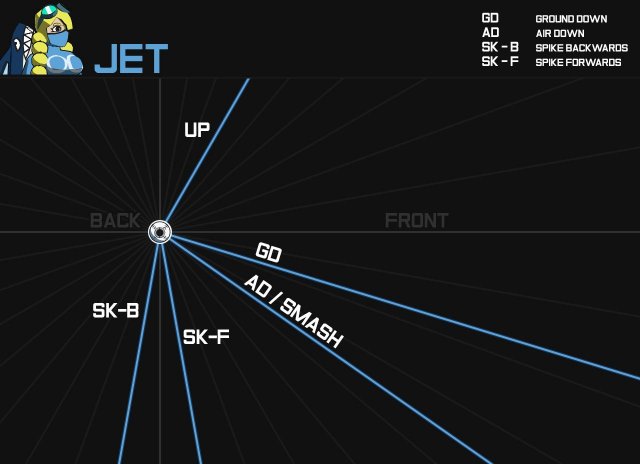
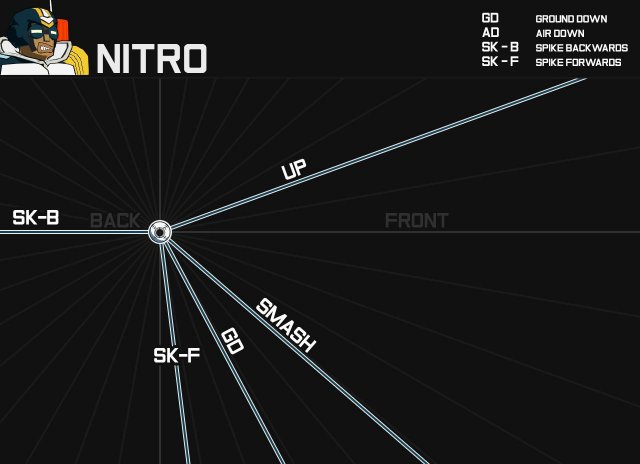
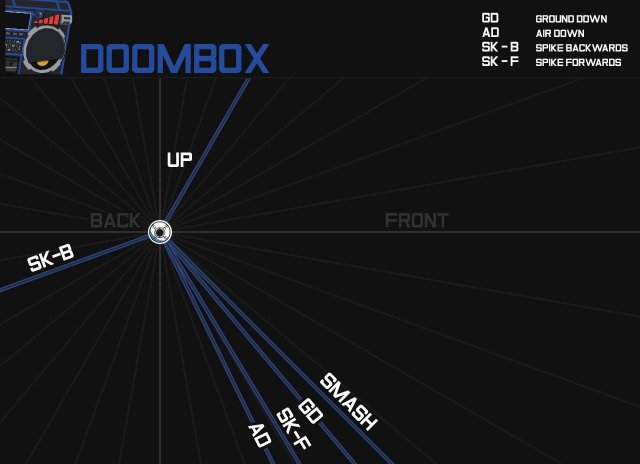
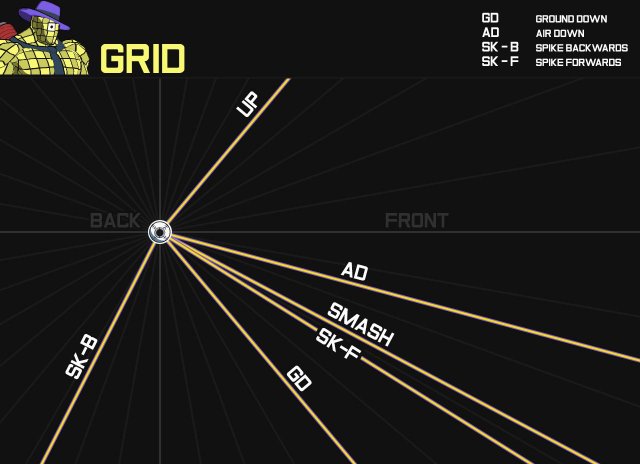
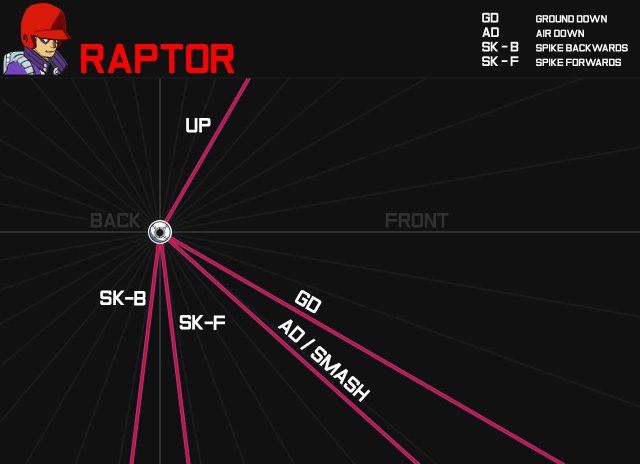
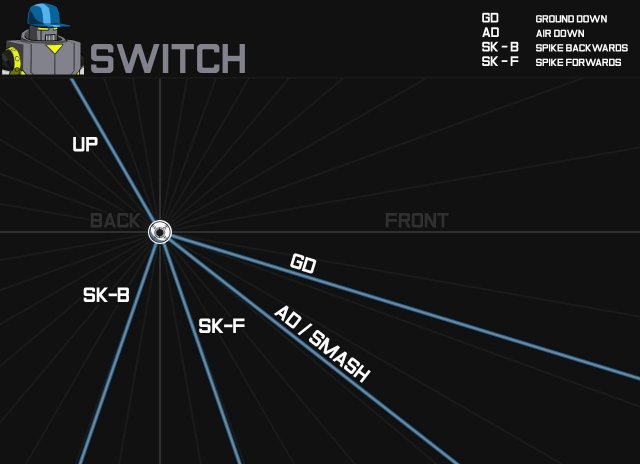
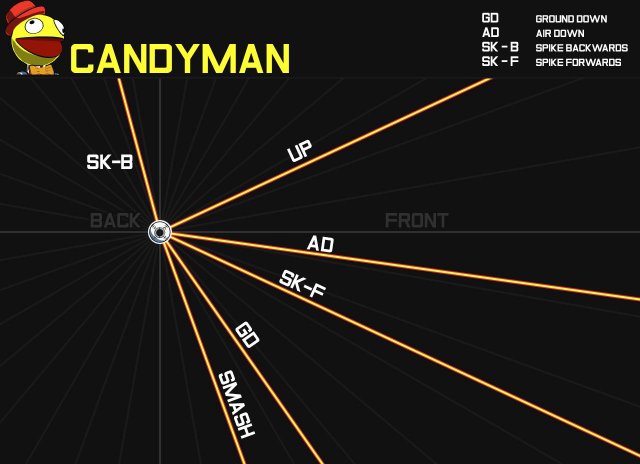
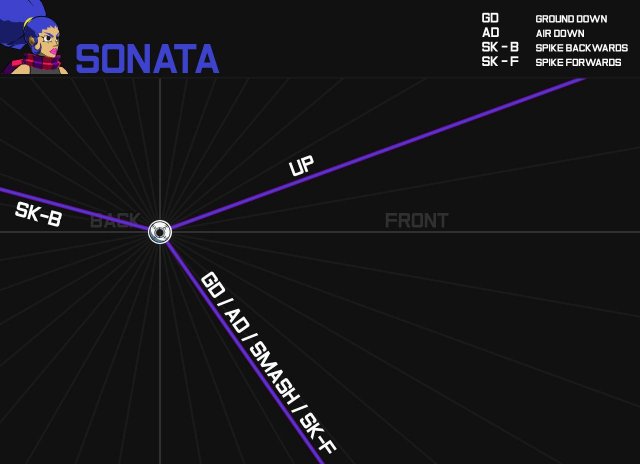
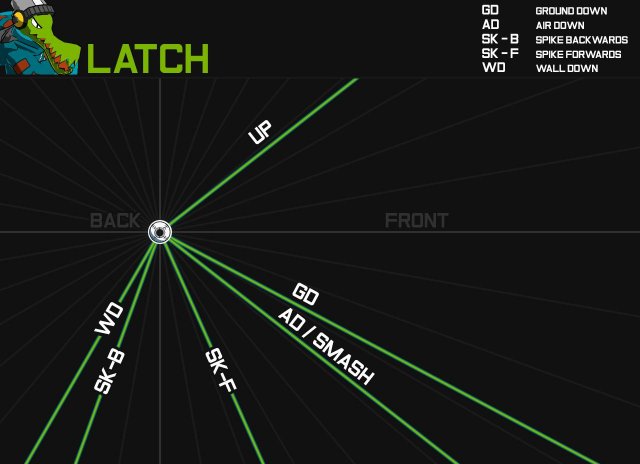
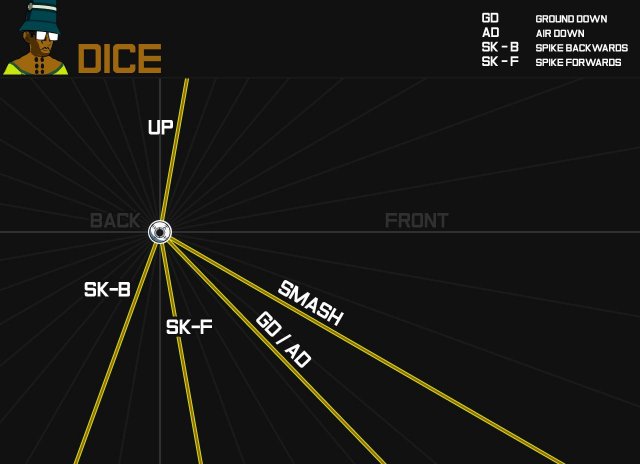
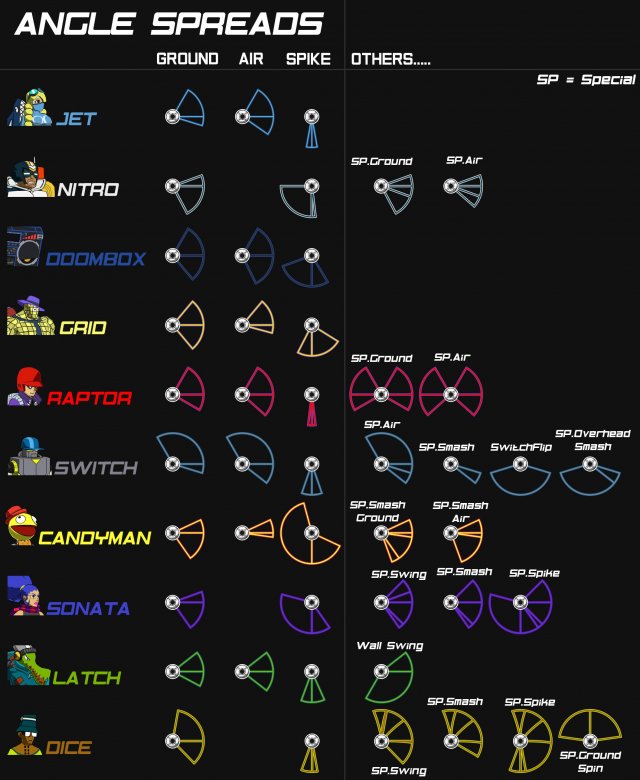
An overview of each characters angles and spreads showing what kind of options they have. The Spread diagram also showing the options in each attack mainly Swing and Spike to know what you can do, but also what your oppoent can do allowing you to formulate a strategy against it.
Other Lethal League Blaze Guides:
- All Unlocks.
- Beginner’s Guide.
- Economics Guide.
- Speed Scaling.
- Candyman Guide.
- Secret Techniques.
- Secret Taunt Costumes.
- How to Unlock the Grand Slam Achievement.
Character Angles
Jet
Sonata
Spread Diagram
Explained: Spreads & More?
What is Spread and Coverage?
- Spread is how far apart a character angles are to each other. To cover a spread your Attack’s hitbox needs to be larger than it. For example Candyman’s “Swing in the air” spread, can easily be covered up close or slighty further back before his UP angles becomes a problem.
How do I cover Raptor, Switch, ect..? Positioning and Safe-zone’s
- Generally you can’t cover all Raptor’s angles by standing in front of him. same with some other characters. So you need to position yourself to where each of their angles will intersect each other which may happen after 1 or maybe even 4 bounces depending on the angle. If you can’t cover all and if covering 2 of their angles is risky then you may need to put yourself somewhere the ball won’t go in the immediate future known as a safe-zone.


Be the first to comment