
Overview of as much of the mechanics of the game as I’ve been able to research over the course of multiple playthroughs. Good place to start for advice on character builds, especially if you’re stuck toward the beginning of the game.
Other W40K Mechanicus Guides:
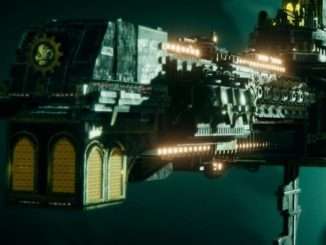
Caestus Metalican Interface
First up is the Caestus Metalican, the massive voidship where Magos Faustinius oversees the operations on Silva Tenebris. You have three buttons across the top to cycle between pages – Tech, Missions, and Cohort.
Your Tech screen is the simplest, showing a roster of how many things you’ve unlocked during your exploration of the Necron tombs on Silva Tenebris. This is broken into five pages of upgrades with buttons on the left. Try not to think of this as a list of achievements, because without modifying the game or editing a save file, it’s impossible to fill in every single entry on those pages. Instead, this is just a more easily sorted list of the things that you’ve unlocked during this playthrough, including a list of your canticles (single-use abilities).
On the other side you have the Cohort screen. There are 6 slots there for TechPriests (though only 2 will be filled initially), and 7 slots for troops (5 small and 2 large ones, and only Servitors will be filled in initially). The troops can only be looked at by hovering the mouse over them, which will show their basic stats. TechPriests, however, can be ranked up to give them new skills, and equipped with a wide variety of weapons and subsystems to increase their abilities.
Lastly is the Missions screen, which shows a list of character portaits on the left side. The first portait is Magos Faustinius, and clicking on his portrait only gives a basic overview of your performance during your exploration of Silva Tenebris, including total awakening percentage, markers that show how much awakening was gained as each mission was completed and what rewards were obtained for them, and which locales have been opened up. The other five portraits are your support crew, who each offer a variety of missions that will unlock over the course of the game.
The missions offered by your 5 support crew are sequential, but don’t necessarily all need to be completed, nor do they need to be completed in order. They unlock through a combination of Awakening percentage and by completing a certain number of missions in a locale, which allows the story to unfold in a fairly organic way, opening up more possibilities as you play.
Accepting Missions
The format of gameplay for Mechanicus is that you select a mission from the Caestus Metalican, dispatch your TechPriests and optional troops to explore that section of Silva Tenebris, and move through the Tomb Map interface and Combat interface until you complete whatever goal the mission gave or die trying. Once the mission is over, you have a debriefing screen that lists your rewards, upkeep costs, and status, and you’ll be taken back to the Caestus Metalican again where you can make changes to your loadout or skills before choosing another mission.
When you select a mission and accept it, you’ll first be given a roster screen to select which TechPriest(s) will be going along (minimum 1, as if there are no surviving TechPriests, the mission ends in failure), and any troops. This is a spot where new players often make several key mistakes:
First, your Arvus Lighter has 6 seats (upgradeable 1 seat at a time to a maximum of 12 via mission rewards) to bring characters with you, be they TechPriests, Servitors, Skitarii, or even Kastelan robots. Your TechPriests are individuals (brought along one at a time), while the troops slots have infinite copies. This means that early on, you’ll have two TechPriests and only the Servitor icon lit – you can bring multiple servitors with you, and they’re zero cost. Lots of people think that you can only bring one servitor along and never think to click the portrait a second time to get another servitor.
Secondly, all of the troops outside of the Servitor have a Blackstone cost. Because Blackstone is effectively your XP for ranking up TechPriests, players think that bringing along troops is a loss – it’s not. Think of the Blackstone cost there as being an investment, because when you complete the mission, ~80% of the Blackstone cost for any surviving troops is refunded. If you bring along Skitarii and never deploy them, then they’ll never have the chance to be hurt, so you’ve lost a trivial amount (about 3-5 per troop, which isn’t going to make a difference even if you do it in every mission). So if you think you might need the firepower, bring along a couple of Skitarii – if you don’t use them at all, they’ll have cost you nothing. You’re not required to just stick to Servitors to avoid cost, but if you want them for extra CP and to use as meat-shields, go right ahead. Early game they can make things much easier by taking hits for you.
Awakening in Missions
Now, Awakening actually has two counters – one that applies globally, and one that applies only while inside of a specific mission. You accept missions from one of 5 characters with different goals and agendas, select which TechPriests and/or troops you’ll be taking with you, and attempt to accomplish a goal within that mission until you are either successful or all of your TechPriests have been incapacitated.
At current there is no permanent death mechanic, so at worst, if you fail a mission by having all of your TechPriests killed, the worst you suffer is heavy repair costs and failing to obtain the rewards offered by that mission.
Mission selection is important. There are a total of 46 missions in the game, but perfect play will only allow you to complete 34 of them at best, and typically closer to about 30-32. The reason for this ties into the Awakening metre.
While in a mission, every step you take into an unexplored room, even empty rooms with no features in them, increases your the Awakening metre by 2 points. Every 5 points will increase the Awakening level for that mission. This starts at zero, but for every level, the necrons gain additional benefits that make fights more difficult:
- Level 0 – no effect
- Level 1 – your presence is detected
- Level 2 – additional necrons spawned
- Level 3 – necrons resurrect 1 round faster
- Level 4 – additional necrons spawned
- Level 5 – necrons resurrect 1 round faster
- Level 6 – necrons will attack first in battle
- Level 7 – necrons resurrect immediately
During a fight, Necrons that are downed but not killed by a critical hit can re-animate. By default, this takes 3 turns, which actually means they’ll stand up and take a full turn on the 3rd turn after they were put down. Any given necron can only re-animate once, and will rise with 50% of its original HP to continue fighting when sufficient time has passed. To prevent this, you’ll either want to end the mission early, either by escaping the area or scanning all terminals if that’s the goal, otherwise killing all enemies. Downed Necrons count as killed for this purpose, so if you can get all of them down at the same time, you won’t need to waste attacks finishing them off.
If finishing the mission early isn’t possible, you can always attack a downed Necron. While downed, they have no armour and only take one point of damage to finish off permanently. Additionally, critical hits will finish off a Necron on a killing shot, denying the chance to reanimate. Necrons can only reanimate once – the second killshot will always force them to teleport away.
Awakening level 1 seems to have no effect, but may have a small impact on how many enemies are spawned or how quickly it takes for sarcophagi to open during an encounter. Awakening levels 2 and 4 each add more necrons to the fight, usually 1-2 extra warriors of whatever type is most common in that area.
The important ones are Awakening levels 3, 5, and 7. Each one shortens how long it takes for reanimation protocols to trigger, with Awakening level 7 ensuring that necrons can stand back up after being killed immediately, and will even continue their turn as normal if they were killed by an opportunity attack.
Finally, Awakening level 6 seems to be bugged and has no apparent effect. Even while triggered, it doesn’t affect Necron initiative at all.
Completing Missions
You complete missions by triggering the rooms in the tomb marked by white diamonds. Each of those is a plot-critical advancement, and while they can be done in any order, they must all be completed to finish the mission, and the mission will end immediately after the last one is resolved.
There are several other types of rooms to pass through during missions, all of which are optional, but you’ll need to go through some of them in order to reach the plot-critical rooms. The types are as follows:
Events – marked by a <!> these rooms will give a short description of the current situation and provide you with three options. Hover over each option to see more information about it. Often a support character will provide additional dialogue, sometimes before the description of the room. The support character provides correct advice about 80% of the time, so listen to what they have to say. The results of your choice may feel random, but they’re actually reasonably appropriate to the scenario if you’re paying close attention.
Encounters – marked by 3 red necron silhouettes, these are optional fights which are usually worth doing because completing them successfully without taking an undue amount of time will usually roll the Awakening metre back a bit.
Glyps – marked by a green square with a necron symbol on it, these will present you with 2-5 glyph shapes, each with a different effect tied to them. If you want to be in the spirit of the game, pay attention to which glyphs give which effects, as they are consistent, and write them down for later reference. Otherwise, there is a guide.
Empty rooms – these have no marking on them, but will still raise your Awakening by 2 points the first time you enter them.
Backtracking through rooms you have already explored doesn’t give any additional Awakening, so you can use that to bypass rooms that you don’t want to deal with. Since glyphs are easier to reference and tend to give more beneficial effects, it’s usually in your interest to hit most of the Glyph rooms and the encounter rooms while skipping as many empty and event rooms as possible while moving between objectives.
Global Awakening
When you complete a mission, your Awakening in that mission (ranging from 0 to 7) will be added to the Global Awakening count. Fractions are ignored, and you cannot gain less than 3% Awakening upon completing a mission, even if your Awakening count was zero during that mission.
This creates a hard timer for the game, and encourages action economy, always moving forward, and trying to maintain high efficiency on every turn. It’s possible to keep most missions below 3%, but you’ll probably have a few outliers at 4 or 5%, so you’ll typically have a limit of about 31-32 total missions that you can accomplish before endgame is triggered.
There is no in-game effect for the global Awakening counter, outside of triggering missions to become available. The earliest that the final boss becomes accessible is about 72-75%. When the counter reaches or exceeds 100%, all other missions lock, and the only mission available will be the final boss.
Mission selection is important. There are a total of 46 missions in the game, but many of them are unlocked either by doing missions in a particular area, or by completing missions for a particular character.
Tech-Acquisitor Scaevola offers a total of 12 missions, most of them involving the salvage/theft of Necron technology, which rubs several of the other characters the wrong way. Completing all 12 of her missions will close off the final mission for Videx, and unlock a different ending, as well as a Steam achievement.
Lector-Dogmatis Videx offers a total of 12 missions as well, most of them involving the spiritual health of the cohort, purification of the tomb, and putting forbidden necron knowledge to the torch. This makes him the direct opposite of Scaevola, as he would rather see the forbidden lore destroyed where she wishes to acquire it for the good of mankind. As such, Videx’s final mission will lock off Scaevola’s mission when completed, making finishing either of their storylines mutually exclusive, unlocking another different ending, and a Steam achievement.
Dubdomina Khepra is the leader of the Skitarii forces and her missions centre around assisting the troops on the ground and often reward more access to troops to assist the cohort as a result. Her missions don’t affect the ending, but are often still worth doing for the rewards. She offers a total of 11 missions.
Quartermaster Rho is in charge of supplies. He only offers a total of 6 missions, mostly centred around obtaining resources, and providing certain technology in return. He typically offers more Blackstone and fewer items for completed missions.
Prime Hermeticon Captris is a field operative working alongside the Skitarii. Her missions are all bossfights, with a total of 6 of them throughout the game. Unlocking a mission from her requires a certain percentage on Global Awakening, as well as finishing a certain number of missions within a particular zone (each of the six zones is named for the boss of that zone). Of note, the final boss becomes available at 72-75% awakening and can be fought early (for a steam achievement), and the final boss’ arena will include all of the other bosses that haven’t been fought yet. There is a canticle that only unlocks upon finishing 5 of the 6 bosses, which pretty much requires careful juggling of all 5 of the mission givers to unlock all of the bosses before time runs out.
Because of how this is laid out, it’s basically impossible to hundred-percent the game in a single playthrough, or even two or three. More testing is needed, but it appears that seeing all of Scaevola’s storyline while avoiding all of Videx’s will make it very difficult to see all of Khepra’s, Rho’s, and Captrix’s storylines as well. At the time of this writing, I believe that the fewest possible playthroughs to see all of the game’s content would be once for Videx’s story, once for Scaevola’s, once for Khepra’s and Rho’s, and once for Captrix to see each boss killed individually for that achievement.
Ranking Up
Improving your TechPriests involves spending Blackstone. Blackstone is gained for finishing missions, but also from scanning necron consoles during missions, killing necron units, and as a reward for many glyphs and events during the game. Each time a TechPriest ranks up, the cost of ranking up again will increase, starting at just above 100, but increasing by about 30 for each rank. Blackstone is kept as a total pool shared by all TechPriests, so be careful about ranking one up far above another.
When you upgrade a TechPriest, that TechPriest will gain an additional augment slot, and unlock either a new skill or an additional piece of armour. Which skills are selected has a big impact on how a TechPriest will perform in combat, and what combat role will be ideal.
Skill Paths
All skill paths are not created equal. Until the devs release a balance patch, there are several that are very much out of order, resulting in some paths being very worth dipping into for one or two ranks to get the best things, then never touching again.
Explorator – the melee and mobility path, this is intended to create a melee specialist that can move around between enemies and place strong single-target damage where needed. Additionally, since enemies moving out of melee reach triggers a free attack, they can be used to pin a ranged enemy down for at least one free hit as they try to back up. Some melee enemies also trigger opportunity attacks as they approach, allowing for the Explorator to sometimes act as a front-line tank to help logjam melee enemies to keep more fragile ranged characters behind him safe.
Secutor – the troop-leader path, the Secutor focuses on providing buffs for troops, either for more damage, more armour, getting them into the fight faster, or giving them free attacks. Sounds useful on paper, but in practice by the time the Secutor starts to get rolling, the other TechPriest classes have already left it in the dust.
Tech-Auxilium – a support class, with a scattering of abilities that don’t really reflect any central theme. Each of the abilities is useful for a different sort of build, making this a good class to dip into for other classes.
Lexmechanic – another support class, but this one with the very clear roll of CP generation. All 5 abilities are built around generating more CP, making this a must-have in most cases, particularly on some of the Ubjao missions where there is very little CP provided by archives.
EnginSeer – another support class, focused entirely on healing. Given that all damage that you haven’t repaired by the end of a mission costs Blackstone to repair (even if the amount is largely trivial), you’ll still want one of these for in-combat healing, if not necessarily to top everyone off as fights are wrapping up.
Dominus – the ranged weapon path, with a focus entirely on energy damage and effectively the opposite of the Explorator.
All skill paths upgrade in the same pattern of 9 ranks – odd ranks grant an ability (some are active with a cooldown or CP cost, others are passive benefits that are always on), while even ranks grant a piece of armour (head, torso, arms, or legs) in whichever order you desire. You can mix and match armour from multiple classes, but can only have one head, one torso, one arm, and one leg equipped at a given time (yes, make sure you equip them, they cost augment slots to use), making it important to consider which combination of kit you want for a TechPriest.
Explorator
Rank 1 ability – Escape. This is quite underrated and probably in the top 5 for most useful/powerful abilities. Increasing movement speed by 3 metres isn’t a big deal, but ignoring opportunity attacks is huge. Enemies with melee attacks can generally make a free attack on you if you move out of a space within their reach, and giving them free damage in order to fall back is a bad move. This is compounded by the fact that you cannot use ranged weapons while in melee with anything. This isn’t the most important ability to pick up early on, but it becomes very useful around Ubjao and even moreso later once Lychguards become common.
Rank 3 ability – Noospheric Scan. This automatically scans any enemy within melee reach, showing you their armour and HP stats. Useful, but there are lots of ways to get that information, and in the late game it’s barely worth knowing.
Rank 5 ability – Angered Spirit. When a weapon is used, it charges up the machine spirit for that weapon. Depending on the weapon, this may take 1-3 uses before the machine spirit is charged. Once it is, the next attack with that weapon will gain some sort of bonus. Most commonly, this bonus is either more damage, or not requiring any CP to use the weapon, or destroying some of the target’s armour. Angered Spirit adds another 2 damage on top of whatever the machine spirit effect is for each weapon. A nice bonus, but generally not something you pay much mind to.
Rank 7 ability – Blessed Generator. Power Field Generators are an augment that fits into the backpack slots on a TechPriest, which provide a bonus of 2, 3, or 4 damage to all physical damage attacks made during the turn that they are activated. They cost 1 CP to activate, and have a cooldown of 3 turns, and this augment makes them not have any CP cost. For melee specialists, this can be stacked for a very nice bonus to damage (two of the Tier 3 Power Field Generators gives a total of +8 damage to physical attacks). Note that there is currently a typo that the Energeia Enhancers at Tier 2 and 3 are listed as Power Field Generators (only the name is incorrect, they have nothing to do with this ability and affect energy weapons instead).
Rank 9 ability – Traveller. So long as you are not equipped with any ranged weapons, you gain +1 damage to attacks, +3 metres to movement, +1 to both types of armour, and +15% to your critical chance. This is a nice ability for those that are fully committing to an all-melee build. Currently the display is bugged so that Traveller will not show until you are in a mission, where it will still provide the buffs properly. In order to claim the buff, you need to either have both of your ranged weapon slots empty, or have them equipped only with the Arc Scourge weapon (provided by the Omnissiah Edition of the game), as all other weapons will deactivate the buff.
Armour parts:
- Head – +1 HP, +1 Physical Armour
- Torso – +3 HP, +1 Physical Armour
- Legs – +2 HP, +3m Movement
- Arms – +1 to all Physical Damage
All four of these parts reflect the preference of melee combat for the Explorator. The Head part is okay, but certainly not best-in-slot in most cases, the Torso part is 1 HP less than the same part on the Tech-Auxilium making it a straight downgrade, the Legs are 1 HP less than the same part on the Dominus making it a straight downgrade (although if you’re going fully melee you wouldn’t want to waste Blackstone on buying the Dominus leg part as the bonus range from Dominus rank 1 isn’t useful to you at all), and the Arm part provides a unique bonus to all physical damage attacks. If you’re going with a fully melee build, you’ll do okay with most of these armour parts, but the Torso from Tech-Auxilium is strictly better, and an arguement can be made for the Head part from Lexmechanic to get +1/+1 armour instead of 1 HP and 1 Physical armour only. If you’re willing to trade away the 1 point of damage from the arm parts, the Lexmechanic arms have a 20% dodge chance that goes a long way toward your survivability.
Secutor
Rank 1 ability – Servant Protocol. This allows your servo skullto be used on a troop unit to give +1 Damage, +4m movement, and +15% critical chance. In the early game, you’ll generally want to save your Servo Skull for grabbing CP from across the map, but once you’re a few ranks in and have someone else building into Lexmechanic, you can afford to use your servo skull to buff your troops. The +1 damage is forgettable, but +4 movement really helps given that troops can’t spend CP to buy more movement leading them to often be outpaced by TechPriests.
Rank 3 ability – Command Fire. This is the core ability for the Secutor, and the main reason to consider having one at all. When you use this ability, you must have at least one troop unit within 8 metres of you. If you do, you can select an enemy unit anywhere on the map, and if any of your troops have line of sight on it and are within range to attack it, they will. This can result in several of your troops all shooting together, which can stack up damage very quickly to focus a target down. Since they all fire in sequence, it’s possible for one trooper to kill the target, then the next trooper to finish it off, ensuring that it cannot use reanimation protocols. Strangely, the area damage from the Kastelan and Kataphron both has no effect – even though they’re using a flamer and a torsion cannon respectively, the attack will only hit the target designated by Command Fire with no area damage, and no chance of friendly fire. Command Fire has a 3-turn cooldown, so it can be used every 3 turns which may require some forethought to avoid wasting it in suboptimal circumstances.
Rank 5 ability – Command. Similar name to the previous ability, this provides either a +2 bonus to the next attack that all of your troops make, or a +2 bonus to both armour types for all troops until the end of the turn. If you can arrange a gun line where you have several Skitarii Rangers or vanguards all with relatively open lines of sight, you can use this immediately before using Command Fire to really ramp up the damage.
Rank 7 ability – Optimized Optimization. Weird name, but this is another ability that improves a backpack item. In this case, Cognitive Canisters can be used to provide a buff to one trooper unit, giving them a bonus to damage and critical chance. The cooldown is usually 3 turns, but this ability reduces it to 2 turns, allowing you to use them every other turn for bonus damage. Not a bad ability if you’re aiming for a challenge where you rely mostly on troops, but not worth it outside of that as troops are quickly left behind on damage scaling compared to TechPriests.
Rank 9 ability – Reinforcements. This allows you to drop one single troops unit anywhere on the map without waiting for a new round. While this is a useful ability to a pure Secutor, it really isn’t worth being the final ability in the class, and really isn’t useful outside of a troops-centric challenge run. If this ability were given much earlier, then it might be a bit more useful.
Armour Parts:
- Head – +2 HP, +1 Energy Armour
- Torso – +4 HP
- Legs – +3 HP, +1 Movement
- Arms – +2 HP, +20% Critical Chance
The Secutor parts really aren’t all that useful compared to those granted by other classes. The head armour is identical to the Dominus, but you get more from the Dominus’ skills than from the Secutor. The torso armour is identical to the Lexmechanic but you get more from the Lexi’s skills than from the Secutor. The leg armour is 2 movement worse than the Dominus and 1 movement worse than the Explorator but otherwise the same. The only part that really stands to be all that useful on its own is the arm for +20% critical chance, which also gives 1 more HP than the same part on the Tech-Auxilium, but there are other parts already vying for the arms slot (Explorator, Dominus, Lexmechanic) that are usually higher priority. What the Secutor’s armour does have going for it is that it stacks HP higher than any other single class. In a troops-centric challenge run, you’re probably going to be out front, tanking hits to prevent your fragile troops from being killed (which is somewhat the opposite of the theme that Skitarii are supposed to be expendable while TechPriests aren’t), but it does make for a somewhat workable tactic with that particular playstyle. Ultimately, the Secutor doesn’t have much to recommend it outside of wanting to have a specific playstyle that is entertaining for theme and for added difficulty.
Tech-Auxilium
Rank 1 ability – Cognition Freedom. This is probably one of the most powerful abilities in the game. Once every three turns, you can turn this on to make your next weapon attack cost zero CP. In the early game when you’re unlikely to have a weapon that costs more than 1 or 2 CP to use, that’s moderately useful, but as soon as you unlock a few power weapons that take 3 or more CP to fire and use that as a balancing factor, this ability swiftly becomes game-breakingly powerful. If you’re finding things difficult or just want to cruise down easy-street, every TechPriest buying a single level of Tech-Auxilium for this ability alone is a huge boost in overall firepower.
Rank 3 ability – Defensive Protocol. Whereas Cognition Freedom is one of the most powerful, this ability is forgettably useless. You can now use your Servo Skull to give a single TechPriest +1 Physical armour for the rest of the turn. That has minimal applications, it’s easy to forget that the buff is even there, and there are almost always better things to use your Servo Skull for in the early game, and in the late game the bonus is too small to really matter.
Rank 5 ability – Bless. This is the TechPriest version of the Secutor’s Command ability, offering either +2 damage to the next attack each TechPriest makes or +2 to both armour types for the rest of the turn. This completely overshadows Defensive Protocol, but ultimately you’ll almost always be using this for the bonus damage.
Rank 7 ability – Master Refractor. This makes Refractor Fields block an additional two damage. Refractor Field Generators are another backpack augment that projects a bubble that provides some temporary HP to yourself and all allies within about 3 metres for the rest of the turn. These temporary HP don’t show anywhere but they ablate incoming damage very well. In version 1.05 this ability was bugged, but it’s difficult to tell if the devs fixed it with version 1.06 as there’s no visual indicator of how much ablative HP you’ve gained – enemy attacks just deal less damage, and tend to just say “DMG absorbed” without it being clear how much damage was actually blocked. This ability, combined with either a pair of Refractor Field Generators or a Refractor Field and a Spot Light can make for a very effective front-line tank that can soak up hits while taking minimal damage.
Rank 9 ability – Overzealous. This is another very powerful ability, but takes some significant investment to get to. Canticles are powerful once-per-mission abilities that give a variety of bonuses. This ability allows you to cast one of them for the price of 2 CP without using it up from your stock, once every three turns. This can result in all sorts of nasty combinations, such as ignoring enemy armour, shredding enemy armour, healing a unit in an emergency, boosting ally armour, gaining a huge bonus to movement, etc. The sky is really the limit for this ability. Of note – the game calculates whether or not you can use the ability based on the 2 CP cost before you cast it, but when you use it, the canticle will trigger first and the CP cost will be spent afterward. Fot Blessing of the Omnissiah, this means that you’ll need to have 2 CP to use Overzealous, then it will give you 3/6/9 CP from the canticle, which will max out at your normal maximum, THEN the 2 CP will be taken out to pay for it. Depending on the size of your CP gauge, that may make Blessing of the Omnissiah a less-than-useful canticle to play with Overzealous.
Armour Parts:
- Head – +2 Energy Armour
- Torso – +4 HP, +1 Physical Armour
- Legs – +2 HP, +2 Movement
- Arms – +1 HP, +20% Critical chance
Tech-Auxilium has some of the better armour parts to choose from. The head armour gives +2 energy armour but no HP, but since the majority of enemies make energy attacks, that’s actually a benefit. The torso gives the same HP as the Secutor but also +1 Physical Armour, making it a candidate for best-in-slot unless you’re specifically stacking Energy Armour (in which case you’ll go with EnginSeer or Dominus). The Leg slot is an acceptable alternative to the Explorator or Dominus, being 1 HP less and 1 movement less than the Dominus and only 1 movement less than the Explorator, but you’ll still want the Dominus legs on most builds. The arm is the only disappointment, being the same as the Secutor but 1 HP less, and critical hit builds aren’t really all that important compared to other factors.
Lexmechanic
Rank 1 ability – Enhanced Analytics. This gives you one free CP at the start of your turn. This is probably one of the best abilities to start off with, as CP fuels everything that you do. It’s also one of the abilities that is most useful in the very beginning of the game before you have access to powerful kit, and doesn’t drop off in usefulness as the game progresses. Having an extra CP from each TechPriest (by each of them buying Lexmechanic 1) really adds up during a fight.
Rank 3 ability – Extraction Protocol. This allows your servo-skull to extra all CP from an archive rather than just one. Early game you’ll find a 2 or 3 CP archive in maybe half of the maps, and occasionally more than one in a single map. In Ubjao you’ll find them much more rarely, but in Mhelob, Akropis, and Neftusk, they’ll be even more common. For early game, you probably only want one TechPriest with this ability, but as you get deeper in (and particularly after Ubjao), having several TechPriests with this ability can be quite useful.
Rank 5 ability – Dead Analytics. This gives you +1 CP whenever you kill an enemy. This can only trigger once per weapon attack, even if your weapon kills several targets, but it will trigger even if the enemy goes down and gets back up from reanimation protocols. This can result in a very good feedback loop, where you spend a lot of CP to ensure kills, get CP from doing that, and allow the next TechPriest in line to spend more CP to get kills. Not a top-tier ability, but certainly a good one.
Rank 7 ability – Sacred Scanners. Scanners are another backpack augment, used for drawing in CP from a source that isn’t nearby. Just like you can send a servo-skull to pull CP from an archive or from a downed necron, you can use a scanner for the same thing. This reduces the cooldown on scanners by 1 turn, allowing you to use them every turn rather than every other turn, but honestly, scanners are probably one of the least useful augments to equip anyway, so this ability doesn’t matter much.
Rank 9 ability – Overcharged Cognition. This ability has two effects. The first is a passive that when you are hit, you gain +1 CP, even if that hit dealt no damage. The second is an active ability that can be triggered once every 5 turns to completely fill the CP gauge to maximum. Since the best weapons all guzzle CP, the active ability here is definitely deserving of a top slot on its own, but the passive synergizes nicely with a Tech-Auxilium using Refractor Fields and/or Spot Lights to provoke attacks and soak up the damage from them, which would make for a great late-game combination if you weren’t already wiping out entire rooms before they can act by the time you had enough ranks to create this combination.
Armour Parts:
- Head – +1 Energy Armour, +1 Physical Armour
- Torso – +4 HP
- Legs – +2 HP, +2m Movement
- Arms – +2 HP, +20% Dodge chance
Lexmechanic armour is a mixed bag. The head part gives one of each armour, which is actually better than HP in most cases. The torso part is only +4 HP with no armour at all, making it identical to the Secutir, strictly inferior to the Tech-Auxilium, and generally weaker than the Explorator, EnginSer, or Dominus torso parts. The legs are identical to the Tech-Auxilium. The arms are one of the three parts tied for best-in-slot, given that a 20% dodge chance avoids a lot more damage over the course of a mission than any of the HP/Armour versions do. If your build doesn’t specifically want the Explorator or Dominus arms for a bonus to damage, the Lexmechanic arms are the best ones for survivability (plus the matrix dodge animation is rather funny to see).
EnginSeer
Rank 1 ability – Cleansing Anointments. Harmful status effects last 1 less turn. Every other turn, you can cleanse a negative status effect from yourself or another unit anywhere on the map. There are really only two status effects in the game, and they both tend to show up only in the early game. Canoptek Acanthites and Scarab Swarms will hit with an acid attack that does minimal damage but deals 2 extra acid damage at the end of each of your turns for 2 turns. The passive from this ability will shorten that to 1 turn if you’re the one that was hit, and you can use the active ability to remove the effect entirely before it triggers. The other effect is a movement speed debuff caused mainly by Immortals with Tesla Cannons which reduces your movement rate by a few metres for one turn. All three of those enemy types become very rare as the game goes on, with Acanthites disappearing entirely, Immortals swapping out for heavy gauss flayers instead, and scarabs only showing up rarely when Canoptek Spyders spawn them (which will usually be killed in the crossfire before they hit anything anyway), so this is an ability that’s only nominally useful in the very early game.
Rank 3 ability – Auto Repair. You heal 1 HP at the end of each of your turns. This doesn’t sound like much, but it does a long way toward survivability and reducing repair costs at the end of a mission, enough to consider having it on several techpriests by the end of the game, or at least on your tank and healer.
Rank 5 ability – Distant Prayers. Heal yourself or one other TechPriest anywhere on the map for 3 HP. This is a nice spot-heal for when you can’t get close enough to a target to heal them more effectively, but isn’t really an ability to rely on as your primary source of healing given that it costs 1 CP and can only be cast once per three turns (making it equivalent to Auto Repair in terms if HP per turn average)
Rank 7 ability – Enhanced Repair. Curatio Claws (not mechadendrites, only the claw versions) heal +2 HP, and have 1 less cooldown. This makes you a true healer, and will generally see you equipping two of your best Curatio Claws onto this character for maximum healing by mid game, then will be out-moded by late game once you’re killing everything too fast for it to hit you anyway. In a challenge run where you either don’t take high-damage weapons or rely mostly on troops instead of TechPriests, this ability is golden, because troops tend to be nearly killed from only one or two hits and need a lot of HP to get them back out of danger.
Rank 9 ability – Benediction. Once per three turns, for 1 CP, you can either heal all Troops to max HP, or all TechPriests to max HP. This will replace your Curatio Claw spam for late-game, as on the rare occasion where you suffer significant damage, you can just kill most of the room, use Benediction to top off and avoid repair costs entirely, then put the killing shot into the last enemy.
Armour Parts:
- Head – +1 Physical Armour
- Torso – +3 HP, +1 Energy Armour
- Legs – +2 HP, +1 Energy Armour
- Arms – +2 HP
EnginSeer got the short end of the stick for armour parts. The head part offers only 1 physical armour, making it 2 HP worse than the Explorator’s version. The torso part is identical to the Dominus, which isn’t bad but isn’t great either. The legs part is an interesting oddity in that it gives energy armour instead of bonus movement, making it possibly useful if you’re stacking energy armour. The arm part is rubbish giving only 2 HP with no further effect, making it substandard to the Secutor and Lexmechanic arms, and definitely the worst arm part you can take. It might be worth it to grab the EnginSeer legs if you’re specifically stacking energy armour for a ranged specialist and aren’t all that worried about melee damage or movement speed, but that’s a very specific and unlikely build combination.
Dominus
Rank 1 ability – Enhanced Weapons. This gives +4m range to all ranged attacks, which is a significant benefit given that pistols typically only have a range of 8m, and many of the rifles have a range of 12 or 15m. However, where this really shines is on the Cognis Flamer, Incendine Combustor, Phosphor Blaster, and Heavy Phosphor Blaster. Each of those weapons has an arc, ranging from 30 degrees to 120 degrees, hitting all targets within that arc (including allies, so be careful of friendly fire). Increasing the range of any of those weapons makes it significantly easier to hit multiple targets, giving a much better benefit than just the bonus range does for other weapons. Note that the Arc Scourge is NOT a ranged weapon, even though it can attack targets a couple metres away. This ability is definitely worth it for a 1 rank dip.
Rank 3 ability – Attack Protocol. This allows the servo skull to deal 1 damage to enemy targets as it scans them, ignoring armour. While this can be funny to occasionally kill off a downed enemy across the map, it actually doesn’t come up that often, and 1 damage to a target is increasingly irrelevant after the early game.
Rank 5 ability – Angered Spirit. This is exactly the same ability as the Explorator gets at the same level. I need to test it, but I believe they stack, though there isn’t much reason to want to go into both Explorator and Dominus deep enough to get both copies of Angered Spirit.
Rank 7 ability – Enhanced Enhancers. Energeia Enhancers cost -1 CP to use, this is another backpack item augment. Since Dominus is all ranged, and almost all of the ranged weapons deal energy damage, this makes it moderately more economical to take a pair of Energeia Enhancers to get some really nice burst damage. Note that as of version 1.06, the Tier 2 and Tier 3 Energeia Enhancers are mislabeled as Power Field Generators. Look for the ones that give bonus energy damage, and this ability will apply to them, as it is only the label that is wrong, and only in the equip screen (they show correctly during missions).
Rank 9 ability – Rites of Range. So long as you don’t equip a melee weapon (which means no Power Axe, no Omnissian Axe, no Infestus Mechadendrites, and no Arc Scourge, but Cognition Mechadendrites are fine a they aren’t a weapon), you gain +4 range on ranged weapons, +1 damage, +1 to both types of armour, and +15% critical chance. Like Traveller, this doesn’t show on the equip screen but does show in missions. This is a decent ability but not one of the real game-breakers.
Armour Parts:
- Head – +2 HP, +1 Energy Armour
- Torso – +3 HP, +1 Energy Armour
- Legs – +3 HP, +3 Movement
- Arms – +1 to all Energy Damage
Much of the advice for the Explorator applies here, with a different goal. The Dominus head armour is the same as the Secutor and generally best in slot unless you somehow need physical armour because you’re not watching your positioning. The torso part is the best one that offers HP and Energy armour, and identical to the EnginSeer version. The legs are best-in-slot for almost every build, having the most HP and the best movement bonus. The arms are situational, being great for a purely energy-damage character but less so if you have a variety of damage types. If you’re going for a pure sniper, stay with all energy weapons, Energeia Enhancers, and all Dominus parts, but if you’re going for a hybrid you’ll probably just want the legs and maybe one other piece, while taking the arms from the Lexmechanic, and other parts as needed for survivability.
Build Combinations
Over the course of the game, assuming you’re taking the time to scan every console when you can (make sure to scan them first for Blackstone then break them to roll back the Awakening), making good decisions on events and glyphs, and completing missions, you should earn between 25000 and 28000 Blackstone. This total is split between all of your TechPriests, but the amount that levelling up costs increases with each rank.
If you take only one TechPriest into missions and don’t bother ranking up any of the others, that single TechPriest can have rank of almost 40 by the final boss. Given that full augment slots (4 armor, 9 weapon, 6 mechadendrite, 6 backpack) are only 25, you’re losing out a lot buying that many ranks on a single TechPriest, because every even-numbered rank in a given path gives a redundant armour part (since you’ll only be using the 4 best ones for your build), and the augment slots given over 25 don’t matter. This is a highly suboptimal build, but can be fun making a Secutor that relies almost entirely on troops for damage while having tons of support abilities.
If you rank up two TechPriests, you’ll reach about rank 26 on each of them by end-game, which is almost enough to complete a three skill paths and definitely allows full augment slots. Still, because the game is driven by action economy, fewer TechPriests is less powerful, so this is technically a minor challenge.
Ranking up three TechPriests yields average rank of just over 20, which is enough to max two full paths and still have a couple ranks to play with.
Ranking up four Techpriests yields an average rank of about 18, not quite enough to complete a second complete path, but solid for making a set of specialists that each max one path and have a scattering of abilities from other paths.
Ranking up five TechPriests yields an average rank of roughly 16-17, which is only slightly less powerful individually than four TechPriests while having 25% more actions due to having a fifth character. Unless you dig deep into Khepra’s missions, this is usually the max you’ll get, and is honestly overkill by the time you get the fifth one, unless you’re deliberately limiting yourself for the challenge.
Ranking up a full cohort of six TechPriests is worth a steam achievement, and gives an average rank of around 14-15. You’re well into overkill by the time you get your sixth TechPriest, and you’ll probably struggle with making the last two TechPriests unique rather than just effective copies of another TechPriest you already have.
The most powerful combination to start from as a character build is as follows:
- Start at rank 1
- Buy 2 ranks in Lexmechanic, selecting the Arms part
- Buy 2 ranks in Dominus, selecting the Legs part
- Buy 2 ranks in Tech-Auxilium, selecting the Torso part
- Buy 2 ranks in Explorator, selecting the Head part
- Evaluate how you want to build from there
The first levels in Lexmechanic give a much-needed boost to CP and reduce damage taken by 20% due to one in five enemy attacks missing outright, both which are great for early survival and use of whatever good weapon you can get first. After that, the Dominus ensures that you can control the distance to an engagement by increasing your range by 4m as well as giving you the best leg augment available, letting you dart in, shoot a target, then back up out of range, or use that movement to cover distance to scan a console then get back out, or to get in position to setup a crossfire. After that, you should be starting to see more difficult enemies as the most difficult missions are generally Missions 4-6 because the number of enemies begins to increase while you still don’t have much in the way of good weapons. If you have at least one high-damage weapon that costs a lot of CP, the first rank of Tech-Auxilium makes that weapon much more economical to use, while the torso part gives a huge boost to survivability. You’ll want to focus on laying down as much damage as you can while avoiding return fire at this point, because even if you build into EnginSeer you won’t have much healing, and your ability to self-heal will be mostly limited to Curatio Claws and Curatio Mechadendrites. After that, a level in Explorator for even more movement speed and immunity to opportunity attacks rounds out the build while still leaving enough available ranks to complete one entire skill path even if you plan on ranking up a full cohort of six TechPriests – the head augment for Explorator isn’t even necessary, it’s just an easy spot to grab the last armour part and isn’t a bad option unless you already have plans to build into a different path that has a better head.
Best Kit for Early-Game
Because item drops and rewards are semi-random, it’s rather difficult to write a guide for which weapons to always build toward, because any given item may not drop during a specific playthrough. However, some recommendations can be made.
Good early-game weapons include the following:
- Phosphor Serpenta: 6-8 energy damage for only 2 CP and a whopping 15m range, plus it scans target stats on a hit
- Arc Rifle: 1-10 energy damage and a minor AoE with 15m range, unreliable but decently powerful
- Cognis Flamer: 4-6 physical damage, 8m range, and a 30 degree arc, your first true AoE attack
- Infestus Mechadendrite: Not so much a great weapon as some supplemental damage and a pushback to get out of melee
- Power Axe: 3-5 damage, only takes 1 attack to charge the machine spirit, and the MS effect strips armour, good for tough enemies that you can’t otherwise hurt easily if you’re willing to juggle around it
Good early-game subsystems include the following:
- Curatio Claw or Curatio Mechadendrite: at least a little healing is very useful
- Refractor Field: great for tanking hits
- Spotlight: Pairs well with a Refractor but works okay without one
- Cognition Mechadendrite: Great way to get free CP
- Infestus Mechadendrite: already mentioned under weapons, basically a free low-damage attack


Be the first to comment