
Hunter mechanics, goals, and playstyles wtih character-specific notes.
Quickstart
All credit goes to Domus Dux!
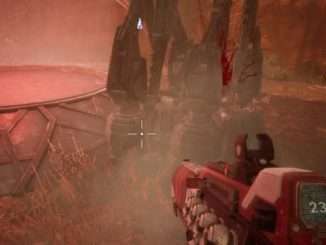
To keep the unwashed masses out of Utopia, you’ll be dropped into a randomly generated area and tasked to hunt them down.
To accomplish this, your primary objective is to prevent the scavengers from moving blood from the body-impaled collection point to the larger spires labelled “A”, “B”, and “C.” You don’t completely win or lose if a few escape, though a “hunter domination” is a satisfying victory.
It’s key to strike a balance between active hunting and maintenance activities. Active hunting involves unglueing your eyes from the ground and scanning the horizon for movement, active blood deposits, drone destructions, and broken drones.
Scavengers will, intentionally or unintentionally, divide your attention between different activities. Your first few pursuits will clue you into the caliber of your prey. Watch for what abilities they’re using, how recklessly they spend their power cores on those abilities, and how well they work together. You can also hold Tab while you’re waiting in the corral at the beginning of the match and look for the microphone icons next to their names.
For example, two microphones means that there will probably be two guys working together. When I first make contact, I notice that there’s a Ghost and a Sawbones working together to cloak and heal each other, respectively. I know that I won’t be able to kill them both outright, so my best chance is to hurt the Ghost and watch keenly for the orange line and impact bubble from his medic friend. Up to that point, I’ve made light chase of the Ghost so my magazine and stamina bars at 75% or more. As soon as I see the orange tracer, I hit supercharge and leave it on till the medic’s downed.
Gameplay
Objective
Have fun playing as hunter, not pursuing rewards. It’s easy to get frustrated when you’re determined to kill all of the scavengers or never let them deposit a drop of blood. This makes you predictable, ineffective, and manipulable (see kiting).
Focus on picking them off one at a time, preferably starting with the weakest first. The 1-2 harvesters who carry the bulk of the team’s workload may evade and annoy you for a while, but don’t waste your time on them. Recognize skill when you see it and adknowledge their prowess by pursing their lessers who are equally adept at harvesting blood.
Starting
The First Jump
- Scavenger hot spots is a roughly equilateral triangle with the A, B, and C deposit spires as its points. If you can see one or two of these from the window, then you’ll have a pretty good idea of where your prey will be when you jump in.
- If you’re not sure where to go, then aim for halfway between the center of the map and the edge.
- Going straight to the center of the map lets them go around you or even swarm you.
- Going to the edge puts you out of the fight, away from where you can collect resources and deploy sensors.
- Hitting them right out of the gate gives you valuable information and makes a statement (see Strategy — Put them Through the Paces)
Strategy
1. Put them through the paces
- Hit the scavengers first thing to make mental dossiers of your quarry.
- Intentionally limit your stamina and ammo usage and allow for multiple small pursuits. Find out how much you can get away with when your try hard pants aren’t on. Unskilled scavengers will fold under the pressure and you have a chance to score a low cost kill and execution, perhaps two if you uses enough resource restraint on the first.
- An aggressive hunter puts the fear of The Pure into coordinated teams. They’ll think twice about pestering or swarming you when you’re performing an execution.
2. Set up sensors
- Take a break from fighting and jump from place to place.
- Prioritize collecting ammo, then power cores.
- Save power cores for the drones near the blood deposit spires.
- Some maps seem to have more power cores than others. Shorten this phase if there are few to be had or their acquisition is time consuming.
- First activate the drones that hover directly over each deposit spire. These usually won’t detect anything because shooting them down is the first order of business before making a blood run. What this gives you is an early warning system. Looks for the gouts of flame, smoke, and broken outline that signal a broken drone. Someone’s wants to make a deposit run in that area and is willing to bet their life that they can make it in and out before the drones come back up (~20 seconds). Alternatively, some teams (especially the coordinated ones with microphones) will shoot down all of your drones all the time. Switch tactics and prowl the highlands while you scan for their telltale arrow tracers.
- After the primary drone’s been activated on each deposit spire, go back around again and start activating the ones next to the spires. Try to choose ones that are between buildings or trees so they won’t be so easily disabled from a distance. These will be your primary detectors. Supplement these by mining the buses and houses or setting up turrets in opportune corners and choke points.
- At the middle of the game you should radically change your patterns.
Vision
They can’t see
- Blood fonts (which is huge, because you can usually find unsuspecting prey if you draw a line between a font and a deposit spire)
- Blood deposit spires
- The Inquisitor’s turrets or their range
- The bubble around the Poachers’s mine
They can see
- Eachother (with a white outline)
- Eachother’s health
- Downed scavengers (with a white outline)
- Red bubbles around active drones
- Golden crates
Movement
Flying (Supercharged jumping)
- Toggle supercharge mode for a second and jump while running forward to launch yourself into the air.
- You can cover roughly 1/2 of the map this way.
- Toggle off supercharge once you’re airborne.
- You need less than a meter’s head start.
- Flitting too much from place to place makes for few kills, even when playing as The Inquisitor.
- Remember that even the most forward feeling jump will quickly gain a lot of altitude. Use this to lessen the number of jumps needed to get out of deep pits.
- It’s ok to fail the landing on larger jumps as long as supercharge is toggled off while you’re airborne. The loss incurred by toggling it back on again to help you up the edge is diminished by the amount of stamina that recharged while you were airborne.
Sprinting (Supercharged running)
- Very useful for finishing a kill
- Critical for shotgun use
- Easy to forget that it’s on while in pursuit
Running
- Significantly faster than the scavengers. Slow down a bit if you’re coming up on your target too quickly in a pursuit. Being close makes it harder for you to land shots and easier for them to double back on you.
Standing Still
- The most underrated hunter ability.
- If there are many scavengers in an area with a bunch of clones, a confusing mass of smoke, and a jungle gym three stories high, sometimes the best thing that you can do is stand and watch. Recognize that whatever just confused you took a lot of resources to pull off and that the guilty parties are probably in the bushes right next to you or slipping down the trunk of a nearby tree. Twitchy parkour fanatics don’t know when to quit and might fall right into your sights any second. Meanwhile, your shock and stamina are recharging. Relax, take a load off, pick up a crate and activate a drone or two. You’re much faster than they are and they can’t leave to harvest blood any time soon.
- Standing still too long makes it easy to triangulate your position via combat music cues.
Crouching
- You can’t Babe Ruth under things like the scavengers can, but sometimes a little peek under the table will find a lot of footsie going on
Stamina
- Each invocation of supercharge mode has a ~15% cost. Don’t spam it.
- Adjust the proportion of jumps and sprints to emphasize your character’s strengths. Inquisitors should use a 50/50 balance of jumping and sprinting for acquiring and finishing prey, respectively. Poachers should use 80% of their stamina to jump from place to place, rarely using the last 20% for a finishing shotgun blast. Stalkers should begin the match with a similar 80/20 strategy to activate drones, then gradually shift to the inverse as they gain more situational awareness.
- Vertically inclined scavengers will bait you off climbable cliffs that are taller than two storeys. Be wary of these cliffs because they’re impossible to surmount without stamina and seem to take a few more seconds than it takes the scavengers.
- Jump to high ground whenever during a pursuit, even if it means giving up some distance or line of sight to your target. This is critically important because it costs you an absurd amount of stamina to scale a cliff, relative to what it costs a scavenger. You can’t do it more than twice and you don’t want to.
- Jump to the top of cliffs that your prey’s headed for during a pursuit. It costs less stamina to jump than it does to climb and they might come straight to you. The scavenger’s venerated 3rd person perspective is flawed in that it affords little field of view at the top of their screen. Players also tend to angle it downward, compounding the issue. Wait patiently at the top of the cliff with a shotgun. It’ll be easy to see where the body drops.
Hunters
Characters
The Inquisitor
- Speed: Fast
- Strategy: Fly from spire to spire with infinite stamina gained by denying health crates.
- Boon: The “Snake Bite” assault rifle’s the only automatic weapon that won’t weigh you down. This is key for noobspray-detecting scavengers under bushes and cloaks
- Curse: Damage output is an issue and fighting a team with a good medic can be very frustrating. The “Mauler 190” shotgun’s good for finishing a kill, but it’s upgrades scale the damage falloff range, which is a bit useless, given its lackluster pellet spread. Upgrade “Snake Bite” first. Note that crate hacking isn’t worth it. Firing at crates generates too much noise and hardly ever reveals a scavenger. You’ll have more success with the latter if you hack the more valuable blue (power core) crates, but you should really take those for yourself because drones are the gift that keeps on giving.
- Crate: Red. Health crates are your bread and butter because they nearly refill your stamina. Without it, Tomas is nearly worthless.
The Poacher
- Speed: Slow
- Strategy: Carefully pick your way across the map and expect to make a kill every time a scavenger gets within 20 meters of you.
- Boon: Once Bubble Burster (25% increased shock range) can clear most two-story structures and the unlockable “Flynn SN14” shotgun is the most range in the game and scales up damage on upgrades.
- Curse: Trigger control for ammo and stamina is a must. Most perks increase Declan’s maximum capacity for things like ammo and stamina, but be consumes resources like none other.
- Crate: Yellow. More. More. More ammo. Keep in mind that you can start a reload with “R” before you start collecting a crate with “E.”
The Stalker
- Speed: Moderate
- Strategy: Lie in wait and snipe from a distance.
- Boon: The semi-automatic sniper rifle has great headshot damage, but it needs a few upgrades before its damage become viable. The cloak’s best used when pursuing prey, not sniping. Jump a scavenger depositing blood toward the edge, cloak up, and ambush him when he’s running inland. He’ll 180 in surprise and his body will ragdoll off the map when you kill him, giving no chance of revival.
- Crate: Blue. With slow movement and no deployables, drone activation’s an important part of your loadout. Finding
Prey
Fog
- Smoke bomb arrows.
- Smart ones will obscure themselves with a smoke plume, enter it, and fire another at a likely path of travel. Then he’ll wait in the first cloud before firing a second toward his actual path of travel. Counter this by standing still when you find yourself surrounded by smoke. Dashing into smoke-laden ruins is a sure way to lose your quarry.
Switch
- Holographic clones.
- Some teams will swarm you with clones when they come to the aid of their friends
- Clones, will run, dodge, climb and draw aggro from The Inquisitor’s turrets, but not The Poacher’s mines
Sawbones
- Healing arrow that produces a ~10 meter orange bubble with a cloud of DNA helices
- Heals for ~25% on each hit
- Can use it on herself, but that requires looking down while running. At this point, she may run into something that she can’t climb or slow down a bit for a nice finishing opportunity.
- Get on top of downed scavengers immediately to start the execution
- If you’re frustrated that you can’t pull off any executions, either find ways to bait the healer or take comfort in the fact that, by repeatedly killing the scavengers, you’re still keeping them from harvesting blood.
Inked
- Seems to be the least popular pick
- Shielding arrow that buffs himself or his teammates.
- Doesn’t seem to apply much of a buff and might give away Switch’s clones (unconfirmed)
Ghost
- Cloaking arrow
- Flashes on en-cloak and de-cloak– watch for the second flash to find out where he went
- A few dusty footfalls may be visible for the first ~2 meters after en-cloak (unconfirmed)
Keybindings
Make sure that the following options are active in Settings -> Game Settings:
Sprint Hold (Hunter Only)
- You’ll be sprinting a lot.
Aim Hold
- Event if you want to use ranged weapons, you won’t have your sights up long enough to need this in toggle mode.
Crouch Hold
- You can’t fit under the wood beams the scavengers like to slide under, but sometimes a quick crouch will give you the extra glimpse of ankle that you need to finish one off.

Be the first to comment