
This is just simply a rudimentary guide to unlocking crafting recipes. I’ll tell you how to access the crafting page, as well as all 35 recipes in the game.
More Stone Story Guides:
How to Access Crafting
- Actions are in “Quotations.”
- Locations are in BOLD.
- Items are in Italics.
- Key Items are Underlined.
When you start a game, you will start off at the Rocky Plateau. To get to crafting, you simply need to continue until you are able to choose your actions freely. So for now, select “Build a Shelter Door” which costs 5 stones.
You’ll be able to explore Deadwood Canyon now. Go through and once you reach the end, leave. You will now have an option to “Build Workstation.” This is technically the first step to crafting. You should already have enough materials (2 Stones & 7 Wood) build it.
Next, tools will appear as craftables in your workstation. This is not traditionally how things are crafted, so don’t get used to this menu. For now, build both the Shovel and the Hatchet. I had just enough stones to craft them.
Now that you have the Shovel, go back into your locations and select “Prospect Cliff” you’ll come up with a (Dirty) Sword. Go into your items and equip it. At this point, I would also change your secondary from Stone Throwing to the Hatchet.
Return to the crafting station and clean the blade. You will still have the blade in your hand. There will be an option to upgrade the crafting station, but it requires many resources. Travel to Deadwood Canyon. You should have enough wood from clearing the path, specifically from the tree creature. There is also a treasure chest. Open the chest in your items. You should have received a Metal Chunk. This is one of three required chunks.
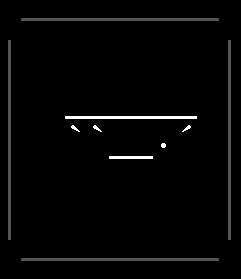
Metal Chunk 1
This time, equip your Shovel. and head back to the Rocky Plateau. Don’t worry, there’s no enemies here. In fact, your health won’t even show up on the bottom left. You’ll eventually reach a mound of dirt and start digging. Eventually, you’ll retrieve another Metal Chunk. That’s 2/3.
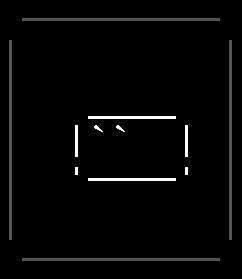
Metal Chunk 2
Go into your workstation and finally upgrade it. You’ll be able to go into your locations again and “Dig Wall Fissure.” You’ll unlock Caves of Fear. If you forgot to change your equipment before you entered, that’s okay. You can pause the game on the bottom right and change your items there. I would recommend re-equipping your Sword and Hatchet again. It doesn’t say, but the attack speed is the same as the Sword, and each swing doing 1 damage, you’re essentially dual wielding for now.
Once you get through to the end, you’ll find a Star Stone. This does two things; One, all previous areas now have a difficulty in stars. Obviously 1-star is easiest and 5-star is the hardest. Two, the Star Stone also acts as a resource vacuum, letting you pick up stuff on the floor without your character physically walking over there, bending over, and picking it up.
I would recommend going back to the Rocky Plateau to get some more items before you venture onto the next part, but it’s optional. It does make everything easier though.
Go back to Deadwood Canyon. Equipping your Star Stone and Hatchet will make you breeze through this while collecting everything. Once you encounter some enemies, switch to your Sword. At this point, I also had a Shield thanks to unlocking a chest back in the previous paragraph, so I made it through the stronger monster. You should receive a chest and your final Metal Chunk.

Metal Chunk 3
In your workstation, you should have an option to “Craft Smithy Hammer,” and after you do so, you should be able to “Craft Anvil.”
Congratulations, you’ve fully unlocked crafting.
What to Do Before Crafting
Now before you get into serious crafting, I would recommend getting the Ouroboros Stone, which allows you to loop the section that you were at freely. This lets you get treasure chests without any effort after a certain point.

Ouroboros Stone
You can get the Ouroboros Stone after fighting the boss in the 3-star Mushroom Forest. One thing to note though is that there is a limit on how many treasure chests you can hold; 150 at any time. And opening them takes about 1 second each, so set aside 2.5-3 minutes when you come back and open your loot.
Also somewhat useful (but definitely not needed because this guide exists), is the Crafting Book. It shows you what recipes you’ve discovered. You can get this when you enter the Mushroom Shop and purchase two things using Ki.
The Recipes!
Important Information
The ORDER of what weapon you put in matters at higher upgrades, because that determines WHAT effect your runes have.
Item Upgrade
Any Item (Any Rarity) + Same Item (Same Rarity) = Same Item (Rarity +1)
Things to note about Item Upgrades:
- You do not have to make four (4) 1-star Swords to make a 3-star Sword. If you have at least a 1-star Sword on the left, and add a base Sword on the right, a counter will appear, and you can directly upgrade it that way. It saves time with higher rarity items.
- An example for the above method is: 3-star Sword + 0-star Sword (x8) = 4-star Sword
- If you upgrade an item, you CAN use it to make another weapon, so long as they are the same rarity. An example is you can combine a 1-star Sword and a 1-star Shield to make a 1-star War Hammer.
Item Rarity & Cost Table
- 0 Star = 1 (Base Cost)
- 1 Star = 2
- 2 Star = 4
- 3 Star = 8
- 4 Star = 16
- 5 Star = 32
- 6 Star = 64
- 7 Star = 128
- 8 Star = 256
- 9 Star = 512
- 10 Star = 1024
War Hammer
- Sword + Shield = War Hammer
Heavy Crossbow
- Sword + Crossbow = Heavy Crossbow
Big Sword
- Sword + Quarterstaff = Big Sword
Stone Sword
- Sword + Stone Wand = Stone Sword
Stone Shield
- Shield + Stone Wand = Stone Shield
Stone Staff
- Quarterstaff + Stone Wand = Stone Staff
Runestone Wand
- Stone Wand + [Any Rune] = Runestone Wand
Stone Hammer
- War Hammer + Stone Wand = Stone Hammer
- Sword + Stone Shield = Stone Hammer
- Shield + Stone Sword = Stone Hammer
Repeating Crossbow
- Heavy Crossbow + Crossbow = Repeating Crossbow
Dashing Shield
- Shield + Crossbow = Dashing Shield
Runestone Sword
- Stone Sword + [Any Rune] = Runestone Sword
- Sword + [Any Runestone] Wand = Runestone Sword
Runestone Shield
- Stone Shield + [Any Rune] = Runestone Shield
- Shield + [Any Runestone] Wand = Runestone Shield
Runestone Staff
- Quarterstaff + [Any Runestone] Wand = Runestone Staff
Stone Crossbow
- Heavy Crossbow + Stone Wand = Stone Crossbow
Runestone Hammer
- Stone Hammer + [Any Rune] = Runestone Hammer
- War Hammer + [Any Runestone] Wand = Runestone Hammer
- Sword + [Any Runestone] Shield = Runestone Hammer
- Shield + [Any Runestone] Sword = Runestone Hammer
Runestone Crossbow
- Stone Crossbow + [Any Rune] = Runestone Crossbow
- Crossbow + [Any Runestone] Sword = Runestone Crossbow
Big Stone Sword
- Big Sword + Stone Wand = Big Stone Sword
Big Runestone Sword
- Big Sword + [Any Runestone] Wand = Big Runestone Sword
- Sword + [Any Runestone] Staff = Big Runestone Sword
- Quarterstaff + [Any Runestone] Sword = Big Runestone Sword




Be the first to comment