A simple guide to creating and using Standby Gates in SimAirport.
Introduction – Why?
Why Use A Standby Gate?
If you have a very busy airport and your flight schedule is very tightly packed you run the risk of a flight boarding at one gate not departing before the next flight using that gate arrives.
Incoming flights usually arrive early, often quite a bit earlier than you have scheduled for. This is good because it means your staff, the crew, and passengers have a little more time before the aircraft has to depart. But if there is any delay with the preceding flight then it can cause the subsequent flights to run late causing problems such as dissatisfaction and lose of the ‘perfect ops’ bonus.
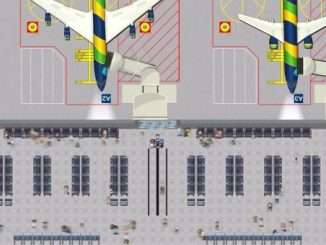
One way of avoiding these sort of crushes at the gate is to make one (or more gates) available as a ‘standby’ so that if a gate is still in use when the next flight arrives that incoming aircraft can be diverted to the ‘standby’ gate where the incoming passengers can disembark, those departing can board and the flight can leave again without incurring a delay penalty.
Research The Operation
Research Standby Gates
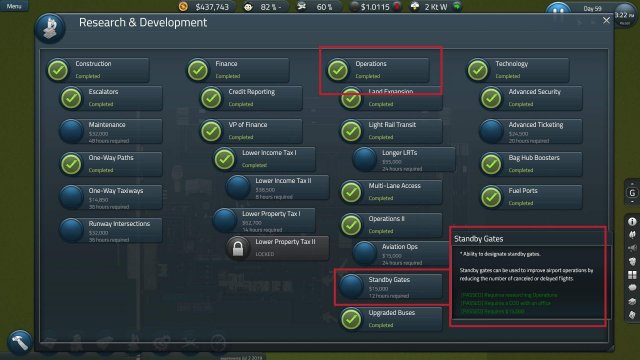
Before you can build or assign a Standby Gate the facility must be researched.
This is in the ‘Operations’ section and you must already have a COO employed and in an office.
It’s not an expensive research option and only takes 12 hours to complete so you can start using Standby Gates quite early in the development of your airport if you want to get as many flight contracts as possible.
Build The Gate
A Standby Gate Is Just A Gate
A Standby Gate is just the same as any other gate in your airport except that it will have fewer, if any, flights scheduled. You do not need to wait until you have completed the research before building the gate as any existing gate can be assigned Standby operation.
Like any other gate you will need to:
- Assign and schedule Gate Agents
- Connect it to the baggage handling system (if you have one)
- Connect it to your fuel delivery infrastructure (if you have one)
- If you have a PA system assign it to one (or more?) of the amplifiers
Basically, just set up a Standby Gate in exactly the same way you would a normal gate.
Schedule Standby Operation
Add Standby To Your Schedule
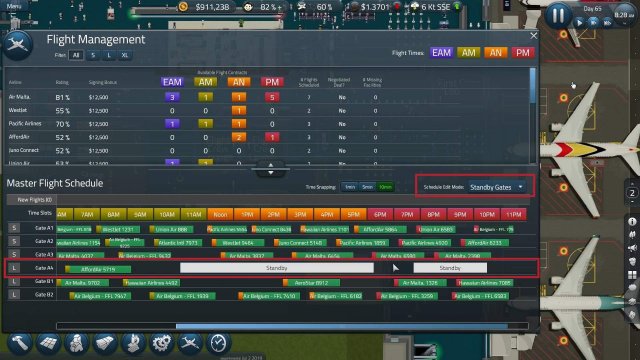
When you have complete the ‘Standby Gates’ research a new option will be available on the Flight Management screen which allows you to add and remove standby operation on any gate.
On the right-hand side in the middle of the dialog box the “Schedule Edit Mode” will now allow you to choose between ‘Flights’ and ‘Standby’. Select ‘Standby Gates‘ to schedule the standby period(s).
Typically you will use a gate with no scheduled flights but that is not actually necessary. Left-click within the gate row at the time you want to start (or end) the period of standby operation. Then drag either right or left to extend the period. A white block will be added to the gate’s schedule When you release the mouse button it will be titled ‘Standby’.
You can create a single or multiple periods of standby operation. Simply left-click and drag to either extend any existing standby block or create a new period.
If there are times when your timetable is not too busy and a Standby Gate is not necessary you can add scheduled flights to the same gate.
Remember: Select the “Schedule Edit Mode” ‘Flights‘ to add contracted flights and ‘Standby Gates‘ to edit the standby operation periods.
Remove Standby Operation
Removing Standby Periods
If you decide that you do not need a particular period of standby operation, or wish to remove standby operation from a gate entirely, simply select ‘Standby Gates‘ from the “Schedule Edit Mode” drop-down.
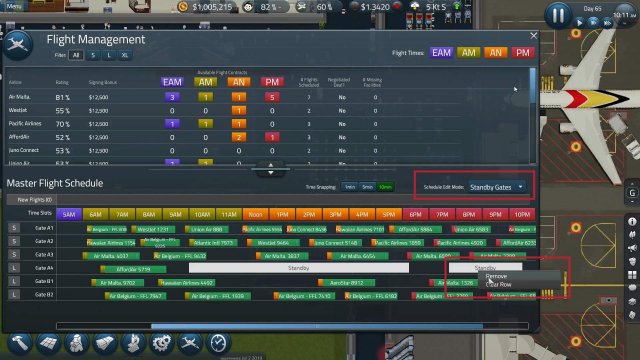
To remove a single specific period of standby right-click on the unwanted block of standby time and select ‘Remove‘.
To remove all standby on a gate right-click anywhere on the gate row select ‘Clear Row‘.
Note that the ‘Clear Row’ option only removes standby periods it does not remove any scheduled flights on that same gate.
See It In Action
I always like to see features demonstrated so if you would also like to see this working on a small, but busy, airport, please check out my short video.


Be the first to comment