
A very short example of a solid starting Franchise Zoo.
The Start
- Begin with a simple layout of just two habitats that aren’t too large
- Start slowly to establish steady income and avoid falling behind financially
The keeper/feeding bug is one of the most common problems players encounter. This guide will help you avoid it and set up a small, successful zoo in Franchise mode. I’ll explain exactly what I do and why, with examples shown in the screenshots.
Avoid:
- Starting to big of a build. You want to keep your money spent on the low. Don’t do more than 2 or 3 Habitats to start.
- Starting with large animals, especially carnivores. The larger the animal, and the more animals you have, the more it will cost to feed them. Start simple.
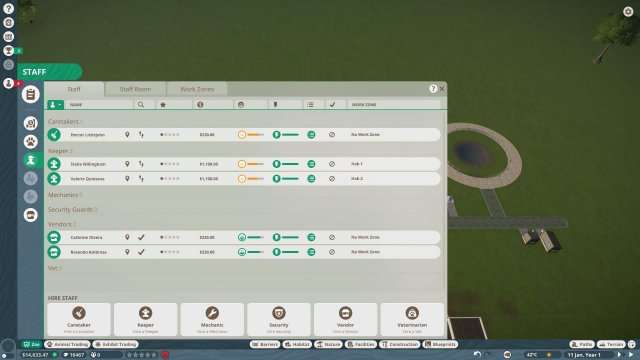
- Hiring too many staff. You do not need that many to start out.
- Vet building and Quarantine. There is no reason to build these fast, as long as you play smart. They are very expensive.
- Be cautious with food enrichment. In my opinion, avoid them completely. You do not need them, and they can cause issues.
- Do not over-train your staff. There is no reason to do this early. They are plenty able to do the jobs at hand, and become quite expensive.
To Do:
- Build 1 Keeper Hut and 1 Staff Room per Habitat, very close by. These are for your Keeper only. This keeps him on good rotation.
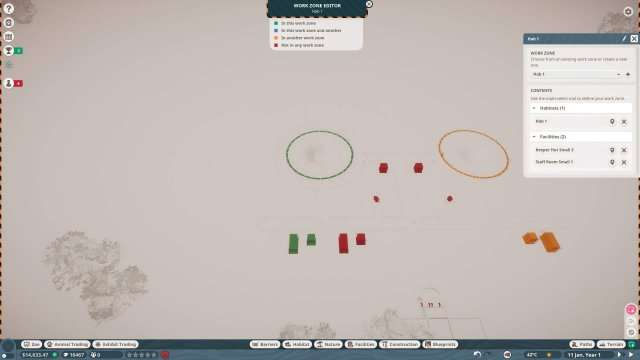
- Create a work area for every Habitat. Name them. I usually name them after the animal that will be inside of them.
- Assign 1 Keeper to the pre-made Keeper Hut, Staff Room and Habitat. This means that Keeper’s sole focus will be on Keeping that Habitat in tip top shape. He won’t be getting lost anywhere, or confused with other Keepers.
- As above, start simple on animals. You need to bake the pie before you sell it. Not too many, not too expensive, not too large. Expand as your income allows.
- Fully research each animal before you go on to creating another Habitat with more animals. This will allow you to max out that animals welfare while educating your guests. Educated guests are happier guests, and will spend more money.
- Have multiple donation boxes wherever your guests seem to congregate. Donations are your lifeline.
- Make sure all buildings, including doors to habitats, have power.
- Make sure all standing water is in range of a water cleaner.
- Once you get 2-3 successful Habitats going, with income coming in – start following the guide the guests provide for you. If they are thirsty, provide drinks. If they are hungry, provide food.
- Don’t forget to add educational signs.
- If you are getting vandals on your signs and trash cans, install security cameras pointed at them.
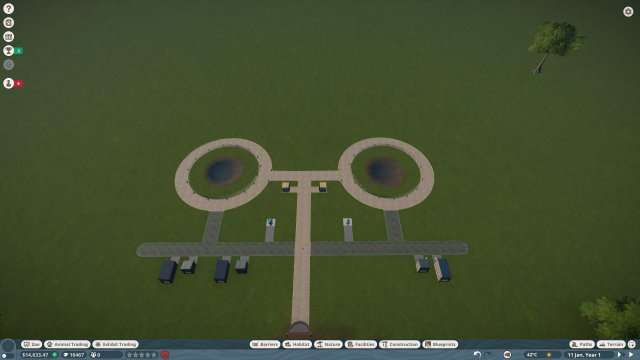
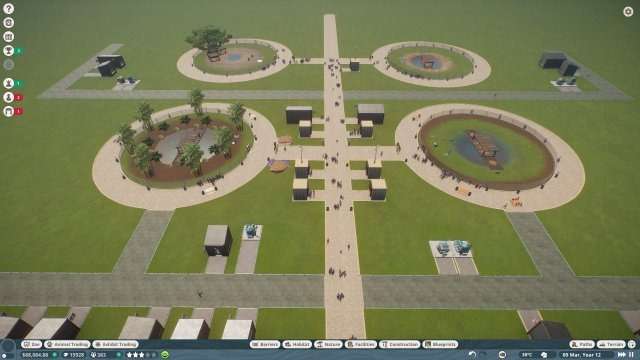
In my first screenshot below, you will see the layout.
- 1 Keeper Hut, 1 Staff Room on each side. One set for each Keeper.
- 1 Staff Room and 1 Trade Center on one side. One set for my caretaker.
- The two buildings near the Habitats are Information Centers. They provide good early income and education.
I have not yet added a workshop and research center, nor hired the staff for them, just so it’s less cluttered for this guide.
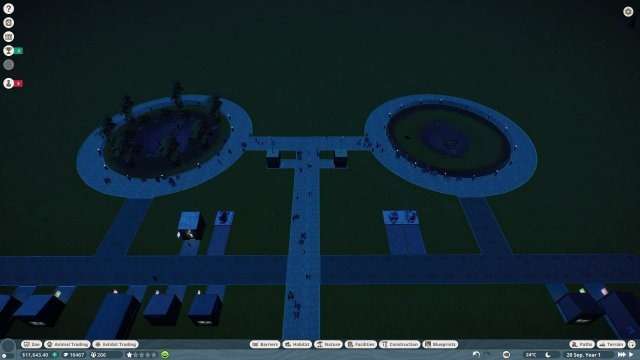
Progression


Would you be willing to make this a blueprint and put it on the gallery?