
This guide will tell you everything you need to know in order to get 100% of the achievements in Raft.
How to Obtain All Achievements in Raft
The Guide
I have divided all of the achievements into different categories in order to keep them all organized and to make it easier for you to find which achievements you still need to get. The categories are:
Survivor Achievements
- These are the achievements which require you to survive a certain amount of days.
Hunter Achievements
- These are the achievements which require you to kill a certain amount of each type of animal.
Builder, Gatherer, Painter Achievements
- These are the achievements based on building foundations on the raft, gathering items with your scrap hook, and painting blocks on your raft.
Wrangler, Hoarder, Farmer Achievements
- These are the achievements based on capturing animals, placing containers, and placing cropplots.
Historian Achievements
- These are the achievements based on finding notes at the story locations.
Story Achievements
- These are the achievements based on finding special locations related to the story.
Earned through Gameplay Achievements
- These are the achievements which are earned though playing the game naturally (with a bit of grinding).
Hidden Achievements (Spoiler Warning)
- These are all of the hidden achievements in Raft. Feel free to ignore this section if you want to discover them for yourself.
The Achievements
I will go into as much depth and detail as possible with each of the achievements. However, Raft is a very repetitive game by nature and so I will try to avoid repetition in this guide.
Some in-game accomplishments, such as the Historian accomplishments, will need a lot of specific information. Other accomplishments, like the three Shark Hunter accomplishments that require you to defeat 1 shark, then 10 sharks, and finally 50 sharks, will all be earned using the same approach. Because of this, there will only be one section explaining how to get all three Shark Hunter accomplishments instead of a separate section for each one.
Survivor Achievements
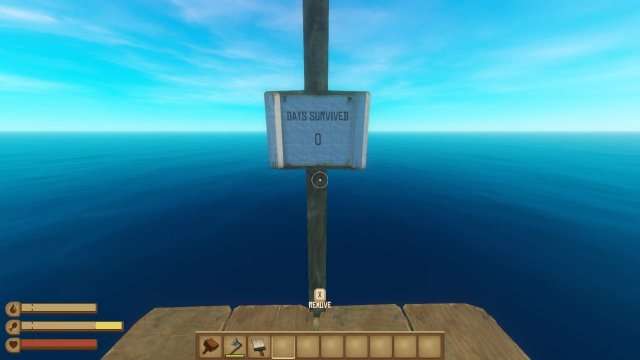
Beginner Survivor
- Survive for 1 day.
Intermediate Survivor
- Survive for 7 days (one week).
Expert Survivor
- Survive for 30 days (one month).
Master Survivor
- Survive for 365 days (one year).
Getting the Survivor set of achievements is a matter of patience. One thing that makes this achievement so tedious is that the days do not accumulate over multiple worlds. For example, you could not survive for 15 days on two different worlds to get Expert Survivor, all 30 days must be on one world.
For many of the in-game accomplishments in Raft, playing on the Easy difficulty setting will be the simplest way to obtain them. This is particularly true for the Survivor and Hunter groups of accomplishments. When playing on Hard difficulty by yourself, you cannot come back to life after dying unless another player helps you.
This makes surviving for a long time on your own much more challenging. However, on Easy difficulty, you can come back to life as many times as needed with hardly any negative effects. Because of this, surviving for the necessary number of in-game days becomes just a matter of waiting.
A Day/Night cycle in Raft lasts 20 irl minutes. This means that to get Master Survivor you need to spend about 122 hours in one world. However, this can be shortened by sleeping. When you sleep in Raft, you skip from 8pm to 4am, about 1/3rd of the day. This saves you almost 41 hours of playtime if you sleep every night.
At the most, the playtime for each of the Survivor Achievements will be:
Beginner Survivor
- 20 Minutes.
Intermediate Survivor
- 2 Hours, 20 Minutes.
Expert Survivor
- 10 Hours.
Master Survivor
- 121 Hours, 40 Minutes.
You can keep track of the amount of days you have survived using a calendar. These can be crafted with 2 nails and 2 planks.
If you are doing a co-op world with a friend. That friend must be on the raft with you for at least half of the in-game play time in order to receive the Survivor Achievements from that world.
Hunter Achievements (Early Game)
Shark Hunter
Beginner Shark Hunter
- Kill 1 Shark.
Intermediate Shark Hunter
- Kill 10 Sharks.
Expert Shark Hunter
- Kill 50 Sharks.
As I mentioned in the Survivor Achievements section, it will be easiest to get all of the Hunter Achievements on Easy difficulty. That way, the animals will do the least amount of damage and if you do end up dying you can respawn with no penalty.
There will always be a shark that follows your raft around as you play the game so it will be easy to kill a lot of them as you simply play the game. Sharks can be shot with a bow from your raft but that consumes a lot of arrows. They can also be stabbed with a spear while swimming underwater.
The best method for killing a shark is to swim at the shark head on and stab their face when they open their mouth to bite you. If you get the timing right you will interrupt their bite and they will swim through you without doing any damage.
After this initial attack they will swim away for a bit after you stab them and you will be able to swim after them and get 1 – 2 stabs on their tail. If you have the flippers equipped, you will be able to chase after the shark more easily and get 3 – 4 stabs on their tail instead.
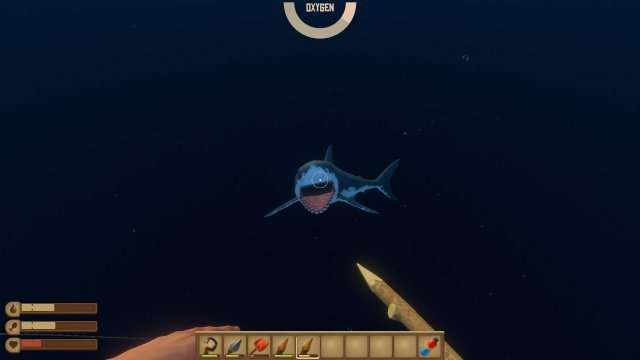

On Easy difficulty, the shark will take 16 stabs from a wooden spear to kill and 15 stabs from a metal spear. The metal spear also has a much longer durability.
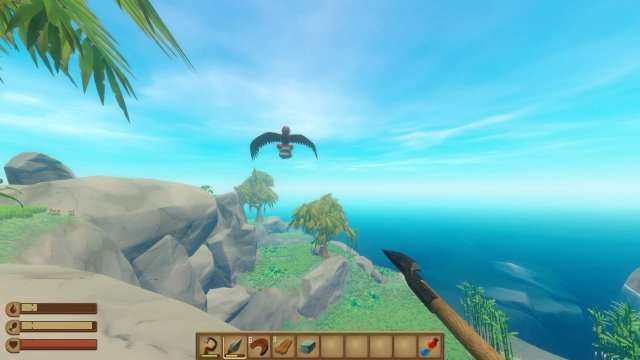
Bird Hunter
Beginner Bird Hunter
- Kill 1 Bird.
Intermediate Bird Hunter
- Kill 10 Birds.
Expert Bird Hunter
- Kill 50 Birds.
Bird killing can be done in a number of ways. You can shoot them down with arrows as they fly around your raft, you can stab or shoot them while they are pecking at your farms, or you can make a scarecrow and stab or shoot them while they are pecking at it.
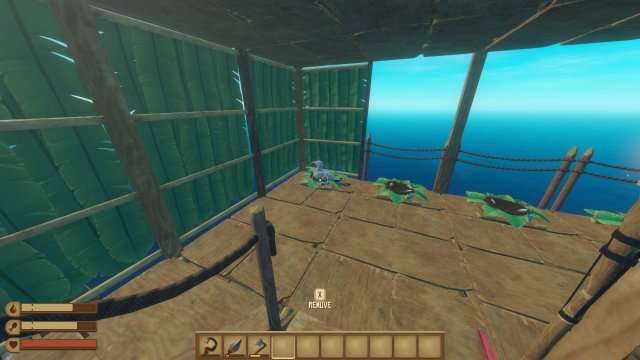
However, the easiest way to kill birds is to craft a birds nest and place 10 – 20 of them on your raft. This will require 6 palm leaves, 6 planks, and 1 giant clam per nest. When you place the birds nest on your raft, birds will be attracted to it.
They will leave feathers inside of the nests and will sit in them for some time. While they are sitting there you can either rush them down and hit them once with a metal spear or you can kill them with one metal arrow from a bow. The bow method is much easier as, when you get close to the birds, they will fly away and it can be difficult to hit their hitbox with the spear while they are in flight.
Hunter Achievements (Mid Game)
Screecher Hunter
Beginner Screecher Hunter
- Kill 1 Screecher.
Intermediate Screecher Hunter
- Kill 10 Screechers.
Expert Screecher Hunter
- Kill 50 Screechers.
Screechers are giant, red and black birds found on large islands. There is one screecher on every large island which means you will have to visit at least 50 large islands to get Expert Screecher Hunter.
Screechers will attack you by picking up boulders from the island and dropping them on your head. It will only take a couple of boulders to kill you so you have to be paying close attention to where the screecher is at all times.
It is possible to stab screechers with your spear when they land to pick up a boulder, however, this will cause you to have to do a lot of running around the island and it will be hard to get to where the screecher has landed in time to stab them.
Attacking the screecher with your spear is also dangerous because the screecher can drop it’s boulder on you immediately as it takes off from the ground, not giving you enough time to avoid taking damage.
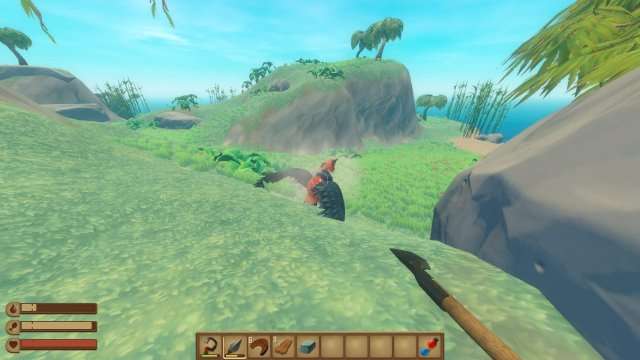
The easier way to kill screechers is to get to a high point on the island with your bow and shoot down on the screecher as they fly up to you. It will take 7 shots with metal arrows on normal difficulty to kill a screecher.
Poison-Puffer Hunter
Beginner Poison-Puffer Hunter
- Kill 1 Poison-Puffer.
Intermediate Poison-Puffer Hunter
- Kill 10 Poison-Puffers.
Expert Poison-Puffer Hunter
- Kill 50 Poison-Puffers.
Poison-puffers are small, yellow pufferfish that are found around large islands. There are 4 – 5 poison-puffers per large island so they are very easy to farm once you have mastered the method for killing them.
Poison-puffers pretty much function the same as Creepers do in Minecraft. If you swim too close to them for too long, they will explode in a cloud of poison which will do a lot of damage to you. If you cause them to explode it will not count as a kill so you have to be careful.
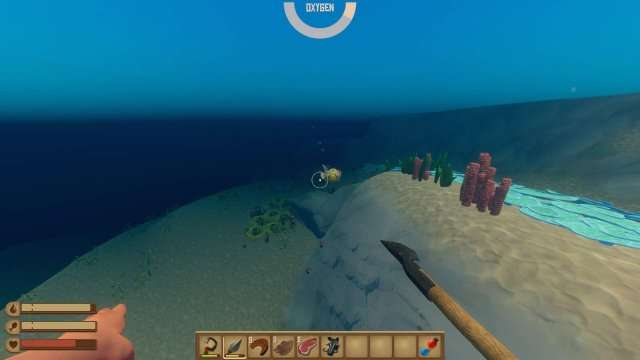
In order to kill them you can either use a bow or a spear. With a bow it will take 3 metal arrows to kill them which makes this the easiest method as it provides the least amount of risk to you and it takes the least amount of time.
If you want to use a spear it will take 4 stabs from a metal spear to kill them and I recommend using flippers as well. If you don’t use flippers while using a spear, it can be difficult to get enough distance between you and the poison-puffer after each stab so that they don’t explode. Unlike Minecraft’s Creepers, once the poison-puffer starts the explosion animation, it cannot be stopped by swimming further away.
Warthog Hunter
Beginner Warthog Hunter
- Kill 1 Warthog.
Intermediate Warthog Hunter
- Kill 10 Warthogs.
Expert Warthog Hunter
- Kill 50 Warthogs.
Warthogs are also found on large islands. There are 0 – 2 warthogs per large island. Warthogs will charge at you and, if they connect with you, they will deal damage and pick you up and carry you to the end of their charge. If you avoid their charge they will continue for some distance before skidding to a stop and recovering.
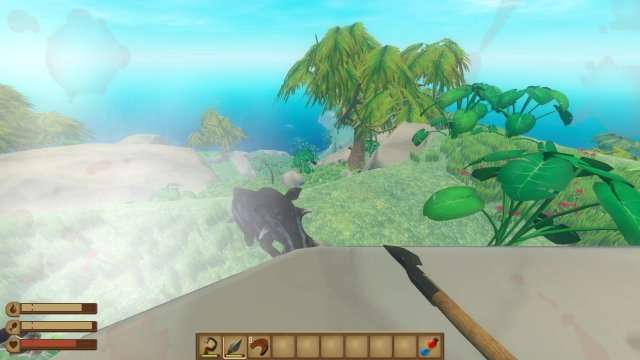
The safest method to kill the warthog is to shoot them from on top of a rock with a bow so that they cannot reach you, however, not every island will have a safe place to stand. The other way to kill warthogs is by using a spear and strafing around their charge.
You can wait for a warthog to charge you and strafe around it by either jumping or stepping out of the way as they are coming at you because they are not able to change directions once their charge has begun. You will not be able to do this without some distance between you and the warthog, though.
After the warthog has charged past you, you can run up to it and get 1 – 2 stabs on its butt before it recovers and can charge again. You can stab it more times, however, you will not have enough time to get away before it charges again and deals damage. It will take about 10 stabs with a metal spear to kill a warthog.
Hunter Achievements (Late Game)
Lurker Hunter
Beginner Lurker Hunter
- Kill 1 Lurker.
Intermediate Lurker Hunter
- Kill 10 Lurkers.
Expert Lurker Hunter
- Kill 50 Lurkers.
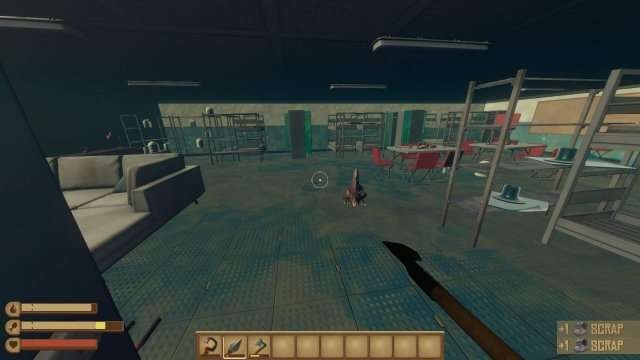
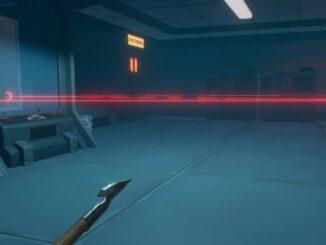
Lurkers are an animal that can only be found at the Vasagatan story location. Lurkers are one of the only two animals in Raft that can respawn when the player gets a certain distance away from their spawn location. There are five lurkers on the Vasagatan, one spawns on each floor except for the top floor.
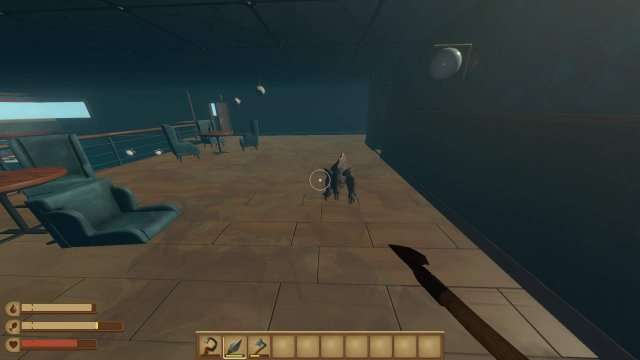
Lurkers have two different attacks, they can do a jump at you if you are far away from them, or they can swipe at you if you are close to them. The easiest way to kill them is to stand close to them and circle strafe around them while stabbing with your spear. Lurkers can be killed with 3 stabs from a metal spear.
I recommend getting to the Vasagatan and farming all 50 lurkers while you are there so that you don’t have to come back. You can kill each floor’s lurker as you ascend the boat and then jump outside and back down to the bottom. The distance it takes to go up the boat and then back down should be enough for the lurkers to respawn by the time you kill a set of five.
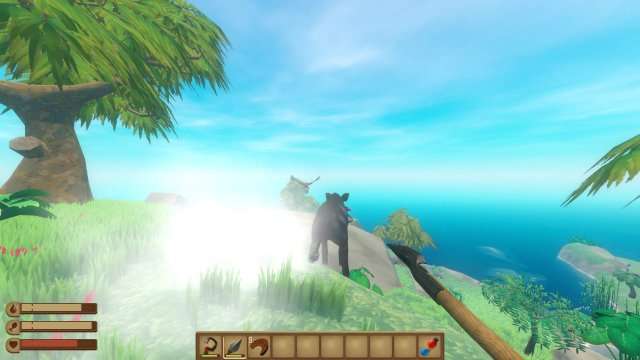
Bear Hunter
Beginner Bear Hunter
- Kill 1 Bear.
Intermediate Bear Hunter
- Kill 10 Bears.
Expert Bear Hunter
- Kill 50 Bears.
The Expert Bear Hunter achievement is currently the rarest achievement for Raft players. As of the time I am writing this guide, 0.1% of players have earned this achievement.
As a result, I want to go into as much detail as possible to show how to get these achievements in the most optimal and efficient way.
First, a little bit about the bears themselves. Bears hit decently hard and have 3 different attacks. They have a leap (similar to the lurkers), they have a swipe (also like lurkers), and they have a stomp. With all of these attacks you want to be moving in and out of the bear’s range as they will be mostly stationary while doing attacks (aside from the leap if you get too far away).
Get in one or two spear stabs between the bear’s attacks because if you are circle strafing around and get caught in an attack, it can be bad news. You can use a bow but it can be difficult to find a safe place to stand that the bears can’t reach and it also takes quite a few arrows per bear. Better to save all of your arrows for when it comes time to fight the Mama Bear. Bears will take 10 stabs from a metal spear to kill.
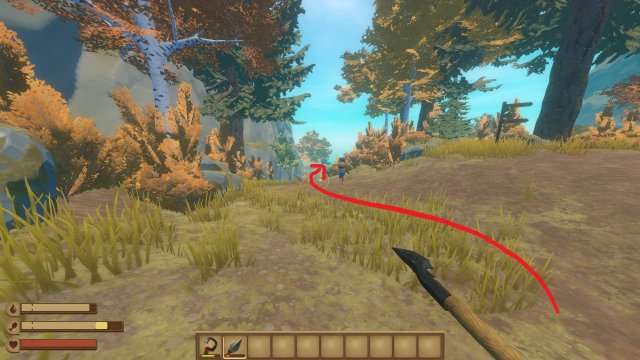
Bears are found on Balboa Island as well as smaller islands around Balboa, but we will stick to Balboa as the bears respawn here, like the lurkers do on the Vasagatan. While exploring Balboa you can find a hand-drawn map of the island on which I have drawn the optimal route for farming bears.
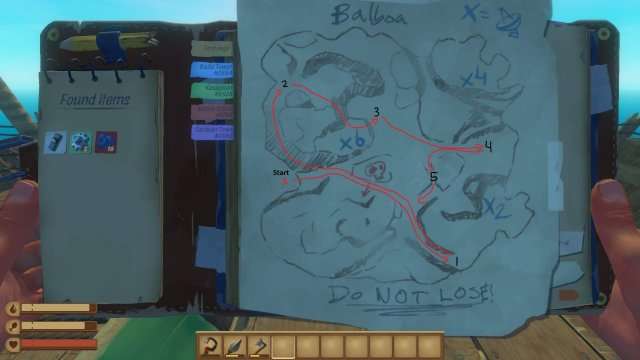
With this route you will kill 5 bears every loop and so it should only take 10 loops to get all three “Bear Hunter” achievements. The bears will respawn when you get a certain distance away from their spawn locations so you should be able to run loops back to back with no problem.
I have plotted out the route as best I can with screenshots because the hand-drawn map isn’t that great.
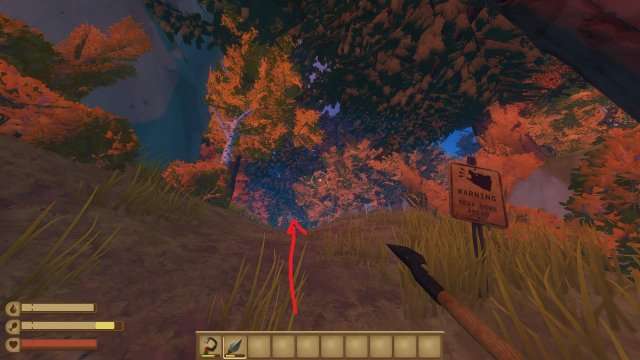
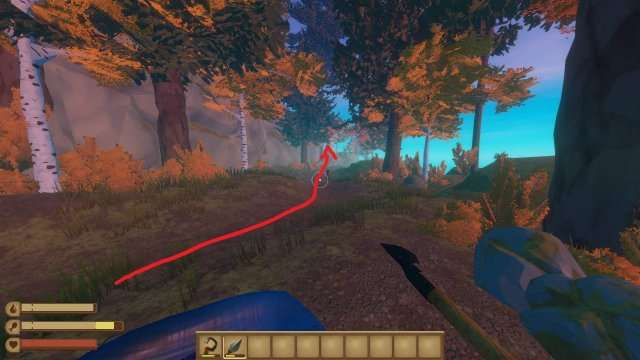
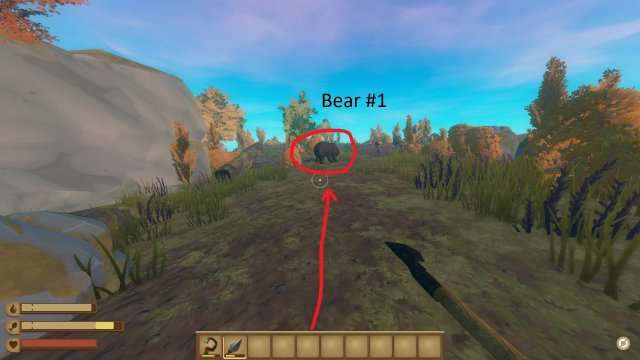
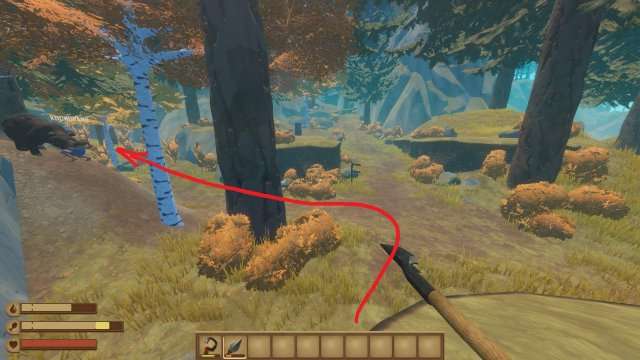
After killing Bear #1 you need to turn around in order to continue the route, don’t follow the path behind Bear #1.
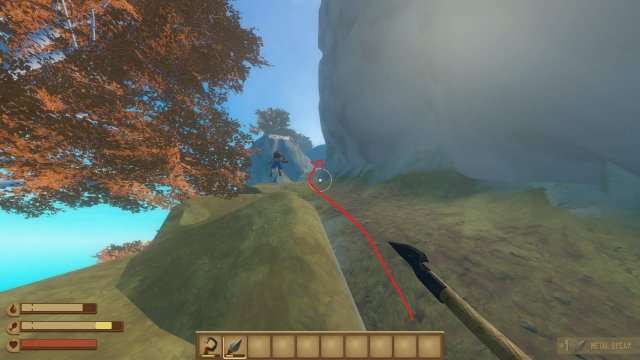
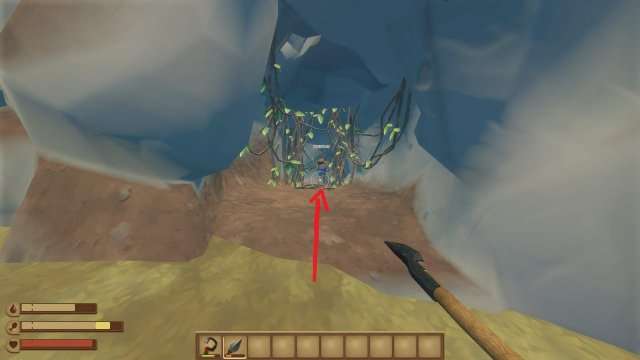
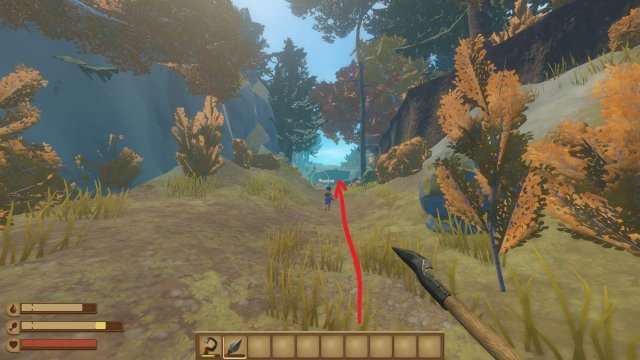
You will need to have gotten the machete from inside the cave near Mama Bear in order to get through these vines.
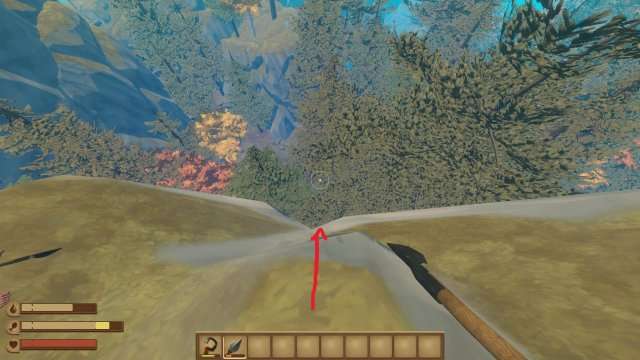
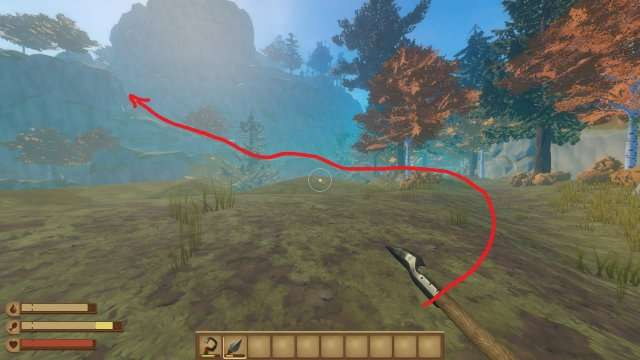
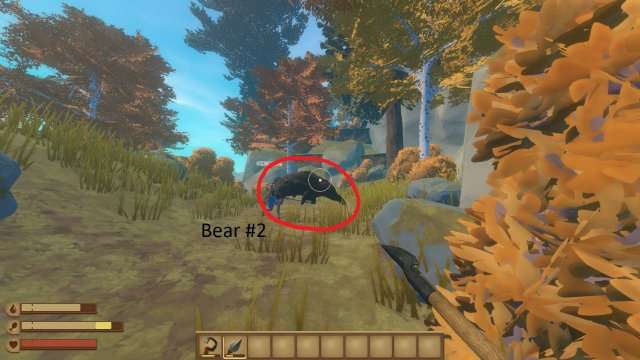
Raft has Skyrim physics but with less fall damage so in order to get down this cliff you can just jump down while sliding against the side of the cliff to slow your momentum. There are enough outcroppings on the way down so you shouldn’t take any fall damage.

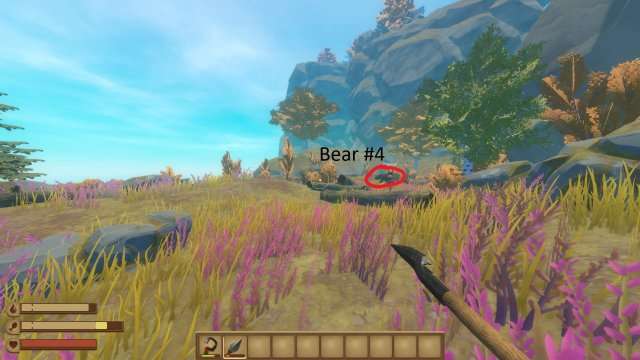
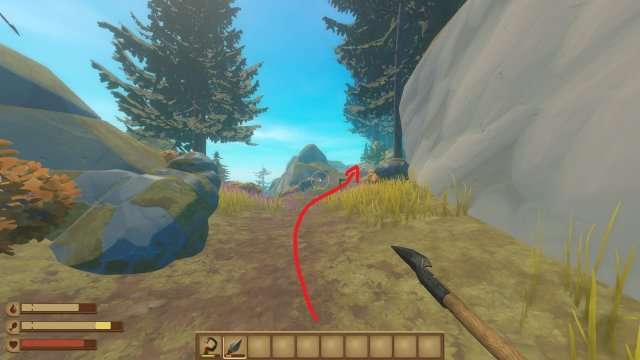
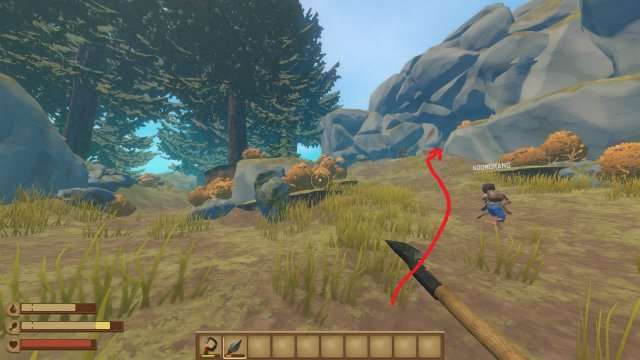
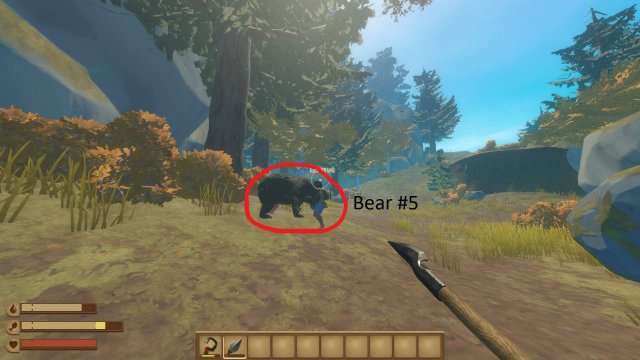
After killing Bear #4 you need to turn around and partially go back the way you came. Make sure to refer to the map if you get confused about where to go.

Using this approach, earning these three accomplishments shouldn’t take much time. As mentioned earlier, it’s generally best to get all three of these during your initial exploration of Balboa Island, as going back there later can be inconvenient. Having another player with you to draw the bear’s attention can also make fighting it significantly easier, possibly to the point where armor isn’t needed and you might not even receive any damage.
Builder, Gatherer, Painter Achievements
Builder
Beginner Builder
- Build 10 Foundations.
Intermediate Builder
- Build 100 Foundations.
Expert Builder
- Build 1000 Foundations.
The Builder, Gatherer and Painter Achievements fall into the more grindy side of Raft achievements. There isn’t too much advice I can give for them as they are pretty straight forward. These achievements do track over multiple worlds though so you don’t have to build all 1000 foundations or hook all 5000 items in one world.
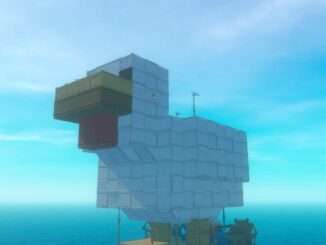
For the Builder achievements, I would build an extension off of the back of your Raft and build a platform of foundations in 10×10 chunks once you have a lot of excess wood and plastic. Building 100 foundations and then destroying them before building the next 100 foundations will reduce the amount of lag in your world that can come with having large builds.
Gatherer
Beginner Gatherer
- Hook 100 Items.
Intermediate Gatherer
- Hook 500 Items.
Expert Gatherer
- Hook 5000 Items.
The first two Gatherer achievements will come very quickly through standard play. However, hooking 5000 items takes quite a long time. Just remember that picking up items from collection nets and mining items underwater both do not count towards this set of achievements. Barrels also only count as one item hooked, rather than however many items the barrel may contain.
I recommend using plastic hooks while grinding towards Expert Gatherer as it will save you a lot of resources.
The only other advice that I can give for this achievement is to have patience, it will come eventually.
Painter
Beginner Painter
- Paint 50 Blocks.
Intermediate Painter
- Paint 200 Blocks.
Expert Painter
- Paint 1000 Blocks.
The Painter achievements are much easier to get than the Builder or Gatherer achievements. Painting is done by making paints from flower seeds in the paint mill and using the paint brush with the dye on blocks of your raft.
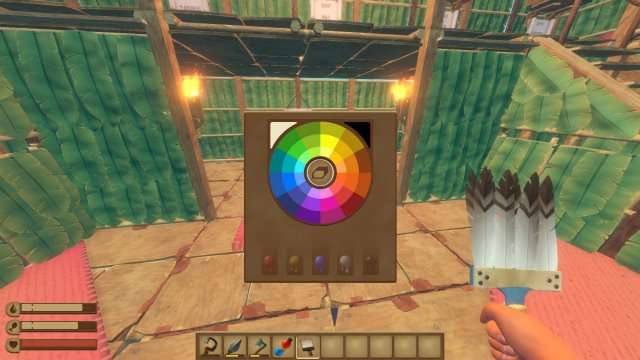
The base flower colours you can find are black, white, blue, yellow, and red. I recommend only painting with the base colours as it uses the least amount of paint. I also recommend painting blocks, using the erase feature of the brush to clean them, then repainting the blocks, rather than painting over already painted blocks. Erasing a painted block counted towards the Painter achievements in previous updates however I am unsure if it still does.
Wrangler, Hoarder, Farmer Achievements
Wrangler
Beginner Wranger
- Capture an animal.
Intermediate Wrangler
- Capture 10 Animals.
Expert Wrangler
- Capture 50 Animals.
Capturing animals is done by using the net launcher, a tool made from 2 scrap, 4 plastic, 1 metal ingot, and 2 bolts. You can craft net canisters for ammunition from 1 explosive powder (smelted explosive goo from poison-puffers), 4 stones, and 4 rope.
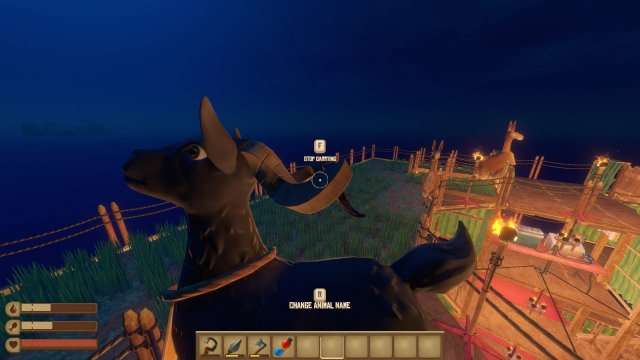
In order to capture an animal you have to be as close to the animal as possible as the net does not launch very far. You are able to capture llamas, goats, and cluckers on large islands and there will be 1 – 4 of any combination of these animals per large island.
It should be noted that currently there is a bug in the game where if you have two people on one raft, each animal will count for two animals captured instead of one.
Some Look Different
- Capture a rare animal.
Rare animals are like shiny pokemon, you find them randomly on large islands and they will be a different colour than the normal version of that animal.
Hoarder and Farmer
Hoarder
- Have 20 storages on the same raft.
Farmer
- Have 20 cropplots on the same raft.
The Hoarder and Farmer achievements are pretty self explanatory, not much to say about them. Only that it’s easiest to do with the small storage containers and the small cropplots.
Historian Achievements
Radio Tower Historian
- Find all notes on the Radio Tower.
To get the Historian achievements, you will need to find all of the notes at each of the three story locations. These notes are not difficult to find but they can be easy to pass up if you’re not paying attention or if you don’t know how many notes are at each location.
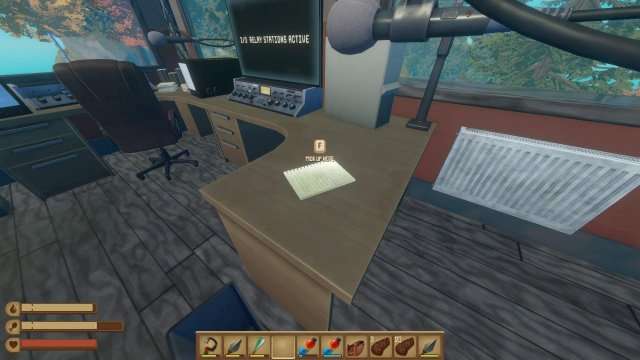
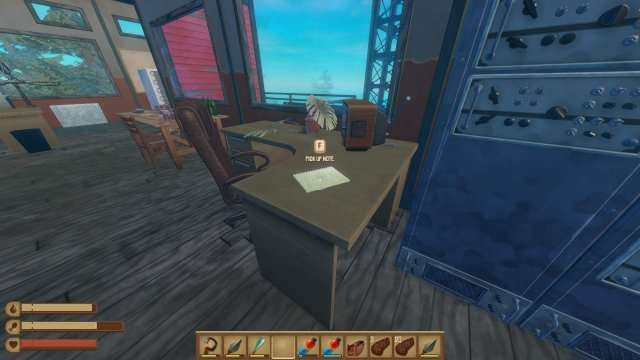
The Radio Station has five notes that you can find.
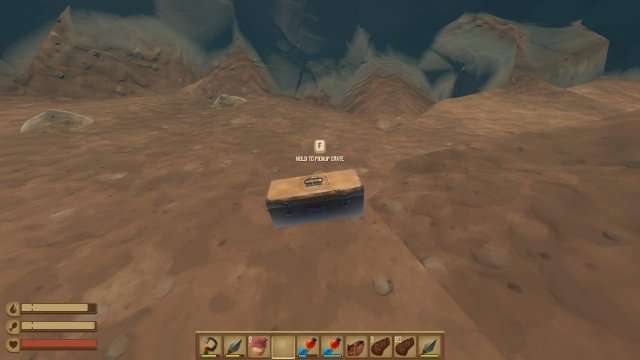
One is in a briefcase that is holding a door open under water.
Two are in rooms that you can explore while ascending the station.
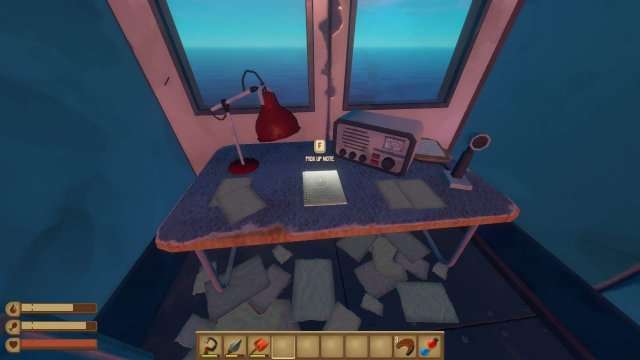
Two are in the uppermost room with the whiteboard.

Vasagatan Historian
- Find all notes on Vasagatan.
The Vasagatan has ten notes to find throughout the boat. I tried to list them in the order that you would come across them while exploring since the Vasagatan is more linear than the other story locations.
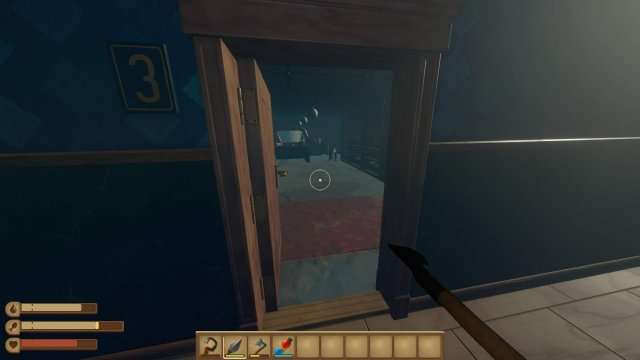
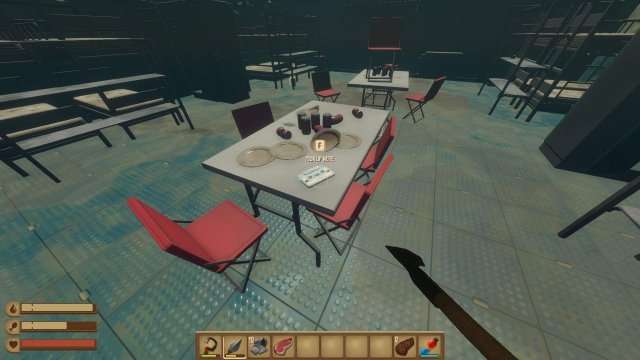
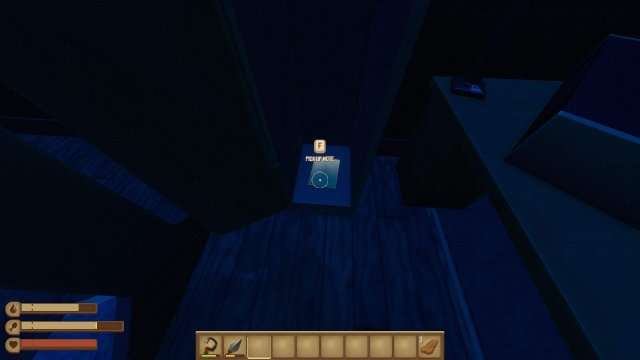
On floor 1 (the basement) there are two notes. One is on a table in the large room and the other is in a locker that you have to open with the bolt cutters.
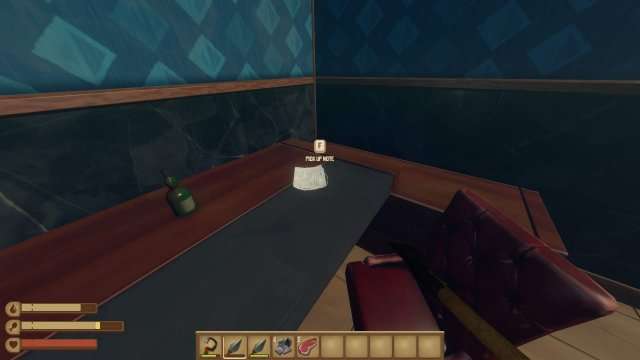
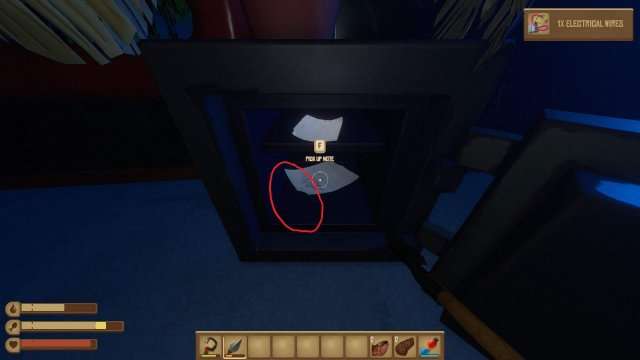
On floor 2 there are three notes. One is on the bar next to the bullet item and the other two are in the safe with the electrical wires that you have to open with the four digit code.

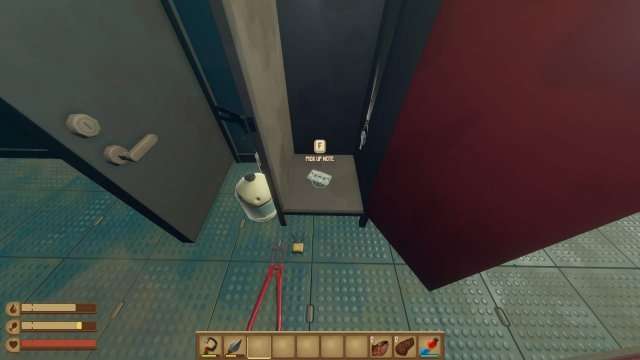
On floor 4 there is one note. To get it you have to craft the carjack in order to move the safe that is blocking the door.
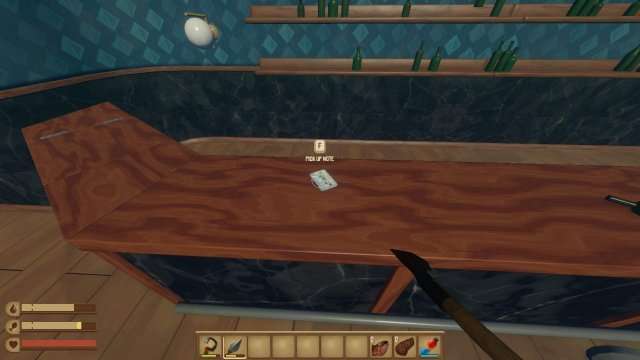
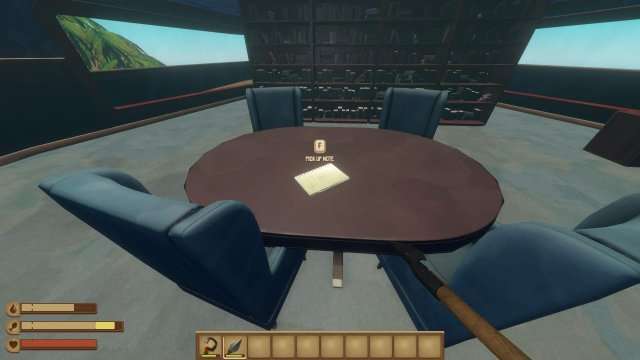
On floor 5 there is one note on a table.
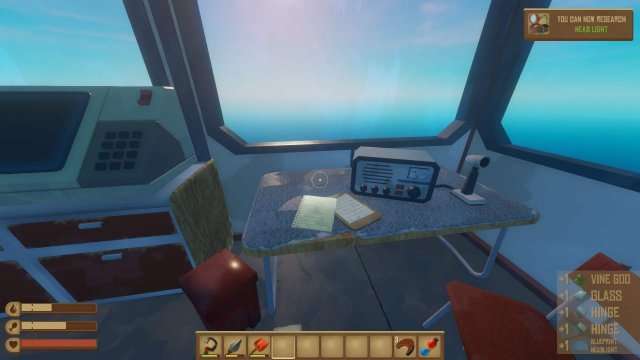
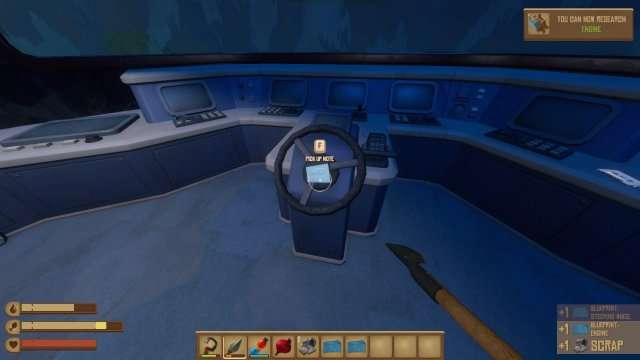
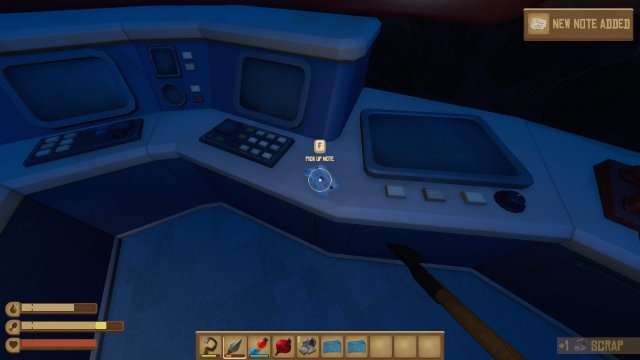
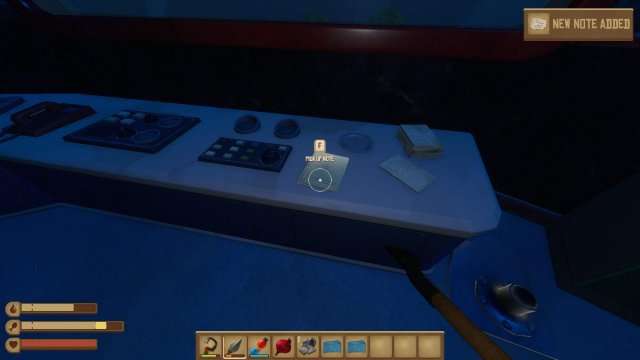
Finally, on floor 6, there are three notes. One is on the steering wheel and two are on the counter to the right.
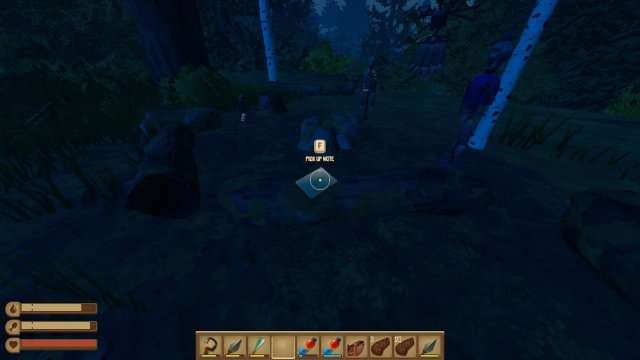
Balboa Historian
- Find all notes on Balboa.
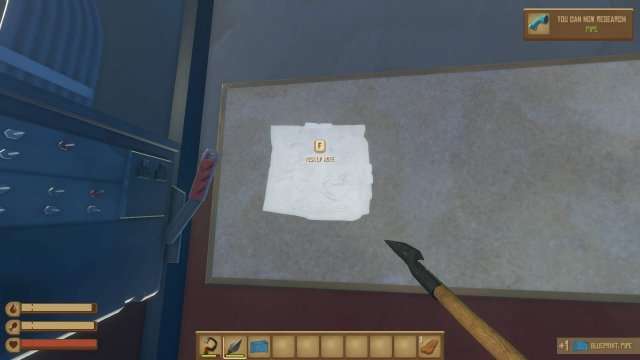
Balboa Island has twelve notes to find and it can be very annoying to collect them all. Your character’s movement speed is very slow on land and if you don’t know where to go to get everything you can end up doing a lot of backtracking. The best order to do things in is to first find five of the blueberries in order to distract the Mama Bear and get the machete from the cave. Getting the machete immediately will prevent a large amount of backtracking.
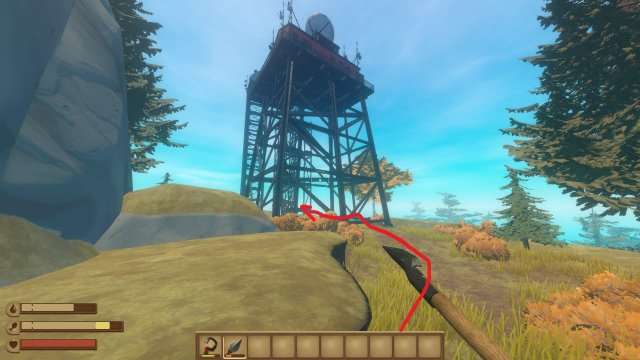
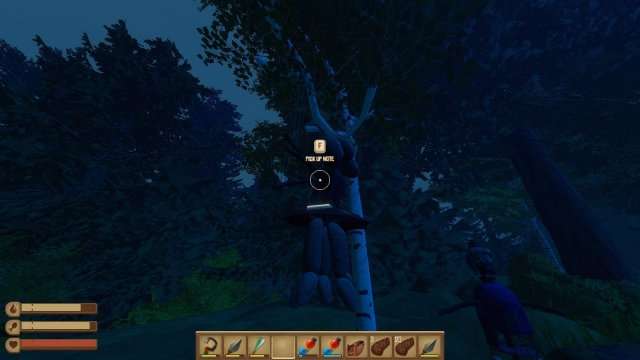
After getting the machete, follow the path signs to relay station’s 4 and 6. Go to relay station 4 first and get the two notes that are inside of the station.

Relay station 6, which is the station you should go to next, will also have two notes.
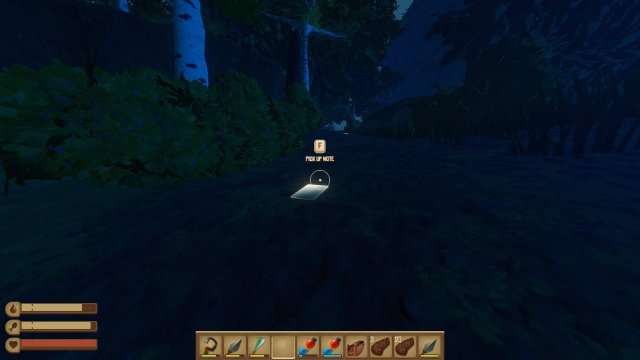
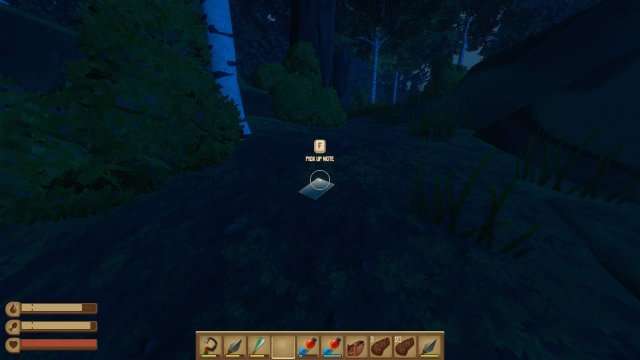
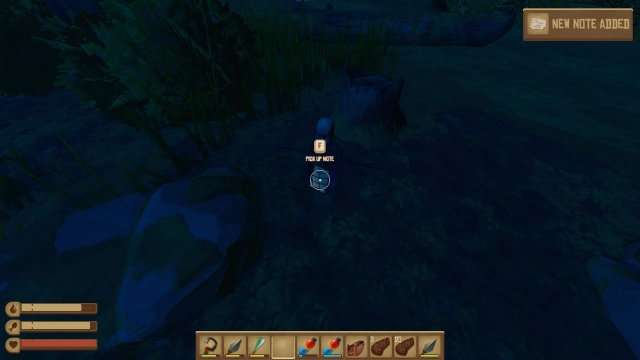
Around the base of the cliff that relay station 6 is on top of, you will find a trail of notes leading to the campfire where you get the Tiny Little Murderer achievement. There are five notes to be found in this area.
Lastly, you will go to relay station 2 and the ranger’s station. There is one note inside of station 2.
There are two notes inside of the ranger’s station, however you can only get the one behind Bruno’s board after finding all of his tools as part of the A Revelation achievement.
Story Achievements
Bootleg Fireworks
- Breach the cockpit of the Vasagatan.
In order to get into the cockpit of the Vasagatan you will need to craft the bomb at the workbench found on floor 1 of the boat. The bomb will require four items to make.
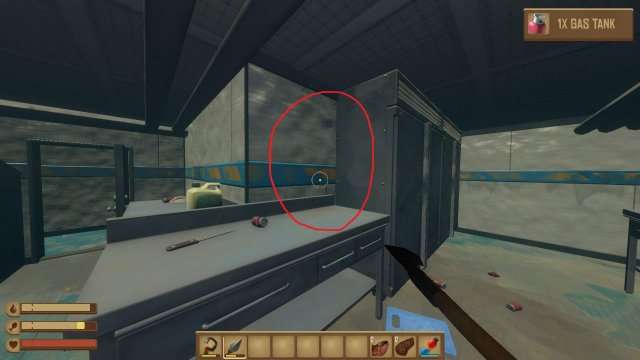
The gas tank can be found on floor 1 in the kitchen.
The bullet can be found on floor 2 on the bar. It is easy to miss because it looks more like a bottle of alcohol than a bullet.
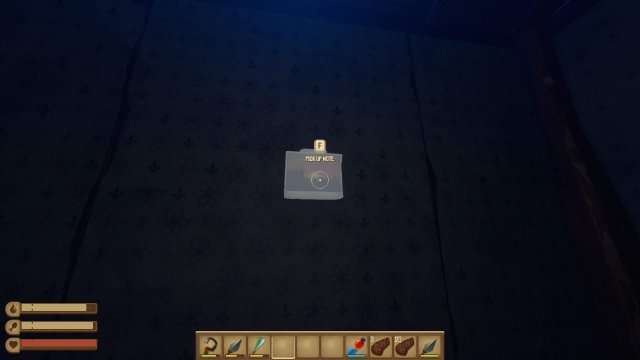
The electrical wires can be found in the safe on floor 2.
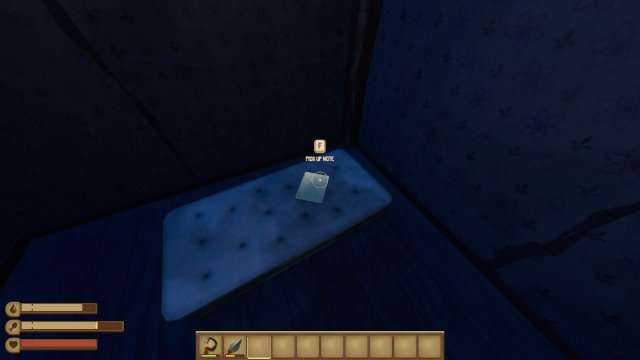
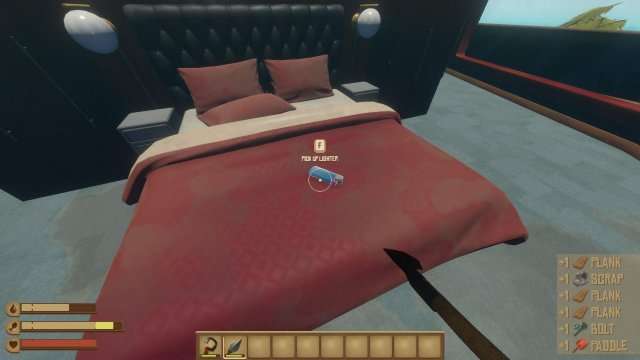
The lighter can be found on top of the bed on floor 5.
You shouldn’t have too much trouble finding each item. The game makes it especially easy by making each item you can pick up glow white. It can be very difficult to see in the Vasagatan at night which is why you find the recipe for the headlamp at the Radio Station, however, you can just sleep so you don’t have to waste materials on the headlamp. The Vasagatan is so small that, unlike Balboa Island, getting back to your boat quickly to sleep is no problem.
Mother Lode
- Slay the Mama Bear.
The next four achievements all take place on Balboa Island. I listed them in the order in which you are most likely to do them in case you are following this guide as you play through the game.
While on Balboa Island you will find the Mama Bear which is a bear much larger than the other bears found on the island. Not only is she larger but she also has much more health and does much more damage. It is not required that you fight her unless you want the achievement.
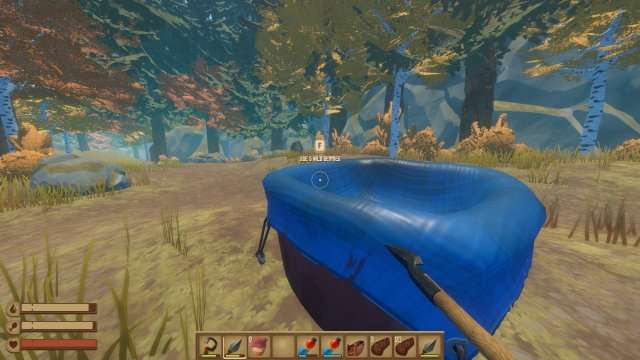
Blueberries can be found on bushes all across the island. These can then be placed into the red container with the blue tarp near where she spawns in order to distract her.
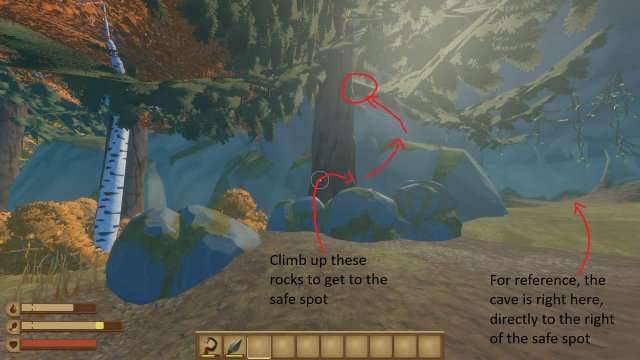
The Mama Bear is dangerous to engage with melee weapons, even with two people, so I recommend using a bow. Near the Mama Bear’s area, to the left of the cave entrance, is a couple of boulders which you can climb in order to get onto a ledge. This ledge is a safe spot that the Mama Bear cannot hit you on. From this ledge, you can shoot the Mama Bear with a bow and in some cases she wont even aggro you.
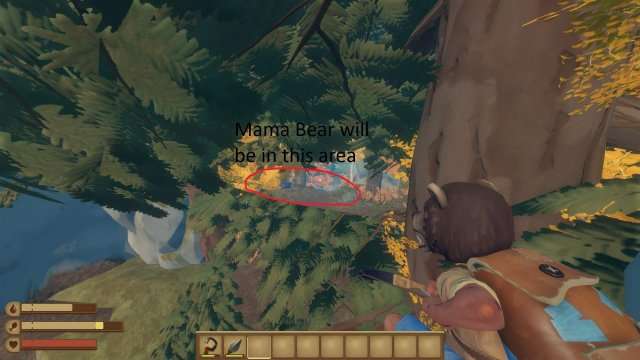
It will take between 40 – 50 arrows to kill the Mama Bear so make sure you come prepared. Make sure to grab the machete from the cave near Mama Bear if you haven’t already because it will be a pain to come back to this area to get it once you are across the island.
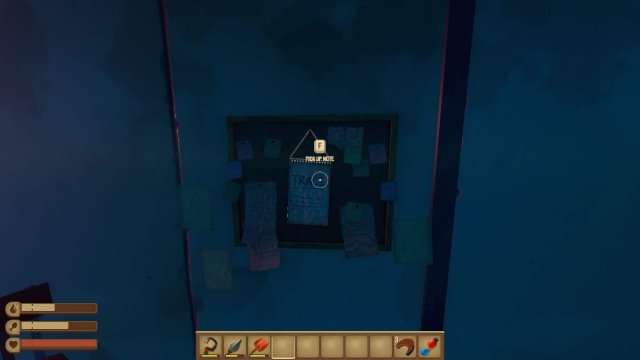
Tiny Little Murderer
- It’s all so obvious now (find the campfire on Balboa Island).
In order to get this achievement you have to find the campfire location on Balboa Island and pick up all five of the notes around it. The campfire is at the base of the cliff that relay station 6 is on top of and you can see station 6 from the campfire.

If you are following the signs and trails, you can follow the ones that lead to relay stations 4 and 6 until you come to this sign.
While you are at the camp, pick up the five notes in the surrounding area (see Historian Achievements section for details). Also, make sure to pick up the lightbulb from one of the figures surrounding the campfire as this will be used for the “Fix Errol” achievement.
Fix Errol
- There you go Errol (find the lightbulb and attach it to the figure outside of the Ranger’s Station on Balboa Island).
After you get the lightbulb from the figure at the camp, take it to the ranger’s station. Outside of the ranger’s station will be another figure that is missing it’s “head”. If you have the lightbulb in your quest item inventory and click use on the figure you will get this achievement.
A Revelation
- Why is there a photo behind the toolboard (find all of the tools and hang them on the board on Balboa Island).
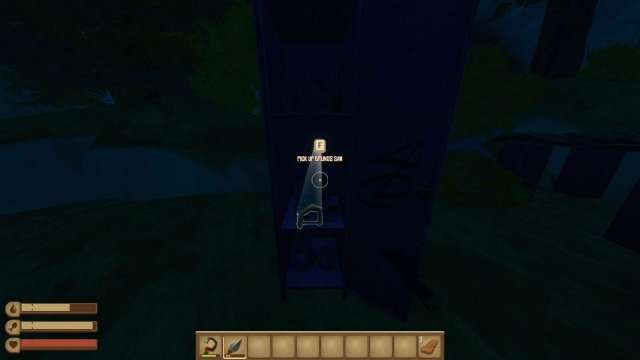
This achievement will require you to find Bruno’s three tools that are scattered across Balboa Island.
Bruno’s Saw can be found inside of a locker at the base of the pathway that leads up to relay stations 4 and 6. Be careful because taking the saw will cause the bear down the hill to become aggro.

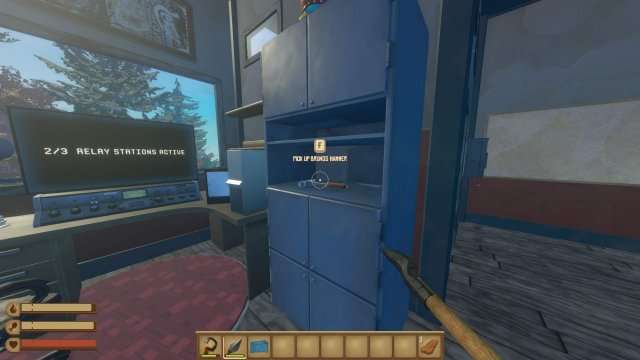
Bruno’s Hammer can be found on a shelf in relay station 4.
Bruno’s Wrench can be found on a table in relay station 6.

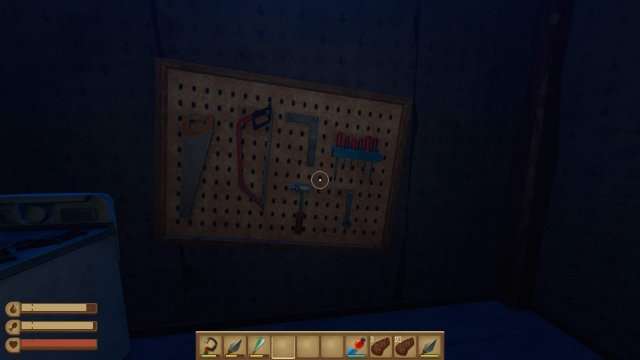
Once you have all three tools, head to the ranger’s station and place them on the tool board. This will cause the board to fall to the floor and you can pick up the note behind it which will grant you the achievement.
Earned Through Gameplay Achievements
It’s better without the salt
- Craft and place a simple purifier.
Dinnertime
- Craft and place a simple grill.
The purifier and grill are probably the first two items you will craft on your raft. They are necessary for survival so long as you aren’t respawn-scumming.

The purifier can be made with 6 planks, 6 leaves, and 4 plastic while the grill can be made with 6 planks, 1 scrap, and 3 rope. The purifier will be easier to make first because getting a scrap for the grill from a barrel is based on random chance.
Teamplay
- Team up with a friend in multiplayer.
This is one of the toughest achievements in Raft to get as the average Raft player doesn’t have many friends, much less friends who also play Raft (I know from experience).
Aye Aye Captain
- Place a sail and a stationary anchor on the same raft.
You will probably get the sail soon after getting your purifier and grill. The sail can take a bit of waiting and hooking barrels in order to get the 3 scrap required to craft it but it shouldn’t take too long. Along with 3 scrap, the sail also requires 20 leaves and 10 planks. Once you have the sail placed you can start controlling your raft to be in favour with the wind in order to move more quickly and steer towards islands.
The stationary anchor will take longer because it requires 3 metal ingots and 1 hinge. You could find these from crates on abandonded rafts or underwater at islands but it is more likely that you will have to mine metal ore at small islands and smelt the metal in a smelter. Once you have placed both a sail and a stationary anchor on the same raft, you will get the achievement.
Bookworm
- Research everything in the research table.
The research table is another item you will craft early on as it only takes 14 planks and 2 scrap and it is used to learn many recipes that are necessary for progression. However, getting the “Bookworm” achievement will take much longer as it requires you to research one of each component item in the game.
In order to research new items, you must research each of the components first. For example, before I can craft a smelter, which requires wood, dry bricks, scrap, and nails, I need to research each one of those items. Once each of those items has been researched, I can research the smelter recipe which will unlock it for crafting.
When you research an item, that item is consumed by the research table so if you are planning on crafting something that you haven’t researched yet, make sure you have one extra of that item.
A more complex Concoction
- Cook a meal by following a recipe.
The cook station is a more mid to late game item that allows you to cook meals based on certain combinations of ingredients. These meals will not only fill part of your hunger bar, like any other food in the game, but they will also provide you with hunger saturation which will extend your bar further than it’s maximum limit.
The cook station takes 6 planks, 6 plastic, 2 metal ingots, 4 vine goo, and 1 bolt to craft so it is not that demanding of an item. You can find recipes in chests on abandoned rafts or in chests underwater which can be placed on a wall or post and tell you which ingredients make which meals. For the achievement, the easiest meal to make is the vegetable stew, which can be made with 4 potatoes, 4 beets, or a combination of the two. To take the meal out of the cooking station pot you need a bowl which can be crafted with 2 clay.
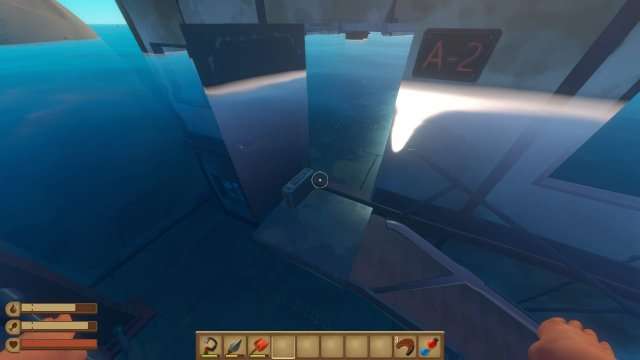
Large landmass ahoy
- Discover a large island.
In this new update, large islands can be found simply through drifting and coming across one like you would a normal sized island. However, the original intention with this achievement was to have the player use their receiver, after find the Radio Tower (Utopia), in order to locate a large island. It can take a lot of patience to find a large island by chance so if you have the receiver built you can plug a battery into it and it will show you where to go.
The large islands will appear as green dots on the map while the blue marker will be a story location based on whatever coordinates you have entered into the right module of the receiver. Just go to one of these green dots and you will get this achievement.
Hidden Achievements (Spoiler Warning)
Is there a Utopia?
- Find the whiteboard in the radio station.
When you turn on the receiver for the first time, the module on the right side will have four numbers entered and the light will be green. These numbers are the broadcast frequency for the Radio Station. I recommend writing these numbers down somewhere, maybe on a sign in game, although they should appear in your journal as well.
On the radar part of the receiver you may see some green dots, which represent the large islands in your surrounding area, but you will also see a blue marker which shows the story location based on the broadcast frequency number that you have entered.
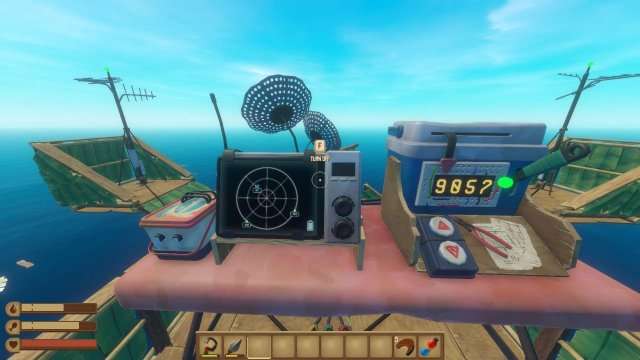
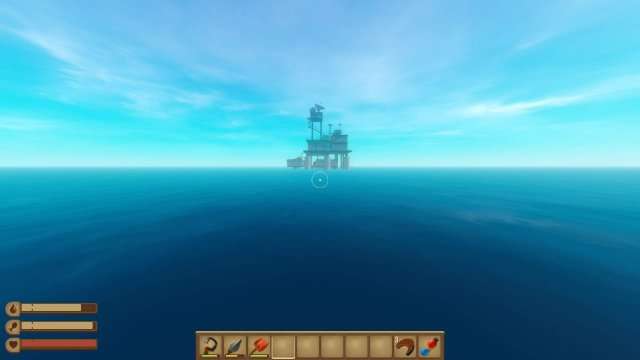
Sailing in the direction of the blue marker will take you towards the Radio Station. You can turn off the receiver to save battery power and you can replace the battery without the location of the Radio Station changing. However, I recommend checking the receiver regularly to make sure you are still going the right way. When you get to be about 300 blocks away from the Radio Station you will begin to see it faintly.
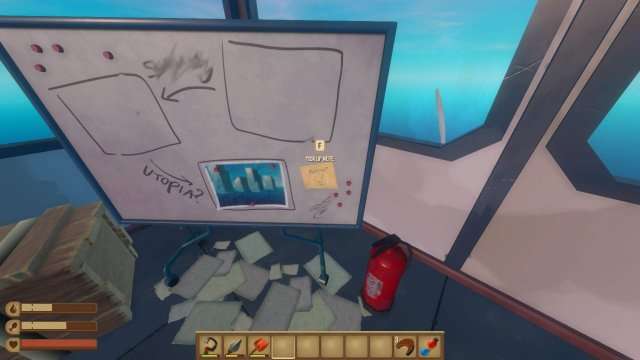
Climbing up to the top-most room of the Radio Station and standing in front of the whiteboard will grant you the achievement.
An ocean cemetary
- Die 25 times.
Pretty self-explanatory. You can drown or let the shark kill you. I know I have said this a lot during this guide already, but I especially recommend doing this achievement on Easy difficulty because you will not lose your inventory when you die on Easy.
Trivia: The achievement has “cemetery” spelled incorrectly
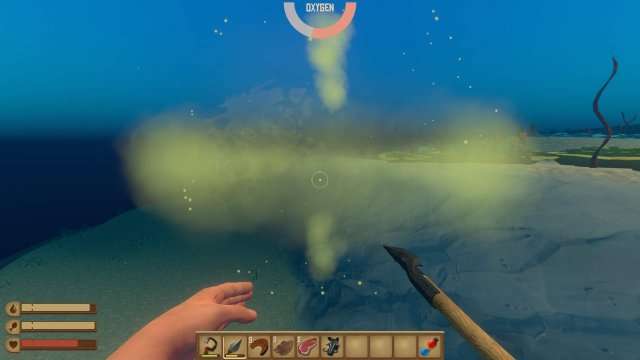
Exploring the depths
- Reach a depth of 100 meters below the surface.
Equip a pair of flippers and an oxygen bottle. Just keep swimming downwards and you will eventually get this achievement. It will probably be easier to get this achievement if you kill the shark first.
This goes here
- Break or pick up 100 blocks.
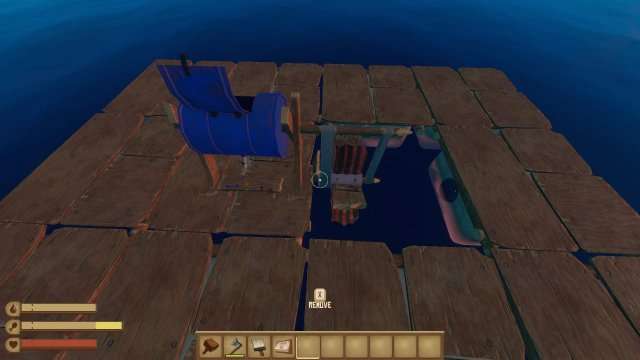
If you are also going for the Builder achievements, you will get this achievement as well as the optimal method for getting the Builder achievements will require you to place and subsequently break over 100 blocks. If you already have the “Builder” achievements, however, this can be done by placing and then picking up a collection net over and over until you have the achievement.
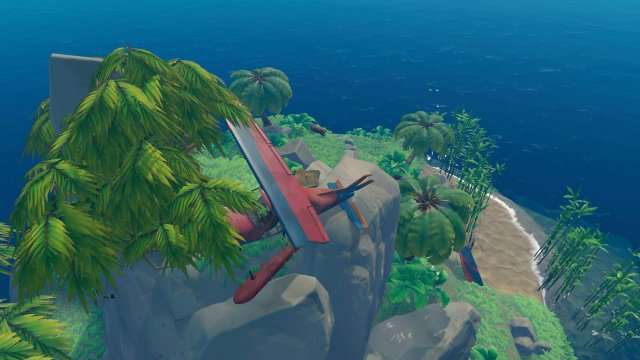
Not a great landing
- Discover a crashed plane.
O Captain My Captain
- Reach Captain’s Island.
The crashed plane island and the Captain’s island are rare islands that you have a small chance to find while drifting on your Raft. Some people will play for hundreds of hours and not find them and some people find them within their first day of playing the game. You only need to get near or step foot on the two islands to get their respective achievements and the islands will each have crates of items and a rare hat.
Remember, you cannot find these islands using the receiver, you have to encounter them randomly. Raft worlds from before “The First Chapter” update might be glitched and you may be unable to find either of these islands while playing on those older worlds, or, if you do find one of the rare islands on an older world, you might not get the achievement for it. It is possible to get these achievements on worlds from before “The First Chapter” update but I think you will have a better chance if you start a new world.
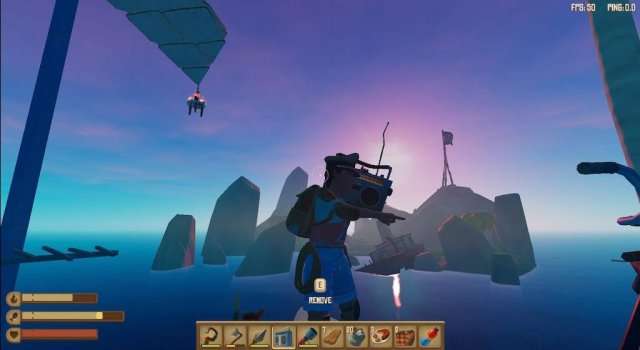
Captain’s Island
Crashed plane
Pling
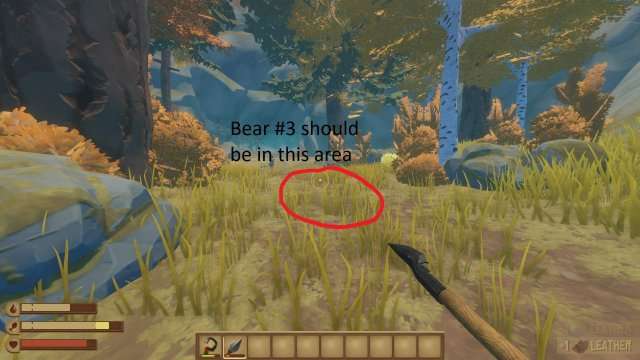
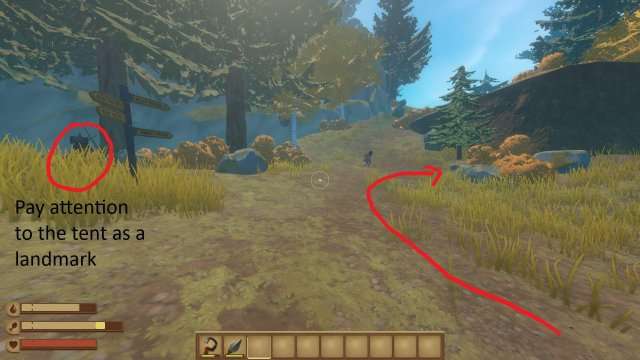
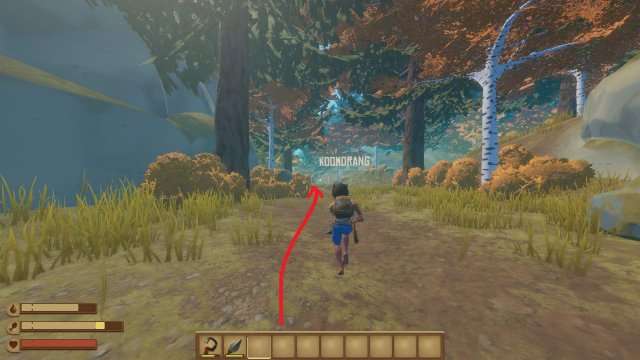
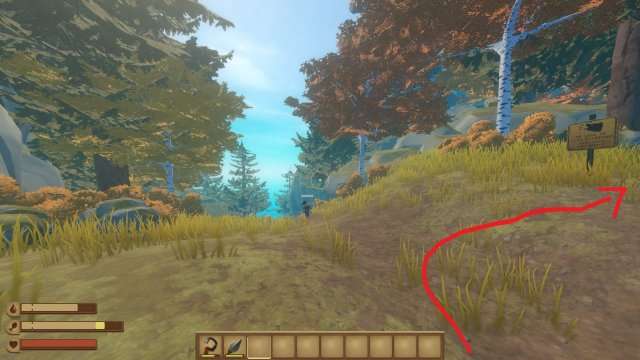
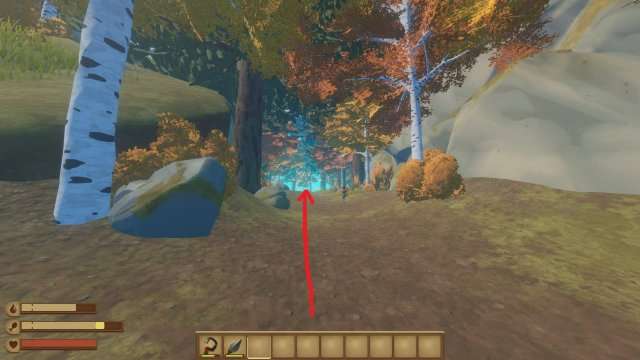
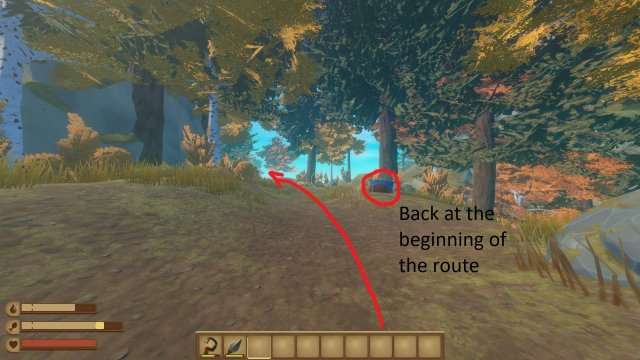
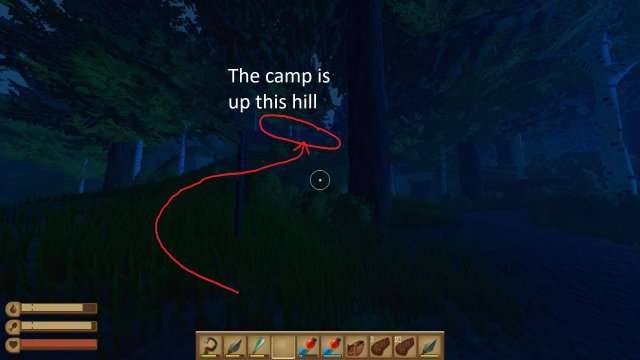
- Can bears use the bicycle bells (Find the bicycle on Balboa Island).
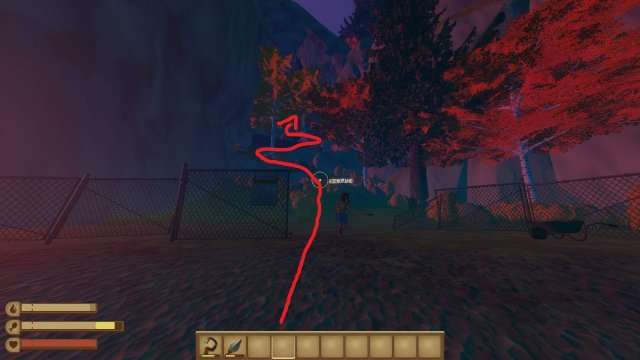
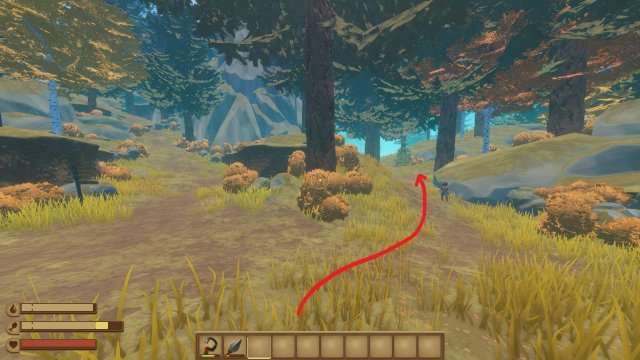
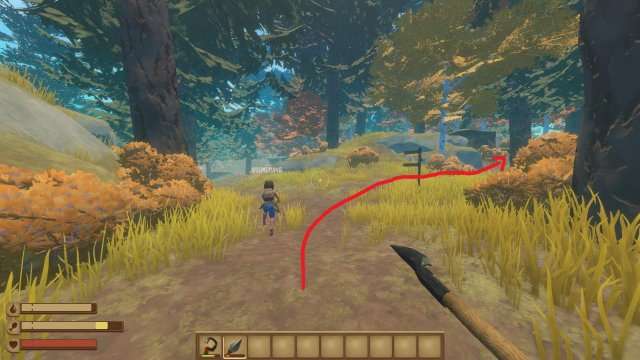
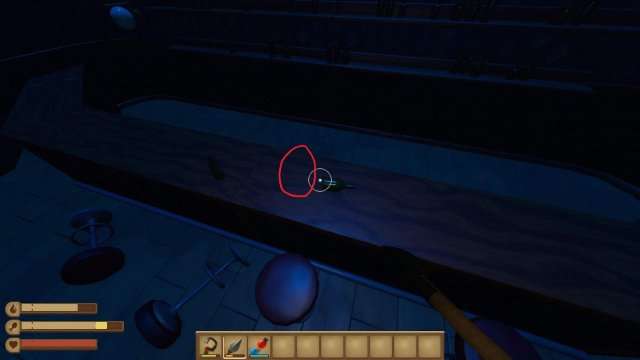
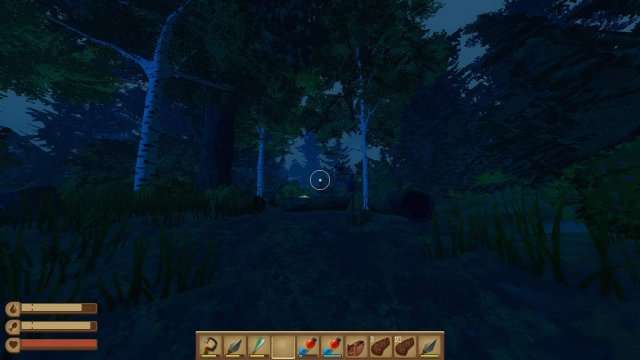
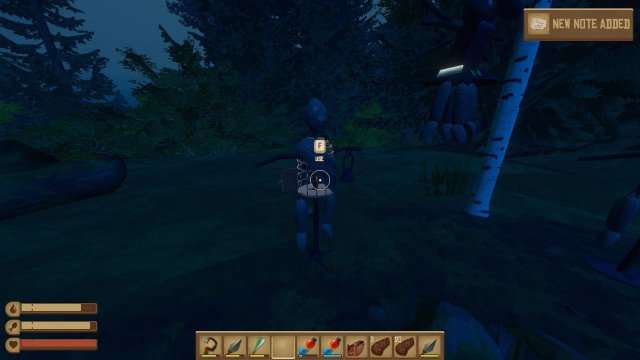
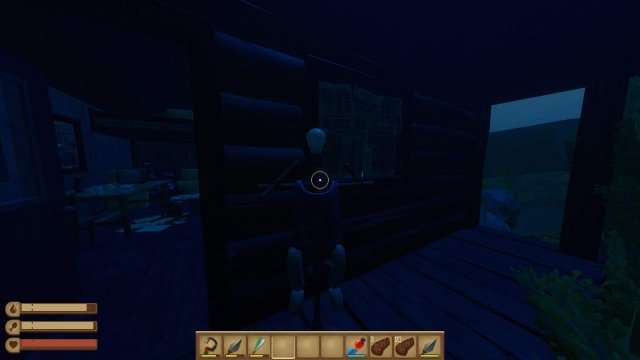
While you’re on Balboa Island, if your volume is turned up, you may here a small ringing sound every once in a while. To find the source of the ringing, go to the tent and turn around (this can be found by following the “Bear Hunter” achievement route).
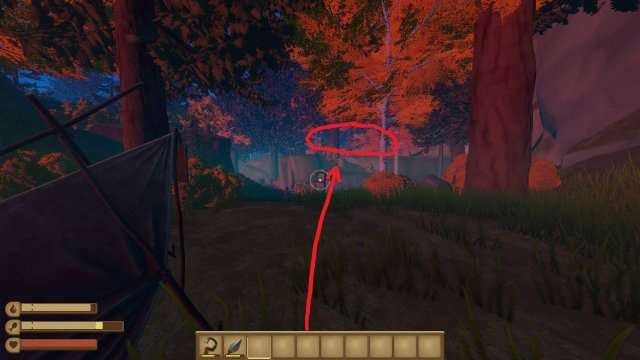
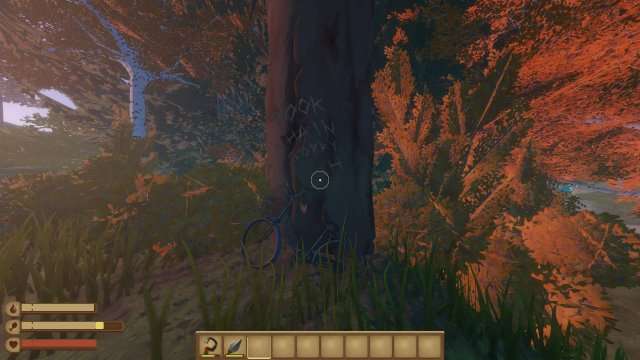
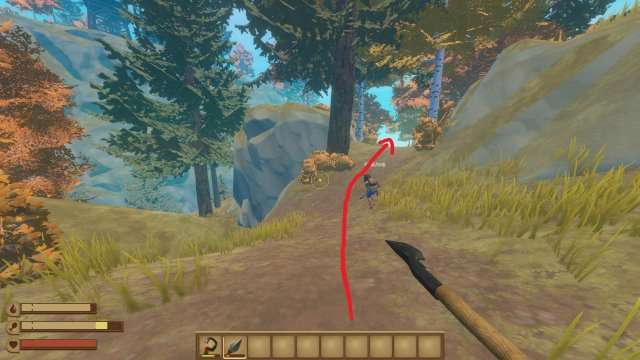
You will find a bicycle on top of this hill in the red circled area. Standing near the bicycle will grant you the achievement.

Be the first to comment