
Brief guide on how to start the game and on what skills to spend the skill points and the ap. Also with brief indications about certain items and how to play.
More Stoneshard Guides:
Introduction
This guide will explain how the game works and how to stay alive in its world. First, I will describe the main game mechanics. After that, I will suggest a player character that I think is good for new players to start with and explore the forests and dungeons in Stoneshard. Lastly, I will briefly mention some helpful tips and strategies for beginners.
First Steps
For anyone who is starting the game for the first time and has decided to stop by to find some information, the first thing I want to say is that my advice is to try and explore it on your own, without reading guides or advice online , since it is the best way to enjoy a game. In case you need help and have already explored enough on your own, read on below.
When you begin playing, you’ll first go through the prologue. This part of the game takes about 40 minutes, give or take, depending on how fast your game runs. It teaches you the basics. I recommend playing through it a few times to test out different character builds. This can help you figure out what kind of character you want to play. However, if you already know you like playing magic characters or want to learn about the game’s magic system, this guide should be useful.
Once the tutorial / prologue is finished, you will appear in Orsbron, the initial city of the game, talking with the protagonist of the game. He will tell you to make a few contracts in the city (the old man you should look for is in the central square on the right, in a house where there are guards and several weapons to catch). At this time you can choose one of the four classes available in the beta (We will talk about the choice of the sorceress later).
When you have decided which class you want to play, two possibilities open up before you:
- Farmeo mode, where you will have to go throughout the city and take all the items you find and sell them. In this way you will make a small amount of money apart from getting better equipment and a bow and arrows useful for later (in the old man’s house, ground floor, in the background.
- The adventure mode, go for the missions and advance in the game, avoiding the collection of material throughout the city and then kill wolves and sell their skins until level 2 or 3. This option would be the one that would advise if you choose sorceress.
Once you have clarified the type of game that you are going to develop some small tricks for both routes (the one of farmeo or the one of adventure way):
a) The orders have to be ordered one by one, since they have “expiration”.
b) To sleep, you have to pay at the inn or in small camps. Regardless of where you do it, pay one night if you know that it will give you time to do the mission in one day (it has always given me, but because I take them one by one) since the game will allow you to save without having I have to pay again. To explain this I will give an example: You pay one night (30 coins) and sleep from 11 to 12 am. You complete the mission in 22 hours, so you have time to go to bed before one day passes. You go straight to bed and, bingo!, You have not had to pay again at night and you can do this infinitely, which allows you to save some coins. If it does not leave you, just go to pay and save since this bug will be fixed (I have warned, as it seems to me that it breaks the idea of the game a bit).
c) Sell to each seller what interests you, that is, always the weapons to the blacksmiths, the herbs to herbalists, the carpenter’s arches, etc., but never sell to the one who has weapons, food, healing objects and books, since this is a non-player character (NPC as of now) that sells the products above its price and buys them for very little (a good scammer). Especially now that the negotiation feature does not work in beta, this is very important.
d) Constantly check what merchants sell, since every time you start the game there will be certain items that will be new. This also allows you to generate skill books that interest you in the store. If for any reason you could not buy it and you fear that when you start again it is gone, do not worry, items that put you in the past always reappear and you did not buy. Something to check is that they improve if you buy them a lot and do business with it, but for the time of the game I can not answer this theory yet.
e) If you want to avoid fights proceed along the map edges, so you can change the box and avoid fights. If you need to fight against groups, use this in your favor, leaving and entering the map box to save time.
f) Never forget to take enough food for the trip, some curatives and fill your canteen in the well (which is in the middle of the town) and drink directly from it. Use the food that expires for hunger during the city and the hams or sausages for the missions (they do not expire).
g) Use time to understand well the system of cures, pain, morals … since for the build that is going to be discussed below it is important.
h) You can change weapons with W, so you can carry two different teams, one for short distance fighting and one for long (for example bow in one and sword and shield in the other).
i) The game generates the loot randomly, in the same way the terrain is generated. Therefore if you do a mission, you drop an interesting object and die in the dungeon, when you return the dungeon can be different in distribution, have more or less enemies and objects that will drop different. That is why he always values flight as an option. The generated map information will be saved until you leave the game or load a save (dying or restarting the game).
j) The map opens with the M or giving Alt + click from the inventory. Each map will be unique to each game, that is, if you create a magician and later want to try the berserk, when you load the new game neither the buildings nor the roads will be in the same layout, only the cities will remain the same.
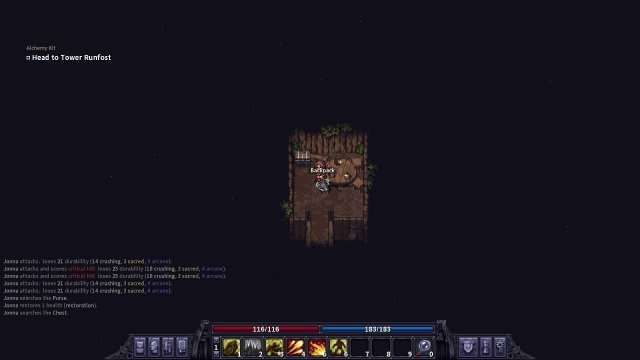
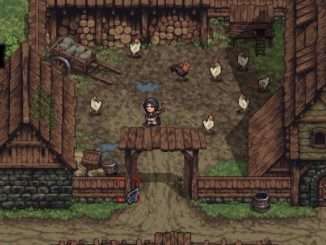
k) In addition to layers you can carry a backpack, which you can find in the house near a tower where you must defeat bandits in the contracts of the second city (thanks to MeyCry for the information). The backpack allows you to store objects, so if the layer you are wearing is quite bad or does not give you enough statistics, my advice is to change it for the backpack, so you will gain precious spaces to sell more objects. The location is in the house of the image, next to the area to enter the tower.

l) If by chance you kill an animal that gives you meat and want to feed you to restore hunger, do not forget that in the game you can cook, so use the ovens or bonfires to cook food and improve the statistics that they give (after a few days the food expires).
m) Keep in mind that area skills and certain effects you use can also affect you and not just enemies. For example, the fire of the ground can cause you to burn, the Stone Spikes of geomancy or petrification are some examples.
n) Enjoy the game, if you see that you get tired, just take it back later, even if you lose some gold and food in the process, the important thing is to have fun.
Build Sorceress – Attributes, Leveling and Combat
Once I have explained small details about Stoneshard, I will begin to describe the operation of the build that I have used and used in the game.
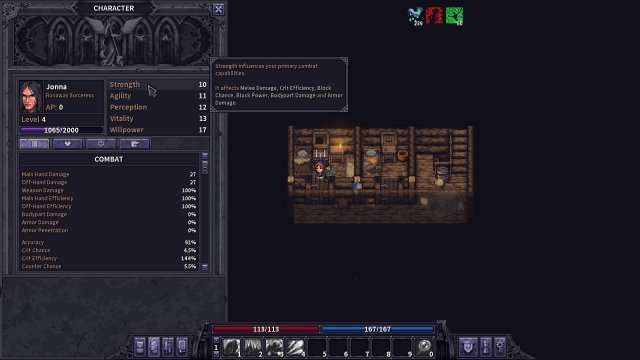
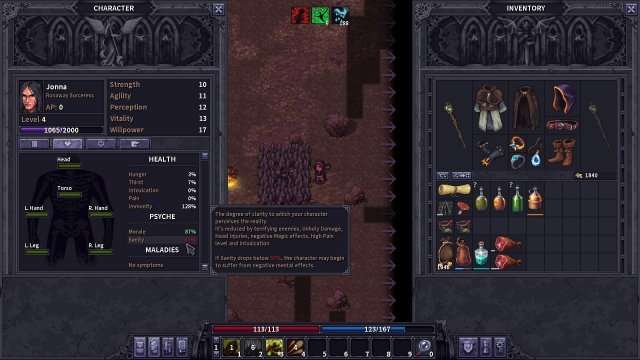
First of all I will explain the class we will need to play. First, in the beta the class that begins with the skills available in magic is the sorceress . Our PC will therefore start with the following attributes:
Strength: 10
Strength increases the melee damage and the likelihood of blockage. It is a skill that we will barely upload to play this build, but that can be useful if you prefer to adapt the game style to something more melee.
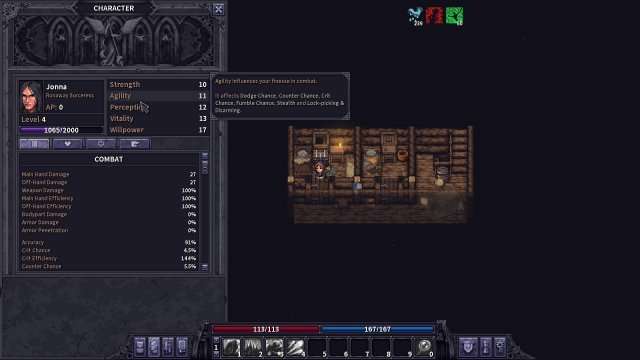
Agility: 11
Agility increases the likelihood of becoming critical, dodging and counterattacking, as well as improving stealth and theft skills. My advice is that this attribute does not spend points on it, unless you want to focus on a more melee style.
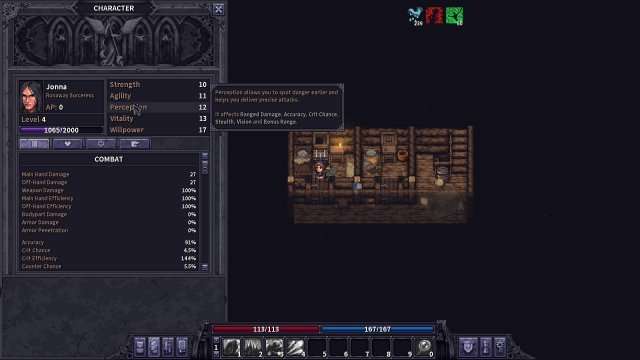
Perception: 12
This attribute gives us precision, damage with ranged weapons (critical for these weapons), stealth and vision. This attribute can be useful in case we want to play with an arc instead of using both branches of magic (pyromancy and geomancy) in the gameplay.
Vitality: 10
It is what allows us to increase life and energy (manna), the regeneration of both and immunity (resistance to altered states). This attribute will interest us for two reasons. First, as we are interested in a very high mana regeneration, spending on this attribute is paramount.
Secondly, we want to have a great deal of life, since in the case of engaging in close combat we will receive almost 100% damage, so instead of putting on heavy armor this attribute will also allow us not to die of two attacks.

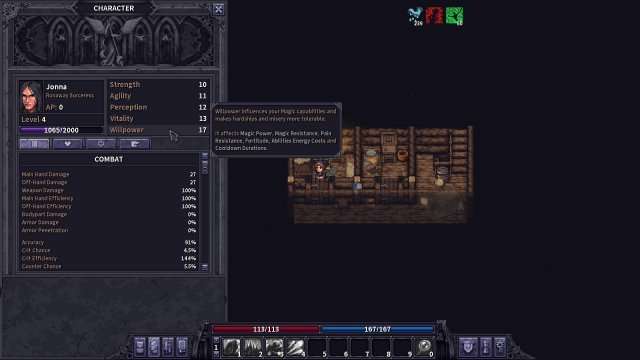
Willpower: 14
The most important attribute for magic, it enhances the magical damage, reduces the cost of skills and cooldown and also gives us resistance to pain and strength.
This is the key attribute of the build, so here most points must be spent when leveling up. Basically it hurts us and allows us to throw more skills. Pain resistance is interesting with a variant of the build.
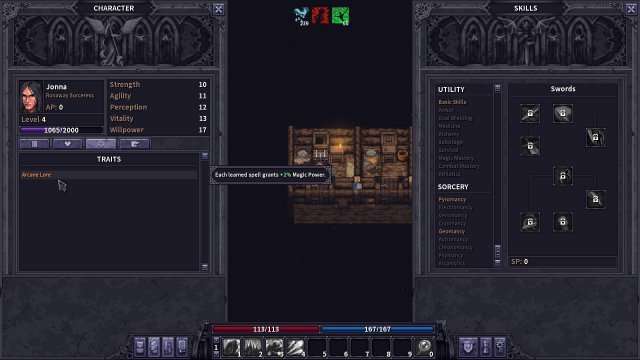
Once the attributes and point spending on them have been explained, I will briefly explain the character’s passive: The passive is called Arcane Lore and allows us to increase the damage by + 2% for each spell learned. This means that the more spells we unlock in the skill tree, the greater our damage.
This to increase the damage in a passive way is incredibly interesting, so I decided to make a build that benefits from the pyromancy and geomancy branch as soon as I start the game instead of spending points on stick skills or other skills that might be interesting . As more magic is available (arcanist, astromancy, etc.) we simply have to unlock the tree to add it to the build and increase our damage.
I will continue explaining the operation of the build, now focusing on the evolution of the character’s abilities, arranged according to the best option to slight:
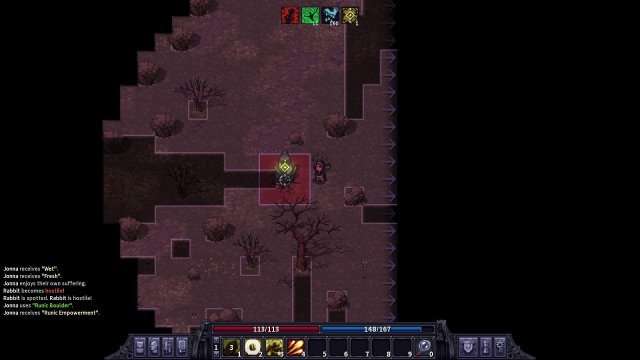
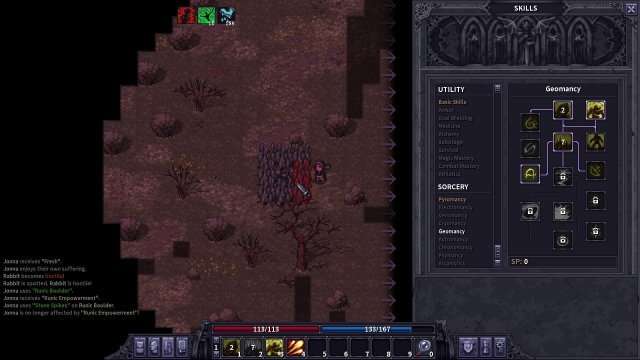
We will start with Geomancy with two skills that we can unlock from level 1. It will be Runic Boulder (RB from now on) and Stone Spikes (SS from now on) . The idea is that with these skills we can do great damage in the area, which allows great control of the combat when we fight against numbers that exceed us. The key is to catch the enemies in walls or corridors with the spikes when breaking the rock.
This will take a long time to break and we can isolate enemies to hit them with the bow or other abilities once we have them. Managing space and movement well normally will not even touch you even if they are groups of several enemies (especially in dungeons, where you can block their way). When performing this type of battles, we will have to be careful with wizards and archers, since they can hurt us from a distance, so many times they can be our priority if we have the warrior locked up with the SS.
The SS can hurt you, so always leave an empty quadrant between the RB and you so that the SS won’t hurt you. In this style of gameplay I advise you to use a bow as a secondary weapon (for example the one you can take from the old man’s house at the beginning of the game, with 20 arrows. You will change it to a better one later). This will allow you to knock down enemies that are captured more quickly from a distance and eliminate archers or magicians who put you in trouble.
Remember that with W you change your weapon, in case you have not yet discovered that you can carry two weapons at the same time. The action consumes a turn, but as I said before, the key to the build is management. It is also important not to generate RB’s unless we are going to break them with SS, since they consume us energy per turn and if it breaks an enemy will leave us stunned for 3 shifts.
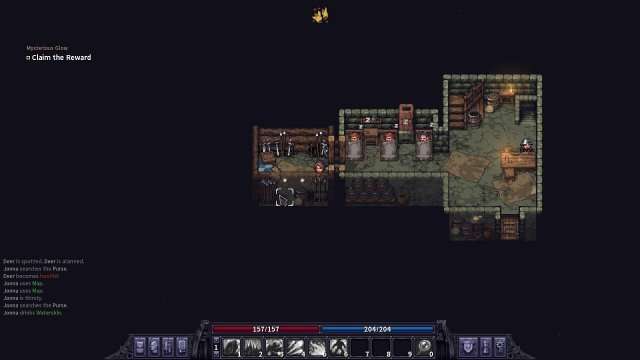
After learning these skills, my advice is to unlock the Fire Barrage (FB) ability in Pyromancy to avoid having to use a bow. This allows you to be constantly with the cane (normally they have magic benefits, otherwise you can cover it with a scroll until you get that improvement. See image).
The use of the fireball also allows you to burn the enemies and surely have greater precision than with the arrows. That is why FB becomes vital for the early game (later Melting Ray or other tree skills may become more useful depending on the situation). At the beginning you will find it here:
Finally, I will explain that the use of Petrification’s geomancy ability will allow us level 3 to have incredible mass control. With it we can petrify the enemy that is too much on us while we continue attacking the one we had encased or the third enemy that attacks us with the bow.
At level four my advice is that the other skill is Stone Armor (SA) (Stone Armor) that will allow us to resist more damage in the event that they hunt us hand-in-hand (gives more resistance and also allows us to damage enemies that are around, really very useful). After this level I recommend taking the skills that we like along with passive to enhance mana regeneration (for example Rune Absortion of geomancy and Flame Saturation of pyromancy).
Therefore, the idea to develop the combat is the following:
- 1st – RB to damage and stun the nearest enemy, preparing us to use SS.
- 2nd – We use SS to block (if possible preventing the passage) and damage the surrounding enemies.
- 3rd – FB to the enemy that worries us the most or that we know we can kill automatically.
- 4th – We use petrify if necessary, otherwise we wait to use FB and then again RB together with SB to maximize the damage. In case we have to use petrify normally we will do it in enemies that have teleportation skills or one that is too close.
- 5th – SA in case they surround us.
Build Sorceress – Equipment and Passive Statistics
Once clarified the way to use skills, a brief explanation of the choice of each basic skill, I will explain which is the best team from my point of view for this build.
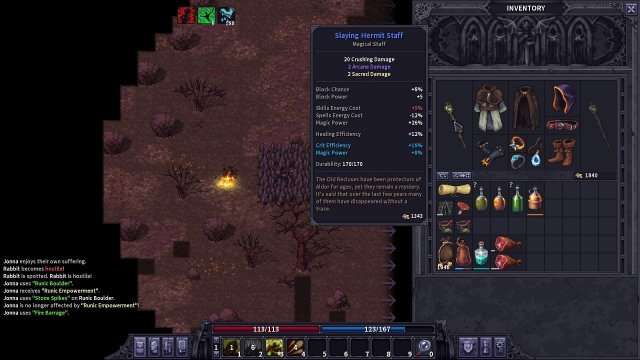
When you search in closets, kill NPCs or complete missions you will get money to improve your equipment, both to buy some in the city and to enchant the one you have found. To know what are the statistics that should be prioritized in the search, I will list them in order of importance:
+% Magic Power: Without a doubt the increase in magic damage is the most important statistic. The more magical damage we have, the greater the damage we do and, therefore, the speed with which we defeat our enemies.
-% Spells Energy Cost: The second most important statistic on objects is the reduction of the cost of spells, the less they cost us, the more spells we can cast without running out of energy and therefore being sold in combat. When you see that the energy drops a lot make sure you do not have an active RB and take or a potion of energy or wait several turns without casting spells (escape sometimes is not a bad option, life and loot is worth more than having to start again).
The -% Spells Energy Cost statistic is not the same as -% Skills Energy Cost, which reduces the energy we need to use weapon skills, such as daggers or bows. This feature does not interest us, although it also has an advantage if you use one (for example, for hand-to-hand combat with daggers or sticks).
+% Energy Restoration and + Energy: The key to being able to cast all our spells is to have energy for them, if we cannot do our chain of attacks it is of little use to have many skills. My advice is that this statistic is as paramount as reducing the cost of spells, since the faster and in greater quantity we generate mana, the more constant our attacks will be.
+ Health, +% Health Restoration and +% Healing Efficiency: These will be our main defensive statistics, without them our survival when we do a close combat is greatly reduced. + Health is the main one, since it will be what directly absorbs the damage and allows us to endure several blows. +% Health Restoration will allow us to stay alive when those arrows reach us while we flee temporarily and need to save time. In addition to earning time, it also allows us to regenerate health faster in combat. Finally, the cure efficiency is useful for when you have to apply a cure, however it is the least interesting statistic of the 3 for the build.
-% Cooldown Duration: Undoubtedly one of the keys at the beginning of the game while you do not have many skills is the reduction of the cooldown, allowing you to spam the ability of RB along with SS as often as possible. It is a very interesting statistic at the beginning of the game, as it progresses it is placed in second place, since this build assumes that you will end up having many spells, so you will constantly have some to use.
After these statistics, any statistics that improve our defenses or damage can be interesting, such as more geomancy damage or a greater chance of dodging or resistance.
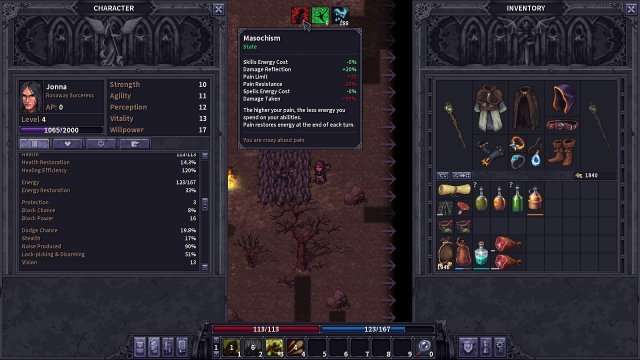
To finish talking about the build I will comment on one last aspect that I am trying to increase the damage. One statistic in the game is sanity, related to terror and pain. Basically, in a simple way, if you fight against ghosts, fight with open wounds and do not heal quickly or use certain objects you will negatively increase this statistic that once it drops 50% it can cause certain states.
One of them is masochism, which for a possible potentiation of our damage can be useful. The statistics of masochism apart from raising the damage we receive and the pain we feel also gives us a reduction in the cost of spells and abilities (the wanted -% Spells Energy Cost that allows us to cast spells for lower cost).
The operation is simple: the greater our pain, the greater the cost reduction. This is very interesting, because you can have minor injuries and heal (especially with a high life, the interest of raising the + health) slightly so that the pain does not rise much more than 50, in order to obtain a reduction more than enough to lower the cost of spells by 1 or 2. This ability is very useful, especially since there are objects that allow us to increase sanity.
Therefore, the idea is to have 49% sanity, in case you are not receiving excessive damage to be able to take an object that gives you sanity and eliminate masochism and thus end the buff to the damage we receive. In any case, with the SA we protect ourselves enough, a percentage of all resistances higher than the debuff of the “masochistic” state. However, in case you see that it is difficult for you to manage (or you simply do not want to complicate your life) I advise you to keep your sanity high and not play with the masochist.
For those players who want to maximize their damage and manage well (good placement of the SS, they usually do not receive melee damage and only from some spell or arrow) this is the greatest possible optimization for the build, regardless of whether it is something else risky Something we have to keep in mind is that we will eventually lose the masochistic state, so I simply advise taking advantage of it while it is active. Over time if you suffer pain with low sanity you will suffer the condition again.
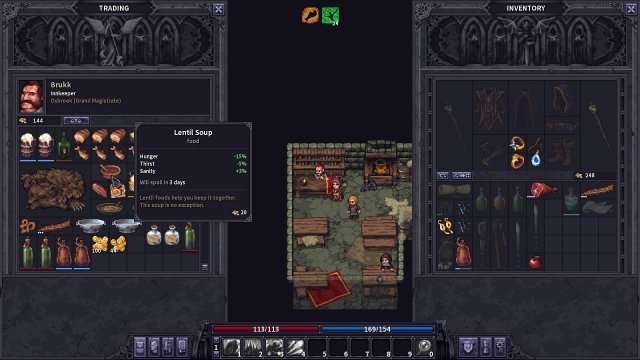
The food that will allow us to increase our sanity besides taking our hunger away is the following (after sleeping or loading, there will always be a merchant who sells it).
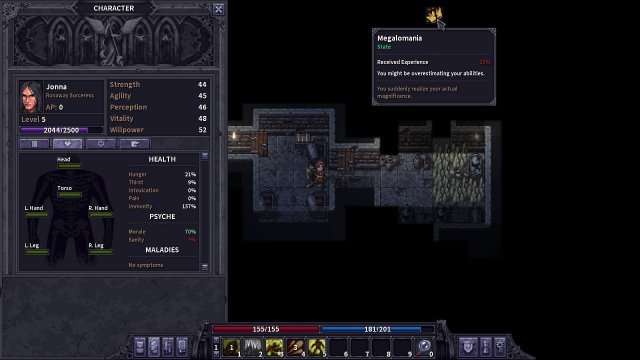
There is a passive, called megalomania, which is dangerous when we have low sanity and that complicates a bit of leveling up quickly, since it will give us a -20% experience and we will also see incorrectly the figures of our statistics.
The truth is that it is a detail that they put it that way, but it will come out when normally we would get masochism if we are injured or optimistic when we are with the sanity of more than 50%. To recover sanity it is also important to sleep and destroy the sanctuaries that are in graves with undead, which if activated enable us to steal life and other bonuses in exchange for subtracting sanity.

Be the first to comment