
This guide will show you some new defensive strategies. These strategies will help you protect your buildings and make them better at defending against zombies. It also has other helpful tips.
The Art of Base Construction & Defense
Phase #1: The New Beginning
This first part of the guide is about what to do when you start a new game. You’ve just appeared with nothing. This phase is all about finding the best first shelter you can. It doesn’t matter if it’s a random world or the default one.
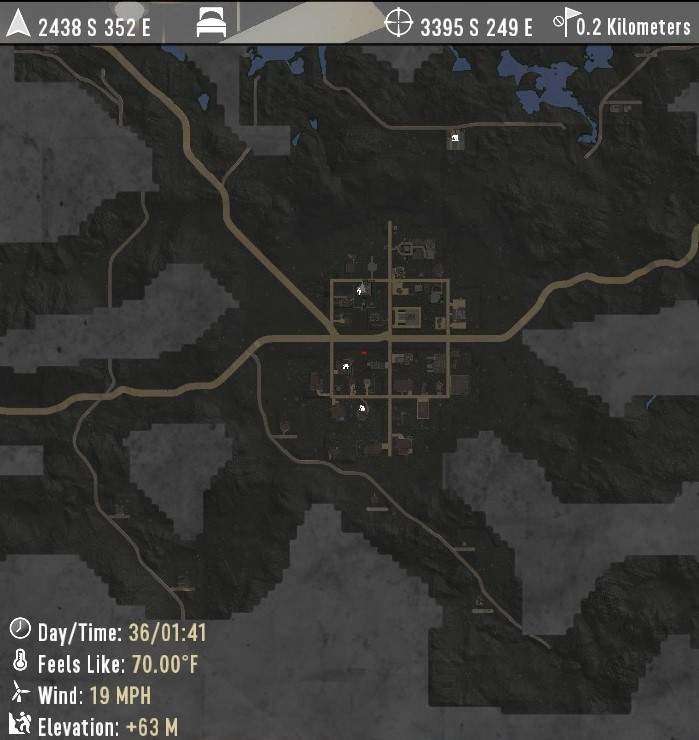
As soon as you start, open your map. See if you’re on the west, east, north, or south side. Then, start looking for a shelter. To find towns or buildings more easily, follow the main roads. These are the asphalt roads that connect different places and cities.
It’s a good idea to remember where cities and buildings are and mark them on your map for later. As you walk along the road, you’ll find buildings. The types of buildings you see will be different depending on the area you’re in. For example, in grassy areas, you might find large cabins in the woods. In the desert, big cities are less common. You’ll mostly see abandoned houses, medium-sized buildings with two sets of stairs at the entrance, and a lot of small houses that are spread out.
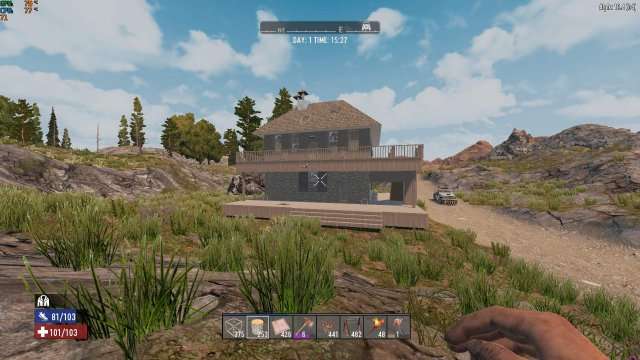
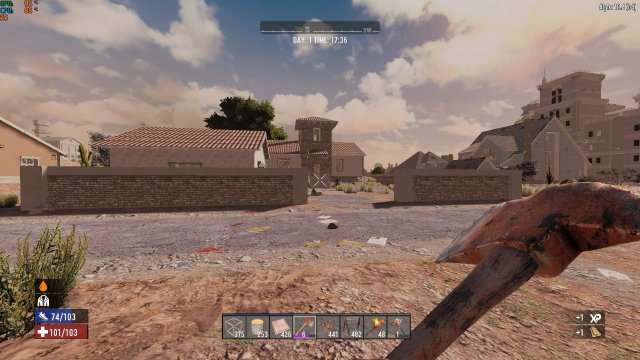
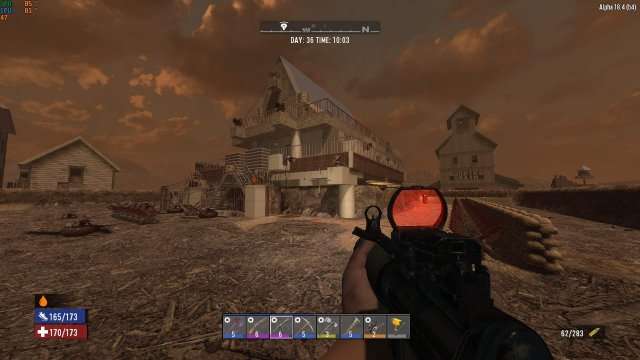
Here’s an example of what i mean by Buildings that can be found by following the road:
Things to take note of from your Base:
- Count how many entrances can A Human Survivor/Zombie enter the house, This includes Doors, Hatches and fragile walls.
- The Main Block the building is constructed with, Most common buildings are made of Wood or cobblestone Blocks Etc…
- The Pros and Cons of your base, This targets Fragile/Weak spots in your inner/Exterior walls or how big your base is and if it includes a Vantage point floor like a balcony or windows.
- The time you its going to take to repair the entire base and upgrade it, Some buildings come in complete shape, Untouched and full of loot, Some come broken down and empty, Keep that in mind, Your base might be material-consuming more than other buildings.
- How far it is from the Main City and the nearby minor cities, This will greatly impact your scavenging adventure if your building ends up away from any city or other buildings and you might need a vehicle or a bike.
- Is it protected from the outside? aka Walls, Having an extra layer of walls outside will greatly increase your building’s chances to survive hordes of zombies coming for you.
- The Terrain surrounding your base, This can drastically change the loot and the type of buildings around you which differs from each biome.
- The main material that is needed for repairing and upgrading your base.
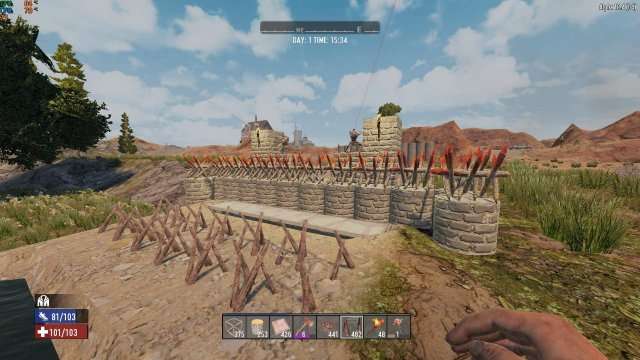
If you find a building with exterior walls, I highly advice that you consider making it your shelter and upgrade it, Some Buildings that spawns with exterior walls come in shape like this:
Phase #2: The Rebuild
This phase is the most crucial turning point in your Building, It’s going to focus on revamping your base, Weather its repairing/Upgrading or Re-shaping your building from the ground up, I will Uncover some methods and tips for you to do it as fast as possible and in an effective way and to consume less resources for your base.
The Following Down below is the block upgrading tree:
Wood -> Sturdy Wood -> Cobblestone Block -> Concrete Block -> Sturdy Concrete Block -> Steel Block -> Sturdy Steel Block
Each Block owns an upgrading tree, Starting from Wooden frames into Cobblestone, Concrete and Steel, Each one contains its own Stats with Block HP.
- Wood Frames -> 50 HP.
- Wood Block -> 225 HP.
- Cobblestone Block -> 1500 HP.
- Concrete Block -> 2500 HP.
- Concrete Block (Sturdy) -> 5000 HP.
Repairing your base requires the most essential Resources that won’t be renewable that easy, You will need the Following :
- Wood: Used for the most basic base blocks, Tools & Objects.
- Stone: Essential for important crafting items and upgrades, Also smelting in forge.
- Iron: Essential for advanced craftings and smelting in forge, Must have.
- Clay Soil: Without clay, You can’t upgrade to cobbletstone Blocks, Can be smelted in forge.
Materials like Short iron pipe, Nails, Glue, Cloth fragments and duct tape play an important role in crafting some specific items, So keep in mind that you have to ensure their presence in your inventory when you intend to craft some helpful items.
When it comes to repairing your base, Make sure you stack on Wood and stone to start repairing your blocks, You don’t want to run and come back for every 10 blocks, You will waste 2x the time you are already spending on repairing your blocks, Your aim on your first day is to find a Good defensive base and you have to repair/Upgrade its walls at least at sturdy wood level.
The Upgrading Material costs:
- To Wood blocks -> 4 Wood per block.
- To Cobblestone Blocks -> 10 Cobblestone Rocks per block.
- To Concrete Blocks -> 10 Concrete Mix per block.
Phase #3: The Defense
This is the Core-part of my guide were i will show you some defensive methods and tips on how to defend and keep the zombies at bay, You see, Defending is the best attack in this game, If you play your cards well, You win, If you don’t, You will suffer, When you reach the point were you are fully-suited and well-armed, You will be worrying about your base, Not your life, And this is the part were i will hopefully save the both of you.
The Following defensive methods are my own, Hopefully it helps you:
1. Turrets + Layers of spikes and barbed wire
2. Giant Spike trap hole
3. Layers of Traps (Mix Ups)
4. Watchtower
5. The Bunker Trap
6. Balcony
These defenses are my very own type of defenses that i use and tested alot, All of them proved that they are battle-tested and effective, Now this is the part were i explain each of them and break them down to where its best at.
- Turrets + Layers of Spike traps and barbed wire: Now this is an old and a traditional 7 DTD Defense idea, Still it proved to be effective till this day, When you plan on holding your base wall, You will use this at the entrance or at the sides of your base, Turrets will provide firepower at short-medium range while The spike traps provide contact-damage when being stepped-on, You can also add fragile wooden carpets on deep holes which includes spike traps or mines at the bottom, This is a very effective method to keep zombies away from walls without them being touched or damaged.
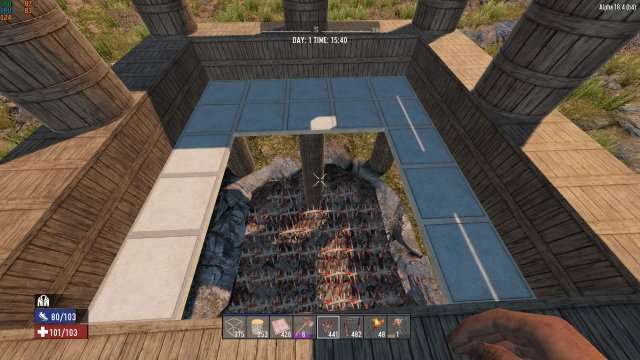
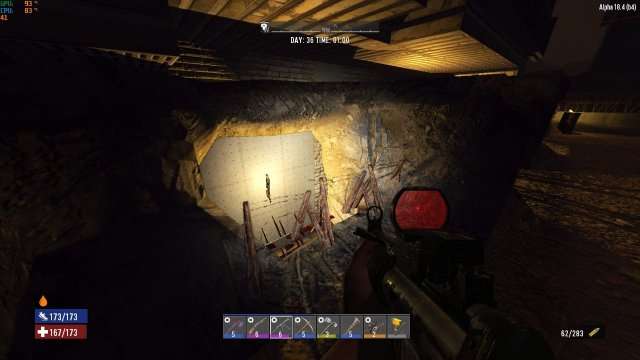
- Giant Spike trap: This is a very effective method Which consists of fragile wooden panels with deep holes that have spikes or any sort of high-damaging trap at the bottom, This will cause the zombies to fall down and either die on the traps or be stuck forever until you kill them or they De-spawn. This is the most ideal when you have only 1 entryway into your base or room for traps under your floor.
- Layers of Traps: This is also a common way to use your traps effectively against zombies by placing spike traps with barbed wire or mines at the last layer of your defense [ Keep it away from other objects ], You can also use dirt fragments as cheap walls to your base and surround the dirt wall with a deep hole right outside the wall so nobody can jump or damage it, Also adding spikes at the bottom, By adding mines as the last layer of this defense then turrets on each sides While you have turret syndrome perk on MAX to let you control 2 turrets at the time, And a big space of wooden carpets that have spikes underneath it when zombies step on it, They will fall, And a small Vantage point for you in the middle to shoot the zombies, Proving such an effective way of breaking down the zombie hordes, Watch out for zombie policemen, They are the only zombies capable of damaging you from distance.
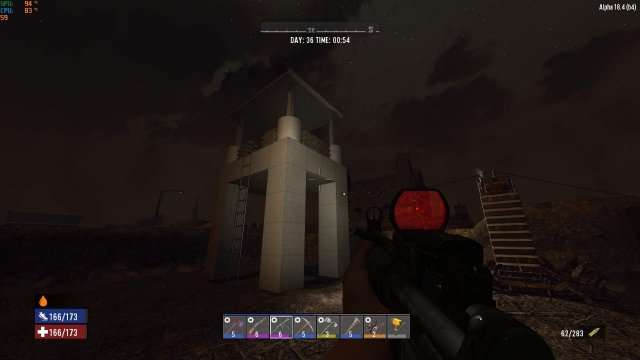
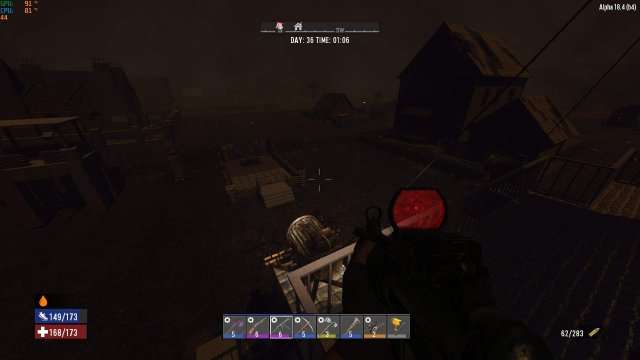
- Watchtower: One of the most important tools of defending your house is a good vantage point, If you have a sniper or a hunting rifle, It won’t help you as much as you are on a watchtower with the entire view of the house surroundings at your hands, More elevation = Better view and tactical awareness.
- The Bunker Trap: This one looks odd for you, I use those under the pillars that support my house’s balcony foundation, So zombies that damage the pillars can’t reach the pillars Because th bunkers are infront of it and they have to go through it while it contains iron spikes and barbed wires.
- Balcony: A Balcony is only better than a tall watchtower for 1 good reason, If you have a balcony, Extend it to make an full circular-shaped balcony, When you do this, You will be able to rotate the entire balcony floor and see the right side, left, front and the back of your house, This will be ideal for any weapon aswell, If you have a tall base, Make a balcony or a watchtower, Its essential.
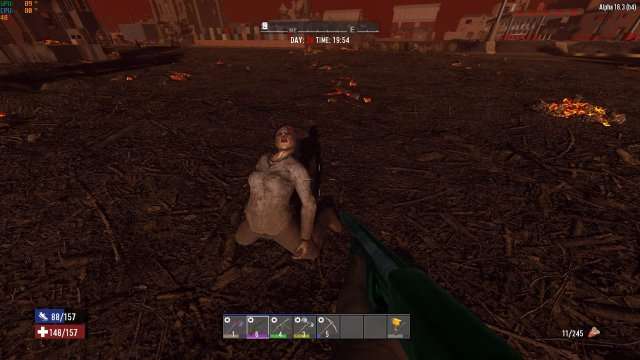
A little tip to help you test your defense, When you are about to test your defense to see weather its going to be any good, Wait for a screamer to scream and spawn some zombies, Or drag a nearby zombie horde to your base, All you have to do is, When they follow you back, Get inside your base and watch them from afar.
Study their behavior and notice the AI Pathing that will be generated to have the best amount of exposure on your base, Zombies will always try to find a way in, Even if its entirely locked in and isolated, If a spike hole trap is the only entryway, They will jump in like its nothing ,So expect the unexpected and make an alternative plans to fix your problems just in case.
There are also essential perks that you will need as an importance to your survival and to greatly extend your base defense, Those are the perks you are going to focus on.
Intellect

Some Other branches from the intellect skill tree:


Phase #4: Facing the Horde Night
This is the the phase were I call it the moment of truth, In the first night, Your Creativity and your defensive traps will be tested tonight, So The very last day before horde night will be important for gathering materials to repair your blocks with, Ammo to keep you protected, Throwables like Molotovs and Grenades would make a nice addition to the defensive workrate of your base.
Destroying groups of zombies in 1 place can be dealt with easily by a grenade or a molotov and you can either watch them dieing or shoot them, Upgrading your traps to the next level has a major impact on your defense, Upgrading from Wooden Spike traps to iron spike traps is decent jump in The trap’s HP value and its damage value.
Make sure to upgrade and focus on the side were it can be obvious on were the zombies might attack from, Zombies often spawn at the right sides and the left sides of your house, They might end up grouping up on few specific blocks or spots, That’s why you need turrets to handle them easily and grenades on top of that, Make sure that you NEVER THROW A GRENADE nearby your building or you will suffer from that
Keep in mind that if you have a building with 2 staircases, You should get rid of them OR shorten the length of your staircase by destroying half of it were they can’t reach it by jumping or walking, You can place a haybale to get over it and jump to the staircase and pick it up as a fast and a good solution, Place a Vault Door and lock it on the staircase so you can access it in another way, But that will make a good pathing point for the zombies to step in and destroy the vault door in Numbers, You don’t want that do you?

When you are done with the Horde Night, And you noticed and took notes of your base weakness, If you survived the night, The best thing you can do for the building is spending the very first day after horde night repairing it and upgrading it, For 2 reasons, 1st Is because It will be back better or at the same original state as it was, Undamaged if you encounter a random horde attack on your base or a screamer, 2nd reason is you going to be done by the very first day repairing and upgrading your base so you don’t have to worry about your scavenging runs because you will have 6 days infront of you worth of looting!
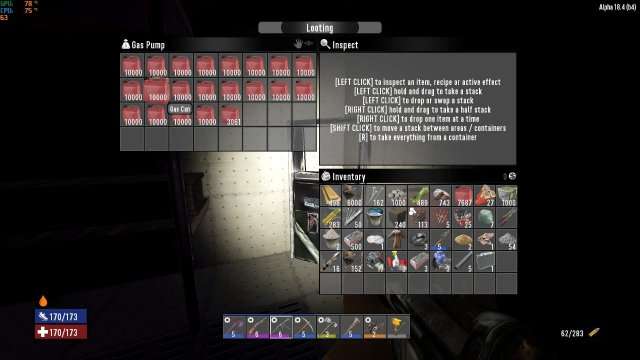
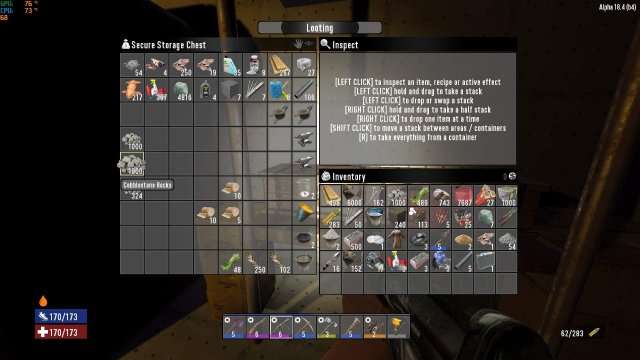
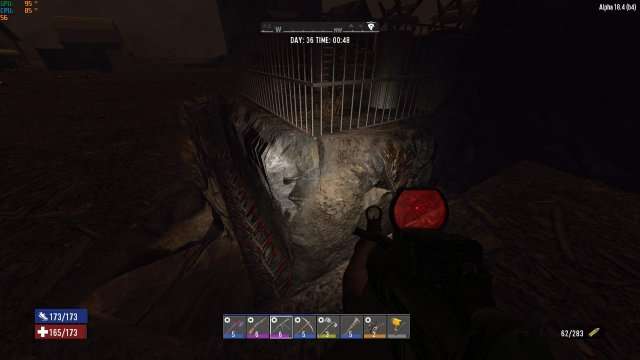
And i highly recommend you to store your essential resources like Forged iron, Stone and other materials in their very own respective containers, It might be a waste but if you choose containers to be a stoarge of only 1 specific item, It might be be easy for you to sort through them, For example, I have stored all my gas tank supplies in this gas pump so i know all the gas i have is stored in here.


Some advice here was good but now building on existing houses is generally VERY BAD IDEA, as it is more difficult then building on some empty even space on green land. Also you can not do it on most of public servers as you take away one potential POI.
Spikes are one of most wasteful idea for defence as zombies will tear them down very quickly and they hurt you much easier then zombies. They give you no exp and you have much better uses for wood and iron. Better keep open space where you can run without threat of running into your spikes and create upward sloped walls for defence.
so much effort, just move away from your base and fight them in the open, this is a vaild option until like week 26. everyone thinks they have to build all this stuff, but then after you have to repair, just stay semi nomad, easy. Almost too easy though….
I find it funny how posts like this that go extremely in-depth and try to be as helpful as positive get 2 awards, but then you find some random meme guide that does nothing for anyone and it gets like 50 awards.
I’ve always thought it was a better idea to have a main base with all the storage and crafting stations and what not, and then have a whole seperate base for Blood Moons instead of just using my main base…because if the zombies your base with all your storage and crafting stations and stuff then you’re screwed and the odds of it happening are higher as the game goes on, which makes it worse if it happens then.
For horde nights, I simply made a couple of 4×4 mini base outside of my main base. It has proven very efficient; I get maximum xp, conserve ammo & materials, and doesn’t have to worry about my main base.
The only real threat is the acid spewing zombie, which I can handle by carrying a gun & some medicine/food