
Here is a guide about Content Drop #0. It covers getting the Harran Military Rifle, finding and defeating new enemies, and obtaining the “Hunted” outfit.
Mutated Goon
The Content Drop adds a new enemy, the mutated Goon. It looks different and has more health, but is otherwise the same as regular Goons. They appear in the same areas as regular Goons, but less often. About 1 in 10 Goons are mutated. They give about $500 and their Heavy Rebar.

Obtaining the Harran Military Rifle [Free]
In order to get the Harran Military Rifle, you first need to get the DLC itself. You do this by “purchasing” the free Item on Techlandgg.com. The first thing you should see is the “featured” tab of the site. Wait a few seconds if the Harran Military Rifle DLC doesn’t show up immediately.
Now create an account or log in with your Techland account, add it to your cart and “purchase” it.
You should now receive a product key. In order to activate it, press the “+ ADD A GAME” in the lower left corner of your Steam window. In the pop-up menu, choose “Activate a product on Steam”
If your code is correct, it should show you what kind of content it belongs to. Confirm and continue to your Steam Library.

Now ingame, all you need is a Police Rifle or a Military Rifle, 6 metal parts as well as 3 rolls of duct tape. Craft the “Harran Military Rifle” Blueprint. This will slightly increase stats as well as change its appereance to a reskinned military rifle. The firemode will be carried over from the rifle you used.
Congratulations, you just got yourself an Assault Rifle with a sick skin and slightly improved stats.

(Note: The Gemly site is known to be pretty buggy, sometimes leading to an inability to log in or random 404 errors. I do not have solutions for these.)
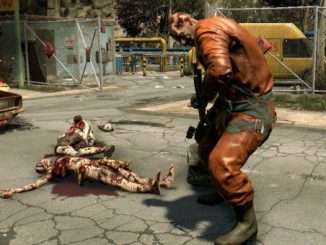
Finding & Killing the Soldiers / Obtaining the Outfit
In order to get the “Hunted” Outfit, you will have to hunt down and kill the Soldiers. Each of them will have one requisition package on them as you loot them. You will need a total of 50 Requisition Packs. Find a Bounty-Dartboard and accept the “Knowing your Enemy” Bounty.
Getting 50 packs will require something between 13 and 17 encounters. Assuming every encounter is 35 minutes from each another (the explanation for this comes later), this means getting the outfit takes 7:35h – 9:55h. (Theoretically. Not counting sleeping, messing around, travelling, combat, all that stuff.)
If you have 50 packs in your inventory, the outfit is automatically added to your stash.

Fun Fact:
The outfit closely resembles the one Tarkan is wearing, the Bandit leader from the “Gaining Credence” mission from The Following. Spot the difference.
The Scarf would be one.

What follows is what we believe to be the key to finding them. This is based on personal experience as well as rumors that sound sensible. I don’t have much to prove this is correct, but it makes enough sense for me to rely on. If you find anything to be false or you know a better way to track them down, please let us know, as we are always willing to change this guide for the better.
In order to find them, you first need to understand the encounter system itself. There are two kinds of encounter, the “random” ones and the “location” ones. These aren’t official names, I just chose to call them that.
Location encounters are those bound to a location, such as Rais’ men looting a supply drop or Survivors fighting Goons or Demolishers.
Random encounters are more complicated. They include:
- Storytellers (Single NPCs talking about their story).

- 2-5 of Rais’ men, looting (not supply drops.)

- Zombie attacks (Single Zombie gnawing at an NPCs shoulder).

- Hostage events, 3 or 4 soldiers kicking a survivor.

Almost all of these random encounters are off the ground, in one of the upper floors or on the roofs. It should also be noted that no humans spawn near the child zombies (screamers).
You can just ignore the “location” encounters, these have nothing to do with what we need.
The new soldiers just replaced the Hostage encounters, but how do you find (or trigger) a Hostage encounter?
Here’s how random events work: one happens every 5-10 minutes. This could be any of the events mentioned. The timer restarts after you finish, fail, or move away from the event. This creates a cycle. After the time passes and you are in the right area, another event starts. The order is random, but the cycle repeats every 30-40 minutes if you complete all events. So, if you meet a storyteller, you’ll see another one in about 35 minutes. You’ll also encounter another group of soldiers in about 35 minutes, and so on.
What has not been tested is how restarting the game affects this process.
Fun Fact: doing these encounters still counts towards the “Homo Homini Lupus Est” achievement!
The plan is, find one of these encounters and complete it. Then roam Old Town in search for the next. Stay on the rooftops and check the minimap as often as you can. You are looking for 3-4 red arrows around a blue arrow. Follow blue pings to events. Don’t bother taking on location-based encounters, these will just waste your time.
Now, as you already noticed, this is mostly a waiting game. Find something to do or you will lose your mind just looking for the next encounter, hearing the same stories hundreds of times over.
If you set out to find them, make sure to pack a lot of firepower. I would recommend an Assault rifle: these boys are tough. Around half of them have assault rifles, the others use melee and throwing weapons – just like Rais’ men, really…
Also, I heavily recommend taking them on on normal difficulty. Assault rifles are nothing to mess with, and with the virals jumping out as soon as you make a noise, you would risk your packages. Of course, if you want a challenge… go for it!!
Also, as Efelli’M pointed out, electric arrows are a great way to take them out. They stun the group for long enough to take out their gunners.
Furthermore, he reported that the gunners are the generals, meaning that if you take them out, one fighter will remain, one will try to escape – if you are not confident you can retrieve the loot from the last fighter (which is usually pretty easy, but he can be difficult to spot if you lost him in a horde), shoot the melee soldiers before taking care of the gunners – you are, however risking getting shot.
After getting the encounter, go to sleep and start over the next day in order to keep going with a steady rythm. There are no random encounters at night.
Following now, a map where I marked the possible spawn locations for Hostage Encounters. You can bounce between those and check them, doing the other encounters in the process. Do keep in mind however, the odds of finding them by just jumping in and checking trough these locations are incredibly low.


Be the first to comment