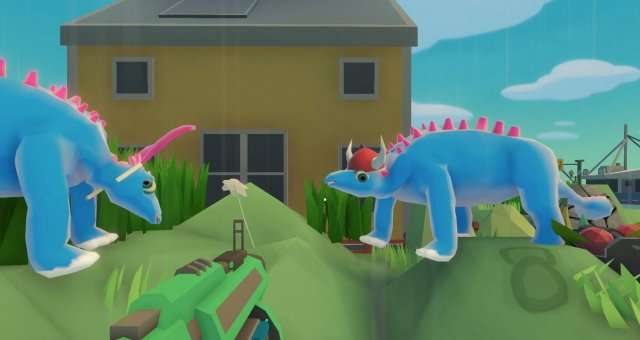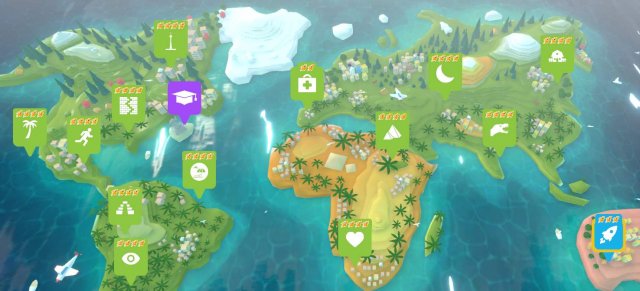
A guide to help you get that fourth ship in every level.
Getting All the Ships
Before You Start, Some Tips
- For the fourth mission it says for example you have to complete it in 3 days. This means you have to have it completed before the 4th night! I’ve tested this many times and the game will accept this.
- Pause the game when you start up a level, when you explore and when you get a new mission.
- I recommend you to not spend all your hearts/science in one go, make sure you save them for upcomming mission! That can save you a lot of time.
- Your dinos do love some privacy! Using the Privacy view button on the bottom left will help you out a ton. Place long grass at the most red spots and you’ll have happy dinos in no time!
- You can mix multiple dinos in one exhibit. Best mixes are if they have the same biome (and are herbivores)
- To save money, buy the specific food that fit their size. Always make sure to order it for the next day to save money!
- In need for extra cash? There are tons of trees and rocks on the map you’ll never use or even see if you dont scroll towards it. Explore the map and sell the items you don’t need.
- Waiting for to hit a certain mark but that only happens at the end of the day and you’re running close to the deadline? Close your park early (around 8 PM) and get all the reviews and such early.
- If you’re stuck on a mission to get all 4 shipparts, do some other missions to get more shipparts and try again later with more upgrades.
Small disclaimer
I wrote down what worked for me for the fourth ship. I played that level just to get that and not to make a pretty zoo. Besides that, there are many ways to get that fourth ship, so what is written here is not the only way. I also like to note that I turned off my upgrades when playing the first few levels so I’d get the same situation as you.
Toronto
First ship
- Dino Appeal 0/500
- Have 0/4 dinosaurs
- Unlock Science 0/2
Second ship
- Earn $0/3000
- Earn 0/20 Reviews of 2 Stars in a single day
Third ship
- Earn $0/6000
- Dino Appeal 0/700
Fourth ship – 4 days
In this mission, if you have the extra egg to start with bonus unlocked, you’ll breeze through this. Start out with one bigger exhibit with 5 Ankylosaurus. I turned the island on the left almost completly in an exhibit by erasing the paths and putting a wall around the house on the left top. Focus on making their happiness above 50% so you’ll get some hearts to unlock another species if you’d like. This is just a fast way to get it done.
Abandoned
First ship
- Have 0/4 dinosaurs with a happiness of 30%
- Brachiosaurus donations $0/500
Second ship
- Have 0/8 dinosaurs with a happiness of 30%
- Stegosaurus donations $0/1000
- Earn $0/2000
Third ship
- Have 0/4 dinosaurs with a happiness of 50%
- Earn $0/2000
- Unlock Science 0/1
- Unlock Heart 0/2
Fourth ship – 2 days
This is a good level to start paused right away. While paused, I make the terrain around the entrance flat, build 3 pens and make them as good as possible for the dinos. You want one big pen that is atleast 2520 ft big for both your Triceratops and Stegosaurus. The other two deserve their own smaller pen that fits their size needs. When moving the dinos, go in first person mode, tranquilize the dinos you want to move and pauze the game again to finish up the preperations so you don’t have to wait for your staff to do so. You want the first mission to be done by the end of day 1. Make sure to save your science and hearts for the third mission!
Energy
First ship
- Build 0/10 bench
- Ornithomimus donations $0/300
Second ship
- Have guest stay in your park for 10 minutes
- Have 0/3 dinosaurs
- Have 0/2 dinosaurs with 50% happiness
- Sell 0/15 Ice cream cones
Third ship
- Have 0/5 dinosaurs
- Have 0/65 guest visit your park
- Hunger meter 0/50% average all guest
- Flush 0/30 toilets
Fourth ship – 3 days
In this level you can prepare the next mission pretty well. I’d recommend getting a larger exhibit with multiple dinosaurs from the same species if you want to play it safe. The rest of your money you can spend. Futher than that, just place around 3/4 toilets and two/three foodtrucks/stands.
Tropical Islands
First ship
- Unlock a dinosaur
- Have 0/2 dinosaur
- Have 0/45 guest visit your park
Second ship
- Have 0/2 dinosaurs with 50% happiness
- Generate 0/100 science
- Generate 0/2 hearts
- Flush 0/20 toilets
Third ship
- Have 0/4 dinosaur
- Unlock a dinosaur
- Sell 0/10 balloons
Fourth ship – 3 days
My tip for this mission is to make sure you save some money on day 1 to buy atleast 1 Imperfect Gem. How I finished this mission fast is to get two exhibits: a larger one and a smaller one (for the free egg you get at the start). In the big exhibit I put two Tricepatops and two Stegosaurus by day two. Focus on getting their happiness above 50% and you’re golden.
Beach Resort
First ship
- Earn 0/3 3 star reviews
- Triceratop donations $0/1000
- Have 0/2 unique species
- Have janitor pick up 0/25 trash
Second ship
- Earn 0/7 3 star reviews
- Have 0/3 unique species
- Earn 0/2 Park Stars
Third ship
- Have 0/5 dinosaurs with happiness 50%
- Earn 0/9 3 star reviews
- Earn 0/$4000
Fourth ship – 3 days
Don’t buy any trashcans in the beginning, in no time there will be trash everywhere. The donations take the longest, so what I did to speed it up was add another dino to the exhibit and make it a little bit bigger to fit both of them. I got it done just before the second night. The second mission should go by very fast with the second night. The last mission takes a while, but remember that you have to finish before the 4th night, not the 3rd! The game is cheeky like that.
Machu Picchu
First ship
- Hatch 0/2 dinosaurs of tier 1
- Have 0/2 dinosaurs with happiness 50%
Second ship
- Collect page 1 of the Dinobook
- Hatch 0/2 dinosaurs of Tier 2
- Earn $0/5000
- Have 0/4 dinosaurs with happiness 50%
Third ship
- Hatch 0/1 dinosaurs of Tier 3
- Kentrosaurus donation $0/2000
- Dino appeal 0/900
- Collect page 3 of the Dinobook
- Dig 0/20 fossils
Fourth ship – 5 days
This level is fairly easy to complete. I recommend getting both the Triceratops and Stegosaurus in one exhibit to complete both page 1 and the first mission. When getting a tier 2 dino, go for the Kentrosaurus. I reccommend getting both the Gigantspinosaurus and Styracosaurus since you can also combine them in one exhibit. Another tip is to keep digging for fossils right when you start the level and focussing on the fossils that you’ll need later in the level. That way you won’t have to wait too much.
Privacy
First ship
- Create an exhibit with 0/80% privacy
- Ankylosaurus donations $0/1200
- Build 0/12 Potted Fern
Second ship
- Upgrade 0/62 wood fence to metal fence
- 0/10 medium intrusions
- Unlock science 0/2
- $0/800 Triceratop donations
- Serve 0/30 Wontons
Third ship
- Have 0/3 exhibits each containing 1 Dino with 50% happiness
- Gastonia donations $0/800
- Unlock Heart 0/2
Fourth ship – 4 days
To make sure you’re on time with this mission, focus on unlocking Gastonia and Triceratops as soon as possible. After that save your hearts and science for the second and third mission! So in total you need 3 pens with atleast 1 dino in them. Don’t worry about the intrusions, you’ll get that when you’ve upgraded your fences and plant lots of long grass around the viewingspots. The Privacy View mode for this is highly recommended, since you’ll easily see where you’ll have to add the long grass. With both the grass on the red spots and the upgraded fences, you’ll have max privacy in no time!
As a tip, get another Ankylosaurus on the first day, unlock the triceratops and dig for them, just dont hatch their eggs yet until the second mission.
Health
First Ship
- Have 0/2 dinosaurs with a happiness 50%
Second Ship – 0 days
This one is very easy. Pause the game in the beginning while following their instructions. After that make the exhibit pretty and you’re done!
Pyramids
First ship
- Open the decoration view
- 0/60% Decoration for your guest
- Potted PalmBush 0/15
- Reveal 2 Dino Rockets
Second ship
- 0/75% Decoration for your guest
- Hatch 0/1 Dinos of tier 3
- Build 0/1 Classic Clock (unlock by researching Nice Pack 1 in science tree)
- Earn $500 profits for 0/2 days
Third ship
- Hatch 0/1 Dinos of tier 4
- Have 0/1 dinosaurs with happyness 90%
- Sell 0/30 hotdogs today
Fourth ship – 5 days
While you’re working on the first mission details, you can already start working on the second mission. Make sure all the paths are well covered with decorations. For the second mission you need to hatch a tier 3 Dino. Luckily you already have two unlocked so start as soon as you can, with exploring for parts for one of those.
You may have noticed those red palms, move them into your exhibits to help your dinos get more happy. Futhermore I put, just to be safe, 2 hotdogstands in the third mission.
Breeding
First ship
- 0/6 dinosaurs with 85% exhibit meter
- Brachiosaurus donations $0/1500
Second ship
- Breed a dinosaur
- 0/1 exhibits with 2 dinosaurs at 80% happiness
- 0/30% fun for your guest
Third ship
- 0/1 exhibit with 100% exhibit meter
- Styracosaurus donations $0/500
- Hatch 0/2 dinosaurs of tier 2
- Sell 0/30 balloons
Fourth ship – 4 days
A good level to start of paused. In the beginning you’re going to have to puzzle a bit with what dinosaur will go where. I recommend going into first person mode, tranquilize them and ‘esc’ + ‘space’ to go back to the main view and pause the game again. Don’t forget to put in some second tier plants seeing as they are unlocked for the tundra and swamp. Another thing you want to start early with is unlocking the Styracosaurus and digging for its fossils. After that the longest you’ll have to wait is for the donations to reach their target.
Space
First ship
- 0/1 exhibits each 1 Dinos at 50% happiness
- sell 0/50 butter sticks
- 20% fun for your guest
Second ship
- Hatch 0/2 3 Tier Dinos
- Have 0/2 dinosaurs
- Donations $0/3000
Third ship
- 0/3 exhibit each with 2 dinosaurs at 50% happiness
- Have 0/6 dinosaurs
- Donations $0/5000
Fourth ship – 4 days
This level is annoying, not gonna lie. Start of paused and make a canal. Preferably you want as much exhibits connected to that one. Wait with hatching your tier 3 dinos until the second mission. In this level the setup is most important. After that you’ll be fine.
Ranch
First ship
- 0/3 unique species with 50% happiness
- Earn $500 profit for 0/2 days
- Dig 0/40 fossils
Second ship
- Hatch 0/1 Dinos of Tier 3
- Have 0/4 unique species
- Earn 3 Star Reviews 0/7
Third ship
- Hatch 0/1 Dinos of Tier 4
- Have 0/6 unique species
- Earn 3 Star Reviews 0/10
Fourth ship – 4 days
This seems hard at first, but there is a trick to it. Your first day you want to aim for two exhibits, a few toilets, benches and whatnot. I combined the Stegosaurus and the Triceratops in one and another dino in the other. After that I just started slowly preparing (keeping an eye on the money) for the other two mission. By night 3 you want to be done with the first mission. You can do the second one by night four and on day five, you close the park early. So close it by 8 pm, this way you’ll get the reviews in time and still make it before the 5th night mark earning you the 4rth ship.
Breakout
First ship
- Donations $0/10000
- Have 0/75 guest visit your park
- 0/40% fun for your guest
- Earn 4 star reviews 0/5
Second ship
- Donations $0/20000
- Have 0/4 dinosaurs with happiness 80%
- Earn 4 star reviews 0/7
- 0/70% decoration for your guests
Third ship
- $0/400 Ovriaptor
- Earn 4 star reviews 0/9
- Have 0/4 dinosaurs with happiness 90%
- Hunger meter 0/60% average all guests
Fourth ship – 4 days
Idealy you want to take two nights for the first mission, one night for the second one and the third mission you can finish before the 5th night. For the third mission I recommend getting another Styracosaurus and give them a bigger exhibit so you’ll easily have 4 dinosaurs with a high happiness. If you still need the reviews/hunger meter, close your park on the 5th day around 8pm, that should do the trick.
I recommend start placing decorations pretty fast and unlock the Ovriaptor. After that you can use your hearts/science for extra money if you need more in the first few days.
Return Home
First ship
- Ornitopoda donations $0/1000
- Sauropoda donations $0/1000
- Stegosauria donations $0/1000
- Theropoda donations $0/1000
- Ankylosauria donations $0/1000
- Ceretopsia donations $0/1000
Second ship
- Hatch 0/1 Dinos of tier 1
- Hatch 0/1 Dinos of tier 2
- Hatch 0/1 Dinos of tier 3
- Hatch 0/1 Dinos of tier 4
Third ship
- Have 0/6 dinosaurs with happiness 50%
Fourth ship – 10 days
- There is no bonus ship in this level, even if you reach the target before day 10!


Be the first to comment