This is an all-purpose guide containing information to help players in all mission types!
Contents
Tips and Tricks
All credit goes to DarkPhoenix#11418!
Using Science as Your Main Currency
In Parkasaurus, there are 3 types of currency: money, hearts, and science.
Money is self-explanatory, but it does come with the hitch that it is only collected and added to your usable balance at the end of the day, making it not as reliable when starting a new zoo.
Hearts come from animals who have a minimum happiness rating, and are collected at the start of each new day. Hearts are used to research the heart tree, which are upgrades for exhibits that include fences, foliage, toys, and feeders. Same as money, this is not the best currency to rely on when starting out.
Science is generated from scientists who are researching at a variety of buildings across your park, which include the science building and presentation locations. You can also generate some later on by placing science arches for guests to add to this total as well.
All of these 3 currencies can be exchanged for any of the others by using the bank, located in the town tab at the top left corner of the screen. Because we can do these exchanges, science is the easiest generated currency to rely on, as you do not have to wait until the end of the day or start of the next day to use it, and you can immediately exchange it in batches as soon as it is generated.
Keeping this tip in mind, we will next look at some important ways to boost not only science, but also your other employees, as well as your park buildings to achieve the maximum potential.
Staff Experience
Since we know now that science is the main currency to rely on, we need to boost it to get as much as possible in order to efficiently research and buy upgrades as well as content for our parks. The best way to do this is to hire 1 extra of each employee type, and always have them training at the employee building. You want to unlock this building as soon as possible, and to start out you will be training the scientists.
A good rule I like to follow is to train each staff member to be 3-4 levels above what the ones who are actively working in other parts of the zoo are, then remove them from the building and place the lower ones in to train until they are also then several levels ahead. Basically, you always want to be training staff. When you first get the employee building, it can train only one staff member, but this number increases as you upgrade the building, which is something I will talk about in the next section.
In order to assign staff skill points, you can click in the lower left corner or the screen, where there is a button that says “staff view” when you hover over it. Alternatively, you can access this by going to the park overview screen where you hire staff from. I have personally found the best categories to spend skill points in are speed and ability, although the other categories are more oriented around digs. Speed is how fast they do something, and ability is how well they do it. We want both of these very high in order to make them as efficient as possible, as higher level staff produce better results- and in the case of scientists who are assigned to the science building or presentations, more science to spend.
Building Upgrades
Now that we have talked a bit about science and staff exp, next we need to look at building upgrades. Building upgrades come from researching talents in the science tree, and you need to use money to buy them once they are ready. We will exchange some science into money in order to do this. I strongly recommend always upgrading the following as you unlock the upgrades:
Priority:
- Science building
- Employee building
- Admission booth
Important:
- Bathrooms/outhouse upgrades
- Trash can
- Picnic tables
Any other upgrades are always a good idea to do, but the ones listed above take precedence. In addition to building upgrades, there are also item upgrades that affect the items sold by your buildings. Ones to take note of here are magic dust in the balloon building, which reduces guest intrusion, and then levels of funnel cakes and similar foods- always pick the newest ones you unlocked as they will offer more bonuses. You can see each individual bonus by hovering over it in the science tree.
The Rocket Ship Parts Tree
Every campaign mission you do, you will earn a minimum of 3 rocket ship parts as long as you completed all the requirements for that mission. You can earn a 4th “extra” part by completing the mission within a certain time frame, which can be difficult as a new player.
You can spend these rocket ship parts on the screen where you select your game mode to unlock bonuses that are useful to you in missions (example- increased movement speed of guests at night, extra money spent by guests at night). Pick the ones that sound best to you, but be advised you can not reset these (please correct me if I am wrong about this). You should earn enough by playing all the missions to unlock the entire tree eventually, so picking something “not optimal” does not mean you are out of luck in the long term.
Chain Lighting
Something I had a hard time figuring out was how to properly place and hang chain lighting in my parks: in my very first non-tutorial mission, I had researched this unlock, and yet every time I placed it, it was sunken into the ground. Some Google research explained the proper way to go about this, which I will summarize below.
To place chain lights, you need something for it to connect to. You can use any type of pole light, or even a plain pole, as well as connect it between buildings’ roofs directly. You want to position it over the starting connection on top of the pole until you see what looks like a 6+ pointed green star shape appear, and you want to line up the center of this where you want the light to hang. Then, you will do the same for the other side it connects to. I plan to take a screenshot to insert into this section of the guide later.
Elevated Walkways
This is another feature I was excited to try out once I unlocked them the first time- I placed them around exhibits but was confused as to why guests weren’t using them, and more importantly, not looking at the exhibits they were positioned over. Again I turned to Google, and I found out that the walkways do not actually count as viewing locations. So, that said, if you want to use them, you need to incorporate them into your park as a way to get places, to give guests a purpose in using them. Remember that you need an entrance and exit stair for these.
The Importance of Hats
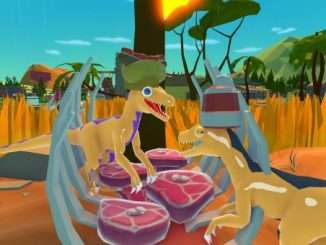
A huge feature of this game is dinosaurs wearing cute hats, and it is very important! Hats have bonuses to appeal on them, which in turn raises your ratings and attracts more guests. In addition to increased appeal, hats often have bonuses for both dinosaurs AND staff. There is a minimum age/level requirement for hats to be used, but use them at least on your dinosaurs as soon as possible. Some important features to look out for include:
Sex change: Say for example, you have hatched 2 dinosaur eggs, and both turned out to be male. This species of dino requires a mate for happiness. You can put a hat that has “+sex change” on it onto one of the dinos, and it will then count as the opposite gender and increase both dino’s happiness.
Biome changes or increased appeal: these are always great to look out for when increasing the overall appeal of an exhibit.
Tool/dig uses: these are great for putting on scientists because you can get extended dig bonuses.
These are my top 3. You can also hover over hats in the hat store (located in the town screen), and it will tell you what that hat’s bonus is. You always want to go with the highest appeal ones for your dinos. You can try to get rare hats that are un-buyable by using already owned hats in the egg screen and “gambling” them to try to make them morph into the rare hat. Rare hats provide several hundred appeal, so they are highly desirable to have.
Using Themes to Maximize Exhibit Appeal
You may have noticed when you create an exhibit and are looking at its info panel that there is a section for “theme.” Selecting each one in the drop down box and reading its requirements will let you know what you need to do in order to fulfill that theme. The final item needed is always bought for money from the exhibit items panel (this is where you buy feeders, toys, etc.), and these items cost 50,000 each. Because of the high cost, you will need to turn the science you are generating into money in order to obtain these without waiting an otherwise absurdly long time. The items should be pretty self-explanatory, but I do plan to include a brief description of each later on.
Once a theme is completed in the exhibit, that exhibit will have bonuses for that not only increase its appeal, but also provide health, safety, visual, and other bonuses to its inhabitants. You will also earn a achievement for each completed theme when it is your first time completing it. You ideally want to have every exhibit in your park containing a theme to boost appeal and happiness.
Upgrade Your Exhibit Contents Regularly
As the title to this section suggests, you want to be upgrading each exhibit’s contents regularly, or as soon as you unlock them in the heart tree most of the time. When you first start out, you will have limited options, and more foliage, enrichment, feeders, and shelters become available with more heart tree advances. Always upgrade to “tier 2” items; you don’t have to remove all tier 1 items, but mix in the tier 2 until the realism meter at the bottom of the exhibit info panel is 100%. On feeders/enrichment/shelters, choose ones with the most green arrows on their info panels, as these provide the most bonuses. Higher tier items lead to happier and healthier animals, which leads to higher rating and less costs spent overall.


Be the first to comment