
In a nutshell, this guide shows you how to line up a moon’s orbit with its parent planet’s equator.
Introduction
Before we start off, I just want to say I didn’t come up with this idea. I forget where I first heard it, but credit to whoever thought of it first. I just want to make this more well known, since I think it would be useful for people making custom stellar systems.
With that out of the way, are you tired of your moons not lining up with at all with your planet’s axial tilt, and instead lining up with the grid? Well, fret no more! This guide will show you how to make your moons’ orbits look good, no equations required!

The Planet
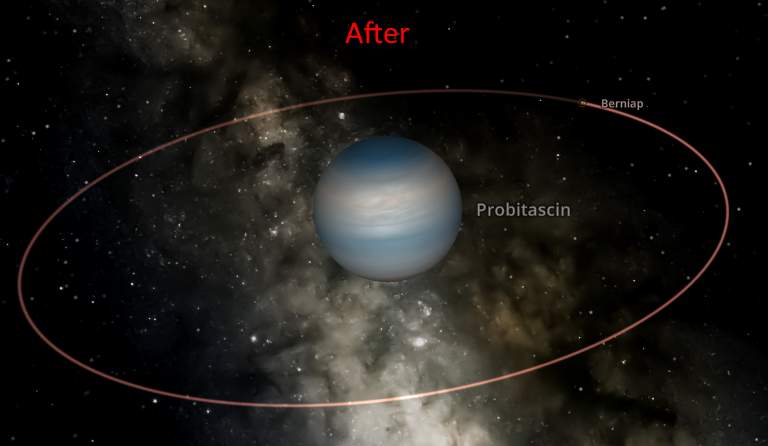
Of course, you need something for your moon to actually orbit. In this tutorial, I’ll be using a randomly generated gas giant, but you can technically use any object, a rocky planet or even a star! I’ve manually edited this planet’s obliquity a bit to be not too extreme, but big enough so the difference is clear:
The Numbers
Now what? Well, now it’s time to get the two most important things for a proper moon orbit: the inclination and the longitude of the ascending node. How exactly do you find these without using an equation? Well, it’s pretty simple.
First things first, select your parent planet, go to Add, and go to the rings tab. This is the key! When adding rings, they automatically align with your planet’s equator, and we’re taking advantage of this. It doesn’t really matter what preset of rings you choose, we’re playing with the advanced settings anyway.
If you don’t know how to get to advanced settings, when hovering over any ring preset, click on the little pencil icon. Good? Good. Now, under the first section, set the Number of Bodies to 1, Total Mass to 100 kg, turn on Bodies instead of Particles, and disable Mass = Parent/Count if it isn’t already.

These particular settings aren’t set in stone, feel free to add more than one body, or more mass. Just make sure to keep the mass DOWN when working with smaller planets or objects, because then wacky stuff will happen if the body spawned is large enough to influence the planet’s orbit significantly.
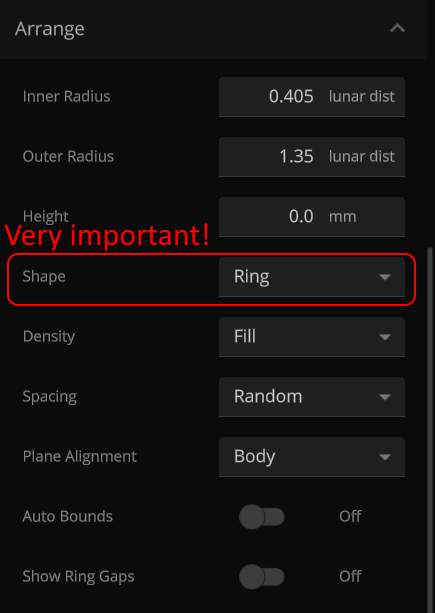
Now for the most crucial part: Under arrange, make sure the Shape is set to Ring! If you chose a preset that already has this, good! But if you chose something like Moon Swarm, make sure to change the Shape! This is so it lines up properly, and isn’t something random.
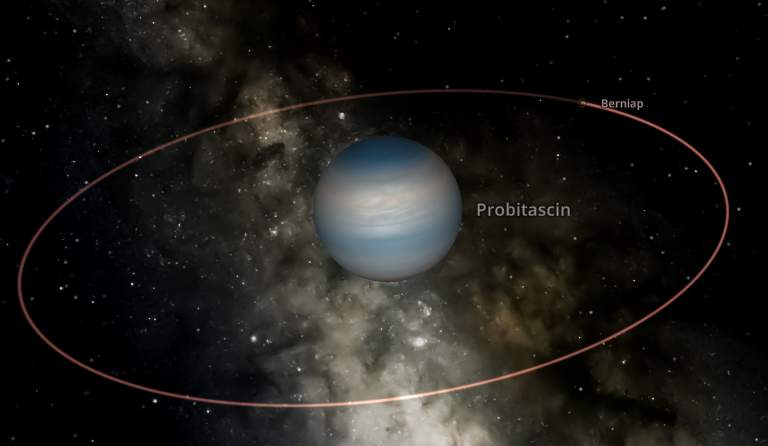
With all that set, just add the ring to your planet, and unpause if your simulation is paused. Depending on what size your planet is, and what you edited in advanced settings, the “ring” should look like this (note I turned orbits on):
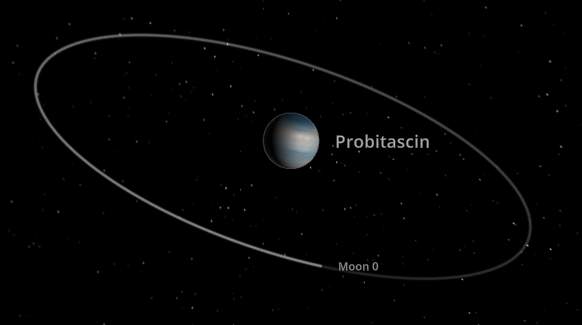
It obviously will vary, but the key point to notice here is that the orbit is aligned with the planet’s equator, exactly what we want!
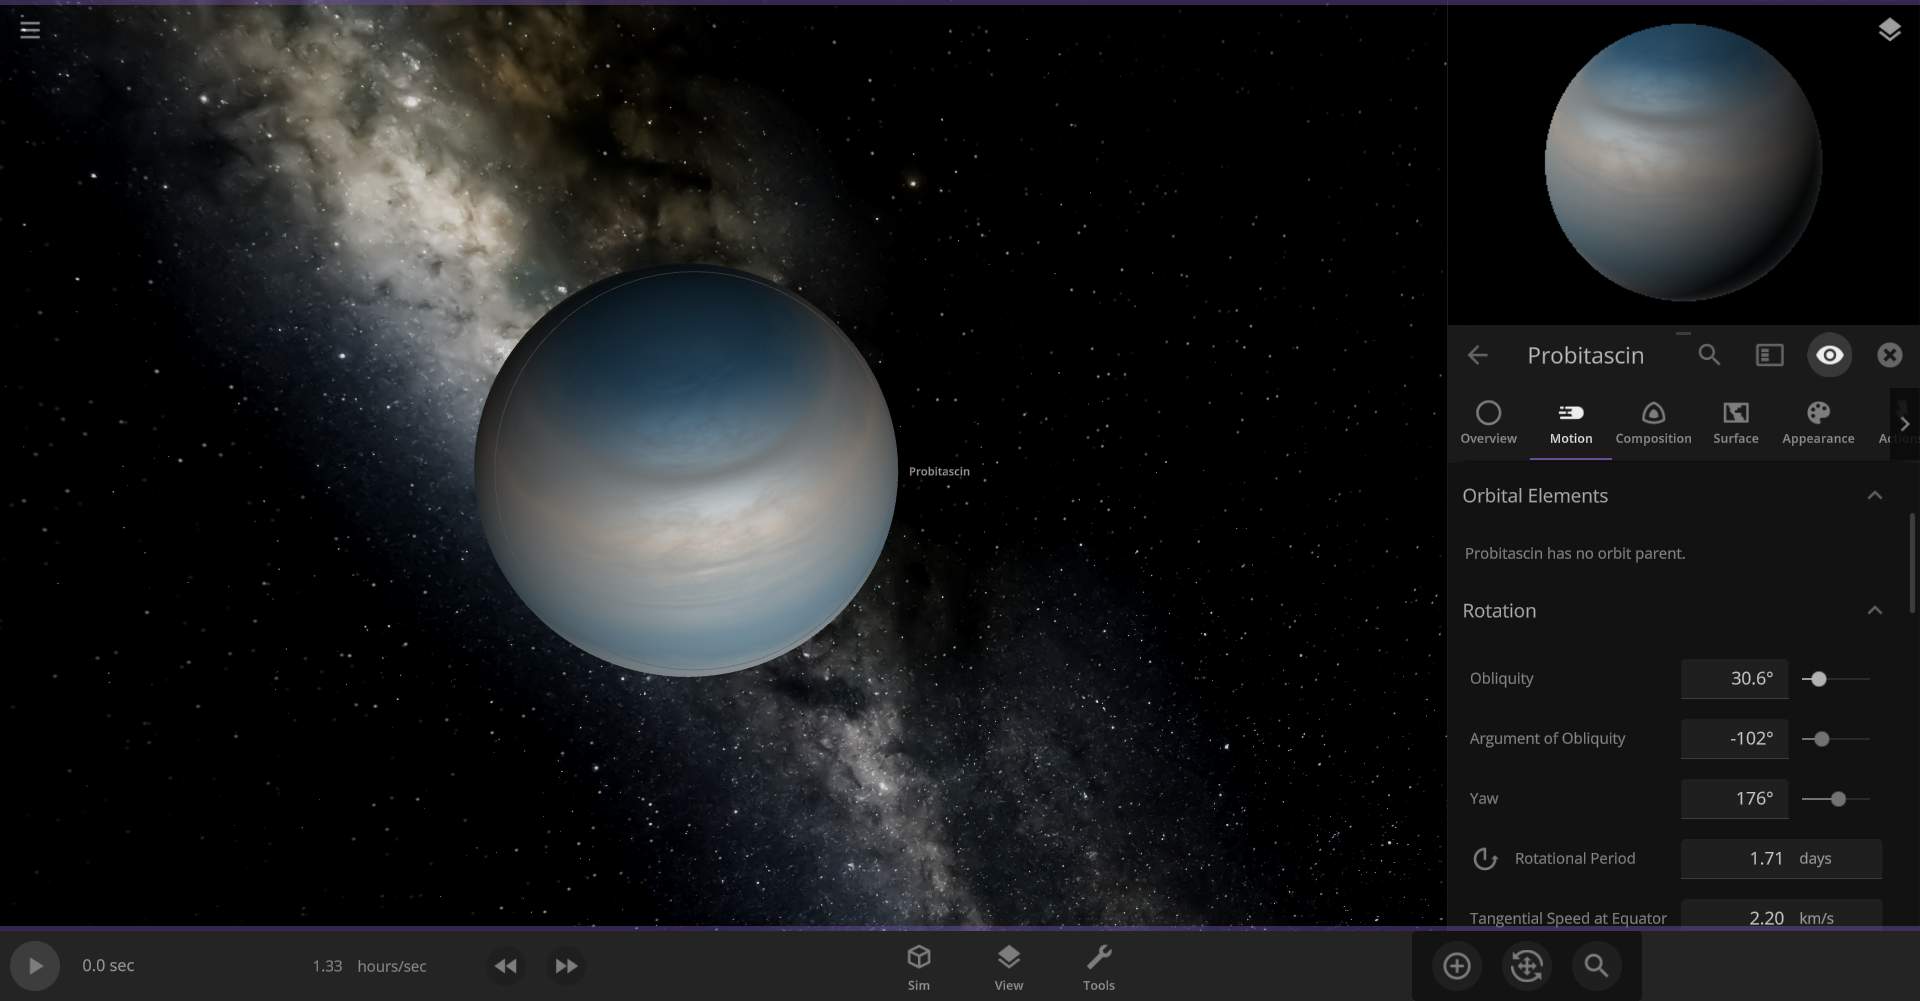
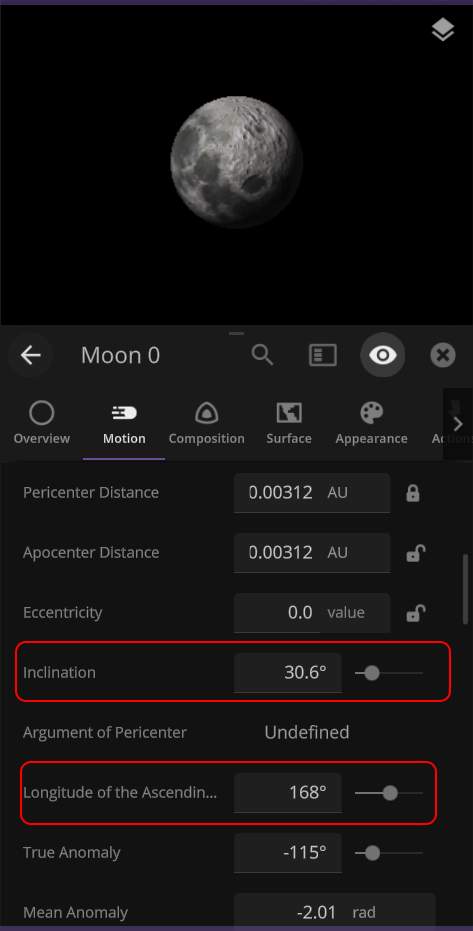
Now, select the Moon 0, and go to its motion tab. Scroll down to Orbital Elements, until you see inclination and longitude of the ascending node. Copy these two numbers down on a notepad or something, and make note of which is which. Nothing else down here is actually important, so you can delete the Moon 0 object now.
The Moons
Now that you got your numbers, it’s time to add moons! Just add moons the way you normally would, and then go to their Motion tab, and down to Orbital Elements. This is where the numbers come in.
First things first, take the number for inclination you got earlier, and put it into your moon’s inclination. This should define the longitude of the ascending node if it was undefined, so you can put in the number you got for longitude of the ascending node too.
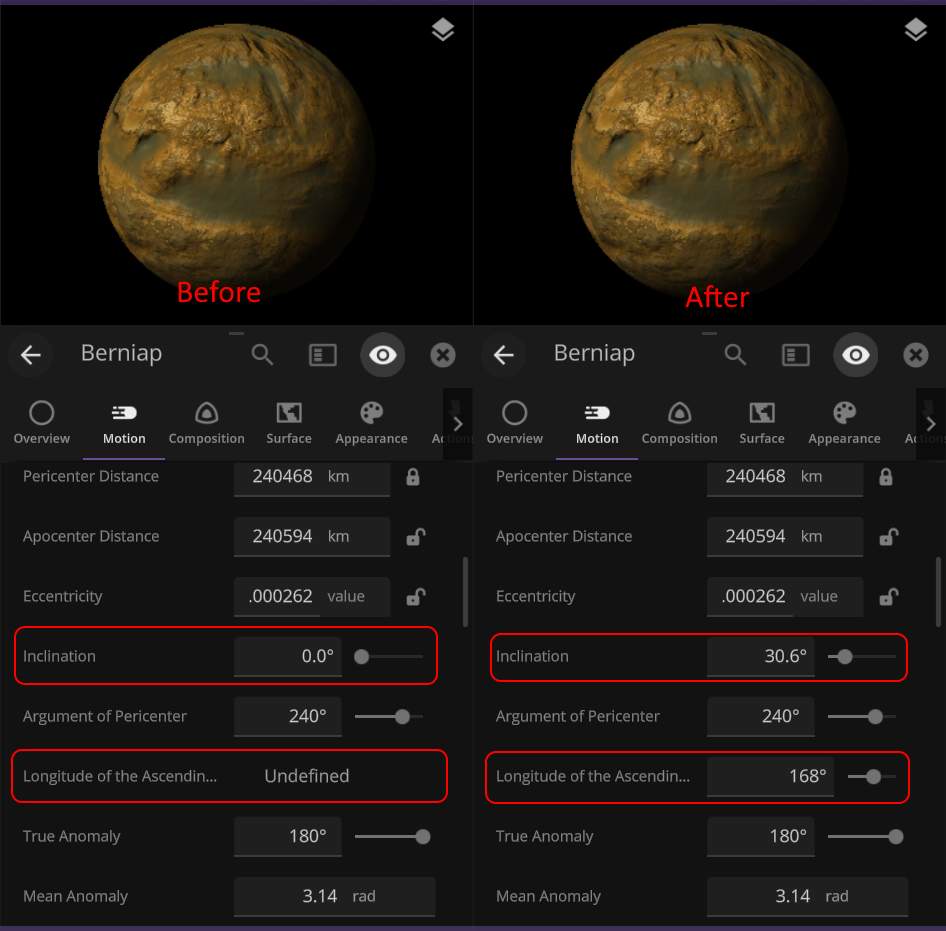
After you put in those two numbers, you’re set! Of course, you can do this with multiple moons using the same numbers you wrote down. You can also tidally lock the moons for extra realism. Enjoy your moons’ proper orbits!

Be the first to comment