I have noticed several questions in the forum that could be addressed with a basic guide. As I gain more experience with the game, I will add relevant information to this guide to assist new players.
Guide to Basics
Getting Started
Upon starting the game and creating a Star Cluster, you will observe a brief, largely automatic introductory sequence featuring a spacecraft traveling to the initial planet. During this sequence, you can use the WASD keys to maneuver the craft, which can be advantageous for selecting a more favorable landing location.
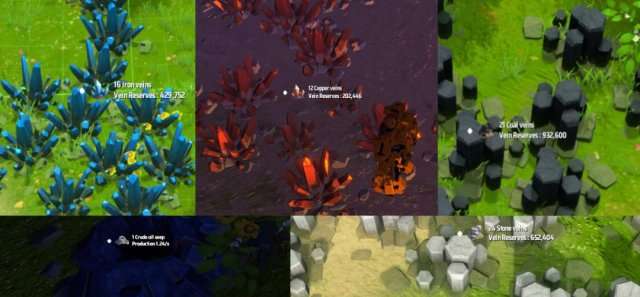
After landing, you may observe various objects on the map. Red crystal nodes indicate Copper Ore, bluish nodes indicate Iron Ore, and plant nodes are harvestable, providing fuel for your mecha (the player character). Other node types, such as stone, coal, and oil, are also present in the environment.
You will be able to move around with WASD, follow the tutorial to learn about the interface and menus.
You can Right click to move your character around as well as designating nodes for harvesting. Shift can be used in combination with right click to queue up multiple tasks, this does have a limit to the number of tasks you can add but don’t expect to reach it.
Also you can delete items from your inventory by selecting them from your inventory screen and then pressing your Delete key. This is irreversible. Useful for removing pesky water from your inventory.
Building
Once you have some buildings in your inventory you may build them by finding them in their hotbar category and then selecting the specific building from that category. You must have the item in your inventory to be able to preview it.
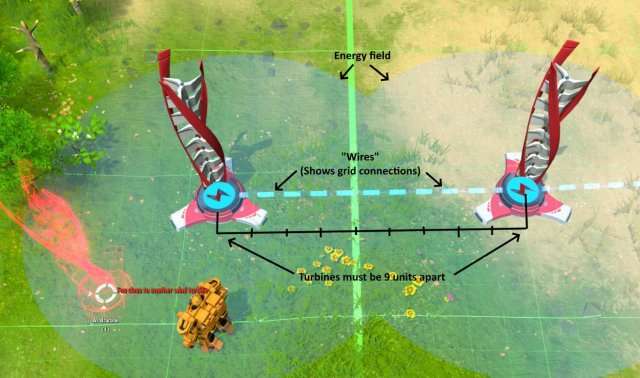
Once you have a building selected you will see a hologram of it in the world following your cursor, energy buildings like Wind Turbines will have a circle around them representing the area they will provide energy within, this can overlap with-ought issue, but Wind Turbines cannot be placed too closely to one another (an exclusion radius of about 9 tiles), this may apply to other buildings but I have not seen it yet.
Some buildings can be stacked vertically on top of one another, this will save space and usually acts as a linear addition to the base building (EX. stacking storage doubles the effective storage and shares the same input/output slots at the base).

Logistics
Input / Output slots: Most buildings have these slots around their base that represent where a Sorter may be used to connect to a belt or other building, only one connection may be used per slot up to the number of slots around the building.
These can be tricky to understand initially, so here’s the basic idea; an input involves clicking the provider (usually a Conveyor) and then clicking on the building you want to put into, the conveyor must be directly neighboring or 1 space away in a cardinal direction (no diagonals).
Making an Output is the exact same thing, click on the provider (usually a machine) and the on the target (usually a conveyor). It is worth noting that the sorters do require power to run and therefore must be within a power field.
Note: For some odd reason the corners of storage containers will make you reach out 2 tiles instead of being able to only go 1 tile out… this may be a bug.
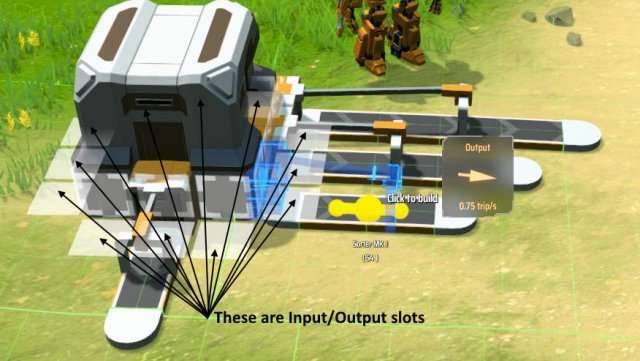
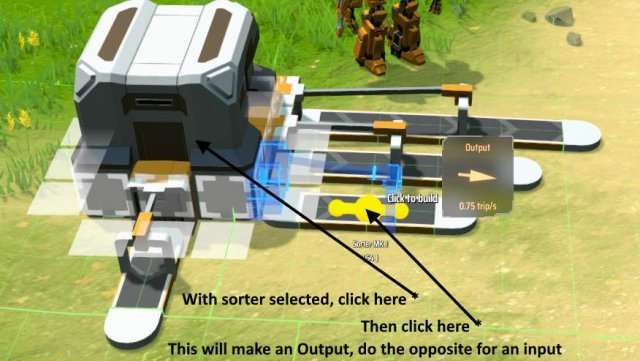
Setting a sorter to reach over longer distances will slow its transfer rate down.
Logistics tiers
Tier 1
- Conveyor – 6 items/second.
- Sorter – 1.5 items/second per tile distance.
Tier 2
- Conveyor – 12 items/second.
- Sorter – 3 items/second per tile distance.
Tier 3
- Conveyor – 24 items/second.
- Sorter – 6 items/second per tile distance.
4-way Splitters can be used to evenly split or combine 1 line into 3 or 3 into 1, and sport an editable priority setting that can be used to make an overflow gate in your system, you can also set a filter on the priority output if you have mixed lines. I have heard that they can also be used to move resources vertically when stacked though.
Fluid Logistics
You got some liquids you need to move around? Wonderful, because in the world of DSP liquids are gelatinous. Yes you heard that right, Water, Oil, and other fluids can be moved as Jell-O cubes on your conveyors and sorters (They also have shaders applied to them that may impact your framerate if you have too many visible).
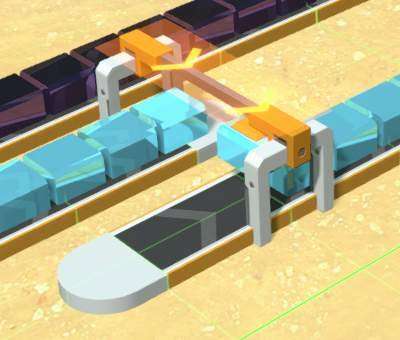
You will often be running a Conveyor directly out or into certain buildings when using fluids, but in most instances you will use them in exactly the same way you might use other items like ores.
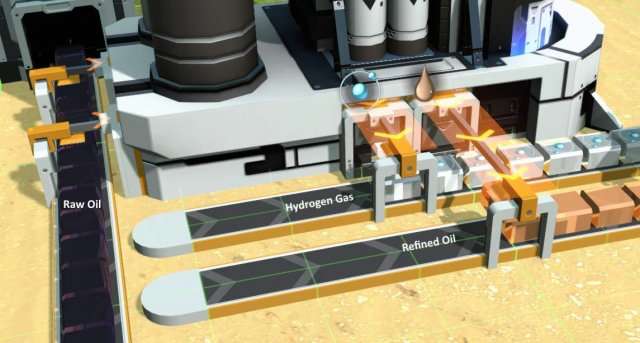
Powering Your Mecha
As you may have noticed by now you have a limited power supply for your character.

This power bar will drain as you move, craft, or otherwise do things, but it will also slowly recharge over time when you are inactive. This passive recharging however is far too slow to rely on, thus we can can feed our mecha basically any combustible object.
This includes Plant Fuel (leaves), Logs, Coal, Hydrogen Fuel Rods and anything else with an “Energy” stat. To do this you open your Mecha Panel (hotkey is ‘C’) and drag or shift-click applicable fuel items into the Fuel Chamber slot. Then over a period of time your Mecha will consume these items converting them into Core Energy. If your core energy maxes out then fret not as your Mecha will stop burning fuel until it is needed again.

You will eventually get the Wireless Power Tower as well which allows you to charge your Mecha with the energy on your Power Grid though fuel will always be useful for any excursions away from your base.
Basic Automation
To get your automation started you will need to achieve a few steps:
- Get Power
- Harvest Iron and Copper
- Refine Ores
You also will need to get some Tech, these are the most important techs to get ASAP
- Basic Logistic Systems (topmost Tech)
- Automatic Metallurgy (Second tech from top)
- Basic Assembling processes (4th tech down)
These can be researched in any order with materials produced in your inventory
1. Getting Power
To power your base you will need energy, your first source of energy is Wind Power.
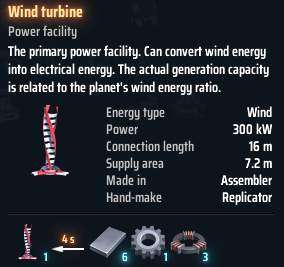
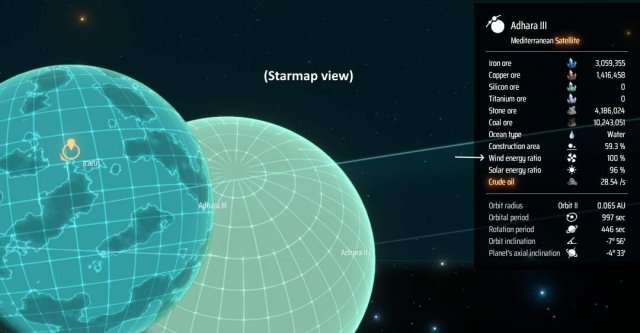
The in-game tutorial should give you one Turbine to start, but you will rapidly need more of them as their output is very low, this is not the end of the world however as buildings can run (at reduced effectiveness) with less power than they demand. Wind Turbines may also be less effective on certain planets depending on their “Wind Energy Ratio”.
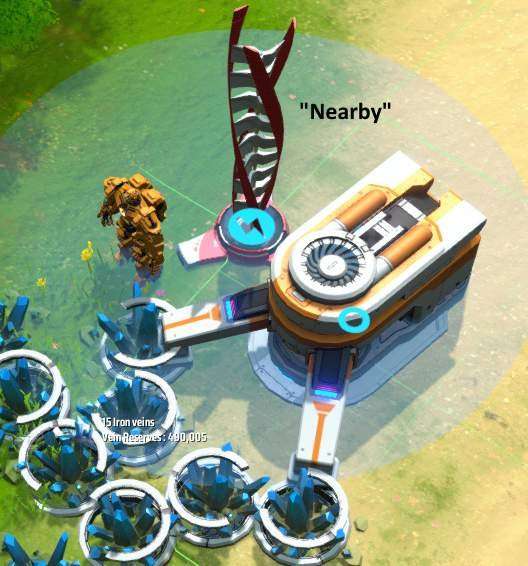
Be sure to place your Wind Turbine near your miner(s) so you wont need a Tesla Tower (power line) to move the power too far. For now at least this does not interfere with the amount of power produced.
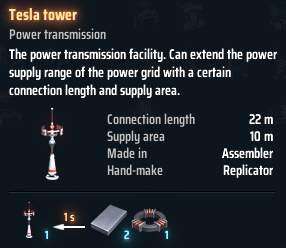
You will eventually need Tesla Towers to move power around, unlike Wind Turbines these can be place nearly anywhere and have a larger supply area and connection length making them ideal for powering your factory.
2. Harvesting Resources
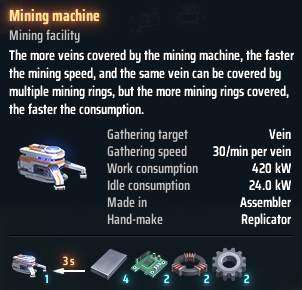
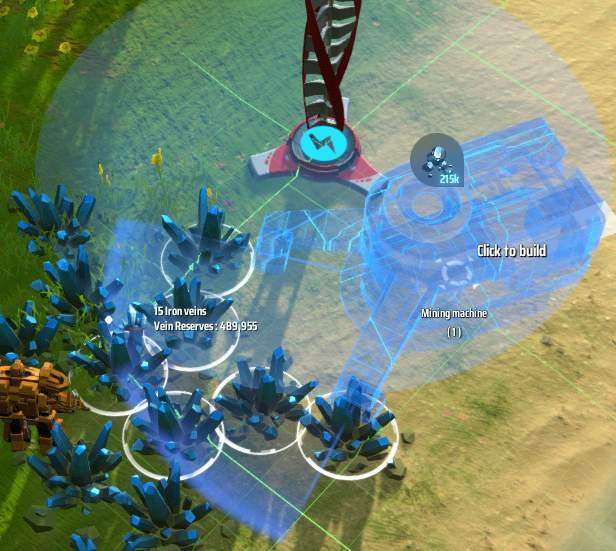
To automate Iron or Copper you will need to place a Mining Machine facing a few nodes of the desired material and power to run it.
You can set up your miners however you like, but I generally try to make them cover as many nodes as possible so that I wont have to deal with cleanup as the nodes run dry. A node can be used by multiple Miners if you need to overlap their zones, this will use up the node faster however.
You can use SHIFT to unlock the grid and rotation snapping of Mining Machines so you can position exactly how you want to.
Once you have your miner in place and powered you can click on it with a conveyor selected to build its output, there is no sorter when pulling out of a Mining Machine.
3. Refining
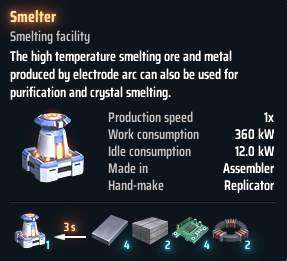
Once you have your ore being mined you can load it into a Smelter to cook it into Ingots or Magnets.
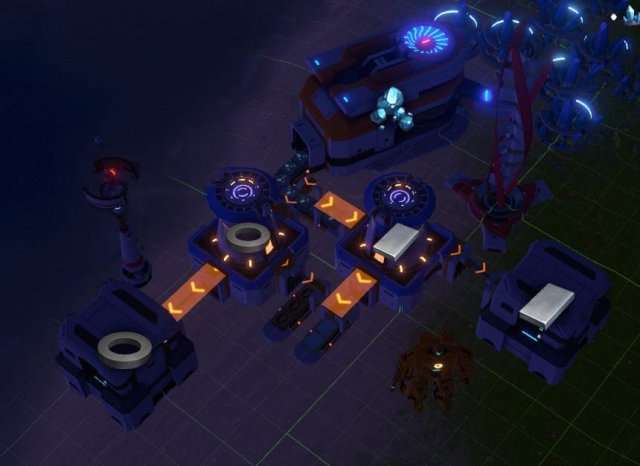
You will need to use Sorters to transfer items into and out of the Smelters.
Here is an example of a basic Iron Ore to Ingot and Magnet factory.
Basic Tech (Electromagnetic Matrix)
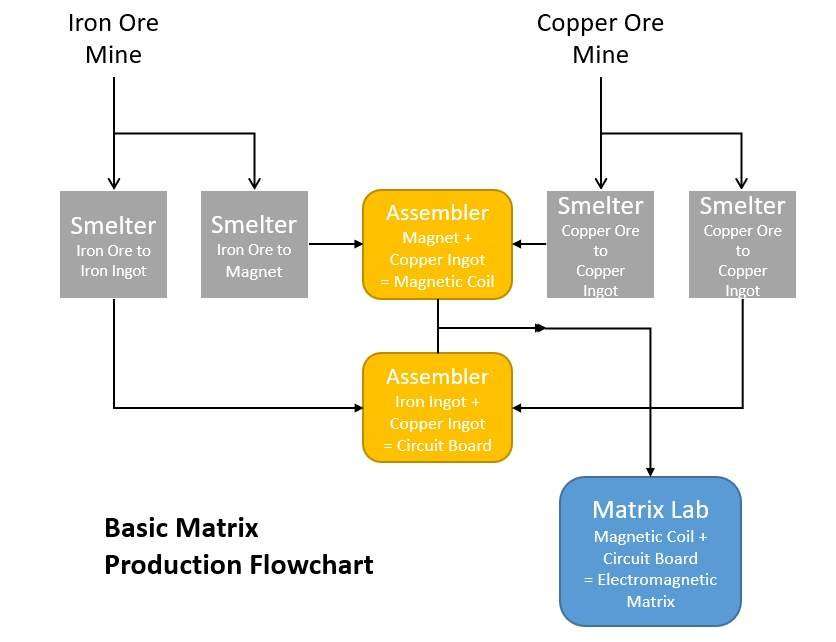
Automating the first major milestone of progression is simple! You already have everything you need to do it. Here is a basic Flowchart mapping out what needs to happen for you to start producing the tier 1 matrix.
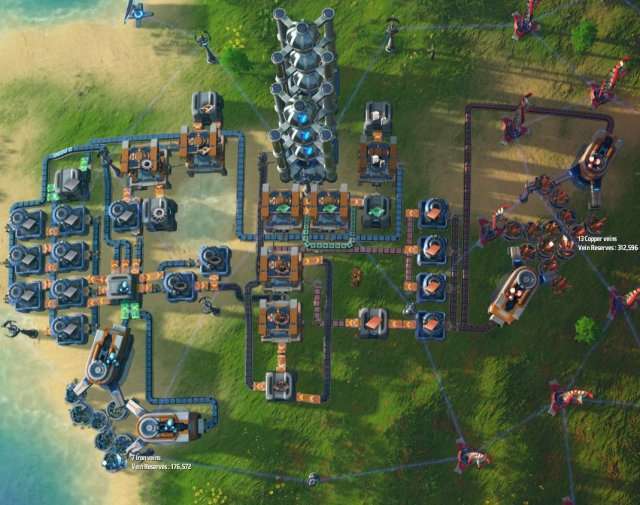
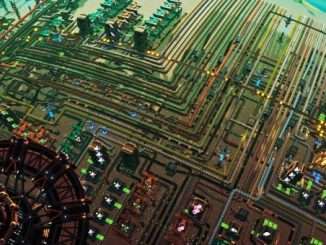
Here is a picture of my Factory at this stage.
Fractioning
Fractioning is the process of turning Hydrogen into Deuterium. The Fractioning Still however is a confusing machine. It intakes Hydrogen on one side and outputs it on the other, 0.5% of the time a unit of hydrogen will turn into Deuterium and be output in the front of the machine.
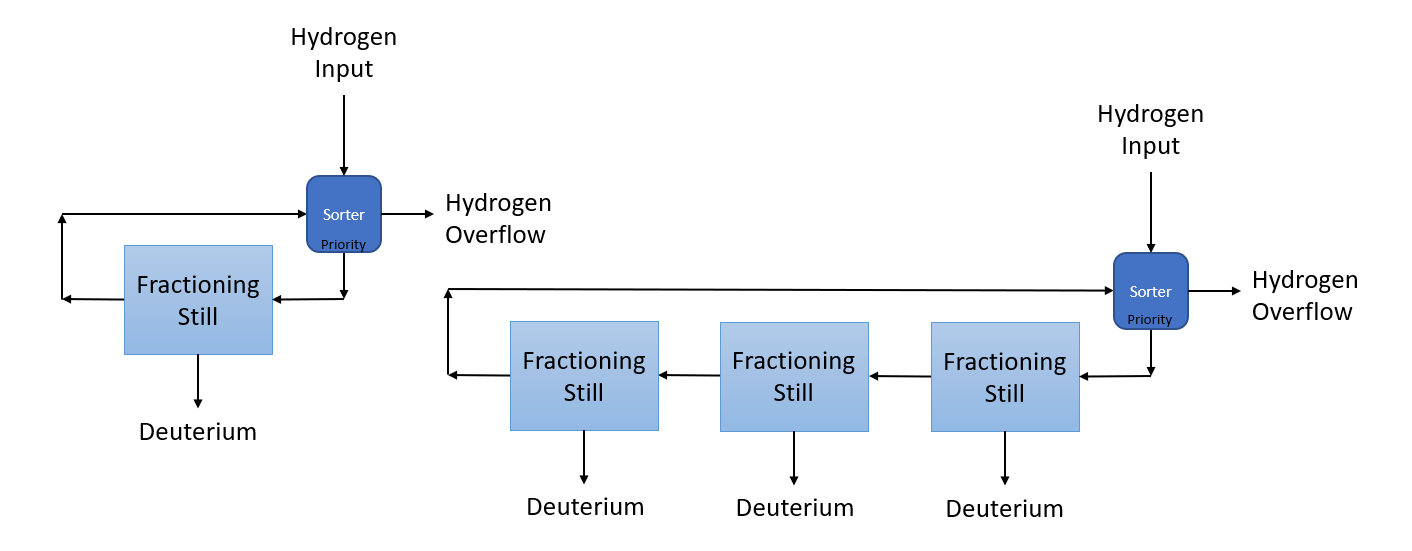
What this means, is that the ideal setup includes making a constant stream of Hydrogen into and out of the Still, starting off this may be done easiest by literally making a circle of conveyors and slapping a still along it (see the flowchart), later on when your Hydrogen supply is more stable you could just slap the still directly into your main Hydrogen line and call that good.
Basic Fractioning Still flowchart: a sorter is used with priority output to ensure that Hydrogen never stops cycling through the setup and can overflow if needed.


Be the first to comment