
A comprehensive walkthrough for Story Mode, aka Wintermute. There will be spoilers, so you have been warned.
More The Long Dark Guides:
Introduction
This is my guide for the story part of The Long Dark. I made this because many players ask about how to move forward in the story.
Important things to know:
- This guide will tell you things that happen in the story. I tried not to give away big surprises, but you will learn about characters and places before you meet them.
- I play the PC version. The game is the same on PC, Xbox, and PS4, but the controls are different.
Control Shortcuts
So I’m going to assume you know the basic controls of walking around and clicking on objects. However, there are some shortcut buttons that will frankly make your life easier when it comes to nagivating The Long Dark’s menus.
- ‘Tab’ brings up your quick stats. This is how you get general information on how your character is doing. If they’re hungry, cold, thirsty, etc…
- The ‘F’ key brings up your status. The status screen is where you can find more detailed information on how your character is feeling, such as exactly how many calories are in your stomach and the precise temperature outside.
- The space bar gives you access to your radial menu. The radial menu is basically a quick access. You can eat, drink, start fires and many other things from the radial menu.
- Pressing the ‘i’ key will bring up your inventory. Knowing what is in your backpack at all times can mean the difference between life or death.
- The ‘M’ key will bring up your map. You don’t have access to it immediately, but the map can be of great help when it comes to locating many of the hidden supply caches found throughout the world.
- Pressing the ‘J’ key will bring up your journal. Here is where you will find all the information on your current quests and goals. If you’ve forgotten what you’re supposed to do, take a look at your journal.
And remember, PC players can change any of these shortcuts through the options menu. Personally, I often rebind the inventory to my ‘E’ key so as to have it close at hand.
Episode 1: Do Not Go Gentle
Overview
Will Mackenzie wakes up after his plane crashes on an island. He looks for his passenger, Astrid Greenwood. He finds a town called Milton. Only one person lives there, an old blind woman called the Grey Mother. She knows about Astrid but does not trust Will. She asks him to help her before she tells him anything.
Chapter 1: Survival of the Fittest
So let’s jump right in! Once you have control of Will, look at the piece of metal sticking out of his hand. You’ll want to interact with it and then rapidly hit the LMB. Eventally the bar will fill and he’ll yank the piece of metal out.
 Walkthrough")
Now he’s bleeding though. If you take a look at your status, you’ll see this:
 Walkthrough")
The status screen is where you can find more detailed information about your environment and condition. Here you’ll see that Will is suffering from the affliction of blood loss on his left hand. You’ll need to find a bandage to treat it before he dies. So walk around a bit until you find a first aid kit on the ground. The game will then walk you through using medications and other treatments.
 Walkthrough")
Once you’ve stopped the blood loss, you need to find somewhere for Will to rest that is protected from the wind. Caves are great places to take shelter, when there are no man-made buildings about, so keep moving fowards until you find one. Once you enter the cave, the game walks you through the importance of fire and how to make one. Will then falls asleep.
Important Note: You’ll see in the screenshot below a pile of moss found inside the cave. That moss serves as Will’s bed. Be sure not to place your fire on top of moss or directly beside it as some players have experienced a glitch where Will wakes up inside the fire and dies.
 Walkthrough")
Day 2
As you can see from your stats, Will is dehydrated and starving.
 Walkthrough")
You need to start a fire so as to melt snow into water. If you look back to where you started the fire last night, you’ll see the remainders of the previous fire. You can start new fires from burnt-out ones. Make sure to boil the water before drinking it to kill anything that could make you sick.
Now you need to go find some food. Head out to the remains of the plane wreckage and loot any containers that you come across. You can also break the green crates for firewood and possibly supplies. There will be an MRE inside the metal container on the left, facing the crash.
After eating the MRE, Will complains about his injuries from the crash. You’ll see in the image below that there is a risk of the wound become infected.
 Walkthrough")
You should have found some antiseptic so go ahead and use it to heal the infection risk. After that, Will decides it’s time to retire for the day.
Day 3
The weather is turning bad, and Will is going to freeze to death if we don’t build up the fire. So head outside and pick up any sticks or wood you can find. There should be around five cedar logs lying around, crates you can break up for reclaimed wood, books inside the crates and plenty of sticks.
Once you’ve gathered all the wood, light another fire and add enough fuel that the burn time is 9 hours or more. You’ll have to wait for Will’s temperature bar to fill up so spend some time boiling water, tearing up newspaper to make tinder plugs or crafting bandages. Once the bar fills up and you exit the fire screen, the day will end.
Day 4
So Will has survived another night. Unfortunately, he doesn’t have any food. Head outside and the game will teach you about crows. When you hear them, there’s some kind of body nearby. Corpses can also be found wherever the crows are circling, so look up when you hear them cawing.
As you’ll be able to see, there is some kind of dead creature up on the ledge across the ravine. And luckly for Will, a tree was blown over by the storm, which is perfectly placed for him to cross. After reaching the ledge, you’ll find a green backpack and metal case. The case will trigger a cutscene that gives some background so be sure to pick it. This backpack isn’t searchable, but normally you can rifle through them.
After picking up the story items, head over to the dead deer. The game will then let you harvest the meat. Go ahead and take all of it. Now you can eat it raw, but I (and the game) recommend you cook the meat first. You can either start a fire on the ledge or head back to your cave.
In your journal, the game suggests you try and climb out of the ravine. The climbing area can be found on the ledge, between the rosehip bushes.
Unfortunately, Will is still injuried, and his attempt has only won him a sprained ankle. The game will then teach you about rosehips, which can act as an alternative to painkillers.
To use rosehips, you must first craft them into prepared rosehips. These can then be cooked with water to create tea.
 Walkthrough")
 Walkthrough")
Once you’ve filled Will’s stomach, he’ll retire for the day.
Day 5
Will notes that he feels capable of climbing out of the ravine today, and if you check your status, you’ll see that the plane crash injuries affliction has disappeared. So head back to the ledge and climb out. You’ll have a few more walls to climb, but the path is pretty linear. Eventually, you’ll come across the skeleton of Will’s plane. A cutscene will play, and the next chapter will begin.
 Walkthrough")
Chapter 2: Echoes of Astrid
At this point, you’re pretty much free to do as you like. The game will give you a pop-up every once in awhile to explain a new game mechanic, but you’re in control for everything else.
The first thing you’ll want to do is break up the green crate next to the crash.
 Walkthrough")
This crate is special because it will provide you with more clothes. But don’t put them on immediately. If you check the clothes in your bag, you’ll see that they’re frozen. Obviously, wearing frozen clothing makes you feel colder instead of warmer. To thaw them out, you have to set them next to a fire or keep them in a warm environment, such as a house.
Anyways, keep going until you come to a frozen lake. The game will teach you about throwing stones. While the tutorial mentions how you can stun rabbits with them, you can also use rocks to distract wolves. Just thrown them near the wolf and it will go investigate the sound.
Once you’re done exploring the lake, head towards the trees with moss on them. There will be another rockface for you to climb. If you’re having trouble locating it, look for the rosehip bushes around the base of the wall.
 Walkthrough")
Once you get up the rock, there will be a dead deer. You can harvest it if you want, but there shouldn’t be any desperate need. Walk forward a little bit, and there will be a cave to your left.
Upon entering the cave, you’ll get a pop-up explaining the annoyance that is darkness. You’ll also unlock the blueprint for a torch. Unfortunately, you need lantern fuel to make a torch and you don’t have that yet.
Thankfully, the game sees fit to provide you with a starter torch! Strike a match so you can see the torch (or just fumble about in the dark, Long Dark veterans) and pick it up. Or you might have taken a torch from a previous fire, in which case just pull that out and light it.
Once you set it alight, you can start exploring the cave. Don’t forget to search the dead body and backpack. One of the two should have some lantern fuel, which will let you craft your own torches. This cave is pretty linear so you shouldn’t get lost. There are a few forks, but they either lead to dead-ends or back to the main path. You do want to explore it throughly though, because there are some nice goodies and side-story items scattered about.
After exitnig the cave, you will come across your first wolf.
 Walkthrough")
The game will explain the basics of wolves. As you can tell, this particular wolf is eating and focused on the dead deer, allowing you to sneak past (crouch) it quite easily. You can also try to scare it off by throwing a torch or flare, but that doesn’t always work so be careful. If the wolf attacks you, you will end up in a struggle.
Struggle Mechanic
When the wolf leaps on your character, the game will slow down and give you a short period of time to pick a weapon. At this point, all you have is the metal shard, but there are other types of weapons with various effects. For example, the metal shard will cause the wolf to bleed while hitting it with a prybar or hammer will scare it away faster. Regardless, once you’ve chosen your weapon, you enter the land of frantic button mashing. You want to try and fill the bar as much as possible until the struggle ends. If you’re sucessful, the wolf will run away yelping. If you fail, you’re character will blackout and regain conscienceness later.
Anyways, keep going past the wolf until you come to a road that Will comments on. You want to head left and follow the road, but watch out for the wolf around this area. If you hear barking, head for the nearest car to hide. You can leapfrog between cars to avoid the wolf or just scare it using a torch/flare. If you’re tired, you can also sleep inside a car. Just light a fire outside to keep warm and make sure it hasn’t blown out while you were sleeping.
Eventually you will come to a fork in the road. The right path will lead to some trailers that you can rest in if needed. Head down the left path to continue the story. You will find a church, which has a wolf out front so be careful. There are some more side-story items inside, along with some clothing and wood. You can also sleep inside.
 Walkthrough")
Keep following the road and you will come to the town of Milton. It’s very important that you enter from the road. Otherwise the game won’t register that you’ve completed the quest objective. You’re in the clear once Will makes some comments about the town looking abandoned and that smoke is coming out of one house. Enter the house with smoke coming out of its chimney.
Chapter 3: The Grey Mother
The first NPC Will encounters, and she shoots at him. Well this is shaping up to be a fruitful relationship.
The first you you want to do is go through all of the dialogue options. For some reason, the game won’t give you the first quest if you skip them. Anyways, Grey Mother won’t tell you any information until you prove yourself to her. But she has given you a map!
Important Note: You’ll notice that most of Grey Mother’s furniture has red text when you go to interact with it. This means that it belongs to her, and she won’t be very pleased with you if you try to loot or break down her furniture. You will lose “trust” with her.
“Trust” can be earned by completing the objectives given to you by an NPC or giving them items that they need. You can find a list of the items Grey Mother needs in the people tab of the journal. The numbers indicate the amount of trust you earn for each item. You can also find a list of the rewards you can earn for increasing her trust.
The first objective is to get her some firewood. If you check your journal, you’ll see that you need to get her 24 hours of burn time. This can come from sticks, reclaimed wood, etc… so there’s no real need to go chop limbs. If you explore the town, you should find enough coal and reclaimed wood to fulfill the quest. As a quick reminder:
- Stick = 8 mins.
- Reclaimed wood = 30 mins.
- Coal = 1 hour.
- Cedar wood = 1 hour.
- Fir wood = 1 hour, 30 mins.
You want to place all of the wood for her into the bin right outside her front door.
 Walkthrough")
You can’t take anything out of the bin once the quest is finished, so be sure to only put her firewood in there.
As for the hatchet she mentioned, go ahead and pick it up. It is a much better weapon against wolves than the metal shard Will pulled from his hand. There is a little shed behind Grey Mother’s house with a red toolbox. The hatchet will be on top of the box and a prybar in one of the drawers.
 Walkthrough")
Once you’ve stocked Grey Mother with firewood, she’ll tell you a little of what’s happened in the past few days and give some tantilzing tidbits about Astrid. But now she wants food before she’ll tell you more. She also suggests you go rob the gas station outside of town if you’re having trouble finding enough.
Once again, check your journal for more details. In this case, Grey Mother wants at least 8000 calories worth of food in her fridge. You should honestly be able to get enough by looting the abandoned houses of Milton. Grey Mother has also marked the locations of several deer carcasses, if you need more food but don’t want to break into the gas station.
If you’re really desperate, go for the gas station. The only penalty seems to be that you gain less trust with Grey Mother (+5 vs +10). To get there, just turn left after leaving Grey Mother’s house and follow the road out of town. The station will be on your right. You’ll need a prybar to open the door.
Grey Mother is quite pleased with Will, and she drops some more information about Astrid. But it doesn’t sound good. Unfortunately, she clams up again. At this point, you have to let her “rest” for a while. This is a good time to do side quests, increase Grey Mother’s trust, or finish looting Milton. You’ll know it’s time to progress when your map shows a giant exclamation mark over Grey Mother’s house.
So it seems Astrid may have left town via the tunnel. But all the talk of strange men is a little disconcerting. Will’s next mission is to go check out the tunnel and report back to Grey Mother. This is pretty easy; just follow the road past the gas station and you’ll find a wrecked bus. A cutscene will play, and it’s back to Grey Mother for Will!
Well that’s sad. I’m starting to like Grey Mother…she even makes you magic soup that stays hot forever. Anyways, time to let her rest again. Like before, just wander around until the map shows an exclamation mark over Grey Mother’s house.
…Okay…I’m getting the distinct impression that Grey Mother and Will are talking about completely different things. But let’s humor her (if only for the sake of story progression). The farmhouse has been marked on your map so it should be easy to find. Don’t forget to check the mailbox for a potential rifle round!
Unfortunately, it’s locked. The key is in the truck off to the left of the farmhouse. Once again, Will makes some comments about his current quest, letting you know you’re on the right track.
 Walkthrough")
As usual, there’s some pretty nice stuff in here. To find the deposit key, you need to search the urn on the fireplace.
 Walkthrough")
You’ll also find a locked box in the office. The key to this can be found on the dead body in the shed outside. But be careful; there’s a wolf chowing on it, and he’s not going to give up his meal easily. Prepare for a struggle.
 Walkthrough")
 Walkthrough")
Anyways, now you need to use that key. If you haven’t started the Milton Deposit Box quest, now is as any good a time as ever. The deposit boxes are found in the vault at the back of the bank. The vault code is found in the bank manager’s house (the one with the Canadian flag), and you need his house key to get in.
Go ahead and open the deposit box. You get another box, which is for Grey Mother. Head on back to her place.
…and the box contained pearls? This isn’t making any sense, and Will is completely fed up. Fortunately (or unfortunately), Will is bound by linear storytelling and thus does not just march right out of town. Talk to Grey Mother, and she’ll tell you to give the pearls to LIly, who is at the graveyard. Head on back to the church, and enter the graveyard across the road. You’ll get a sad cutscene. Then it’s back to Grey Mother for your final cutscene.
Chapter 4: Paradise Lost
Well that was sad. I don’t know about you, but I really like Grey Mother. For those who just wanted to steal her rilfe from the get-go, take solace in the fact that you don’t have to deal with her anymore.
Anyways! Head upstairs and unlock the chest. You’ll get some nice items and the all important mountaineering rope. Now Chapter 4 officially begins! Take any magic soup left out for you and use Grey Mother’s magic fire to do any last minute cooking.
Time to head out! Take a right after passing the Milton gate (the picture on the right shows the path you want to take, looking back at Milton) and eventually you’ll see a hiking sign.
 Walkthrough")
 Walkthrough")
Keep going, past the ranger station until you come to a picnic area. You want to attach your mountaineering rope to the rock pictured below.
 Walkthrough")
 Walkthrough")
As Will says, you won’t be coming back to Milton once you go down the rope. So finish up your remaining side-quests, max out Grey Mother’s trust, etc…
You can’t go down the rope if you’re encumbered, so this is a good time to practice inventory management. The next area is pretty generous with the items, so don’t worry too much about messing up. Make sure your clothes are ~100% condition (cloth is heavy), and don’t leave the hatchet behind! Coffee is also nice to bring. When you’re ready, click on the rope and head down the cliff.
Ouch. Time certainly took a toll on that rope. Well, gotta move foward. Keep following the climbing area signs and you’ll eventually come across another mountaineering rope.
 Walkthrough")
Since you’re climbing up instead of down, this trip will exhaust you much more. Make sure your tiredness bar is at least half full (completely full is best). Drink any coffee if you have it, and start climbing the rope.
Once you’re at the top, it’s pretty much a straight shot. If you’re not sure where to go, head for the waterfalls. You’ll have to climb over the fallen tree to advance. After some time, you’ll come across a cave. Like the previous one, this cave is linear; any detours will lead to dead ends in short order. So keep going until you find the cave exit. One more cutscene and then credits!
Important Note: After the credits (you can skip with ESC), you’ll be brought back to the main menu. You want to select “Wintermute” and then “Load” to access the save you just finished. If you select “New” and then Episode 2 instead, you’ll be starting fresh and not have any of the nice items you collected in Episode 1.
Light Up the Night
You will unlock this side quest after earning 175 trust with Grey Mother. Will wants something to defend himself from the wolves. While Grey Mother isn’t going to give him her rifle, she does know that one of the neighbors owned a distress pistol in case of emergencies. However, he seems to have hid it, to prevent the kids from shooting themselves in the eye.
You can check your map to learn approximately which house the flare gun is in (see the picture below for the exact house). Once you enter, Will will make a comment about old McDermontt hiding the gun, so you know you’re on the right track. The gun is under the rug in the bedroom.
 Walkthrough")
 Walkthrough")
Milton Deposit Boxes
There are a few locked deposit boxes at the bank. One is unlocked during the story, but you have to find keys for the others.
First of all, you need to gain access to the deposit boxes. They’re locked in the vault at the back of the bank, and Will won’t even attempt to unlock it without the combination.
 Walkthrough")
To get the combination, you need the bank manager’s house key. It can be found in the top drawer of the office on your right when you first enter the bank. This key unlocks the house with the Canadian flag outside.
 Walkthrough")
 Walkthrough")
Once you’re in the bank manager’s house, search the bedside drawer on the right. You’ll find a piece of paper with the vault code on in. Then just head to the vault and unlock it.
Below is the map Grey Mother gives you for Milton. I’ve labelled each of the deposit keys in different colors, as well as a suggested path to said key in the matching color. For more detailed descriptions, look below.
 Walkthrough")
Deposit Box #7
This key is in the below house of Milton. You’ll find it in a plastic container, under the bed.
 Walkthrough")
 Walkthrough")
Deposit Box #13
This key can be found on a corpse outside of Milton. Head out of town as though you’re going to the farm. Once you reach the wooden bridge, turn left and follow the river. The corpse will be on your right, up on the snow bank. Look for circling crows.
 Walkthrough")
Deposit Box #15
You’ll find this key during the story. It’s in Paradise Meadows farm. Check the main story walkthrough for more details.
Deposit Box #20
The key to this box is in the blue truck on the outskirts of Milton.You want to leave Milton as though going to the gas station, but head off the road to your right. The key will be on the dashboard of the car.
 Walkthrough")
Milton Supply Caches
You must have activated the relevant mission in order for the cache to appear. To check if the cache mission is active, check your journal and click on the “side mission” tab.
 Walkthrough")
Medical Supply Cache
You can unlock this cache by raising Grey Mother’s trust to 125. She’ll tell you that the Millers have some medical supplies hidden in their backyard. If you check the map, you can see that the Miller live right in on the edge of town, near the gas station. The cache can be found behind the second-to-last house on the way to the gas station.
 Walkthrough")
 Walkthrough")
Church Supply Cache
This is unlocked through a note found in the below car. It should be on the floor of the passenger seat. The cache is behind the church on the way into Milton, near a fallen tree.
 Walkthrough")
 Walkthrough")
Radio Tower Cave Cache
To unlock this cache, you need to pick up the below note. It can be found in the little house up on a hill, somewhat separated from Milton.
 Walkthrough")
 Walkthrough")
The cache itself is hidden in a cave near the radio tower. The tower should already be marked on your map, and there are little signs along the trail up.
 Walkthrough")
When you reach a big, knocked-over tree, go under it. The cave will be down the slope. The cache itself is hidden in the big rock at the very back of the cave.
 Walkthrough")
 Walkthrough")
Episode 2: Luminance Fuge
Although Will manages to drive off the Old Bear, the trapper, Jeremiah, is badly injured. Will retrieves medication strong enough to help the old man and fixes the rifle he broke while shooting the bear. Jeremiah hasn’t seen Astrid, but offers to teach Will the skills necessary to survive long enough to find her.
Chapter 1: Risk of Infection
The Trapper needs medicine, and the stuff Will has on hand isn’t good enough. Fortunately, there’s an abandoned hydroelectric dam that probably has some prescription-level stuff.
As before, the map will show you exactly where to go. I personally like to follow the railroad to get to the Dam, but feel free to get there however you want. There will be some wolves, but you can scare them away by lighting a fire or flare. You can also hit them with your weapon.
Once you reach the Dam, you’ll find that it’s properly locked up, as any industrial area should be. To get in, you need the fence key. It can be found in the left trailer (when facing them), in one of the lockers.
 Walkthrough")
 Walkthrough")
Head on inside. A cutscene will play once you walk forward a bit, and then it’s time to find medication. Go ahead and loot the place while you’re here, but don’t bother going down the stairs; it’s blocked off in story mode.
If you didn’t work on Grey Mother’s trust in the previous episode, you can get a flare gun here. If you did get one, go ahead and open the case anyways. There are some extra flare shells, which are always useful.
 Walkthrough")
Anyways, let’s continue with story objectives. To save some time, go ahead and search the body in the bathroom; he’ll be holding an office key.
 Walkthrough")
When you leave the bathroom, there will be a stairwell on your left. Head upstairs and you’ll find the office area. And how lucky for Will, there’s a red locker here that just screams “medical supplies”. On the unlucky side, it’s locked. Head to the office in the back (with an actual door instead of cubicles) and unlock it with the key you found on the dead body. You’ll find the key to the medical locker in the desk drawer. Grab the medical box and head on back to Trapper’s when you’re ready.
 Walkthrough")
 Walkthrough")
Chapter 2: You Fix My Rifle?
Well we’ve learned the name of the mysterious Trapper. Unfortunately, it seems Will managed to break Jeremiah’s rifle while driving the bear off. Thankfully, Will can fix it, but it’s going to be a long trip.
When you’re ready, head on out. Despite what Jeremiah said, there’s no risk of running into the Old Bear (although regular bears are still roaming about). The map will show you that you need to go down the railroad again, this time in the opposite direction.
You’ll leave Mystery Lake via the rail tunnel and enter a brand new region: Forlorn Muskeg. Like Jeremiah said, just keep following the railroad. Forlorn Muskeg is full of thin ice, so you risk a dunking in icy water if you leave the railroad. If you get a “thin ice” warning, quickly back up the way you came to avoid falling through.
Once you reach the other side of Forlorn Muskeg, you’ll leave that region and enter the Broken Railroad region. At this point, you can check your map and see the Maintenance Yard labeled with an exclamation mark. Keep following the railroad until you run into a landslide, which makes things a little more difficult.
Head to the right and you’ll come across a frozen lake. you want to cross the fallen tree up onto the ledge. You can then follow the path to bypass the landslide.
 Walkthrough")
 Walkthrough")
 Walkthrough")
Once you find the railroad again, just keep following it until you see some trucks. Take a right, and the Maintenance Yard will be straight ahead. Will the main door is locked, there is a convinently open side door you can get into.
 Walkthrough")
 Walkthrough")
Once you’re inside, take some time to explore the area. A cutscene will trigger when you enter the area below.
 Walkthrough")
Here is our first Forest Talker! If you explored the Dam thoroughly, you might have seen some notes about the group. Turns out they were meeting at the nearby hunting lodge, and Will decides to investigate. But we need to fix Jeremiah’s rifle first! To do so, just interact with the machine pictured below. Pick up the bolt cutters too; you’ll need them.
 Walkthrough")
Now, to the Hunting Lodge! Before you leave, make sure to rest and fill up your fatigue bar. Once you exit the building, a cutscene will play and Will passes out. When he comes to, things are…strange.
 Walkthrough")
Meet the aurora wolves! As Will notes, they seem to be scared of electrial lights. And luckily for us, the aurora overhead seems to have fixed all the electrical objects. Now, you have two options:
- Go back into the Maintenance Yard building and sleep until morning. The aurora only happens at night, so do this if you don’t want to deal with the aurora wolves.
- Head to the Hunting Lodge right now. Convinently for us, there’s a line of streetlights that lead directly to the Lodge.
I would recommend option 2. It’s a good time to learn more about the aurora with very little risk. If Will dies on the way there, he just respawns at the Yard (versus the permadeath of Survival Mode). If you choose option 1, be careful. There are open wires in the building, and they will burn/kill Will if you touch them.
To get to the Hunting Lodge, turn immediately left after leaving the Yard and start making your way behind the building. You’ll eventually come across a frozen lake, and there will be a gate in the distance.
 Walkthrough")
This gate seems to be locked, so hopefully you brought the bolt cutters witth you. If not, head back to the Yard and pick them up. From there, just follow the path up the hill to reach the Lodge.
 Walkthrough")
Once you enter the building, your missions will update. Now you need to find more information on the Forest Talkers and locate some items. Helpful item #1 is a hunting rifle, found on a rack above the fireplace. Helpful item #2 is a flashlight, found in the basement of the Lodge.
 Walkthrough")
 Walkthrough")
Once you pick up the flashlight, a phone will start ringing. You can try to answer it, but it will stop the moment you approach the phone box (found near the door). Anyways, last item on the list is Forest Talker memo. You find it in the basement as well, on a metal desk. Picking it up will also unlock the Forest Talker cache side-missions.
 Walkthrough")
Anyways, Will is now ready to return to Jeremiah. Make sure to search the Lodge thorougly; there are a couple boxes of ammunition as well as some loose rifle cartidges. You can leave right away and practice using the flashlight to keep the wolves at bay, or you can wait until daytime so you can explore the surrounding area more. Regardless, head on back to Trapper’s for a cutscene and the end of Chapter 2.
Chapter 3: Survival School
After fixing Jeremiah’s rifle, Will attempts to hightail it out of the region. After all, Astrid is still out there. But Jeremiah has plenty of information about surviving in the wilderness that Will is going to need if he’s to survive long enough to actually find her.
So talk to Jeremiah and select the “Survival School” option. You have the option to learn about the following skills:
- Hunting
- Fishing
- Clothing
- Harvestable Plants
You can complete these missions in any order. For this guide, we’ll be going in the order listed above.
Hunting
To complete the hunting lesson, you have to gather 10.0 kg of deer meat for Jeremiah. He’ll mark the location of the Unnamed Pond on your map, so head out there with your rifle. Once you see a deer, crouch and slowly approach the animal. You can shoot the rifle while crouching, so there is no risk of spooking the animal too soon.
Now there are two outcomes to hitting an animal. If you’re lucky, it will be a ‘critical hit’ and the animal will drop dead immediately. However, it’s more likely that you will just injure the deer. You can tell if the animal is wounded by the blood spray and trail that it leaves as it runs away. Like Jeremiah said, follow the blood trail and eventually there should be a dead animal at the end.
After harvesting your deer meat, place it in the bin outside Jeremiah’s house. It can be cooked or uncooked (uncooked is heavier but smellier), however you can’t take it out once the quest is registered as complete. Talk to Jeremiah to complete the lesson.
Fishing
You need 5.0 kg of fish to complete this lesson. Head over to the Camp Office, which should be marked on your map, and loot the place. If you didn’t have any fishing tackle before, then you’ll have it now. You can also craft extra fishing tackle using a hook and line. You might also want to collect some wood.
Once you’re ready, head out onto Mystery Lake. You’ll see some green shacks, which are fishing huts. Head inside one, and there will be an ice covered hole that you can break open with a hatchet/prybar/knife. Light stove if it’s cold, and start fishing. You want to place your fish inside the bin like you did with the deer meat.
Clothing
This lesson is all about repairing clothing. Jeremiah will give you his bearskin coat (no you can’t wear it sadly) and tells you to repair it for him. You have to go to the Lookout, where he’s left a bear hide drying. Just in case, bring either a sewing kit or fishing tackle.
To get to the Lookout, head down the railroad tracks, past the Camp Office but before the Derailment. On your left, there will be a clearing, usually filled with rabbits and/or deer, that you should enter. If you look to your right, you should seem some trees with lichen. Head up the hill, past those trees and you will eventually see the fence that marks the path up to the Lookout.
 Walkthrough")
The bearskin will be on the floor of the Lookout, so pick it up. To repair the coat, select the “action” option under the bearskin coat. There will be a repair option and a harvest option. Obviously, choose repair. Once you’re done, head back to the Trapper’s Cabin and talk to Jeremiah to give him the coat back.
Harvestable Plants
The final lesson is all about the plants that are capable of surviving the harsh Canadian winters. All you have to do is gather a certain number of each plant–look in the journal–and place them in Jeremiah’s bin.
The plants are as follows:
- Old man’s beard lichen–Craft into a wound dressing that will treat infection risk.
- Rosehips–Craft and then cook into a tea that will act as a painkiller.
- Reshi mushroom–Craft and then cook into a tea that serves as an antibiotic.
- Cattails–the stalks can be eaten while the heads serve as tinder.
Once you’ve placed the plants, talk to Jeremiah and trigger the cutscene.
Chapter 4: Jeremiah’s Folly
Welp, it’s time to kill the Old Bear! Apparently this is such a blood-thristy beast that it will hunt you down at the slightest whiff of blood. And Will has just cut himself on the new knife Jeremiah just gave him.
You want to equip your rifle before leaving the cabin. You might also want to undress because the bear will be waiting right outside for you. If you’re fast with the rifle, you can shoot the bear in the face and scare it off. If not, prepare to be mauled. Unlike with wolves, there is no fighting back against a bear.
Since you’ll have to hit the bear (lets call him Teddy) six times (because apperantly Canadian bears have god mod enabled) you’ll need a strategy. Now it’s important to know that Teddy has 3 “stages” of aggression:
- Stalking (he’s hanging around one of his haunts)
- Locking on Target (he slowly walks to you)
- Attacking (RUN)
To avoid getting mauled, you should wait untill Teddy locks on to you and then give him a headshot. This will usually cause him to flee the scene and, once he arrives at a different haunt go back to Stalking. You can also try to headshot him while in phase 1 or 3, but i find it more effective in phase 2.
You can also use the Flare gun. Unlike with the rilfe, a flare gun shot is guarenteed to scare Teddy away, even if you don’t hit him. The downside is that it can sometimes cause him to freak out and run off his preset game path. If this happens, you essentially have to chase him around until his pathfinding kicks back in.
If using the flare gun, wait until he’s right in front of you before shooting. This is because the game will sometimes not count the encounter properly.
Now if you check your map, you’ll see that Jeremiah has kindly marked some of Teddy’s favorite hangouts. However, he actually visits each of these areas in a specific order. You’ll know you’re in the right place because the game will pause and autosave before each encounter.
- Encounter 1: Right in front of Trapper’s Cabin.
- Encounter 2: Climb the hill to the right of Trapper’s. You should be travelling parallel to the rock wall.
- Encounter 3: Teddy will be wandering around near Frozen Creek. To get there, go to Unnamed Pond and follow the water uphill.
- Encounter 4: Near the railroad tracks in front of the Camp Office. You want to approach directly from Frozen Creek to ensure his pathfinding doesn’t glitch.
- Encounter 5: In the forest by the Logging Camp.
- Encounter 6: On the outskirts of Clearcut. Be sure to follow his blood trail because the thick fog makes it nearly impossible to nagivate (I personally recommend restarting immediately if you lose his trail the fog is that thick).
Old Bear Hunting Problems
I don’t have anymore bullets!
If you’ve run out of bullets, don’t panic. As mentioned above, you can use the flare gun for the majority of this chapter. There are also caches at each of the encounter locations with bullets and some medical supplies. I have heard that these caches respawn their contents daily, although I have not personally tested it.
I completed Encounter X, but Teddy isn’t anywhere near Encounter Y spot.
This problem can occur for two reasons:
- You used the flare gun, and now Teddy is running around panicked and off his game path. To fix this, you essentially have to run around in the general area that you last saw Teddy. Once you’re close enough, he will reset and start running in the correct direction. If you’re lucky, he’ll run right past you, allowing you to start tracking him again. Don’t worry about being attacked while he’s in this state.
- Teddy is stuck in between the two enounter locations. This problem occurs because Hinterland didn’t seem to realize how easy it is to lose a blood trail in this game and they underestimated the power of online guides. Essentially, Teddy is programmed to stop at certain points and check that the player is still following him. If the player has gotten lost, Teddy stays exactly where he is. Unfortunately, this means that players who take alternative routes to the next encounter will not “push” Teddy along. To solve this, run around in the general area directly between the two encounter locations. This will get the player close enough to trigger Teddy’s forward movement.
Chapter 5: Renewed Hope
All right, Will has a game plan. Time to go break into the Dam. Like Jeremiah said, you won’t be able to get into the control room unless the aurora is in the sky and powering up all the electronics.
Unlike most of the story quests, the aurora is not scripted. That means you’re going to have to camp out near the dam until it shows up. I would recommend staying at the trailers right in front of the dam so you don’t have to dodge aurora wolves.
Because you could be waiting for several days until the game gives you an aurora, I would recommend you use the “hibernating” tactic. This takes advantage of the fact that you restore more condition during a standard 10 hour sleep than you lose from starving all day. In this case, you want to sleep through the day and look for signs of the aurora during the night. Before going to sleep, eat exactly 600 calories (Will’s calorie load is on the status screen) and drink so that the thirst meter is full.
Auroras only show up at night, in clear weather. Therefore, it is possible for an aurora to start at sundown, but then disappear by midnight. You’ll want to pass time in one hour increments during the night to minimize the chance of missing the aurora.
Once you have an aurora, head to the Dam. If you camped out by the trailers, you should hopefully run into this guy.
 Walkthrough")
A cutscene will play the moment you get close to him, where he basically waxes philosophical about the nature of the disaster. You can’t interact with him after this, but you can make use of his magic fire if you need to.
If the cutscene doesn’t play, then your game is slightly bugged. It’s not vital to the storyline, so don’t worry and head into the Dam.
You have limited time so head straight for the control room door. You’ll see a keypad next to it that Will can interact with, allowing you to enter the control room. Loot what you want and open the safe if you have the time. To progress, go to the switch box in the room and turn it on; this will allow you to use the elevator in the room next door.
 Walkthrough")
 Walkthrough")
 Walkthrough")
Of course the elevator breaks…there’s a prybar in the backpack if you didn’t bring an extra, so use that to pry open the doors. And welcome to the land of electric burns! You want to make your way to the stairwell on the left side of the room when you first exit the elevator. This will let you get up on the platforms. From there, you can cross to the other side and climb down the rope to bypass the electricity.
 Walkthrough")
 Walkthrough")
When you’re ready, leave the Upper Dam via the door.
 Walkthrough")
From here it’s a straight shot. Once you enter the turbine room, you’ll see that the path is completely blocked by wires. After passing the first turbine, look to your left to see some planks along the side of the wall. You can use these to get to a control panel that will turn off the electricity.
 Walkthrough")
 Walkthrough")
After turning off the wires, just keep going straight. You’ll come to another stairwell blocked by electricity. You can wait and learn the timing of the sparks to get past, or you can tank it to go up the stairs. Keep going and you’ll get your ending cutscene….a cliffhanger…lovely…
Lake Gunshots
This side quest is unlocked by talking to Jeremiah after fixing his rifle. Choose the “Forest Talkers” option, and he’ll mention that there were some gunshots at the Lake a few days ago. Head over to the exclamation point, and you’ll find a dead body. There’s also a blood trail that leads to one of the cabins.
Follow the trail and you’ll find a Forest Talker hiding in the cabin. They don’t trust you enough to let you inside, but they will tell you where secret Forest Talker documents are hidden. You’ve now been tasked with retrieving these plans and some hidden supplies. The Forest Talker will slide a key under the door, so remember to pick it up before leaving.
The key opens one of the trailers at the Logging Camp. To get there, you need to follow the railroad as if heading to the Dam. Once you get past the Derailment, there’ll be a large yellow sign on your left and a path that you should follow. Eventually you’ll see some trailers on your left. In the locked trailer, you’ll find this backpack with supplies in it.
Now for the plans. You can find them in the Carter Hydro Dam, hidden under a floor tile in the stairwell. Go to the bottom level and check this tile.
 Walkthrough")
Once you’ve gotten the documents and supplies, head on back to the lake cabin. When you click on the door, you’ll get an option to leave all the supplies or steal some rifle ammunition.
 Walkthrough")
If you steal the ammo, the Forest Talker will be very upset and commits suicide when you return the next day. If you don’t steal, Will is rewarded with a nice letter and some deerskin pants. So make the call based on your needs. The pants are warm but heavy, while the ammuntion isn’t too necessary given the respawning caches.
Note: Some players have been encountering a bug where the quest freezes after handing over the supplies. So Will never gets the deerskin pants and the door to the cabin remains locked.
Forge Blueprints
You unlock this side quest after raising Jeremiah’s trust, and it allows you to make your own knife and/or hatchet from scratch. While not required, this is useful for players who have struggled to find a knife or have broken their hatchets.
You can find the Spence Family Homestead, which has a forge, in the Forlorn Muskeg region. There are two ways to get there:
- Go left when you first enter Forlorn Muskeg from Mystery Lake and stick to the edges of the map. This path is longer and has a greater risk of wolf attacks, but you don’t have to worry about missing the Homestead or falling through thin ice.
- Head to the Poacher’s Camp (crashed train) and then go on a diagonal left (check the map for a better idea). You want to pick your way across the Muskeg–staying on the snow helps to avoid thin ice–until you see a hunter’s blind. From there, you should be able to see the ruins of a dock and some houses in good weather. Head there, and the Homestead will be directly in front of you.
For new players, I would suggest option 1. It’s very easy to get lost on the Muskeg and thin ice is everywhere. But if you’re in a hurry, option 2 is faster as long as you don’t get lost.
Anyways, once you get to the Homestead, you’ll see an outdoor building. There will be a workbench, a locker, a toolbox, and the forge. The blueprints will be in a metal box behind the forge. There should be enough materials around to forge both the knife and hatchet, but there’s extra scrap metal at the nearby bunkhouses and more coal in the burnt house near the Homestead (go straight when looking in the direction of the railroad).
You need a heavy hammer, scrap metal, and cloth to forge the improvised hatchet and/or knife. The heavy hammer should be in the red toolbox, and the locker will have some low quality clothing you can tear up for cloth. Before forging, you need to bring the fire temperature up to 150 degrees Celsius. If you don’t have a lot of coal, you can use wood to raise the temperature to 80 degrees first, and then use coal to reach 150.
Jeremiah’s Hideout
You unlock this quest by raising Jeremiah’s trust to 375. He wants you to burn some personal letters that are hidden in his secret bunker. Of course, this bunker is in Forlorn Muskeg…
Well back we go. The bunker is located near the radio tower. To get there, you want to go right when you first enter the region. As long as the weather is clear, it’s pretty easy to nagivate by sight. Once you get to the tower, turn so that your back is to the railroad, and head to the rocks that are a little to the right. The bunker hatch is hidden behind them.
 Walkthrough")
Will has to wait for an aurora to gain access to the bunker so you’re just going to have to wait for a bit. Auroras can happen anytime during the night, as long as the weather is clear. To ensure you don’t miss it, you want to sleep in one hour increments during the night.
When the lights in the sky appear, go inside. You will see active wires in the hallway. The letters you need are in the other room. You can do this in two ways: If you are careful, wait until morning because the wires will stop when the lights go away. If you don’t want to wait, you can walk through the wires and get hurt. You will lose a lot of health, but it is possible. If you die, you will start again from when you entered the bunker. After you go through the wires once, you can turn them off with a box on the wall. The box does not control the door.
Jeremiah’s letters are on the metal table. There are also some nice goodies inside (the clothing is the main attraction) so feel free to loot the place.
 Walkthrough")
But you do need an aurora to get out. If you tanked it, I would recommend turning off the wires and getting out that same night. Otherwise, you’ll have to wait for another aurora night. At this point, you want to practice rationing. Don’t eat unless you’re going to sleep for 8-10 hours, and make sure to fill your thirst meter with sodas and condensed milk before going for the water. As when you were trying to get in the bunker, make sure to sleep for only an hour at a time.
After you finally get it, it’s time to burn the letters. Will is such a good guy that we don’t even get the choice to read the letters so that’s the only thing we can do. You want to start a fire, but make sure not to use the letters as the starting fuel. It seems this has caused the mission to bug out in some players’ games. After the fire is lit, just go to the fuel section and choose the letters. This cannot be done in Jeremiah’s magic fire since you don’t have access to the fuel page for it.
 Walkthrough")
Hank’s Hatch
This side quest is not available until you complete Chapter 4. Once you’ve given Jeremiah the Old Bear’s Ear, head back to the Unnamed Pond. You’ll find another magic fire and a body!
 Walkthrough")
Search the body for a note and a key! This key goes to the lockbox in the Lookout. You probably found the box during the Survival School lessons, and now you have a key for it.
 Walkthrough")
When you open the lockbox, there’s a journal page and instructions on entering the prepper cache. Hank’s hatch is found behind a big rock near the logging camp. Follow the railroad to Carter Dam until you reach the Loading Area (there will be a vehicle on the tracks and a yellow sign on your left). You want to turn left, and then hug the wall next to the yellow sign.
 Walkthrough")
 Walkthrough")
Enter the combination you found in Hank’s lockbox–it’s in your notes section of the journal (4th from the top)–and you’ve completed the mission. The hatch has Hank’s body and more of his side-story, but the important part is all the food. This is a great mission to complete if you need food while waiting for the aurora.
Lake Cabin Keys
There are several cabins surrounding Mystery Lake, three of which are locked.
 Walkthrough")
 Walkthrough")
Key #1: This key is in the Forlorn Muskeg region. Search the dead body next to the radio tower.
 Walkthrough")
Key #2: You can find this key on your way to Alan’s Cave. Search the body beside the hunter’s blind.
 Walkthrough")
Key #3: This key is in the Camp Office on Mystery Lake. Check the filing cabinet on the first floor.
 Walkthrough")
Mystery Lake Supply Caches
As with the Milton supply caches, you can’t find these until you find the note/directions to the particular cache.
Alan’s Cave Cache
You gain access to this cache by finding the note on one of the office desks in the dam.
 Walkthrough")
Alan’s Cave can be found off the Eastern’s Access to Mystery Lake. Follow the river until you reach an open area filled with trees. From here, you want to leave the river (circled in red) and follow the path through the snow (black arrow).
 Walkthrough")
 Walkthrough")
Eventually you will reach a hunter’s blind. Turn left and the cave will be directly in front of you. The supply cache is near the back wall, between the trees.
 Walkthrough")
Flare Cache
This cache is unlocked by raising Jeremiah’s trust to 50. Talk to Jeremiah and choose the “Trust” option. Talk about “Flares”, and the cache icon should now be on your map.
This cache is easy to find. Just leave Trapper’s, and immediately turn around towards the wall. Hug the wall and travel as if you’re going to the railroad. There will a cave entrance to your right (heading inside will give you an option to “Leave Mystery Lake”) and the cache will be in a plastic container a little further towards the railroad.
 Walkthrough")
Clearcut Cache
To unlock this cache, find the following note inside one of the lake cabins below. It’s unlocked, so you don’t have to worry about finding the key.
 Walkthrough")
 Walkthrough")
The cache itself is at the Clearcut. You can get there by following the railroad until you reach the Unloading Area. There will be a yellow sign on your left that indicates another road. Just follow that road until you see a colorful sign on your left. Clearcut will be on the right. You can also look for the radio tower on clear days; Clearcut is in the same area as that tower.
 Walkthrough")
 Walkthrough")
The cache can be found near a tree stump between two log piles. In the picture below, you can see part of the colorful sign in the top-left.
 Walkthrough")
Rail Tunnel Cache
You unlock this cache by finding the illegible note in the Forestry Lookout.
 Walkthrough")
To get to the cache, head to the Rail Tunnel, where you leave Mystery Lake to get to Forlorn Muskeg. The cache is next ot the big rock pictured below.
 Walkthrough")
Forlorn Muskeg Cache
To unlock this cache, follow the railroad as if heading to the Maintenance Yard. However, you want to keep following the railroad past the Yard. You’ll find a note in the truck below.
 Walkthrough")
To get to the cache, head to the Forlorn Muskeg region. When leaving from the Broken Railroad region, follow the railroad but look to your right. The cache is next to the root section of the circled tree in the picture. When approaching the fallen tree, you should see a hollow tree with a backpack to your right.
 Walkthrough")
Broken Railroad Cache
This cache is unlocked by finding the bloody note next to the body in Forlorn Muskeg. You’ll find the body leaning beside the train car, on the Broken Railroad end of the Muskeg.
 Walkthrough")
In the Broken Railroad, head to the frozen lake. You want to go under the fallen tree that leads to the Yard. The cache will be buried in a snowbank, and it has bullets!
 Walkthrough")
 Walkthrough")
Hunting Lodge Cache
You unlock this cache by finding the note on the Hunting Lodge outside stairs.
 Walkthrough")
The cache itself is close to the Hunting Lodge. Head outside as if you were going back to the Maintenance Yard. In the picture below, you can see the Hunting Lodge sign in the bottom; you want to go in the same direction as the streetlamp is pointing. From there, look for the tree below to find the cache.
 Walkthrough")
 Walkthrough")
This cache has some Mukluks, so I would definitely recommend it if you didn’t get Grey Mother’s trust up in Episode 1.
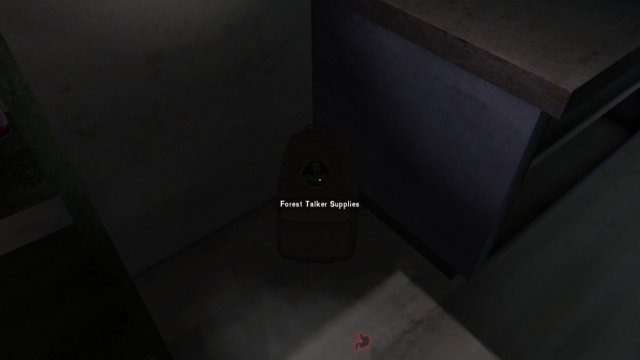
Forest Talker Suppy Caches
These caches are unlocked after Will searches the Hunting Lodge. There is one cache in each region, and you get a Steam achievement for your efforts. As usual, check your map for a rough idea of where each cache is located.
Broken Railroad Cache
This cache is right behind the Maintenance Yard building. Just head out the back and then turn left once you get past the fence. There will be some big rocks on that side, and the cache is hidden among them.
 Walkthrough")
Forlorn Muskeg Cache
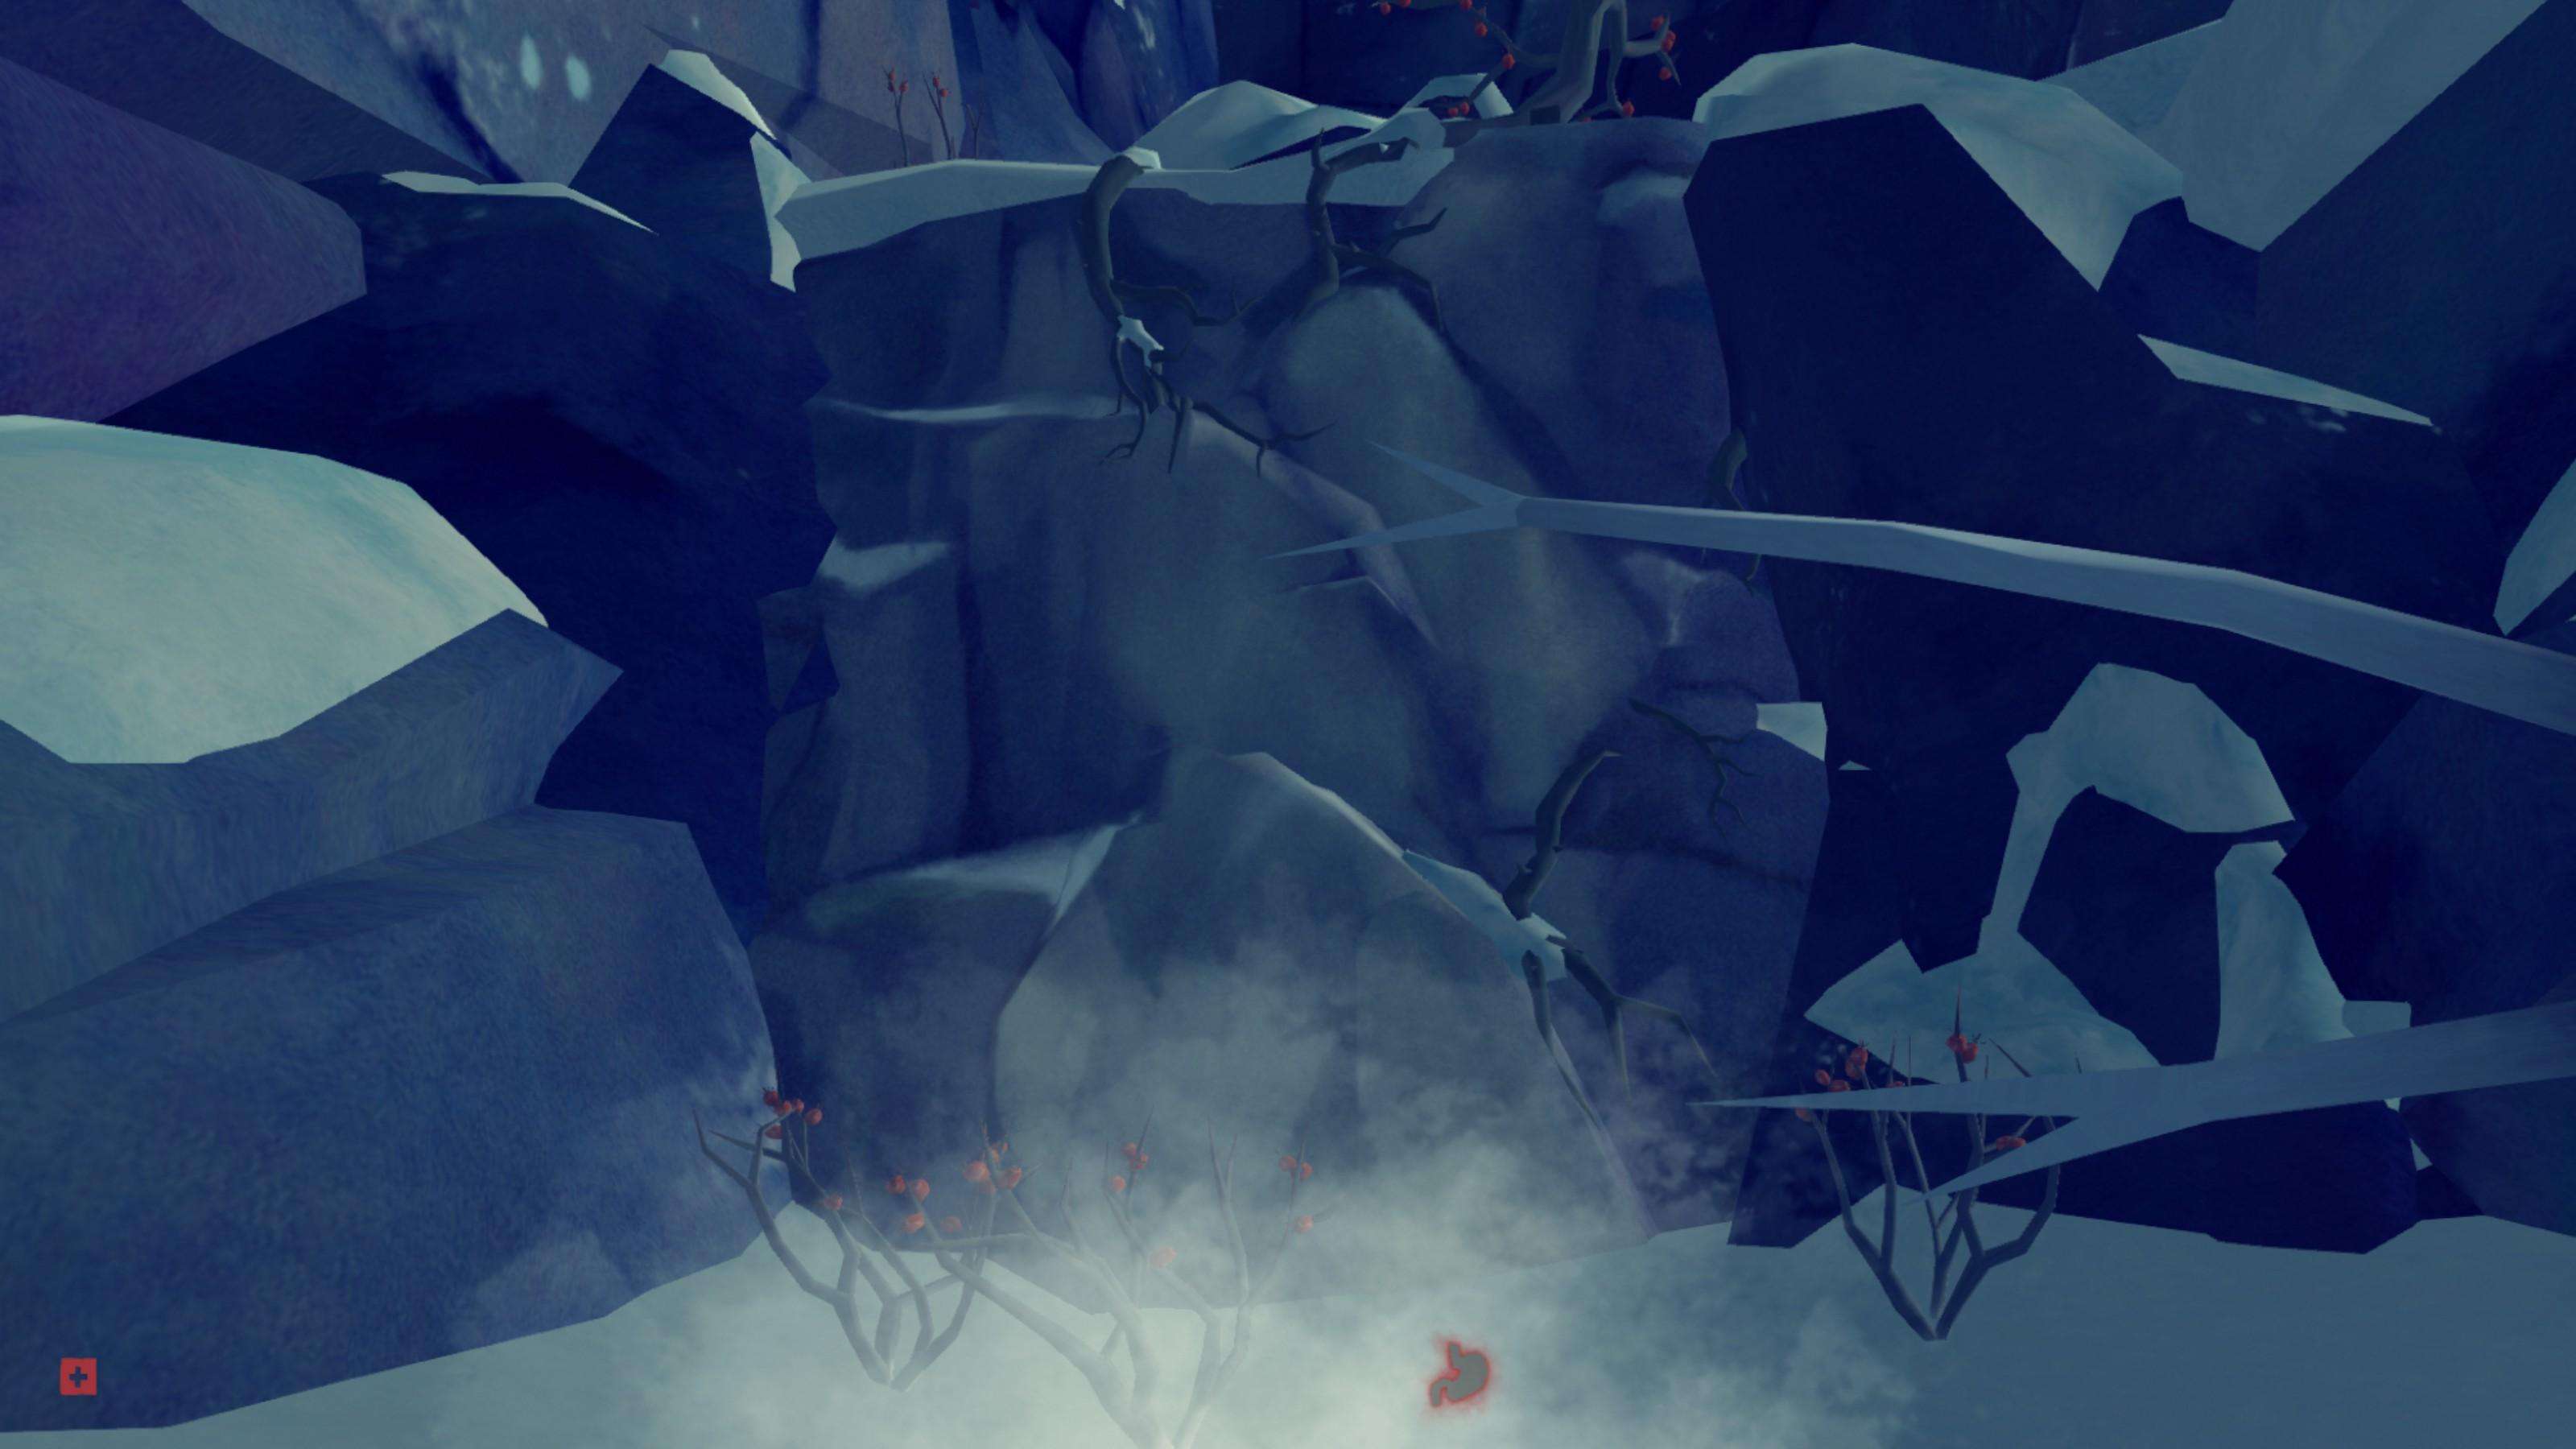
This cache is on the edge of Forlorn Muskeg. When leaving from Mystery Lake, take a left and hug the wall. Eventually, you’ll come across the below rock formation. There will be a cave to your left right before reaching the rocks below. The cache is found near the left rock in the picture.
 Walkthrough")
 Walkthrough")
Mystery Lake Cache
This cache is hidden in the rocks between the Forestry Lookout and the Logging Camp. You can see the trailers of the Logging Camp in the picture below, as well as the cache box.
 Walkthrough")


I’m struggling to defeat the old bear in his cave.
I think it is because I am not clicking fast enough, but in previous encounters (getting the radio transponders) He has run off anyway.
I think it may be related to my Mac touchpad – I am wondering if it isn’t responsive enough?
Do you need to beat the bear in a struggle, or all three struggles? Because I’ve had times when I’ve died on the fifth struggle, but I just can’t beat him.
Any thoughts, advice, tips appreciated.
About the Ep3, Chapter 4, I think it played out differently at my playthrough. During the blizzard walk to the radio tower, there was many scripted encounters with Timberwolf pack (about 5), you don’t mention it.
Another thing is the scene inside the radio building. When I got there (daytime), she first tries the radio and it fails. She says it was a waste of time, so she can just go to bed and rest before going to the mines. I go to sleep in the bed adjacent to the radio, Astrid sleeps until the custcene triggers with aurora starting the electricity inside and Astrid using the radio.
Just wanted to say I don’t usually play with guides, but I made exception for this game. I’m going with your guide and having a hell of a great time playing this game this way 😉 Thanks for making it! It’s really useful! 😉
About Joplin’s Shelter Raid quest start location: In my Hardened Survivor game backpack and corpse was at Derelict Cabins, east side of the map.
I’m pretty sure the Rabbit Snare side mission for episode 2 is not in the game anymore, checked the whole hunting lodge twice and didn’t see the book or snare anywhere.
This was my guide all the way and its fantastic. Many times I wished you were more specific when looking for something, but that just made it more interesting for me. Many thanks for a lot of enjoyable hours.
Very nice guide! As a suggestion, adding the initials of the region when naming places, could help a lot: i.e. Unnamed Pond (ML). And also, not sure if I run into a bug. I was doing the Sidequest of the miystery lake supply caches on episode 2, but the illegible note in the lookout just isnt’t there. I checked my inventory in case I had picked it up on a previous visit, and is not there either. That caché isn’t active on sidequests either, so I guess I’m stuck.
“When playing in “green” or “capable”, the wolves will sometimes run away instead of attacking”. Misleading. With Green wolves often flee when you have equipped stone.
awesome guide, hope you update for act 4. can confirm the blizzard does dissipate in act 3 after a bit. was about to give up on some side quests and it ended
can confirm distress pistol spawns by the corpse when you’re on your way to the power plant (part 1) in episode 4 on hardened survivor 🙂 thanks!!