
Everything you need to know before you start, based on common questions I saw during the game.
Contents
Guide for New Players
Intro
I put in about 100 hours into the demo and got a pretty good grasp of what was offered. Most of my knowledge so far deals with the Royal Woodlands, no Harpies, and the first three levels. Now that the game is out, I’ve been playing to see the rest of the game and I’ll add my tips and tricks as I got along.
As it stands, I recommend any new players to stick to the Royal Woodlands themselves as it’s the most straight forward. Most of this information is to get you on your feet. I didn’t bother with anything above settler during the demo since the level cap was at 3. Maybe I’ll make another guide for higher difficulties once I’ve played around, but I’m willing to bet those Epic platform players might beat me to it.
This guide is lacking some photos and I just haven’t gotten it to sync right for a screenshot, so more will be added over time to this guide as I get more visual aids.
Need to Know Basics
Master Race?
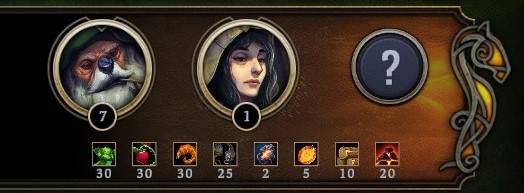
This is what I call a jackpot caravan. Beavers are my choice for best race. The simplest economy is wood to planks to building materials and beavers have a chance of doubling that all along the way. Humans are my second go to as they give a great hearth bonus (See below) and run most of the farms that usually end up being a key piece to surviving.
Hearth Bonuses

Each race gives a different bonus when working the hearth.
- Humans – 25% Slower Impatience (My favorite).
- Beavers – 25% Slower burn rate on fuel (Stuff burns longer).
- Lizardmen – +1 Global Resolve.
- Harpies – 5 Additional Carry for workers.
Modifiers
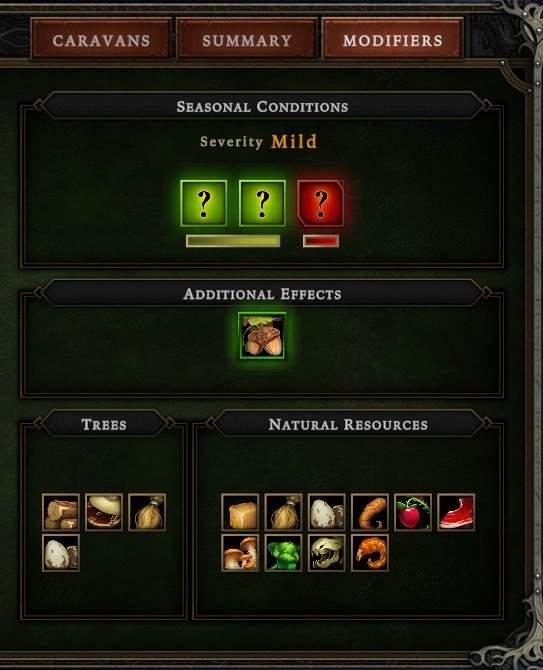
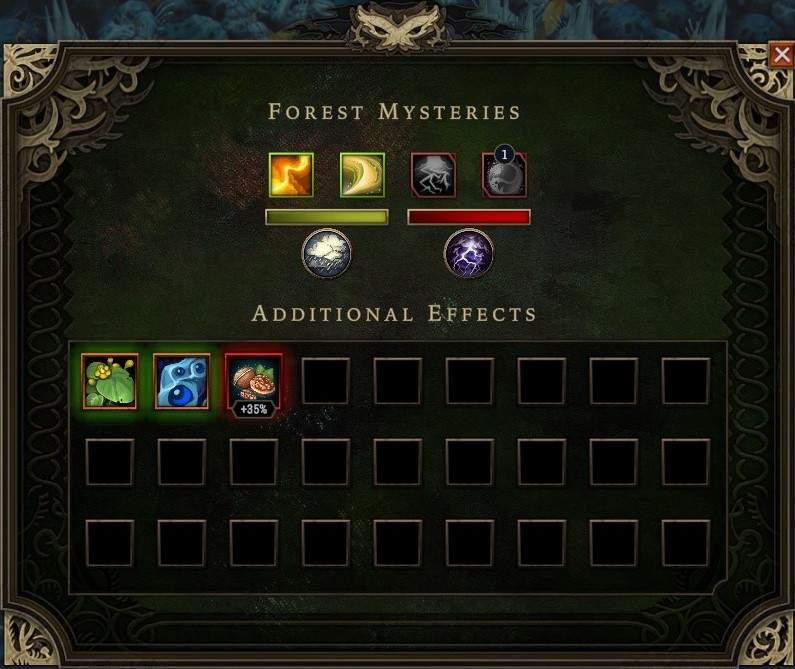
Modifiers, what are they? A lot of people seem to ask, “Why is everything going horribly wrong?” Well, they either help you or hinder you. Anything that helps, will be only during the ‘Drizzle’, anything that hurts will be during the ‘storm’. Be sure to check what modifiers you get before even starting anything in the town. Some are completely negated by basic housing, others with services, and some might require clothing.
One negative you will always have is a -4 resolve per level of hostility during the storm period. The more woodcutters, more glades you open, and how old your town is all contribute to the hostility level as well as other factors. If you get lucky with your perks, you can keep the hostility down through different means and just outright avoid the negative perks.
Switching out items

Anything with arrows around an item, can be changed to something else. This is true for manufacturing buildings and events. Lots of people didn’t know this and unfortunately they resigned themselves to letting villagers die because they didn’t have incense or something.
Industry, Trading, and You
The Core Resources
There are three core manufactured resources that buildings and events all use. Planks, Cloth, and Bricks. When choosing your buildings, focus on trying to pick three stars of these three. Although, the carpenter’s building is slightly better than the lumber mill due to the ability to craft tools to open caches.
The Farms
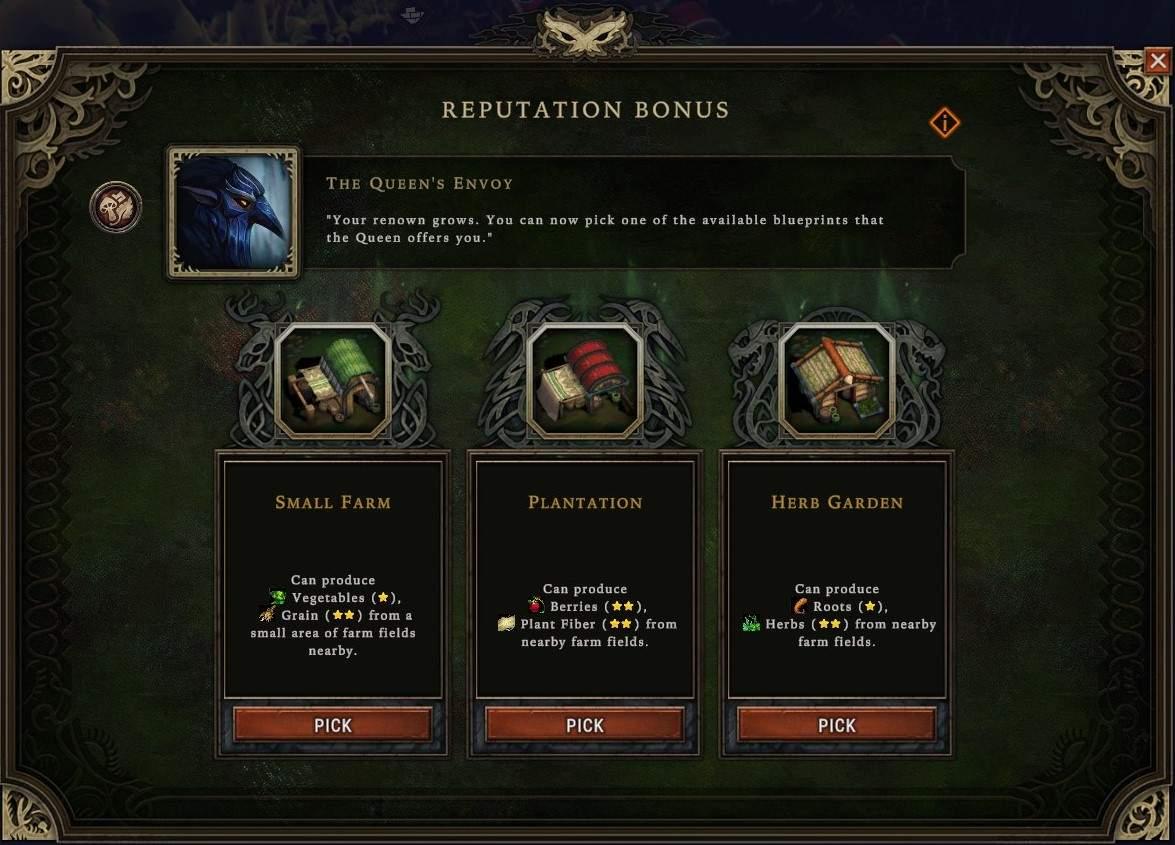
Early game, you’ll be seeing one of these. I would recommend choosing at least one of these in your initial three choices for blueprints, otherwise you might be looking at an empty field until one comes around.
Now it’s going to depend wildly on what cornerstones you get. If you get a +2 to broccoli production, get the small farm. If no real perks push you, get the herb garden. It has great synergy with the bakery or cookhouse as the roots can be made into flour and the herbs can be combined with flour to make biscuits. One of the great perk combinations I’ve seen is every 75 biscuits you get +1 Herb and root production. Get it early enough and food production just snowballs.
Notes and tips about farming
Farms have a different function during each season in a year. The core is Planting in Drizzle and Harvesting in Clearance. The Sparkle is from plowing a field during a Storm to provide a yield boost.
The full breakdown is:
- Drizzle: Planting takes place, any double yield bonus happens now.
- Clearance: Harvesting takes place (Any unharvested materials are lost when Clearance ends).
- Storm: Plowing takes place, +10% Double Yield chances are added – noted by a sparkle.
All buildings that use farm fields plow the fields during storm, plant crops during drizzle, and harvest during clearance. The sparking effect indicates that the field was plowed during storm. it lasts till end of clearance.
Clay pit and greenhouse are regular production buildings that have to be built on fertile soil, so they don’t follow this cycle.
How Dangerous is Dangerous Really?
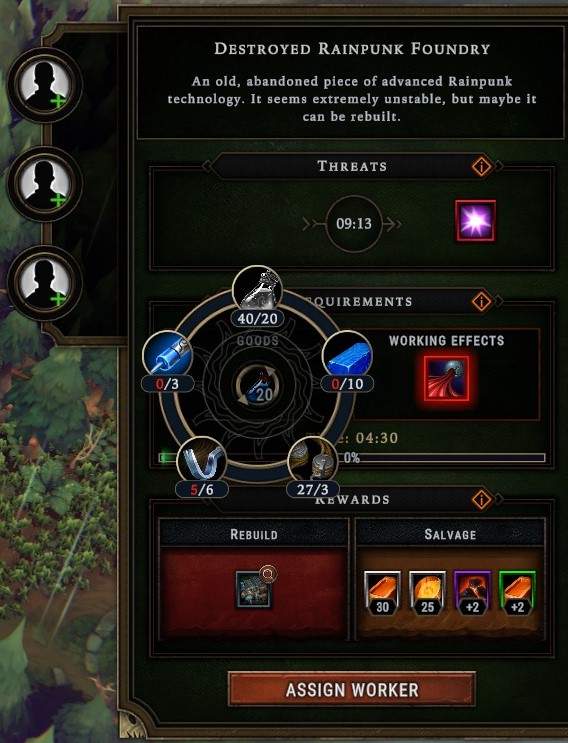
A new player, looking all these skulls over the larger glades, can understandably be intimidated. Don’t be! Most of these glade events take Resin, a fairly common/uncommon resource for the woodlands, and 2-3 citizens to handle. If not that, then one of the core resource I spoke about previously or nothing at all. Take a look at my gallery and see what I mean.

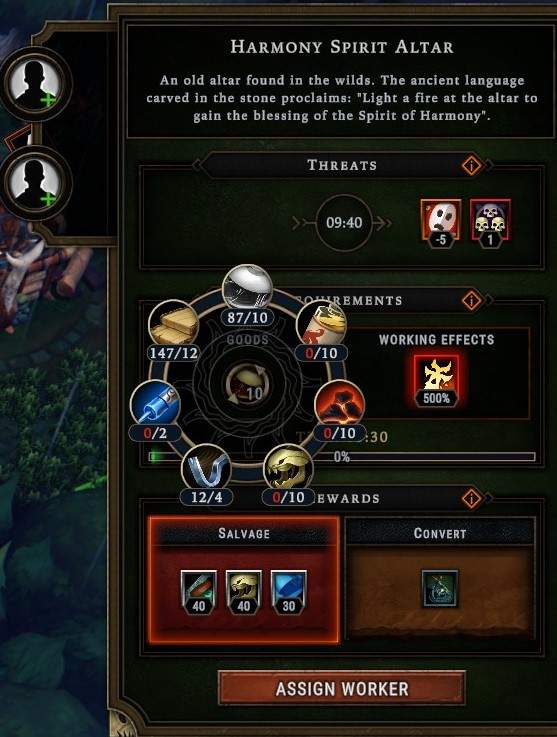

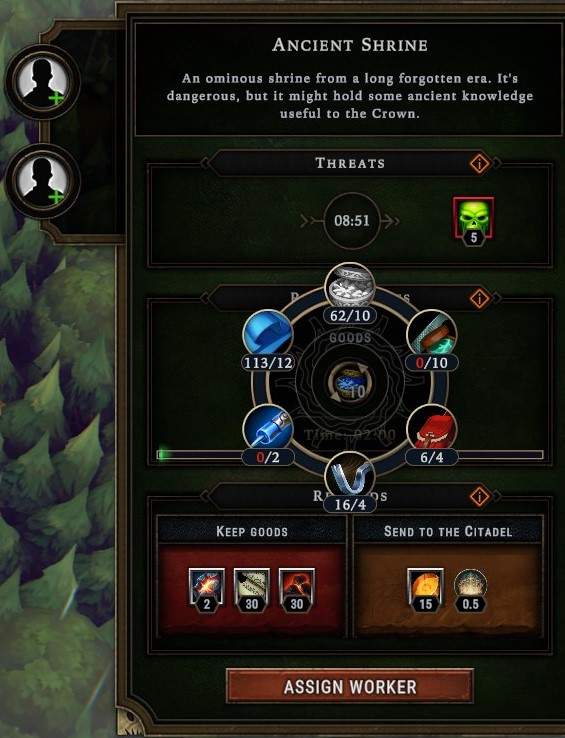


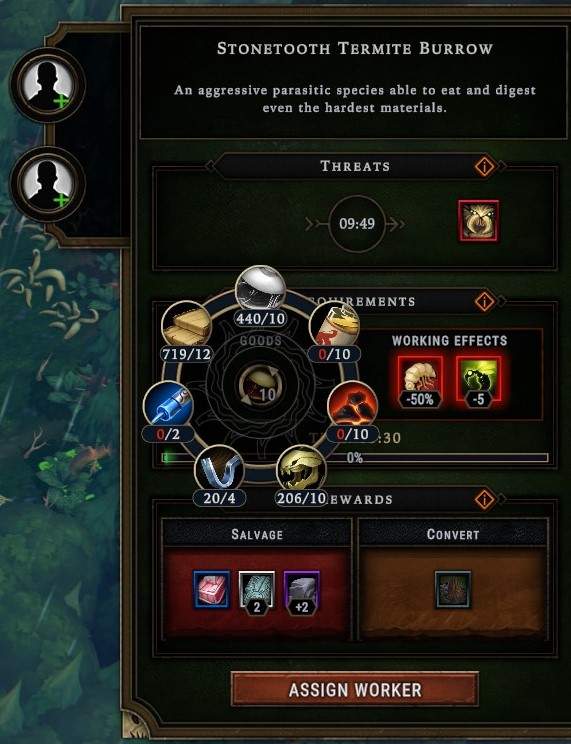


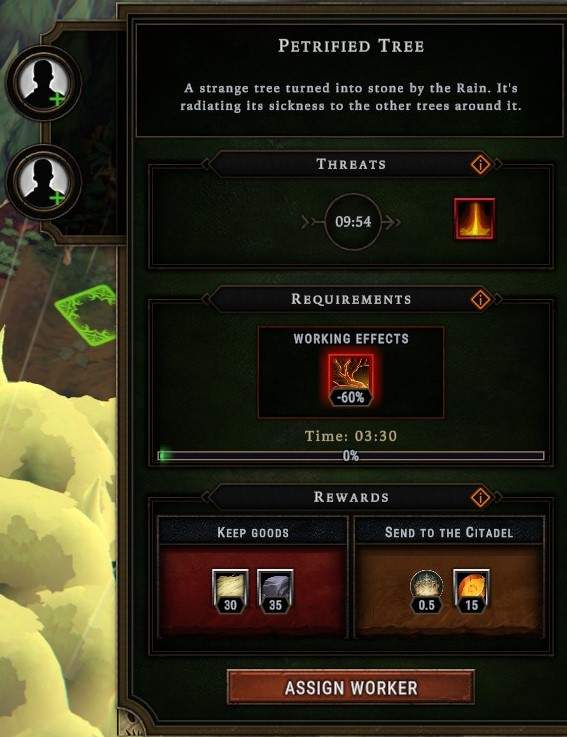
Also take note and look at the resources you can gain by solving these easy events. Sometimes salvaging the shrines can make your life easier. It’s gonna be a case by case basis for you. These dangerous glades can also have ruined buildings that can be fixed and larger than normal resource nodes.
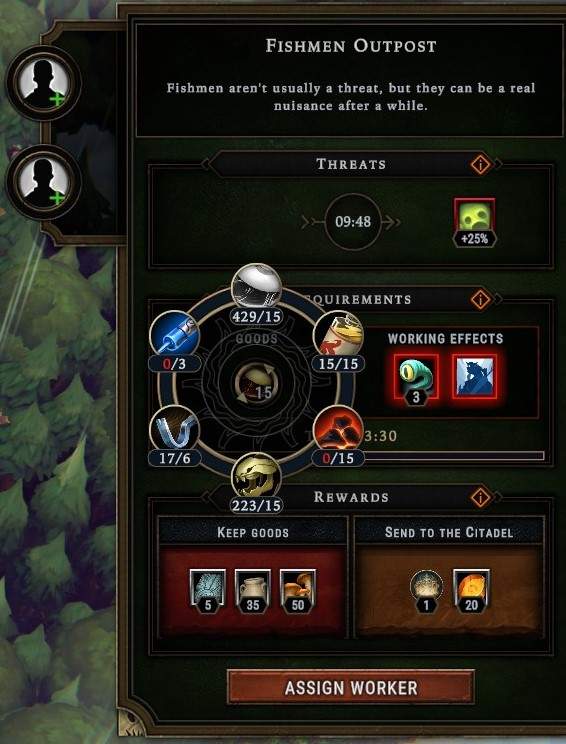
What About the Forbidden Glades?
These can be trickier, and can utilize a wider array of resources.
A Bunch of Efficient Tips
Once it is unlocked favouring races is really useful. In the first couple of years you can speed up those first few resolve points and therefore blueprints by selectively favouring lizards/foxes/harpies.
Food production chains give more units of complex food than they cost in basic foods. So once you have a strong production chain for one type of complex food disable all basic food. Even the races that don’t get the resolve bonus will then eat the complex food making your supplies go further.
Complex foods, clothing, and service goods should be used intentionally. Focus a single complex food to keep the whole settlement fed, then selectively enable additional needs only when it will keep a race out of the red, push them into the blue, or complete an order.
Delay opening the first set of orders until mid clearance, timed orders usually give the best rewards and holding off just a couple of minutes makes them much easier to complete. You might be able to finish some before the storm hits but the delay allows time to finish preparing for completing the racial resolve orders at the start of Drizzle 2 if needed.
Time cornerstone selection for when there is a trader in your village, some cornerstones grant a very strong benefit but deplete your resources when chosen and will disappear if you unpause the game. With a trader in town you might be able to sell off the resource before choosing the cornerstone, minimising the cost.
After completing a glade event workers will collect the resources from left to right, so if the rightmost goods are not useful at the minute you can unassign the workers so they can do more immediately pressing jobs, you can collect the rest of the loot later.
Know your firekeepers, the ancient hearth should be staffed by whichever race solves your biggest problem. As a default the harpie efficiency improvement is great. Human if the queen is getting too impatient, beaver if you are struggling for fuel, lizard if a race is sat at 0 resolve or exactly 1 point below its threshold, fox if taking the edge off hostility from open glades gets you down a hostility level.


Be the first to comment