
Note that Shadowheart’s story spans the entire game, and has spoilers for all Acts of the game.
Contents
Recruiting Shadowheart
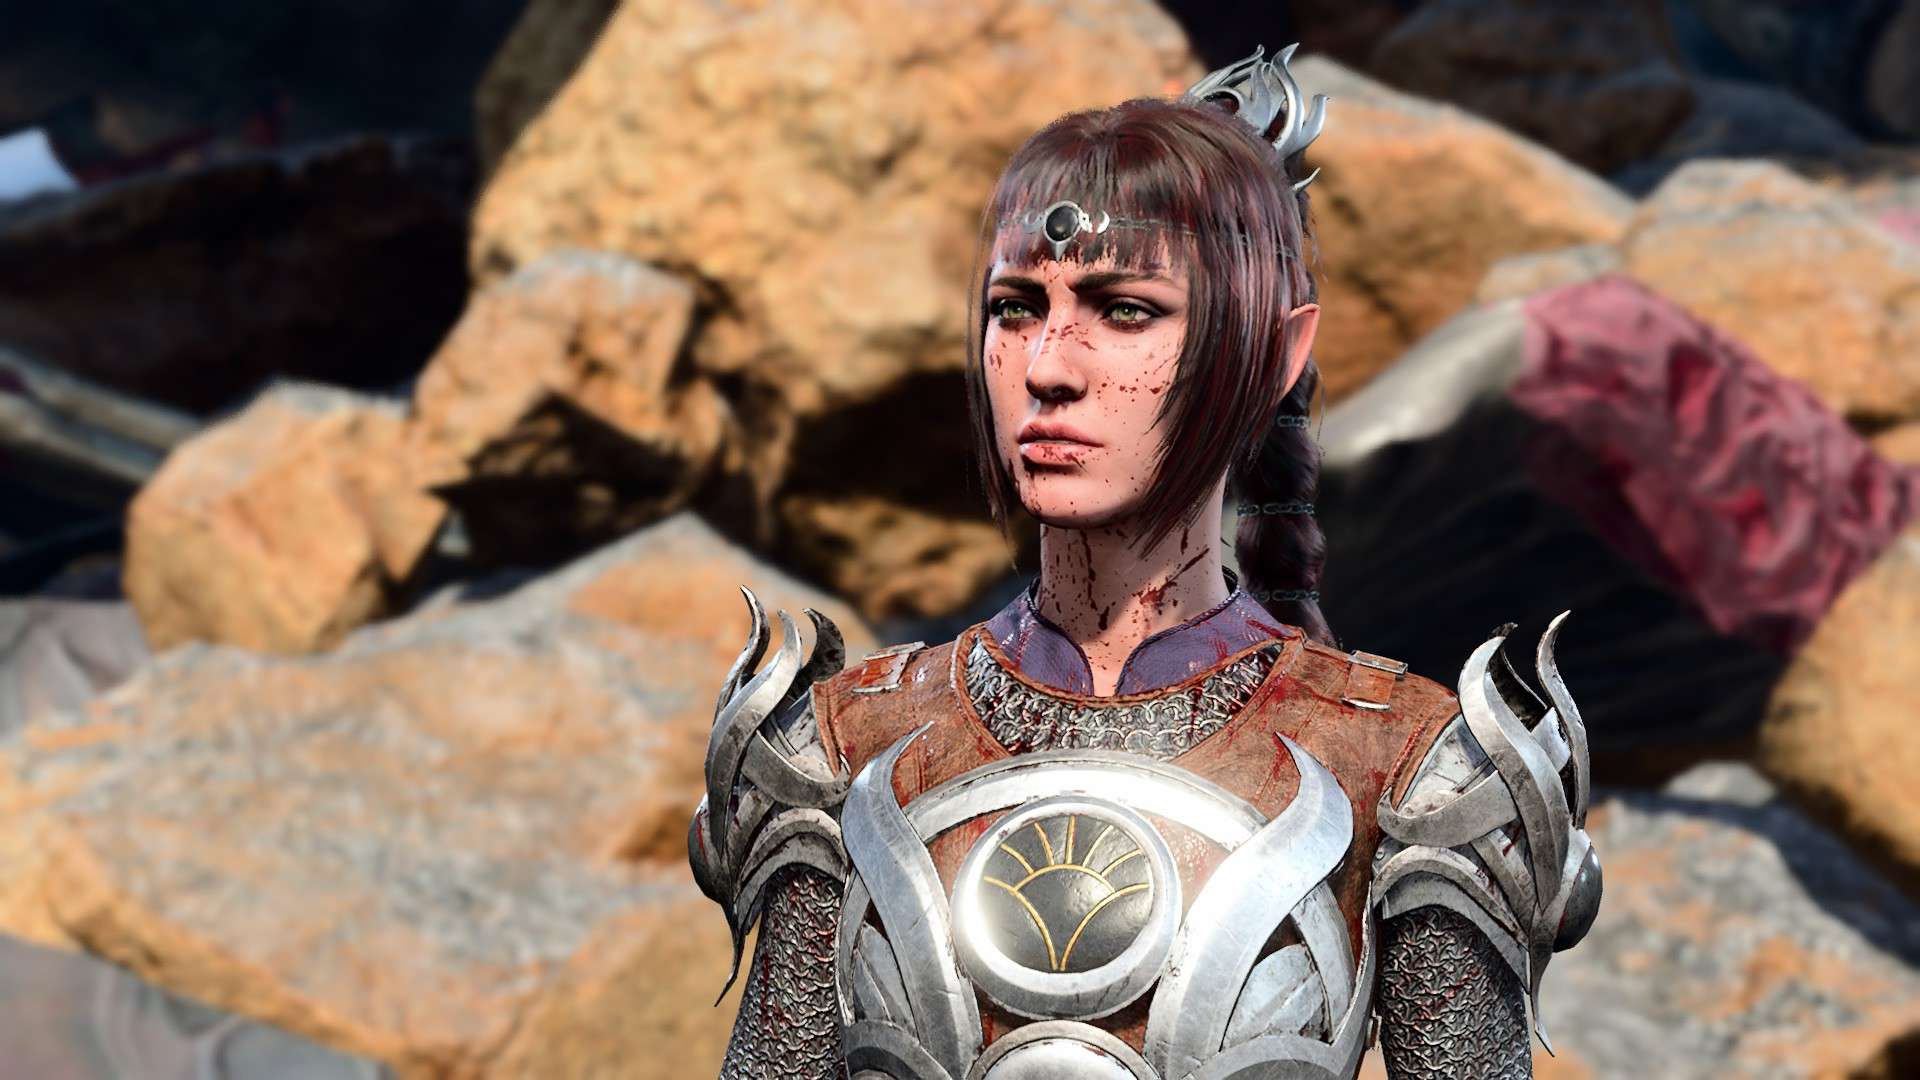
Shadowheart is awoken on the Ravaged Beach.
Shadowheart is first encountered on the Nautiloid in the Prologue, where she can be seen banging on her Mind Flayer Pod. She begs to be released, although Lae’zel thinks they are wasting time. The party can either abandon Shadowheart to her fate, or aid her as part of Rescue the Illithid’s Captive.
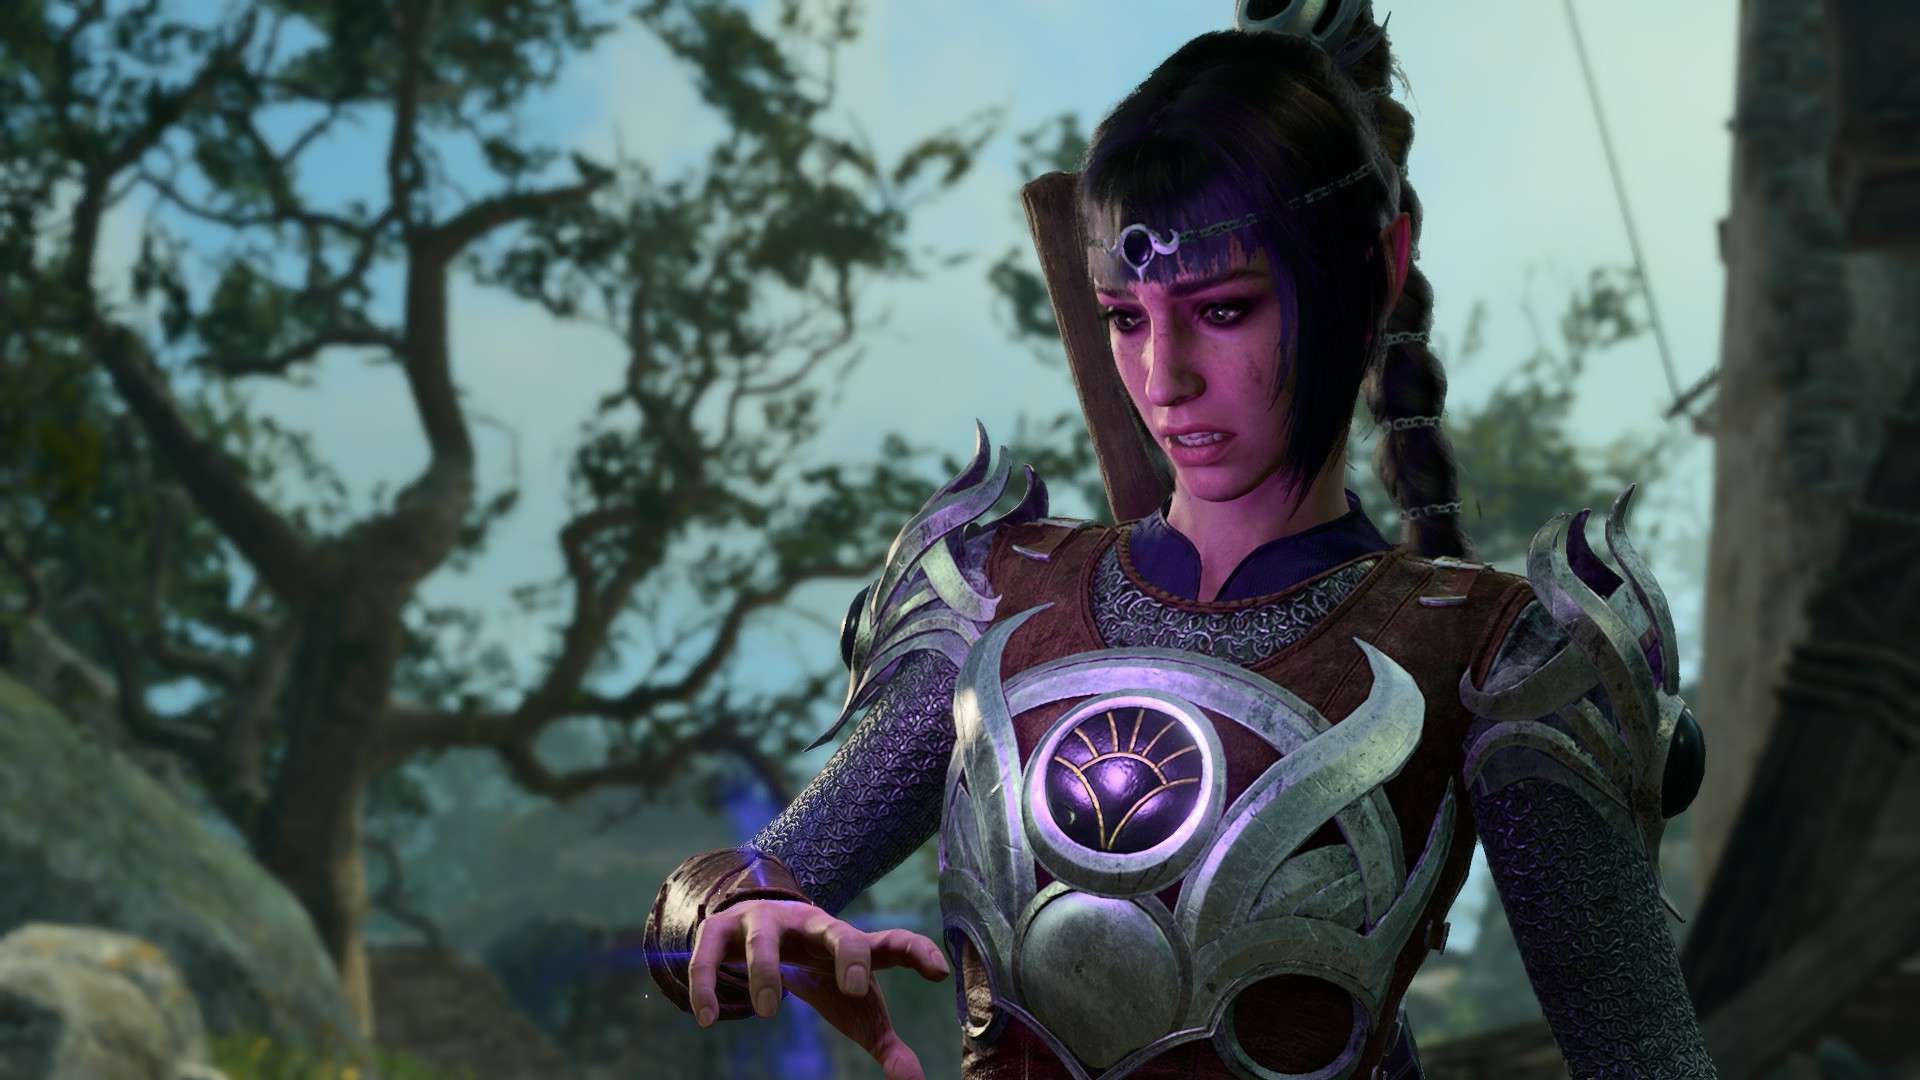
If Shadowheart is rescued, she joins the party in moving to the helm. While in the party, Shadowheart shows a distrust of githyanki, but it isn’t clear why she feels so strongly about them.
Once the Nautiloid arrives in the Material Plane and crashes on the Sword Coast, Shadowheart can be found unconscious on the Ravaged Beach (X:273, Y:223) if she was rescued or banging on the door to the Dank Crypt (X:285, Y:305).
If the party either ignores her or refuses to let her join, she appears yet again in the Druid Grove. Lastly, if she has still not been recruited, she’ll appear in either the Goblin Camp or the Mountain Pass with the Mysterious Artefact as the party is being overwhelmed by the voice of The Absolute.
At the very last chance of recruitment, Shadowheart says that the party needs the Artefact, and she needs them to avoid being hunted down for it. If the party still refuses to recruit her, she says she’ll remain in the same place until they change their mind on recruiting her, although moving on to the Mountain Pass does cause her Artefact to transfer to the player character in a Long Rest scene at camp.
Follower of Shar
While very secretive at first, Shadowheart eventually reveals her biggest secret – she is a follower of Shar. One way to trigger this is by finding the Selûnite statue in the Owlbear Cave.
Once the party reads the prayer sheet in front of the Selûnite Chest, Shadowheart interjects that they should just leave it, as it’s trash at best and dangerous at worst. If an Insight check is passed (DC 15) asking Shadowheart why she cares so much, she confesses that she worships Shar.
Shadowheart’s Mission
Shadowheart is forced to reveal more about herself at the Goblin Camp or Mountain Pass after the mysterious artefact protects the party from the voice of The Absolute. If the party says she has some explaining to do, she only says that she has a mission to return the artefact to Baldur’s Gate at all costs and that it’s very important.
If the matter is pushed, either saying there has to be more to it or asking why Baldur’s Gate, she finally admits that she is a Shar Worshipper. She was sent to retrieve the artefact at all costs and her memories were suppressed so that she wouldn’t betray Shar. She lives in the Sharran cloister in Baldur’s Gate, where she must return. She’s the only one left of her cohort who survived the journey.
A Mysterious Wound
Shadowheart suffers from a mysterious unhealing wound.
At various points during the adventure, when Shadowheart is in the party, she can feel intense pain from a Mysterious Sharran Wound. This can be encountered quite early, such as if the party chooses to save Arabella as part of Save Arabella or finding the broken Selûne statue in the Blighted Village near the windmill. Shadowheart is initially quite cagey about the wound, simply describing it as an old wound that never properly healed.
After Shadowheart reveals her Shar worship, she explains a little more about the wound. She explains that the wound is her burden to bear from Lady Shar and that she can somehow feel her influence. She still doesn’t know why she has it, assuming that Shar must have her reasons. As a Shar worshipper, she’s been taught to endure pain if it has a reason.
Conflict at Camp
Once the party reaches the Mountain Pass and finds the githyanki patrol, Kith’rak Voss interrogates the party on the location of a stolen githyanki artefact. It is polyhedric in shape and inscribed with the sacred runes of the githyanki people. Shadowheart is clearly anxious if she’s in the party, as she’s aware she carries the artefact he speaks of.
After the patrol is dealt with, an event occurs during a Long Rest at camp. Lae’zel is arguing with Shadowheart about the theft of an object owned by her people. Lae’zel demands the artefact, but Shadowheart tells her to back off and be grateful they have the artefact to protect them. Lae’zel suggests they duel at sunrise to settle things.
During the night, the player wakes up to Shadowheart holding a knife to Lae’zel’s neck. She says she’ll tell the party Lae’zel was transforming, so she put her down. If nothing is done, Shadowheart slits Lae’zel’s neck and smashes her parasite as it crawls out. The player can defend Lae’zel, causing Shadowheart to become hostile and have to be killed. Lastly, with a Persuasion check (DC 10), Shadowheart can stand down. In this case, Lae’zel and Shadowheart resolve their issues and agree not to fight again.
Shadowheart’s Memories
As part of her sacred mission for Lady Shar, Shadowheart has lost most of her memories about herself. She believes she can only regain them by returning to her cloister with the artefact. That said, Shadowheart does remember some things about her life. If, after learning about her Shar worship, the player asks Shadowheart “Tell me something about yourself besides Shar, besides tadpoles,” she says that she doesn’t know how to swim and she likes night orchids. If asked for anything more she’d care to share, Shadowheart explains that she quite literally can’t, as there is little she remembers about herself.
Shadowheart and Wolves
When faced with wolves, Shadowheart shows extreme fear and gains the Frightened status. This can happen as early as Act One, in the Inner Sanctum of the Druid Grove. There are several wolves near the entrance, which scare Shadowheart and prompt a dialogue with her. She explains that they are ravenous predators with fangs, so it’s hardly irrational for her to fear them. If the player has at least 10 approval to her, she asks that they avoid having her face wolves if at all possible, as they’ve been decent to her so far. Otherwise, she just says the player shouldn’t be surprised if she’s reluctant to face them in the future. Another area this can be triggered is the captain’s room in Creche Y’llek.
With a high enough approval, the player gains a dialogue with Shadowheart where she explains she wants to share something, as she’s never felt more comfortable with anyone than she has with the player. She says that it’s difficult to put into words and asks the player to connect their tadpoles so that she can show them what she wants to share. The memory shows a young Shadowheart as a group of Sharran worshippers corner a wolf in the woods. The leader of the Sharrans, the Mother Superior who raised Shadowheart, asked her name and took her away to be raised in the cloister.
Shadowheart has no memory before the woods and can’t remember what her name was before becoming Shadowheart. A passive Religion check reveals that a typical Selûnite ritual is to send children into the woods at night to find their way back home. If the check is passed, the player can mention it looked like she was wearing Moonstone, which is typical for Selûnites. However, Shadowheart rejects this and says she was just wearing some meaningless bauble.
Noblestalk
The party can gain a powerful curative mushroom known as the Noblestalk (X:-4, Y:-62) in the Underdark in the same area as Find the Mushroom Picker. In order to safely acquire the Noblestalk, the Bibberbang in the area must not be detonated. There are many ways to achieve this, such as using Glut to move the Noblestalk, using the Sovereign’s Key to prevent the Bibberbang from activating, jumping on high strength characters, or utilizing spells such as Misty Step or Fly.
After obtaining the Noblestalk, speak to Shadowheart and she can be offered it as a chance to regain her memories. Shadowheart as hesitant to do this, as she fears it might be considered defying Shar to try and overcome the memory suppression. However, she can be Persuaded or Intimidated (DC 12) to consume it. If she does, she regains a childhood memory of a tiefling named ‘Rennald’ who comforted her when she was being teased by the other initiates. This initiates A Familiar Face, as Shadowheart hopes to reunite with the tiefling in Baldur’s Gate.
Night Orchids
Within the Shadow-Cursed Lands, a Night Orchid (X:57, Y:179) can be found in the Ruined Battlefield, northeast of the Last Light Inn. By talking to Shadowheart, the player can remind her that she told them about the flower, and that they have one for her. She teases the player, initially saying she hopes they didn’t pick them by hand as they’re deadly poisonous. However, she was only joking – they’re safe, and beautiful. She thanks them for the gift, although she has nothing to give in return.
The Night Orchid can only be given to Shadowheart if she has previously been asked about her interests.
The Chosen of Shar
During dialogue with Shadowheart, she reveals that she has always dreamed of becoming a Dark Justiciar, but that the Mother Superior thwarted any attempts at doing so. More information on the Dark Justiciars can be found within the Inner Sanctum of the Druid Grove by examining the murals with Shadowheart in the party. This starts The Chosen of Shar to learn more about the Dark Justiciars and their history. Additionally, if the druid Halsin is saved during Rescue the Druid Halsin, he can explain more about a war that was fought between the Selunites and the Dark Justiciars.
If the party chooses to Travel through the Underdark and enters Grymforge, several signs of Dark Justiciar remnants are noticed. In the area near the deep rothe in the quest Get Past the Rubble, there are several Dark Justiciar corpses that Shadowheart can comment on. Additionally, there is a statuette of Shar that can be found on the path past the rubble, through many sets of pressure plate traps and a locked grate. The grate can either be smashed with force damage or passed with spells such as Misty Step or Gaseous Form. Speaking to Shadowheart, she can be gifted the statuette.
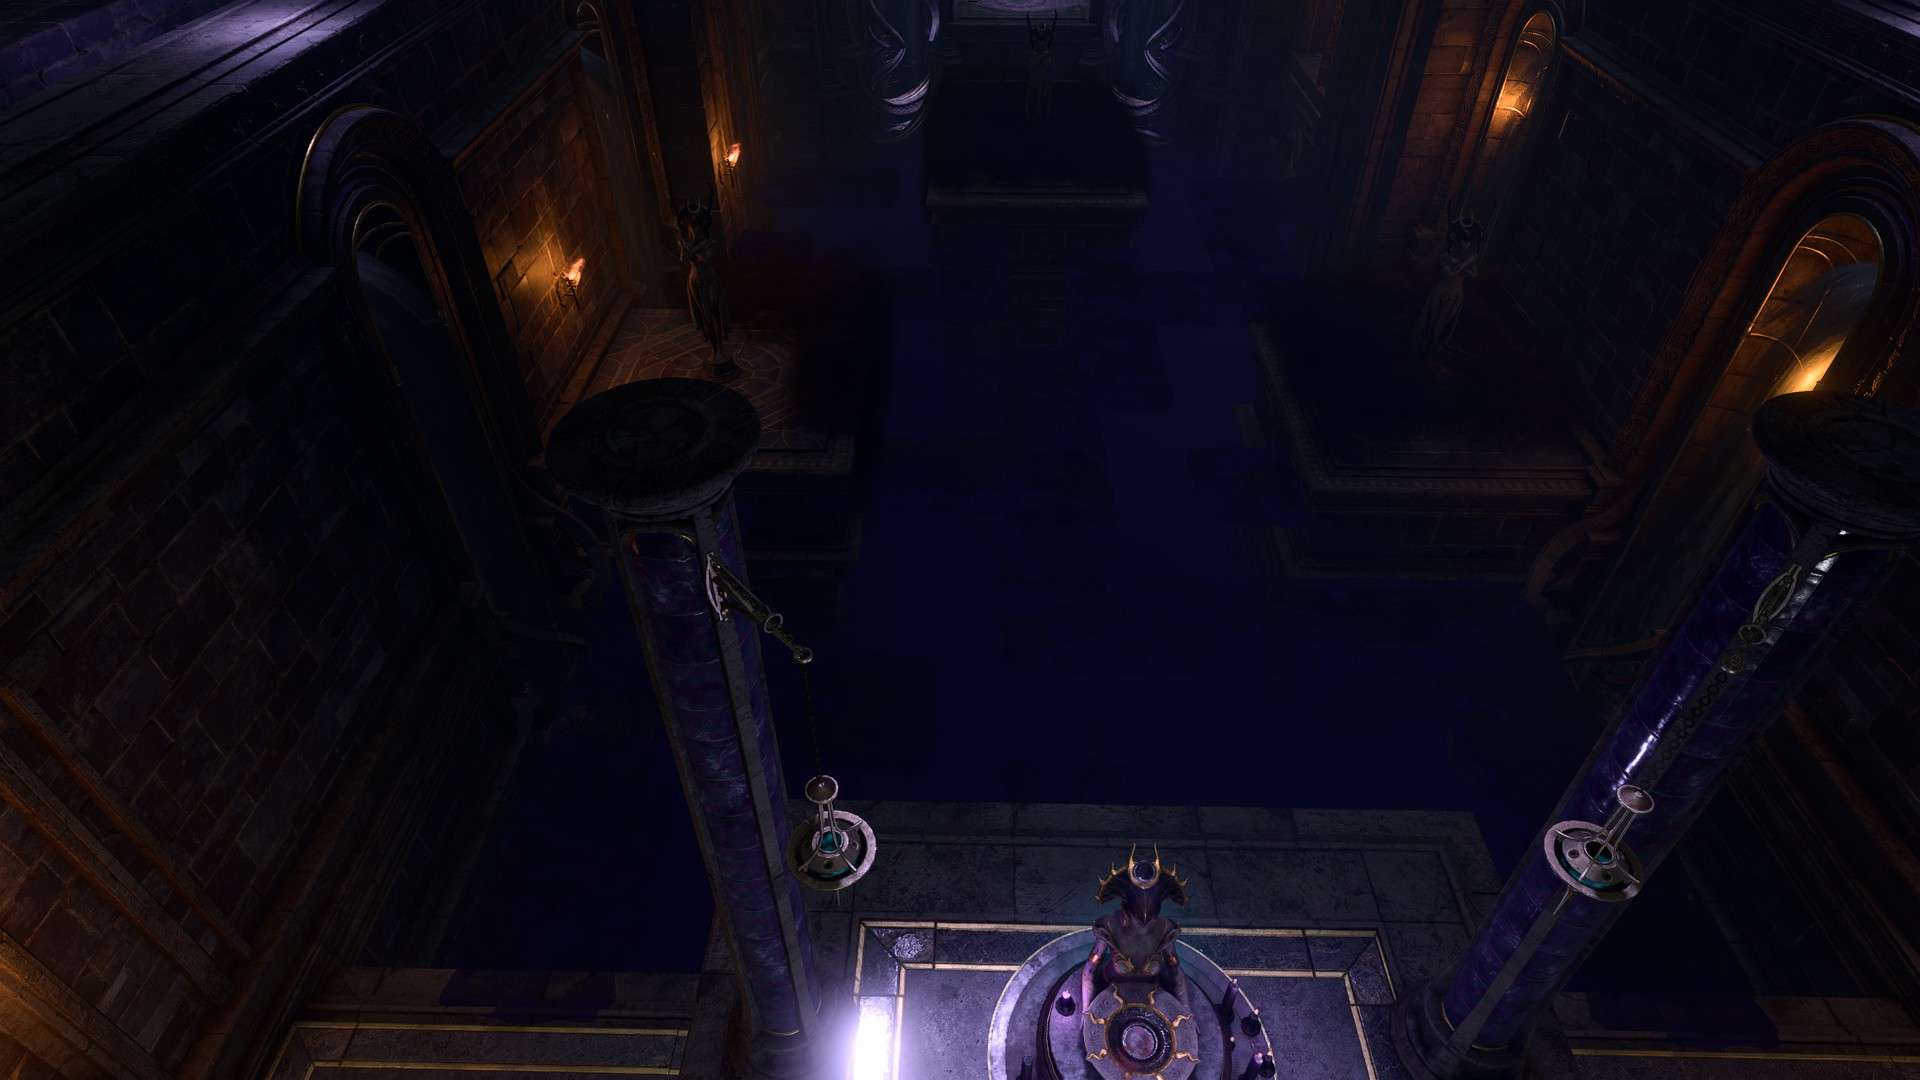
The Gauntlet of Shar
As part of Infiltrate Moonrise Towers, the party is prompted to Find Ketheric Thorm’s Relic by aiding Thorm’s servant Balthazar, which leads them to the Grand Mausoleum. The Grand Mausoleum is north of the House of Healing. Enter the Mausoleum after being accosted by Raphael and there is a small puzzle to proceed forward. There are three paintings with buttons underneath them, press them in the following order to open the way: Moonrise Towers, Grief, General. Move north using the traversal gem to enter the Gauntlet of Shar.
The purple glyphs reveal a path to the umbral gem.
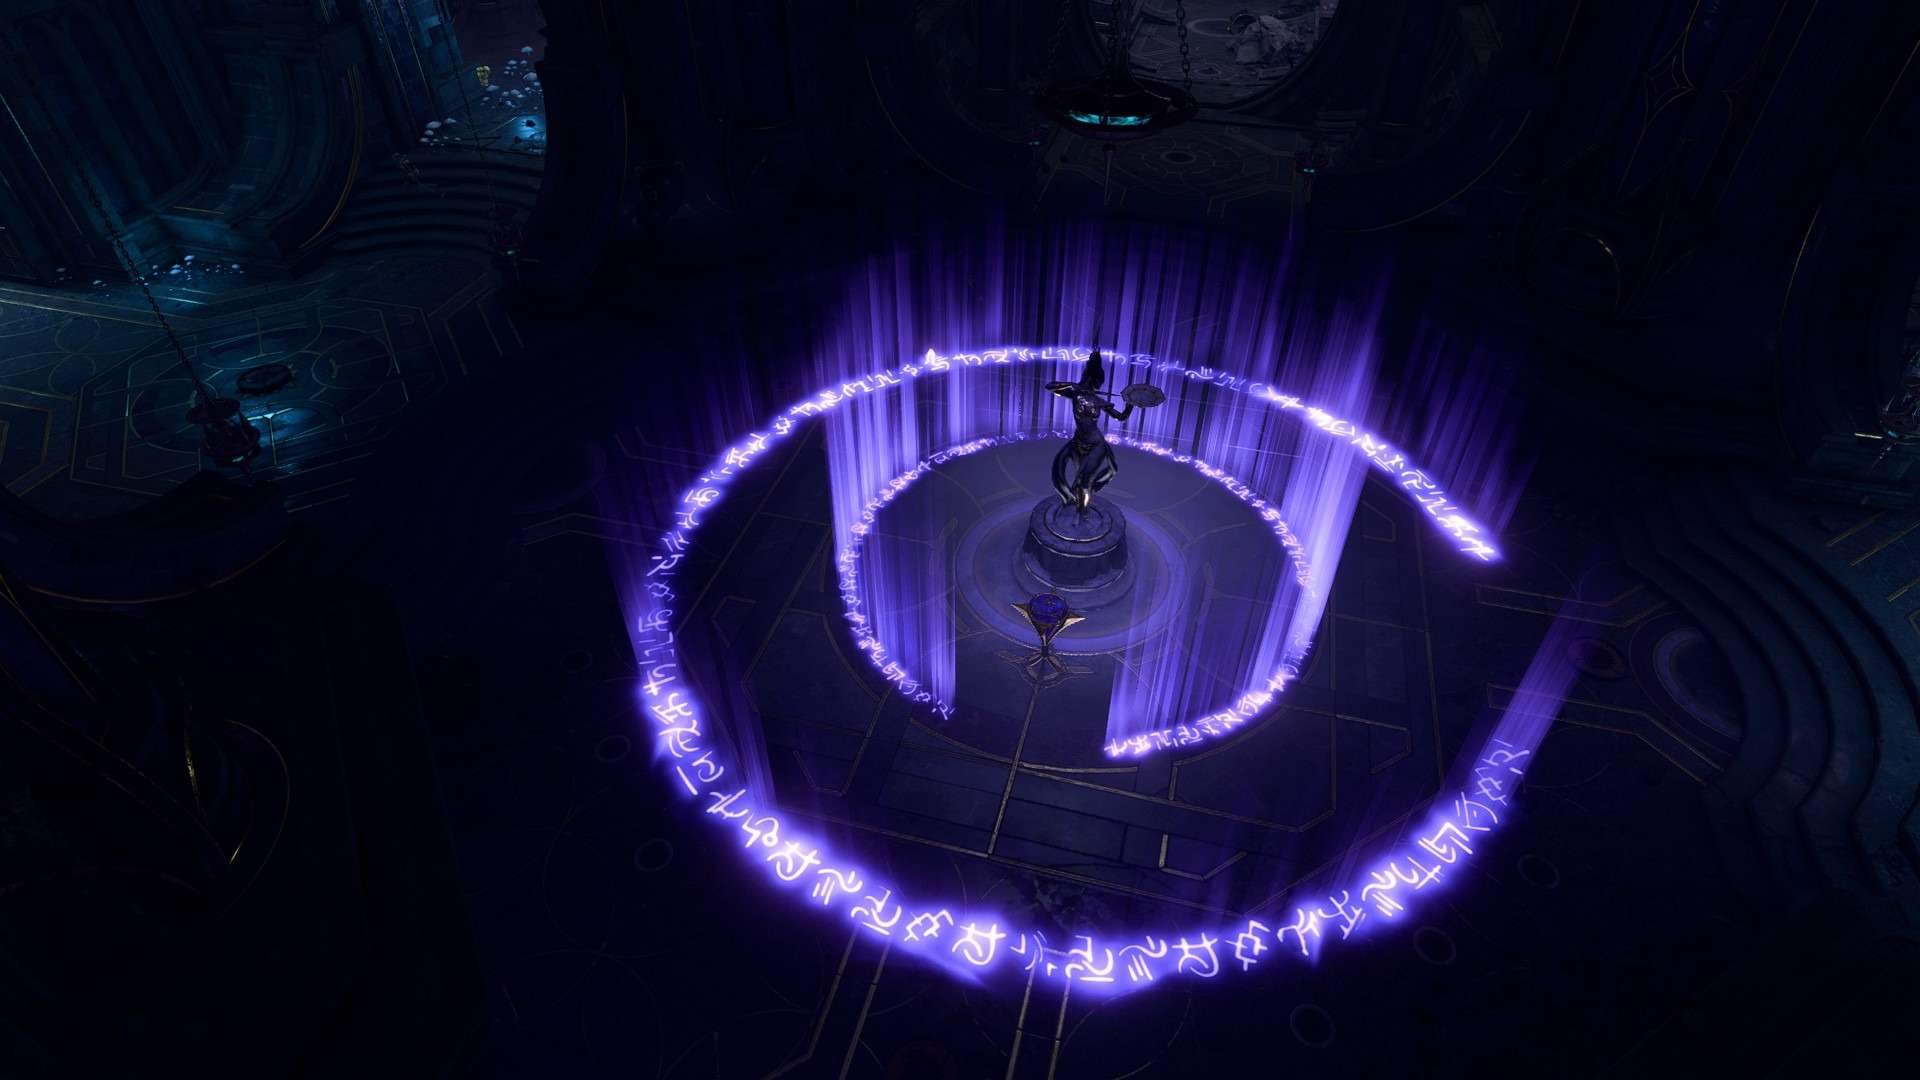
Once inside, Shar speaks to the party, inviting them to take on her trials and prove themselves worthy. The first task is to access an Umbral Gem at a statue. To do this, the party must snuff out eight Mystic Thuribles around the room. There are two levels to the north and south of each side of the room. The rooms are protected by pressure plates, which can be disarmed (DC 10) as well as vents that activate with the plates. Hit the levers to lower the Thuribles, then interact with them to snuff out their lights. Getting too close to the statue before the Thuribles are snuffed out causes it to magically repel the party. Any Moonlanterns must also be unequipped, as they emit light. Once the room is shrouded in darkness, purple glyphs are revealed around the statue. Follow the gaps in the glyphs to touch the Umbral Gem. This opens the way north.
Follow the path forward and the party eventually encounters a group of Reconstituted Duelists. They try to warn the party away, but are interrupted by tremors. A group of undead Justiciars attack the party and Umbral Tremors appear. The Umbral Tremors can summor more Justiciars until they disappear.
The tremors persist until the party moves west and encounters more Reconstituted Duelists. The tremors begin in earnest as more Umbral Tremors and Justiciars are summoned to attack the party. Several waves appear, until finally a Justiciar Crusader appears. Defeat it and its minions and the path opens, revealing Balthazar, a servant of Ketheric Thorm who has been tasked with retrieving the Nightsong. Balthazar tells the party to go and complete the trials for him, as the Justiciars have been making it impossible for them to move forward. The party can either agree to help him or attack him outright. If the party agrees to help him, they can convince him to offer help in the form of a summoning item that summons his brother, Flesh. Otherwise, Balthazar attacks with flesh and three Ghoul Medics.
The Trials of Shar
- Soft-Step Trial
The key to the Soft-Step Trial.
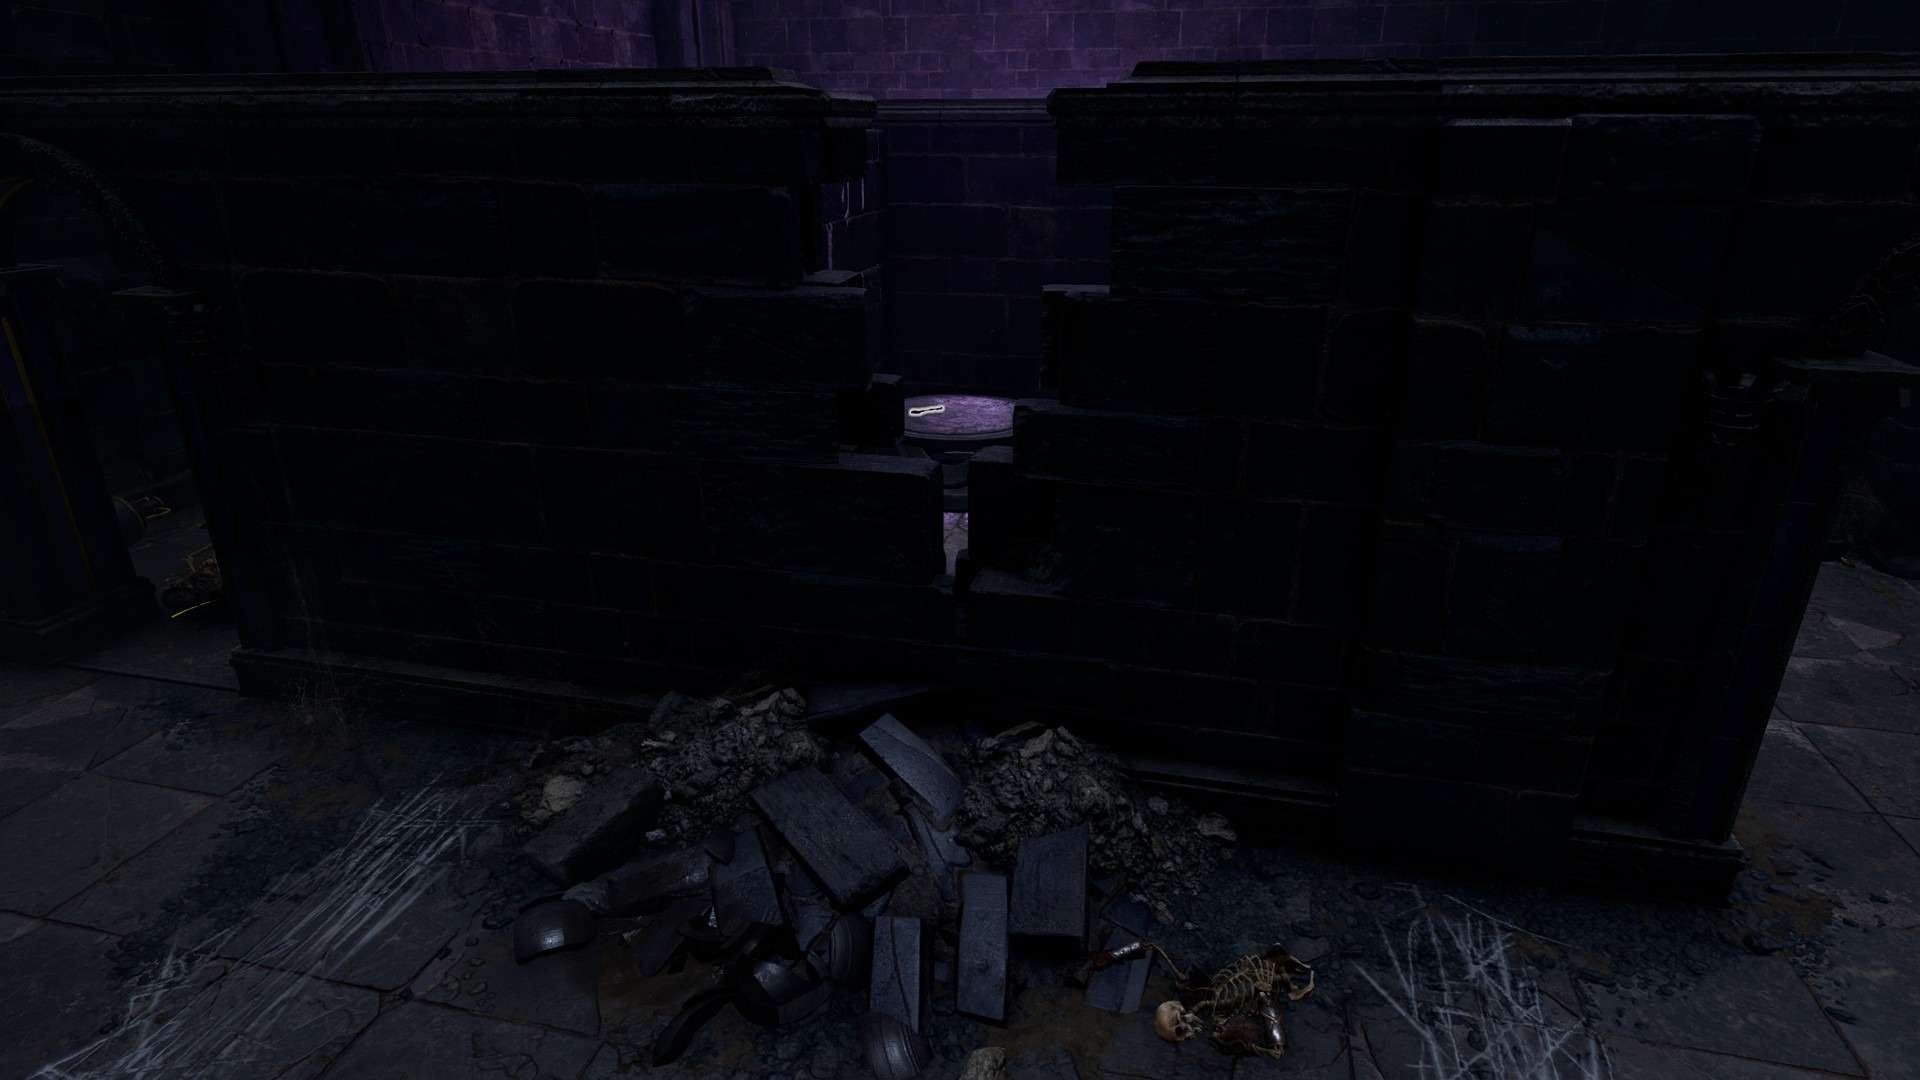
After entering the room (X:-767, Y:-755), the party notices a sacrificial bowl. The party must give a blood offering to continue onto the trial. If Shadowheart is in the party, she offers to do this. Once the offering is given, the party can proceed to the trial.
The Soft-Step Trial is a stealth trial. There are two shadows patrolling a small maze, which the party must sneak past to get to the umbral gem. If the party is detected by a shadow, they are transported back to the start of the maze. Find the Soft-Step Key in the hidden room of the maze to proceed forward, lockpick the door open, or use Misty Step to bypass it entirely.
- Self-Same Trial
As with the Soft-Step Trial, proceed to the offering bowl with an offering of blood to proceed.
In this trial (X:-767, Y:-727), the party faces replicas of themselves. If the party attacks a replica of a different character, they gain a debuff that lowers their ability scores. An easy way to end this trial quickly is to remove all equipment until the replicas appear, then add the equipment again, so that the replicas are weaker. Using only one party member can also help, as it avoids the debuff. Once the replica has been defeated, an Umbral Gem is dropped.
- Faith-Step Trial
The dimly lit path in the Faith-Step Trial.
The Faith-Step trial can be accessed by moving north of the other two trials and then following the stairs down (X:-752, Y:-727).
To complete this trial, the party must walk along a chasm, with a barely visible pathway allowing them to move forward. After blood is offered to the trial, the room is plunged in darkness, making the path forward difficult to see (and impossible to see from the overhead camera view).
There are several ways to trivialize this trial:
- Use the spell Daylight to make the pathway extremely obvious and easy to traverse.
- Use Fly, Misty Step, or Dimension Door to bypass the pathway entirely by utilizing the patforms with the statues.
- Yurgir’s Umbral Gem
There is one more Umbral Gem, which is in the possession of Yurgir, the orthon that Raphael is hunting. The party can either kill him as part of Kill Raphael’s Old Enemy, trick him into killing himself, or help him as part of Break Yurgir’s Contract. Regardless of how the conflict is resolved, the party can take the gem, which is in front of his throne of skulls (X:-641, Y:-754).
The Silent Library
Before placing the Umbral Gems on the Pedestal of Reckoning, Shadowheart has one final request if she is in the party. She states that she needs to obtain the Spear of Night if she is to become a Dark Justiciar. The Spear is in the Silent Library.
The Silent Library is south of the Faith-Step Trial. Once inside, Silence is cast over the party. If the party is detected, a number of Justiciar Soulhunter and Justiciar Nightweaver attack. Defeating The Librarian at the centre of the room ends the Silence spell. With a successful Perception check, the party notices a button (X:-784, Y:-747) that unlocks the locked gate to the west.
To access the hidden room, the party must offer the correct book to the pedestal. The correct book is Teachings of Loss: The Nightsinger (X:-771, Y:-742) which is inside a trapped bookshelf (DC 15). Interact with the Riddle of the Night and combine it with the book to open the way. Inside is the Spear of Night, as well as Dark Justiciar Half-Plate and a Dark Justiciar Helmet. Giving the Spear to Shadowheart allows her to claim her place as a Dark Justiciar.
Return to the Pedestal of Reckoning and use the Umbral Gems to activate the moving disks. The path ends at a pool of water to The Shadowfell.
Shadowfell
Warning: Entering Shadowfell locks the player out of many side quests, and pushes the player to the end of the act. Do NOT enter until all other business in the area has been resolved.
Although Shadowheart does not need to be taken through the Gauntlet of Shar, she must be taken with the party to the Shadowfell. If she is not taken, then she immediately appears after the party returns to the material plane to confront them, saying they prevented her from achieving her destiny. She permanently leaves the party, saying she hopes she never sees them again and forgets them in time.
If Balthazar was not killed, he arrives in the Shadowfell immediately after the player, thanking them for their service in completing the trials. He floats ahead and tells the party to come with him to witness greatness. Once the party leaps to the heart of the Shadowfell, they learn the Nightsong is not an object, but an aasimar woman named Dame Aylin. She has been held captive by Thorm using the power of Balthazar to share her immortal life with him.
After this, several events can play out:
- If Balzathar is alive, the party can let him take her to Moonrise Towers
- If Shadowheart is in the party, she can kill the Nightsong and become the Dark Justiciar she always dreamed she’d be.
- Dame Aylin can be set free, resulting in a battle with Balthazar and requiring Shadowheart to be convinced to spare her.
Shadowheart can be convinced to spare Aylin in several ways. If the party does nothing and lets Shadowheart decide fully on her own, she chooses to thrown the spear into the depths of the Shadowfell. However, she can also be persuaded by a difficult Persuasion check (DC 30), or by giving her the choice on her own and then passing a second, less difficult check.
If the Nightsong is freed, she thanks the party. If Shadowheart spared her, then she throws the Spear of Night into the abyss of the Shadowfell. However, Dame Aylin grants her a new weapon as thanks – the Moonlight Glaive. Aylin promises to tell Shadowheart more about her history after taking down Thorm. Then, Aylin flies off to face him. After leaving the Shadowfell, Lady Shar subjects Shadowheart to unimaginable torment before sending her back to the mortal realm, and Shadowheart loses her favour.
If Shadowheart kills the Nightsong, she becomes the Dark Justiciar and gains the Shar’s Spear of Evening. However, the party loses a valuable ally in the Nightsong. There is a major consequence for Last Light Inn due to Shadowheart’s actions. Isobel is overwhelmed and unable to sustain her protection magic over the Inn, causing all within to fall to the shadow curse. Shadowheart refers to this as cleansing the resistance to Lady Shar’s will. Additionally, unlike instances where Isobel is kidnapped in Resolve the Abduction, Jaheira is nowhere to be found and does not aid the party in the Last Light Inn fight.
Regardless of what Shadowheart’s fate is, the result is that Ketheric Thorm must be faced as part of Defeat Ketheric Thorm. This is either mandated by Shar, who sees him as a traitor, or requested by Aylin, who will give her more information on her past if she assists her.
The House of Grief
After defeating Thorm, Shadowheart must confront her cloister. Dark Justiciar Shadowheart is commanded to clear out the corruption of the cloister by Shar. Enemy of Shar Shadowheart is told by Aylin that her parents were kidnapped by the Sharran cultists and are still alive, held captive in the cloister. Either way, she must confront her former ‘family.’
When Shadowheart arrives in Baldur’s Gate, she says that her peers are no doubt watching her. She can find Ferg Drogher (X:45, Y:-98) in Rivington near the Requisitioned Barn. He calls out to the party as they get closer to him, if Shadowheart is in the party. He explains that the Sharrans are in the House of Grief in the Lower City, starting Investigate the House of Grief. If the party enters the House of Grief with Shadowheart in the party, she is immediately led further in by Mirie. From here, either she or the player can undergo the Mapping of the Heart by an Inquirer of Grief. After the Mapping, the Inquirer reveals themselves to be none other than the Mother Superior herself, Viconia DeVir. She bids the party to come down further, into the Cloister of Sombre Embrace.
Deep in the heart of the Cloister is Viconia, with a group of Sharran cultists. She explains that she knows the party has the artifact in their possession and that she needs it to destroy the Absolute. Viconia initially attempts to negotiate in a way which keeps blades sheathed:
- All right, you wish to negotiate? Make me an offer then.
- As far as the artefact is concerned, there’s nothing to discuss.
- Attack
- Turn to leave.
Selecting the first option has Viconia demanding the artifact in exchange for the party’s lives. The party can counter:
- Shar will allow you to make such an offer?
- [INTIMIDATION] Not happening Even if I wanted to give it to you, I can’t. The artefact is bound to me. It will kill you.
- [PERSUASION] The artefact alone can’t save you. Best if we unite against a common enemy – the Absolute.
- Attack.
If the Intimidation or Persuasion checks are passed, then Viconia will relent. However, she demands that Shadowheart be handed over. The party can either agree, starting Surrender Shadowheart to Viconia, or refuse, which starts a fight. Defeating Viconia or giving Shadowheart over to her resolves the quest. If Shadowheart is a Dark Justiciar, then she can convince some of the cultists to fight along with the party, taking over the cloister after Viconia’s defeat.
Shar’s Final Test
The conclusion to Shadowheart’s quest is a final test beyond the Threshold of Loss. The door be opened either by a key, by lock picking it (DC 30), or by placing items amounting to 1000 or more gold value in the scale on the statue of Shar. If Shadowheart is a Dark Justiciar, the door opens on its own.
Here, Shadowheart is faced with her two parents in the Chamber of Loss and Shar appears before the party. Shadowheart can choose to kill them, either gaining Shar’s favour as a Dark Justiciar or removing her curse if Shadowheart spurned Shar. She can also save them, rejecting Shar outright, losing her memories and being stuck with her Sharran wound.
If Dark Justiciar Shadowheart is given the choice to make on her own, without any persuading from the party, she says all she has left to do is to follow orders and kills her parents. As a ‘blessing,’ Shar removes her memories again, leaving Shadowheart ready to lead the cloister.
If Shadowheart has followed the path of Selûne through her quest, her father tells her that she cannot both free her parents and free herself from Shar’s curse. He asks her to free herself from the curse. If given the choice to make on her own, without any persuading from the party, Shadowheart chooses to put her parents to rest, transforming them into moon motes.
Quest Rewards
- Shadowheart and her Sharran Followers as allies for Gather Your Allies – if Shadowheart becomes a Dark Justiciar.
- Viconia and her Sharran Followers as allies for Gather Your Allies – if Shadowheart is given over the Viconia

Be the first to comment