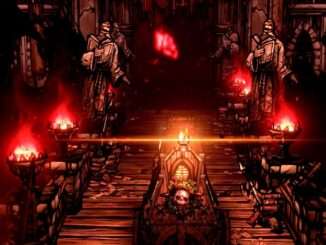
A comprehensive guide to defeating the final boss with the Stygian Blaze equipped.
Summary / Spoiler Warning
I’ll go over each part of the guide in a good amount of depth, to make things as concise as possible, it will be broken down into three parts: characters & battle strategy, stagecoach items/Inn planning, and region strategy. In the same order they are listed above.
If you have the Stygian Blaze unlocked there will probably be little to spoil for you, that being said, here there be spoilers.
Characters & Battle Strategy
Here I’ll go over the Heroes I used, how the comp works & what the advantages/disadvantages are.
In rank 1 Ravager Hellion, skills: Wicked Hack, Iron Swan, Adrenaline Rush, Toe To Toe, Raucous Revelry.
This is the least set in stone member of the team, you could swap her out for a Man At Arms if you wanted, but I recommend her due to her excellent self sustain & innate damage bonus as she gets lower in health.
Use Toe To Toe when shuffled, or when a Taunt is needed badly.
Raucous Revelry is the only means of stress control you will have access to in this comp, try to sneak it into fights here & there to back people down from the brink.
For her Quirks, Jinx is my recommendation, though Iron constitution/anything that gives Crit is solid.
In rank 2 Scourge Flagellant, skills: Punish, Acid Rain, Deathless, More! MORE!, Undying.
This is the best healer in the game & I will die on this hill if need be, that being said, you will mostly be attacking with him. Use More! MORE! when a taunt is needed, or when there is likely large amounts of incoming damage. Undying is far better than it appears, it is not a heal for 3 and 5, it applies regeneration for 3 turns for those same amounts, this is your go-to way to save the backline.
For his Quirks, Jinx & Defiant are ideal, other than that, Cosmic Slayer & Iron Constitution are great.
In rank 3 Sharpshot Highwayman, skills: Grapeshot Blast, Double Tap, Pistol Shot, Highway Robbery, Point Blank Shot.
This is your big damage dealer, largely use Grapeshot Blast, though Pistol Shot & Double tap are ideal to finish off backline targets. Point Black Shot is used only when shuffled/pulled, if you end up using the General’s Dream Trophy, or are going into the final boss fight, swap it out for Take Aim.
Highway Robbery might be the best skill in the game, try to upgrade it at region 2, primarily use it to steal Crit/Riposte tokens.
For his Quirks, Bloodthirsty is my recommendation, though anything Crit should work fine. It should be noted that this is the only member of the team that I feel NEEDS a good Quirk, the others can make do, but he really is the carry.
In rank 4 Alchemist Plague Doctor, skills: Noxious Blast, Plague Grenade, Battlefield Medicine, Magnesium Rain, Indiscriminate Science.
Don’t be too eager in using Battlefield Medicine, use it when the DOT damage is overwhelming, the Flagellant has access to stronger healing & is not nearly as good at dealing damage as she is.
Magnesium Rain can be used to clear bodies/mass remove dodge tokens.
You can use Incision instead of Indiscriminate Science early on as a shuffle defense, though with how fragile she is, I recommend getting her out asap instead.
For her Quirks, Cosmic Slayer is hugely clutch on her.
Be aggressive, end fights quickly, trying to stall for a heal, stress or otherwise, typically backfires in an order of magnitude that would give a cannon performance anxiety.
Your advantage with this comp lies in the relatively high speed, great AOE skills & the sheer strength of your damage output.
You want to start fights by carpet bombing the backline with Plague Grenades & Acid rain; Iron Swan & Highwayman’s pistol can be used as finishers. Aim for anything without a Deathblow resist first typically, then focus the resistant enemies afterwards.
The team is reasonably flexible when pulled/shuffled & the biggest advantage lies in only having one truly low HP character in the Plague Doctor. The Flagellant & Hellion are extremely resilient & are highly effective against lair bosses.
The biggest downside you will have are the very low stress management capabilities, later on, Crits from Trinkets/upgraded skills will carry you through the fights, early on, try to pick up some Laudanum bottles, or get to an Oasis. Another concern being you lack block generation, this means you have to carefully manage your incoming damage & keep a close eye on DOT ticks.
Be wary of Death always, the creepy ex stalking your Flagellant & waiting to jumpscare you. Getting the General’s Dream trophy greatly reduces her threat to your team, and should be considered thusly. Although this team is not the easiest to manage, they are quite reliable when you are used to them; using this comp took two tries to complete the achievement, the first only ended by one unlucky Crit from the Exemplar followed by instant death from a DOT tick on the Hellion.
An important note for the final Boss fight, try to get your Highwayman having as many items that provide a turn based buff as possible. Inn items, Trinkets, ect.
The Boss will mostly prioritize inverting those tokens from positive to negative if he has a lot of them, and this keeps him from nuking your backline with damage, potentially fatally if he Crits.
You can replace Point Black Shot before the Mountain, upgraded Take Aim can then be used to remove most of those negative tokens, creating a loop that massively cuts down the Boss’s damage. The Flagellant excels at healing what does get through with Undying.
A warning though, this can make the Highwayman’s Ghost Of The Past much harder to fight, as the Boss will constantly de-buff his damage and try to blind him, seeing as the Ghosts will spiral out of control if not killed quickly, this can be extremely dangerous.
The Boss in my experience, without loathing, will die from 3 Ghosts & the fallout from your constant attacking without needing the 4th. As such, I recommend not choosing the Highwayman if possible.
If you do, upgraded Indiscriminate Science from your Plague Doctor can be used to help cleanse his de-buffs, as you really don’t have long before his fate is sealed.
Finally, Quirk recommendations are mostly a “nice to have” thing. You really don’t need much, the only things I strongly advise is that you have the “Favorite Toy” memory on your Plague Doctor & Flagellant, a good Quirk for your Highwayman & you want at least 1 team member to have Cosmic Slayer, as without it the Exemplar can be classified as a raid boss that would cause Focused Fault to go hide under the couch cushions.
Stagecoach Items / Inn Planning
Here I’ll go over everything that will give you a decisive edge in stagecoach-ery & generally how your devious plan should ideally unfold.
This is actually the most important step to victory, and the one that requires the most planning if you want your run to be ironclad. First off, the items you want to keep an extremely close eye out for are: the Assay Gear, the Pot & Still, the Griddle/Stew Pot, and finally the Medicine Chest.
The Assay Gear gives you a huge increase to Relic income, especially road battles/loot. Those gains can be invested in inn items, bad Quirk removal and combat items.
The Pot & Still can print Whiskey to negate some of the terrible relationships caused by the Stygian Blaze.
The Griddle/Stew Pot are great, you will save huge amounts of Relics on food that can be now be spent elsewhere.
The Medicine Chest is the most important & typically the easiest to find, this item allows you to increase stacks of restorative items by 6. That applies to stagecoach inventory & combat slots, meaning you can bring up to 8 Healing Salves, or 7 Triage kits on EACH of your characters.
Additionally, the Lashing Tides Trophy will allow all combat items to gain 2 extra stacks, both in the stagecoach & character inventories.
Now you should have an idea of what the play is, the name of the game is stockpile, buy Healing Salve from every possible source, you could potentially do the same with Triage kits, or a different combination of stagecoach items & Adrenaline Tonics, but Triage kits are more expensive & Adrenaline Tonics are harder to come by, at least in my experience.
You want to be slowly collecting Healing Salves from every source you can as you travel, and you want to have them available on all your characters if possible, if you don’t have too many healing items, put them on your fastest team member.
Stockpile everything that can give you an edge, even if you can’t find anything that improves the amount you can hold, just having every Hero with a item that heals is a colossal advantage in the final fight, as well as when fights suddenly go south along the way.
Take special note to try to acquire Restorative Herbs, Roast Pig & Songbook Of Rousing Tunes. Restorative Herbs are fairly common & affordable, moreover, they stack to 8 like Healing Salve with Medicine Chest, meaning they don’t take up much stagecoach space.
The effect of the herbs also stacks, meaning if you were to bring 5 to the Mountain boss you can get 100% extra healing received across your team.
Roast Pig is one of the only things that can hope to offset the horrible relationships caused by the Stygian Blaze, you can only use 1 per inn, but they are fairly uncommon, so even if you have 1, get another if possible to use at the next inn.
The songbook is just always good, stockpile them where possible & try to use 1 per region, as the speed greatly boosts your already quick team, allowing them many more favorable fights.
The effect also stacks, meaning bringing a couple to the Mountain is quite handy.
For pets, it is all rng what you end up being offered, but the Wolf Cub is very solid, I would take the Shambler’s Spawn whenever you can though, as it has the largest potential to make your team unstoppable. Slapping +75% Hp -50% damage on the Plague Doctor with 1 Trinket is a war crime that has my seal of approval.
Final notes, remember to purge your stagecoach of all Candles Of Hope & clear out the bad trinkets.
This will allow your hoarding to flourish, as is your right.
Region Strategy
Blood For The Blood God! Skulls For The Skull Thro – sorry, ’tis but a mere Khornate outburst, naught to worry about.
I jest, but not really, the best way to go about your region planning is unrelenting violence, prosecuted unrelentingly.
Loathing should be quashed wherever & whenever possible; pick every fight you can for the items & Mastery gains.
Bosses will be tougher to deal with by far, but whenever possible, slay them. The rewards in Trinkets, Relics & Baubles will aid you greatly, not to mention getting a good Trophy is hugely beneficial.
The only fight that is never recommended is the Shambler, as it can go very wrong & end in a merciless manner far more quickly than you would think, or indeed deserve.
Moreover, at least at the time of my writing this, his unique trinkets are objectively pretty awful.
Avoid Assistance Encounters at all costs, the rewards you get are usually very bad when compared to everything else. They primarily serve to grant you light & the boon of your Hellion hating your Plague Doctor. It should be noted though, that in every run I have ever done, the flame has gone out exactly 1 time, you really don’t need to try to get light, simply fighting oft is usually more than enough to suffice.
Picking up the Bounty Hunter can be very useful early on, typically replacing the Hellion & taking the rank 2 slot. You have to click his poster in the Inn, seems like basic info that hardly warrants being in this guide, but I must confess it took me a shamefully long time to realize that, so yea, verily, my shame must be made manifest here so that it might be for your gain, dear reader.
While the Inn is where you spend your Mastery, it should be dictated by which region you are headed to, so I have it here. Wherever you go, you should go with the boss in mind; entering the Tangle? Upgraded Plague Grenades to hit the General & the Taproot in the same volley.
Intend to end the Leviathan? Make sure your single target damage is prioritized, Noxious Blast and Wicked Hack, Double Tap, ect.
As a General note, when in doubt, multi-target abilities should be the priority, as they typically gain the most benefit from being upgraded.
The Sluice is “free”, it will not take away any regions from the Mountain. I.E, if you are 2 regions away & enter the Sluice, you will still be two regions away from the Mountain when you return from it; as such you should always go whenever possible for the power spike.
One warning though, it may be due to the amount of fights, or by design, but Death is extremely likely to show up in the Sluice, so take extra precautions to keep your team in good shape, treat each battle as if she will show up by its conclusion.
Creature Dens are also a huge source of loot, they have a good deal of Rng involved but when they high roll, dear lord the gains can be mighty indeed. Nothing quite like wiping out bad Quirks en masse, getting +3 Mastery, or being able to buy every item in the Inn in one fell swoop.
Another tip when choosing Regions: the Region Challenge is useful in more ways than it seems at a glance. The destination will always be marked on your map. Useful to find the Creature Lair, surely, however what “avoid the Field Hospital” is really trying to tell you is, “there is the Field Hospital, go remove Coward from your Hellion”.
Final Thoughts
This is the first guide I have ever written, I hope you found it useful in thy masochistic quest, and I ask you to forgive its humble trappings & lack of pictures.
I would have you know that I tried to make a picture of the Medicine Chest with a halo on it, upon my attempt I realized the cruel fate reality had left me, nay inflicted on me!
That fate dear reader, was that I had zero idea how to use Microsoft Paint, so painfully obvious & steadfast was this wall to mine objective that the only hope that remained would have been to get my friend to show me how.
I could not inflict this injustice on him, for to teach me such a thing, with this most rancorus beast they call “technology”, it would entail sufferings innumerable for him.
Anyway, fare thee well & I wish you good fortune in your endeavors.


Hi, thanks for the guide! The class composition looks solid. I tried switching out the Alchemist for something else in my mind, since the comp seems a bit weak against enemies resistant/immune to blight.
But had trouble coming up with an improvement. I could see switching her with an occultist, but I admit it’s probably not really worth it just for a few blight-resilient enemies. I guess even with scourge healer, having a clutch healer on Rank 4 is necessary?
Anyway, I especially liked the general tips about preparation, etc.. Those are valuable even if you try running a different comp
The last thing I would ever seek to do would be to stifle creativity & build experimentation. Nor do I think it could not be improved upon. Regarding the Alchemist, I always try to get one resist piercing Trinket, with it, she more or less does “true” blight damage, but you are correct, the Foetor is rough early on, the Flagellant particularly despises his lot there & largely is forced to Taunt, heal & occasionally smack with Punish.
For needing a clutch heal on Rank 4, honestly the issue is Dot ticks. Battlefield Medicine upgraded cleanses both her, and her target. The Flagellant is more than capable of healing the most mortal blows, but it is extremely easy during some fights to accumulate 14+ Dot per-turn, once the incoming damage exceeds the cooldown on Deathless, you can be concluded to be in checkmate.