
Beginners Tips and Tricks
Gameplay Tips
If you’re not aiming for a no-hit and max difficulty run, then Justice is top of the pyramid: you can, very literally, make yourself unkillable via Luck stacks, Regen, Armor, and the blessing that stuns and damages enemies from any distance with no cooldown when they try to attack.
If you’re aiming for perfection, though, then Mort is probably the best if you use Alterations to ensure you’re always stacking her stuff. She has an infinitely stacking damage boost blessing, which nobody else has; grab that and crows early to casually reach 200% before the Baron. Phantoms deal percent damage upfront and then the Curse burst, and Scythes can reliably spread your status effect from a different god’s basic attack blessing or mass activate Curse. Her dash deals stupid amounts of damage and can lock on from off-screen while healing if you do end up hurt.
Summer is strong in how basic and straightforward she is: light everything on fire and keep kiting. Her blessings don’t require thinking and she can do a little bit of every form of offense, though to get summon damage with her you need to luck into the Legendary dragon.
Time can scale well if you wholly dedicate yourself with Alteration re-rolls; all that extra EXP adds up throughout a run, and Za Warudo can render a boss totally harmless since they are not immune to it. His upfront damage is lackluster, though, so he combos better with damaging blessings from other gods; fitting, since he brought everyone together for this undertaking.
Winter is strong simply due to Freezing. An enemy can’t kill you if they can’t do anything, and with how high your damage values can get you’ll have plenty of time to finish them off while they’re frozen or focus on a bigger threat; Freezing also ignores enemy armor thresholds and boss immunities, rendering it universally useful. The damage and area scaling on her basic attack blessing are also surprisingly good considering how powerful the status effect is. She’s also good for farming, since she can increase drop rates when you shatter a Frozen or recently Frozen enemy.
Lei is lackluster. I understand the idea of his kit: stack his blessings so you’re a rapid-fire machine gun of multi-attacks and chain lightning while detonating the shock mines with all those basic attacks, but his dash completely shuts his own kit down due to locking you out of basic attacks. He’d be a lot better if he stole Justice’s dash effect of allowing you to move at nearly full speed while attacking after a dash.
Krom baffles me. His attacks aim to Rupture enemies and bleed them out via… running away like a coward. On paper, the devs want you to Rupture an enemy and then use knockback to force a faster bleed, but enemies are way too resistant to knockback (and immune while armored) for that to work; by the time you’ve invested enough to knock them back far enough to matter, you’ve also invested enough to just beat them to death in melee. He also has no defensive or supporting blessings, aside from reducing enemy armor thresholds.
The Fates are, fittingly, more of a supporting god(s) than a main investment; they can boost your effective DPS via attack speed and crit chance upgrades, but you’ll never achieve the same damage as you’d get with another god. It doesn’t help that they seem to be the rarest to pop up, so you can’t reliably stack your crit chance or attack speed to levels that matter.
Options / Settings Tips
The options are mostly self-explanatory, but I will still go over some of them for anyone who may have any questions. Settings are split into 7 groups consisting of: Gameplay, Controls, Accessibility, Display, Graphics, Audio, and Text.
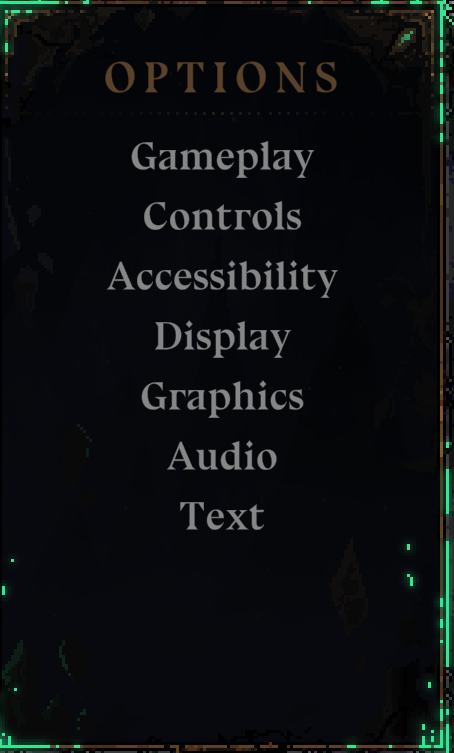
- Gameplay: Under Gameplay there are 10 Options for you to mess around with.
- Power: This Options functionally does nothing. The only effect this has is making numbers really big. The actual effect is increasing both your damage and the monsters’ health by the number listed by the power bar. Effectively causing no difference in actual gameplay. But bigger numbers are very cool.

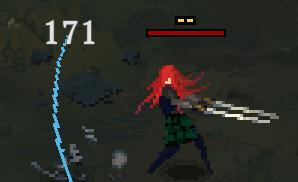

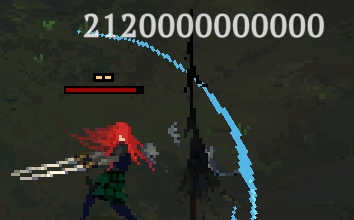
- Show Damage Numbers: This toggles damage numbers on or off. If you are having FPS issues when fighting large waves of monsters you may want to turn this off.
- Show Health Bars: This turns health bars above monsters on or off.
- Screenshake: Turns screenshake on or off.
- Damage Flash: This will tint the edges of your screen red when you are hit.
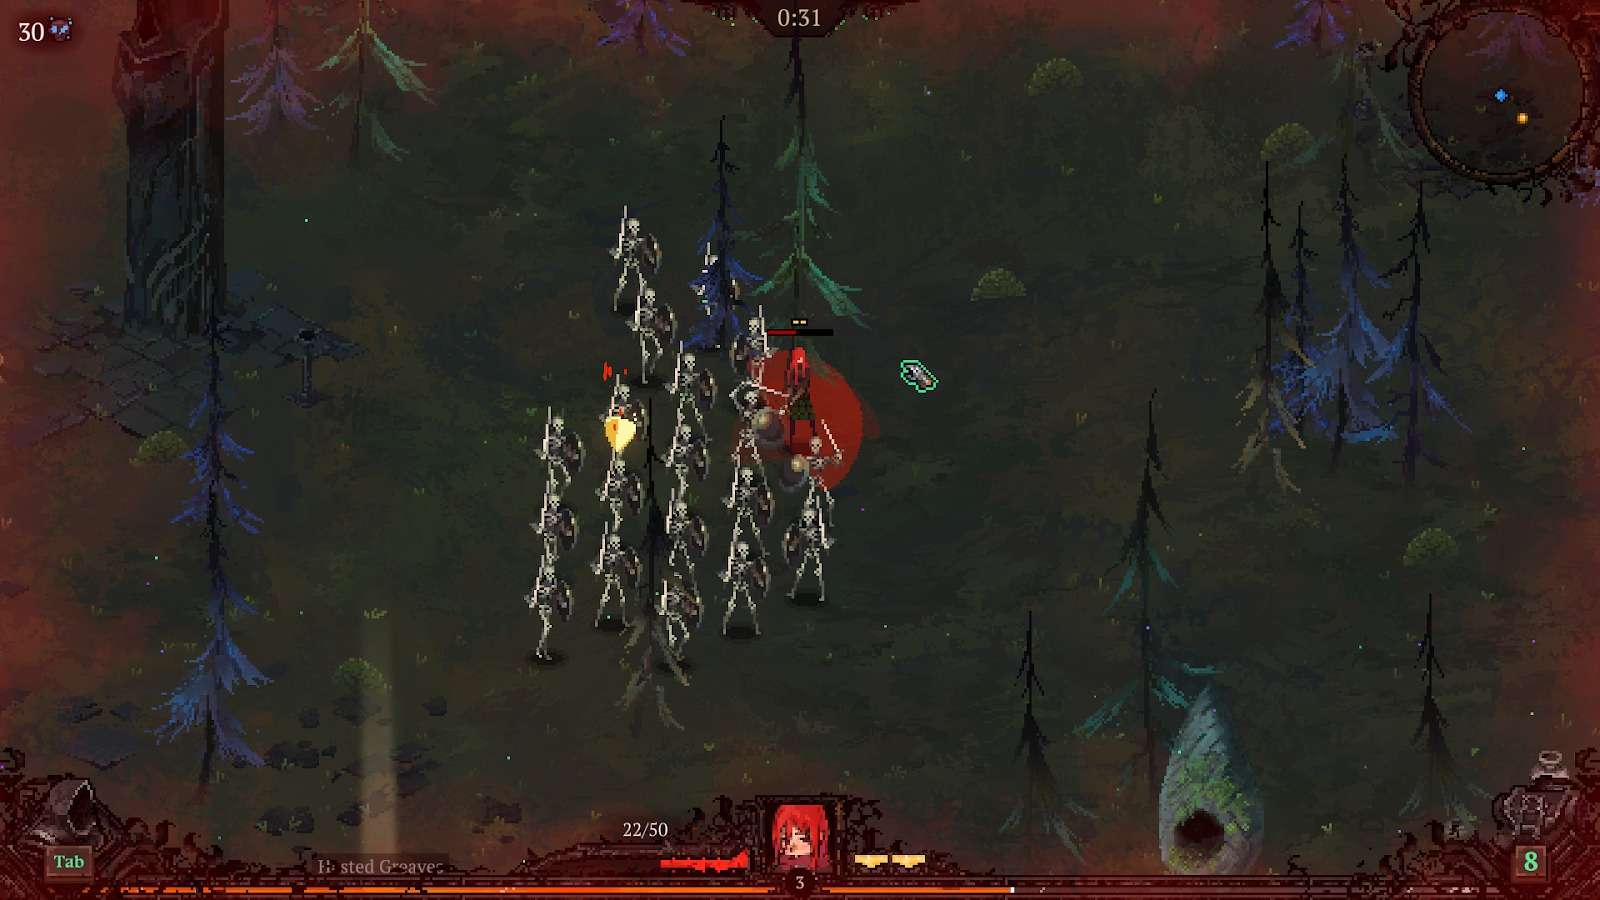
- Show HP text: This will turn the text above your HP on or off.
- Gamepad Aim+Attack: This option allows gamepad users to attack with the right analog stick without requiring an additional input.
- Health Over Hero: Turns the Health bar above your hero on or off.
- Charges Over Hero: This will turn the dash charge Display over your hero on or off.
- Show Prompts On Start: This will turn the control display prompt at the start of each run on or off.
Stat Explanation and Break-down
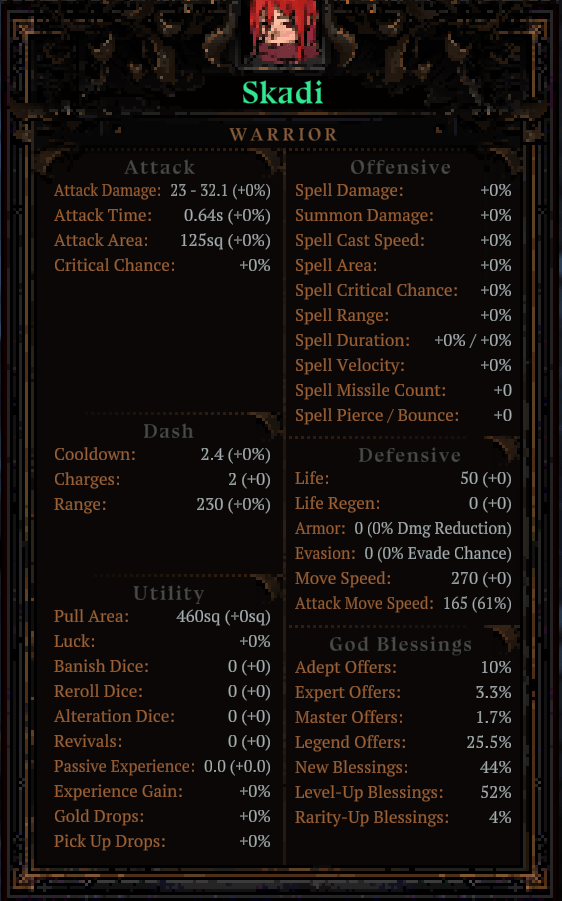
Death must die is filled with stats and numbers and all sorts of things so this section will help explain what some of the stats actually are.
Attack Stats
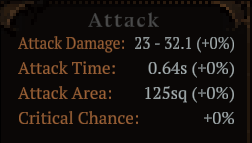
- Attack Damage: How much damage your Basic Attack (left click default) deals. All increases go off of the Base damage. Merris has a special interaction on this where attack damage will be calculated based on maximum possible damage all pierce/bounce/projectiles hitting)
- Attack Time: The time in seconds it takes to complete your attack. Every 100% attack speed will halve this stat. For instance: an attack time of 0.64 will become an attack time of 0.32 with 100% increased attack speed.
- Attack Area: this is the total area your attack will cover. NOTE: a 100% increase in area is roughly 41% increased range if measured by the distance the attack hits from the character. This means a ~243% increased attack area will double the range of your basic attack.
- Critical Chance: This is your chance to deal 300% increased damage. This stat only affects your basic attacks. Critical damage is always 300%.
Merris Only Stats
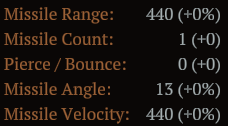
- Missile Range: The total distance your attack projectile will travel before disappearing.
- Missile Count: The number of projectiles your attack will create.
- Pierce / Bounce: The amount times your attack projectiles will pierce or bounce. NOTE whether your projectiles pierce or bounce will be determined by your basic attack boon
- Missile Angle: This is the angle between your attack projectiles, smaller angle means extra projectiles will be closer together.
- Missile Velocity: This is the distance per second your projectiles will travel.
Offensive Stats
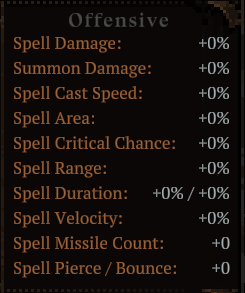
- Spell Damage: This stat increases damage of your spell Boons and spell based equipment abilities. The increased damage will scale off of base damage of the spell.
- Summon Damage: This stat increases the damage of your summons from boons summon based abilities from equipment. The increased damage is based on your summons’ base damage.
- Spell Cast Speed: This stat (also called Spell Speed) reduces the time between your spell casts (possibly also reduces the frame time of spells but i do not have conclusive data). A 100% increase of spell speed will halve the time between spell casts. For example if you have a spell with a 10 second cooldown its new cooldown will be 5 seconds. NOTE: Not every spell scales with spell speed even if it has a cooldown time. Justice’s shield for instance.
- Spell Area: Much like Attack Area this increases the total area a spell will hit. A 100% increase in this spell area will increase the range (from the center of the spell to the edge) by ~41%. Doubling the range of a spell requires ~243% spell area.
- Spell Critical Chance: Your spell’s chance to hit for 300% critical damage. Critical damage is always 300%
- Spell Range: The distance a spell travels before disappearing. I do not recall having seen anything affecting this stat but I could be wrong.
- Spell Duration: The increase in duration of any spell that has a duration. Spell duration scales off of the base duration of the spell. A 100% increase in spell duration will double the duration of the spell.
- Spell Velocity: The increase in speed your spells will travel per second.
- Spell Missile Count: This stat adds additional projectiles to any spell that has a spell count that can be increased.
- Spell Pierce/Bounce: Increases the amount of pierce/bounces for your spells.
Dash Stats
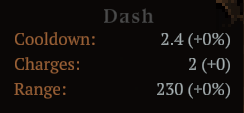
- Cooldown: The time it takes in seconds to regenerate a dash charge.the base dash cooldown is 2.4 seconds. Some boons will have different cooldowns for dash. Dash charges recharge independently from each other. Using 2 dashes at the same time will cause both to begin recharging and you will be able to use both again after 2.4 seconds.
- Charges: The amount of dashes you can use and be put on cooldown. The base amount is 2.
- Range: The range of dashes. Some dash boons have different distances for dashes.
Defensive Stats
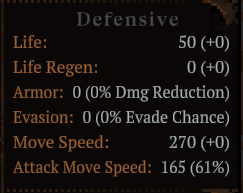
- Life: This is your health. If it reaches 0 you die. There are some shrines in a run that can increase or reduce your max hp.
- Life Regen: The amount of life you regenerate per second. You cannot regenerate above your maximum life.
- Armor: This reduces the damage you take by a percentage.
I hope you found this helpful!



Be the first to comment