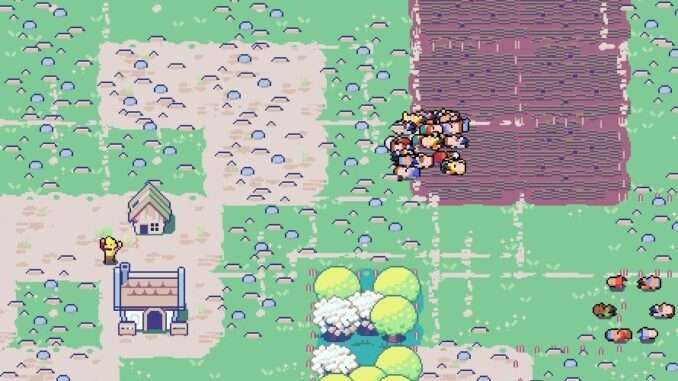
Keep in mind that a factor of this game is intended to be the discovery, failure, and repetition of runs, and this will mostly concern some early game tips, as after a certain point you have either scaled to a point that your chosen difficulty is achievable, or you will have cascaded into run failure.
Tips and Tricks
Starting Out
In short, a ‘strong map’ is one with a good amount of open space, a ton of forest adjacencies and a handful of stone adjacencies. Meaning; open, available tiles adjacent to either of these tiles. Placing your town center somewhere in the open space is ideal, but if you can’t, you can make it work later with some hassle.
My first suggestion is to research your 2 per turn research station first thing – literally doubling your research early when pips are short is too powerful, and lets you get early hunting/bbq. (the bench/dwelling adjacency tech tree is straight much stronger in my opinion for having easier adjacencies, being better with Scriptorium, and being twice as space efficient at third level). Place near forageable items, as these are temporarily stronger than the Forager building and will support you until you can grow your population some. Only get as much food as you need, don’t let pips get hungry or they’ll add to Domain counters with effects you can’t counter until later.
Boom woodcutting to get houses to get pips to get food to get… Grow pops, throw them on Foragers until you need them, sustain them.
Depending on your difficulty, split this population boom priority with boosting research and gaining several instances of the early Domain techs. These are the social buildings under the Community Tab for Hope, The Cold/Heat items under the same, and the Health buildings under Education. On day 10, you will know what omens you have and what your Doom is. Focus on these Domain Buildings for which you have Omens or a Doom event. If you look ahead in the tree and see you have no Omens in Cold/Nature/etc, you can get away with ignoring it completely if you want to- yes, even if there is an event, until it generates threat. This is because the scale of the event failure scales with the red number; it will only count up to around 5, and then stun one of your pips for three turns or do something very minor. You should still research the first level techs of all Domains before your first Doom arrives. The higher your difficulty, the more of your production and research you must focus on Domain Tech, the slower you will boom and stabilize.
Exclusively pay attention to Domain Tech and Food Tech until you feel you are stable (ie. able to defeat the first Doom and have all starting Domain Techs). You don’t need to stock up food a lot, even if the game tells you it’s crucial for winter. The ultimate goal is to reach a point that feeding everyone is done automatically and you can sustain Domain buildings sufficiently to win the game. I will often have six or more wood stacks by the start of Autumn.
Food, Food, Food
So here’s a whole section on food, because if you’ve played any strategy game, you know booming faster and earlier is always good. Besides wood which doesn’t need a section, Food is pretty much everything in this game. We’re looking to get to a point we have enough labor, production, research etc. to keep up with threat.
All things must be compared to Forager – Berry Picking. Bang a cheap building next to any tree, and a single pip can produce 2 food per Action, meaning you can sustain your entire game indefinitely through any season (yes, even Winter) if half your pips are picking berries. We’ll call this value Foods Per Action (FPA). This gets even harder to beat after the +1 to all outputs with forest adjacency boon in Prophecy IV.
Ignore the tomato plants outright. It will give you 12 Foods per 11 (5 growing, 6 harvesting) turns at the cost of 3 seeds and 1 water. 3 seeds from the forager is one action, and we’ll say 1 water is an action. So for (5 growing, 6 harvesting, 1 seeds, 1 water = 12 Foods), we have a FPA of 0.92. This is of course doubled if you build them next to your water for… 1.84 FPA. Whoof.
Compare to Hunting/Fishing. Build one hunting lodge per animal tile or fishing shack per fish tile. If there are three within 2 tiles of the location, you can use the upgraded version without adding micro to your between turn phase and wasting early tech/resources. With 1 Hunting/Fishing, a dwelling and barbeque, your pips gain 7 food a turn for 3 actions for 2.8 FPA with a base wood camp. A wood stack makes this about 3.1 FPA.
A warning- if using the Great BBQ (GBBQ) with adjacencies, the food efficiency actually decreases. The difference is 1 fish/7 food for the BBQ, or 2/10 for GBBQ, which could only be said to gain a free pip and one wood per turn – that is, 4.44 FPA with a wood stack at double the cost in raw fish (which can be hoarded for winter).
The GBBQ, therefore, only provides about 70% of the food per fish in addition to needing a 30 research and specialized job. With upgraded hunting, three BBQ and a single wood stack, you can make 21 food per turn, for a combined roughly 4.42 FPA (4.75/21 – 3 BBQ, 1 Hunter’s Lodge, 3/4 wood from wood stack). This is a better use of the pips than most other food jobs anyway. To pull back from the math for a second, if you get 2 of these groupings of 3 animals, you can feed 42 pips with 9 pips. That’s near good enough to finish some playthroughs. Good stuff.
Finally, time for a doozy. Bread.
Math: Barley Fields produce 15 Barley each in a square-shaped set of four per 8 turns for an EIGHT TURN CYCLE (1.875 Barley per field per turn). A mill consumes 3 Barley per turn and produces 1.5 Flour per turn with adjacency to one field, so we can build two mills next to this. This will support a bakery and a half. Not enough? We can finagle this a bit. You can simply create tilled soil next to any crop or mill for a +1 bonus. You can place most low-tech buildings on these while retaining the bonus. If we do this with the mills, we can get the mill up to 2+2 flour, enough for one mill per bakery. You are now at 50 food a turn (252 breads). The FPA calculation for this has many variables, but we’ll try. 12 seeds, 4 water we’ll say is 6 actions (4 seeds, 2 water). There is a seed collector and higher-tier water, but we’re mostly concerned with early-midgame. 3 actions each to harvest, one to plant for a total of 12 crop actions. The mills run every turn, so 82=16. The bakeries similarly do the same, for 16.
16+16+6+12=50, for- wait, 1 Foods Per Action? Yeah. For perspective, 4 untrained pips doing berries for 8 turns (48 = 24(2 = 48) are 48 foods, and it works in Winter.
The main reason you would use the bakery for pips is to support much larger populations or to have more resilience during winter, because every resource stacks independently. What this statistic doesn’t show is that you are only using 8 pips to achieve this in 8 turns, with four turns free for all four farmers. Yes, Barley Processing is about half as pip efficient, and 60% as space efficient as just farming berries. You do have a limit of tree adjacencies, though, so if you really want to make your game chug go for it.
Okay, that’s it for bread.
Final Notes, Bugs, etc.
Threat: As defined by the game, the total sum of pips above the Domain. This affects how strong the Omen events are, as well as acting as a exponential increase in how much of their element they will produce during an Event for you to overcome. This threat progresses at 1/3/7/13/20/etc. keep in mind that tripping an omen will always increase the track in addition to your difficulty modifier.
You can in fact freely save-scum the result of Domain Events if you choose to do so immediately after they roll, but there is presently a visual bug associated with it that may occur involving the Domain tab being very large. Quitting out and restarting the game is necessary to fix this issue.
Be warned that performance issues may begin to exist around 50-60 pips. At 67 pips I sit at 22FPS with a GeForce RTX 4060 Ti and Ryzen 5 3600 6-core. This will also cause temporary freezing during sorting and allocation operations. In addition, consequences for events and omens get much more harsh at higher pops. Failing a health event at around 60 threat with 70 pips rendered about 30 of them sick, which added +30 to the Health Domain Threat per turn. This was a problem, as there was an event straight after that killed 40. Short version – while high pop is strong, be warned the events will become incredibly threatening especially in sequence and you will suffer.
While Bourgeois citizens can perform the highest end jobs, they cannot do anything else. Don’t make any more than you need.


Be the first to comment