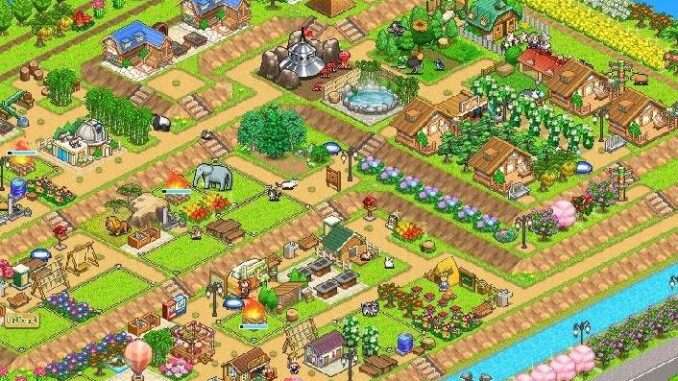
A helpful guide for answering some common questions.
Useful Tips
The Camp/Store
I decided to write a guide for Forest Camp Story because the Wiki for it is dead and most folks still think it’s strictly a mobile game.
There’s tons to explore with Kairosoft, more players will be exposed to Kairosoft’s unique style. Which is good. Not having answers is not good. So I’ll handle that.
Gameplay is divided into two maps; one is your camp and the other is your storefront. You’ll be bouncing back and forth as you unlock items and progress through the game.
On the camp map, you’ll be placing campsites/lodging, amenities, decoration and you’ll be terraforming the land to suit the desires of your campers. It’s important to note here that pathways do not matter in this game. Aside from bridges, you do not need to waste your time placing them if you’re playing for completion and not for aesthetics.
On the storefront map, you’ll be placing camping items you’ve unlocked so they can be purchased. It’s your biggest income, so it’s important to say on top of what’s new and available to sell.
Building The Campgrounds
There are several notes in this section; half are covered by the game and the other half comes from beating my head on a wall figuring it out.
Firstly, you will unlock terraforming a little ways into the gameplay. The main game takes place over 16 years. You can play on afterward, so don’t worry about any time crunch for developments in that regard. You will have plenty of time for all upgrades and changes.
Terraforming is important because campers want to be up high. With terraforming (“hill” in BUILD menu) you can lift the earth into higher altitudes, up to 3 stories. I strongly suggest you terraform early and in rows to get definitive “hills” and “valleys”. You should be placing the campsites at the very top of the hill, surrounded by one 1-square statue/amenity and several seasonal flowers/trees. At the start of the game, you won’t have many seasonal trees. Place them as you get them around your campsites at the top of the hill.
The second “floor” should consist of 2×2 and 4×4 attractions and activities; the ground floor should have places to cook, a restroom, water supply, etc.
It doesn’t really matter how many campsites you have, so long as they are built on the very top of a 3-story hill with the trickle down into other activities and amenities. You want to make sure the activities are closer than the amenities of grills and such.
Note: Campfire
When you unlock the campfire, place it in an area you can surround it with decorative flowers/trees and activities. The more “fun” and “environment” occurring in its vicinity, the quicker the Camp Fever builds. You want Camp Fever as often as possible.
Note: Guided Tours
Occasionally you’ll have to do guided tours. There’s two different kinds–one is a customer, which you must provide items for–and the other is an animal, which you must provide a handler.
For customers you must select three items for them to take with them on their trip, and then a high scoring popular/environmental campsite for them to stay in. It will mark this area “reserved” until they check-in. They’ll spend the night at your campsite interacting with nearby activities and amenities. Ultimately, you want their satisfied bar to fill completely so make sure you place them in an ideal spot with the right items.
*You’ll have to pay the cost to give the customer those items.
For animals you must provide a decent handler and campsite. Ideally the most expensive customer you have on the list will give an excellent boost before they even arrive, so save for those. Animals differ in the sense that they need open and beautiful spaces to inhabit. They won’t use activities or amenities. They like wide open, high environment spaces.
Storefront
Listen to me now, okay? You’re going to unlock all the items you can and then fill any/all empty spaces with seasonal decoration. This is how you will get to #1 in sales, which is needed to unlock Kairobot & his dog as Guided Tours.
- There are 21 small shelf items.
- There are 48 large shelf items.
- There are 7 types of tent.
- There are 2 types of tables.
- There are 2 types of hammock.
- There are 3 types of grill.
There are 4 different decorations that actually matter. Don’t worry about Cardboard Boxes or Storehouse. Fill absolutely every empty inch of your store after placing ALL of the unlockable items with seasonal decoration.
You will unlock rapport with each sale location. A new one will open up after you hit rapport 6 in the one you are selling in. You want to stay in each sale location until you hit level 9 Rapport in it, then move to the next. Yes, it will lag your progress at Rapport level 7 to frustrate you. Just wait it out and you’ll get to Rapport 9 quick enough.
Alternately, you can do what I did since I didn’t know and open up all the locations, then realize each location maxes out at 9 and you open up valuable customers and items by maxing them out, so you can move all the way back down the ladder painfully maxing as you go. Up to you.
TL;DR
- Build campsites on the top of 3-story hills.
- Fill every inch with decoration. (Fun cheese fact! You can put water on every inch of your land and cover it with bridges, then build on those bridges. Water = popularity/environment boost)
- Upgrade the size of your storefront and camp ASAP.
- Upgrade everything else to max.
- Use Fee Token, Environment Tokens and Popularity Tokens on activities.
- Get each store location to level 9 before moving to the next location.


Be the first to comment