
A beginners guide if you struggle to survive in Hard West 2. Gameplay strategy, combat tactics and general tips and tricks!
Beginners Guide
High Risk – High Reward
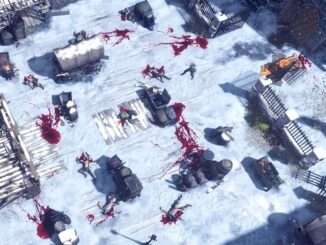
Hard West 2 is a hard game, which you probably have noticed by now. A unique aspect (at least new to me) to this game is that it promotes an aggressive approach to combat, as you will get your action points back whenever you kill an enemy.
This means high risk will give a high reward. But it will also be very punishing when you fail. Use your save and load files often.
If you fail a mission, you can use Retry to start it over. Use this to your advantage if you feel you could have performed better by the end of a mission. Being persistent and succeeding with side objectives will reward you with better gear and loot which will be helpful for future missions. Take advantage!
And also note that there is no shame in learning the game on the Easy level, as you will get better with practice and if you stop playing because it’s not fun anymore, the only one losing out on entertainment is you.
Gameplay Strategy
You don’t get your life restored after combat. There are no healer characters, which means that you will start the next encounter in a really bad spot unless you restore your life. Doing so without consumables will cost you money.
Do side-missions! They will give you rewards such as better equipment and consumables. You’ll need these for the challenges coming up.
Consider which characters to befriend first. A higher level of relationship will open up new conversation options, and eventually new combat skills on the higher levels (Ally and Friend).
Look for quest items in the stores. They will help you access spots on the map, which will give you access to items or improve your relationship level with your possy.
Combat Tactics
The main challenge with combat is to use your unique character skills to lower the HP of enough enemies to be able to chain up Bravado triggers. Get in position, use your special skill or an explosive to do area damage, and you will quickly kill many enemies in one single turn. This means you focus on the low HP enemies first and use a combination of movement and Bravado! to kill as many enemies in one turn as possible.
General Considerations
As you can only have 4 people in any combat, choose them wisely. Consider how you can use their skills to benefit each other. Save before you enter a combat zone, so you can switch the possy if the chosen characters didn’t end up being a good fit.
Some characters need certain playing cards to access their special combat skills, i.e. a pair for Old Man Bill. Consider which character needs the cards the most before you go into combat. Characters that aren’t taking part in the mission don’t need any cards wasted on them.
Ensure every character has two weapons, and don’t forget to use them. The rifle will consume 3AP, but if you make a kill, you get them back from the Bravado!-trigger.
Consumables that restore HP are things such as whiskey, bandages and different kind of food. You don’t get a lot of HP from them though, so preferably avoid taking damage in the first place. Use the automatic loads to recover from poor decisions.
Dynamite is useful in combat as it does area damage, but it will also give access to hidden locations and special options in conversation, so don’t use them all up!
Splitter bombs will cause bleeding, but some characters are resistant (e.g. Revenants).
Have a look at the Enemies section of this guide for tips on how to combat individual enemies.
Characters (Spoilers!)
Note: If you’ve just started playing, there are some spoilers ahead about upcoming characters!
Gin Carter
Gin is the leader of the gang.
- Weapon: He is a rifleman and can use a revolver as a backup weapon.
- Shadow Barrage: Shoots through any protection. Base Damage -6HP. Range 12.
- Level 2: Base Damage -7HP.
- Level 3: Base Damage -8HP and adds Burning.
Kestrel Colt
Kestrel is the brother of Gin and will only be available in the tutorial and optionally in the very last part of the game. He has the same skills as Gin.
Flynn
Flynn grew up in an orphanage and she has knowledge of the dark arts. She is a bit weaker than other characters and will do well with a shotgun for close encounters.
- Weapons: I recommend a revolver and rifle as she will mostly keep a distance from her enemies.
- Shadow Swap: Swaps position with another character, friendly or enemy, at the cost of -1HP.
- Level 2: No cooldown
- Level 3: Makes enemies bleed.
Old Man Bill
Bill is a revenant, woken up from the dead. Unfortunately, he does not regain HP on each turn as the revenant enemies.
- Weapons: He is good with revolvers. Give him a rifle as a backup.
- Deadman’s Revenge: He drains life from all enemies within sight. Base Damage -2HP. The lower HP he has, the more damage he does. Use this to soften enemies for the rest of the possy to kill.
- Level 2: Longer range and Base Damage -3HP.
- Level 3: Base Damage -4HP.
Laughing Deer
With a brutal and mostly unknown background, Laughing Deer clearly has no problem beating people to death when they have it coming. And as he says, “a lot of people have it coming”.
- Weapons: Melee, obviously. I recommend a shotgun as his alternative weapon, as he will be mostly close to enemies and in good position and range.
- Wild Run: He does more damage the longer he runs before he hits.
- Level 2: Daze on enemies for one turn.
- Level 3: Duelist on self.
Cla’lish
Once you befriend her enough, she will hunt provisions for you (once).
- Weapons: Her primary weapon is a rifle. Don’t forget to give her a revolver, so she has a weapon to use when she’s on the move.
- Deceptive Spirit: Summons a spirit that deceives enemies for one turn. Requires Two Pairs.
- Level 2: Lasts two turns and can move and attack.
- Level 3: Cripples targets.
Lazarus
Lazarus is a priest. Instead of Heads Down, he has a Purification skill, which removes any of his debuffs (but it also ends the turn).
- Weapons: Lazarus can use any weapon, I find that I mostly use him with a revolver and a rifle, as for most characters.
- Transfusion: Swaps HP and buffs/debuffs with any ally. Range 12.
- Level 2: Can also be used on enemies.
- Level 3: Range 25.
Loyalty Points (Spoilers!)
All characters can be befriended. It takes two points to reach the next level of your relationship, and certain levels will open up new interactions and skills:
- Accomplice (0p)
- Companion (2p)
- Ally (4p)
- Partner (6p)
- Friend (8p) – Unlocks a second skill
Encounters with loyalty points – Chapter 1
After Boomtown Combat
- +1 Flynn or +1 Laughing Deer
Second Red Cross
- +1 Flynn or +1 Laughing Deer or + Old Man Bill
FourthRed Cross
- A dead woman needs to be ended.
- +1 Flynn or +1 Laughing Deer or + Old Man Bill
Bandits’ Camp
- Approach the enemy.
- +1 Flynn or +1 Laughing Deer
Camping, Flynn
- A conversation about Kestrel. Use one Whiskey to gain +1.
Lost Supplies
- If you leave the supplies for the townsfolk, you get +1 loyalty with Bill.
Chapter 2
After Whistle Pass
- Express hope for Kestrel to gain +1 loyalty with Glenn, or pessimism to gain +1 with Bill.
Zeke’s Trading Post
- In conversation about the refugees from Calla Calla, you can side with Laughing Deer or Old Man Bill for +1.
- In conversation with Cla’lish you can side with her or Laughing Deer for +1.
Sacred Site
- Side with Old Man Bill or Cla’lish for +1 loyalty.
Sacred Site, After Combat
- Forgive Cla’lish for +1 loyalty.
Small Camp
- Side with Laughing Deer, Old man Bill or Cla’lish for +1 loyalty and a tobacco pouch.
Lone Stranger
- Don’t steal his shotgun, and Lazarus will give you +1 loyalty.
Pine Falls
- Speak to the expedition and side with Lazarus or Flynn for +1 loyalty.
Spirit Totem
- Speak to the bear and side with Cla’lish or Flynn for +1 loyalty.
Hidden Cave
- Side with Laughing Deer or Cla’lish for +1 loyalty.
Native Village
- Side with Laughing Deer or Lazarus for +1 loyalty.
- Or, side with Cla’lish for +1 loyalty with both Laughing Deer and Lazarus.
- Side with Laughing Deer or Cla’lish for +1 loyalty.
Pitch Black Cavern
- Leave the valuables to gain +1 loyalty with Cla’lish.
Old Silver Mine
- Side with Lazarus, Flynn or Old Man Bill for +1 loyalty with either of them.
Chapter 3
Hanging Tree
- Side with Old Man Bill or Lazarus for +1 loyalty with either of them.
Widow’s Home
- Her husband has come back from the dead and needs taking care of. Bill can do it if he’s an Ally, but he requires a whiskey, and you only get $20. Lazarus can do it if he is an Ally, and he will gain you $40.
Missing Cows – North
- Bill can help you rein in the cows, but he needs to be an Ally, and he requires a rope.
Ransacked Coach
- Dead people with arrows in them. Side with Laughing Deer or Lazarus for +1 loyalty with either of them.
Small Camp
- Dead people in a camp. Ransack the camp for $40, or if Cla’lish is your Partner, she can get you $80.
Mc’Carthy’s Hideout
- Somebody needs to take out this criminal.
- Laughing Deer (Ally 4p), will take -6HP to do it.
- Flynn (Ally 4p), will take -1HP.
- Lazarus (Ally 4p), will require a Whiskey.
- Old Man Bill (Ally 4p), will take -6HP.
- Cla’lish (Partner 6p), can do it without any damage or further requirements.
Missing Cows – South
- If Laughing Deer is an Ally, he can distinguish the hurt cows from the healthy.
Missing Cows – West
- The cows are taken on by natives. You can take them and side with Lazarus or let them keep them and side with Cla’lish for +1 loyalty.
Fort Prudence
- Old Man Bill discovers something hidden. You can access it with Blue Dynamite, or if Flynn is Partner, she can find it for you.
Beast’s Territory
- Kill the cub and side with Lazarus or leave the cub alive and side with Cla’lish and Flynn for +1 loyalty with either of them.
Trampletown, after Bank Robbery
- Assure Lazarus or Joke with Cla’lish for +1 loyalty.
Scorndale, after Mission
- Part ways peacefully for +1 loyalty with Old Man Bill.
St. Jude’s Parish, after Mission
- Side with Cla’lish or Laughing Deer for +1 loyalty.
- Let the sheriff keep his money for an additional +1 loyalty with Laughing Deer.
Abandoned Strip Mine, after Mission
- Side with Flynn or Lazarus for +1 loyalty.
Enemies (Spoilers!)
Bandits
Rifleman
- 5HP
- Long Range, High Damage (-8HP on Hard)
- Tactics: Due to the high damage and low HP, taking this enemy out should be a priority. Stay outside their view and range, or take them out to gain Bravado!
Gunman
- 10HP
- Medium Range, Medium Damage (-5HP on Hard)
- Tactics: Not a high priority, as they can’t ricochet bullets they need to be fairly close to hit you.
Shotgunner
- 15HP
- Short Range, Low Damage
- Tactics: High HP means you need to beware so they don’t get too close before you’ve ground their health down enough to kill them.
Demolisher
- 8HP
- Short Range, Low Damage (-3HP on Hard), Bleed
- Tactics: The bleeding is the annoying part because it means every action makes you lose HP, so you either need to bandage, or you can’t do anything for 3 turns. That is why I make this enemy a high priority.
Sharpshooter
- 8HP
- Long Range, High Damage, Duelist
- Tactics: Due to the high damage and relatively HP, taking this enemy out should be a priority. Stay
- outside their view and range, or take them out to gain Bravado!
Gunslinger
- 15HP
- Medium Range, Medium Damage -4HP, Duelist, Can ricochet bullets
- Tactics: Duelists will return fire, but not if you use ricochet to bounce the bullet towards them.
Brawler
- 20HP
- Short Range, medium damage (-4HP)
- Tactics: Mainly bothersome due to the high HP, but the damage output isn’t great and he can be avoided by keeping a distance.
Mad Dog
- 10HP
- Short Range Melee (burning), Medium Range Demolition (-6HP) that causes bleeding.
- Tactics: This enemy should be a priority. He will damage multiple characters and cause them bleeding, which reduces your health by -2HP with every action you take. Use bandages or other healing appliances to remove bleeding.
Shadow Dancers
Shadow Warrior
- 12HP
- Melee, medium damage, cripple
- Tactics: These annoying crazies will run up close, and attack you with their club which cripples you for one turn (no movement). You can take them out with two rifle shots (6) or improved revolver (Desert Ranger) shots (6). Since they can only attack close up, they might not be your highest priority considering that they often come along with Blackhearts.
Blackheart
- 16HP
- Long Range, High Damage, Hex and Steal Life
- Tactics: These should be a high priority to take out, but only damage them if you are sure you can kill them in one turn. Once they have reduced health they will steal your life and that makes a lot of damage. They can hex you to reduce the luck of anyone in a certain area (and do minor -1 damage). They also have a rifle so if you are exposed, they will shoot you, doing high damage.
Wendigo
- 30HP
- Short Range, Melee (-4HP) and Bleed, Will Counter When in Melee Range, Bloodlust
- Tactics: Although they have a lot of HP, you can avoid them by keeping your distance, so this might not be your top priority target.
Revenants
All revenants have the annoying habit of restoring 5HP every turn, so you need to kill them or the damage done is (partly) wasted.
Revenant
- 10HP
- Melee, low damage, restore HP on every turn
Gunman Revenant
- 9HP
- Medium range, low damage (-3HP), restore HP on every turn
- Tactics: These guys have revolvers and will not do great damage or have great range, so they shouldn’t be your top priority.
Rifleman Revenant
- 5HP
- Long range, high damage, restore HP on every turn
- Tactics: Same as for ordinary Rifleman.
Shotgunner Revenant
- 15HP
- Medium range, low damage (-2HP), restore HP on every turn
- Tactics: Similar to ordinary Shotgunner.
Demolisher Revenant
- 10HP
- Medium range, medium damage (-6HP) explosives, causes bleeding, restore HP on every turn
- Tactics: Similar to ordinary Mad Dog.
Witch
- 20HP
- Spawns two new revenants every turn. Will not restore her own HP though.
Demons
Hellspawn
- 8HP
- Medium range, Low Damage (-4HP on Hard)
- Tactics: Not a high-priority target, as they are fairly weak and cause relatively small damage. Use them for Bravado! when needed.
Bloodspawn
- 16HP
- Long Range, Daze
- Tactics: Not much to it.
Weapons
Melee
Skullcrusher
- Melee
- AP Cost: 1
- Range: 1
- Damage: 3
Jawbone Club
- Melee
- AP Cost: 1
- Range: 1
- Damage: 3
- Crippled: The enemy cannot move for one turn
Gunstock Club
- Melee
- AP Cost: 1
- Range: 1
- Damage: 3
- Dazed: The enemy cannot use weapons for one turn
Machete
- Melee
- AP Cost: 1
- Range: 1
- Damage: 3
- Bleeding: -2HP per action, 3 Turns
Reinforced Skullcrusher
- Melee
- AP Cost: 1
- Range: 1
- Damage: 4
Tomahawk
- Melee
- AP Cost: 1
- Range: 1
- Damage: 4
- Bleeding: -2HP per action, 3 Turns
Cross of Thorns
- Melee
- AP Cost: 1
- Range: 1
- Damage: 4
- Burning: -3HP per action, 3 Turns.
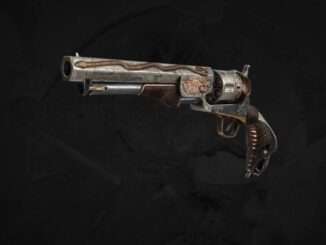
Handguns
Dirty Copper
- Handgun
- AP Cost: 2
- Range: 1-12
- Damage: 5
- Trick Shot
Widowmaker
- Handgun
- AP Cost: 2
- Range: 1-12
- Damage: 7
- Dazed: Cannot use weapons for one turn.
Hand Cannon
- Handgun
- AP Cost: 2
- Range: 1-12
- Damage: 5
- Bullseye Chance Buff: +15%
- Trick Shot
Desert Ranger
- Handgun
- AP Cost: 2
- Range: 1-18
- Damage: 6
- Trick Shot
Bullet Bouncer
- Handgun
- AP Cost: 2
- Range: 1-12
- Damage: 6
- Ricochet Bonus: +25% CtH for every ricochet.
- Duelist: Will perform counter when attacked by a single attack.
- Trick Shot
Derringer
- Handgun
- AP Cost: 1
- Range: 1-12
- Damage: 2
- Trick Shot
Duckfoot
- Handgun
- AP Cost: 2
- Range: 1-10
- Damage: 4
- Crippled: The target cannot move for one turn.
Deadman’s Gun
- Handgun
- AP Cost: 2
- Range: 1-12
- Damage: 6
- Bullseye Chance Buff: +15%
Shotguns
Coach Gun
- Shotgun
- AP Cost: 2
- Range: 1-10
- Damage: 4
- Buckshot (cone area damage)
- Bullseye Chance Buff +15%
Sawed Off Shotgun
- Shotgun
- AP Cost: 1
- Range: 1-10
- Damage: 2
- Buckshot (cone area damage)
- Bullseye Chance Buff +15%
Gutshaker
- Shotgun
- AP Cost: 2
- Range: 1-14
- Damage: 5
- Buckshot (cone area damage)
- Bleeding: -2HP per action
- Bullseye Chance Buff: +15%
Scorcher
- Shotgun
- AP Cost: 2
- Range: 1-14
- Damage: 6
- Buckshot (cone area damage)
- Burning: -3HP per turn for three turns
- Bullseye Chance Buff: +15%
Rifles
Wild Buffalo’s Rifle
- Rifle
- AP Cost: 3
- Range: 1-18
- Damage: 8
Hawkeye Rifle
- Rifle
- AP Cost: 3
- Range: 1-18
- Damage: 8
- Trick Shot
Chain Gun
- Rifle
- AP Cost: 2
- Range: 1-18
- Damage: 8
- CtH Debuff: -25%
Beecher’s Carbine
- Rifle
- AP Cost: 3
- Range: 1-18
- Damage: 8
- Bullseye Chance Buff +15%
- Elevation Bonus: CtH 50% instead of 25%
Elephant Rifle
- Rifle
- AP Cost: 3
- Range: 1-18
- Damage: 12
- Cooldown: One turn
Throwables
Nail Bomb
- Throwable
- AP Cost: 1
- Range: 12
- Area of Effect Damage: 3
- Damage: 3
- Bleeding: -2HP per action
Dynamite
- Throwable
- AP Cost: 1
- Range: 12
- Area of Effect Damage: 3
- Damage: 6
Blue Dynamite
- Throwable
- AP Cost: 1
- Range: 12
- Area of Effect Damage: 3
- Damage: 8
- Burning: -3HP per turn
Be the first to comment