
This is an in detail and comprehensive guide that will help you through each of the challenges in JWE2 Challenge Mode. It aims to be an overall guide of tips and tricks for any challenge map, as well as a walkthrough of how to complete each map.
Ultimate Guide to Challenge Mode
Introduction
Hey! This section of the guide is dedicated to tips and tricks for Challenge Mode that can be applied to any of the maps. Is challenge mode giving you troubles? Maybe you haven’t completed the first map yet, or maybe you have done them all and just want to improve your par-time. Whatever the case, you want to get better at the game. Don’t worry, this guide is here to help! These tips are strategies that I utilized to beat the Challenge Maps on Hard difficulty. This portion is organized by when in the game they will be relevant. The First Steps, the Early Game, the Mid Game, and the Winning End!
Each portion will also have a summary just in case you only want very quick tips. I recommend reading each portion though, as I go in depth into mechanics of the game and why these strategies are successful.
The First Steps Part 1: Pause and Assess
The First Steps
Skip intro pause game
You have selected a map and difficulty and have clicked play.
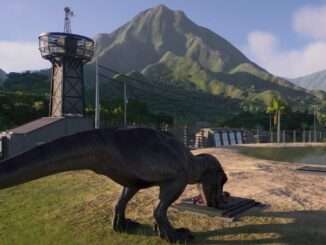
As soon as you click play Skip the intro for the love of dino dna skip the intro! Yes the time has started and yes your starting cash is already being drained! Skip that intro and then pause the game! Every minute in the game that passes is money wasted which we can not afford! There is a lot to do in this beginning stage before we even get to playing the game, so pause and relax and take your time. Before we get to doing anything there are a few things we need to organize. We need to take inventory of our resources, familiarize ourselves with the map, and form a plan of action. While paused take a look at the map (hotkey is M), look and see where our ‘arrival point’ and ‘command center’ are located, look for wild dinosaurs and pre-existing sources of water/plants that we can take advantage of.
This would be a good time to decide if our two buildings are in the optimal position. We won’t get much of a chance to move them later on, and the maps typically have us starting in a corner of the map which is less than ideal. We want access to some of the maps resources so that we don’t have to spend money terraforming or building long paths to get to them, so don’t be afraid to move our ‘arrival point’ and ‘command center’ to a more open area. This is made even easier in this game, as you actually can just move the building without demolishing and rebuilding it. You will have to unpause to get this completed, but it shouldn’t take long. Once you are in a good position and you know what the map has to offer, we can move un to the next step. Keep in mind we are still paused! Don’t get ahead of yourself.
Summary
- Skip the intro!
- Pause game!
- Take stock of resources, look for free water or edible plants
- Relocate facilities if needed
- Keep in mind your park’s needs for the future
The First Steps Part 2: Assemble Your Team
Assembling your team
We need to address the biggest money suckers in our park. The scientists. They are a new mechanic in JWE2 and can be very frustrating and demanding. If we are not careful they will cause us to go bankrupt, which at an early stage just means you have to take the L and start over. Check on your scientists, we usually have at least 1 already hired for us, and assess whether or not they can be helpful in the early stages. Scientists have three major characteristics that make up their usefulness:
- Stats
- Ability
- Salary
To do anything in the game, and I mean anything, from going on expeditions for fossils to actually incubating dinosaurs you need a scientist (or a team of scientists) that is skilled enough to complete the task. This is broken into three stats of
- Entertainment
- Research
- Welfare
The higher the number, the more skilled they are in that stat. It can be very tempting early on to hire any scientist striking a 4 or a 5 in one of their stats, but trust me your wallet doesn’t think it is worth it. I never even got to training my scientists until the mid game, and since most of the early game tasks don’t need more than a 5 of any one stat we will be good with low-tier scientists. The next attribute to consider is their ability. Scientists come with a perk that can affect their work, like make a task go faster or boost the moral of their team. Right now the only perks we should look for are any that lower the cost of a task or lower the time it takes to complete. For success we need to hit the ground running, we have to save every penny we can and since time is money we need to save that too! Lastly and most importantly is the overall cost/salary of employing the scientist. They end up being your most costly upkeep, some scientists can cost upwards of 50,000 a minute just to employ. In this early game we can not take on anyone costing more than 10,000 a minute. Keep in mind that we want at least three scientists, and at 10,000 each that is 30,000 a minute we are losing. Assemble your team carefully. Once you have about three selected, with about 4 or 5 combined points in for the three stats, we can move on to the next stage.
Summary
- Fire the scientists you start with.
- Hire a new team!.
- Hire scientists that work for cheap (10,000 or less).
- Aim for scientists with perks that either lower task time or lower task cost.
- Have a combined stat of 5 for each stat type.
The First Steps Part 3: The Race is On!
The race is on!
Ok we have gotten to know the map, we have selected a location to start in, we have relocated our two buildings (if needed), and we have assembled our victory team! Does this mean we finally get to unpause and start? Yup it sure does! And every minute that passes is money down the drain, so we should coordinate what our goal is. What is our goal? Essentially the name of the game is that cold hard cash baby. Money makes the world go round, without it we can not employ our scientists and without them we are toast. To make money we need dinosaurs to draw guests in. With so many to choose from, where should we start? Typically the map starts you off with enough of a genome for Struthiomimus to make a batch. Don’t do this. In JWE1 the name of the game was “the Race to Struthy!”, but in JWE2 apparently the guests are bored of this dino and it will not make enough money for us to begin making a profit. You can make 10 of them and our profits will go from -40,000 to maybe -35,000? Nah man. Instead the motto of JWE2 is “Race to Nasuto!” Has a better ring anyways. Nasutoceratops, an early game ceratopsid, is cheap enough that we can get it easily, but also wowing enough to draw in the crowds. Plus later down the line, these dinos have a lot of tolerance for different species which makes for a winning exhibit.
In order to get to our first dinosaur we are going to need a few things. You should construct the following:
- Backup Generator (this thing is *** evil)
- Science Center
- Expedition Center
- Hatchery – attached to an exhibit for our eventual Nasutoceratops
Try to keep everything organized and compact, transportation is a thing and it does affect our star rating. You might be wondering about a Ranger Team or about Amenities, and don’t worry we will get to them eventually. For now however, they are a major waste of money and should be put on the back burner.
We move unto the next step, making our first dinosaur!
If this is a map that already supplies enough genome to make a Nasutoceratops then go for it! Make that dinosaur ASAP! The sooner we make it the sooner we stop losing money. If this is a map without enough genome, then send out an expedition for its fossils.
While this is happening we need to take a quick detour to do some research. You likely won’t start out with much of anything available to you, but that’s ok because overall there is next to no research that we need for the entire game. The first thing you should research is Power Technologies, it is found in the power tab and is crucial for long term development. Why are we researching this over anything else? Because the backup generator is evil and we hates it. The Backup Generator is another new implementation of JWE2 and is one of the necessities of the first steps to any play-through. The generator supplies power to your buildings, but requires fuel to run. You have to manually resupply the fuel, and one full refill of the generator costs around $500,000. Holy ornithomimus batman! That is enough money to hatch a full herd of dinosaurs, and is 100% not worth wasting on fuel. Instead what we are going to do is research Power Technology so we can have a renewable source of power for our park. One small Power Generator will for sure be enough to last us to the mid game if we are smart, and it will do so without breaking the bank! So assign your team to researching!
While they are doing that our first batch of Nasutos should be done by now! That or our expedition team just returned with the precious Nasuto fossils. If this is the case then take the time to synthesize them for dino DNA. We only need enough to successfully make a dinosaur, there is no reason to get to 100%. It doesn’t matter if our dinosaur is pretty, just as long as we can get it out there for our guests to see.
Let’s say that your Nasutos are still being extracted from fossils, your research team has finished and you have placed down your small Power Generator, what should you do while waiting for that Nasuto? There is one other thing essential to research before we move unto the official Early Game, and that is a Staff Center. You may have noticed that your staff are getting more tired with each task they complete, it is a pesky trait of humans that they can’t work endlessly without burnout. If you overwork your staff they will become ornery and may even quit or sabotage your park! The Staff Center is needed to provide a place for your staff to rest and be ready for more grueling work. Research and build that bad boy!
And with that, you finally have a batch of Nasutos synthesized and ready to go. More on that in the next part!
Summary
- Race to Nasuto!
- Build power, science, expedition, hatchery with exhibit. Forget rangers, medical, or amenities (for now)
- If you have nasuto genome, make some! If not, then go get some nasuto genome!
- Research Power Technology
- Research Staff Center
The First Steps Part 4: Your First Dino
We are looking good!
Now we have setup a good starting facility. We have Science, Expedition teams, Unlimited Power, happy Staff, and most importantly a Hatchery that is revvin to make some dinosaurs. We should for sure by now have enough of a genome to make our Nasutoceratops.
In order to make a dinosaur we need to go into our hatchery and assign scientists to synthesizing a clutch of eggs, from which we will select the best eggs for incubation. Nasutoceratops has a max clutch of 4 eggs, which means that for every synthesized batch we can get at most 4 dinosaurs from it. This method is much better to the previous game, where we were forced to pain stakenly incubate each dinosaur individually. Before assigning scientists we are given the opportunity to modifying the dinosaurs genome. Don’t waste your time. Modifying the genome for prettier or hardier dinosaurs on the surface sounds like a great idea, and it certainly is something you could get into later on once we are financially stable. For now though it is yet another frivolous addition that will only cost us more money and make the genome synthesis unstable. A basic batch of Nasutos will work just fine.
As a quick note, getting DNA from fossils doesn’t always leave you with a perfect 100% genome. The percentage of genome required to make a batch of dinosaurs changes from map to map. On some maps you can get away with 50% genome, while others require 100%. Think of the percentage as how good the base dinosaur can be. Sure you CAN make dinosaurs with 50% genome, but they are more likely to die in incubation, more likely to have negative behaviors, and more likely to be sickly. This also affects what your guests think of the dinosaur. Things have changed since the first game, and your guests DO care if your dinosaurs are half-baked. Typically I just wait to make dinosaurs until they are 100%, otherwise I am spending money on sub-par dinosaurs.
Your Nasutoceratops batch is likely done by now. Hooray! Your first dinosaurs! But oop, not quite. You have synthesized a clutch of eggs, now you have to decide which ones will go on to be incubated. If you took the time to get full 100% genome then it is likely you have a full clutch of 4 eggs, each egg with varying traits. TAKE NOTE: Each time you synthesize a clutch of eggs, each egg will have the traits you pick when you modify genome before synthesis occurs! IN ADDITION to those modifications (if any) each egg has a chance of developing traits. The higher the genome, the more likely it is those traits are positive. Similarly, the lower the genome, the more likely it is those traits are negative. These traits are wide ranging, and you can check out my guide to traits for a more in-depth understanding of each trait! For right now though, traits highlighted in red are evidently the bad ones. While you can accept those eggs, (I do it all the time with little repercussion), be sure to avoid any trait that increases the Aggression of your dinosaur. Higher Aggression makes a dinosaur more likely to attack vehicles, fences, other dinosaurs, and even more likely to frighten guests! Overall, a nuisance.
Pick which eggs you would like to incubate. Preferably eggs that have positive traits. It will take some time to incubate, and while that is happening you can set up a proper enclosure for your happy Nasutos.
With housing dinosaurs you need to keep a few things in mind. Things have gotten a lot more complicated since the first game. We will use our Nasutoceratops as reference to go through all the new mechanics for keeping your dinosaur happy:
Summary:
- Make those Nasutos!
- Don’t make sick ones
- Pick the best of the bunch!
- Enjoy watching your happy dinos!
The First Steps Part 5: Enclosure Mechanics
Taking a brief moment to explain the new mechanics of JWE2’s dinosaur housing. This is vital for the rest of the game, as what dinosaurs we choose now will have impact on which ones we should choose later. The mechanics are very complicated, but no worries! We will get through this together. Let us take a look at our lovely Nasutoceratops as reference to understand these new mechanics. In the first game, dinosaurs had very simple needs. Food, Environment, and Social. There were feeders for both carnivores and veggiesaurs, the only environment types were forest/notforest, and pretty much any herbivore could live with any other herbivore (just as long as they had enough space).
Throw all that knowledge out of the window. Literally none of it will help you now. Everything has changed.
Lol ok maybe its not that much of a detour from the first game, but it is very different. Your dinosaurs needs can still be broken down into Food, Environment, and Social. Except things have changed for each of those categories. These categories combine to create your dinosaurs overall Comfort percentage. The level of discomfort a dinosaur can tolerate before rampaging is different based on the species.
Food
Dinosaurs need to eat! While we still have carnivore feeders, we no longer have herbivore feeders. Instead you must edit the terrain to have the preferred edible plants of the enclosed dinosaurs. This can be tricky when housing multiple species with different preferred plants.
Note: If an herbivore does not have enough of its preferred plant, it will starve! They will NOT eat other plant types.
Carnivores are much easier to feed. They have three feeder types; dead meat, live prey, and fish! Certain species only accept one of these feeder types. Note: Don’t get me wrong, a Baryonyx ( a fish eater) will just as happily eat a goat as it will a fish. However! Putting a goat dispenser into its enclosure will do nothing for its comfort level! So to reiterate, most carnivores have animations for eating from any of their available feeders, but only certain feeders actually matter when it comes to maintaining their Comfort level.
Environment
Different dinosaurs thrive in different environments. In JWE2 we have WAAAAY more options in enclosure customization. More tree types, a terrain brush, and even rocks! (That rocks). All of these customizations actually may have an impact on your dinosaurs comfort. How do you know which ones will affect your dino? TIP: Before synthesizing a species, you can look at that species comfort needs in the genome library of your hatchery. There it will tell you what its needs are. Every dinosaur will have its environmental needs broken down into four-ish categories. What does this mean? Basically, for example our Nasuto needs; Water, Forest, Open Space, and Ground Leaf. A Baryonyx needs; Water, Forest, Rock, Fish. A dinosaur will typically have four things, this might be a ground type, a plant food type, etc. Chunkingosaurus is one that only requires three things, curse you ya chubby stego!
Herbivores typically all need; Forest, Water, and then either they will have two different food needs (like ground leaf AND ground fiber) or they will have one food need with an open space need.
Carnivores typically all need; Forest, Water, their preferred feeder, and then either open space, rock or terrain type (like sand or rock).
You may be looking at this thinking “Oh! So I can house herbivores together if they have the same environment needs!” Well yes, but actually no. And that is due to the newer mechanic that I think is the one that most players struggle with, Social.
Social
In the past game players were able to create vast enclosures with several herbivore species living harmoniously. Unfortunately now our dinosaurs have a much more complex social structure. To Summarize: Any dinosaur does NOT like other dinosaurs of its same type (type, not species). Armoured dinosaurs do NOT like other armoured dinosaurs.
So what does this mean? What is dinosaur type? Your dinosaur species are categorized by their larger family, such as Sauropod or Ceratopsid. When looking at our Nasuto’s social tab, you can see which types it likes and dislikes. NasutoCERATOPS is (you guessed it!) a Ceratopsid. It is an armoured herbivore. So what can we deduce from this? It means it is unlikely to tolerate other Ceratopsid or other armoured herbivores in its enclosure. If a dinosaur is housed with a type that it dislikes it becomes highly agitated. This agitation will cause its comfort to slowly go down until it rampages, and it may even pick a fight with the dinosaur it dislikes. If a dinosaur is housed with a type that it likes its comfort level will increase, giving you more leway with some of its other comfort stats. For example, our Nasuto.. if we were to house them with say a Triceratops or a Kentrosaur, our Nasutos will become angry and will try to kill the other dinosaurs. However, they like Anklysaurids! So if we were to house them with a Nodosaurus, our Nasutos will overall need less of all their other comfort stats, giving us more wiggle room to make the enclosure comfortable for other species. IMPORTANT NOTE: When a dinosaur type is listed as being “liked”, that does not always mean it is safe to house! A lot of dinosaurs “like” Comsagnathus, but use common sense. Ceratasaurus doesn’t like Compys because they are a chill dino to live with, they like them because they want to EAT THEM! This goes for herbivores too, your Sauropods can squish your Compys.
Another new aspect of the Social need is the Territory mechanic. In the first game, you would plop a dinosaur down in an enclosure and it would instantly map out the whole fenced in area and calculate its comfort. However, this would only extend a certain distance. You could try to have one area of a habitat be forest while another is open plains in order to suit dinosaurs of varying needs (looking at you Brachiasaurus) but this wouldn’t really work. Instead of them sticking to the place they were happy, it was inevitable your dinosaur would wander to a place where it couldn’t calculate its forest anymore and would become angry. In JWE2 this has been fixed with territories. A dinosaur will map out its territory within the bounds of its enclosure as it walks around, and will do so until it is 100% comfort.
You can check out my guide that outlines which species can live with which, and what could be considered “Game Winning Enclosures” to maximize enclosure to profit ratio.
Additional Changes
These are some quick additional changes from JWE1 to JWE2 to keep in mind when building enclosures.
- You won’t know a dinosaurs comfort level until you build a Ranger Outpost to check on them. You can assign Ranger Teams to routinely check on enclosures.
- Dinosaur Visibility DOES affect star rating now!
- If the fence is stronger than the dinosaur enclosed it CAN’T break out! But unhappy dinosaurs make for unhappy guests.
- Carnivores can fail at hunting goats, which can lead to starvation if they are bad at hunting. (Yes that is an actual trait) So sometimes an extra meat dispenser is helpful.
- Don’t house carnivores with herbivores, just don’t. Armoured herbivores used to be safe from small carnivores, but now because of pack hunting no herbivore is safe.
- Even in large enclosures, dinosaurs who dislike eachother will seek eachother out.
To Summarize
- Things have gotten more complicated
- Be sure to supply your dinosaur with the right food
- Environment matters!
- Don’t house different species that share a family type in the same enclosure
- Don’t house different armoured herbivores together
- Don’t house small carnivores with larger carnivores
- Don’t house carnivores with herbivores, even the small ones are vicious
- Happy dinos are happy guests!
Forget dinos at start. Race to to guest attraction. You may need to release a dino to access research. Pick the cheapest and only make 1. Airlift it but don’t actually place it. Cancel the release. Then continue research. Innovation center + guest attraction = 350 appeal = instant profit. Add 3 small amenities plus restroom, shelter, and hotel for 100% satisfaction. You can even unlock more attractions without adding a single dino Best way to kick off any park and stop bleeding money. Except the $ 0 challenge map which requires a different stategy early game, but you can still use this once you get over that first hump.
This Could Be Helpful For Me In Canada Medium So Thx And Also Ur First Carnivore I Recommend As Carnotaurus Cuz U Only Need A 2×2 Max Fence Square With ALL SAND And A Prey Feeder And Some Water And They Are Comfortable
Also Make 2 Carnotaurs Or They Gonna Be Lonely
I’m excited for the rest of this guide, looking good so far! 🙂
If anyone is having any trouble with Germany on Jurassic, “race to Nasuto” kinda got me on my first attempt, better to pump out a few batches of struthis first to get your guest count up. They lock a lot of tech behind guest count, including core buildings.
They give you such little starting cash that you have to research everything in the right order and build stuff in the right order or you go bankrupt before hit the break even point. Its honestly pretty fun.
This is really great! Thank you for your time!
This guide is terrible and straight out bad information for too many reasons to list
Could you list some, for goodness sake?!