
This guide is meant for those who’ve used an Event Power Pass. They are normally released with new classes, so it may have the class’ name in the title of the voucher. That doesn’t matter, use it on whatever character you want.
What is the Power Pass?
A Powerpass is Lost Ark’s version of a Level Boost or other paid/premium boost in other games. It’ll generally have a title such as Elgacia Powerpass or similar. Elgacia is one of the areas in the game. Each area in the game is linked to both story and gear progression, as each new area requires a certain item level to enter. Once used, a Powerpass will grant you all quest completion through that specified area along with items such as mounts you would’ve gotten as story quest rewards and a full set of gear relevant to that area. Refer to the rest of the guide to find out how to use this Powerpass.
Using the Power Pass
You should’ve gotten the power pass in your mail in the form of a ticket looking voucher on whatever character you’ve logged onto first in that region. You need to claim that power pass from your mail, then “consume/learn” it from your inventory by right clicking on it to add it to your account. Do keep in mind that these power passes will expire if not used within their allotted time even after you consume it. Finally, you must go to the Character Select screen to use the Power Pass on a character.
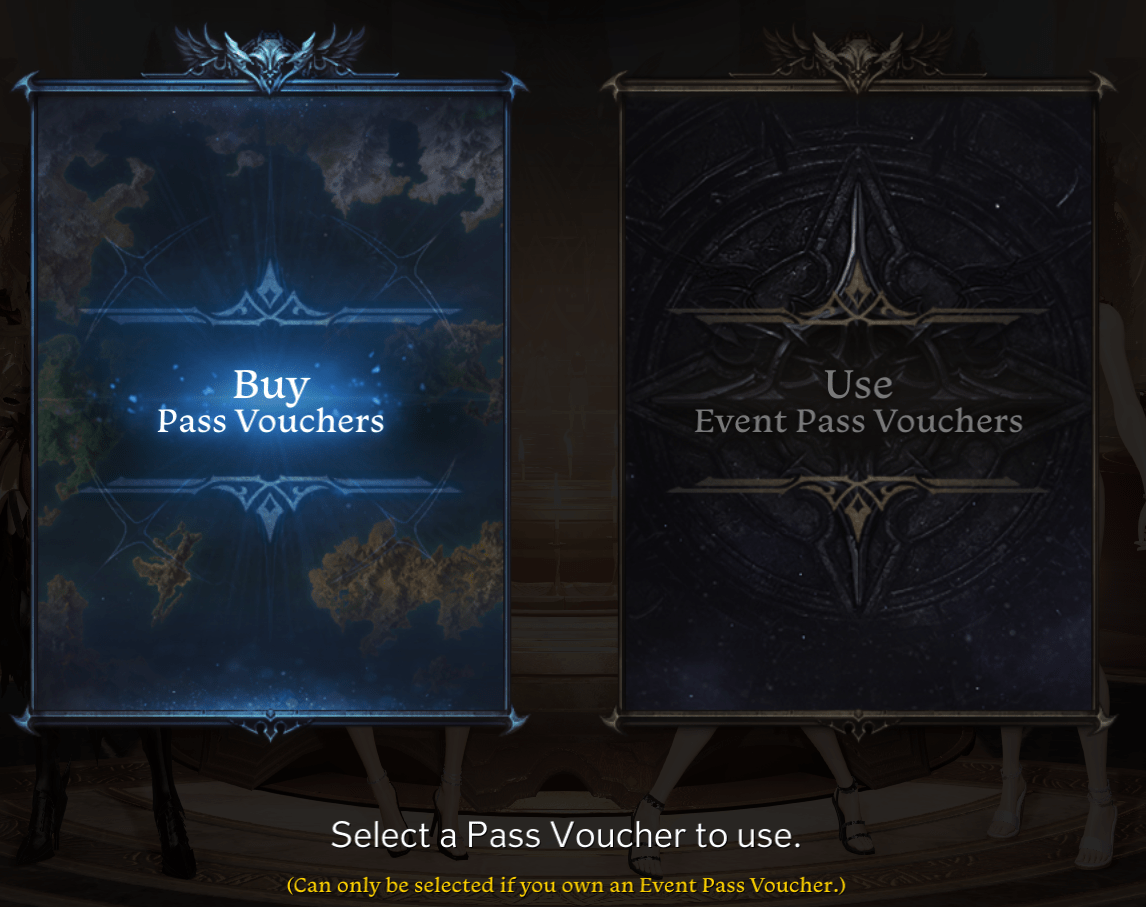
From there, you want to select the “Use Event Pass Vouchers” button. Congratulations! Now we can move on to what’s next after using it. This should teleport you to Trixion where you talk to Beatrice. You’re given the option to review the past major points in the story by replaying sections of it for one time per account rewards. Feel free to either do it, or skip it to do it on a later power pass as it does take some time to get through.
After Using the Power Pass
Now, you’ll be spat out somewhere in North Vern once you use the Power Pass. You would’ve gotten a few boxes containing mounts, go ahead and open whatever you think looks the coolest then learn them. For the potions you’ve received, you can place them in your Hot Bar. They should be titled something like “Starlight Healing Potion.” Your Hot Bar is directly below your Mana bar. Just drag and drop them into a slot. Now, you should’ve also gotten a box containing different sets of Relic Rarity armor and weapons. What set you choose is very important as each class relies on certain sets to perform. If you choose the wrong one, it’s not a big deal at all since you can freely swap between sets using Gear Set Conversion. It’ll either be immediately unlocked, or unlocked through a short Guide Quest. Guide Quests are colored purple and may be located from your Quest Journal [J] under the Guide tab.
Next on the list of things to do, you should see another couple Guide Quests in your quest tab on the right of your screen below the minimap. One should be mentioning how to start the Elgacia questline, the next area after South Vern, and the other should mention how to start your adventure. You want to follow that short quest that’ll have you press [F5] and talk to a man standing outside of the building you’re currently in. He’ll go over some basic game systems. I suggest you read it.
Very nice! Now you’re ready to start your dive into Lost Ark!
What Now?
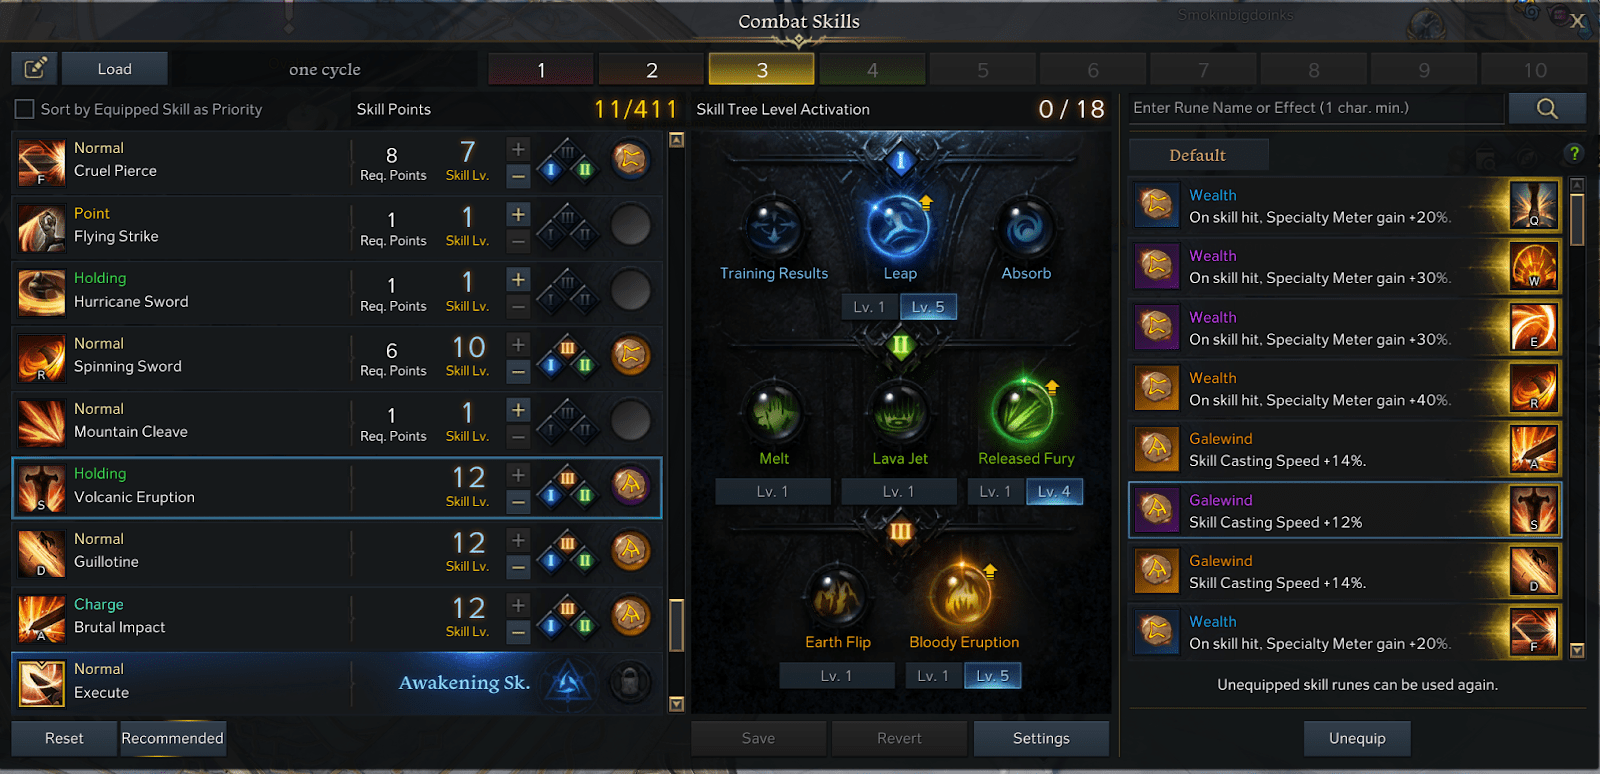
Setting Up Your Skills
Now is the time to set up your character for your main daily and weekly content. Class Engravings will determine how your class plays, what skills you use, combat stats, etc. What you should do now is set up your skills in your Skill Menu [K] to match whatever class engraving you’re going to use. You won’t have enough Skill Points to level all skills and select all the Skill Tree nodes as written in the guide, but you’ll gain them over time through various methods. There will also be Runes and Gems in the class guide. For runes, you will have gotten many of them in your Universal Storage located in the bottom right of your screen under the Guide button. Go ahead and claim all items from that storage and learn whatever you can, it’ll get added to your account.
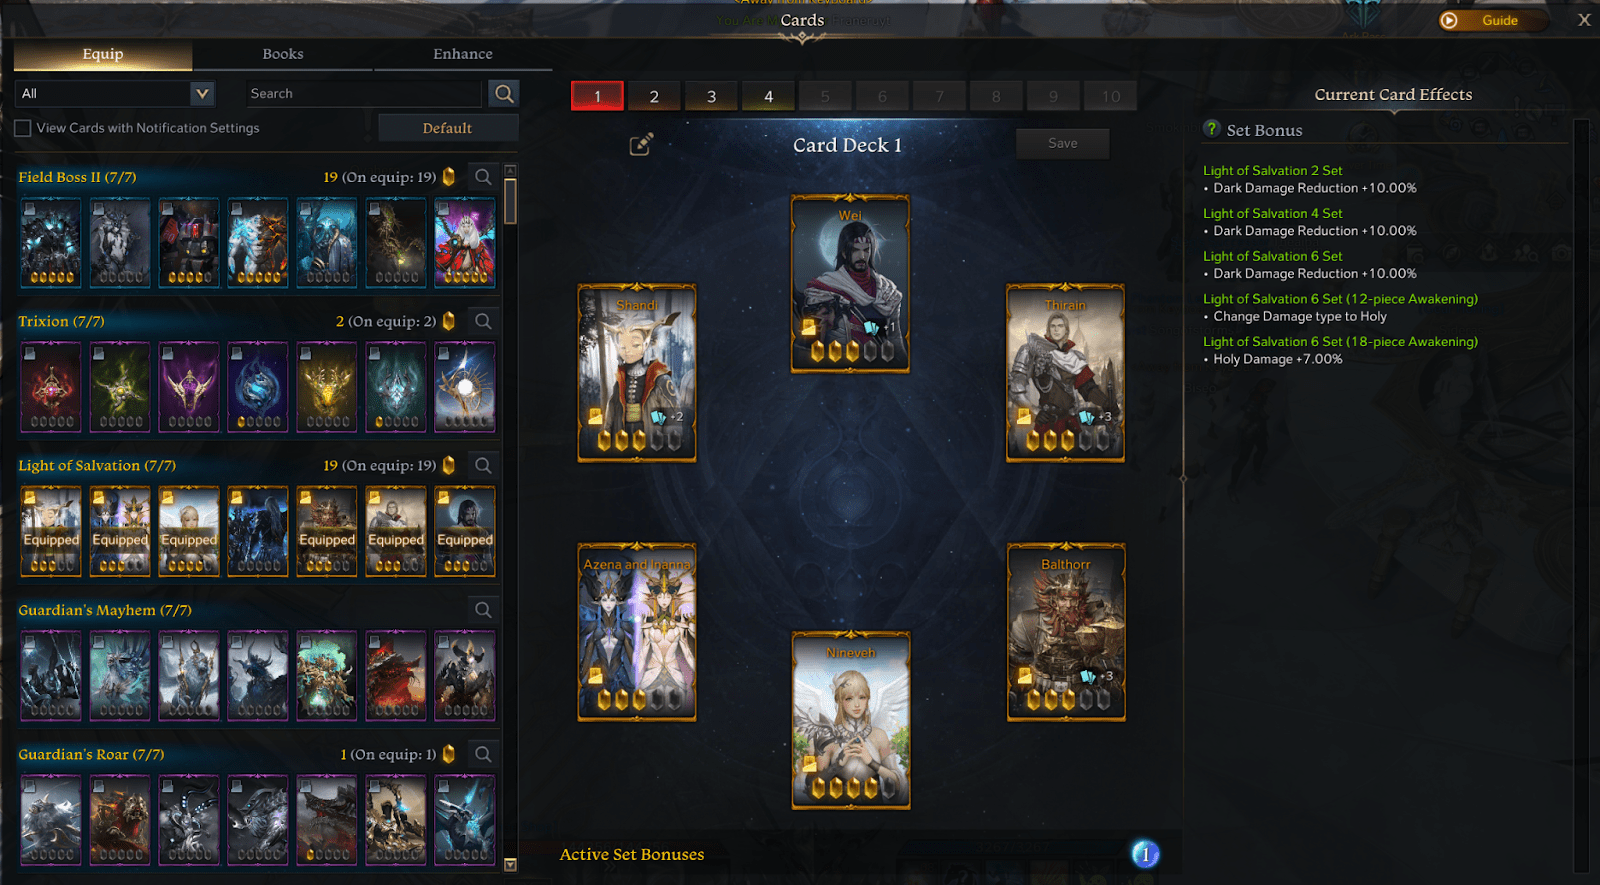
Cards
Going over the entire card system is a bit beyond this guide, so I’ll just briefly touch on the subject.
Cards are collected for stat bonuses and to be equipped in sets [alt + c]. I mentioned to claim everything from your Universal Storage earlier, the card set Star of Destiny will be there as well. You’re given this set by completing the main story. Open your card menu [alt + c], and equip those cards by right clicking to add them from the Equip tab. It will be a while before you manage to collect endgame card sets such as Light of Salvation for dps or Lostwind Cliff for support. The Star of Destiny card set will be fine until you manage to farm out Deep Dive, then finally move over to an endgame card set.
Important: Do not awaken cards unless you know what you’re doing and never delete cards.
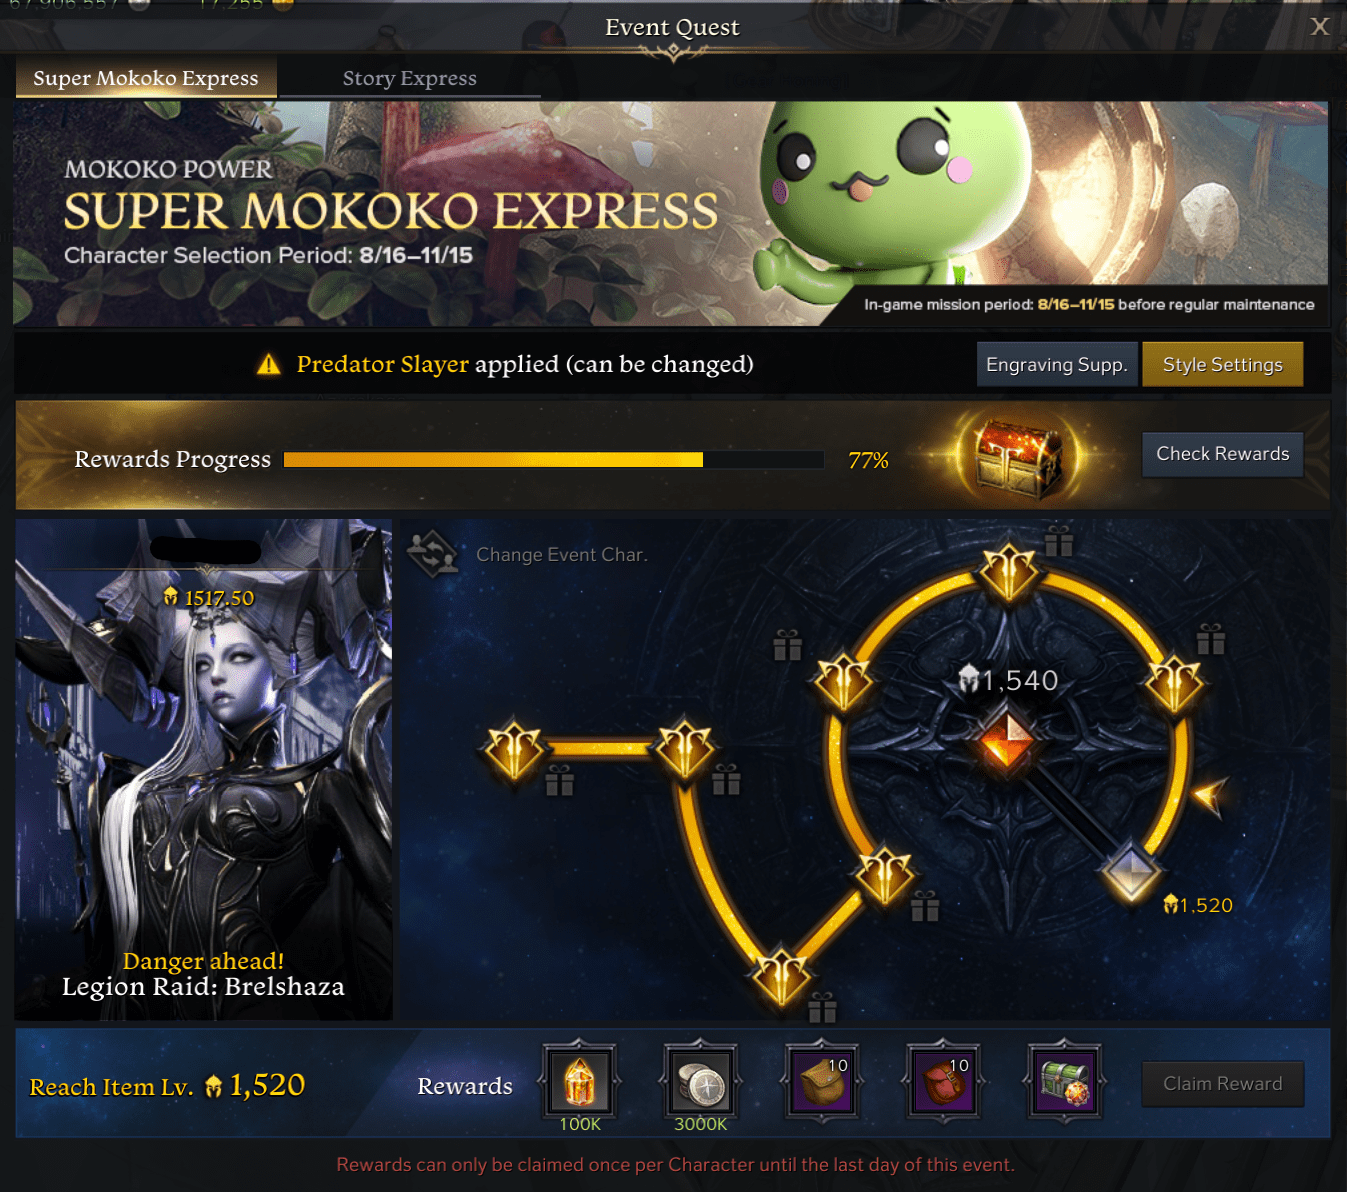
Hyper Express Event
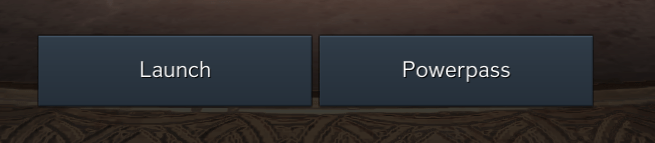
With free event power passes and new classes, a Hyper Express Event (also named super mokoko express) normally exists as well. You should’ve gotten a large popup window mentioning it, prompting you to select a character to use it on. These express events are made to help you get from x item level to y item level. They won’t give you enough honing materials to reach it alone, but it’ll greatly speed up your journey. If you’re a new player with no other characters, I’d suggest you accept the hyper express event on the character you used the power pass on. If you’re an existing player, I’d use it on your main character if they’re still at the eligible item level to accept the event.
Once you accept the hyper express, you want to claim the rewards by clicking on the Event Quest button directly to the left of your minimap. Now, you should hone your gear using those materials at the Gear Honing NPC. You can find them by searching “honing” in your map [M]. Hone all pieces of gear evenly and as high as you can, but make sure to stop honing at +15 (1490 item level) on relic gear. You won’t have enough materials to finish the hyper express, so now this is when you’ll need to start looking at doing Daily and Weekly content.
It’s very unlikely that you’ll have enough honing materials such as Honor Shards and Leapstones to progress to 1490 item level from the Express Event alone. Shards will probably be your biggest bottleneck. Later on in this guide, I go over daily and weekly content. These things will be the main source of your honing material income. But in addition to those, there are a few other things you can do. First would be the Chaos Line found in Bellion Ruins, South Vern.
This is a weekly you can do that gives you currency to buy from a one-time per account shop. Second would be other events happening at the time. Event vendors and guide quests are marked by a bright pink color. Generally, they give an exchange currency obtained by doing daily/weekly content to be used at an event shop. Finally, there’s Thronespire. This is a familiar tower climb where you gain items per floor you clear. With Thronespire, you can go to the highest floor that rewards items, clear it, then obtain all lower floor rewards as well. This is one time per account.
Finally, a couple of extra things regarding the Hyper Express Event. If you took the Hyper Express on the wrong character, you can swap it to another once so long as you’ve not honed your Hyper Express character with it active. If you hone at all it can no longer be transferred. Also, when you accept the event, you must choose a Style. This is telling you to choose a Class Engraving. It’ll give you gems, engravings, accessories, and even allocate skills. Feel free to skip hitting the “Auto Apply” button which will change your skills, but you must choose a Style.
Daily and Weekly Content
Daily and weekly content is going to be your main source of honing materials (guardian and destruction stones, shards, and leapstones), silver, gold, and many other things.
Daily Content
Daily content consists of Chaos Dungeons, Guardian Raids, and Una Daily Tasks.
Chaos Dungeons and Guardian Raids can be accessed by pressing [Alt + Q]. The menu that appears defaults to a strange layout, so hit the “Select UI” in the top right and swap it to the “Main Content” layout. Chaos Dungeons and Guardian raids give a large amount of materials (chaos dungeons being the largest), and the rewards scale with item level. So you want to hone your gear as much as you can before entering so you can go into the highest difficulty. Chaos Dungeons are made to be easy solo AOE farm content. Just go in solo using your Chaos Dungeon build from your class guide and kill some monsters.
The same goes for Guardian Raids in that higher leveled ones give better rewards more fitting for your item level. But beware, guardian raids are meant to be challenged in a group of four people, and require certain Battle Items to be used at specific times. Guardian Raids aren’t meant to be super difficult, but not knowing mechanics will waste your time and everyone else’s. This content you want to match make.
Daily Una Tasks can be accessed by pressing [Alt + J]. You can accept up to three per day per character normally. The usual ones people do are Una Tasks that give Leapstones or Silver. For Leapstones, I personally do “Where it Belongs,” “Unsolved Mystery of the Watchers,” and “Kinsera’s Memorial Service.” While Silver Una Tasks are called “Lopangs” after the island named Lopang Island. You’ll need to complete the quest line there to access the Daily Una Task. Each Una daily and weekly you complete will award Una Tokens located on the left side of your Una Task screen. You can gain these each week to spend at the [Gold Shop] NPC. The number of Una tokens will increase as you gain a higher item level. For additional daily Una’s Tasks, there’s the Rowen penpal one. if you want to unlock that continent by doing its main story quest, and the Elgacia one where you just sit around in Hestera.
Weekly Content
Weekly content consists of Abyssal Dungeons, Challenge Guardian Raids, Challenge Abyssal Dungeons, Legion Raids, and Weekly Una tasks. Challenge Guardian Raids are pretty much the same as the daily ones, but you can only do three per week in whatever that week’s rotation is. They give a massive amount of rewards fit for your item level, so try to hone as high as possible before doing them.
Weekly Una Tasks are the same as daily, but you can only do three per week.
Legion Raids and Abyssal dungeons you want to use the party finder function. No one match makes these as they’re more challenging content. Finally, Challenge Guardian raids are fine to match make. The content is quite easy. The rest of the weekly content is out of this guide’s scope. So, follow these links if you want to read more on them.
Note: Legion raids in lost ark are very mechanically heavy. For the most part, they require everyone to complete mechanics quickly and correctly many times or the entire raid will wipe.
Reading and watching guides is required to do legion raids, otherwise you’ll get swiftly kicked from groups.
Disclaimer: Daily and Weekly content could very well change in the coming months. If it does, I’ll work to update this guide as soon as I can.


Be the first to comment