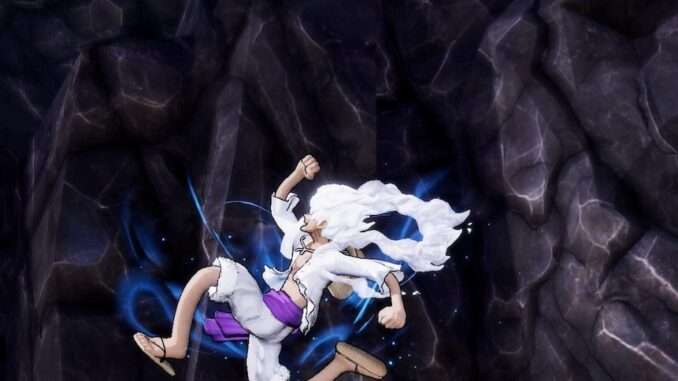
Clearing all Objectives in the Yamato Special Log 2 Land of Confections with Objective Details and Pathing.
Objective Results
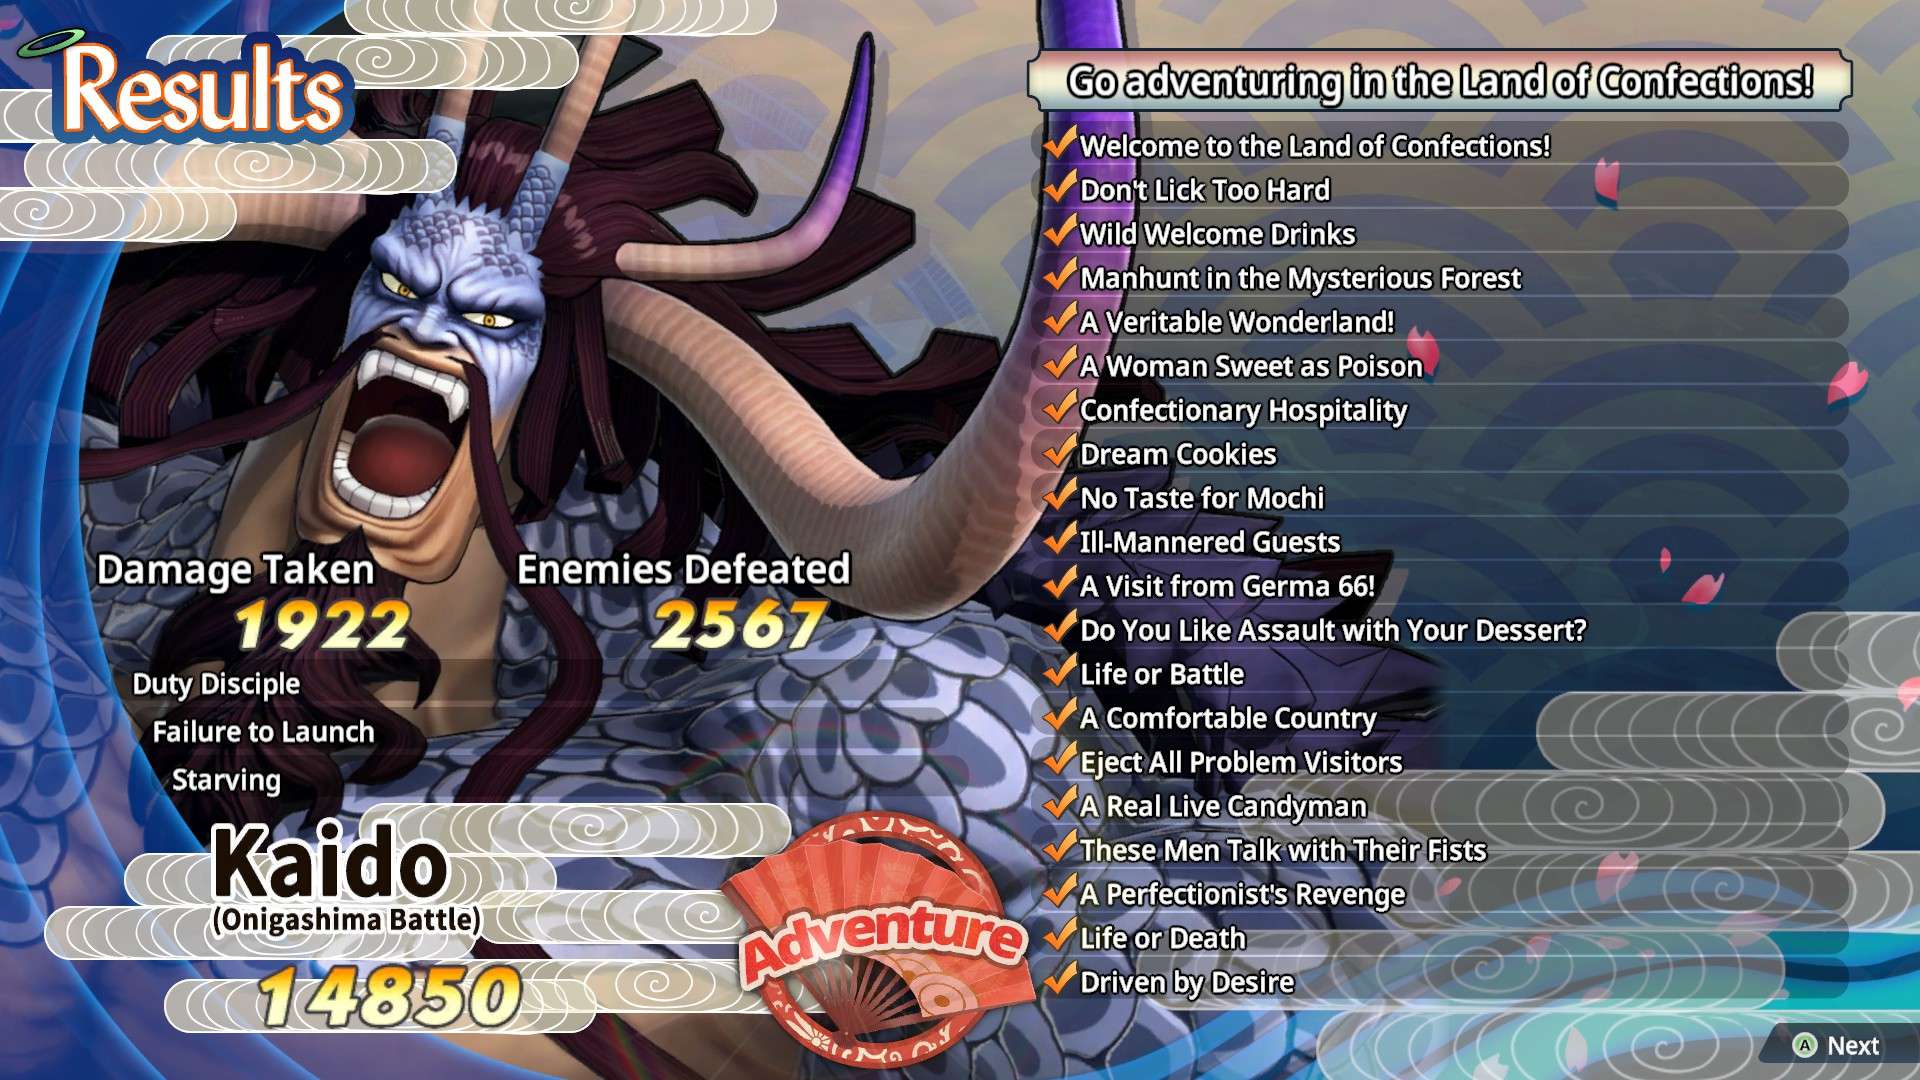
These are the results you can expect to get by focusing only Objectives, not including Chest Points (1000 points each) or Minion Kill Points (300 points for every 500 minions). So you will need to collect a couple of Chests or kill more Minions in order to hit the 15,000 mark to get all the end rewards. I still had over 10 minutes left on the clock when I completed the Map, so getting to the 15,000 Points mark is super easy.
You can ignore all the Soul Enemies, as the farming spots for each Soul Type are as followed:
- Land of Wano for Stamina Souls
- Land of Confections for Health Souls
- Navy Base for Defense Souls
- Archipelago of Dancing Bubbles for Power Souls
Part 1
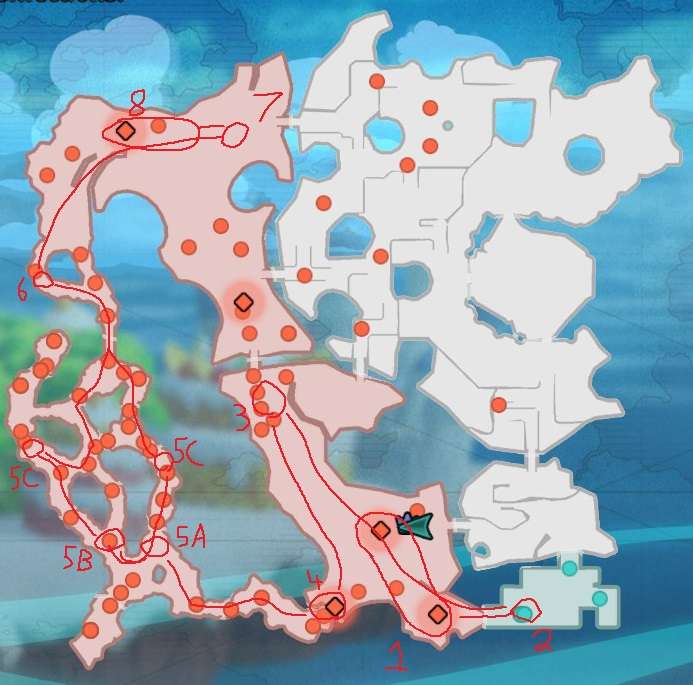
- Defeat the Commanders.
- Defeat Reiju.
- Defeat Perospero. Don’t defeat the Commander above him, as he will head to the exit point once you go into the Woods for Part 4/5.
- Defeat the Commander. He will be leading you into the woods where you encounter many Brulee disguised as Luffy? like in the Whole Cake Island Arc.
- Defeat Luffy?. Brulee will block off the Woods once you enter. Each Luffy? defeated will unlock more of the Woods.
- Defeat Luffy?. This is to unlock a section of the Woods where the real Brulee as Luffy? is hiding same as objective 5A. Pay close attention to the Mini-Map when the Objective to defeat Brulee is active, as the real one on the mini-map is actually a darker red than the fakes. When another objective has the highlight, all the markers for this one become the same colour.
- Defeat Luffy?. I have played the Map 6 times, and the real Brulee has always spawned in either of the 2 locations marked. If they spawn in the bottom left for some reason, defeating the Luffy? at the Forest Entrance opens that area up, which you need to defeat the 5A objective Luffy? in order to open the entrance up. Just want to clarify in case the real Brulee can spawn in any of the locations. The rest open up as you progress forward, that one is the only exception. Once the real Brulee has been defeated, ALL the Woods open up like normal again.
- Rescue Carrot by defeating the Commander. Carrot spawns with very little HP and the Rescue Circle around her, so get to her quickly upon getting to the top of the Woods after defeating Brulee so she doesn’t flee from taking too much damage.
- Defeat Smoothie. Do not defeat the commanders until after you beat smoothie, that progresses the map search.
- Defeat the Commanders. The Commander that starts near where Perospero spawns in should have moved to the top before this point, leaving the last 2 Commanders to defeat in close proximity and close to Smoothies spawn.
Part 2
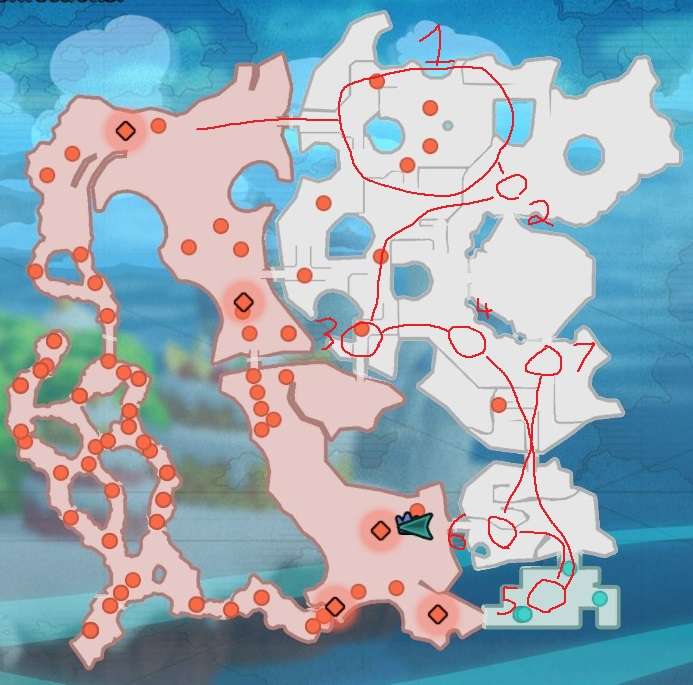
- Defeat the Commanders. There are 3 Commanders in that top area, defeat all 3 of them as you move towards Crackers spawn which is objective 2.
- Defeat Cracker.
- Defeat Katakuri.
- Defeat the Commander with a HIT 300 Count. There is a Spawner near the Commander, but also another one just above the Wedding Hall Entrance just north of where he spawns, so if needed just kite him backwards a bit to ensure you get the 300 HIT Count going before you defeat him. Do not defeat the last 2 commanders, that will trigger the map search and you can’t complete the rest of the objectives for this part.
- Defeat the Vinsmoke Siblings. All 3 of Sanji’s brothers spawn this time around. If you ran past the objective 6 Commander, he will run in there to be beaten up at the same time as them to save some time.
- Defeat the Commander. This step only applies if you didn’t run past him to get his attention on the way to objective 5.
- Defeat the Commander. This will trigger the Map Search to move onto Part 3. You want to end in that zone specifically for Part 3, as a Messenger can spawn super early on, and is objective 1 in Part 3 for that reason.
Part 3
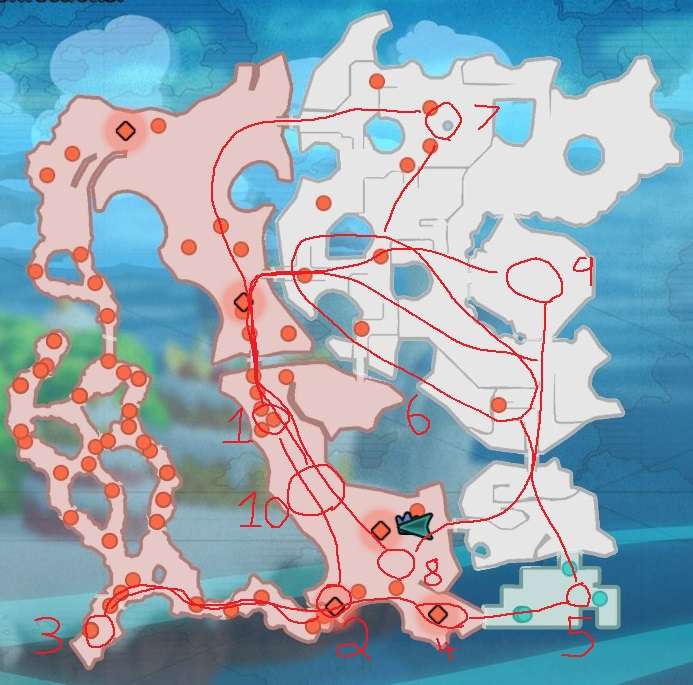
The pathing for this section overlaps a bit, but its because you can Sky Dash in the open to get around really fast, and just helps save time if that is an issue at all. The path to Objective 1 starts from where Objective 7 is located in Part 2 in case that isn’t completely clear.
- Defeat the Messenger before he reaches the Destination. As mentioned in Part 2, he can spawn in really quickly, but his spawn is the lower end of the zone, and his destination is the bridge, so as long as you come in from the bridge like the pathing shows, you will be able to stop him.
- Defeat the Commander. If you kill enough minions, you can also spawn the leader at that spawner where the Commander is, in which case defeat the leader too, but only after Big Mom spawns, as she will prevent the zone from being captured.
- Defeat Serious Perospero in the time limit (2 minutes). He will block you in the area until he is defeated or the time runs out.
- Defeat the Commander. Important, as Serious Katakuri which is objective 7, doesn’t spawn in until all the Commanders have been defeated.
- Defeat Judge.
- Defeat the Commanders. There are 2 or 3 in the highlighted area, defeating them will spawn Serious Katakuri for objective 7. The Leader should spawn while defeating these Commands or when fighting Katakuri, which is when you’ll capture the zone, as Katakuri will block the zone capture if the Leader is defeated after he spawns.
- Defeat Serious Katakuri.
- Defeat Big Mom. This will capture the last zone that is possible to take over, triggering the Serious Big Mom spawn being objective 9.
- Defeat Serious Big Mom. If ALL objectives have been completed up to and including this one, then the last objective will spawn.
- Defeat Big Mom, Katakuri and Judge. Big Mom and Katakuri will be fighting Judge in the highlighted zone while you sky dash your way over there, slowly weakening each other as they aren’t allies. Defeating all 3 will accomplish all Objectives for this Map.



Be the first to comment