
Clearing all Objectives for the Archipelago of Dancing Bubbles Special Log Mission for Yamato with Pathing and Objective Details.
Objective Only Results
These are the points you can expect to get just focusing on the Objectives for this map.
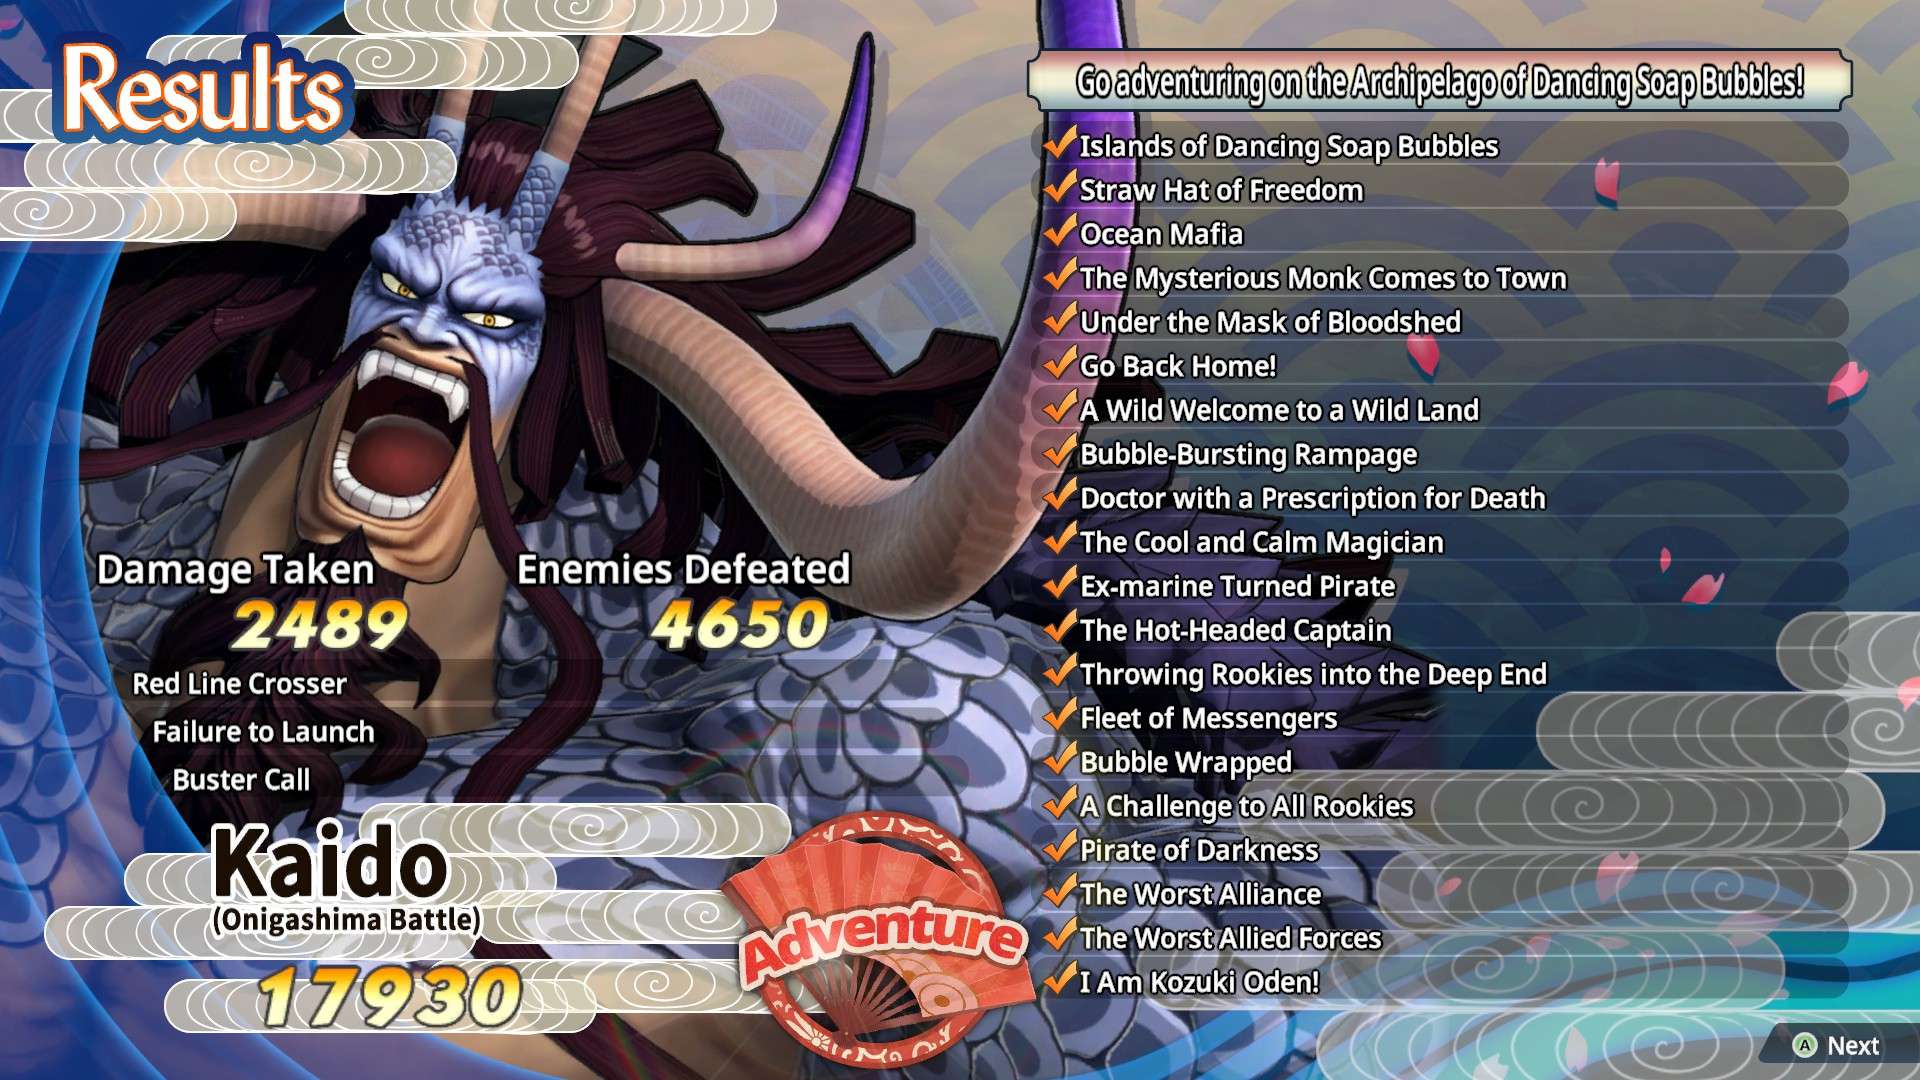
I didn’t try to get minion kills that weren’t necessary (300 points for every 500), and I ignored the Treasure Chests (1000 points each). Cleared with over 3 minutes left on the clock, and ignored the Soul Enemies, so you can very easily get over 20,000 points if you go for those also, but you only need 15,000 to get the max end mission rewards, for this level being the Power Souls. The Soul Enemies will just give the other types of Souls as rewards after completing the level, so honestly best to just ignore them and focus on clearing with 15,000 points for the max Power Souls reward.
- Land of Wano gives Stamina Souls.
- Land of Confections gives Life Souls.
- Navy Base gives Defense Souls.
- Archipelago of Dancing Bubbles gives Power Souls.
That’s the farming areas for Soul types, which is why you can ignore the Soul Enemies in each mission.
Part 1

- Defeat the Commander. DO NOT KILL LUFFY AFTERWARDS! That advances the map search.
- Defeat Urouge.
- Save the Villager by Defeating 300 Pirates. This only spawns after defeating Urouge. He will have waves of Commanders spawning on him, so stay close to him. Once all 300 have been defeated, which will only take seconds, the Villager will retreat.
- Defeat Bege.
- Defeat Killer.
- Defeat the Commander while having a HIT 500 count. This only spawns after defeating Killer. If you followed the pathing without killing too many little minions, you’ll notice a horde trail leading towards where you encountered Killer. If needed, just kite the Commander back that way once he spawns and you’ll have heaps on enemies to get the 500 hit counter going before defeating him.
- Defeat Luffy. This will change the Map Search area and all previous objectives can no longer be cleared, so make sure you done all the previous objectives first.
Part 2

- Defeat Commander and Law. Defeating Law is vital to starting the 6 objective. DO NOT KILL ALL 3 COMMANDERS! That advances the map search.
- Defeat Hawkins.
- Defeat Drake.
- Defeat the Sentry’s before time runs out (1 minute). This only spawns after defeating Drake, and clearing the 6 objective in Part 1. There will be 5 Sentry’s spawn in the lower area where the shipping containers are, defeating them only takes seconds.
- Defeat Kid.
- Stop the Messenger from reaching the Destination (the Bridge North). This only spawns after completing the 3 objective in Part 1 and defeating all the Supernova’s (if it spawns before, then Law is the trigger, so slightly change the pathing from the previous objectives to defeat Law after Kid. Not entirely sure as I defeated Law after Kid myself, as I noticed 1 objective hadn’t triggered yet at that point).
- Defeat the last 2 Commanders. This will change the Map Search area and all previous objectives can no longer be cleared, so make sure you done all the previous objectives first.
Part 3
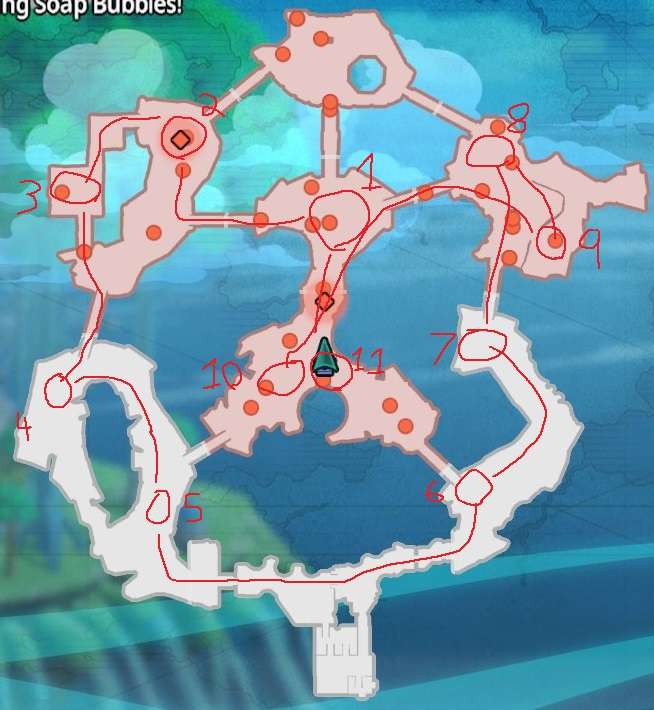
- Defeat Commander and Capture Territory. Wait until the objectives tell you that you can capture the territories before defeating the Commander, as that will speed up the process. So just run around in circles staying out of range of the Commanders attacks until that point.
- Defeat Luffy.
- Defeat Killer and Capture Territory. The area Killer is in has spawners, and since the Maps turn Green at this Point, Killer and Luffy both spawn as Red, so there are more red minions always spawning with them until defeated along with the green to make capturing it super easy.
- Defeat Bege. His underlings will retreat after you defeat him.
- Defeat Commander and Capture Territory. There will be a non-objective Commander in the back near a spawner too, so worth hitting that up after defeating the objective Commander to get the Territory Leader to spawn if it hasn’t already.
- Defeat Commander. This is to just give you 1 more minute plus enemies to kill on the way to the top of the territory.
- Defeat Drake and Capture Territory. He spawns close to the bridge, so try to get on the bridge before he spawns so you can knock him back towards the spawner to capture the territory quickly while defeating him.
- Defeat Hawkins and Capture Territory. He spawns with Underlings giving him lives like he does in the Wano Arc, so defeat his Underlings first, then take him out. You will spawn the Territory Leader during the fight, as Hawkins and Law are both in that zone and aren’t on the same team as the territory holder like Killer and Luffy in objective 3, plus your territory right beside it also sending units in there to help capture it, also Hawkins and his Underlings spawn near a spawner.
- Defeat Law. Every so often he will use Shambles to return to where he spawns, which is the circled area on the map. Be careful as it is kinda buggy, by that, I mean if you defeat him at the same time he uses Shambles, he will be back at his spawn, and back at 100% HP. Happened to me a few times while I was figuring out all the objectives for this Map.
- Capture the Territory. Since that territory is surrounded by your territories at that point in time, sometimes the Leader will have already spawned, other times it is only a couple of minion kills away from spawning the Leader, thus the pathing for this final part to make that incredibly easy and consume close to no time.
- Defeat Teach. Shortly after you defeat Teach, and only after ALL previous objectives have been cleared will the final objective appear. In this case, it is to defeat Yamato which happens where ever you end up after fighting Teach, so I didn’t provide a Map Marker for it. Not sure what happens if you specifically choose to play as Yamato for this level, as I cleared it with Onigashima Kaido, which some people say he’s bad at these missions, but he’s not.
I’ve full cleared Land of Confections with him also on my 2nd attempt, which I will be making another guide on that soon. I’m missing 3 for Wano and 1 for Navy Base, at which point I will make those guides too.


I followed this exactly to a tee – great guide by the way!!!!! – but still come up short. I made it all the way up to Part 3 bullet 7 & 8. I beat them but ran out of time. I felt like I blitzed the whole thing. Any tips to ensure you’re hitting the timing right? Any notes on what triggers extra time for you?
if you do the special log 4th with Yamato, the last enemy Is luffy
The one you are missing in Part 2 is called “Duel atop the Bridge”. You have to go to the thin bridge on the left and 4 commanders spawn. The the 2 triggers in Part 3 are to the left, he spawns next to the cliff and the other is in the sumo ring. Okiku and Kin’emon demand a duel if you stand on top of the ring for a bit.
Appreciate it, but Yami on Steam (where I originally posted the Guides) already told me how to finish Wano, which is why the Guide for that has been out for a while, and I even credited him for his help in making that on possible.
I will be doing these again for the next lot of DLC Maps, so if you want to assist, feel free to hit me up on Steam when they come out. Help is always appreciated to get them out quickly for others.
DerpSmashed here. Feel free to post my other Yamato Mission Guides here also. All 4 are now available on Steam.
Thank you very much for your work!
No problem at all. I’m looking at doing it again for the next lot of Special Log Missions that come out if they are doing something similar to these ones again, in having hidden objectives. Was quite fun to try and figure them all out, then find good pathing for them, to make speed running them for the Souls easy.
thnx again! GLFH!