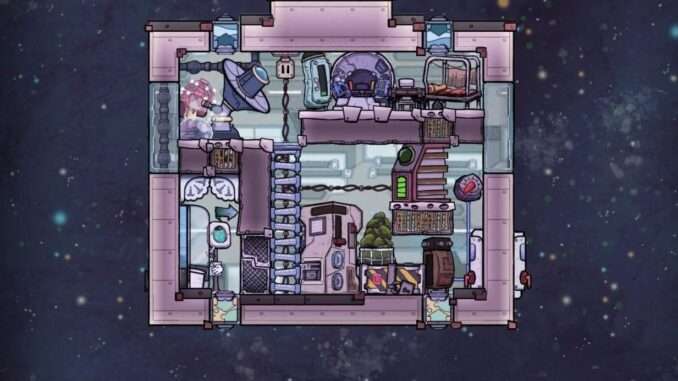
Cold and clean oxygen for your dupes. Mid to late game. Can supply up to 16 dupes with ease.
Guide to Air Conditioning Plant
Basic Layout
First of all, to build this AC Plant, the most advanced materials you need are Steel and Plastic.
So make sure you have some to spare.
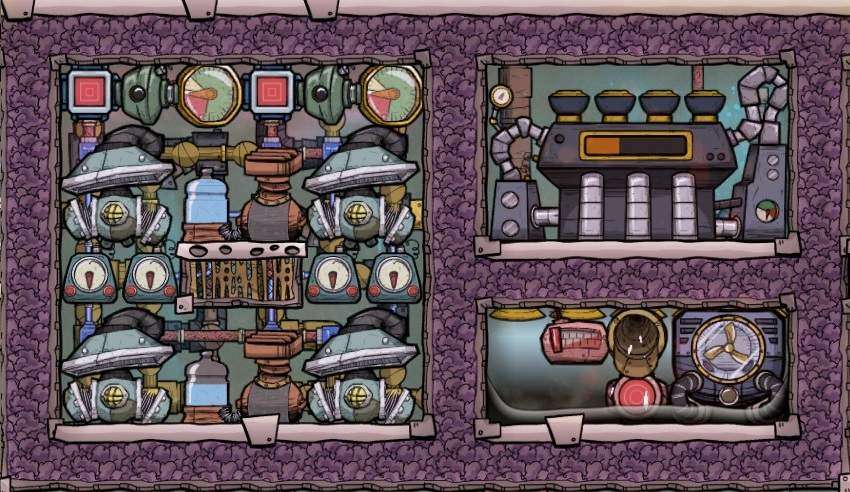
Build everything as shown in the figure above.
Liquid Aquatuner should be build with at least Gold grade material. Otherwise, it will break.
Components
- 2 Electrolyzers
- 2 Gas Element Sensors
- 2 Gas Shut Offs
- 4 Gas Pumps
- 4 Cycle Sensors
- 1 Steam Turbine
- 1 Thermo Aquatuner (Gold or better)
- 1 Thermo Senser
- 1 Liquid Vent
- 1 Liquid Pipe Thermo Sensor
Should be easy enough. Just don’t left anything out.
Piping Layout
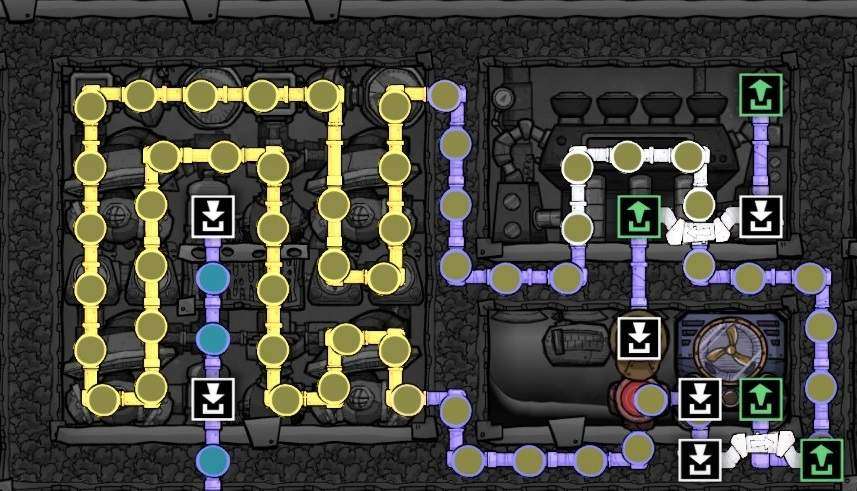
Normal Pipes, Insulated Pipes, Radiant Pipes. Build them exactly as shown for optimal cooling effect. Use better materials for Radiant Pipes if you want to improve the cooling factor.
After all the pipes are built, fill the loop with Polluted Water before running the Aquatuner.
The vertical pipe on the left is for the fresh water intake.
When you get to late game, the Supercoolant will be your best replacement for the Polluted Water. Keep in mind that Polluted Water will freeze at 20C , therefore, your safe minimum temperature is -5C.
Mine is set to 0C and it can give out around 0C Oxygen so it’s pretty decent there.
Gas Pipes Layout
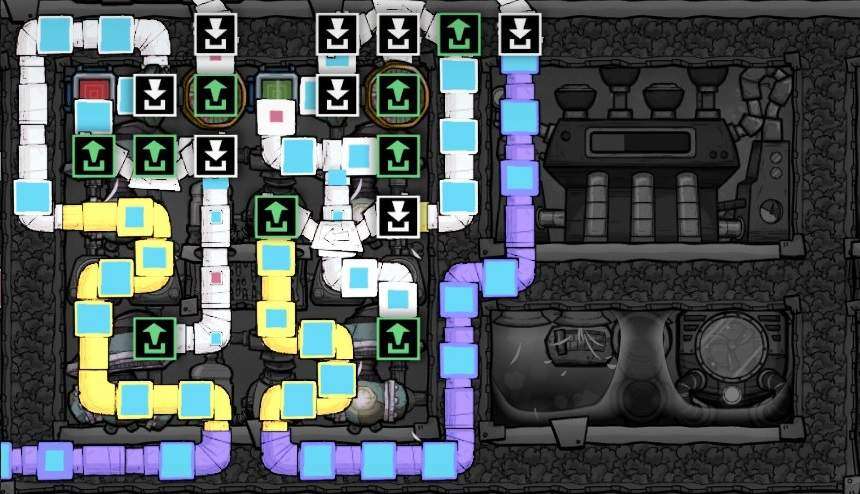
Build the pipes exact– Woah, woah, woah…. please don’t run away yet. I’ll make it simple for you.
Here..
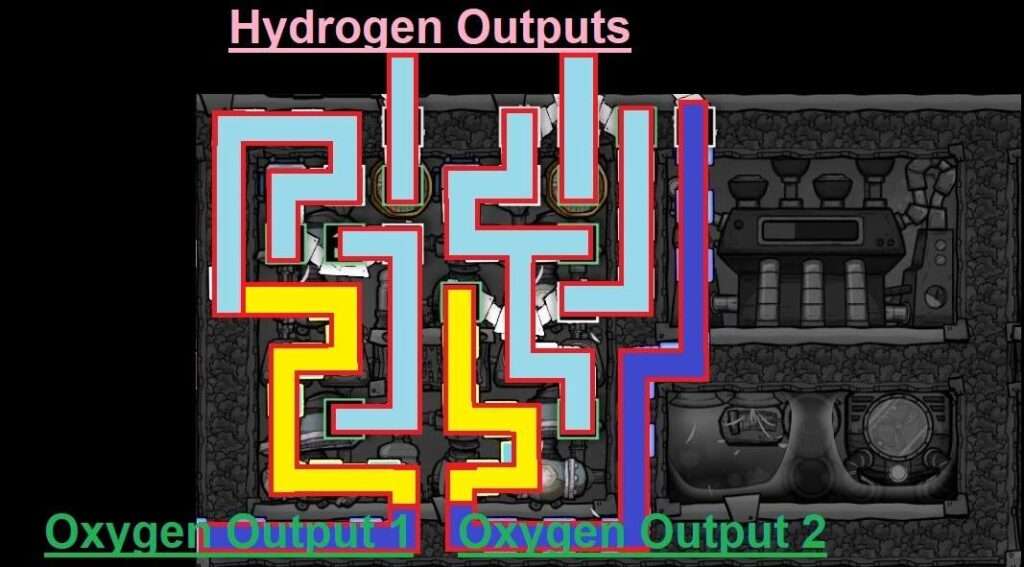
Much better. Right?
Now let’s add the Bridges.
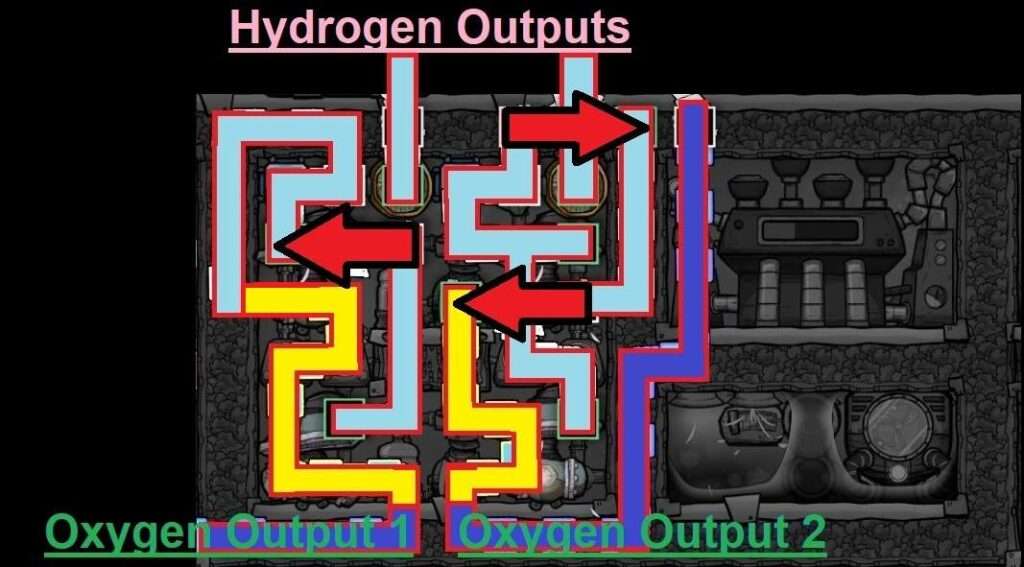
Done!
One thing to note. You can combine the Hydrogen Pipes and hook it up with a Reservoir but you cannot do that to Oxygen Pipes. Oxygen will choke inside the pipes and bad things will happen.
Automation Layout
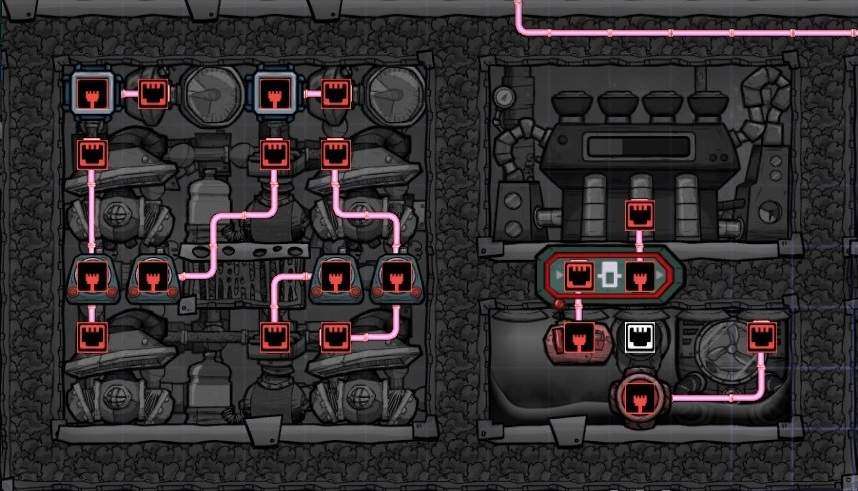
Build everything as shown. You know the drill.
Buffer Gate is there to eliminate the jerky operations of the Steam Turbine. It is set it to 5 seconds but this can be adjusted to your liking.
Oh.. I didn’t notice the red wire at the top. It is not necessary just pretend you didn’t see that. Okay?
Power Layout
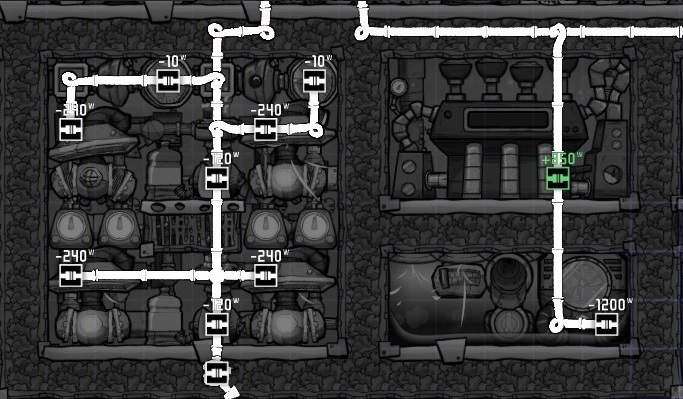
Same same.
Just make sure you give 2 separate power suppliers to avoid overload damages.
Filling the Chamber
This is how you do it.
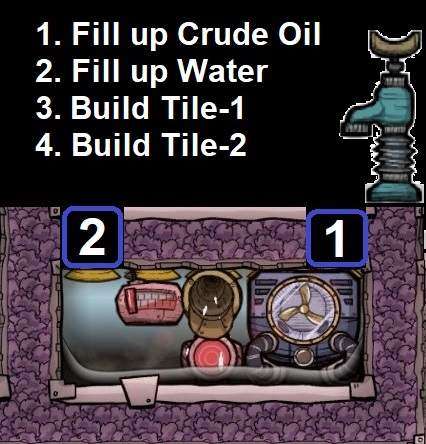
This could be tricky if you haven’t done it before.
This is easiest way. After following these steps, you’ll have a nice 2 layered liquid compartment sealed off from outer environment.
So make sure you have built everything you need before sealing it off.
Configurations
The picture says it all.
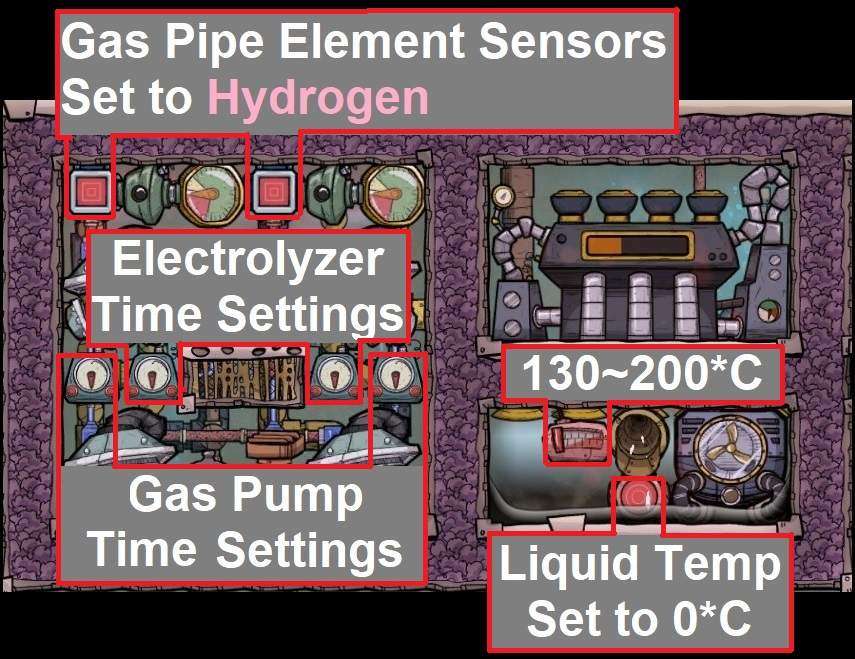
One exception, if you used Gold to build Aquatuner, 170C is your MAX setting. Gold Aquatuner overheats at 175C.
The upper limit is 200C because the Steam Turbine will give you peak power at 200C with 5 inlet ports open. Anything higher than that will reduce the power efficiency of the Plant.
Here is a little side note. This Plant is based on the assumption of being built inside the base somewhere. Therefore, the Steam Turbine Chamber should be filled with some gases. In my case, it’s Oxygen.
But if you built this out in space for some reason, you’ll need to fill up some gas inside the compartment. Otherwise, the Turbine will go overheat.
Conclusions
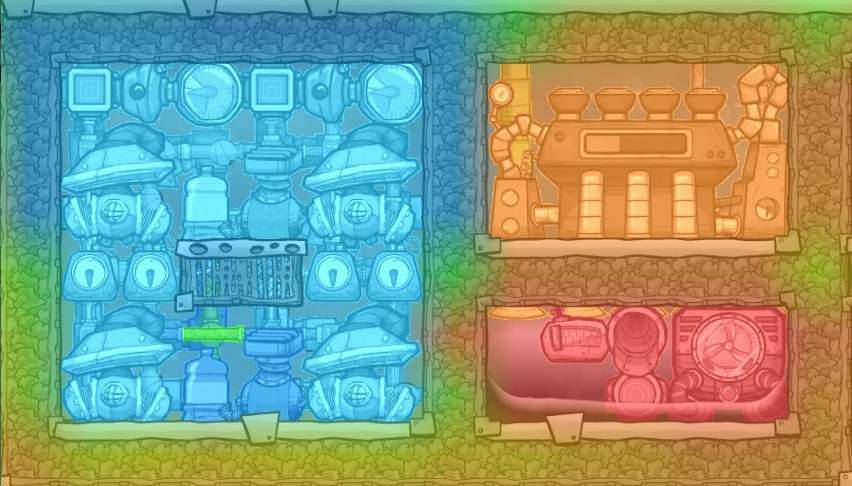
After running for some time, your Plant will start to look like this in Thermal Layout.
Congratulations!
You have successfully built an Air Conditioning Plant that will provide nice and cold Oxygen supply for centuries to come.





Be the first to comment