
An introduction to Re-Volt tracks for new users.
Newbies Guide to Tracks
All credit goes to Ziimbiian!
Tracks
Re-Volt presents tracks on real life locations with several hazards and shortcuts that your RC car has to pass through to reach the finish line in first place, get a better time or mess around with other people’s cars.
These tracks are divided by difficulty level:
Easy (set of 4 tracks), Medium (set of 3 tracks, 4 with RVGL), Hard (set of 3) and Extreme (set of 4)


As of writing this guide, i’ll be focusing on Easy tracks. Those being:
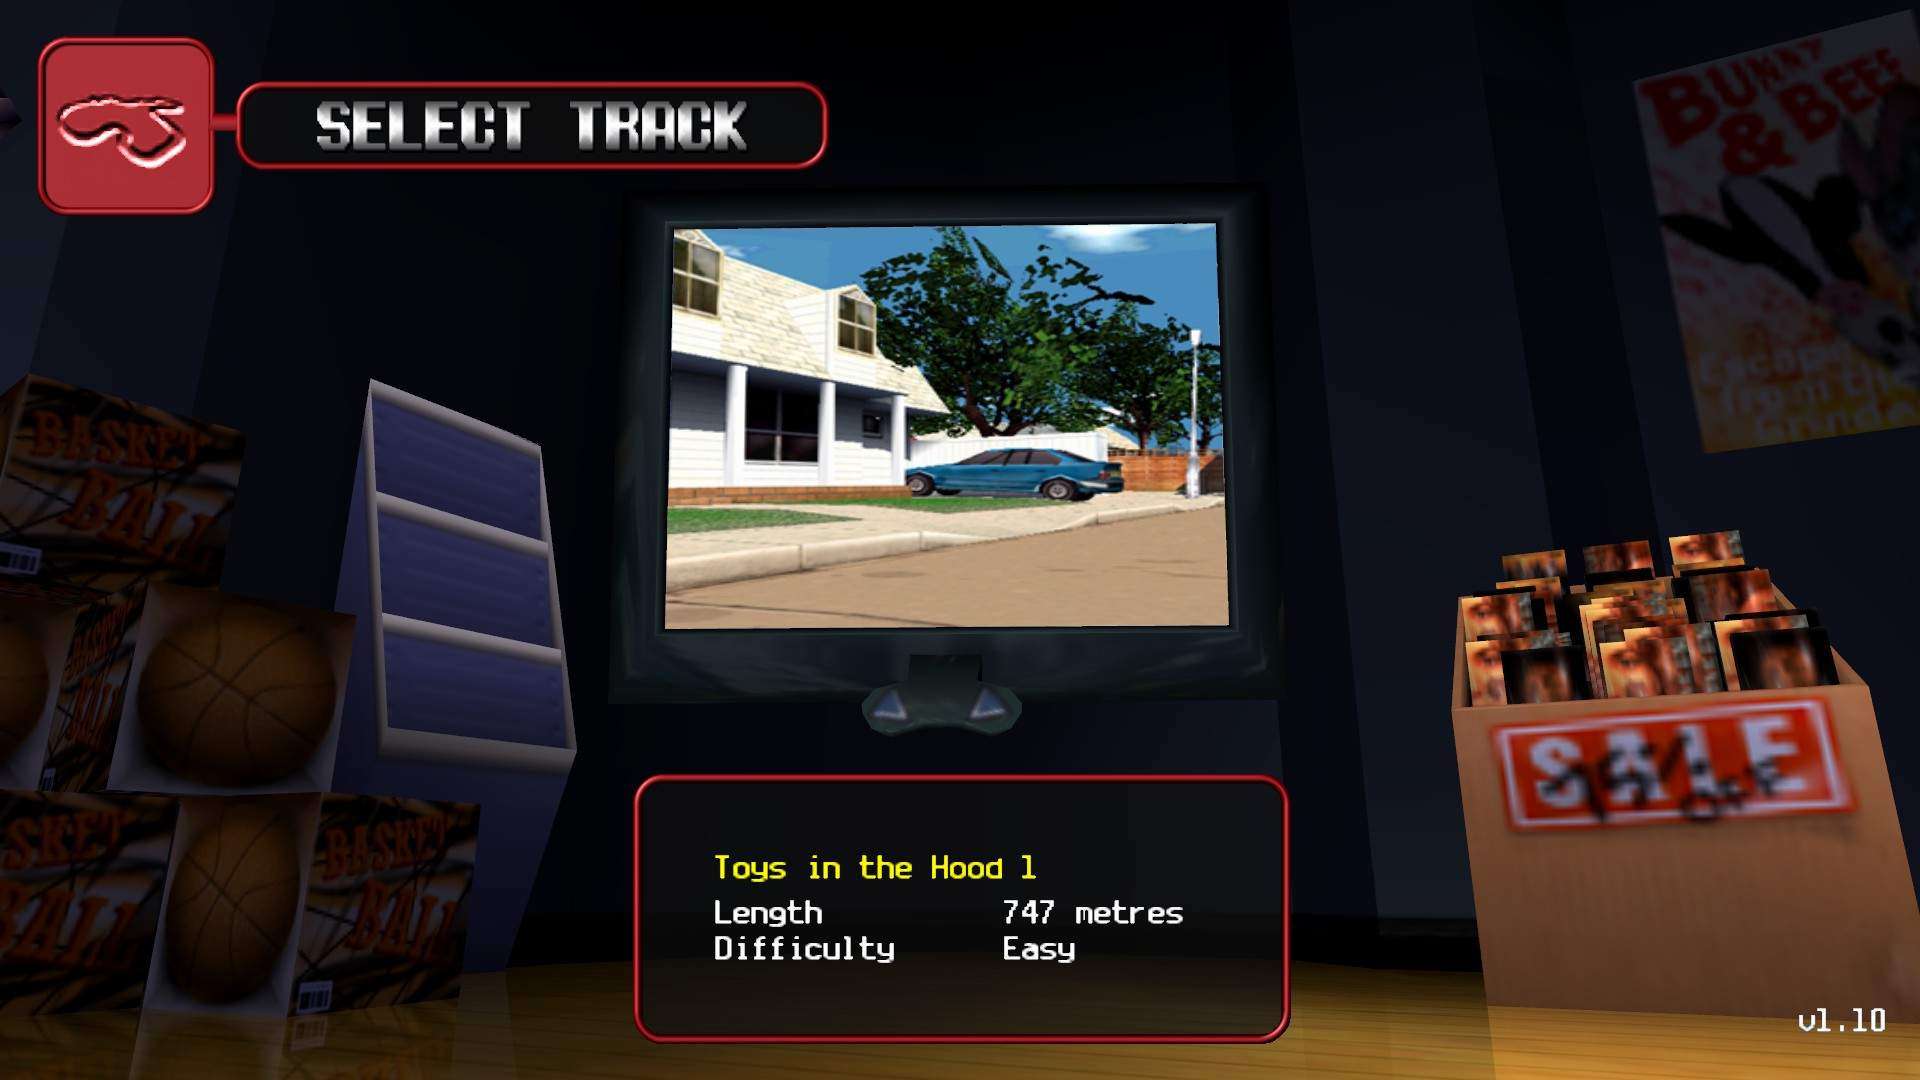
- “Toys in the Hood 1”.
- “Supermarket 2”.
- “Museum 2”.
- “Botanical Garden”.
Easy Tracks
Toys in the Hood 1
The first level you get to play when you boot up the game for the first time, either on Quick-Race or Championship mode.
Toys in the Hood 1 presents a wide open space full of hazards and shortcuts to take advantage of. It works best for explaining the game’s basic mechanics, such as pickups, scenario collisions, ramps, corner cutting and more.
Race Start
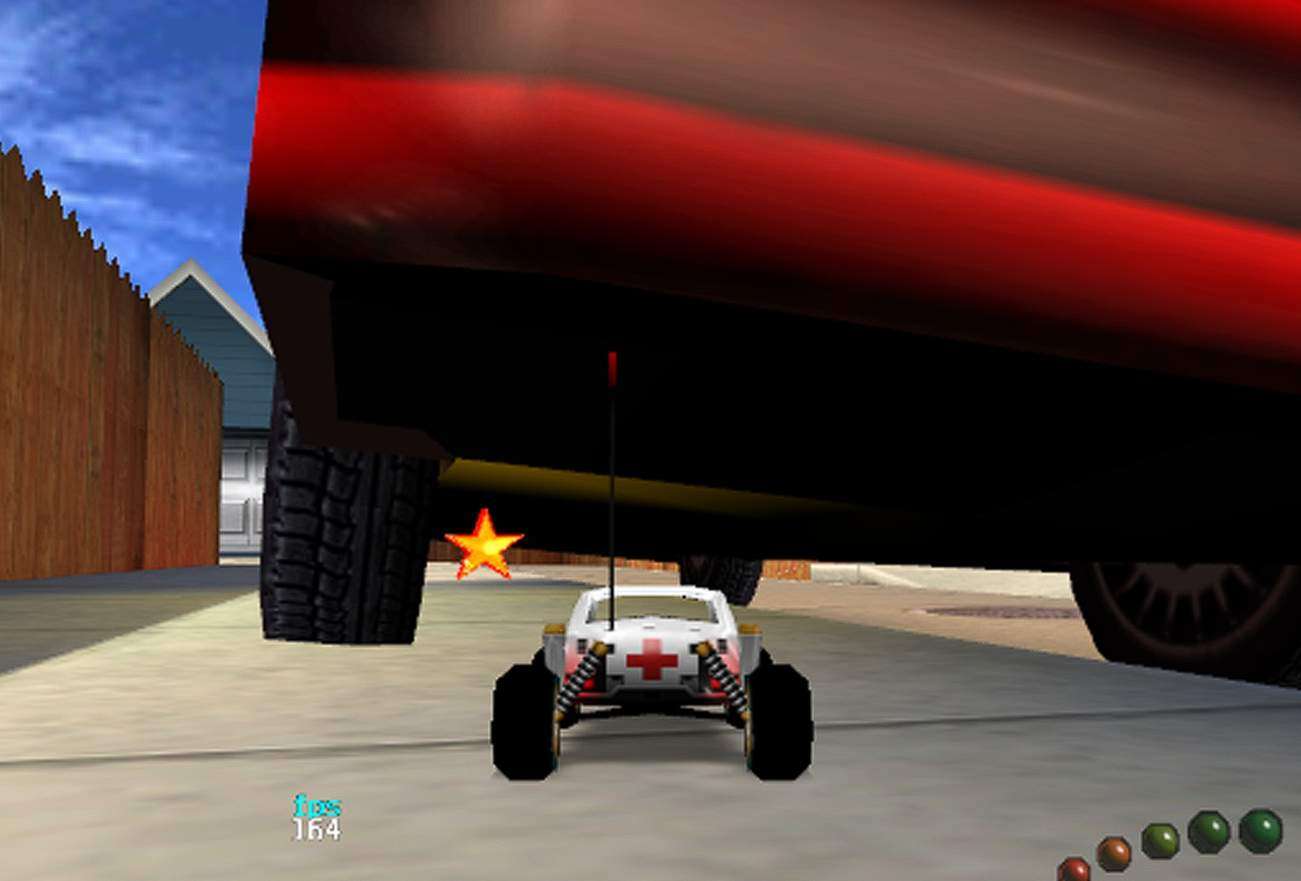
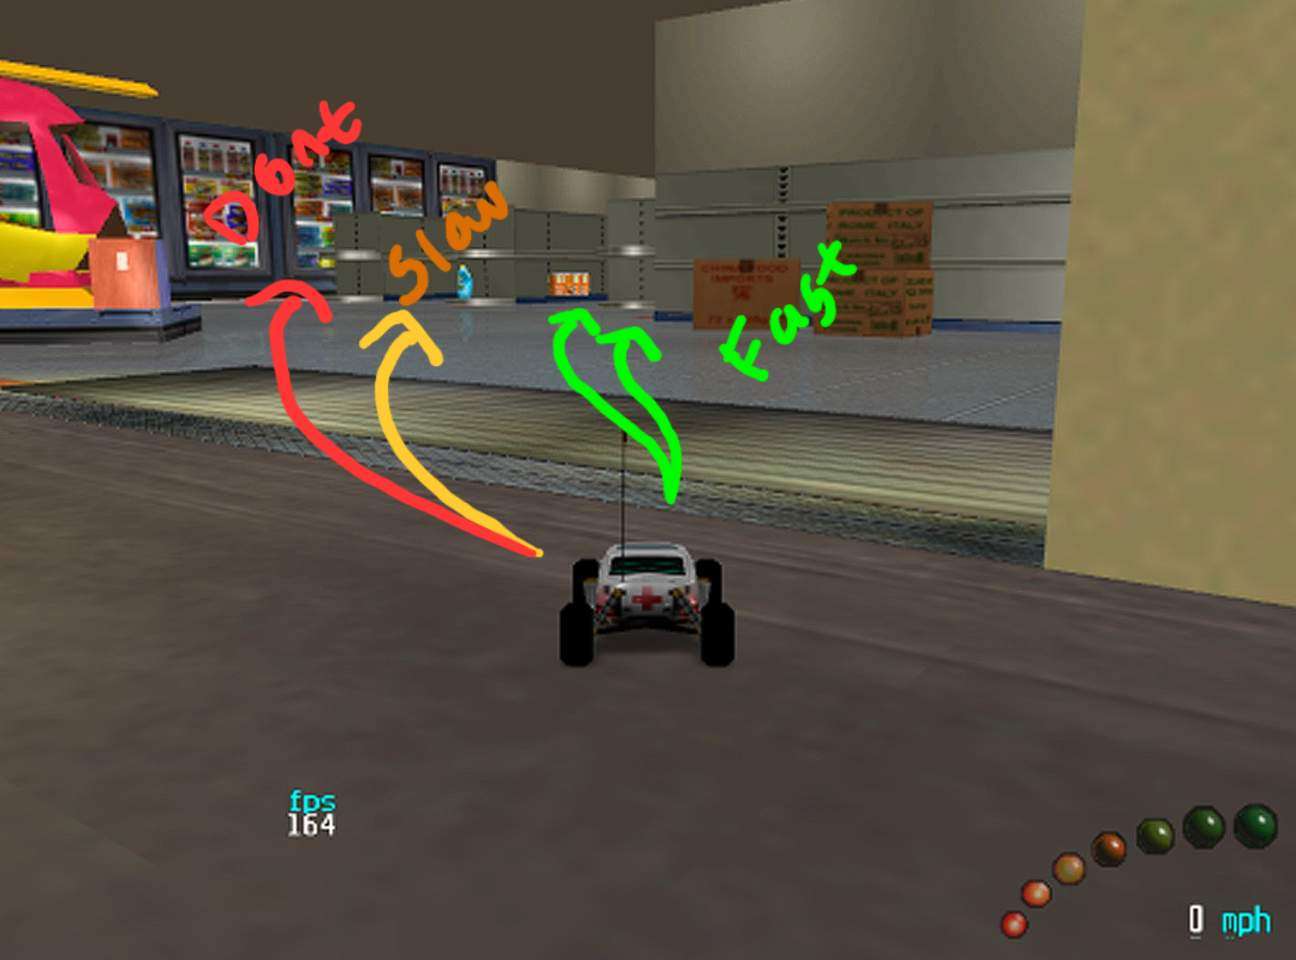
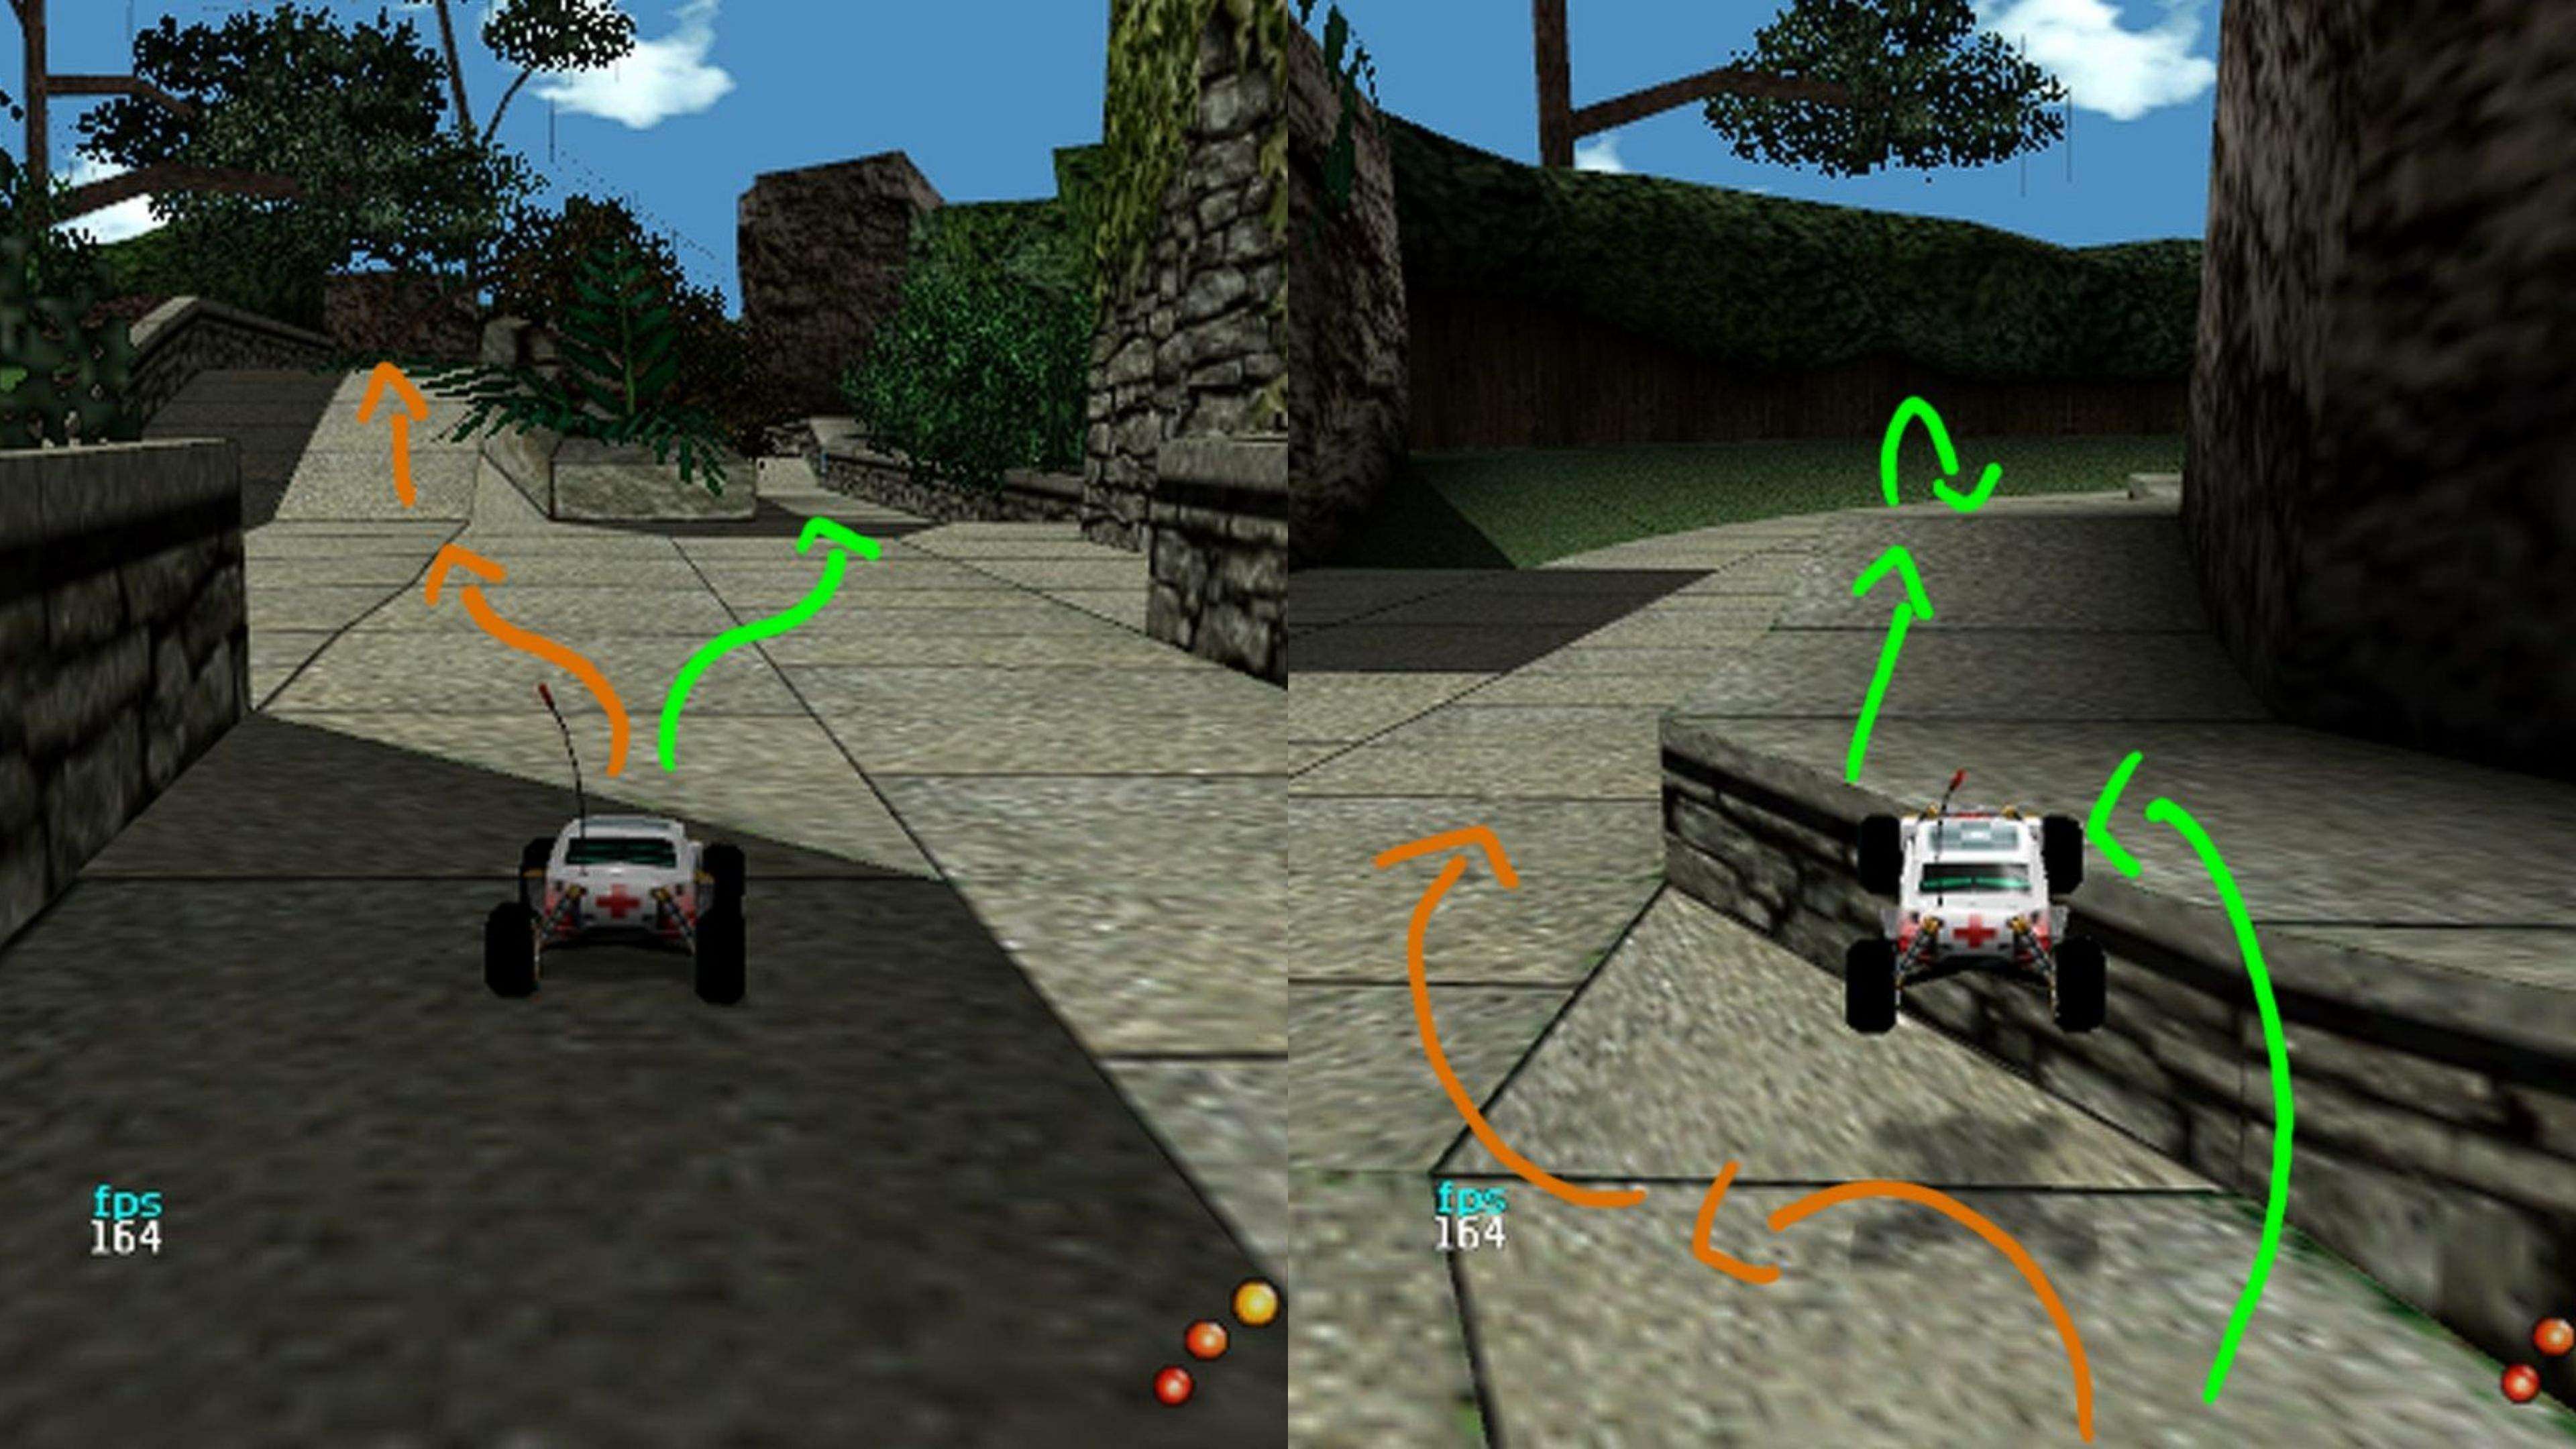
Upon starting the race, turn right to get a glimpse of the first shortcut of the map. It goes in-between a house into an L shape curve that ends on the first red car sitting on the sidewalk.
I do not recommend taking this shortcut even for a time trial, it sacrifices a lot of speed from the start to its end (top to below).
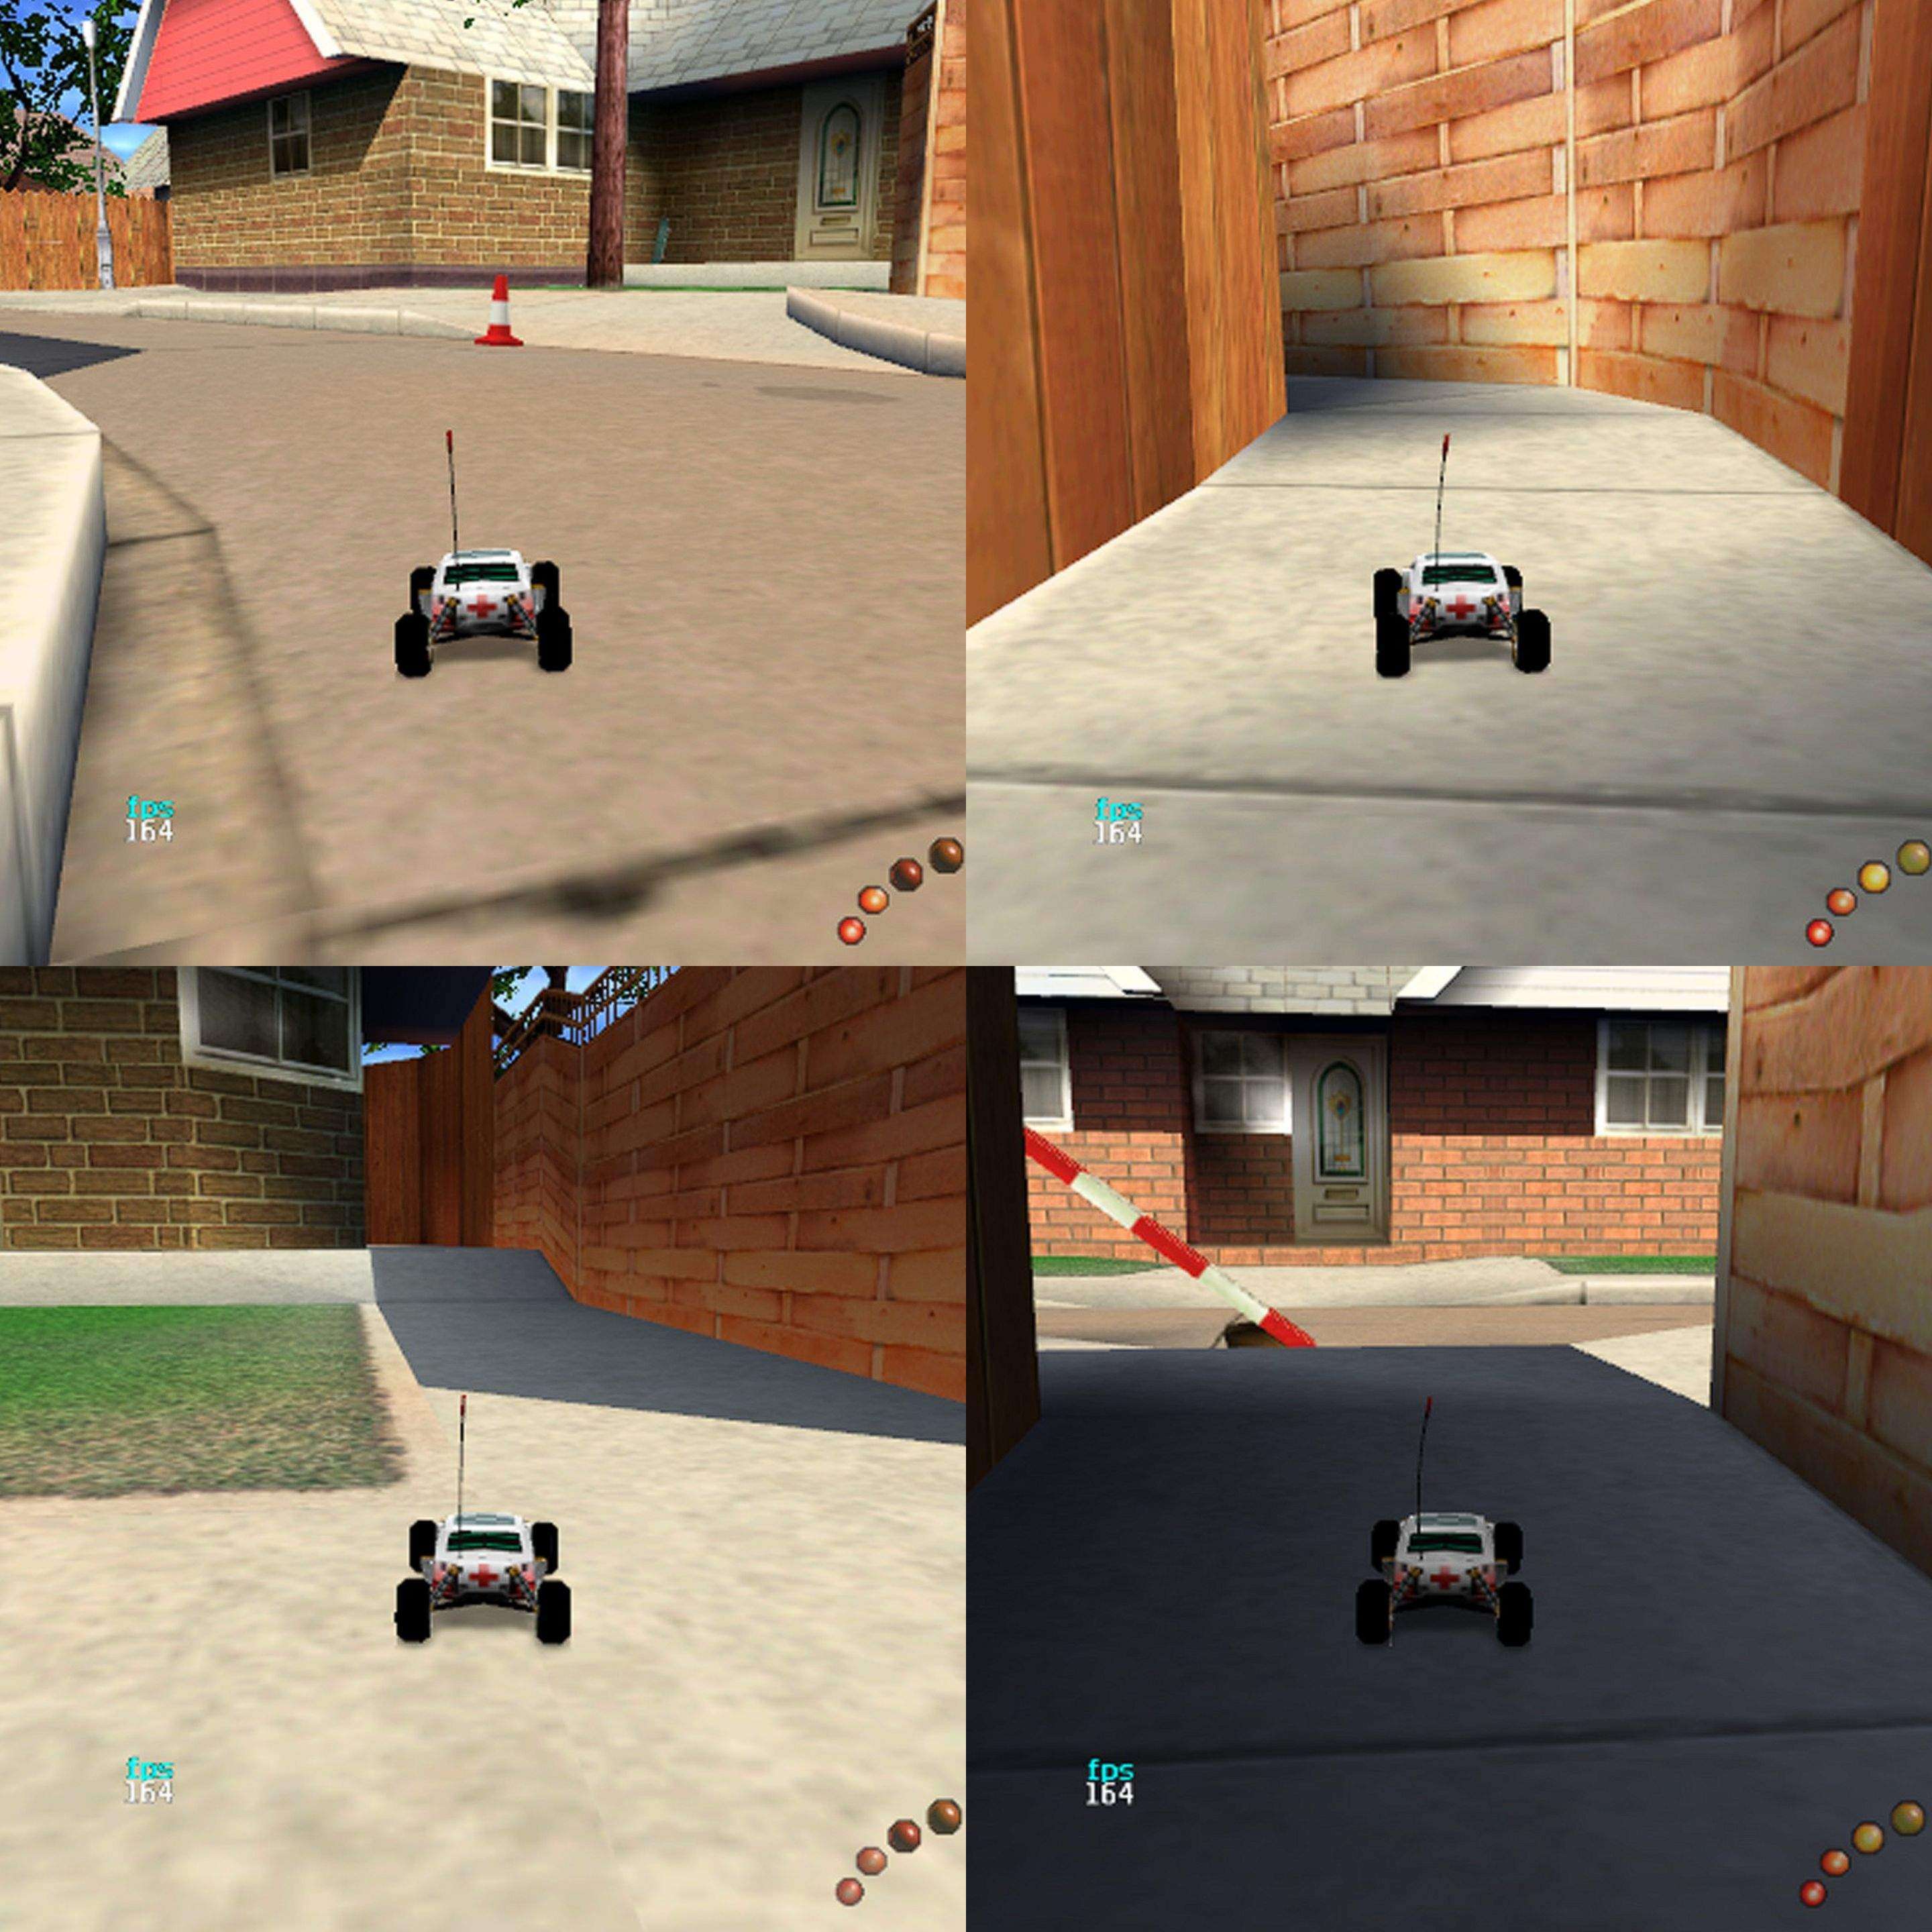
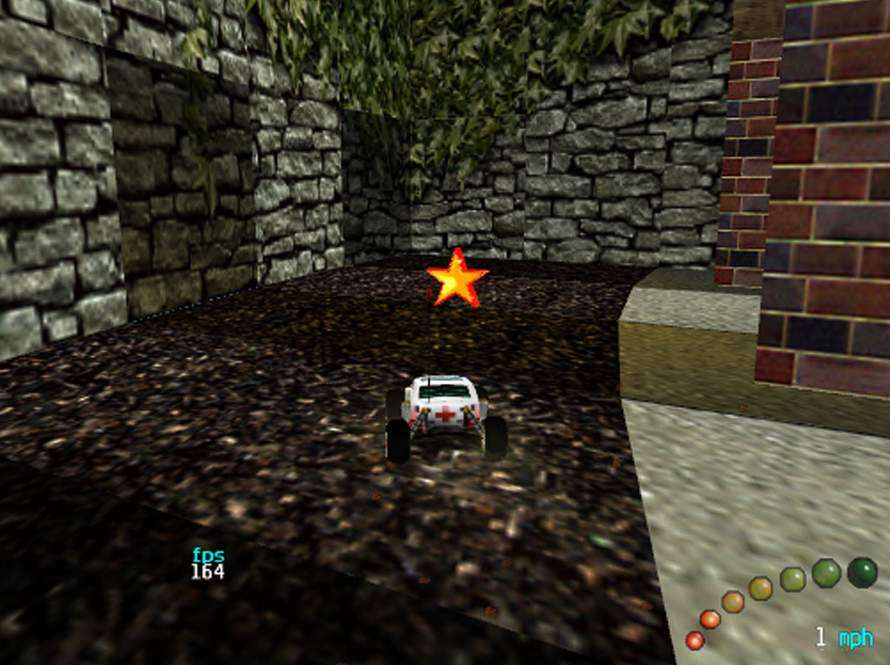
Under said red car (if you’re on practice mode) you’ll find the star needed to unlock more cars.
Upon collecting the star (how i accidentally did it). Continue the course normally. These sidewalks can be jumped over to skip several section of the track.
One is located before the red car, the second appears after turning left. There’s one to avoid after the next turn, then the Zig-Zag comes, don’t steer too much otherwise you’ll lose control.
After the Zig-Zag, you’ll see the sidewalk at the right.
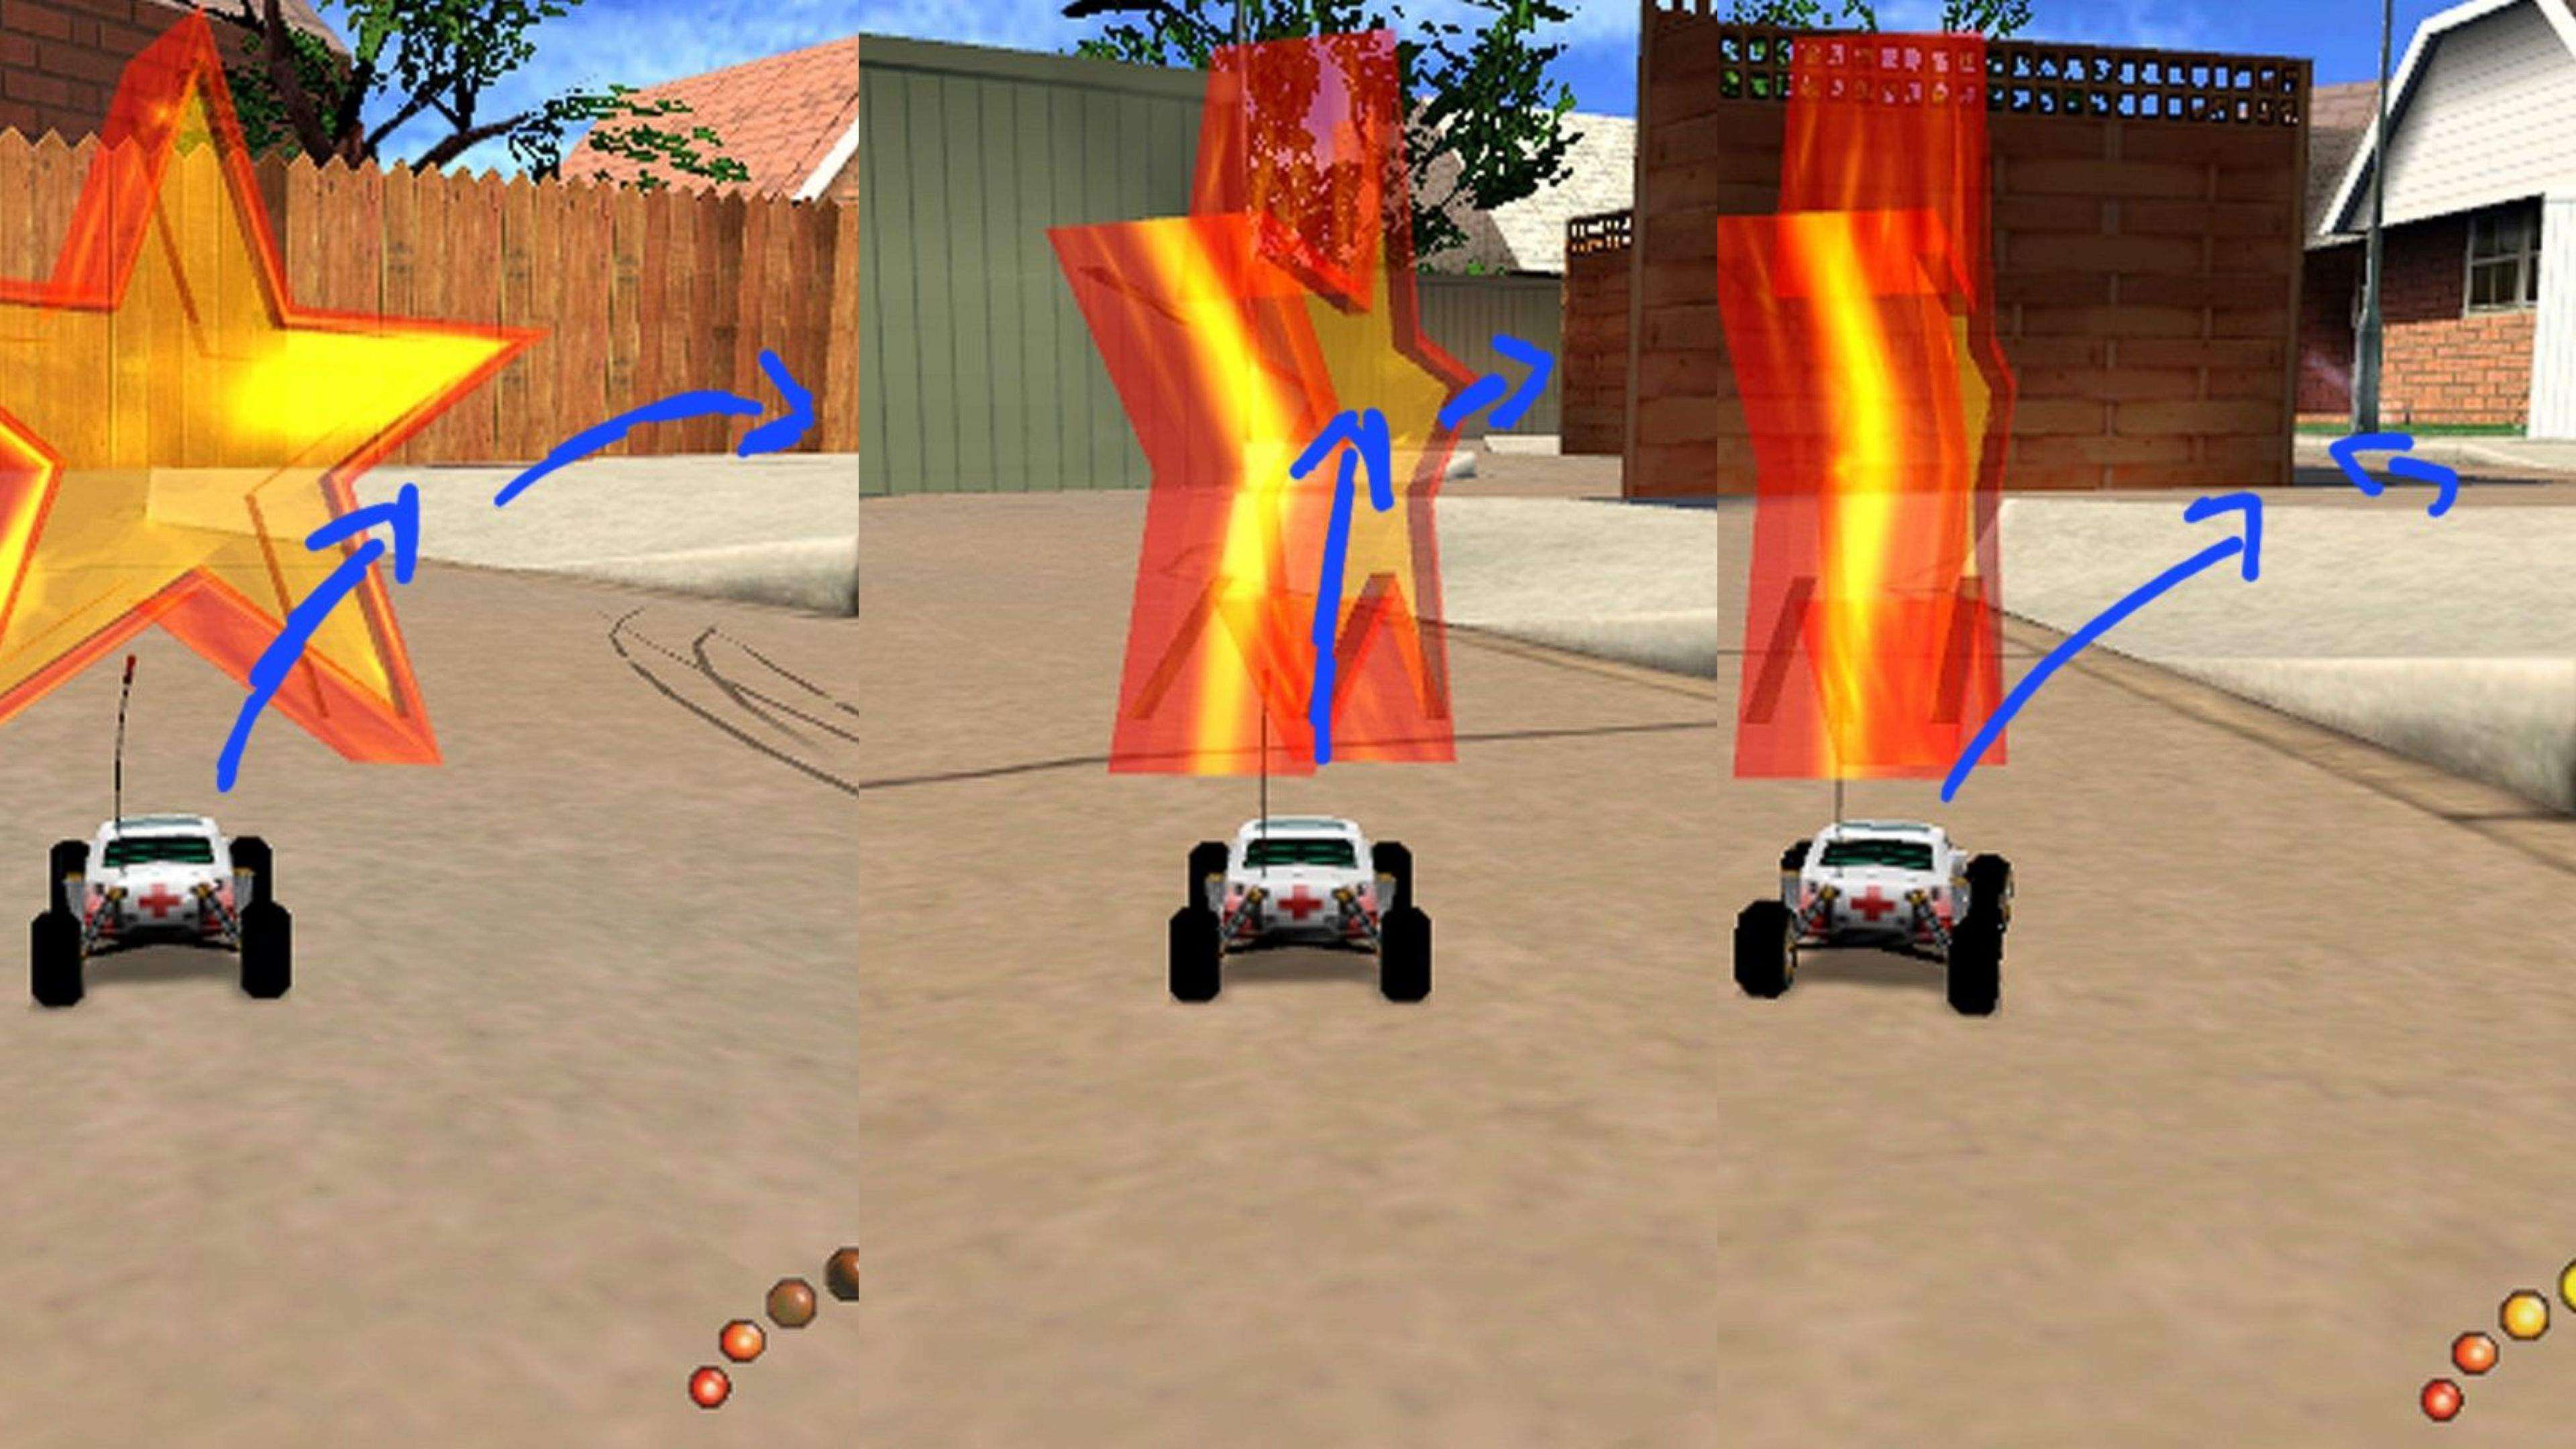
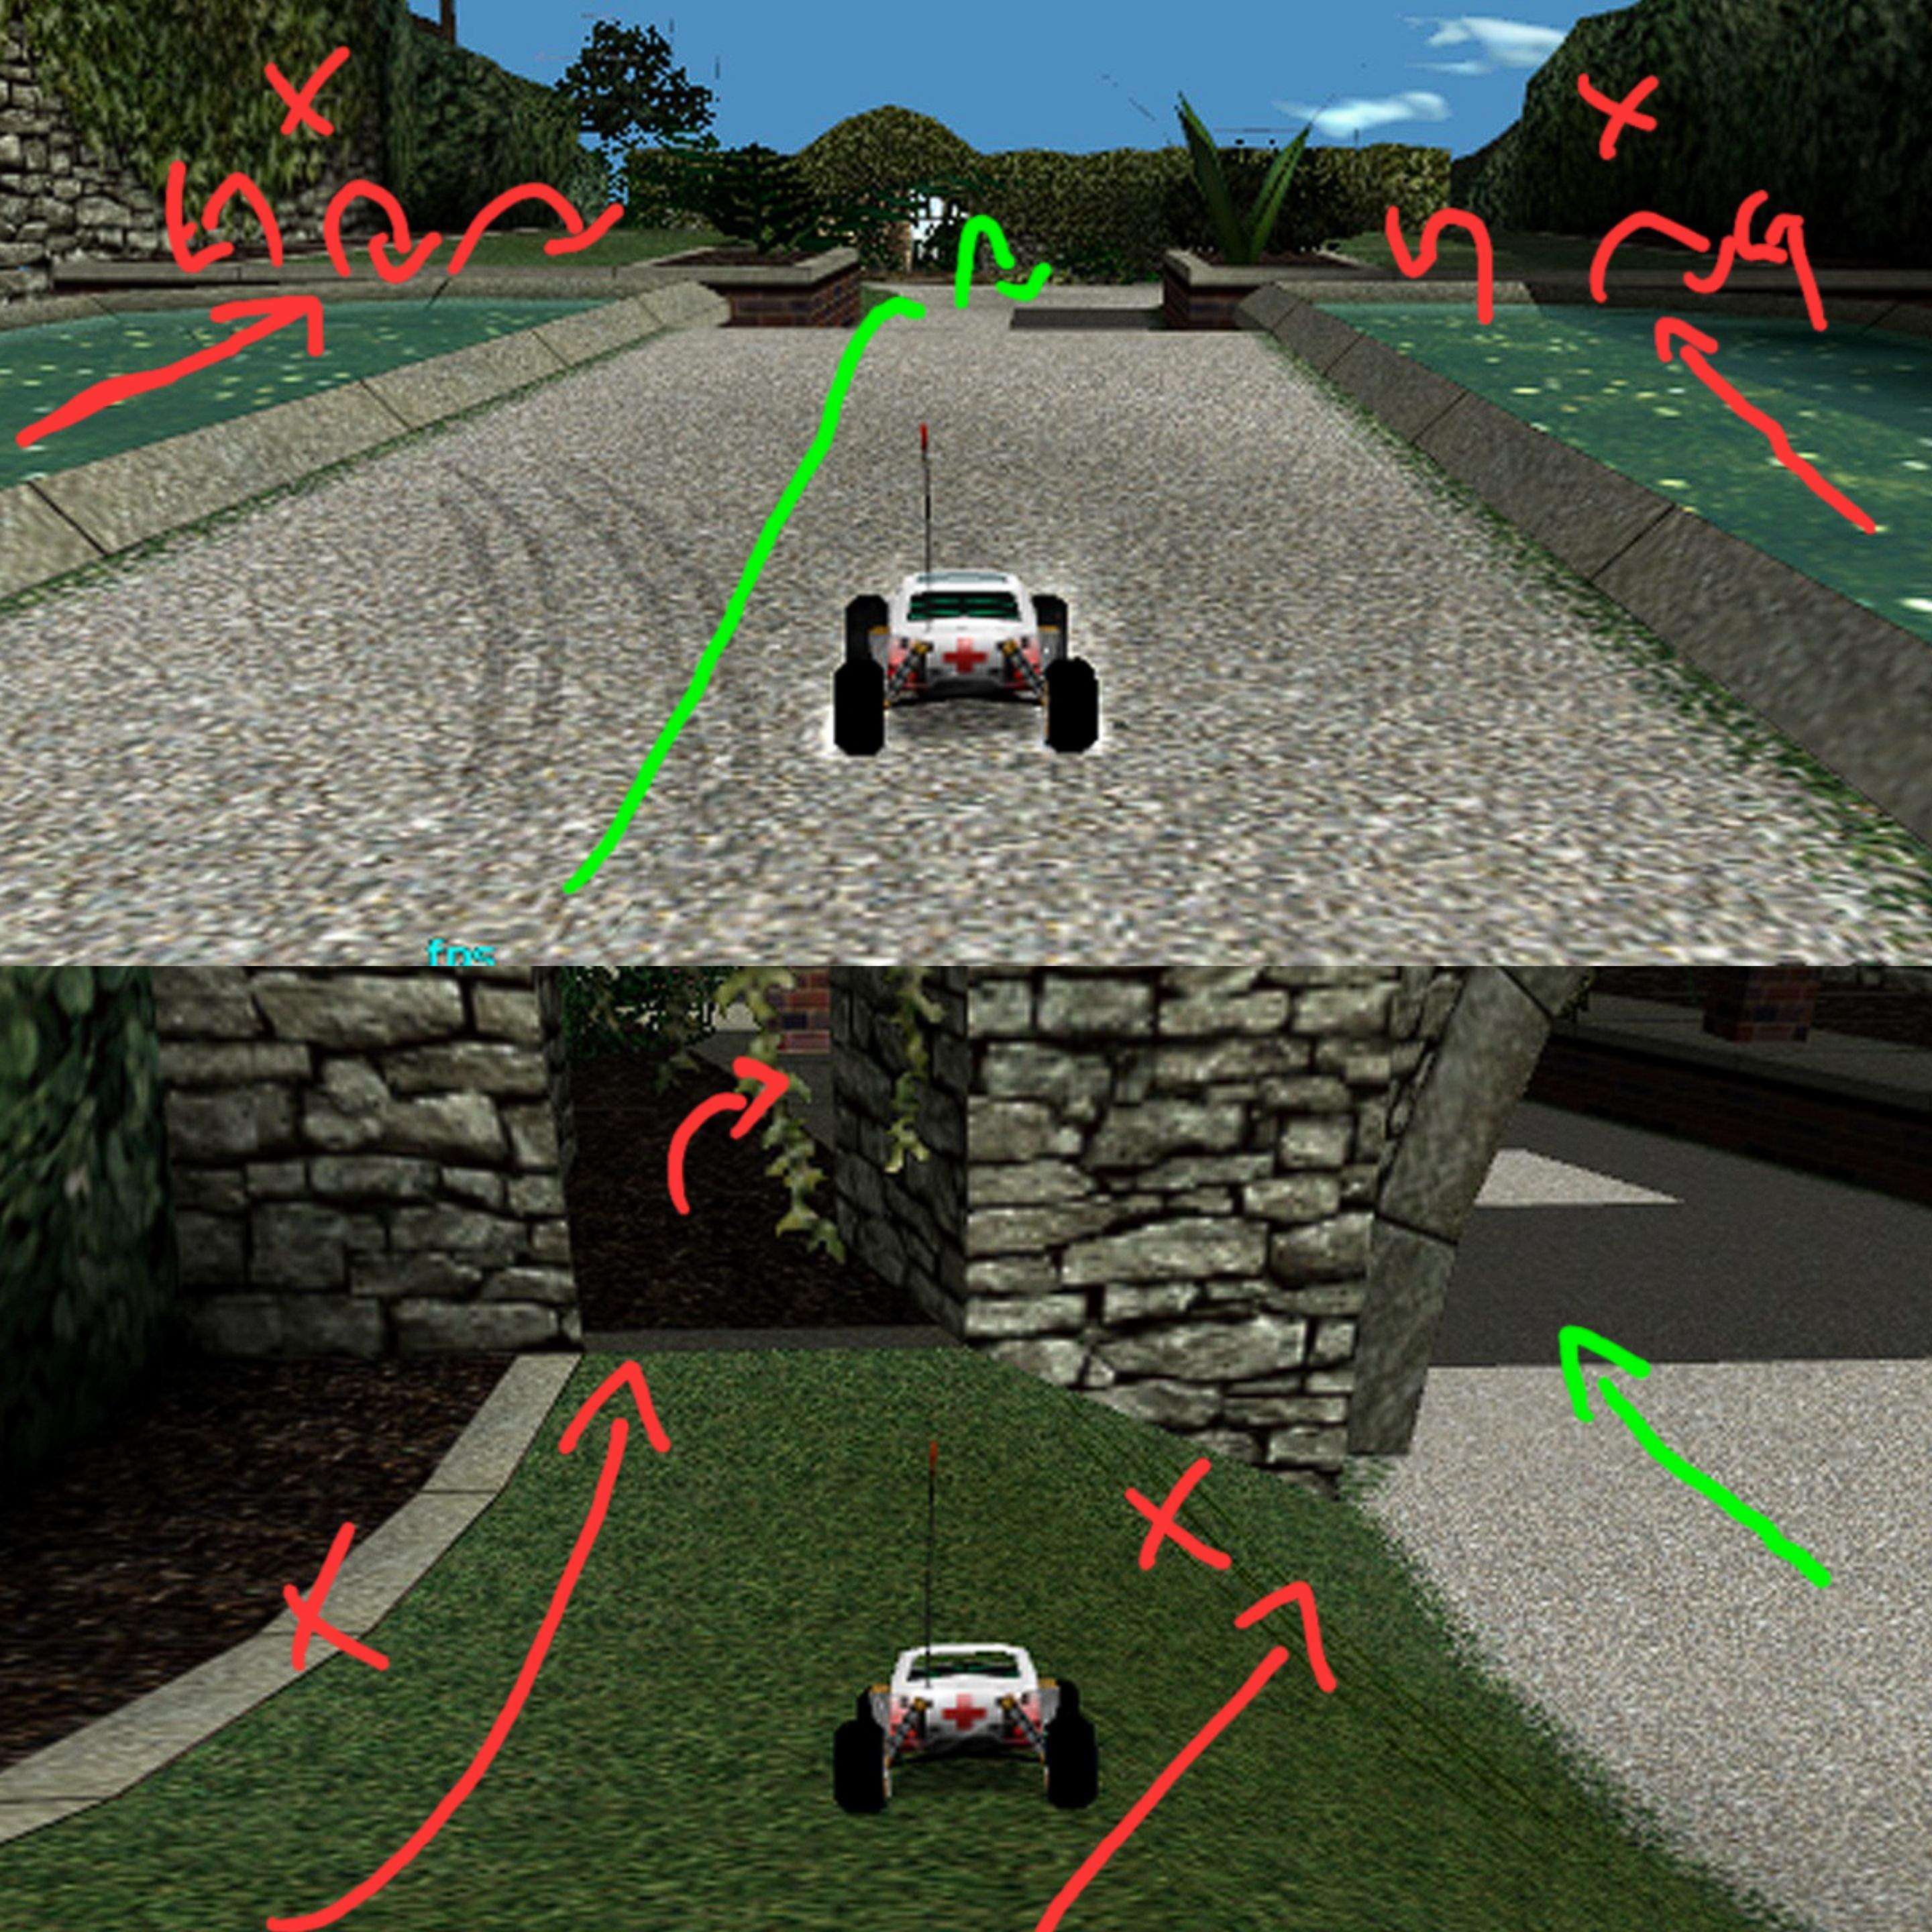
At last, after exiting the construction tunnel, instead of hard turning left to escalate the gravel pit, go diagonally on it and exit without losing too much speed nor flipping over.

Supermarket 2
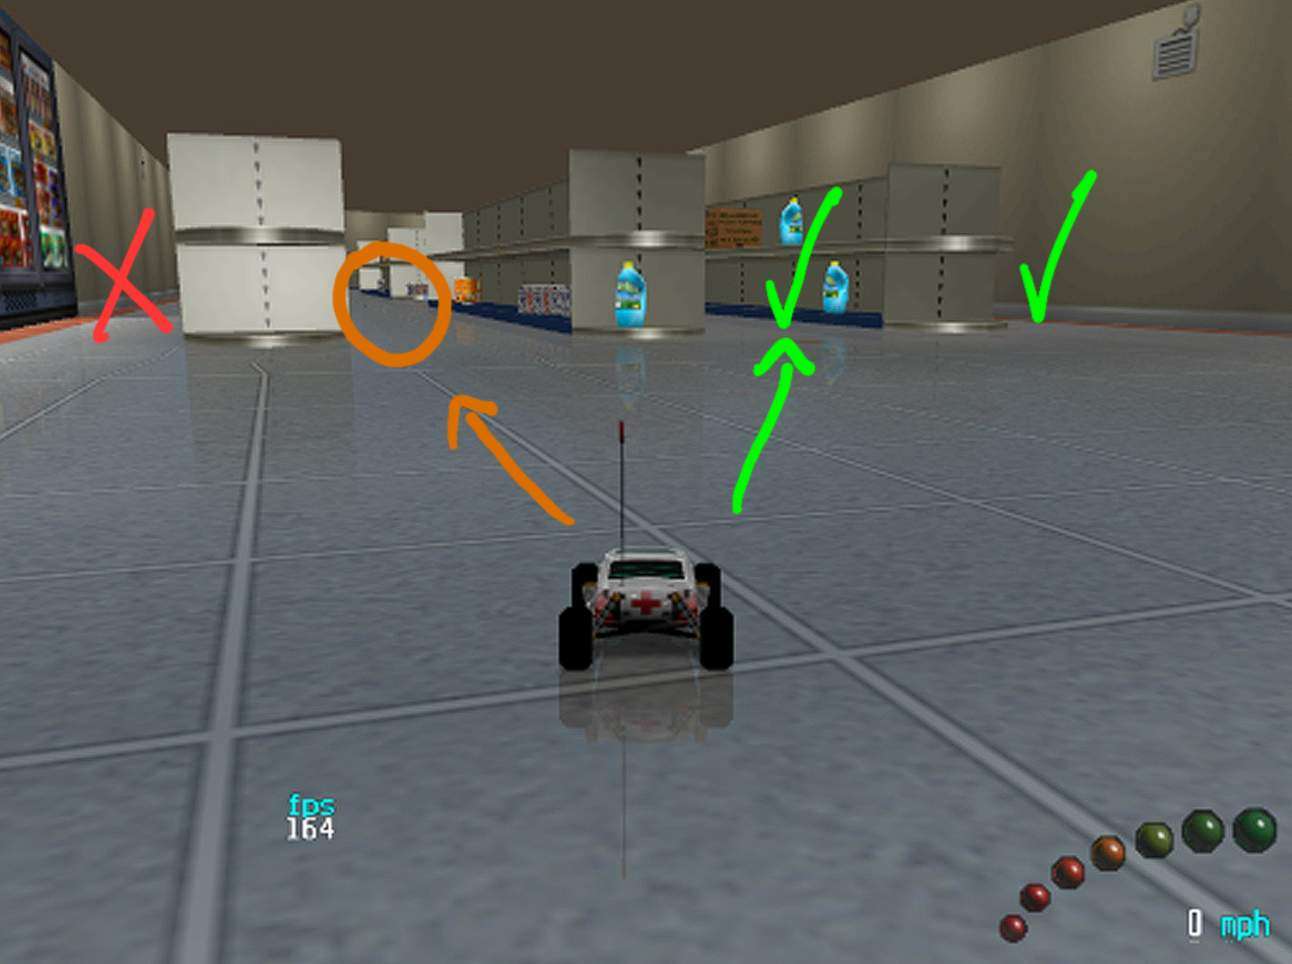
Supermarket 2 is the shortest track of the game, with an average time of 24 seconds per lap. Its pretty straightforward, almost square shaped. But it has its secrets, lets analyze them.
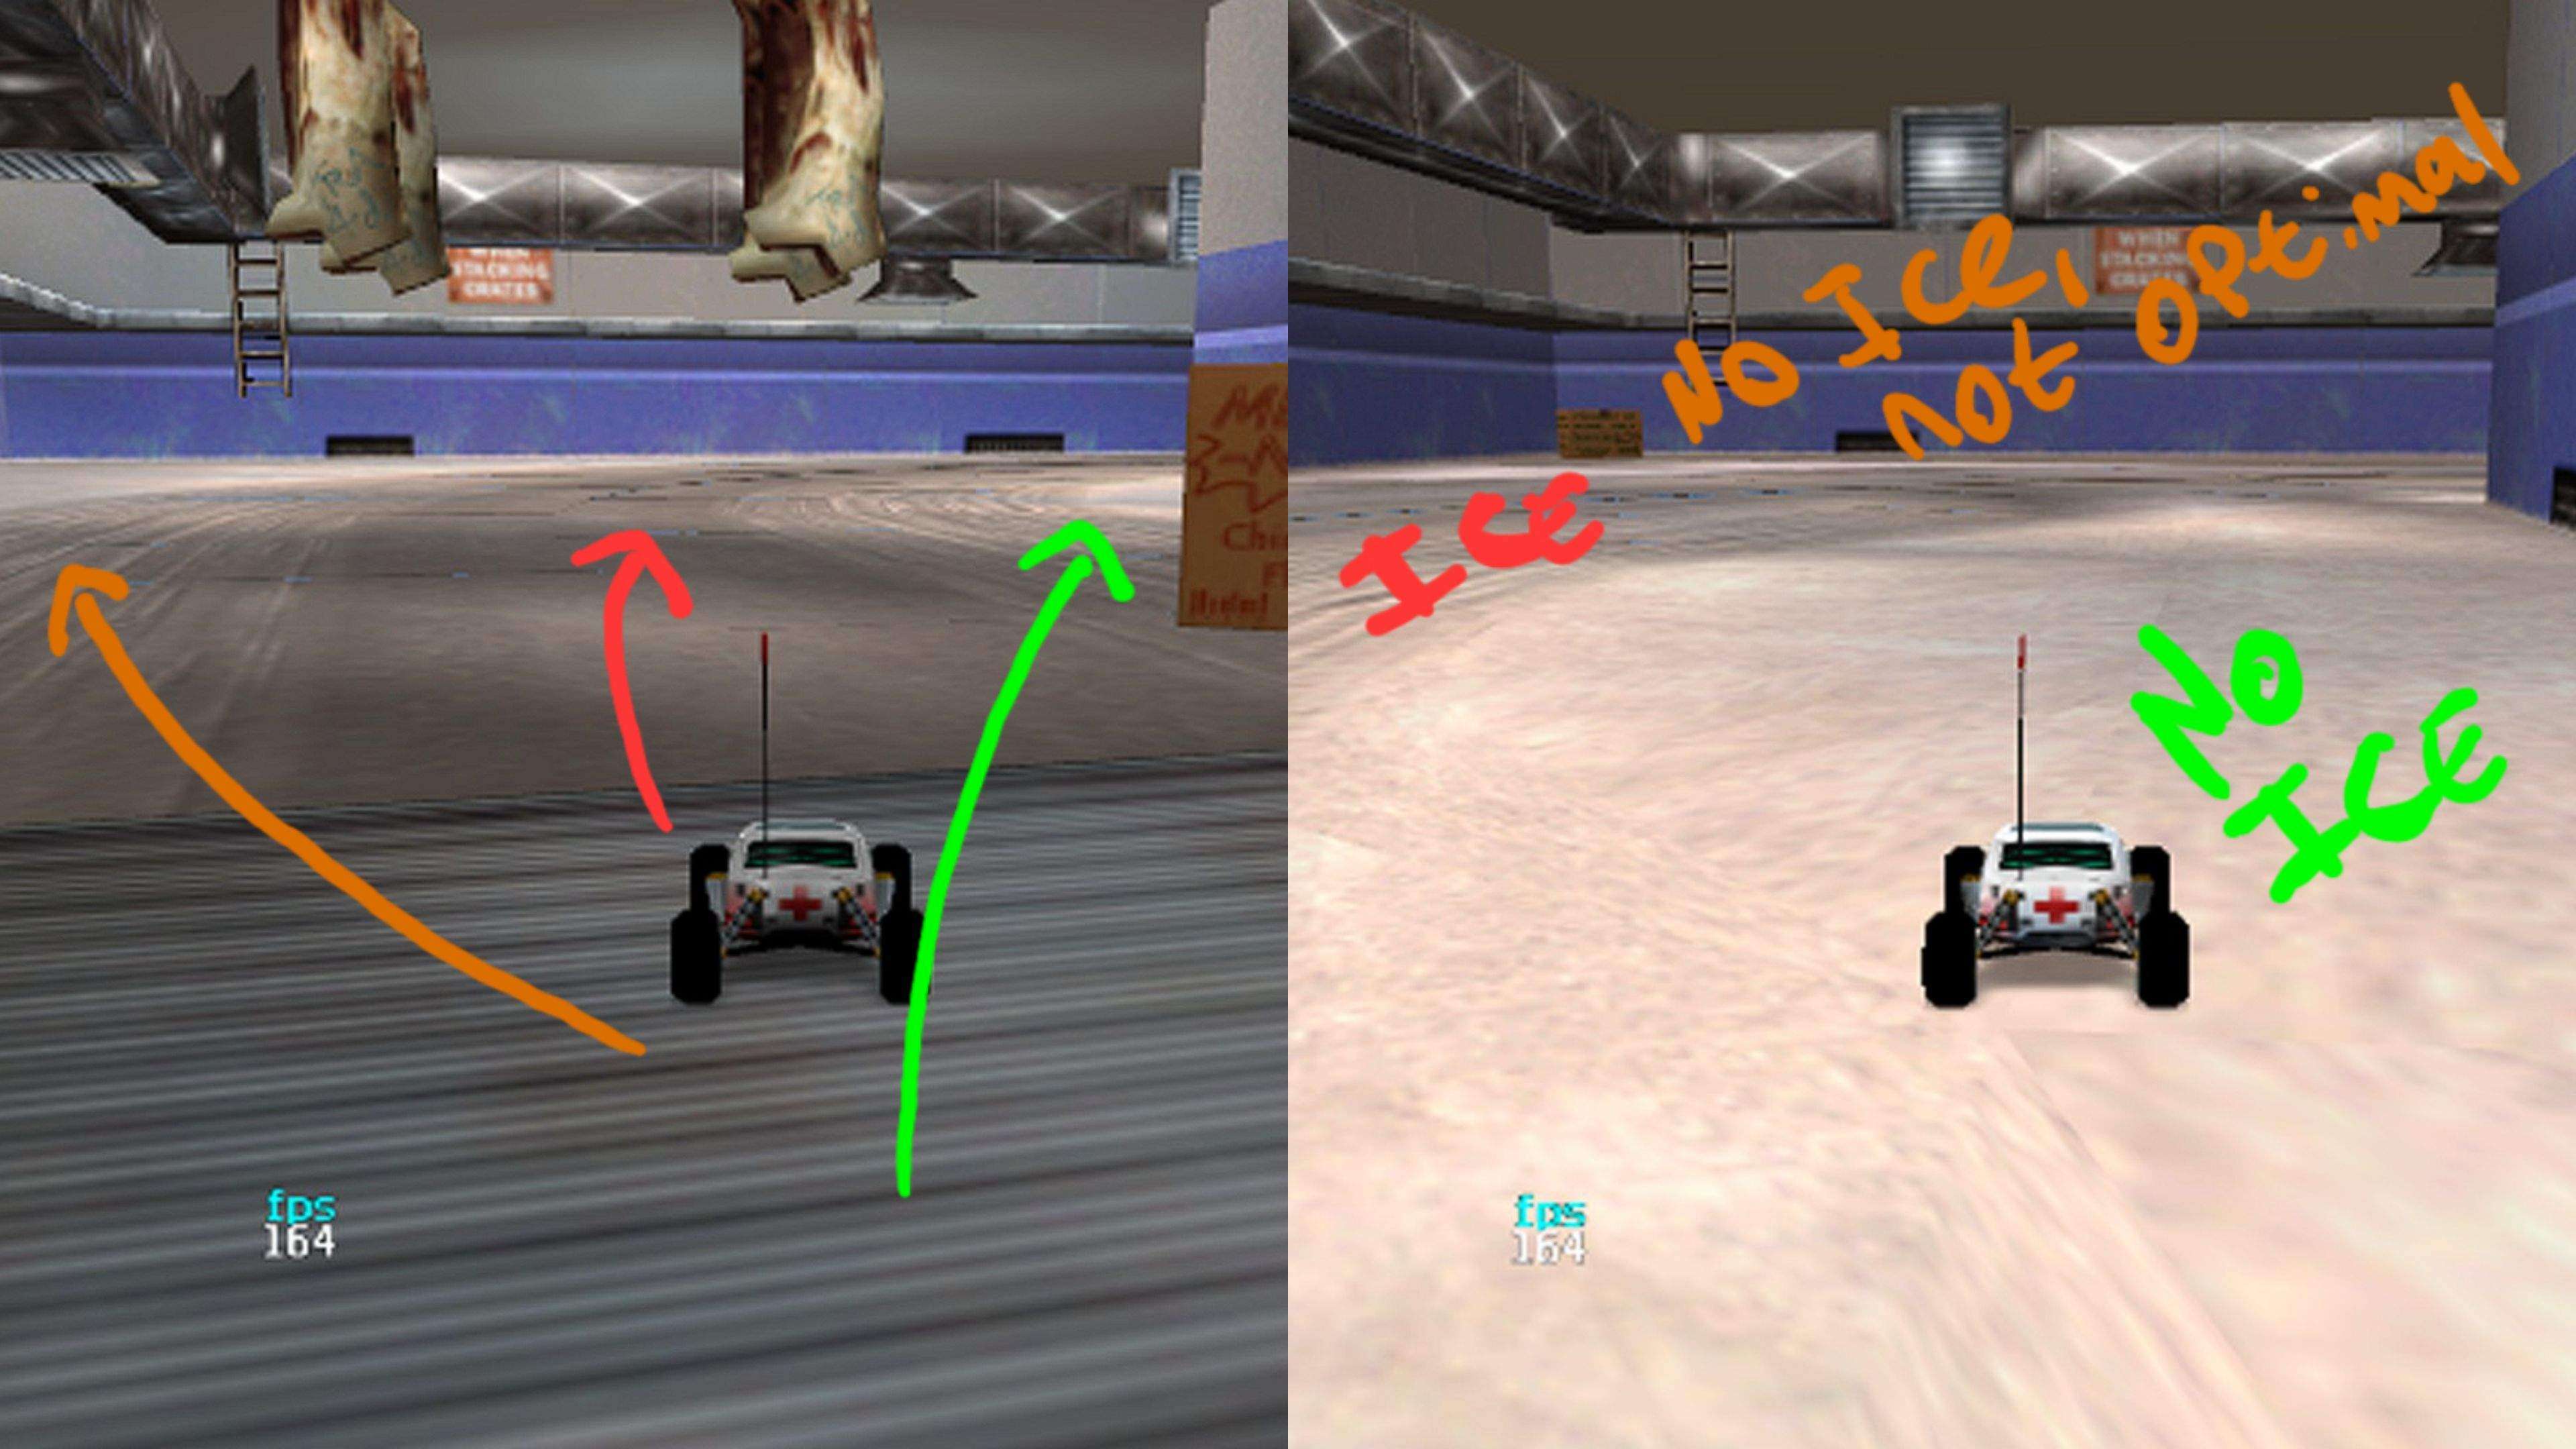
The first thing you need to keep in mind is your initial route. Upon starting the race your RC car will appear on the middle, this means the orange arrow and the green arrow are your first options. Starting on said green arrow will give you a 1 second advantage over everyone for entering the meat freezer early. This also works as a memorization for later laps. Keep this in mind.
Upon entering the meat freezer, you’ll find that the floor is slippery due to the ice in the middle. But there’s a catch, this section is divided by 3 parts:
- A_Left wall section, which doesn’t have Ice, but is the one that’s further away to the exit.
- B_Middle section, which has ICE and the distance between your RC car and the exit could depend on how much traction loss you got.
- C_Right wall section, which doesn’t have ice and is the closest one to the exit.
Prioritize said section as much as you can, your car doesn’t lose speed nor traction and its a huge advantage over everyone else.
- After exiting the freezer, you’ll be greeted with the checkout area near the exit of the Supermarket. Here just keep a straight pace, keep the speed until you leave the supermarket.
- Don’t take the left checkout, it furthers away your RC car from the exit.
- The right part that hugs the wall makes your car slow upon turning, it is closer to the exit, but your initial speed loss will penalize you from that.
- And absolutely do not jump them.

Here you can find the star.
Once you re-enter the supermarket, keep your car near the wall and those boxes upfront. Then take the right row or the left one marked on green to, once again, be the closest and first one to reach the freezer.
Do not keep the car up to the orange row as you’ll lose speed and distance. And absolutely do not go wide open, that’s total disadvantage…
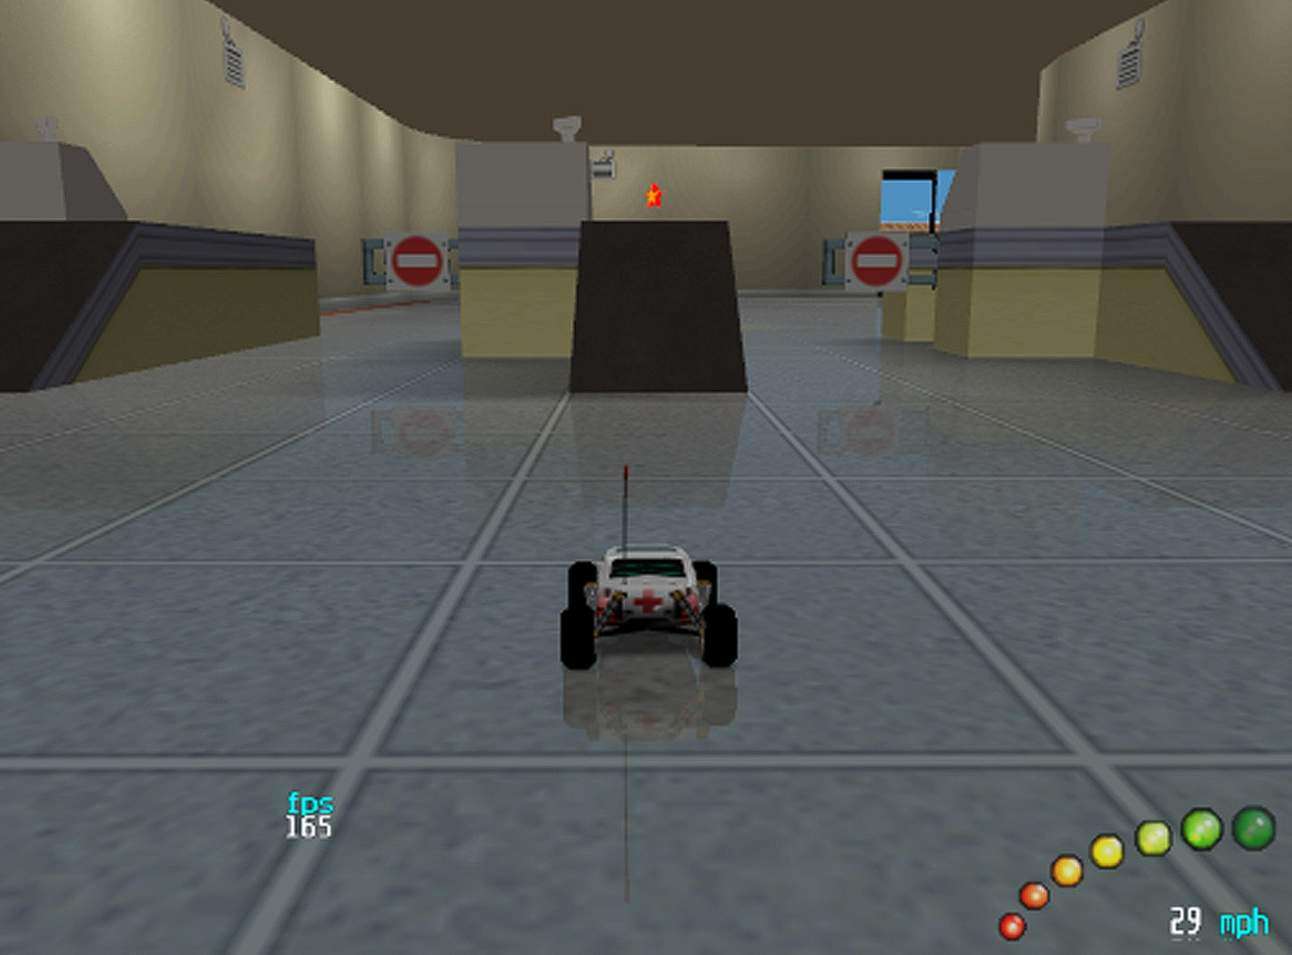
Museum 2
One of the most technical tracks alongside its prequel and Ghost Town. Museum 2 has a starting easy layout but you need to take some considerations on specific sections of the track to save time or be the first to cross the finish line.
The first one being the moving staircases. The one on the left will push your car forwards while the one at the right will slow it down. This is something easy to miss out but always remember to hug the left wall for extra speed.
Hey there’s the star.
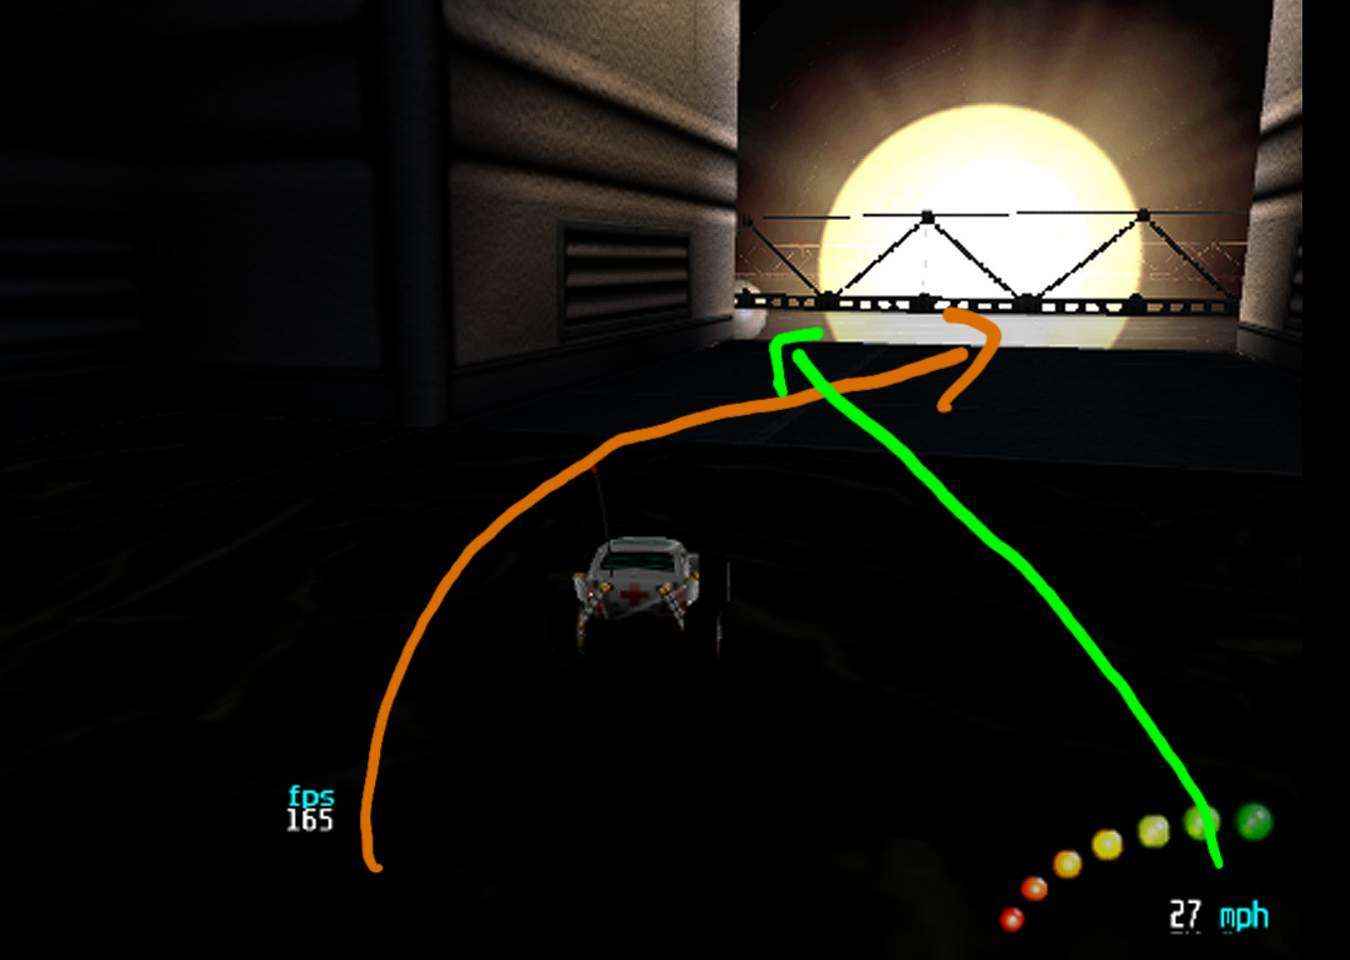
After jumping the staircases, you’ll find the solar system which both ways got the same distance to the planetary. But (again) it all comes down to how you took the corner after the jump.
If you slightly moved to the right after jumping, your car would have a minimal speed loss when taking the corner and you’ll be able to regain all of that speed on the left section indicated with a green arrow
If you kept the same line after the jump, you’ll have to keep steering in order to enter the solar system. This is a constant speed loss which gets penalized even more after turning to enter the planetary.
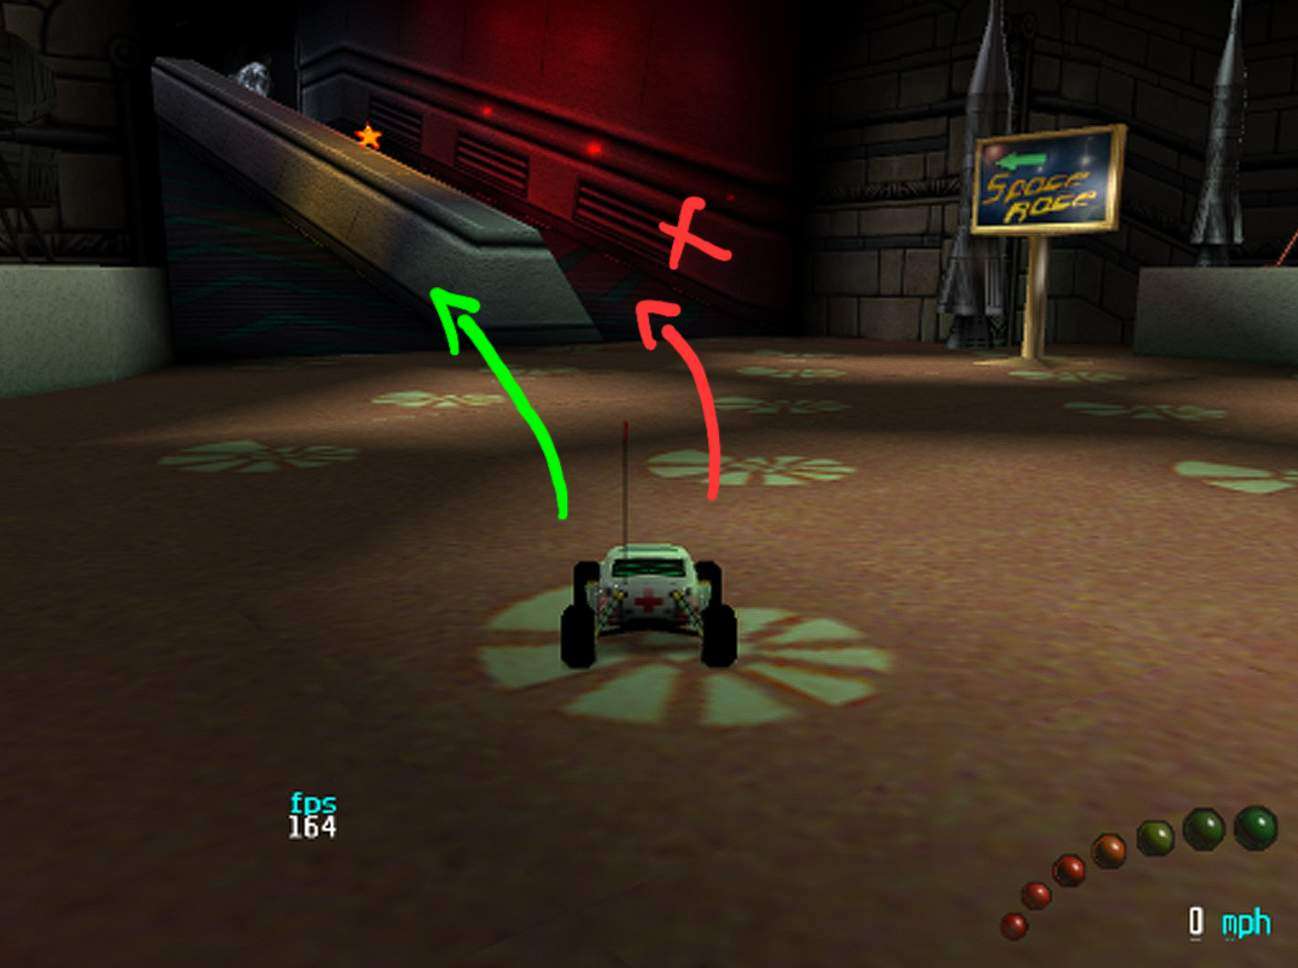
Lastly for Museum 2 is the planetary shortcut. Just dont. Its a waste of time.
Botanical Garden
The last track is Botanical Garden. This track also has a simple layout, but it does have more jumps and sections to be aware off. It pretty much takes all of the previous tracks experience on the user and puts them into a single place.
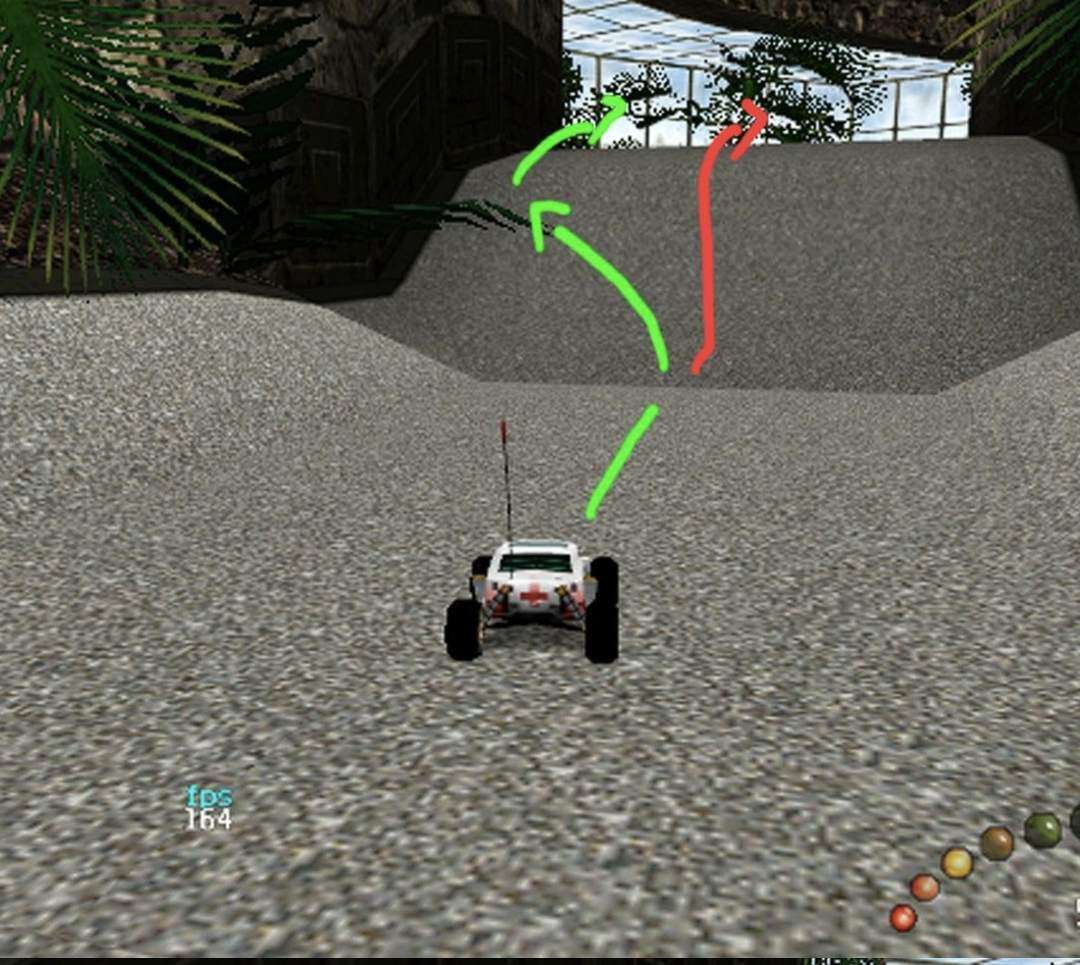
After starting the race and taking the first right corner, you’ll realize this massive mountain that your RC car has to escalate.
Well this is easy, rather than going full-on against it then jumping over it, drive diagonally, then jump. This wont affect your speed massively than doing a vertical escalation.
Right after that section, you’ll have to cross an S shaped part that leads to a bridge. Upon crossing the bridge you’ll face two roads:
- The road on the left makes your car lose speed and distance between the fountain.
- The road on the right makes your car get a small amount of speed that either.
- A_You could use to jump that small gap then onto the fountain.
- B_You could use to avoid the jump, turn and then turn again onto the fountain, which is not entirely optimal.
IMO, it doesnt really matter here as the outcome is the same, but depending on the car, doing “B” can affect your time or the race results.
The final section is another jump, this time try to keep yourself at the middle, this will lead you to a fountain which is divided by 3: A left water filled pool, the middle section and the right pool. Avoid jumping into the pools at all costs, getting out of them make you lose speed and control.
If you took the middle, keep moving forward and drop down right into the finish line. Try to not move when going downwards as doing so might spin your RC car out.
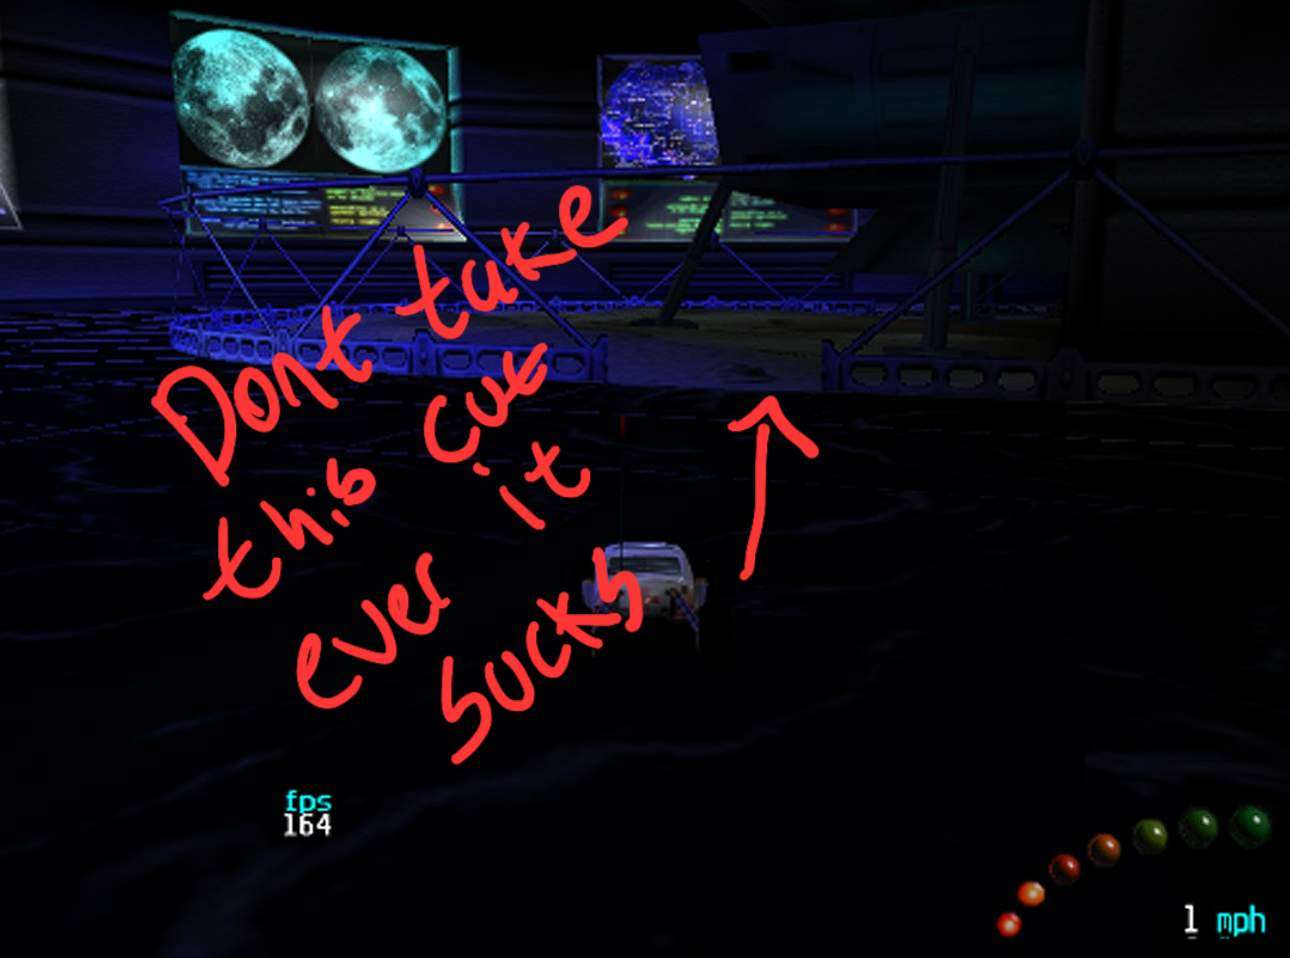
If you (for some reason which we dont know of) decided to press the directionals previous to the jump, you’ll see that on the left part, theres a shortcut.
Do not take it, its a waste of time.
If you happen to be on practice, the star is inside this shortcut.


Be the first to comment