
Contents
Beginner and Intermediate Tips
By Nirinirino
Quick List of Things I Notice Newer Players Don’t Do
- Check what are the best sides for the 5 heroes for the particular fight and for the particular turn
- I.e. Look for Damage vs many small enemies, Weaken/Poison vs Big enemies, Dodge when being targeted
- Think about thresholds – how much shield or damage is needed to keep Thief alive this turn
- Don’t Reroll too aggressively and end up having many blanks
- Abuse Undoes – always check if your current roll is enough
- Move items around after every fight
Flow of the Fight
- At start of fight, your team usually cannot block/heal all incoming damage
- Hence, you want to start fights dealing damage and killing enemies! (Kill-or-be-killed Phase)
- Killing one enemy is like blocking that enemy damage for the rest of the fight
- After killing some units, your team may be able to block/heal the incoming damage completely (Sustain Phase)
- At this stage, you are allowed to focus on full-blocking and regain the lost hp, instead of rushing down enemies
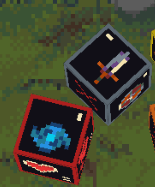
Good red/grey sides to deal damage.
Piloting a Fight
- There are mini-objectives to be done during the Kill-or-be-killed phase, in order of priority:
- Win the fight: No point prioritizing saving heroes if it won’t lead you to win the fight. In most cases saving heroes will, but keep an eye of when you shouldn’t
- Keep heroes alive: More heroes mean you get more actions to kill enemies/block attacks. You also have more damage “sponges” and reduced variance on your high/lowrolls
- Quickly execute priority targets: Killing enemies serves as “block” for this turn, and incoming turns. If there are multiple enemies, figure out which one deals the most damage or most likely to kill your heroes.
- Do sustained damage on big enemies: If you can’t kill any other small enemies, try to deal as much damage as possible while healing/sustaining
- How to do these in practice will be explained in the next section, on Thresholds
Threshold
- Thresholds are the “minimum” numbers where a marginal improvement can create key outcomes
- 4 damage is better than 3 damage, which is better than 2 damage. But how much better? This is based on the game state.
- I.e. against Rats with 3 hp, 3 damage is optimal and far better than 2 damage
- Against Zombie or Ghost, having source of 4 damage is crucial, far more important than 3 damage. 5 damage is a luxury, but the benefit is marginal
- Thresholds can be both offensive (can kill some enemies at certain numbers), or defensive (need at least 10 block or 6 mana to save a hero)
- Threshold help inform just how much your total dice needs to roll
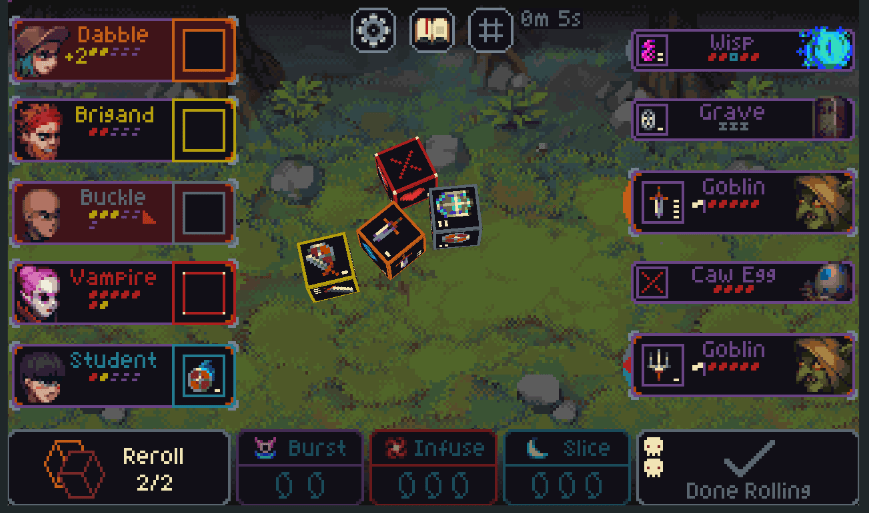
Can you identify the important thresholds are for this turn?

- Killing Grave with 3 sources of damage prevents Bones spawning (Difficult, but Important to end fight)
- Dealing 3 damage to Wisp earns 1 mana. This can enable spells this turn
- Dealing 5 damage to Wisp or Goblin kills an enemy AND saves a hero (Important)
- 1 shield is an easy way to save Buckle (Important)
- If you have 3 shield or heal, you can save Dabble instead (Expends too much actions)
- 3 mana allows casting Slice, which efficiently hits Grave
Always Stop and Think!
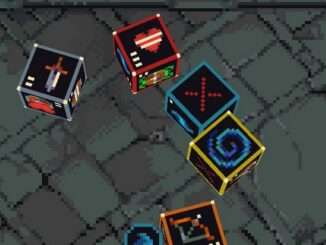
Think what you are rolling for! Values of sides can CHANGE within the same fight:
- As explained earlier, pick more damage at start of fights to eliminate enemies, then you can have grey/red specialize towards blocking/healing nearing end of the fight
- Dodge can have occasional value, far exceeding other sides
- Some sides have valuation that depended on other heroes (e.g. Vulnerable, Reuse and Copycat sides)
Make a habit to check curses/blessings and inventory before picking every item/hero upgrade:
- Mortal means that Max HP items aren’t as excellent
- If you have Basilisk Scale, you want to pick that Origami/Spell:Remedy even if you rarely pick them
- You also can move items around in between fights, so always check for a better configuration
“The Lowroll” Theory
- Enemies at lower difficulties (Normal/Hard, and to some extent Unfair) aren’t threatening enough to kill you when you are rolling “ok” sides
- The Lowroll is what will kill you
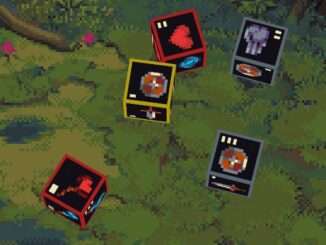
- Keeping mediocre dice will on average lower dice outputs, but prevents losses
This is a sketch, and any similarities to your math homework is coincidental

- Before rerolling, always check if your current roll is “good enough”
- Abuse undos. Get 100s of undoes each run
- If rerolling can cause a CRITICAL FAILURE (losing 1 or 2 heroes) without potential gain (you don’t kill more enemies), DO NOT REROLL
- I repeat, DO NOT REROLL mediocre sides if you stand to lose the game
- Pick heroes with less situational sides and more blanks
- Especially avoid Evoker, Gambler, Ace because they have more “less than par” sides than other heroes, and hence likely to cause deaths by lowrolling
Some empiric evidence of lowroll theory:
- Hard runs in v2.0.1 have an estimated optimal winrate of 98-99%, while Unfair runs is estimated at 85-90%.
- This number is based on the winstreaks and win records of streak record holders I talk to, as well as from my own experience
- Hence on a per floor average, Hard runs only lose to 0.05% to 0.1% scenarios – i.e. your dice roll for the fight need to be so terribly bad, it only happens once in 1000 fights.
- A similar calculation for Unfair puts the per floor average at 0.53% to 0.9% of scenarios – i.e. your dice roll for the fight need to be so bad, it only happens once in 100 fights.
When does the “Lowroll theory” not apply:
- If the fight is so difficult such that you need to hit so many thresholds just to be “on par” with the fight, you should play to highroll instead of avoiding lowrolls.
- Playing for lowroll avoidance can be afforded when your winrate approaches 20% and above. i.e. in Classic Brutal or Hell mode. Or if you aren’t doing well in Classic Unfair yet.
General Gameplay Tips
Skipping heroes
- Do not skip any tier 2 heroes (because it delays tier 3 upgrades), but tier 3 heroes can be skipped depending on how likely you want to use it for the final boss
- Remember that not skipping any hero choices gets rewarded with a double-choice of one color on floor 20, allowing you to force synergies better
Avoid synergies that require you to roll 2 or more hero sides simultaneously
- Avoid these especially if the sides are difficult to roll for, and are bad as a stand-alone.
- For example, Herbalist apply-Growth + Wanderer’s Quad-use, the apply-growth is normally not good
Do not apply a “Cannot reroll” and “Must be rolled” debuffs on the same hero!
- You will really regret it
Be aggressive
- So many monsters have the ability to kill from full hp (Slate, Caw), and have generally lower hp. This incentivizes just killing enemies over trying to outheal them, because it is more prone to failing
- Pick more aggressive heroes, especially those with killling/elimination potential. Avoid Whirl, Rogue, who have very little directed damage. Also avoid the Barricade curse for it prevents eliminating enemies, hence you take much more damage.
Some curses are notoriously difficult, even as a standalone:
- Death Shield, Shield Response, Start Damaged, Sandstorm (at high levels), Vowels curse series, Stony Grasp, Middle Blank, Fifth (to Second) Death, Shimmering Monsters, Barricade, Swarm, Fear.
This patch (2.0.1) has many powerful item-hero combinations, so powerful they can end the game really quickly
- It is therefore incentivized to draft aggressively to creating one “super-carry”, where item and hero picks are picked for highest chance to find at least 1 broken combo
Avoid Curse Picks That “Synergize”
For example:
- Fight prolonging curses (Monster HP, Armour 4, Stitch 4) should be avoided with a curse that punishes long fights (Monster Growth/Doom/Exhaustion)
- Curses that punishes a similar early/mid/lategame phase should not be stacked together. (Mundane + Pain Edges add too much lategame stress, Add enemy + Mana Debt has a stressful midgame)
- Elimination-preventing curses (Undying Monsters, Armour 4, Barricade) mustn’t be matched with curses that punishes failure to eliminate (Monster Left, Stitch)
Floor-Specific Tips
Floor 4 is typically a damage race, with Bramble and Troll being the primary obstacles
- Alpha can be approached by killing Wolves first, or by focusing down Alpha. The latter is usually better when you have a bad healer, like Mystic or Herbalist
- Troll is a kill-or-be-killed. Pour all damage ASAP, but Grey and Red can heal if it’s efficient to do so
- Focus Bramble over Rat, unless you are certain you have the total damage to end the fight. Student is a liability this fight, so you should upgrade it if possible
Floor 8-11 is home to Suduls, Chests and Grave
- Most of the dangerous encounters here are yet another damage race, so a midgame tier 2 team with damage is preferred
Floor 16 is the next big check
- Troll King is the least threatening especially if you build a damage heavy team composition, which allows to shred through his 20(+2?) hp. Target TK before Slate unless you have a good way to kill Slates
- Fighting the long fight vs Tarantus is possible, but requires Cleanse/Regen to beat Poison and great single-target defense vs Bite. If not possible, try to rush the big spider. You can leave 1 or 2 spiders while you rush Tarantus, but should kill small stuff if there’s more.
- Basalt is dangerous. Typically clear Quartz first, but you need to beat Basalt ASAP because you can’t normally overcome Slate spam. Flank dodges, weaken/good way to kill slates, regen provides ways to beat the rock. 1 and 3 damage are important numbers to reach decent chip damage.
Item picks before floor 16 should focus on beating Tarantus and Basalt, which are likely to be very long fights.
- Cleanse, Tourmaline Paraiba, Second Chance provide good ways to overcome Weaken attacks
Prepare against the final boss
- Hero choices starting from floor 12, and Item choices from floor 17 should focus on building a team that can beat floor 20. Poison is good against all 3 end bosses
Floor 17-19 are not too hard, but can provide challenges for teams who plays too “fairly”.
- You want a big minion shredder vs Troll, Demon. Typically focus on killing enemies one by one, and try to out-sustain the whittled down enemies because fights can be decently long
- Some AOE is helpful vs Wisps Snipers
Floor 20 is the final boss.
- Hexia is the sustain check and anti-cheese boss. You can either burst her (it’s only 30 hp to burst) or outlive her with Cleanse (beats Petrify), Weaken (stop summons), Regen (Hexia don’t deal too much damage herself). If you can’t burst, you want to have your attacks timed/matching your defenses
- Dragon is the anti-burst boss, with 40 hp. Target Caw first where possible. Its preferred to have damage dealers at the flank because of poison breath. Some common answers are Prophet (Soothe outheals breath), Forsaken (anti-Bite and AOE heals), Venom (Plague benefits of Poison on team).
- Hand allows combo/cantrip teams to pop off, but fair teams will find this boss very difficult. This boss needs to be rushed, no good way to stall vs Hand’s powerful sides. Rush Hand before Sabers, unless you have a good reason to do so. Be wary of 1st turn AOE, can end the run in 1 turn if you lowroll.

Be the first to comment