
A beginner’s guide to each class.
Basic Guide to Classes
All credit goes to Future Corpse!
The Hunter

To infinity…and beyond!
The Hunter utilizes unparalleled mobility (including a literal jet pack) to escape bad situations or reach high places no other class can, enabling them to easily identify and destroy priority targets (including some that no other class has the sightlines to see) before they become a problem for the ground crew. In addition, their higher run speed allows them to more quickly move around the map and respond to problems.
Once on a rooftop or other inaccessible position, the Hunter is immune to all bug attacks except those of the Grenadier and Gunner. These serve as both the counter to the Hunter, and exactly the sorts of targets the Hunter should be taking out. Due to the ballistic arcs Grenadier attacks take, it is entirely possible for a Grenadier to be destroying walls while fully protected from ground troopers by terrain features, so it is essential for rooftop Hunters to engage such targets.
The weakness of the Hunter is that it has a limited ability to support its allies on the ground when it is up high, and has a limited ability to benefit from its allies’ support abilities while up high (for example, a downed Hunter on a roof cannot be revived by an Operator’s medical drone).
In terms of progression, the Hunter arguably takes the longest of the three classes to hit its stride, as the Hawkeye is essential to its functionality yet is locked behind 11th level. Its purpose is also rather subtle, which makes it easy to use incorrectly. Fortunately, it has little need of the rewards of its last few levels, and (like the Operator) can gain useful experience points from the Ammo Fabricator it unlocks at 8th level.
Progression
Level/Rewards
- Morita MK1, TW-102-s Peacemaker, MX-90 Grenade
- Morita MK1 Carbine
- Thermo Charge
- Pain Boosters
- TW-109-e Emancipator
- Cluster Grenade
- Magazine Bandolier
- Ammo Fabricator
- Napalm Grenade
- Bloodlust
- TW 202-I Morita Hawkeye
- Improved Grenade Cooldown
- Proximity Bug Mine
- Chem Grenade
- Scan Beacon
- Synthetic Underarmor
- Shock Beacon
- Hi-Ex Grenade
- Heal Beacon
- Nuclear Det Pack
Sample Builds
- TW 202-I Morita Hawkeye
- TW-109-e Emancipator
- Ammo Fabricator
- Chem Grenade
- Synthetic Underarmour
- Improved Grenade Cooldown
- TW 202-I Morita Hawkeye
- TW-109-e Emancipator
- Ammo Fabricator
- Napalm Grenade
- Synthetic Underarmour
- Pain Boosters
The Bastion
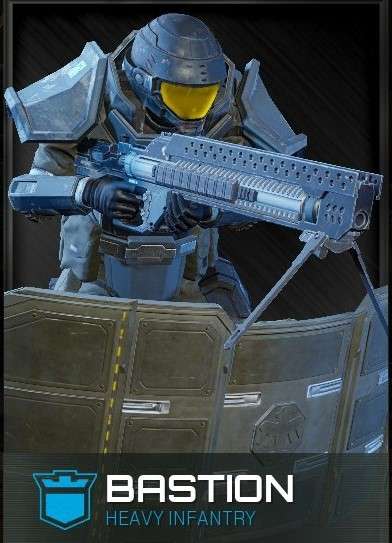
You shall not pass!
The Bastion specializes in tanking and horde suppression. Rather than doing damage or providing support, the Bastion sets themself on a point, tanks every hit through their superior armor, and literally pushes back the hordes through sheer weight of fire.
An essential aspect of playing Bastion is the correct use of siege mode. Activating it improves accuracy (essential to making the Bastion-exclusive SAW effective) and armor, but prevents movement, so make sure to choose your position wisely.
The weaknesses of the Bastion class are that it has no means of inflicting high dps and its static playstyle makes it very dependent on allies to provide ammunition in the form of ammo fabricators.
As progression goes, the Bastion is somewhere between the Hunter and Operator. It receives its exclusive weapon (the SAW) at level 2, yet some of its most useful rewards lie in the last five levels of progression.
Progression
Level/Rewards
- Morita MK1, TW-102-s Peacemaker, MX-90 Grenade
- Morita MK3 SAW
- Proximity Bug Mine
- Hardened Ceramic Plates
- TW-109-e Emancipator
- Hi-Ex Grenade
- Magazine Bandolier
- Thermo Charge
- Shock Beacon
- Synthetic Underamor
- Nuclear Det Pack
- Cluster Grenade
- Morita MK1 Carbine
- Chem Grenade
- Powered-Up Build-Tool
- Shock Grenade
- Scan Beacon
- Improved Grenade Cooldown
- Heal Beacon
- Extended Magazines
Sample Builds
- Morita MK3 SAW
- TW-109-e Emancipator
- Scan Beacon
- Chem Grenade
- Synthetic Underarmor
- Extended Magazines
- Morita MK3 SAW
- TW-109-e Emancipator
- Shock Beacon
- Chem Grenade
- Extended Magazines
- Magazine Bandolier
The Operator
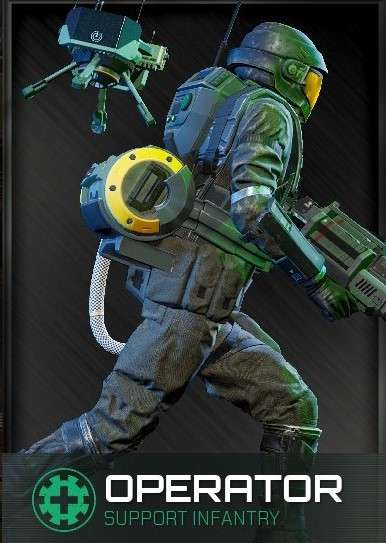
How many times do I have to kill you, boy?!
The Operator simultaneously functions as support, objective runner, and dps.
They can passively heal and revive players (including themselves) with their medical drone, and transport canisters without a speed decrease or giving up the use of their guns (unless they want to carry two, which is also an ability unique to them). They get the Hawkeye quite early (and can combine it with the Extended Magazine perk to exceed the dps of the Hunter), and eventually get the Operator-exclusive Chi-Hong grenade launcher as well.
The high versatility of the Operator class gives it few weaknesses, save for its reliance on limited (3 per 3 minutes) self-revives for survivability. If the Operator burns through their medical drone revives on allies or themself (or neglects to have it up at a critical moment), they can go down like anyone else.
The Operator is a perfect class for a beginner, due to its high versatility and early acquisition of key equipment (the Hawkeye and Ammo Fabricator). It also has little need for the last five levels of progression. The Ammo Fabricator in particular is quite useful for leveling, as each player who takes ammo from it (including the one who dropped it) grants the owner experience points. It is also the only class to have a utility available at 1st level.
Progression
Level/Rewards
- Morita MK1, TW-102-s Peacemaker, MX-90 Grenade, First Aid Stim
- TW 202-I Morita Hawkeye
- Ammo Fabricator
- Powered-Up Build-Tool
- TW-109-e Emancipator
- Scan Grenade
- Magazine Bandolier
- Morita MK1 Carbine
- Medical Station
- Improved Grenade Cooldown
- C-32 Chi-Hong Grenade Launcher
- Pain Boosters
- Chem Grenade
- Scan Beacons
- Extended Magazines
- Shock Beacon
- Thermo Charge
- Napalm Grenade
- Heal Beacon
- Utility Satchel
Sample Builds
- TW 202-I Morita Hawkeye
- TW-109-e Emancipator
- Ammo Fabricator
- Scan Grenade
- Improved Grenade Cooldown
- Extended Magazines
- C-32 Chi-Hong Grenade Launcher
- TW-109-e Emancipator
- Scan Beacon
- Chem Grenade
- Improved Grenade Cooldown
- Extended Magazines


This guide is out of date. All the classes have access to the Nuke Det pack now.